When you click on links to various merchants on this site and make a purchase, this can result in this site earning a commission. Affiliate programs and affiliations include, but are not limited to, the eBay Partner Network.
Nope, didn't shop around once I saw one of these on another LSx. It's a nice piece, but I wouldn't have minded one about an inch or 2 shorter, more compact.
I had to go back and look to see what I paid, and it was around $190.00. Clean side separator is cool, but a bit beyond what I was looking for I guess.
A few Spring 2017 updates & a small leak repair ------
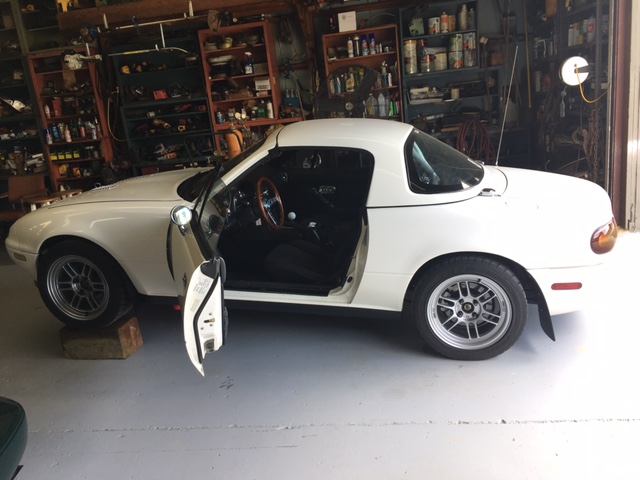
I�ve had a few things with the car that I wanted to address before MATG that�s approaching in early August. With life and stuff happening, the V8M hasn�t had much attention � just sitting around on the battery tender and going out for a few early Saturday morning drives or Cars n� Coffee.
But one small, irritating concern that I�d spot from time to time was what looked like water on the garage floor under the driver side footwell after sitting for a week or a month at a time. Weird� The spot of water would be small and clear � as best as I could tell. And then this Spring, I backed it out, and as it was idling on the slightly sloped driveway, engine coolant was dripping out of the REAR of the V8Roadsters LH frame rail stiffener! Well, I think I know knew what was going on -- My heater core must be leaking somehow, dripping down the LH side of the tranny tunnel and finding a way out through one of the bolts securing the frame rail stiffener.
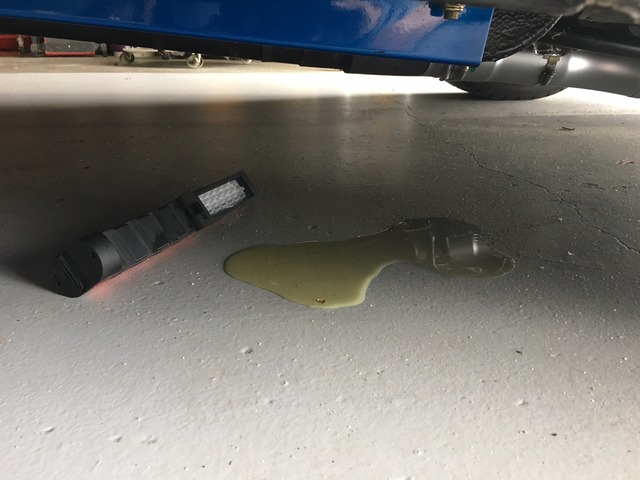
Drove the car into the shop, put the front wheels on heavy wooden blocks for increased angle, and my hidden reservoir of coolant was now exiting the car � just in front of the rear wheel well.
So, my original heater core plumbing consisted of cutting the copper pipes short of the firewall and used hose clamps with short rubber hose �nipples� sticking through the firewall. That afternoon, I took a small flashlight and folded myself up to get a peak under the dash to discover that one of the hose clamps was just beyond hand tight and the other one wasn�t much better! I guess this situation has been going on for 2+ years now. Tightened things up and after checking for leaks the first 5 or 6 heat cycles, problem is solved.
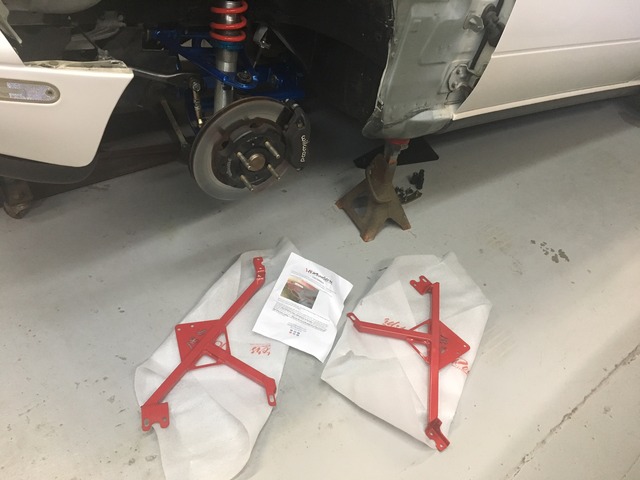
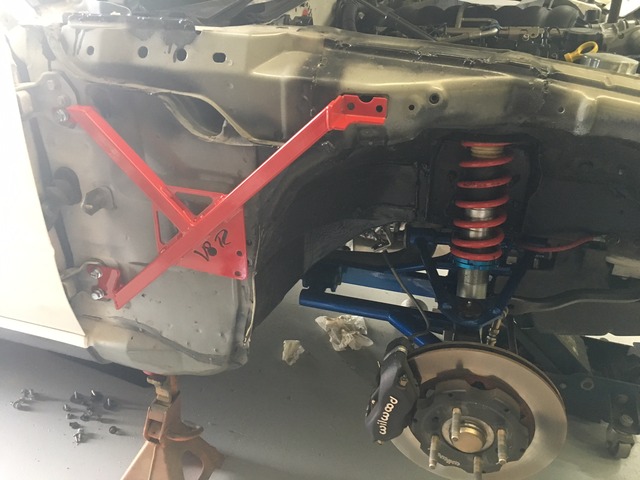
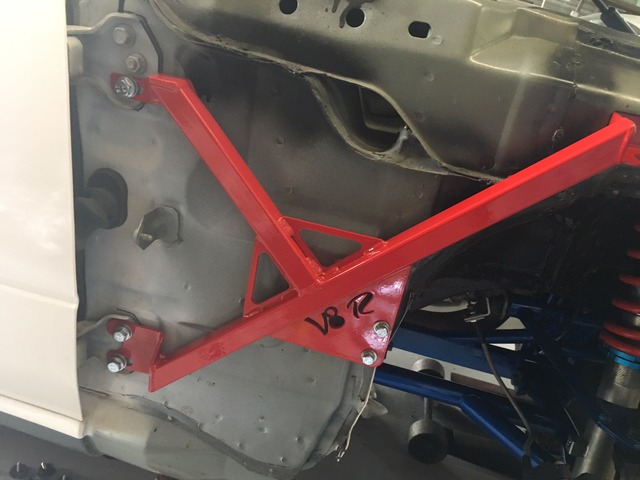
Next job was removing the front fenders on a Friday night in preparation for V8R chassis braces. I got these in January and took them out of the box on an early Saturday morning to learn that some necessary V8R hardware would be quite useful for bolting them in place. Emailed Shandelle at V8R to let him know but quickly decided that one trip to a small Ace Hardware store would solve the problem.
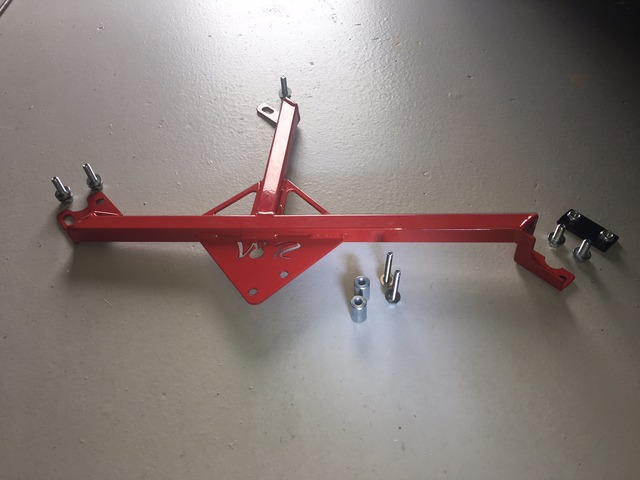
I used a band saw and cut two 1�x2�x1/2� piece out of the stockpile of metal in the family�s shop, drilled two holes and painted them rattle can black for the backer plates up in the frame horn. Then I cut down aluminum spacers for the center bolts that properly offset the �V8R� triangle when you bolt everything together� Installation is relatively easy. You just have to adjust the door hinges to get everything properly aligned again.
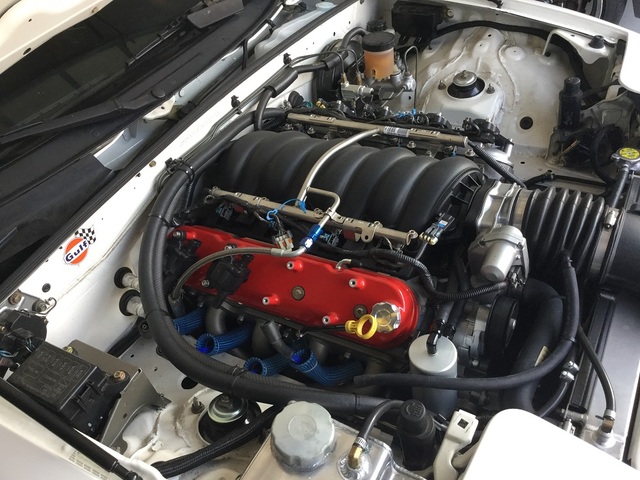
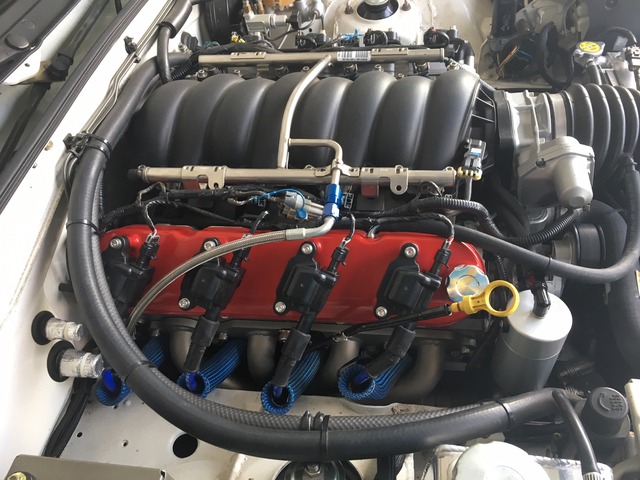
And lastly, I ordered these hi-rise Holley valve covers from Summit to clean up the appearance a bit more. These came with the longer center bolts and I added pair of new valve cover gaskets. I�m quite pleased with these. And yes, I did replace both sides. Just didn�t take the additional pics for some reason!
Currently, there is a whopping 4,600 or so. And you'll be proud to know that 450 of those went on in the past two weeks. Car has become ALMOST as fun to drive as it was to build!
Here's a new concern of mine that has me scratching my head... My what appears to be simple Catch Can is really catching a LOT of oil. Recent 350 mile trip dumped in about 3-4 oz of oil into the removable lower body. That's the 2nd time I've checked it and subsequently emptied it since original installation. The plumbing of the unit was simple. I just haven't had enough time as of yet to figure out why.
Sounds to me like your motor is trashed.
Time to sell the whole project.
I will give you $100 cash up front and $1 per week for the next year.
Sound like a deal?
Seriously, you should check on the Camaro forums and see what they have to say about it. My other car is a new Mustang and some people put the same catch can on their car. Seems to be hit and miss. Some get almost nothing and some get what they consider to be a lot. If it was me, I would just put the oil back into the engine, presuming it is still nice and clean. At least you know it is not burning out the tailpipe and clogging the catalytic converter.
Here's a new concern of mine that has me scratching my head... My what appears to be simple Catch Can is really catching a LOT of oil. Recent 350 mile trip dumped in about 3-4 oz of oil into the removable lower body. That's the 2nd time I've checked it and subsequently emptied it since original installation. The plumbing of the unit was simple. I just haven't had enough time as of yet to figure out why.
Looks like you have the same catch can I have. I don't have many miles on my swap yet, but with that much oil a few things could be happening.
1. You have alot of blowby past the pistons creating crankcase pressure, pushing out into the catch can. Compression test might tell the tale.
2. It's normal and the catch can is "catching" all the oil that would normally go into the intake and get burned.
3. The catch can might be setup wrong
I'd be curious if what you're getting is oil, or is it oil and condensation. If you pour it into a jar and let it settle, what does it look like? I had a boosted 4 cylinder VW engine and it was pretty tight compression wise, and I didn't get that much oil in the catch can.
LOL issue is partly my job takes more time, to much fun with the camera and IB admin log in on my laptop isn't set up. LOL yeah I know all 3 are lame but I do miss hanging out here!
I am so jealous of the color of your V8R mounting hardware. I just ordered my LFX mounting kit a few days ago, and having read through your build log before ordering, I requested the same (or similar) color.
Unfortunately, I was told they quit doing that. Apparently it is too difficult for them to keep up with. I thought that color would go great with my 10AE.
ZB, I'm with you. I just wanted something different under there. So.., way back in 2012, I didn't know what they would be willing to do. Shandalle said he thought they could accommodate a special color request; he just needed to know what I wanted and a photo. So I thought it may increase my chances if I let him pick... My 3 choices were (sort of) Subaru rally blue, Kawasaki green, and school bus yellow. I guess you know which one picked... And I wanted the lime green! But thanks. Hope your VA build goes well. I'll keep an eye on it. Wonder how far away you are from Raleigh..?
ZB, I'm with you. I just wanted something different under there. So.., way back in 2012, I didn't know what they would be willing to do. Shandalle said he thought they could accommodate a special color request; he just needed to know what I wanted and a photo. So I thought it may increase my chances if I let him pick... My 3 choices were (sort of) Subaru rally blue, Kawasaki green, and school bus yellow. I guess you know which one picked... And I wanted the lime green! But thanks. Hope your VA build goes well. I'll keep an eye on it. Wonder how far away you are from Raleigh..?
I'm in Christiansburg, VA (Near Blacksburg - Virginia Tech). It's about 3.5 hours to Raleigh.
Hoping we'll get to meet at Miatas at the Gap 2018 (if not at a meetup sooner)
Well.., A week ago, before leaving on a trip in another car - I made a quick decision to crank up the V8M and let it idle, warm up as I packed the Jeep. Nada - no running of engine. Easy to detect the concern as I let it crank for 4-5 seconds... Fuel pump is not priming 1-1/2 feet behind my head. Remove key and walk away. Come home a week later, roll the carpet back, remove access plate, devise a scheme to single-handily get my multimeter to read voltage on the pump plug. I get 12V for the approx 2 second prime so that’s good.
Plug it back together, firmly tap on that fuel pump cover with hammer, and she cranks up. Ran 20 seconds and died. Goodbye DW300 pump - I hardly knew ye!!
Decided that approx 5000 mi and 4 yrs wasn’t a spectacularly long life and ordered the below. Out of town again, but I’ll post up pics & info in the coming weeks on whatever I can learn about the high-price DW pump failure.
HAHA, hard to believe that I was logging on to post the same thing in my thread, only I used the Walbro 255....probably got 6k on mine, 2.5 years. I'm probably just going back with the same one, unless I find something else that jumps at me. For the money its hard to argue with.
Yup.., keep y’all posted & what a coincidence too on same failure. Hope the Walbro likes me more than the previous. I’m wondering if I should trace back my wiring to the pump from the GM Delphi relay and run a slightly larger wire size than the Miata wiring to the fuel pump plug that I think I utilized. Am I just adding drama to this simple pump failure issue?
Just checked back on my build thread and turns out I'm running a DW200, which should be plenty of fuel for a stock LS1 like mine. Not to mention it's half the price of the DW300.
Any chance the fuel pump failure(s) has anything to do with using the factory Miata fuel pump wiring?
The factory wiring routes from the rear battery to the engine compartment main fuse box to under the dash near the steering column then back to the fuel pump behind the driver seat.
I did not like the long and convoluted routing and also saw a couple of things online about upgraded fuel pumps pulling more current and causing wiring under the dash to get hot.
On my build the factory wiring was deleted from the relay that is under the dash to the fuel tank and I ran an entirely new power line directly from the battery to the fuel tank (approx. 36" total length) in order to keep the routing as short as possible.
It was real simple and has been working great so far.
Not sure what fuel pump was utilized but it was the Flyin Miata fuel kit that included AN fittings and braided hose.
Alrighty --- I’m ready to update this chapter on recent fuel pump woes. And the results are all good with a big plus added at the end of this exercise. Here’s what happened as I swapped pumps and allowed mission creep to join in and extend the fun a few additional hours of bending over the trunk and sitting facing backwards in the newly created, temporary space of where the driver seat normally resides…
New Walbro GSS342 pump with 255 lph capacity is installed in place of the now-retired DW300 unit. After several hours of twenty-some different GOOGLE searches in a 3 night period, I found the solution that I hoped would relieve me of any non-fueling issues that had recently arrived and kept this V8M from firing up! Let’s add a RELAY, heavy-duty wiring, and proper fuse to make this Walbro a happy camper for as long as possible.
As some have suggested – maybe the factory Mazda wiring and under-dash relay were not enough for the larger, aftermarket fuel pump. Well, my little car had a healthy wiring diet and all unnecessary under-hood fuses, under dash relays, and non-essential wiring were thoughtfully removed and stored away in a cardboard box three years ago, I guess.
But.., because I didn’t know any better, I DID use the stock Mazda blue/red wire to connect to my Delphi fuel pump relay (located in passenger footwell along with the LS2 E40 PCM). That wire went direct to the electrical connector at top of fuel tank to spin the DW300 fuel pump. That wire must be 16 gauge or smaller. Perhaps that hasn’t helped the situation --- small wire brings on some increased resistance. Increased resistance brings on heat. But don’t quote me – I just read a lot of m.net, mt.net, and V8M.net archived posts from 2008 – 2015.
So, a trip to the parts store, and I buy lots of blister packs of small things that I don’t often buy. Important components are 30 Amp normally-open Relay, 25 Amp in-line fuse, small spools of wiring, various insulated, heat-shrink connectors, stuff, and a new 4 gauge battery cable.
The idea is to locate this new Fuel Pump Relay in the trunk and pull power directly from the battery to the pump (through the relay, obviously). So I cut out a flat piece of aluminum 1-1/4” wide x 4-3/4” long to mount on the existing radio antenna lower mount.
Drill 2 holes and secure the new Relay at the top.
Here’s the plan I followed:
Use sufficient wire, heat shrink ends, good quality connectors, and dig out the box of assorted, leftover braided wire sleeving from the LS2 swap.�
12-gauge wire from battery through 25A in-line fuse to Relay terminal 30.�
12-gauge wire from Relay terminal 87 to butt splice connector within 2-3” of electrical connector at fuel tank on the blue/red wire. Again, that wire is approx 16 ga. As another gentleman had previously indicated in a m.net post that had done this exact same thing – a short distance of small gauge wiring (and higher resistance) is better to deal with than the whole darn length of wire from relay to pump. (Hope he’s right!!)�
16-gauge wire (blue/red) from Delphi fuel pump relay now connected to New Relay at terminal 85. Wire was sufficiently long enough - no splicing required. This wire will now not work near as hard as it did in the past. It will simply engage the solenoid in the New Relay.�
14-gauge wire from negative post/ chassis ground in trunk to New Relay terminal 86.�
And lastly, 14-gauge wire from chassis ground at front corner of trunk (behind driver seat under large, bolted-on access panel) to butt connector on negative wire close to the fuel tank electrical connector.
You may be able to see the yellow 14-gauge negative wire going into the rubber grommet alongside the red 12-gauge positive wire coming in from the opposite direction…
Here is the completed New Relay in the trunk. …And the big PLUS here at the end, is that while I had the larger BMW battery out of the trunk, I simplified my Negative battery wiring by removing an assortment of lead fittings & a battery disconnect I had rigged up when I first put the V8M on the road. I thought – just maybe – this crazy mess contributed to my slow start issue. (Positive battery wiring to starter was already improved upon with large Hobart welding cable in lieu of Mazda wiring…)
Dropped battery back in, added quick-disconnect wiring pigtail for new Battery Tender Plus, and held my breath as I waited to see what the fuel pump and starter would do… They both kicked ***! Pump sounds great, did it’s prime sequence, and battery spins over QUICKLY in both cold and hot starts. Never had that before until now.
Proper wiring is so important – along with good grounds! Baby just needs a bath & 7 qts of fresh Royal Purple with filter. Happy Motoring y’all.
Last edited by ToySnakePMC; Jul 25, 2018 at 08:14 PM.
Reason: Wow.... weird large and small font... Don't like that
Where did you mount the actual inline fuse in the loop in the picture?
I looked but am not absolutely sure.
Is it in the lower right of the last picture?
Good stuff. Curious if you still have the old pump and did any resistance checks on it, to see if it was indeed a motor that went bad, and not just the pump eating itself.
Thanks guys.
BG - Yes, the � heavy-duty� in-line fuse is visible in the above photo - it�s just hard to see head on since it�s tilted facing the camera. Popped in a 25A fuse since I read others say the Walbro can draw somewhere in the 15 - 20A range...
PJ - No, I haven�t tested the DW pump - other than connect it briefly to the battery. ...And it ran nice and smooth, dammit! Guess I need to do as you suggest and see if ohms are out of expected range or what. Perhaps the windings or something went bad and there are dead spots that prevent it from starting easily...? I dunno. Will investigate sometime soon.