When you click on links to various merchants on this site and make a purchase, this can result in this site earning a commission. Affiliate programs and affiliations include, but are not limited to, the eBay Partner Network.
Monsta, Just saw your PM and replied. Definitely want to catch up over a cup or 3 of coffee and see whatcha got!! And you’re local too. Please post a thread on your car or lots of pics, either way - I’m sure it’s bad @ss.
A few Spring 2017 updates & a small leak repair ------
I�ve had a few things with the car that I wanted to address before MATG that�s approaching in early August. With life and stuff happening, the V8M hasn�t had much attention � just sitting around on the battery tender and going out for a few early Saturday morning drives or Cars n� Coffee.
But one small, irritating concern that I�d spot from time to time was what looked like water on the garage floor under the driver side footwell after sitting for a week or a month at a time. Weird� The spot of water would be small and clear � as best as I could tell. And then this Spring, I backed it out, and as it was idling on the slightly sloped driveway, engine coolant was dripping out of the REAR of the V8Roadsters LH frame rail stiffener! Well, I think I know knew what was going on -- My heater core must be leaking somehow, dripping down the LH side of the tranny tunnel and finding a way out through one of the bolts securing the frame rail stiffener.
Drove the car into the shop, put the front wheels on heavy wooden blocks for increased angle, and my hidden reservoir of coolant was now exiting the car � just in front of the rear wheel well.
So, my original heater core plumbing consisted of cutting the copper pipes short of the firewall and used hose clamps with short rubber hose �nipples� sticking through the firewall. That afternoon, I took a small flashlight and folded myself up to get a peak under the dash to discover that one of the hose clamps was just beyond hand tight and the other one wasn�t much better! I guess this situation has been going on for 2+ years now. Tightened things up and after checking for leaks the first 5 or 6 heat cycles, problem is solved.
Next job was removing the front fenders on a Friday night in preparation for V8R chassis braces. I got these in January and took them out of the box on an early Saturday morning to learn that some necessary V8R hardware would be quite useful for bolting them in place. Emailed Shandelle at V8R to let him know but quickly decided that one trip to a small Ace Hardware store would solve the problem.
I used a band saw and cut two 1�x2�x1/2� piece out of the stockpile of metal in the family�s shop, drilled two holes and painted them rattle can black for the backer plates up in the frame horn. Then I cut down aluminum spacers for the center bolts that properly offset the �V8R� triangle when you bolt everything together� Installation is relatively easy. You just have to adjust the door hinges to get everything properly aligned again.
And lastly, I ordered these hi-rise Holley valve covers from Summit to clean up the appearance a bit more. These came with the longer center bolts and I added pair of new valve cover gaskets. I�m quite pleased with these. And yes, I did replace both sides. Just didn�t take the additional pics for some reason!
Wondering what your impressions were about the V8R cowl braces? I'm planning to do door bars, and I'm wondering if these are worth the hassle to add in addition?
Cowl braces, I guess, help somewhat. I feel like my V8M was already pretty solid feeling. I really don�t beat on this car very much, so I�m probably not the best test subject to ask. I think I ordered these cause �everyone else� has them, lol. They can�t hurt! But I�d spend your money on other stuff first as you get going. You can always add these later.
I think this thread needs some photos and a brief update.
A few random pics below. Under hood shot and on the road pic from MATG.
Messy and crowded shop view of my current stock blue ‘97, ‘91 BRG, and recently parted-out ‘99 NB that was $120 investment. Kept the 1.8 head and intake along with front subframe, steering rack, control arms, and rear Torsen for future project for that BRG. (That’s the Miata that I drive the most.).
The Corvette is a 1964 327/250 4 speed two-top convertible project car that my brother found. It’s a joint project, and I now have the chassis and running gear in my shop while my brother has the body on a dolly at his shop a state away. Car was stored at a sawmill in upstate NY for 40 years - what a mess, lol...
PS - Why am I having a hard time creating this post? I cannot insert pics exactly where I want them to sit. Something has changed...
I installed my cowl braces at the same time I did the LS swap, seam welded much of the chassis, added frame rail stiffeners, removed some structure to make the engine fit... etc. So not a good back to back comparison. I think they probably do work well along with other stiffening mods. When you add more weight and torque to the front end and remove some factory structure, and then drive it hard, every little bit can help.
Last edited by pj_mcgarvey; Jan 31, 2019 at 09:02 AM.
Hi, I was wondering what you did to address the front sway bar/radiator hose interference issue? I have the same issue. Thanks, David
I have not had any issues with the lower radiator hose touching the sway bar. I would reason that these two items are touching (or very close to touching) is because I relocated the sway bar brackets an approximate 3/4"-1" further forward than the stock location. All is good! Car has been bulletproof (after improving my fuel pump wiring last year).
Last edited by ToySnakePMC; Sep 23, 2020 at 06:27 PM.
I haven�t posted here in quite a while - looks like 13-14 months ago, lol! Other car projects have dominated any free time I�ve had (which isn�t a whole lot), and the V8R patiently sits around waiting for a trip or two out of the shop and to a few eastern NC destinations. The car just runs flawlessly so there hasn�t been anything much to bring up on this build thread. ...However, I am finally ready to figure out my AC system, or lack thereof.. I have about 90% of the components and stuff for the plumbing and wiring sitting on the shelf, but I�ve come up with 731 excuses in the past 3-4 years as to why I have held off from doing the job.
I�m happy to report that I am genuinely excited about digging in and making the AC a success somehow some way here in the coming weeks (months?). Keep you in the loop and here are some current pics and our other project car that went WAY off the rails early on!!!
It�s been quite an absence of mine here on this fine forum. I currently have 2 other project cars in play this past year or so, but I want to finish up the AC to make my V8M a more complete package. It gets hot in the summer - as the hard top hasn�t been off in 5 yrs, lol..!
So, I have the Cadillac CTS-V compressor like many others around here, I would guess. My plans are to use a Vintage Air trinary switch to help control compressor and fan. That should allow me to completely avoid worrying about involving my E40 (correct name?) ECM from the �05 GTO as that ECM had a body control module (BCM) giving it such directions...
I hear that my compressor has an internal diode and can be quickly fried if I hook it up backwards. Does that sound correct?
My connector pigtail from GM is wired with WHITE wires so having never seen which wire would have originally been green (12v+?) and which one would be ground... I currently have a 50/50 chance of being correct. I�m just concerned since there could be difficulties if I get it wrong.
I�m no where near ready to try it as I�m just now formulating my plan. I have V8R fittings for the compressor on the shelf, so I�m just now figuring out what it�s going to look like. Any help is appreciated.
Pretty good weekend for V8M work! I’ll get a full update out in the next day or so, but I’ll get us started with a few things here...
So, my plan is to document this AC job as best as possible, and see if the path I take, my photos and details can be of help to other folks with any sort of swap, really...
First of all, here are some items I have on-hand. This is the Flyin Miata AC plumbing kit that gives you two critical fittings for the Cadillac CTS-V unit. The compressor fittings, unfortunately, closely face the RH upper A arm and make the fit a little tough - without some sort of a manifold block (or separate aluminum connectors like FM’s) that make the plumbing possible.
Looks like this kit shipped in Jan ‘16. No instructions given, so I’ll jump in and see how the puzzle works.
I’ve decided to go with a stand-alone AC system and not involve my E40 ECM. If this works for me, then it will seem almost too good to be true, lol. So, the trianary switch will be my saving grace. I’ve put together my wiring schematic based on the info I’ve seen others post on this Vintage Air part. And the same info with this critical diagram arrived with the item last week.
I like what I see - with one exception. And that’s the size of this fitting. Here’s the FM crimp fitting that fits their high pressure hose that they shipped a piece of in their kit. When I find an AC shop or hydraulic shop that can crimp the hoses, I’ll have them possibly replace this Vintage Air one with a smaller sized one.
Keep you posted with more on the way this week.
Last edited by ToySnakePMC; Sep 22, 2020 at 04:55 AM.
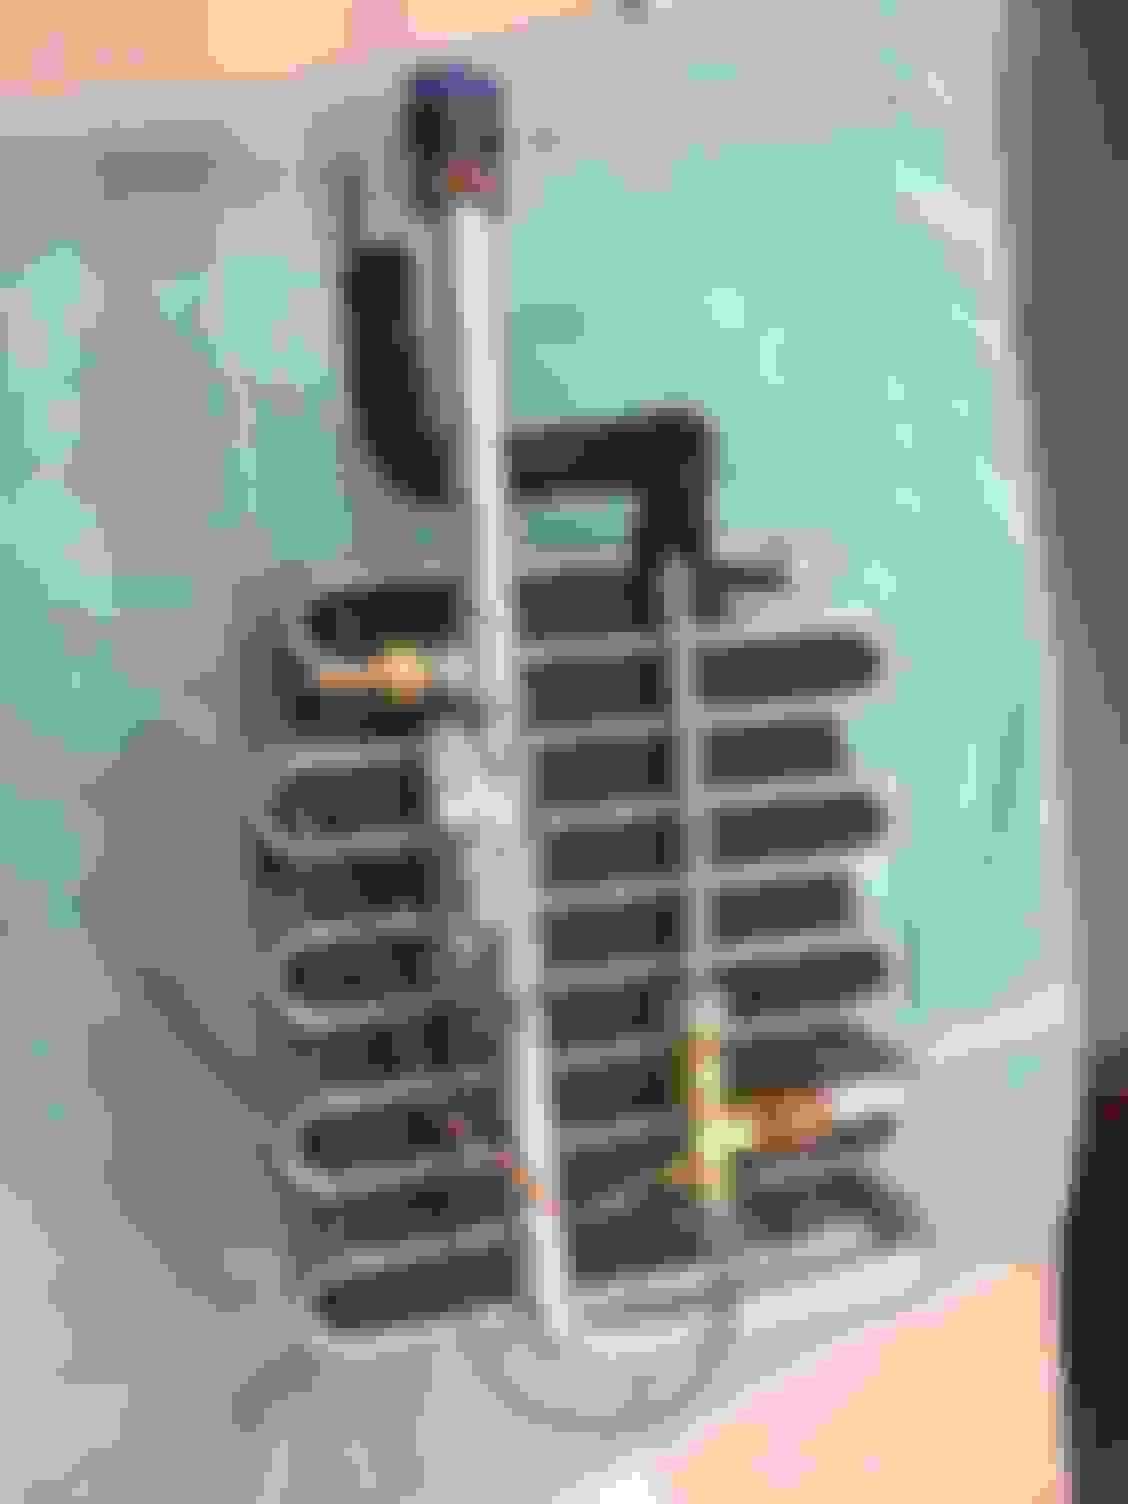
It was time to dig in this past Saturday afternoon as I wanted to install the new condenser coil that’s been boxed and sealed up for 4 years... Idea was to carefully remove the bumper assembly so I could better access the previously adjusted coil factory mounting brackets that I did “back in the day” as a result of kicking the bottom of the FM radiator more forward. Think that was done to create sufficient space for FM sway bar and FM electric fan kit... Had the cover off and installed a new Delco Z06 air filter while I had easy access.
The original filter didn’t look that bad, and it actually looks worse in this iPhone pic if you ask me. That filter, by the way, arrived slightly used - almost new looking - in the intake assembly I won on eBay years ago so the new filter has just quietly waited its turn on the shelf for quite sometime. It’s so large and thick, that I decided to use a sharpie to document it for posterity’s sake.
Last edited by ToySnakePMC; Sep 23, 2020 at 06:31 PM.
Here’s an interesting, at least to me anyway, comparison between V8Roadsters manifold block that I bought in 2014 or so. I installed it and plugged it up when I put the compressor on at the completion of my build. I hope I didn’t hurt the compressor but I don’t think it ever got contaminated - at least I hope not. The V8R manifold is one piece, using 2 bolts, and it has the two connections/ outlets ready to be brazed. I can get better pics of that adapter if you want, just ask.
Here’s the FM plumbing adapters - obviously two separate connections that I think will make for easier installation actually.
Please ignore my additional ground wire in this photo, lol. It appears it’s been smushed somewhat by the upper tubular A arm. I’ll reroute it if I decide to keep it. It was installed when I experienced slow engine starts when the motor was hot. Turns out I had a loose ground connection back at the battery!
So with the help of a healthy dose of Four Roses small batch over ice, I zero’d in on the plumbing or hose routing and condenser coil installation.
4 bolts, rubber isolator items, and it’s in.
Now, pull out some saved NA Miata AC lines. I decided to cut up the dirty, old lines from a previous project car. The clean ones were off of this car. Used up a piece of Scotchbrite pad to make em look new - because I like the aesthetics of this little V8Miata!
So here’s a pic of the original mock up of the fat line coming from the evaporator in the cabin. Cut off beyond the Mazda test or fill port so the FM braze/crimp connector gives me a suitable length of flexible rubber hose to where it connects to FM’s sweet adapter fitting. I also cut the FM alum adapter / fitting at the blue tape for no other reason that my piece had 3 or 4 previous, shallow cuts from what looked like a tubing cutter. I didn’t like their looks solely based on cosmetic reasons. Below mock-up reflects the shortened piece.
Above, you can also see the liquid, high pressure line that I’ve cut and hung the hose adapter on.
Now, here’s the results of my initial “design” for my aluminum brazing and hose crimping project that I need to find and take to a local shop. I’m hopeful one AC shop or individual can do all of this for me. The blue tape on the two fatter hoses mocked up indicates where the hoses need to be cut. These two appear fairly simple, to me, at least!
Now, this small diameter liquid line that runs from the drier up front to the firewall will need more goodies installed. The blue tape represents the allowable or desired space I have for installing a crimped on fill/test port (don’t have that fitting as of yet) AND the separate Trinary switch. I think that’s all in the space of 15” or so - where the pen is pointing. The reason is I want those accessible and sitting between the fuse box and the overflow tank on that side of the motor. At that tank, the hose will dive down and shoot to the connection for the drier. I don’t want the service items hard to reach. That rubber hose will be about 33” overall from forward to rear crimp connectors.
Sunday began the start of figuring out the wiring. I’m going to use 2 relays in series and a 30 or 40 amp fuse, if you will, to best handle the call for AC. At a later time, I’ll provide my wiring diagram and the reasoning behind it as I don’t want any safety concerns, but also trying to keep it simple for aesthetic purposes under the hood.
I used a piece of aluminum extrusion sitting in the shop & cut it to size. This small project became the focus of my afternoon. Using the Mazda captured nuts for the since-removed, and relocated, plastic washer bottle, I could attach my new bracket with short plastic stand-off pieces so it will be easy to service someday. More details to follow when I get back on it next week. Thx, Patrick
Last edited by ToySnakePMC; Sep 22, 2020 at 05:09 AM.
It’s Friday evening, and I was able to continue with wiring up the relays. I also located my higher amp 12v source to connect the new 30 (or 40 if needed) amp fuse which will feed power to the front cooling fan once keyed-switch power energizes the first relay and after the 2nd relay is energized by a competed ground circuit that begins at the AC button on the dash and goes through the trinary switch.
Here’s tonight’s photos.
I’m using heat shrink connectors and black, flex wire covering where possible to keep it attractive and for ease of service later on. The single, stainless-steel post terminal arrived today from a marine / boating supply house, and it’s going to be mounted out of the way facing the firewall. I want that soon-to-be hot + terminal post protected from harm or curious hands poking around where they shouldn’t be. You also may notice that the yellow wire on each relay is missing. And that’s because it’s unnecessary and I clipped them off and covered the wire stubs with heat shrink. They were on post 87A on normally closed position. More to follow...
Last edited by ToySnakePMC; Sep 26, 2020 at 12:21 AM.
Time to move inside the car on Saturday, the 26th of Sept. I had two goals to accomplish in the dash and there were as follows: Locate a suitable 12V+ key-on wire for triggering AC Relay #1. And remove evap coil housing to replace the components with new items. This step went easily enough as I've dug into 15-20 NA and NB dashes over the last 25 years for various reasons. I pulled out the console and tombstone to temporarily remove the Kenwood stereo. This is as good as any location to tie into the key-on hot wire. Made the connection and used the opportunity to detail and clean up any dust and such that had gathered in the various seams and nooks & crannies.
Next up was to remove said evaporator from behind the glovebox. Two screws release the door assembly from the horizontal hinge metal that runs along the bottom of the RH dash. Two screws and that piece is out of the way. Two 10mm nuts and two clips removed that connect the air passageways at the left and rights side - and that puppy is pulled out. I had some wiring harnesses secured and tucked behind the HVAC system as the GM wiring is heading towards the E40 ECM and Delphi fuse panel sitting just below...
Old evap coil was not nearly as dirty as all previous ones I've seen. I know this car has been garage kept by me since... 2004 or 05 when I bought it in Midlothian VA.
Remove the evaporator thermostat sensor (the item that has two wires running to it), grab the new evap coil and expansion valve and install to mimic the old assembly.
Sharp eyes will notice that I failed to re-install the pipe insulation on the larger diameter line... So, i opened the box up again and reused the nice insulation from previous coil..! Ran the 12v+ keyed-on wire up through the large RH firewall grommet with the coil AND now the fan housing removed. That was just three 10mm nuts and two small wiring harness plugs -- unplugged. That wire was secured and covered in flex coming out of the firewall.
Wiring for the most part is complete. I will have to, obviously, wait for the final location of the trinary switch to correctly operate the condensor fan and the compressor. That location will be determined when I get the AC hoses completed. I was able to T into the wiring for the fan from Relay #2 with stout 12 gauage wiring. Heat-shrinked and secured in the split Techflex covering. All grounds for the relays are completed and the 12v+ key-on wire is successfully connected to Relay #1.
... And then TODAY happened! I had to be in Wilmington NC this week so i grabbed up my AC hoses and decided that I would try and find a suitable shop here to do my hose fabrication. One call to a random auto AC repair shop led me to Diesel Parts of Carolina on Hwy 421 (about 4 miles up the road from the USS North Carolina battleship). Tanner was the young man that took my call and invited me to head to his shop as soon as possible. It was a "slow day" he said... That's all I needed to hear. Got there in 20 minutes, and he spent the next hour or so working with me on each of the three hoses to make them just as I desired! He had the fittng and extra Goodyear hose in stock to build this thing out while I hung out at his parts counter. The job got done, the bill got paid, and Tanner got a fat monetary tip!! Next thing I know, I'm showing him and his boss, Jeff, this build thread and explaining how well the V8Roadsters kits work and what minimal cutting is done on a Miata to make an LS engine fit. Turns out they know LS swaps as they assist https://www.ospreycustomcars.com/ with the plumbing of brakes, AC, power steering, etc on their elaborate Land Rover Defender/ LSx builds! What they can't believe is how quick a 2,400 lb Mazda would be with that same powerplant. So, I promised to give these guys a ride someday when I bring the car here (with working AC right??) !! This 2" hydraulic hose hanging above the parts counter has an approx 4" OD and must weigh 20 lbs!
Now, I can not wait to get back to the shop to plumb, wire, test said wiring, pull a vacuum, and eventually charge it with some 134a!
Yesterday was a good day. ...Well, actually, last night was a good day. I got about 4 hours of uninterrupted shop time (How rare is that, married fellas?), and may have either reached the end zone, or at least into the red zone should I find myself having to make any repairs, fix leaks, and such.
Ready to dig back in.
Took my three newly minted hoses one by one to their new homes, installed with new green o-rings, tightened down maybe more than I should have..? I dunno, I�m just fearful of chasing any leaks so we�ll see how I did soon enough. Hoses went on way too easily! My high pressure hose could have been 1� to 1-1/2� shorter, and that�s the exact amount of extra length that I added at the final moment when working with the hose shop tech, Tanner.
Firewall connections turned out nicely. I like having the high pressure line kicked out towards the right side. And new drier installed as well. 100% new system.
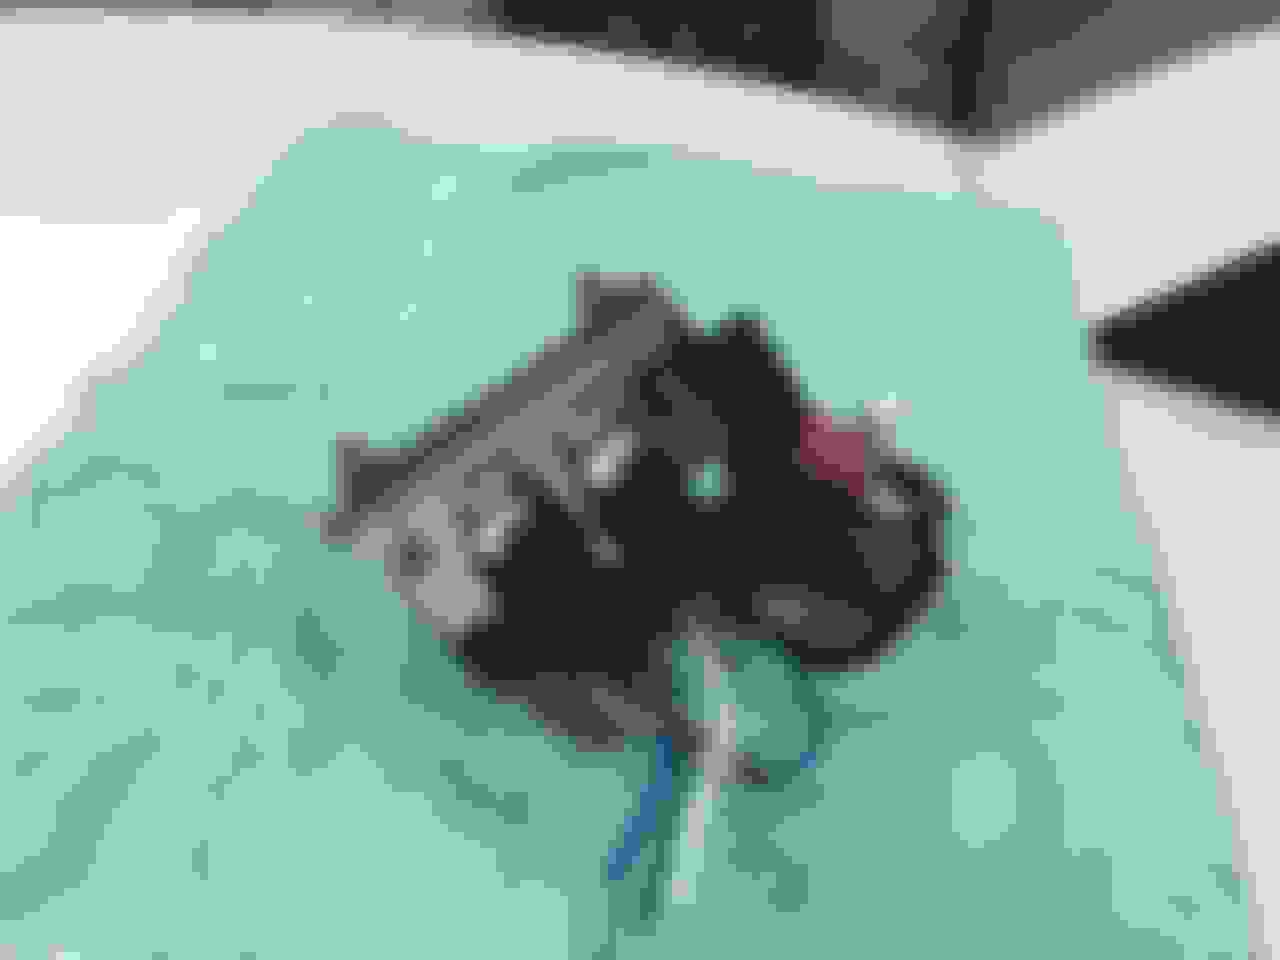
Only thing left to do was finalize my wiring - anything associated with the trinary switch from Vintage Air and the compressor plug. Dash AC button/switch connects to black wire. Other black wire goes to AC compressor. This is a ground wire, and the trinary switch will only close when AC pressure is within a certain safe range AND below a certain high temp. Otherwise, switch will open cutting off the call for AC. That�s 2 of the trinary switch�s 4 wires. Next, take one blue wire and connect to ground. Other blue wire connects to Relay 2 at pin 85 which is the ground wire for the control circuit of the relay. So, when the trinary switch closes (see above) in the safe zone, if you will, that allows Relay 2 to close and will turn on my Fan. I�m tied into Fan 2, by the way.
I used heat shrink connectors and heat shrink wrap to help keep this AC harness blend into my existing, minimal wiring. This is the AC compressor plug all tidied up.
So, here�s the final results! It�s fully plumbed and wired to the best of my ability. I�m pleased with how it turned out and the AC hoses didn�t overwhelm the RH side of the engine bay like I feared they would. Hopefully, I can pull a vacuum on my friend�s AC machine and fill with 134a and some additional compressor oil if he thinks we need more. (Can that be added through a port with the shraeder valve removed...?). If not, I can just remove one line at the compressor so maybe no big deal. See what you think??!
My wiring diagram. Fingers crossed that this works as I’m posting this before ever testing or turning it on. I’ve got to install the AC belt as well, lol. Won’t ever run without that!
Note: 16 and 18 gauge wiring on the control side and 12 gauge wiring on the load side for the fan and such.


 More to follow...