V8R sloooww build - 94 Miata - North Carolina

 02-23-2014, 07:41 PM
#176
V8 Miata Fanatic

Thread Starter

Last day of the weekend and heading out of town for 4 or 5 days for business (what's new...) so the Mazda is awaiting its next adventure.
And that next step is... the exhaust shop. The Roadster will be delivered to him Wed or Thursday. So, I met with the fella on Saturday and went over my plan and have all the important components in the passenger side of the car: which includes a Dynomax VT 3" muffler, a 2-1/2"x3" Y, a couple of 2-1/2" and one 3" V Band clamps, along with two O2 sensor bungs. I did a drawing (should have taken a pic of it!) for him to use as a guide and hopefully answer any questions while I'm away.
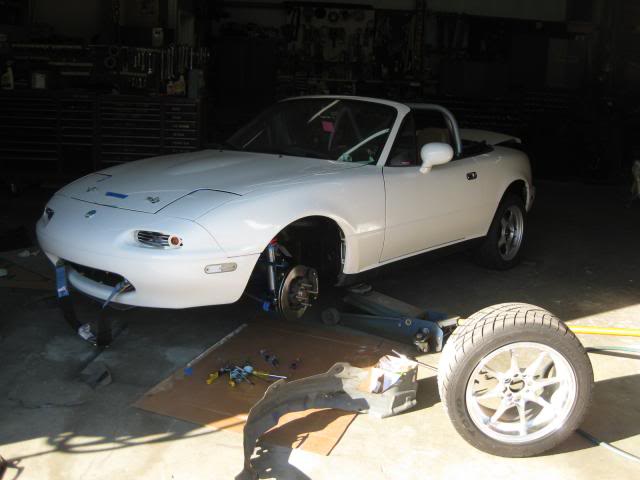
So, today was a brake job for the part-time DD - our '91 BRG. I slapped in new pads, rotated the tires, and gave it a quick wash just before sundown.
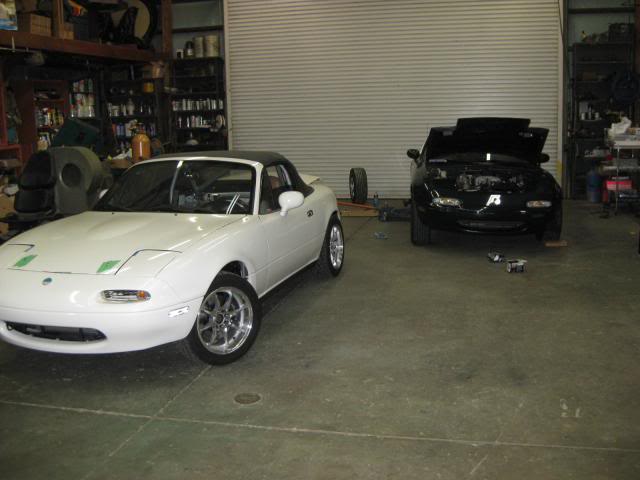
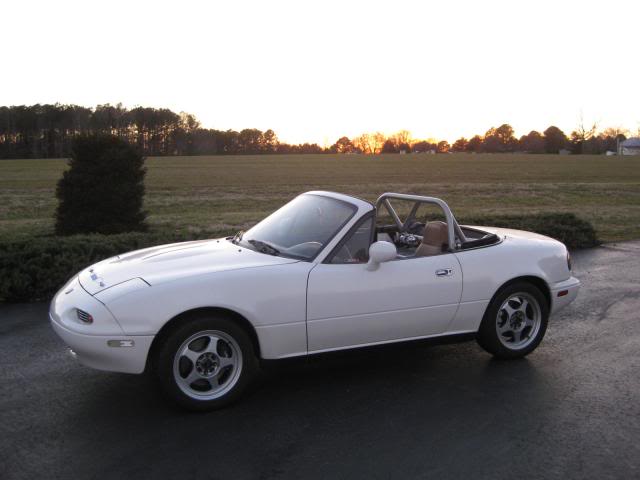
Here, you can see the hardtop that I had painted last month to match the 1994 Mazda "PT" white. This hardtop was a 1999 metallic dark green. The wifey insisted on a white hardtop in lieu of my Phoenix Yellow metallic one. That top sure has gotten mixed reactions over the years... But I'll keep it in storage for now.
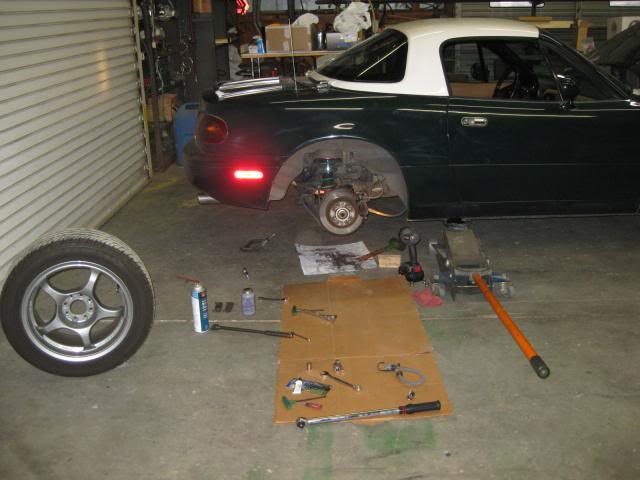
Here's a flashback pic for comparison. I think it was getting new brakes back in the day...
And that next step is... the exhaust shop. The Roadster will be delivered to him Wed or Thursday. So, I met with the fella on Saturday and went over my plan and have all the important components in the passenger side of the car: which includes a Dynomax VT 3" muffler, a 2-1/2"x3" Y, a couple of 2-1/2" and one 3" V Band clamps, along with two O2 sensor bungs. I did a drawing (should have taken a pic of it!) for him to use as a guide and hopefully answer any questions while I'm away.
So, today was a brake job for the part-time DD - our '91 BRG. I slapped in new pads, rotated the tires, and gave it a quick wash just before sundown.
Here, you can see the hardtop that I had painted last month to match the 1994 Mazda "PT" white. This hardtop was a 1999 metallic dark green. The wifey insisted on a white hardtop in lieu of my Phoenix Yellow metallic one. That top sure has gotten mixed reactions over the years... But I'll keep it in storage for now.
Here's a flashback pic for comparison. I think it was getting new brakes back in the day...
 02-27-2014, 09:08 PM
#177
V8 Miata Fan

Join Date: Dec 2013
Location: Des Moines, IA
Posts: 99
Likes: 0
Received 0 Likes
on
0 Posts
Looks like your getting your car done!! Gratz I was wondering how much your drivetrain cost you? You had an ls1 but you sold it for an ls2? Any particular reason?
Ive been looking around online, ls2 and a t56 drive trains seem a bit pricey to me, I saw a corvette rolling chassis for $7500, but at least I might be able to sell the frame, suspension and wheels and recoup some money...but it's still a big hit.
Ive been looking around online, ls2 and a t56 drive trains seem a bit pricey to me, I saw a corvette rolling chassis for $7500, but at least I might be able to sell the frame, suspension and wheels and recoup some money...but it's still a big hit.
02-27-2014, 11:25 PM
#178
V8 Miata Fanatic
Thread Starter
Looks like your getting your car done!! Gratz I was wondering how much your drivetrain cost you? You had an ls1 but you sold it for an ls2? Any particular reason?
Ive been looking around online, ls2 and a t56 drive trains seem a bit pricey to me, I saw a corvette rolling chassis for $7500, but at least I might be able to sell the frame, suspension and wheels and recoup some money...but it's still a big hit.
Ive been looking around online, ls2 and a t56 drive trains seem a bit pricey to me, I saw a corvette rolling chassis for $7500, but at least I might be able to sell the frame, suspension and wheels and recoup some money...but it's still a big hit.
Good luck with your build! Be cautious with the Vette chassis. That T56 isn't the same as the GTO or Camaro tranny...
Last edited by ToySnakePMC; 02-27-2014 at 11:27 PM.
02-27-2014, 11:59 PM
#179
V8 Miata Fan
Join Date: Dec 2013
Location: Des Moines, IA
Posts: 99
Likes: 0
Received 0 Likes
on
0 Posts
02-28-2014, 02:01 PM
#180
V8 Miata Fanatic
Thread Starter
This is where my powertrain came from:
Contemporary Corvette - Used Corvette Parts from 1968 to the Present
Search for GTO perhaps. I had found them in eBay actually.
Contemporary Corvette - Used Corvette Parts from 1968 to the Present
Search for GTO perhaps. I had found them in eBay actually.
03-09-2014, 07:45 AM
#181
V8 Miata Fanatic
Thread Starter
Been away for work the past 2 weeks - and... nothing much has happened. Exhaust guy says he will be ready for the car this week - and I'll be in town as well - so that's a good thing.
Yesterday comprised of just a few small things - hood pins, front fender liners, and a wheel/tire swap.
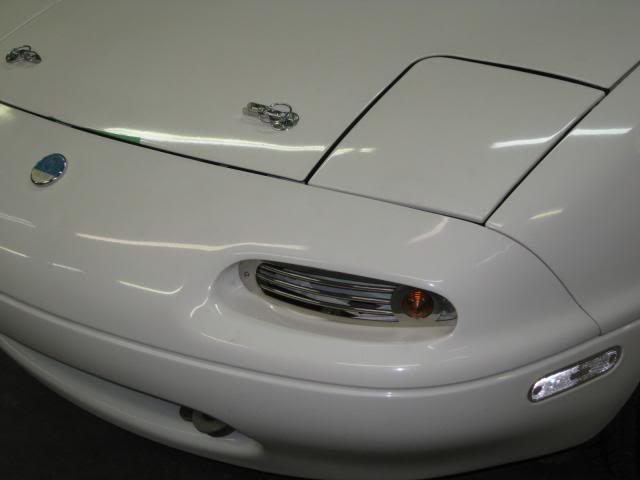
The Sparco hood pins needed the hood latches installed. The kit comes with tiny Phillips-head screws and tiny sheet metal/ nuts for the underside of the hood which would be fine for a single layer fiberglass hood. There's no way I'd cut layer upon layer of my aluminum hood to get these tiny rectangles of steel mated up to the tiny screws... So it was time for the rivet gun and utilize a box of new small diameter aluminum rivets. Lay down blue tape, align latches, drill 6 holes in hood, and pop in rivets. Cut 2 short sections of rubber hose for hood bumpers, adjusted the height of the pins for snug fit, and all done. Quite easy but was apprehensive about the project.
Next up was fender liners. I initially thought I would cut them off about 1/3 of the way up the back of the wheelwell to better keep small rocks and stuff getting piled into that open void behind the rear of the front fenders. But the more I looked at it, I decided to trim where I think the fat tires will rub. The fenders have a moderate to decent roll so it was obvious where I wanted to trim at the top. The front of the liners have a bulge the protrudes towards the tires, so that rectangular section came out as well with a pair of tin snips. Put liners back in, installed the two pairs of tiny front fender and bumper brackets in as well to firm the front corners up for my future high-speed 70 mph runs!!!

Here's a pic of the RH fender liner with hunk cut out and brackets installed. I got lazy and didn't clean up the liners before putting them in - will do that another day - perhaps when I lower the front coilovers to an acceptable ride height. Edit: Just noticed the bolt & nut are not tightened in the photo - will go back and check that out. Looks sloppy & dirty! Yuck.
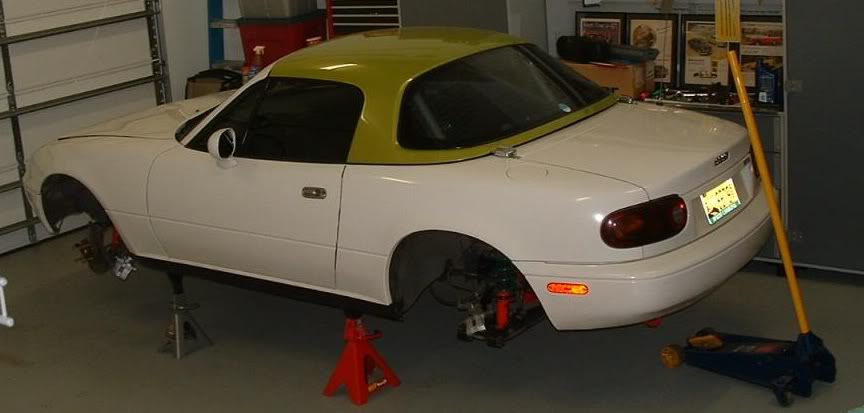
Swapped out to a set of Rota Slipstreams 15"x7" with some Yoko 205 tires (this set has been on a VW Cabrio and a few Miatas over the past 2 years...). I thought since all 4 wheels must be out of alignment, it would be better to scoot around on these little things versus tearing up my wider, sticky stuff. Yeah, it sits HIGH - especially up front - I know...
Believe it or not, I fired her up w/o exhaust and took the Mazda outside to let water temps warm up, check for leaks, noises, etc. All is good so far - just tightened up a loose clamp on the radiator overflow that had a slow drip... You can't hear it in the photo, but it's sorta LOUD back here.
Also, the Mazda now has 2.0 miles on the odometer! I couldn't resist driving this thing up the road and back as twilight approached. Clutch and tranny feel GREAT - better than I thought the Tremec would after being spoiled by Mazda's tight and direct-feeling 5 speed all these years. Engine is quite responsive - I don't know if it's that new PCM tune I got or that lightweight flywheel - but I like it. I'd just like to hear it all after it runs through an exhaust. NASCAR sounds are fun - but it's time to quiet her down now, I think.
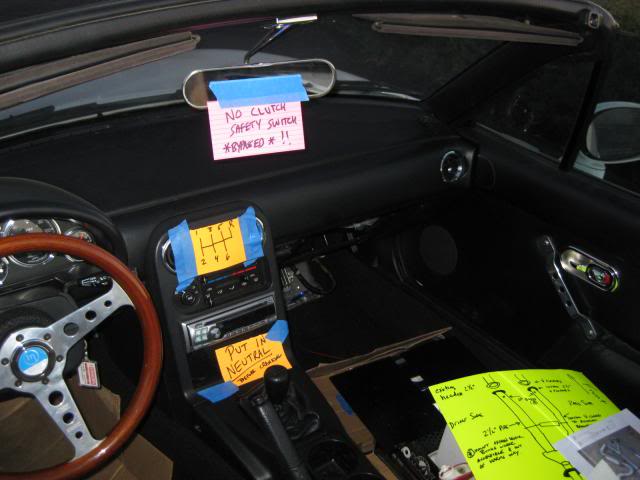
Here's my helpful tips to those that have access to this shop and have a certain urge to crank it up to either move it across the building or scare a welcomed guest! (Don't worry - it's just my father-in-law or my buddy with the rollback. They respect the build.)
Yesterday comprised of just a few small things - hood pins, front fender liners, and a wheel/tire swap.
The Sparco hood pins needed the hood latches installed. The kit comes with tiny Phillips-head screws and tiny sheet metal/ nuts for the underside of the hood which would be fine for a single layer fiberglass hood. There's no way I'd cut layer upon layer of my aluminum hood to get these tiny rectangles of steel mated up to the tiny screws... So it was time for the rivet gun and utilize a box of new small diameter aluminum rivets. Lay down blue tape, align latches, drill 6 holes in hood, and pop in rivets. Cut 2 short sections of rubber hose for hood bumpers, adjusted the height of the pins for snug fit, and all done. Quite easy but was apprehensive about the project.
Next up was fender liners. I initially thought I would cut them off about 1/3 of the way up the back of the wheelwell to better keep small rocks and stuff getting piled into that open void behind the rear of the front fenders. But the more I looked at it, I decided to trim where I think the fat tires will rub. The fenders have a moderate to decent roll so it was obvious where I wanted to trim at the top. The front of the liners have a bulge the protrudes towards the tires, so that rectangular section came out as well with a pair of tin snips. Put liners back in, installed the two pairs of tiny front fender and bumper brackets in as well to firm the front corners up for my future high-speed 70 mph runs!!!
Here's a pic of the RH fender liner with hunk cut out and brackets installed. I got lazy and didn't clean up the liners before putting them in - will do that another day - perhaps when I lower the front coilovers to an acceptable ride height. Edit: Just noticed the bolt & nut are not tightened in the photo - will go back and check that out. Looks sloppy & dirty! Yuck.
Swapped out to a set of Rota Slipstreams 15"x7" with some Yoko 205 tires (this set has been on a VW Cabrio and a few Miatas over the past 2 years...). I thought since all 4 wheels must be out of alignment, it would be better to scoot around on these little things versus tearing up my wider, sticky stuff. Yeah, it sits HIGH - especially up front - I know...
Believe it or not, I fired her up w/o exhaust and took the Mazda outside to let water temps warm up, check for leaks, noises, etc. All is good so far - just tightened up a loose clamp on the radiator overflow that had a slow drip... You can't hear it in the photo, but it's sorta LOUD back here.
Also, the Mazda now has 2.0 miles on the odometer! I couldn't resist driving this thing up the road and back as twilight approached. Clutch and tranny feel GREAT - better than I thought the Tremec would after being spoiled by Mazda's tight and direct-feeling 5 speed all these years. Engine is quite responsive - I don't know if it's that new PCM tune I got or that lightweight flywheel - but I like it. I'd just like to hear it all after it runs through an exhaust. NASCAR sounds are fun - but it's time to quiet her down now, I think.
Here's my helpful tips to those that have access to this shop and have a certain urge to crank it up to either move it across the building or scare a welcomed guest! (Don't worry - it's just my father-in-law or my buddy with the rollback. They respect the build.)
Last edited by ToySnakePMC; 03-09-2014 at 09:09 AM.
03-09-2014, 09:17 AM
#182
V8 Miata Fanatic
Thread Starter
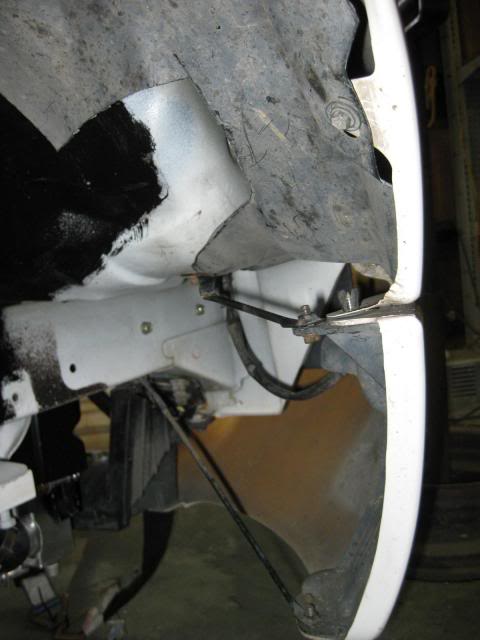
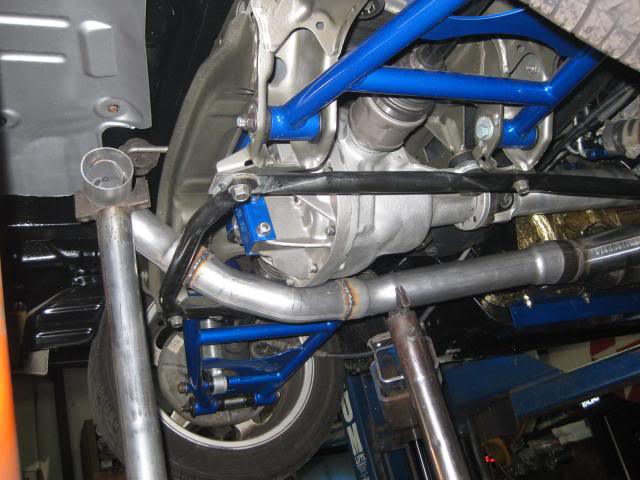
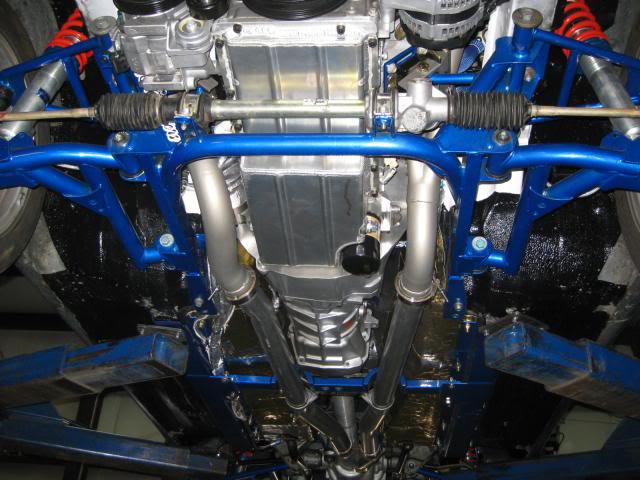
By the way - can't believe I almost forgot to share this concern - but look at this pic and see if you see my potential compatibility issue with front sway bar and lower radiator hose.
This being the FM V8 radiator and cooling fan kit, I'm somewhat surprised that I see an upcoming interference between where the FM V8 bar and the lower hose. I know I dreamed up these extended sway bar brackets to allow the bar to clear the engine and fans (as I recall) but I didn't think the radiator hose was going to get in the way... Of course, I haven't attempted to install the sway bar so maybe I'm over-reacting too quickly. Will try it out soon. Keep you posted.
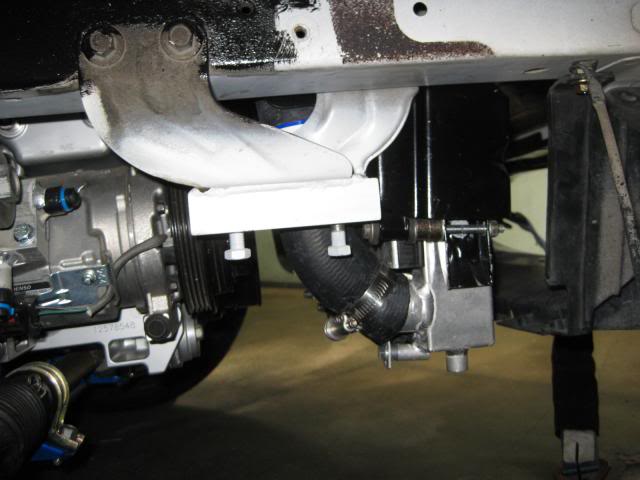
This being the FM V8 radiator and cooling fan kit, I'm somewhat surprised that I see an upcoming interference between where the FM V8 bar and the lower hose. I know I dreamed up these extended sway bar brackets to allow the bar to clear the engine and fans (as I recall) but I didn't think the radiator hose was going to get in the way... Of course, I haven't attempted to install the sway bar so maybe I'm over-reacting too quickly. Will try it out soon. Keep you posted.
03-14-2014, 10:45 PM
#183
V8 Miata Fanatic
Thread Starter
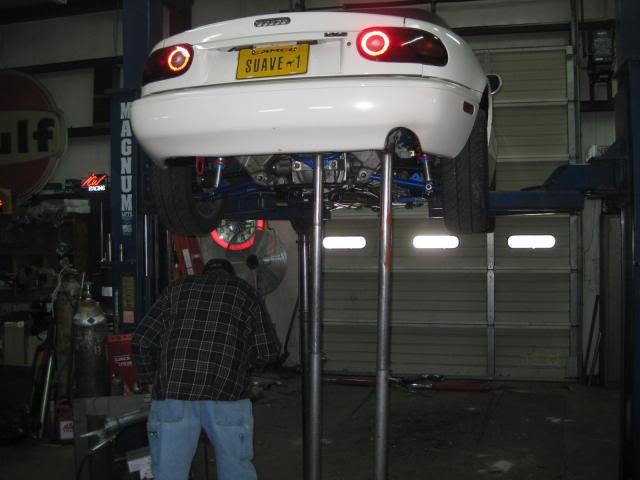
Thursday 3-13-14 marks a milestone in the build of this V8 Mazda, and that consisted of the final pieces added to this car puzzle I began about 14-15 months ago. After giving a muffler shop the benefit of the doubt and a few weeks without any appointment confirmed to bring my roadster in, I got on the phone that morning and made a few calls to local muffler shops. That resulted in a referral to D&K Muffler in Dunn, NC. Donald sounded like the right person on the first phone call, and he could start the job within 4 hours of the call!
Needless to say, I jumped at the chance and loaded this 20 yr-old on the dolly for a 20 mile ride south.
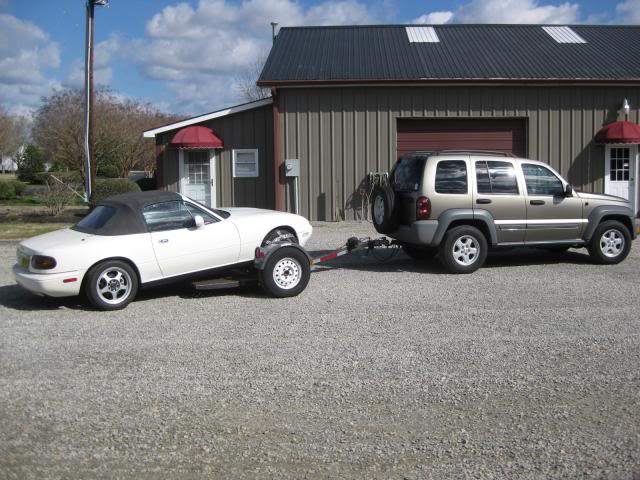
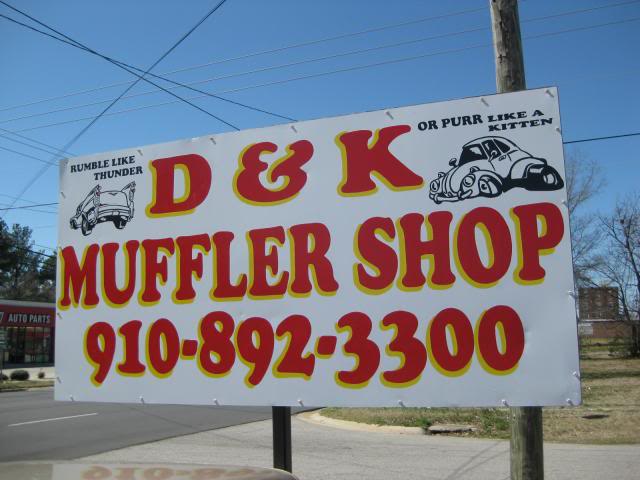
Rolled into town and easily found this welcomed sight. I decided that day I wanted exhaust on this car and I wanted it now!!
Within 15 minutes of putting this car up on the lift and looking over my 2-1/2" to 3" Y and Dynomax VT muffler, Donald had collected his thoughts and got busy. It all started with the 2-1/2" V-Band clamps on the headers and some strategic bends to the pipe, and he had half of the system laid into place!
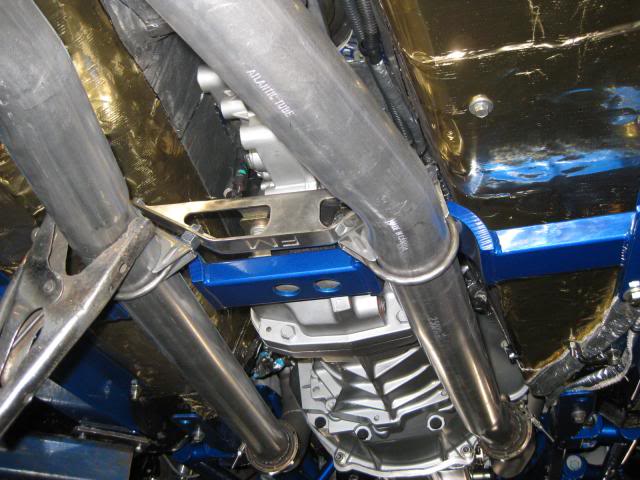
I did make a concession and resign to the idea of completing the back half also in 2-1/2" pipe in lieu of my preferred 3". Donald's concern was mostly wanting to achieve some tight turns around the Ford diff, and he felt he could do it fairly easy with 2-1/2". His hydraulic tubing bender and "expander" feature was put into heavy use as he flared or swelled the end to 3" to utilize my Y and large-opening single inlet & outlet muffler! I'm thinking that if I'm not crazy with this particular layout and think the single 2-1/2" chokes the LS2 down miserably, it won't be an expensive chore to replace it from the headers back...
Here's a shot to illustrate the single rear pipe and how it snakes around my diff.
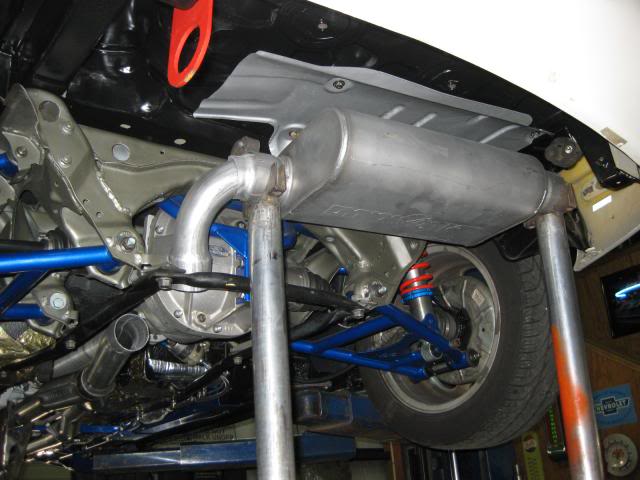
The Dynomax VT with its internal flapper valve and spring is the answer to my prayers if it will keep a hush on things when I creep in and out of my neighborhood! This photo either is taken from an odd angle or the pic was taken prior to the muffler being properly tucked in tight with the trunk floor and Dynamat-backed muffler shield. What I can tell you is that this muffler doesn't sit low...
There's some serious thinking going on here as he figures the angles and bends needed to get this muffler into position...
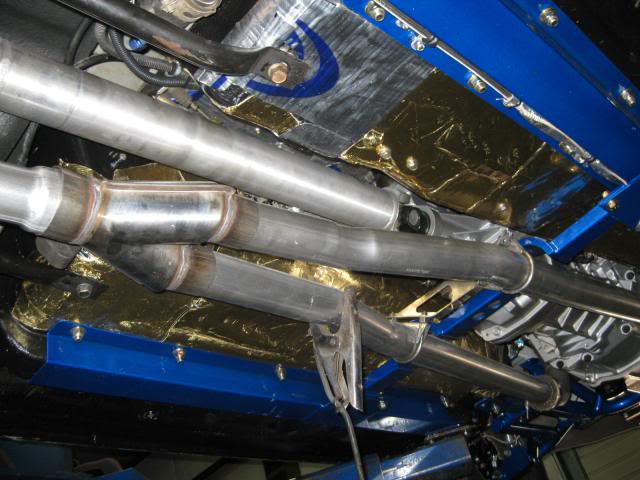
Here's a pic looking back on the nearly-finished exhaust system. I'll probably paint the system with hi-temp black engine before it gets some surface rust all over it!
Lastly, Donald ran the pipe out of the muffler with its final, 90 degree turn towards the bumper. And he threw a slash chrome tip on there to get my reaction. I love it -- as it appears identical to the slash tip I had on my Borla cat-back system. It just looks so innocent -- until you twist the key!
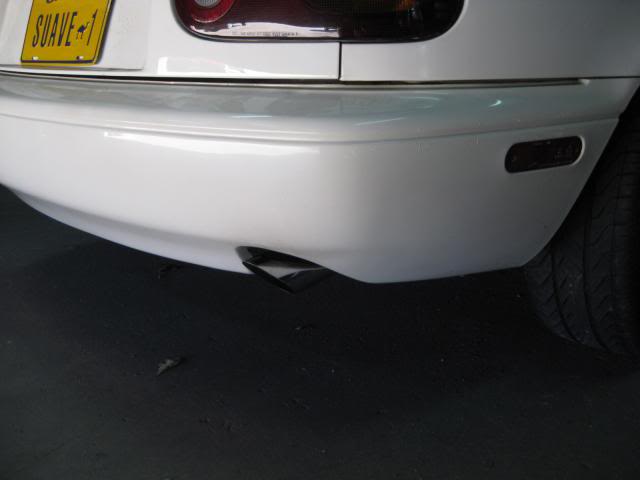
D&K did a nice job. The Mazda sounds great too. As Donald said it first - within seconds of the first start-up in the shop - the little roadster sounds like a C5 Corvette now. It has a slight crackle when it cranks, idles somewhat quiet, but sounds a bit angry when you give it any sort of partial throttle! I like it! Can't wait to drive it!
Needless to say, I jumped at the chance and loaded this 20 yr-old on the dolly for a 20 mile ride south.
Rolled into town and easily found this welcomed sight. I decided that day I wanted exhaust on this car and I wanted it now!!
Within 15 minutes of putting this car up on the lift and looking over my 2-1/2" to 3" Y and Dynomax VT muffler, Donald had collected his thoughts and got busy. It all started with the 2-1/2" V-Band clamps on the headers and some strategic bends to the pipe, and he had half of the system laid into place!
I did make a concession and resign to the idea of completing the back half also in 2-1/2" pipe in lieu of my preferred 3". Donald's concern was mostly wanting to achieve some tight turns around the Ford diff, and he felt he could do it fairly easy with 2-1/2". His hydraulic tubing bender and "expander" feature was put into heavy use as he flared or swelled the end to 3" to utilize my Y and large-opening single inlet & outlet muffler! I'm thinking that if I'm not crazy with this particular layout and think the single 2-1/2" chokes the LS2 down miserably, it won't be an expensive chore to replace it from the headers back...
Here's a shot to illustrate the single rear pipe and how it snakes around my diff.
The Dynomax VT with its internal flapper valve and spring is the answer to my prayers if it will keep a hush on things when I creep in and out of my neighborhood! This photo either is taken from an odd angle or the pic was taken prior to the muffler being properly tucked in tight with the trunk floor and Dynamat-backed muffler shield. What I can tell you is that this muffler doesn't sit low...
There's some serious thinking going on here as he figures the angles and bends needed to get this muffler into position...
Here's a pic looking back on the nearly-finished exhaust system. I'll probably paint the system with hi-temp black engine before it gets some surface rust all over it!
Lastly, Donald ran the pipe out of the muffler with its final, 90 degree turn towards the bumper. And he threw a slash chrome tip on there to get my reaction. I love it -- as it appears identical to the slash tip I had on my Borla cat-back system. It just looks so innocent -- until you twist the key!
D&K did a nice job. The Mazda sounds great too. As Donald said it first - within seconds of the first start-up in the shop - the little roadster sounds like a C5 Corvette now. It has a slight crackle when it cranks, idles somewhat quiet, but sounds a bit angry when you give it any sort of partial throttle! I like it! Can't wait to drive it!
Last edited by ToySnakePMC; 03-14-2014 at 11:45 PM.
03-15-2014, 06:22 AM
#184
Jim Stainer

Um excuse me for writing before my coffee but 15 months of the most epic build this forum has seen in years that is first rate from start to almost finish and you compromise now?? And no way is this a good shop. No exhaust pro worth his salt would see the size of that throttle body and intake you have and think a single 2 1/2 pipe is a good idea. Man if I can get a 3" pipe through all the crap in my car anyone can! Did anyone else read this and want to go Gibbs smack this guy on the back of the head? And maybe the car owner too!
Consider that most guys run 2.5s all the way back on both sides even on the smaller Ford engines. And the brace is not hard to work around. Shim it down 1/2" and have him throw it in his pipe bender to gain another 1/2 and you have plenty of room. IMO you would be better off to ditch the brace all together than kill that poor engine with that tiny pipe. He should have been telling you to go to a 3 1/2 or duels all the way back!
OK time for coffee...
Last edited by charchri4; 03-15-2014 at 08:59 PM.
03-16-2014, 07:41 AM
#186
V8 Miata Fanatic
Thread Starter
Thanks for posting up and sharing concerns on the rear piping, Jim & Tbone. I'll definitely stay aware of what effects this 2-1/2" has on performance as I get it on the road, double & triple check bolts, wiring , piping, clearances, etc. This 6.0 tub-of-fun now has approx 12 miles on it & is a SCREAM with all that TQ under my right foot. I have no cats and my VT muffler is supposed to flow very well under WOT so at this early point in time, it seems as if this stock LS2 is pretty happy. Then again, I doubt I've given it much more than 1/2 or 2/3 throttle... Things start to get sorta crazy pretty quickly!
03-16-2014, 11:10 AM
#187
V8 Miata Participant

The exhaust looks great. You'll have plenty of power (for now). And you have a good pattern to follow. Looks like a couple of mandrel bends will do the trick. Your exhaust guy probably doesn't work with 3" every day except for long straight runs on diesel trucks and also they tend to forget that the diff isn't moving around, so pipes can be a little closer.
Enjoy it. You can call it an upgrade later on.
Mike
Enjoy it. You can call it an upgrade later on.
Mike
03-16-2014, 12:43 PM
#188
V8 Miata Noob

Join Date: Feb 2013
Posts: 5
Likes: 0
Received 0 Likes
on
0 Posts
Agreed Mike. Excellent points! Work out the bugs with it as is for now. These "projects" are never truly finished. Pat - do the exhaust upgrade when you opt for a cam upgrade...  .
.
.
Last edited by tad240; 03-16-2014 at 12:54 PM.
03-16-2014, 01:38 PM
#189
V8 Miata Fanatic
Thread Starter
Thank you Mike -- You're exactly right! This guy IS primarily tossing on new pickup truck exhausts... I heard him on the phone while I was there with a caller: "How loud do you want it? ...How LOUD do you want it to sound?" Tight radius 3" bends will be the cure if/ when there are upgrades.
Cheers.
03-17-2014, 08:58 PM
#190
V8 Miata Fanatic
Thread Starter
No pics to toss up with today's post, but I got a short list of tasks accomplished this afternoon and evening...
1. Drove the Mazda to a nearby, friendly independent garage for it's NC Safety Inspection. I coached the young lady before she climbed in and twisted the key - and she successfully mastered the clutch letting the V8 idle its way into the small building. Was I a bit nervous..? Yes, I was! Anywho, she checked the various light functions and we were done! $13.50 later and I was backing the Mazda out of the bay and back to the shop 1 mile away!
2. Jacked the car up at the rear, put a few washers to space the rear, factory chassis brace away from the exhaust pipe for add'l 1/4" clearance.
3. Masked off the chassis and carefully sprayed hi-temp black header paint on the bare metal exhaust piping. It looks much better - and lessens the chance for surface rust to develop.
4. Snaked my rear FM sway bar on, put the rear tires on ramps and torqued the bushings down.
5. Swapped the Rhino ramps to the front so the suspension could find it's general ride height, and wonder of all wonders, the front FM V8 swap bar fit right into place! It does push or rest against the lower rad hose, but I don't think it will restrict flow. I'll keep an eye on this to be ultra sure and post some pics to compare with the prior one of the empty swaybar mount. Torqued down the end-links & I'm just very pleased to have this done. I've sorta worried about this $hit not coming together this easily for a week or 2!
6. And finally, I made an appt for 4-wheel alignment in two days. I need to go ahead before the appointment and lower front coilovers down about 1-1/4" as they are currently jacked to the moon! (My original setting was just ballparked - nothing more...) I also tossed the new R-spec tie-rod ends into the passenger seat that I've been sitting on so they can quickly replace the old ones that will get whacked into submission when this suspension expert brings my reasonably bad alignment into proper specs.
List is getting oh so short! Need to drive it some more, check and recheck bolts, hoses, belt, etc, etc,.... and hopefully, get it ready to drive to The Mitty at Road Atlanta in late April! Cannot wait to see if this works out like I think it will!!!
03-19-2014, 11:55 AM
#191
V8 Miata Fanatic
Thread Starter
Brief lunchtime update: Made it to my early AM four-wheel alignment appointment this morning. This particular technician was recommended to me by a friend - but not somebody who would necessarily seem that they would want, or notice, an exact tolerance, performance alignment. So my expectations were somewhat guarded when I handed the keys over... But, I'm pleased to say this young man took the time to get everything spot-on with my supplied "Lanny's Alignment spec"!! He had the car for about 50 minutes, brought me into the shop, and went over the digital readings on the machine to confirm that I was satisfied. Perfect match, too. He then indicated that he would raise the car higher up on the 4 post lift to torque down all suspension settings to match the other sheet I supplied him! Nice stuff, for sure.
Drove the car back 5 miles in the 37F rain, and pulled her in close to the heater to dry out. 41 miles on the odometer and this Mazda needs to rest up for the upcoming sunny weekend...
Drove the car back 5 miles in the 37F rain, and pulled her in close to the heater to dry out. 41 miles on the odometer and this Mazda needs to rest up for the upcoming sunny weekend...
Last edited by ToySnakePMC; 03-19-2014 at 09:45 PM.
03-20-2014, 07:14 AM
#192
V8 Miata Zealot

I found that the "Lanny Alignment" specs. (camber setting) were too aggressive for the rear of a V-8 Miata. With all of the extra power,(4 times that of a stock Miata) the gain of negative camber under acceleration was tremendous. This was due to the squatting of the rear suspension. It would actually make the outside of the rear tire's tread lose contact with the pavement. It could be seen in the skinny black marks left by my wide rear tires. I re-aligned it at work (been aligning cars for a living for 27 years) to 0* camber & 0* toe in the rear, & 0* camber, MAX caster, & 1/8" TOE-IN for the front. These settings have resulted in good handling, great tire wear, & very wide black marks on the pavement.
03-21-2014, 06:47 AM
#193
V8 Miata Fanatic
Thread Starter
Well, shoot... I did some searching (no much, however) on-line for alignment recommendations & I never found the right thread or post to advise me differently... That's my fault - I should have tossed the question out there to see what you guys were doing or had done... I'll run this awhile and see what's up with it - keep an eye out for the symptons you described! Thanks for the note - may be very useful to me in another month or 3!
03-21-2014, 09:16 AM
#194
Jim Stainer
For what it’s worth I did a bus load of research on this subject and you need not have bothered because nobody agrees on anything!
There is roughly a 50/50 split between “right” being more camber in the front than the back verses more in back than the front. Even the experts like Flying Miata and 949 Racing can’t agree on that. In a .5 second google search you will find tried and true camber specs from 0 to -3.5 along with testimonials over how perfect their specs are. And after hours of sifting through the rubble the conclusion is?.... Like most things with 4 wheels the Miata is a car!
After 5000 miles and 4 autocrosses it turns out the V8 Miata is no different than any other car in the alignment department. Anything over about -1.5 camber will wear the inside of the tires unless you drive very aggressively in the corners. Be it hot rod or winter beater I have found over the years that at -1.5 camber it takes about 1 auto cross for every 1500 - 2000 miles of street driving to have even tire wear. (the street wears the inside, the autox wears the outside and the right foot wears the center) For a V8 Miata I think tbone has a good point and a less camber in the back is the way to go.
So IMO you would be better off with closer to -1 in the back but I’d drive it for a little bit the way it is because chances are you will want to change the ride height after a few miles anyway. Then you can fix the rear camber, the exhaust and what ever else pops up at the same time.
Last edited by charchri4; 03-21-2014 at 09:25 AM.
03-21-2014, 11:07 AM
#195
V8 Miata Fanatic
Thread Starter
Thanks Jim. There are a lot of opinions on Miata settings, that's for sure!
03-23-2014, 05:37 PM
#196
V8 Miata Fanatic
Thread Starter
Messy, rainy day in NC so I corrected one concern and added what may be the final component underneath the Mazda.
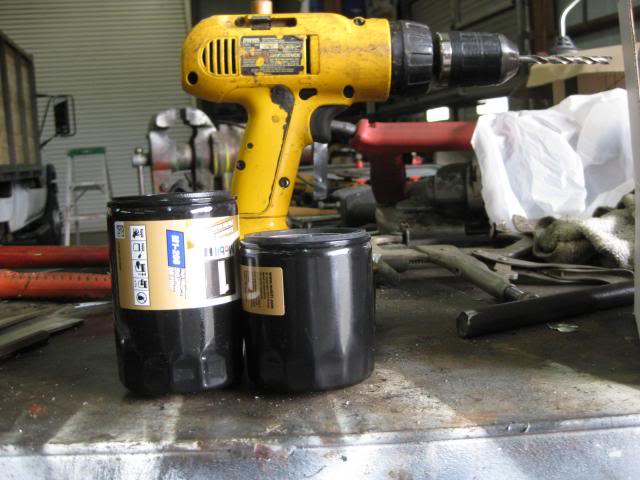
My concern over the past 90 initial miles was the long oil filter hanging below the aluminum pan and the front crossmember (which are approx. parallel with each other). I had to go to 2 auto parts stores to find the correct, shorter oil filter that fits the threads on the V8R pan. ...So with that being said, the filter YOU will want to start and end with is the M1-107 Mobil1, or its equivalent.
When I removed the taller filter last night, I noticed that the fresh synthetic oil that had just a few hours of use and put through about ten different heat cycles was darker (thus dirtier) than I anticipated. With that being said, I put in a fresh 6.5 Qts of 10W-30. Perhaps this highly shortened oil change helped clean out any of the original oil that was hidden in this take-out engine... I feel good about this 2nd oil change already!

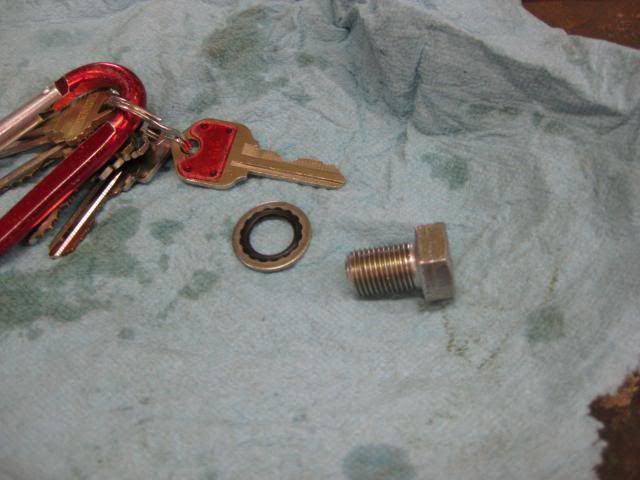
So, with the oil change I noticed this somewhat unique oil pan drain washer that came with the V8R alum pan. It looks like a stainless washer with a rubber o-ring locked or molded inside the metal. Works well - and was careful not to hopefully over tighten the bolt and screw this one up. It measures a tad over 12mm inside diameter, and I think I'd like to go ahead and search for a half dozen extras for the garage and glovebox... just in case!

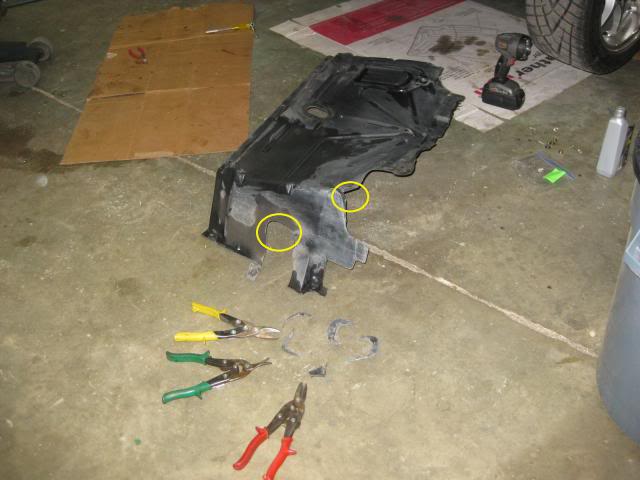
And finally, I pulled out my best of 3 plastic Mazda under-car trays to see how much work it would take to re-install for better at-speed radiator cooling. Not much work at all was needed. I had to trim the U shaped holes for the front sway bar since I had originally dropped mine down about an inch - and I gave the steering rack about an additional 1/2" of room so the rack's rubber boots cannot touch. My LS2 runs cool, so far, with the fan(s) coming on nicely at about 195 or 200 while at a few stop lights, but drops down to 180'ish going down the road in 70F temps. But I know hotter days are coming & this plastic tray should be a welcomed addition.
My concern over the past 90 initial miles was the long oil filter hanging below the aluminum pan and the front crossmember (which are approx. parallel with each other). I had to go to 2 auto parts stores to find the correct, shorter oil filter that fits the threads on the V8R pan. ...So with that being said, the filter YOU will want to start and end with is the M1-107 Mobil1, or its equivalent.
When I removed the taller filter last night, I noticed that the fresh synthetic oil that had just a few hours of use and put through about ten different heat cycles was darker (thus dirtier) than I anticipated. With that being said, I put in a fresh 6.5 Qts of 10W-30. Perhaps this highly shortened oil change helped clean out any of the original oil that was hidden in this take-out engine... I feel good about this 2nd oil change already!
So, with the oil change I noticed this somewhat unique oil pan drain washer that came with the V8R alum pan. It looks like a stainless washer with a rubber o-ring locked or molded inside the metal. Works well - and was careful not to hopefully over tighten the bolt and screw this one up. It measures a tad over 12mm inside diameter, and I think I'd like to go ahead and search for a half dozen extras for the garage and glovebox... just in case!
And finally, I pulled out my best of 3 plastic Mazda under-car trays to see how much work it would take to re-install for better at-speed radiator cooling. Not much work at all was needed. I had to trim the U shaped holes for the front sway bar since I had originally dropped mine down about an inch - and I gave the steering rack about an additional 1/2" of room so the rack's rubber boots cannot touch. My LS2 runs cool, so far, with the fan(s) coming on nicely at about 195 or 200 while at a few stop lights, but drops down to 180'ish going down the road in 70F temps. But I know hotter days are coming & this plastic tray should be a welcomed addition.
Last edited by ToySnakePMC; 03-23-2014 at 05:48 PM.
03-25-2014, 09:25 PM
#197
V8 Miata Noob
Join Date: Feb 2013
Posts: 5
Likes: 0
Received 0 Likes
on
0 Posts
So, with the oil change I noticed this somewhat unique oil pan drain washer that came with the V8R alum pan. It looks like a stainless washer with a rubber o-ring locked or molded inside the metal. Works well - and was careful not to hopefully over tighten the bolt and screw this one up. It measures a tad over 12mm inside diameter, and I think I'd like to go ahead and search for a half dozen extras for the garage and glovebox... just in case!
Here is a link to shop and buy:
https://www.pegasusautoracing.com/pr...p?Product=3245
I used a few of these on my build...
03-25-2014, 10:09 PM
#198
V8 Miata Fanatic
Thread Starter
That's a Stat O Seal.
Here is a link to shop and buy:
https://www.pegasusautoracing.com/pr...p?Product=3245
I used a few of these on my build...
Here is a link to shop and buy:
https://www.pegasusautoracing.com/pr...p?Product=3245
I used a few of these on my build...
03-31-2014, 05:10 PM
#199
V8 Miata Fanatic
Thread Starter
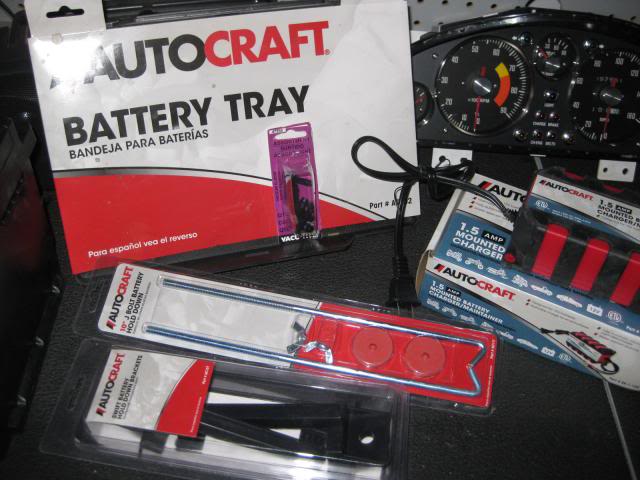
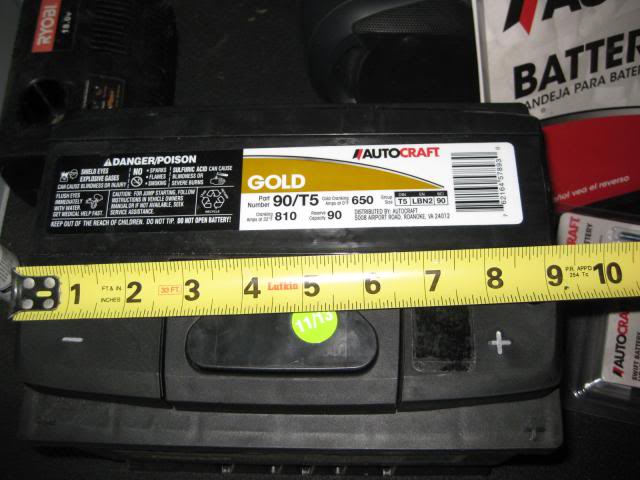
OK, students of all things good with V8 Miatas --- After having approx. 140 miles on the swap, I decided to move ahead with adding MORE Power. Yup, sometimes 370 CCA with a Miata-specific battery just isn't enough anymore! So the rainy weekend was put to use as I searched the interweb for good ideas and recommended upgrade batteries for these sometimes more reluctant starting 5 litre and larger power plants. I read way too many recent horror stories on Optimas - just enough to keep me away despite good luck with a pair of these 10+ years ago. Oh well, kept searching... Finally, I thought I located the perfect battery via a Dodge Neon forum discussion/ Bing search, and I took off for O'Reiley's - only to learn that the battery did not have vent tubes so this thing can safely "breathe" in my trunk. To speed this story along, the excellent counter guy at my local Advance showed me some BMW batteries with small round vents. And the perfect one was there: Autocraft Gold 90T5 with 650CCA and 3 year free replacement warranty. Purchased a bunch of stuff and off I went to the home garage for a Sunday evening re-power event!
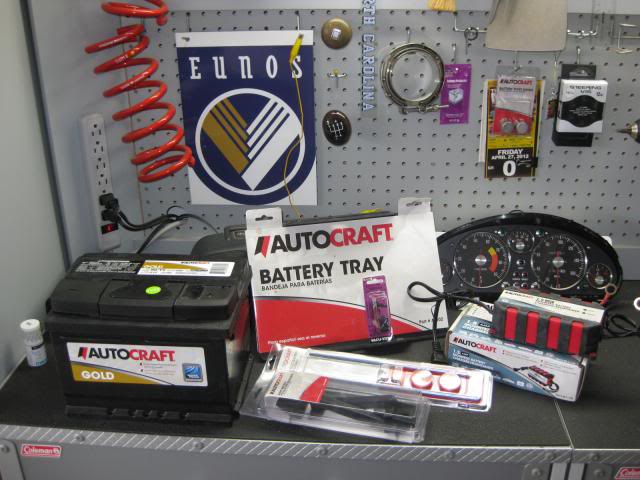
Here's an up-close and personal pic of the power source: This thing is approx. 7" wide x 7" tall x 9-1/4" long. Obviously the width and length are larger than Mazda's battery, but that's the reason I decided to try out this universal plastic battery tray in the above pic...
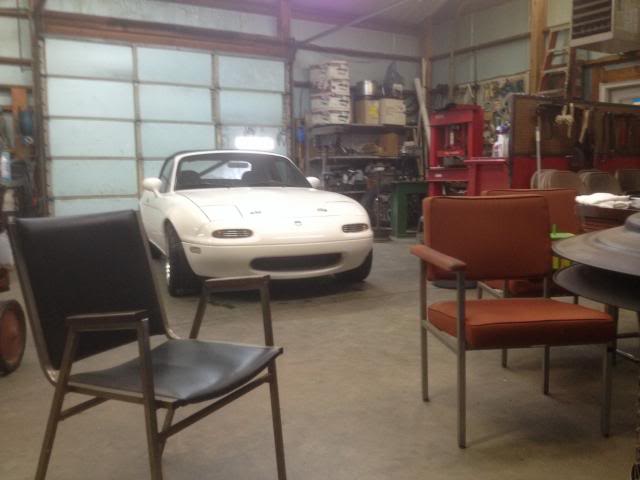
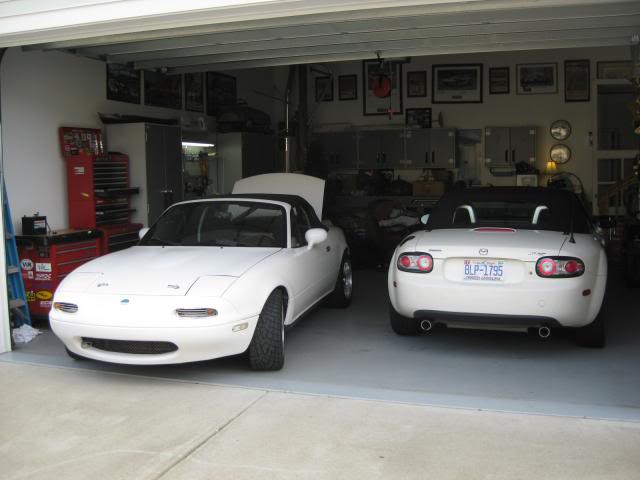
Backed the 20 yr-old toy into the garage next to the wifey's '06. Not a big garage by any means but with cars this small, the man cave actually feels pretty big! I guess if my hobby was Chevy Suburbans, I wouldn't feel this way...
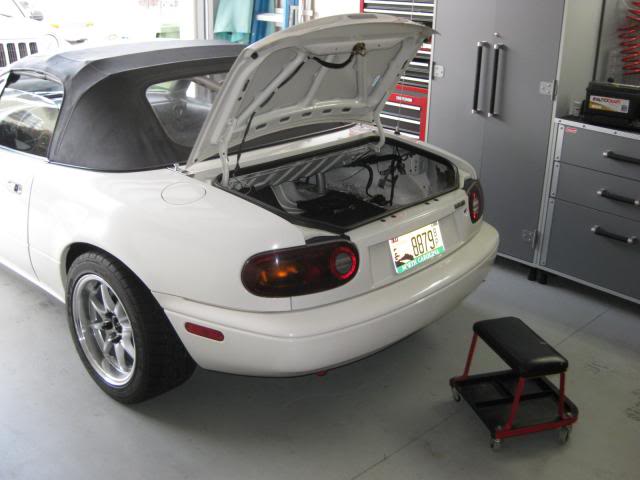
Made some room in the trunk and tossed out the 4-month old battery. (Actually, our '91 BRG needs this battery so sorta killed 2 birds with one stone here.)
Here's the tray after I drilled two holes to allow for aligning up with two factory Mazda bolts: 1 was from the L-shaped frame bracket and 1 was from the J-clamp bracket. I also utilized a block of wood that was cut to fit in the far RH side of the battery tray to make this battery fit snug!

Battery with the two-piece Autocraft hold down bracket. It's pretty ingenious how this thing clamps together for different widths! Notice the small plastic 90 degree elbow vacuum fittings in each end of the battery. To keep these in tight, I wound a small, narrow strip of electrical tape to keep them snug in the battery before pushing them in.

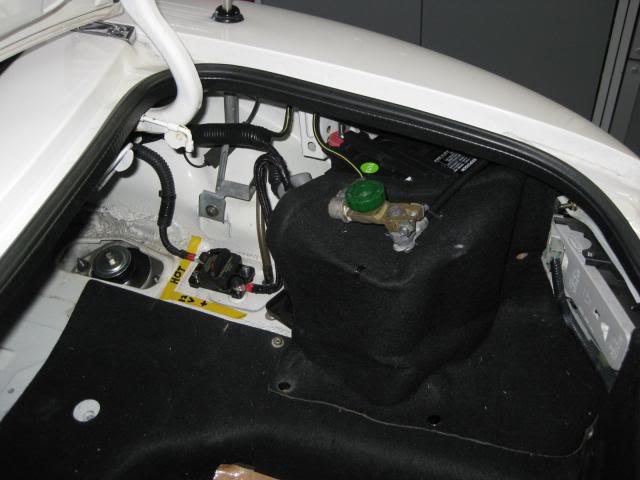
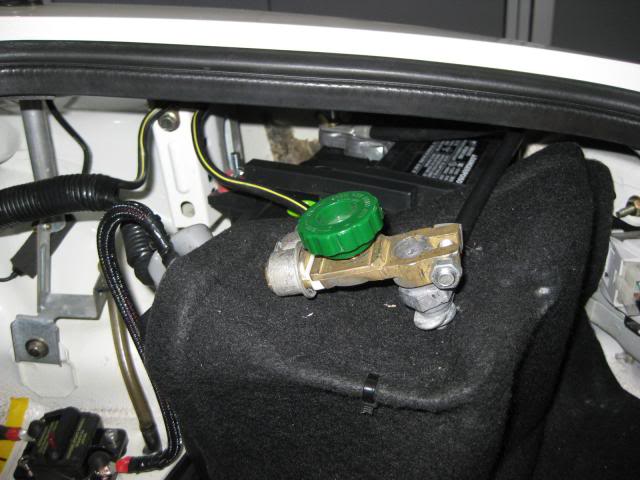
Well, the next few steps all ran together before I remembered to snap some more pics... Basically threw the battery on the bolted-down tray, cut down the too-long J-hooks I purchased (that came with some neat, industrial-sized, red rubber washers that go under the wing nuts to minimize vibration, loosening, etc). Secured it with the hold-down bracket, ran new 1/4", I think, rubber vacuum tubing from the vent T in the floor to the ends of the new battery, and reattached the factory Mazda cables along with the cut-off on the ground to kill the whole car when needed.
She now wants to crank a good bit quicker when cold. I look forward to some hot starts now - as opposed to the ones in the recent past that were a little sketchy and sloooowww...
At a later date, I will share how I will wire in and secure my new trickle charger that will go wherever the car goes!
Here's an up-close and personal pic of the power source: This thing is approx. 7" wide x 7" tall x 9-1/4" long. Obviously the width and length are larger than Mazda's battery, but that's the reason I decided to try out this universal plastic battery tray in the above pic...
Backed the 20 yr-old toy into the garage next to the wifey's '06. Not a big garage by any means but with cars this small, the man cave actually feels pretty big! I guess if my hobby was Chevy Suburbans, I wouldn't feel this way...
Made some room in the trunk and tossed out the 4-month old battery. (Actually, our '91 BRG needs this battery so sorta killed 2 birds with one stone here.)
Here's the tray after I drilled two holes to allow for aligning up with two factory Mazda bolts: 1 was from the L-shaped frame bracket and 1 was from the J-clamp bracket. I also utilized a block of wood that was cut to fit in the far RH side of the battery tray to make this battery fit snug!
Battery with the two-piece Autocraft hold down bracket. It's pretty ingenious how this thing clamps together for different widths! Notice the small plastic 90 degree elbow vacuum fittings in each end of the battery. To keep these in tight, I wound a small, narrow strip of electrical tape to keep them snug in the battery before pushing them in.
Well, the next few steps all ran together before I remembered to snap some more pics... Basically threw the battery on the bolted-down tray, cut down the too-long J-hooks I purchased (that came with some neat, industrial-sized, red rubber washers that go under the wing nuts to minimize vibration, loosening, etc). Secured it with the hold-down bracket, ran new 1/4", I think, rubber vacuum tubing from the vent T in the floor to the ends of the new battery, and reattached the factory Mazda cables along with the cut-off on the ground to kill the whole car when needed.
She now wants to crank a good bit quicker when cold. I look forward to some hot starts now - as opposed to the ones in the recent past that were a little sketchy and sloooowww...
At a later date, I will share how I will wire in and secure my new trickle charger that will go wherever the car goes!
Last edited by ToySnakePMC; 04-01-2014 at 12:30 AM.


