pj_mcgarvey's - LS1/T56 NB build thread

 01-13-2017, 02:49 PM
#101
V8 Miata Enthusiast
Thread Starter

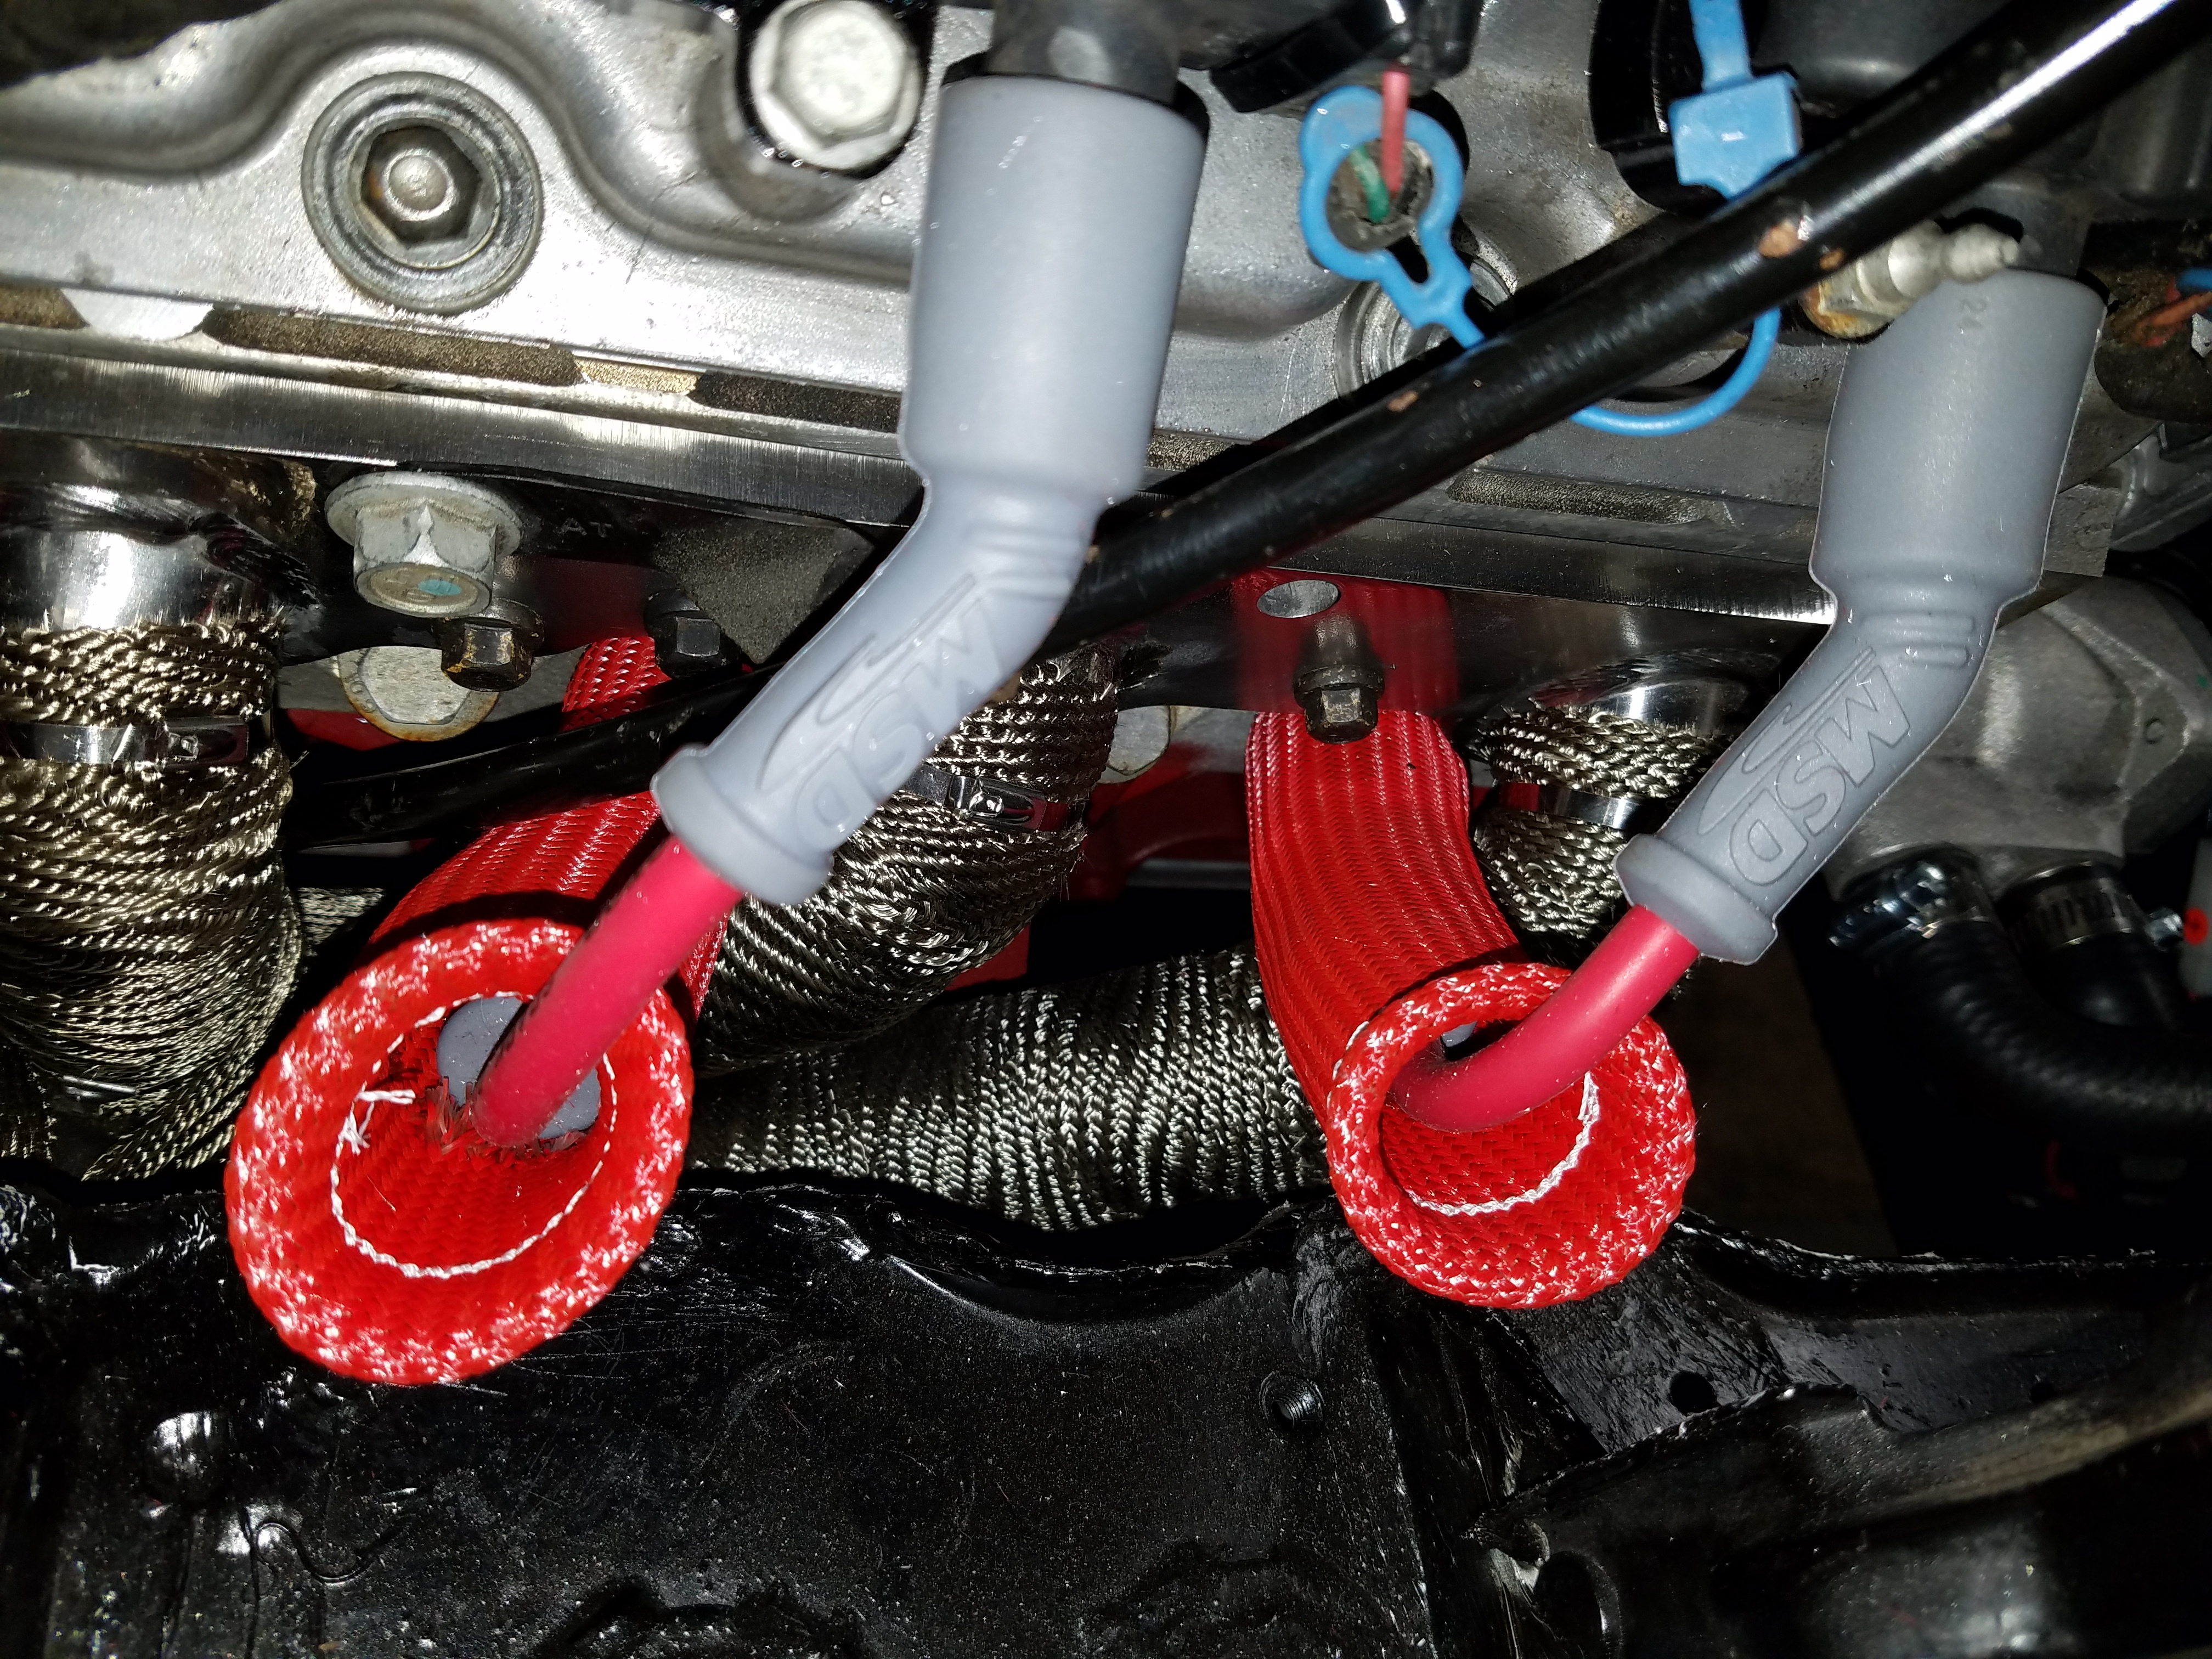
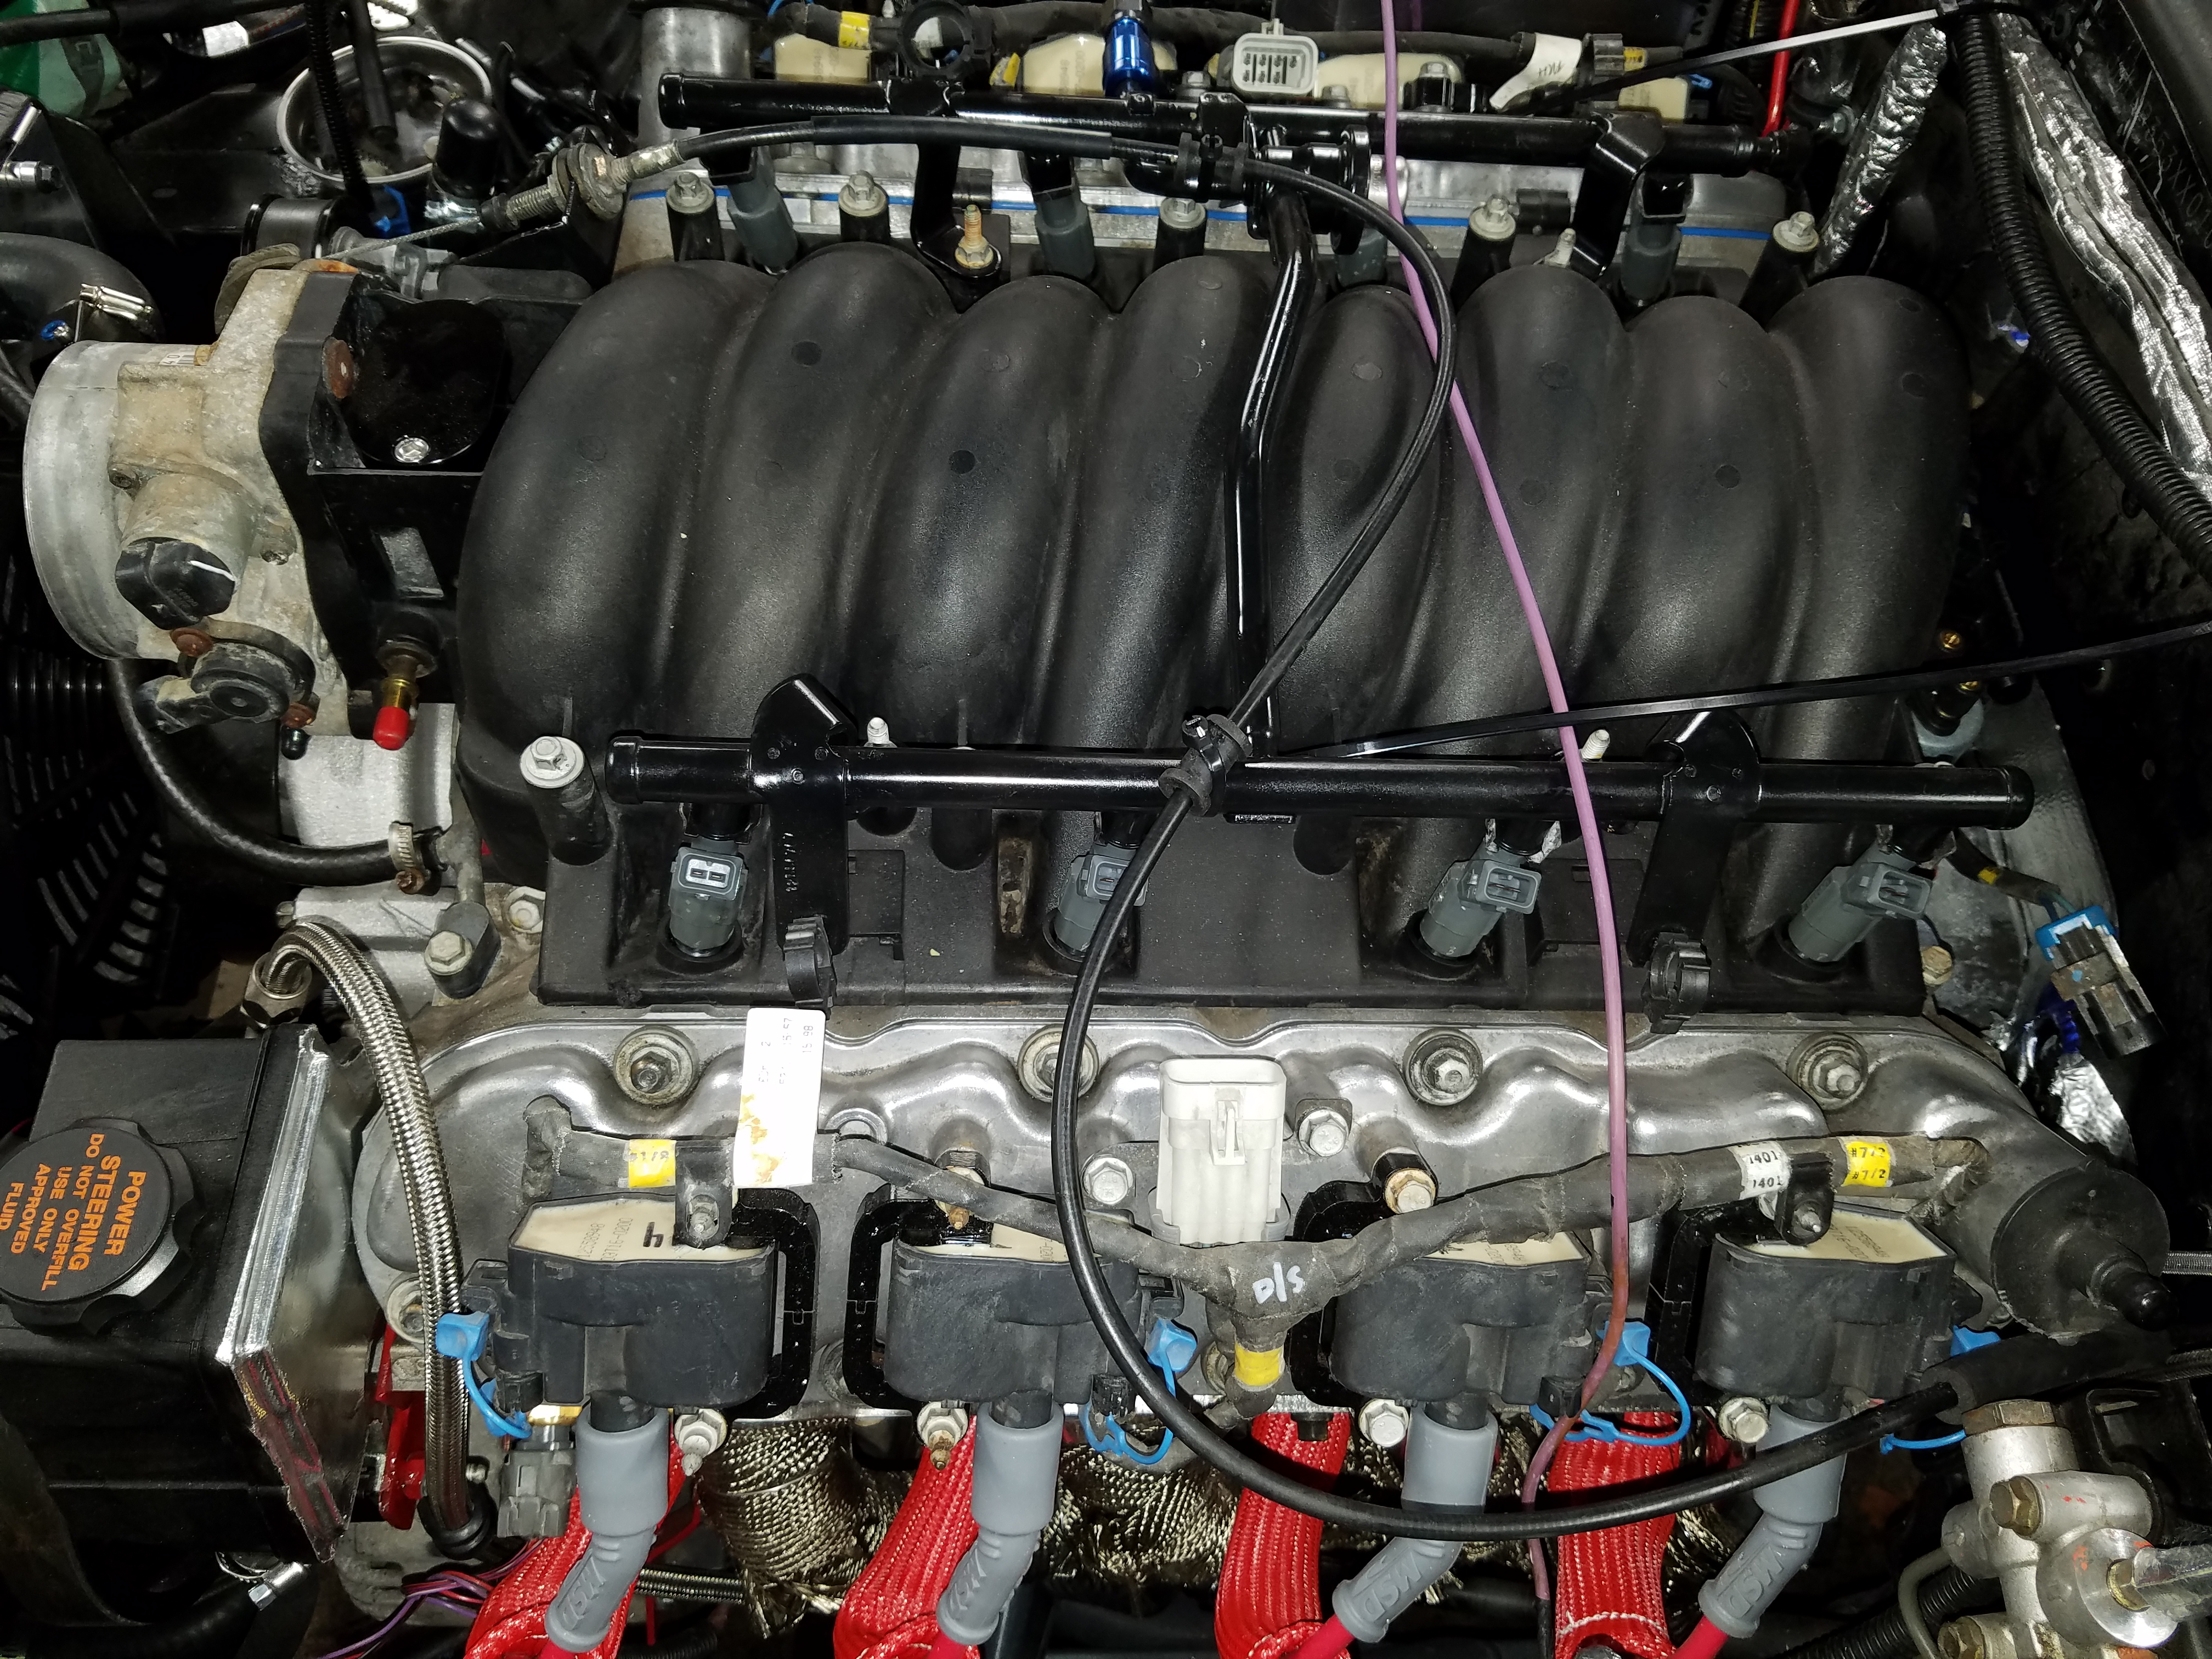
Installed the MSD ignition coil wires and heat protect "booties". These were a pain as I wasn't sure the best way to install the booties - they wouldn't slide over the plugs very easily
Also didn't find the plug wire connections to be very positive. On other cars, the wires make a nice *click* when you push them on. One the spark plug side especially, I had to remove and reinstall a few times until I was sure they were on all the way. Guess the first fire up will tell... They also seem a bit longer than needed but not causing any issues here
Heat shield for the PCM
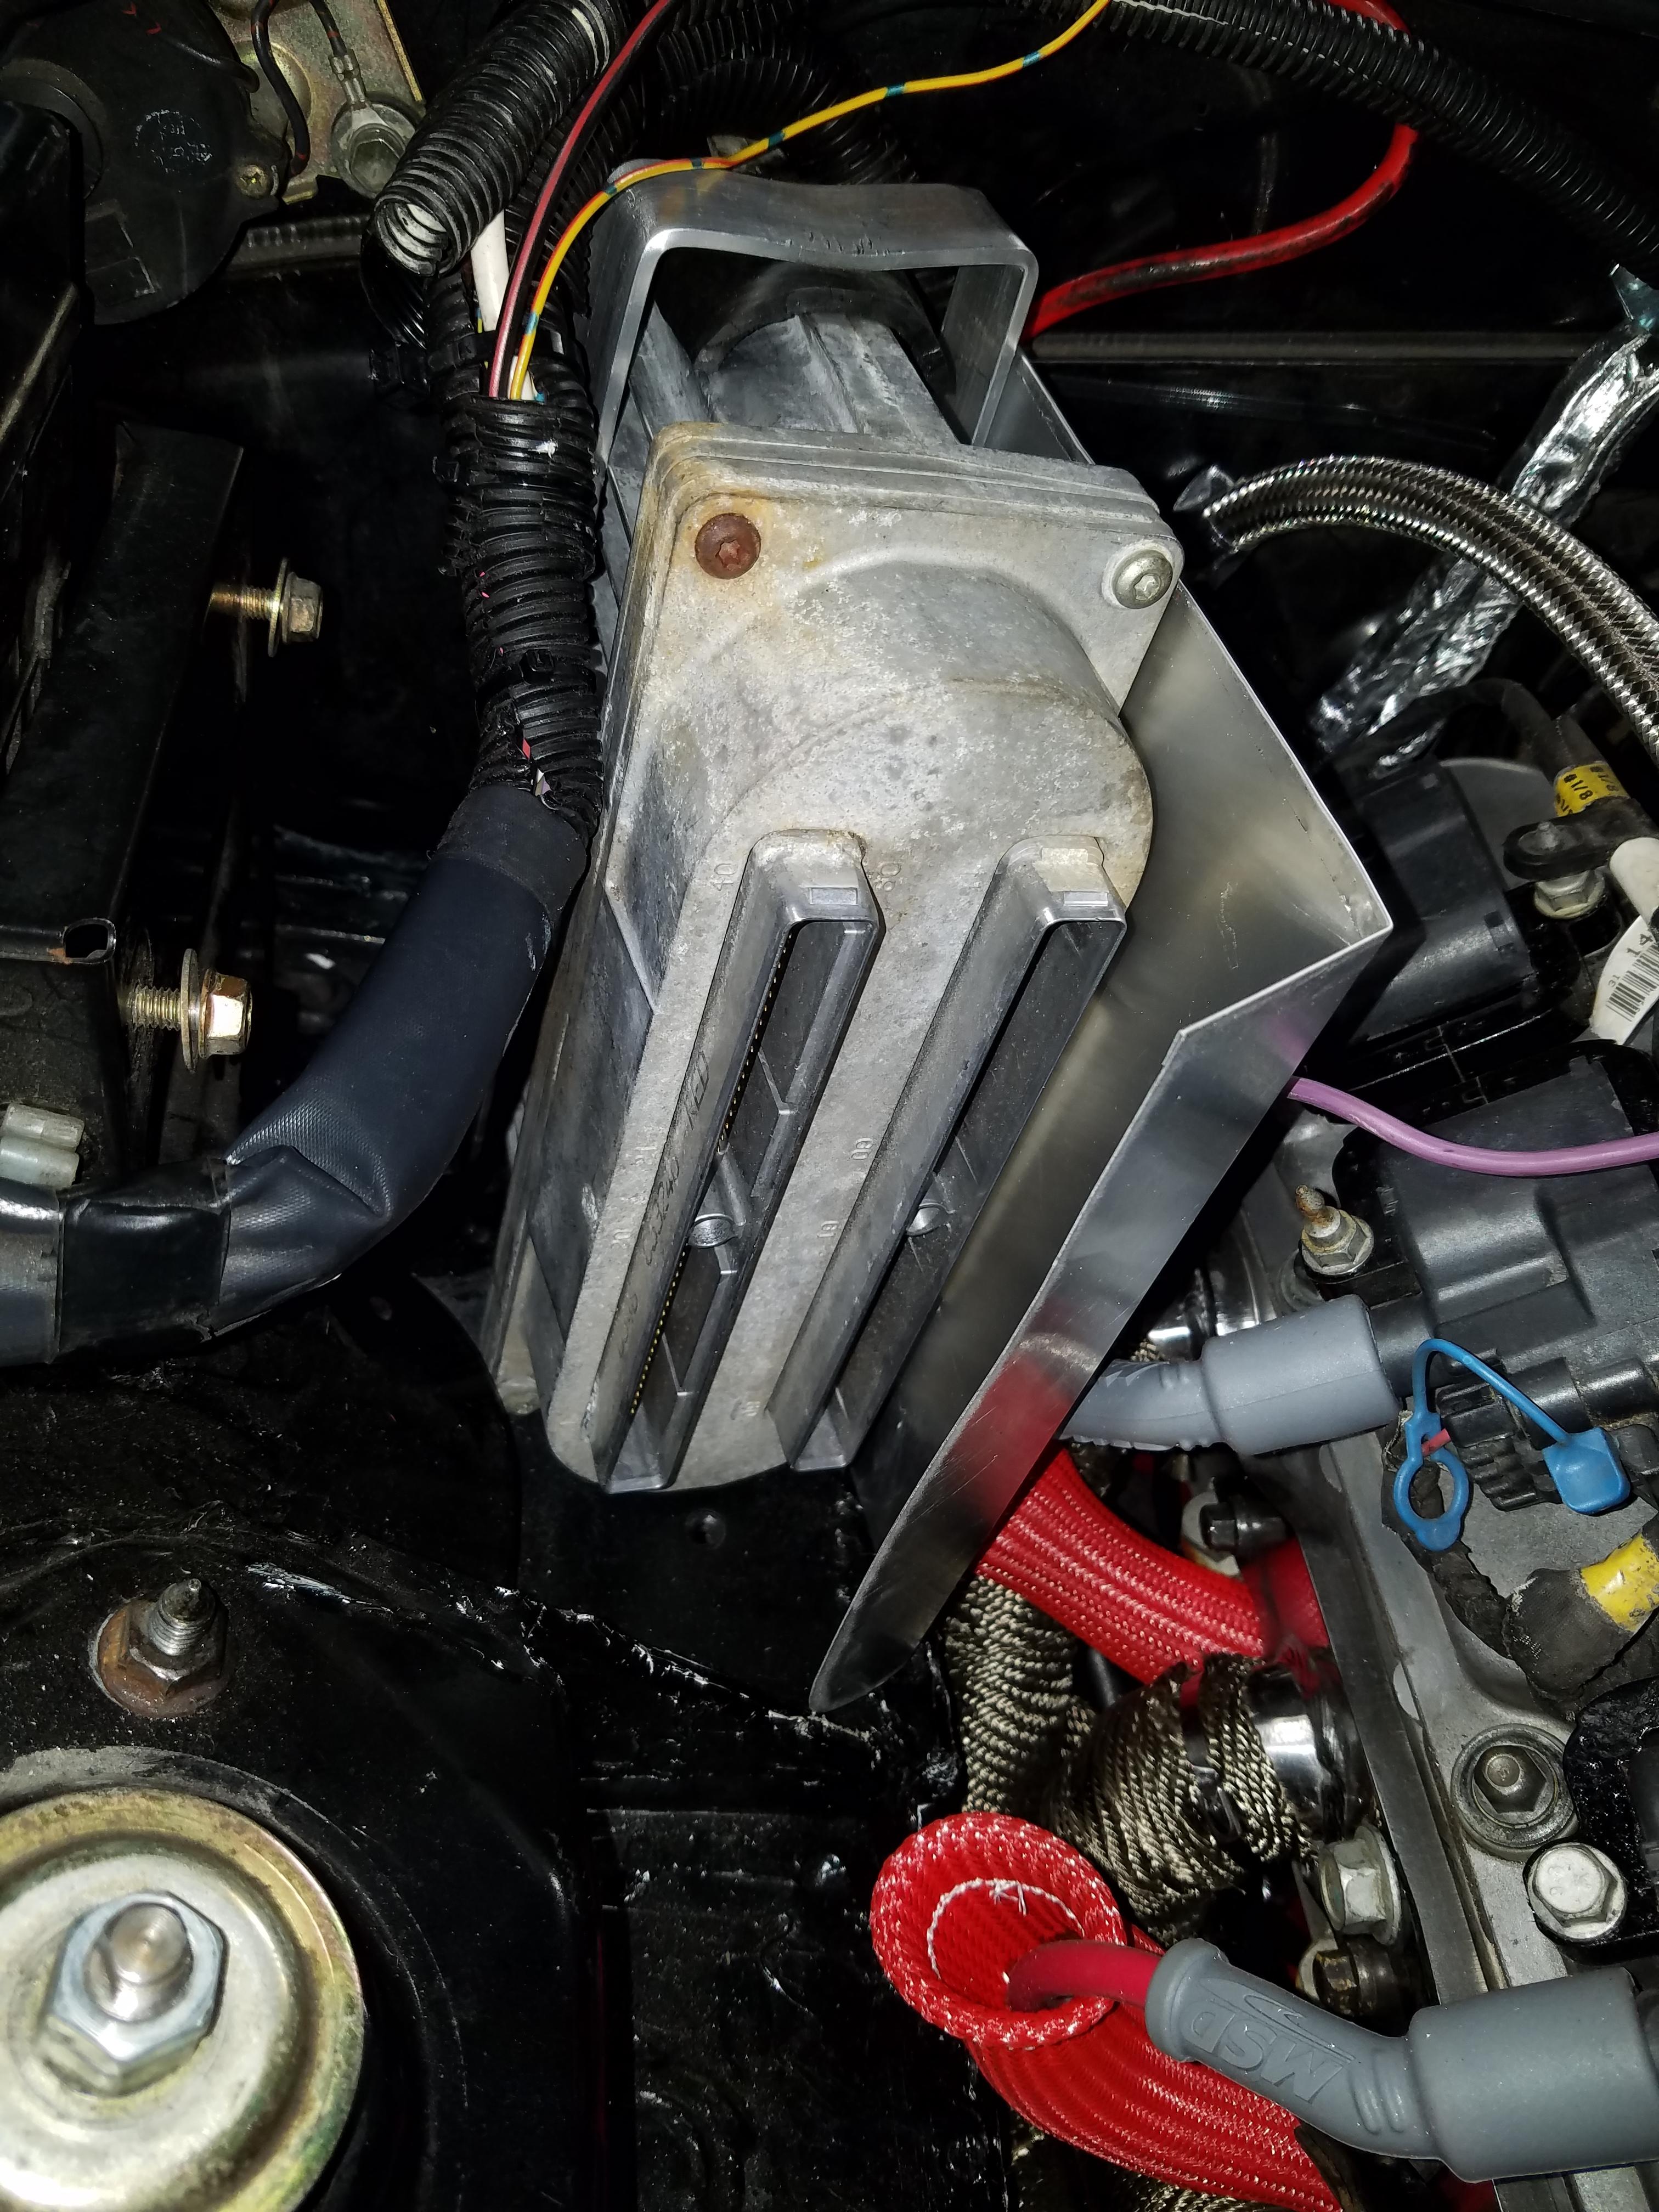
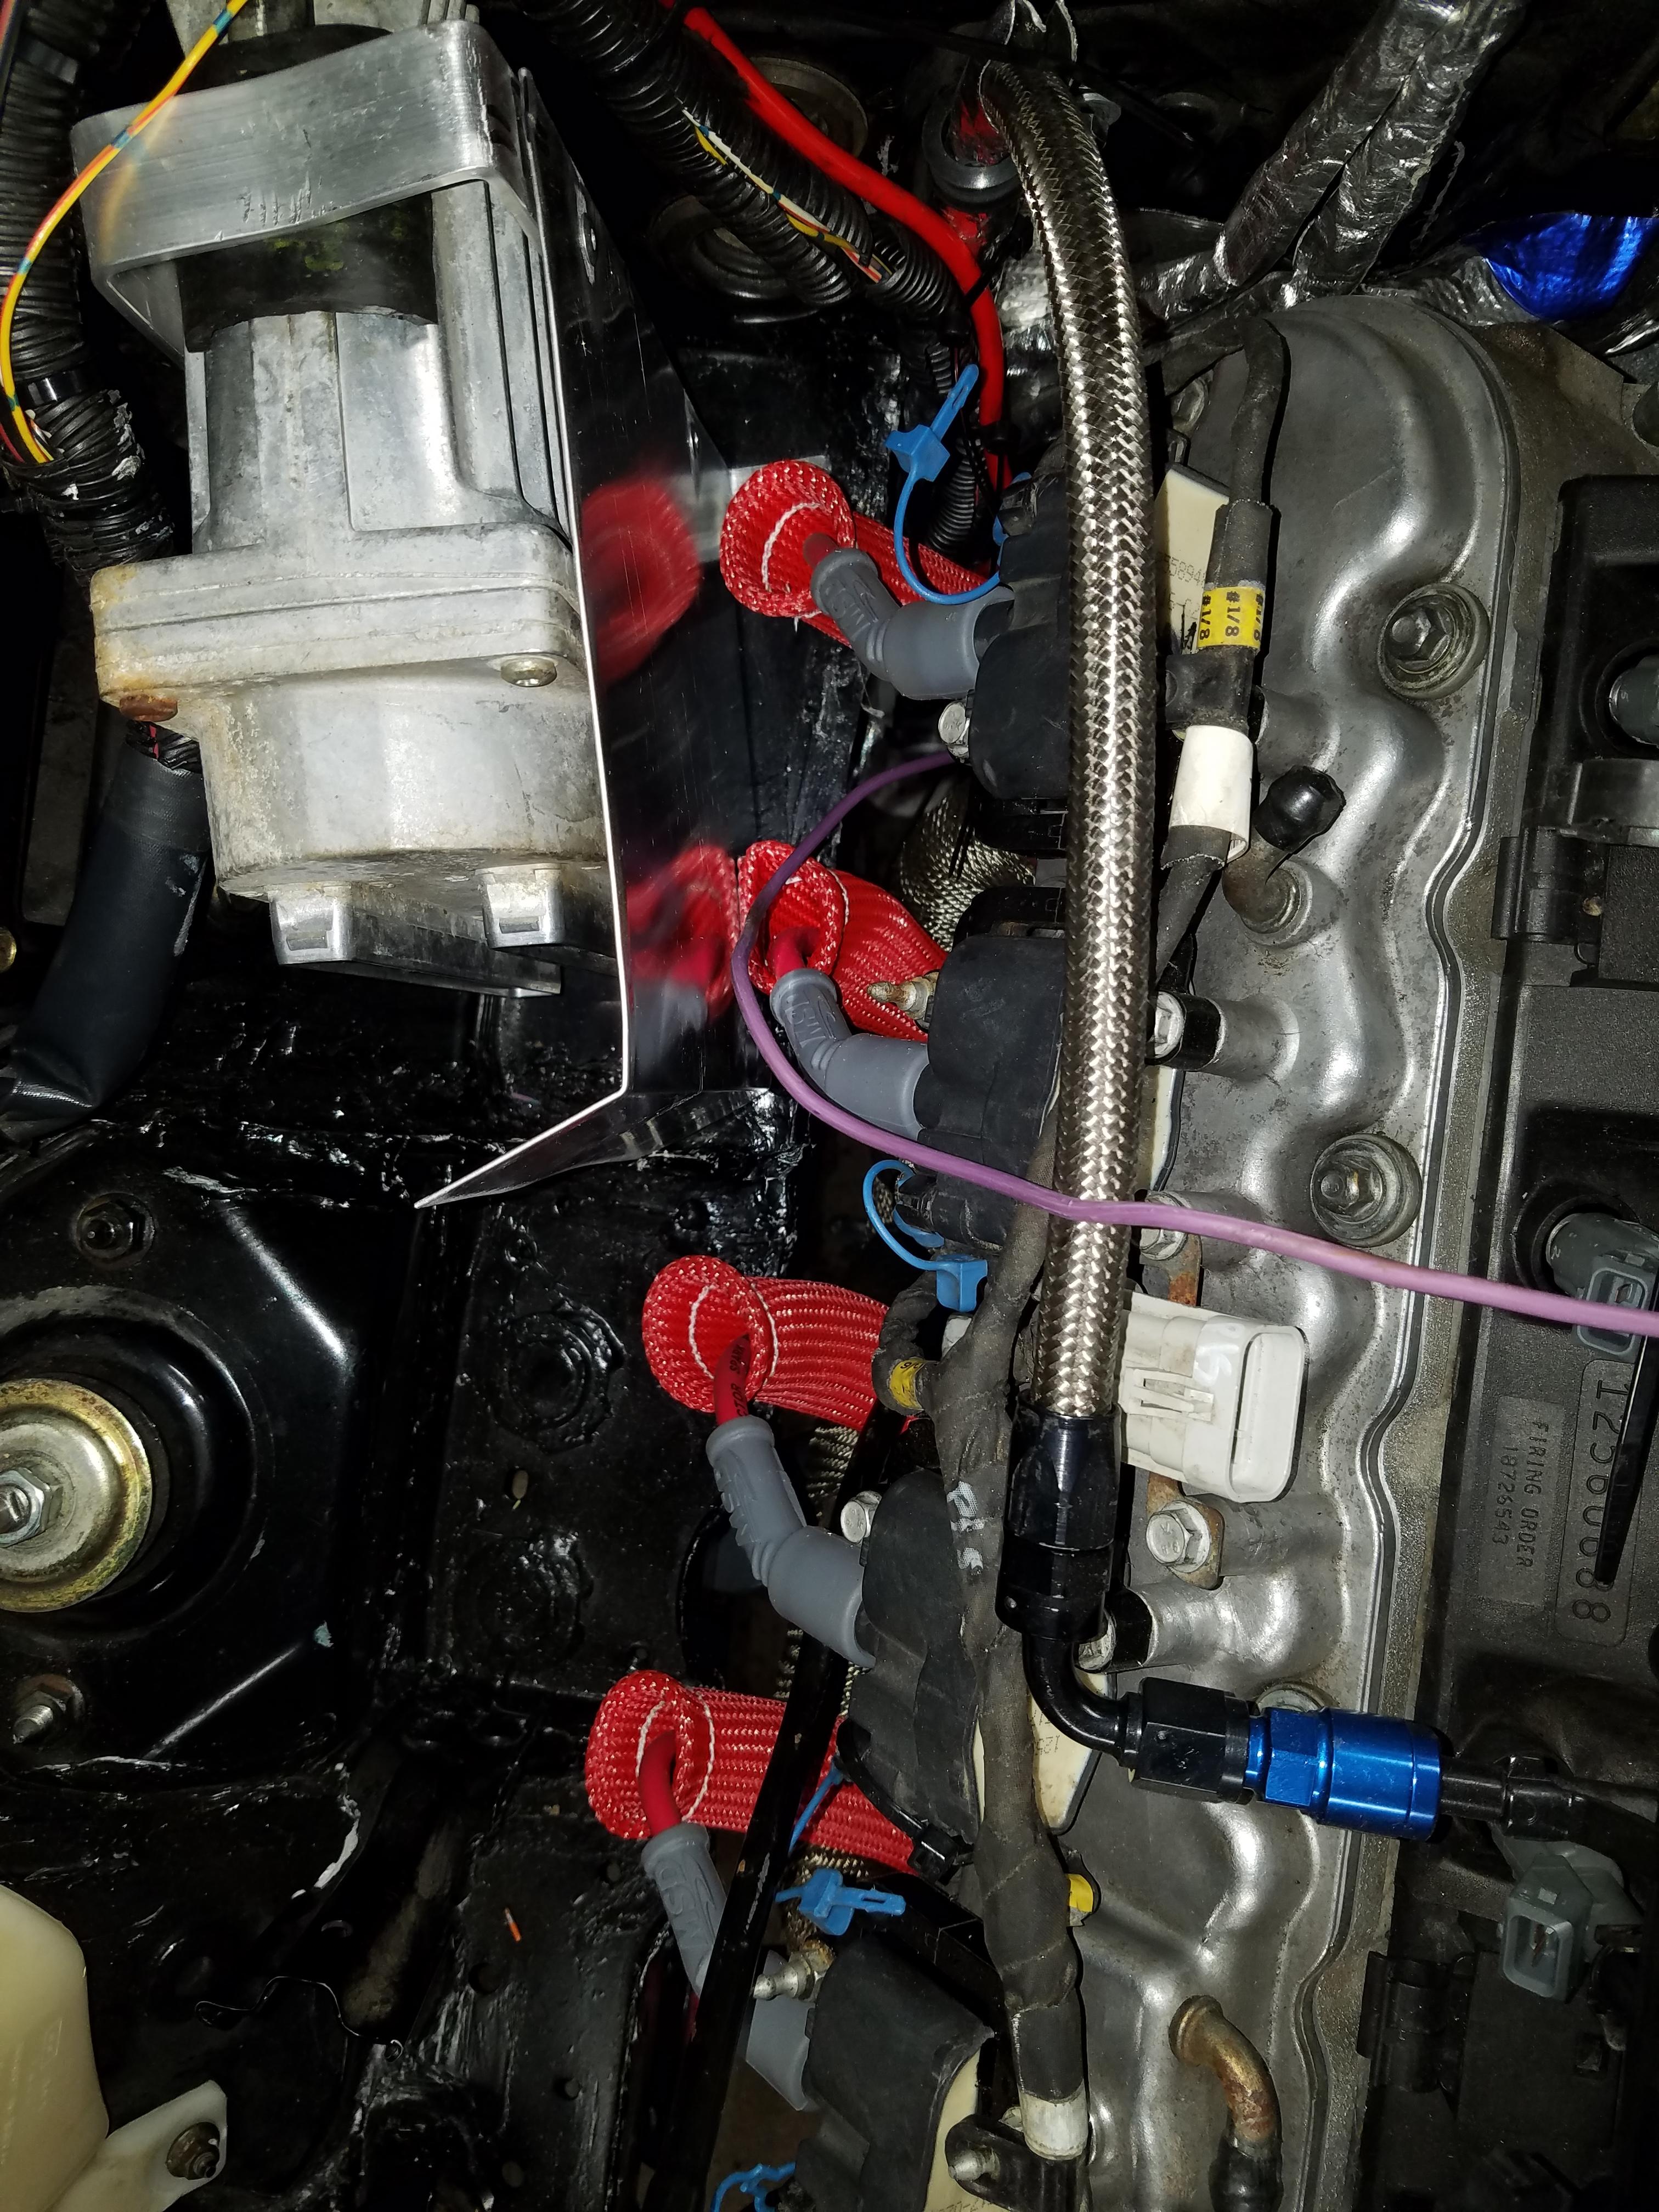
Still room for plug wires and shield to live together over here
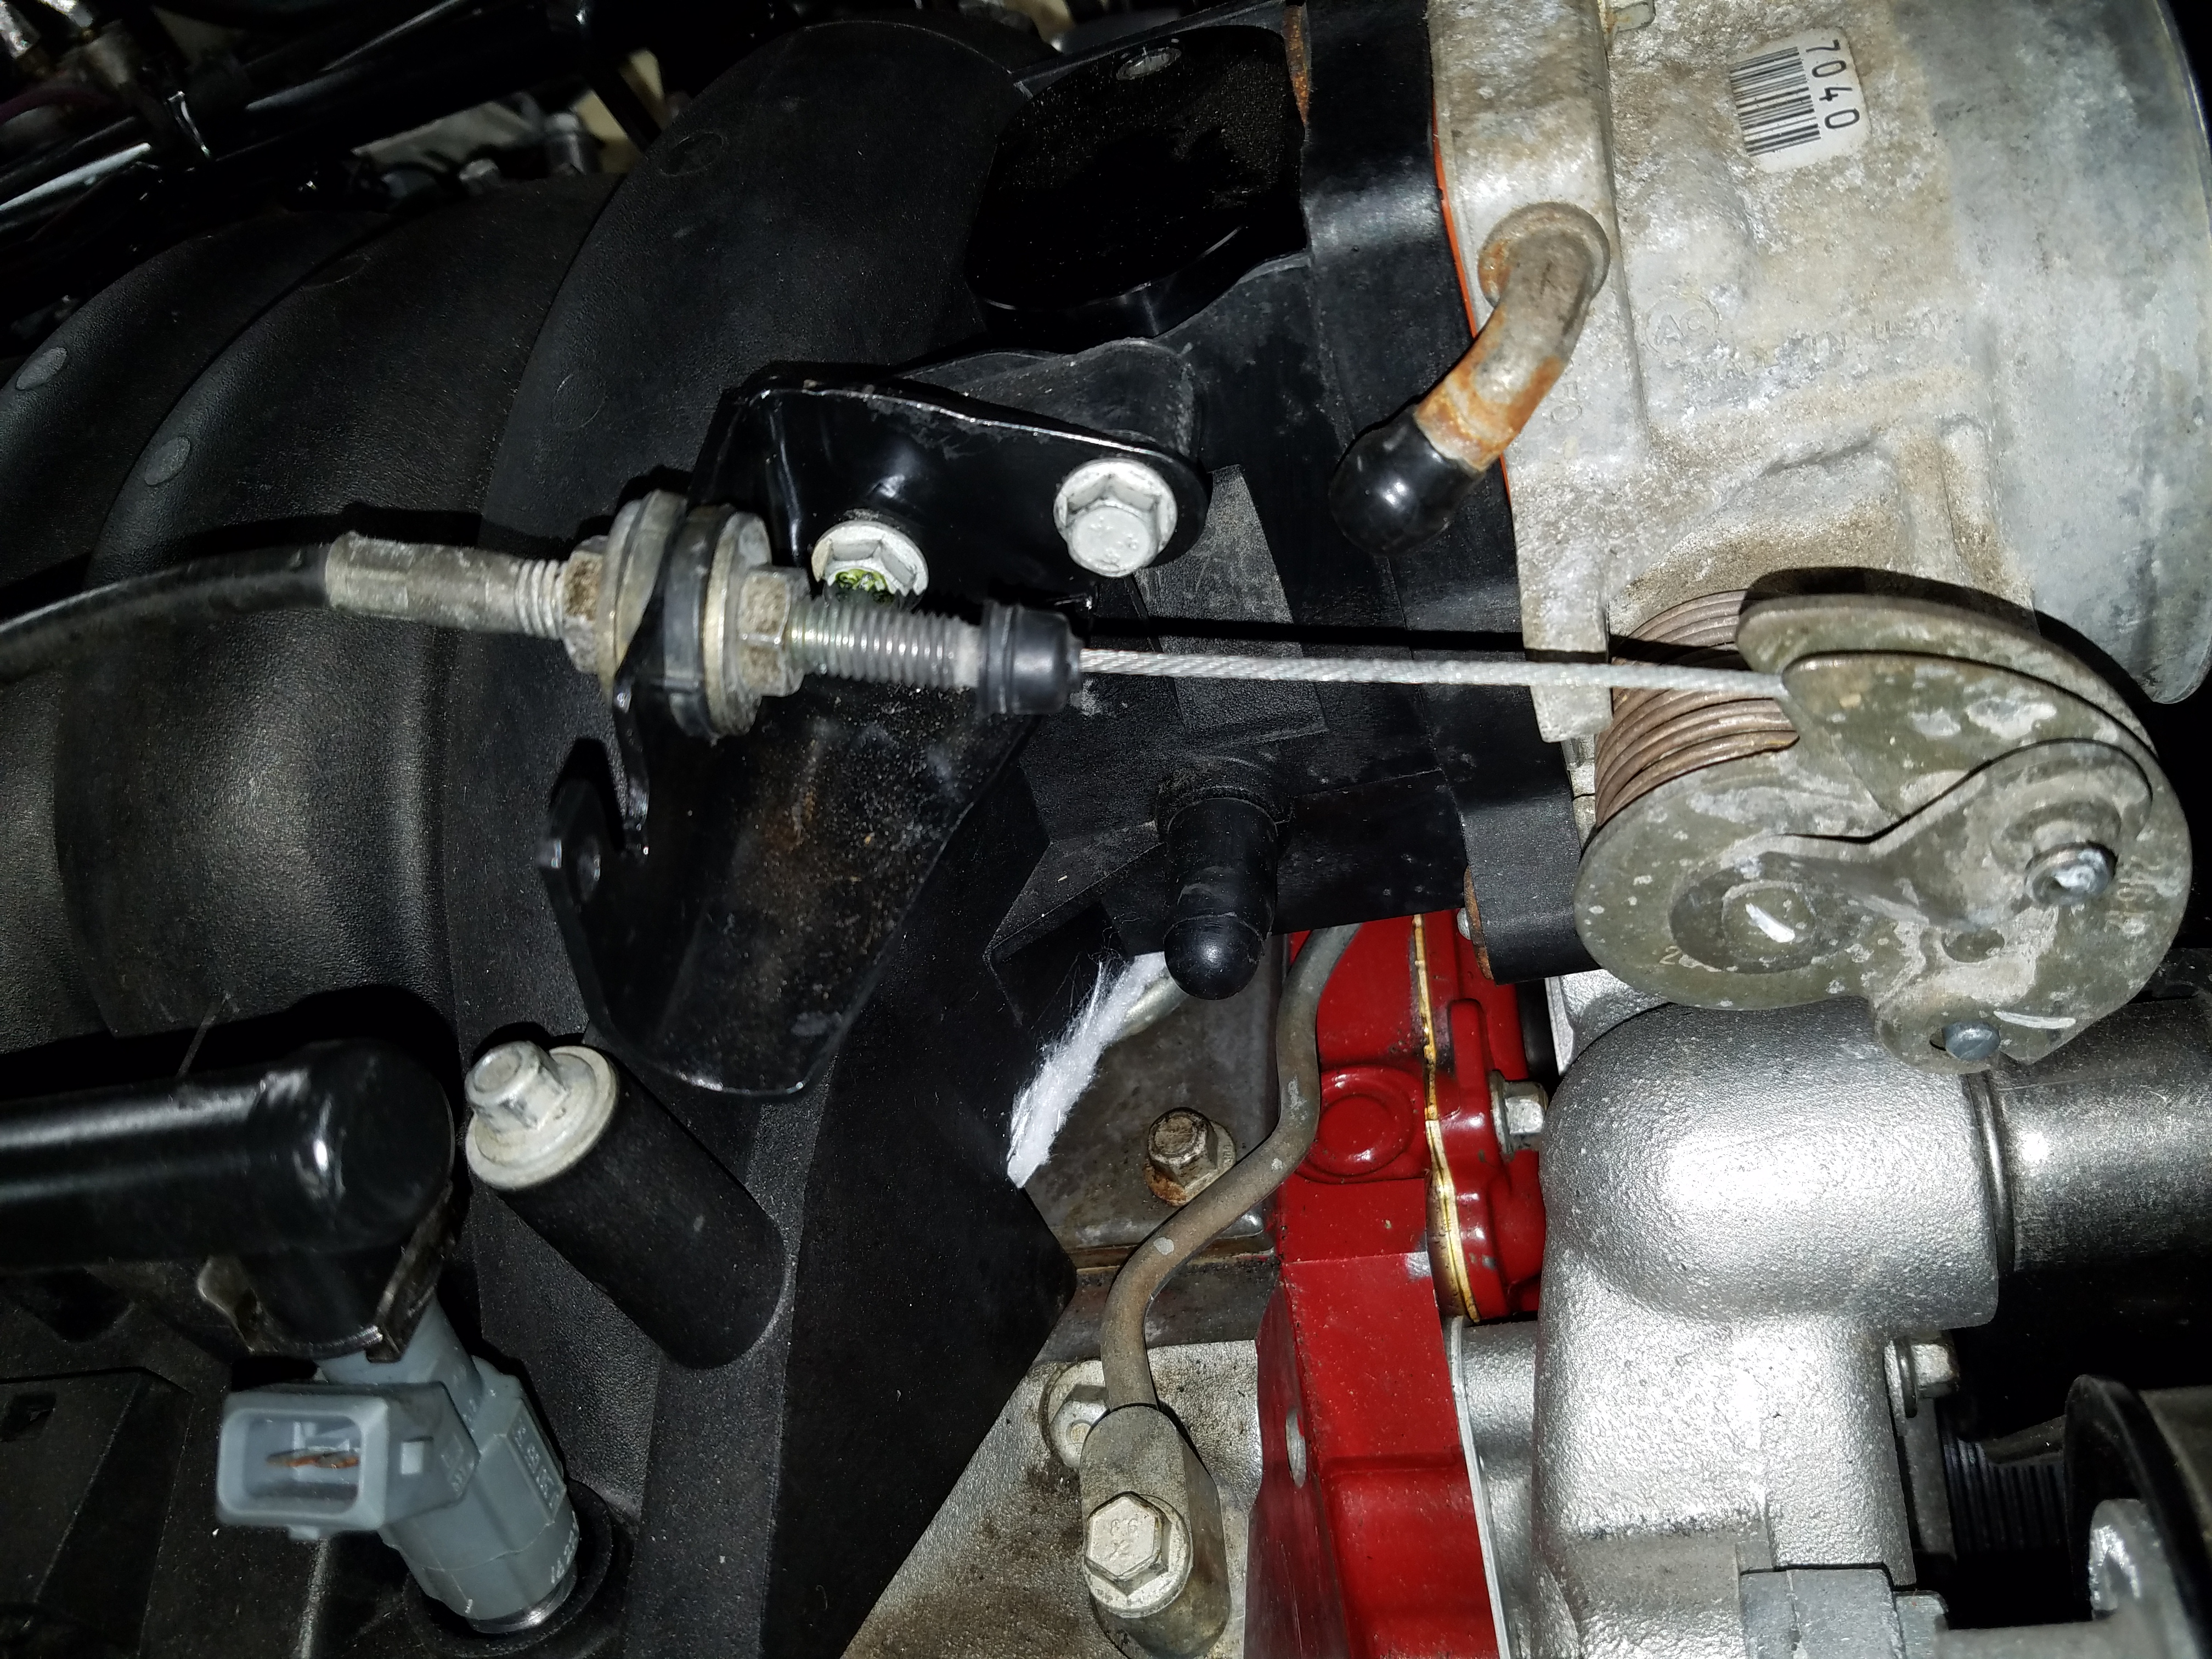
Amazingly, I didn't need to make any modifications to make the Miata throttle cable work. At the TB side, looks almost stock to me
Here's how it routes from the firewall, just along the coil packs...

...and then makes an S-shape on top of the engine
Tested the pedal and due to the tunnel widening there is some touching of the pedal to the tunnel. No evidence of the pedal sticking but might not be worth the risk, so I may pound out the tunnel a bit here.
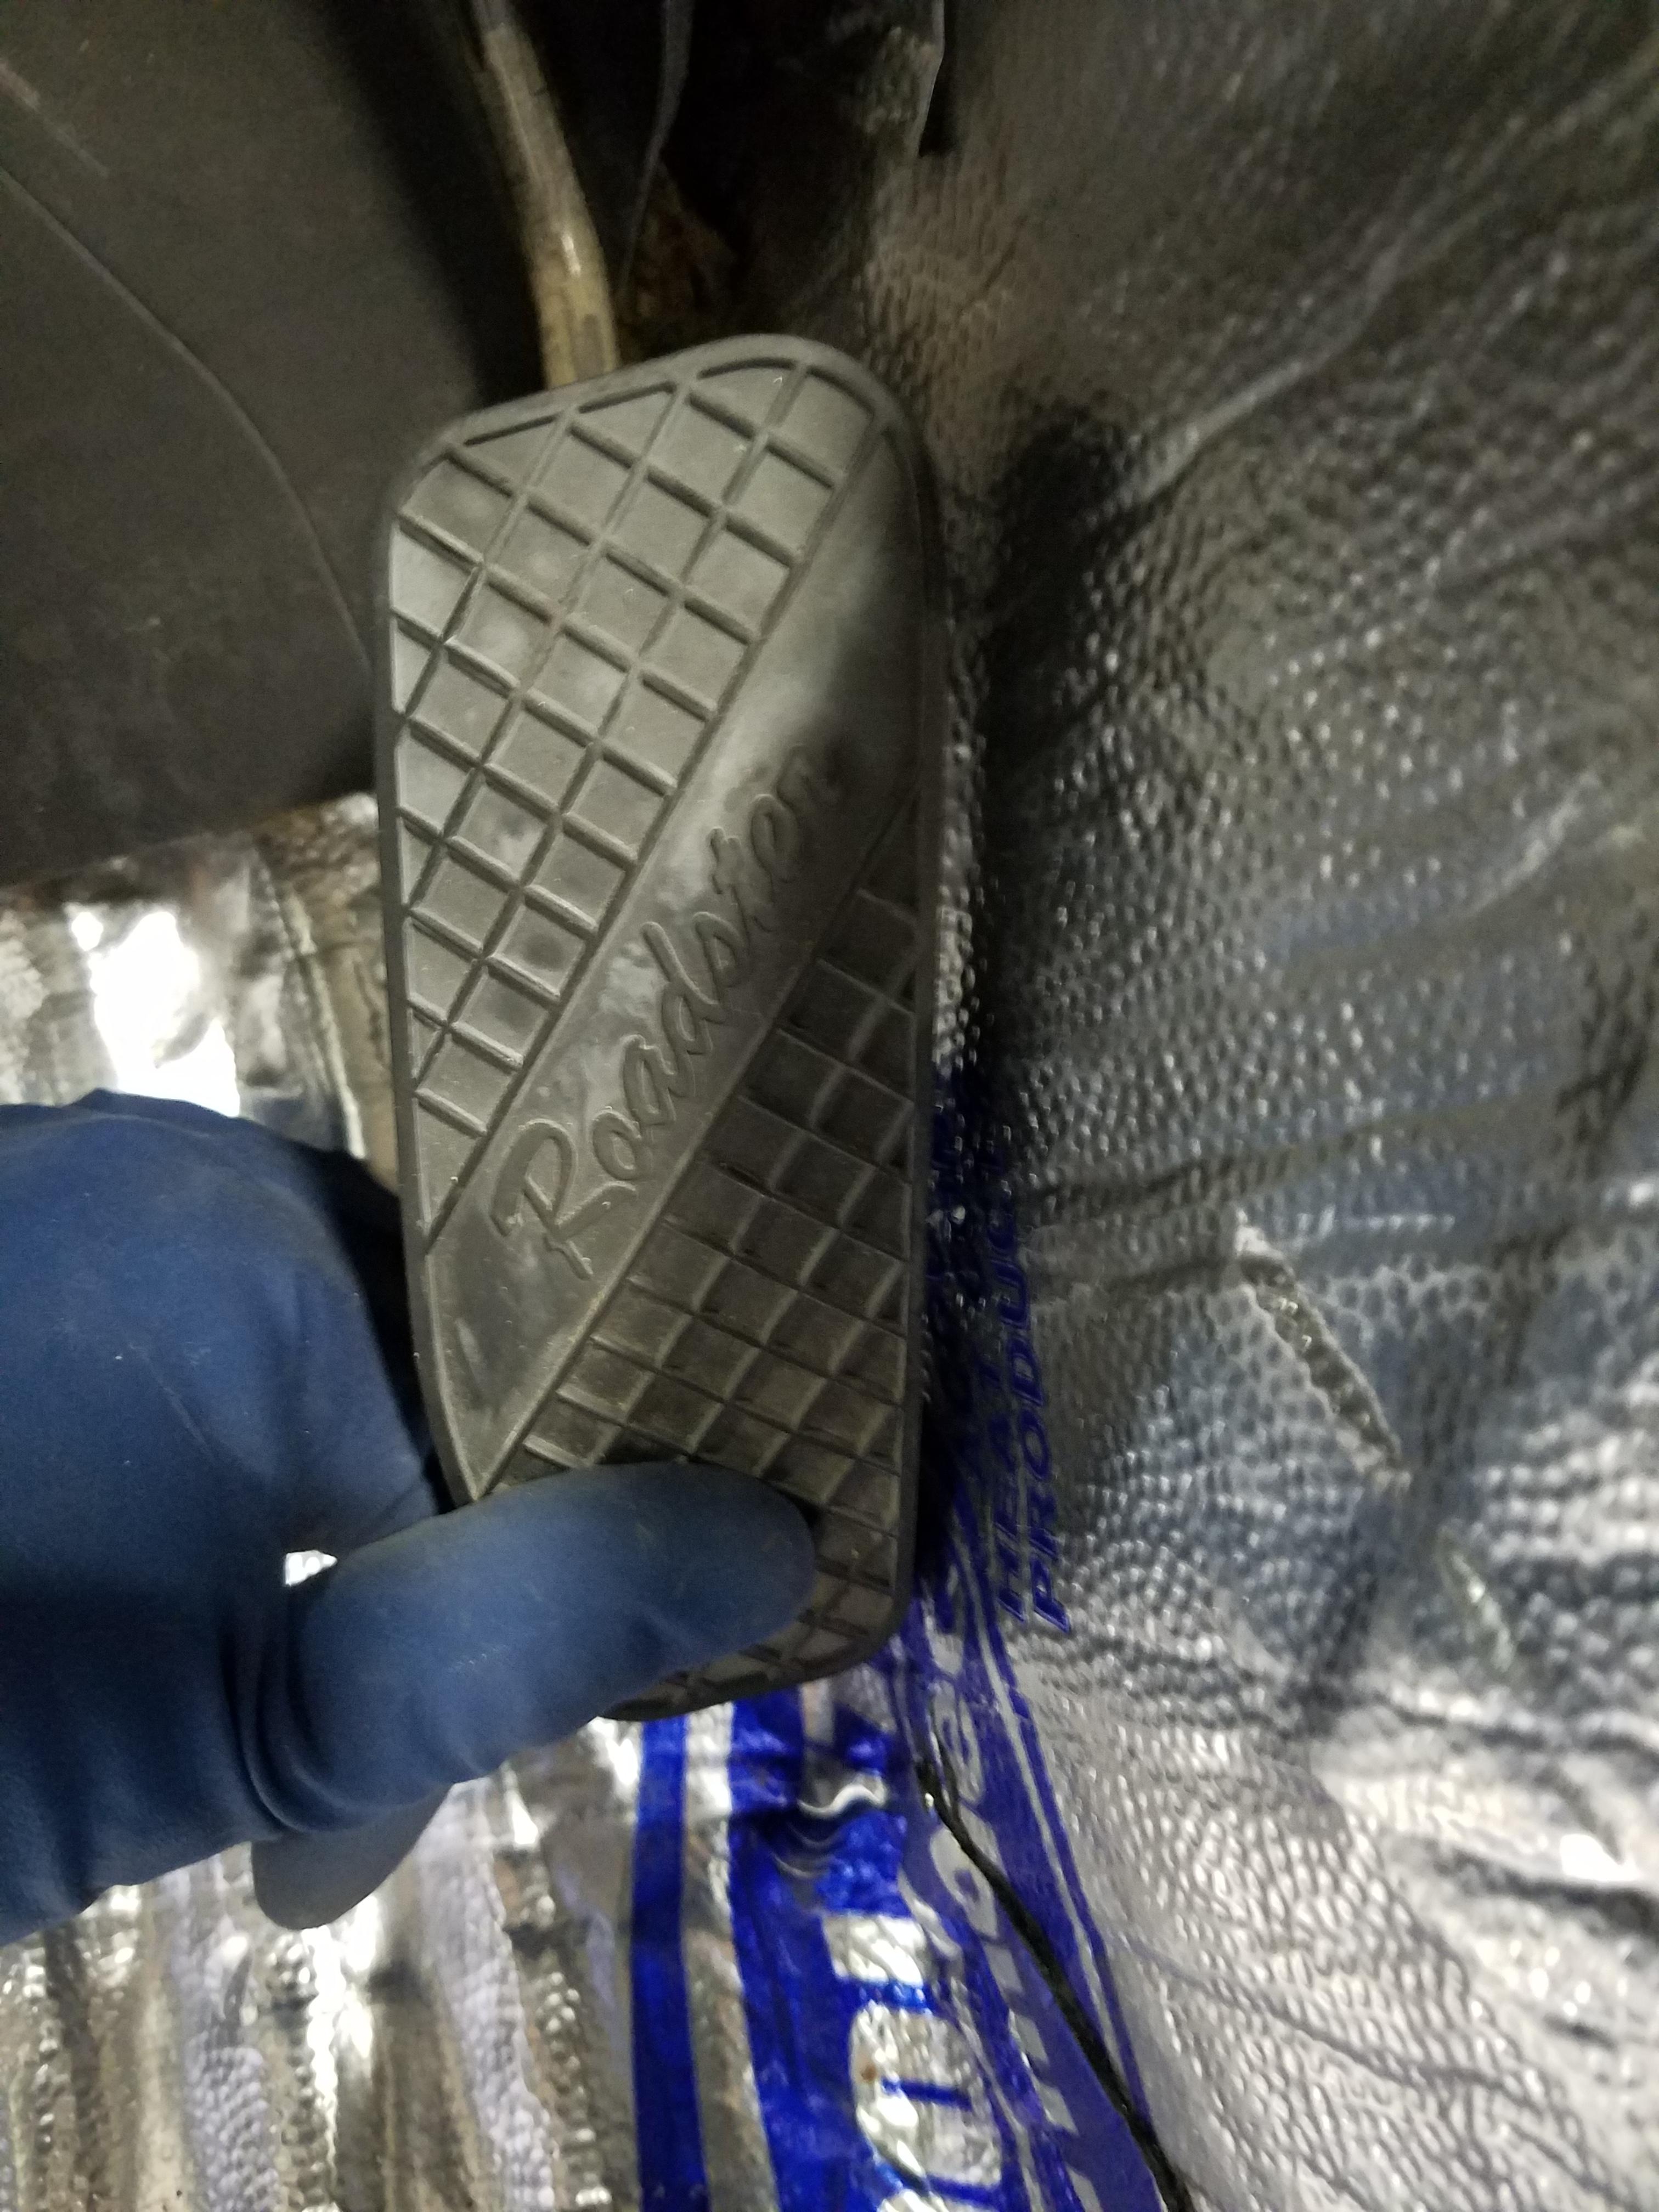
Made some final adjustments so that the "stop" on the pedal adjustment does its thing before the throttle is wide open so there is no stretching of the cable if you are pushing the pedal at WOT. When the pedal is in normal position, so is the throttle plate. Any final adjustments can be made once the engine is running and things start to "loosen up".
Still amazed that the cable just WORKS.
Also didn't find the plug wire connections to be very positive. On other cars, the wires make a nice *click* when you push them on. One the spark plug side especially, I had to remove and reinstall a few times until I was sure they were on all the way. Guess the first fire up will tell... They also seem a bit longer than needed but not causing any issues here
Heat shield for the PCM
Still room for plug wires and shield to live together over here
Amazingly, I didn't need to make any modifications to make the Miata throttle cable work. At the TB side, looks almost stock to me
Here's how it routes from the firewall, just along the coil packs...
...and then makes an S-shape on top of the engine
Tested the pedal and due to the tunnel widening there is some touching of the pedal to the tunnel. No evidence of the pedal sticking but might not be worth the risk, so I may pound out the tunnel a bit here.
Made some final adjustments so that the "stop" on the pedal adjustment does its thing before the throttle is wide open so there is no stretching of the cable if you are pushing the pedal at WOT. When the pedal is in normal position, so is the throttle plate. Any final adjustments can be made once the engine is running and things start to "loosen up".
Still amazed that the cable just WORKS.

 01-27-2017, 02:45 PM
#106
V8 Miata Enthusiast
Thread Starter
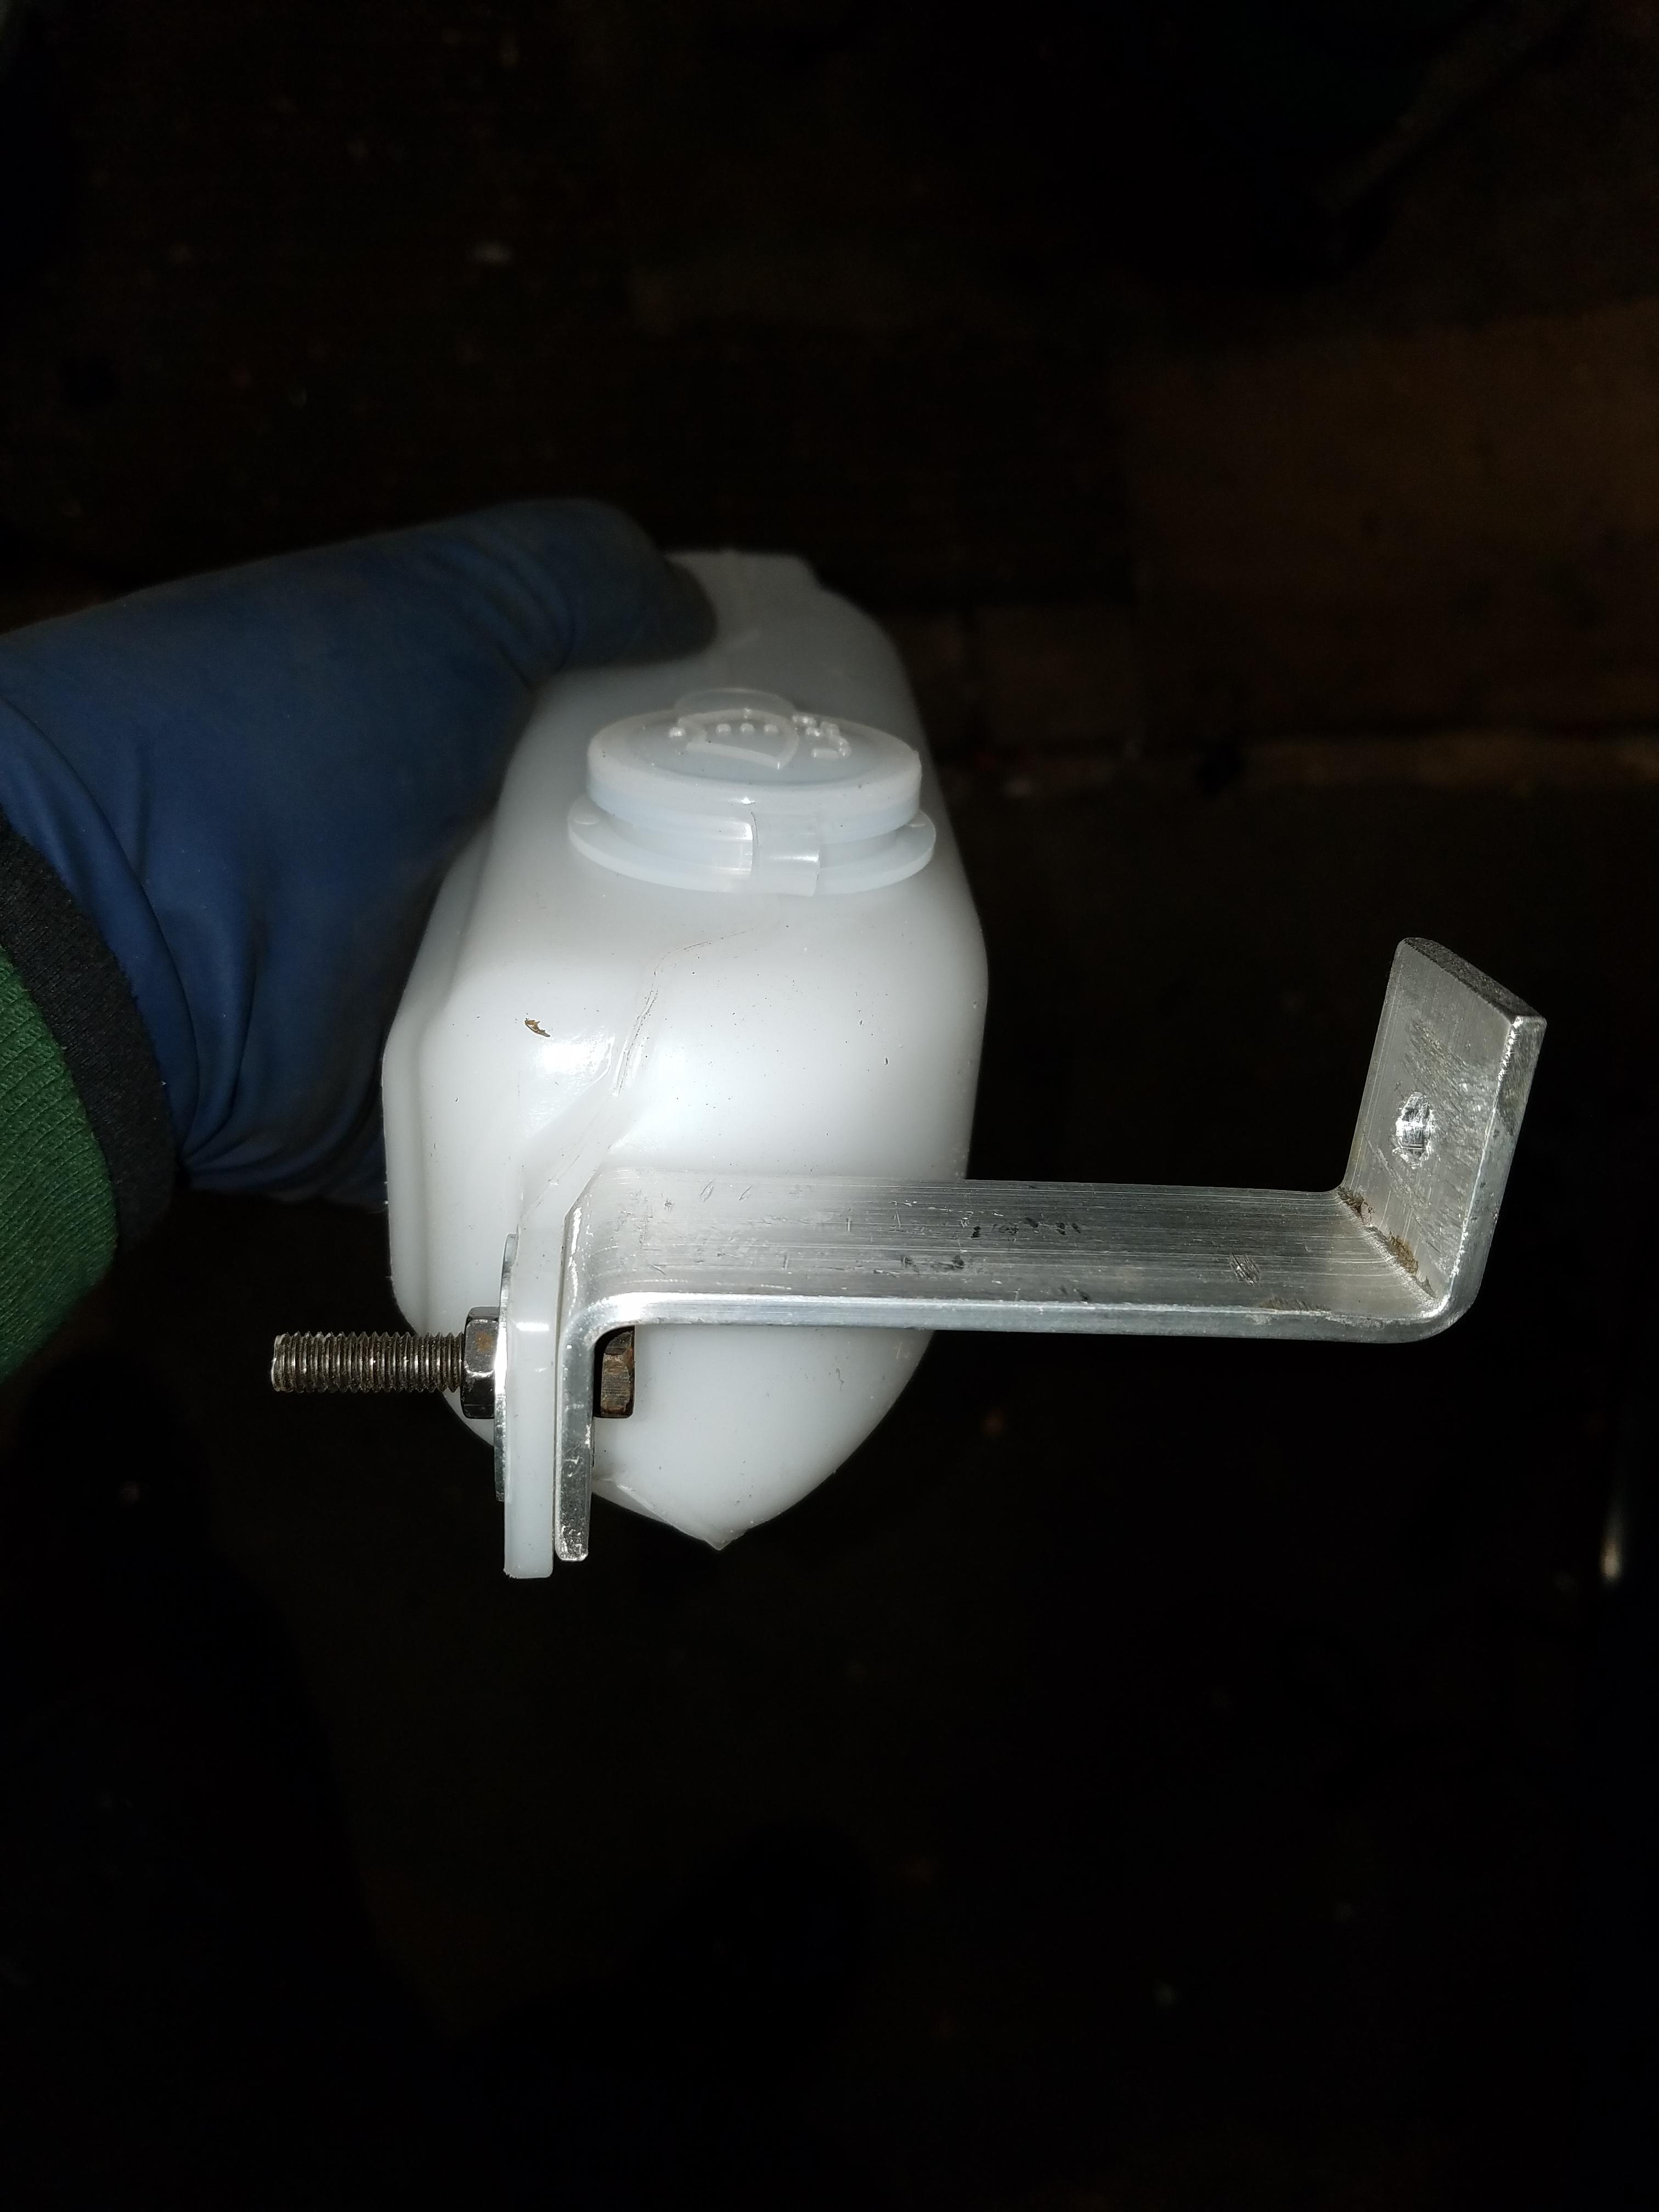
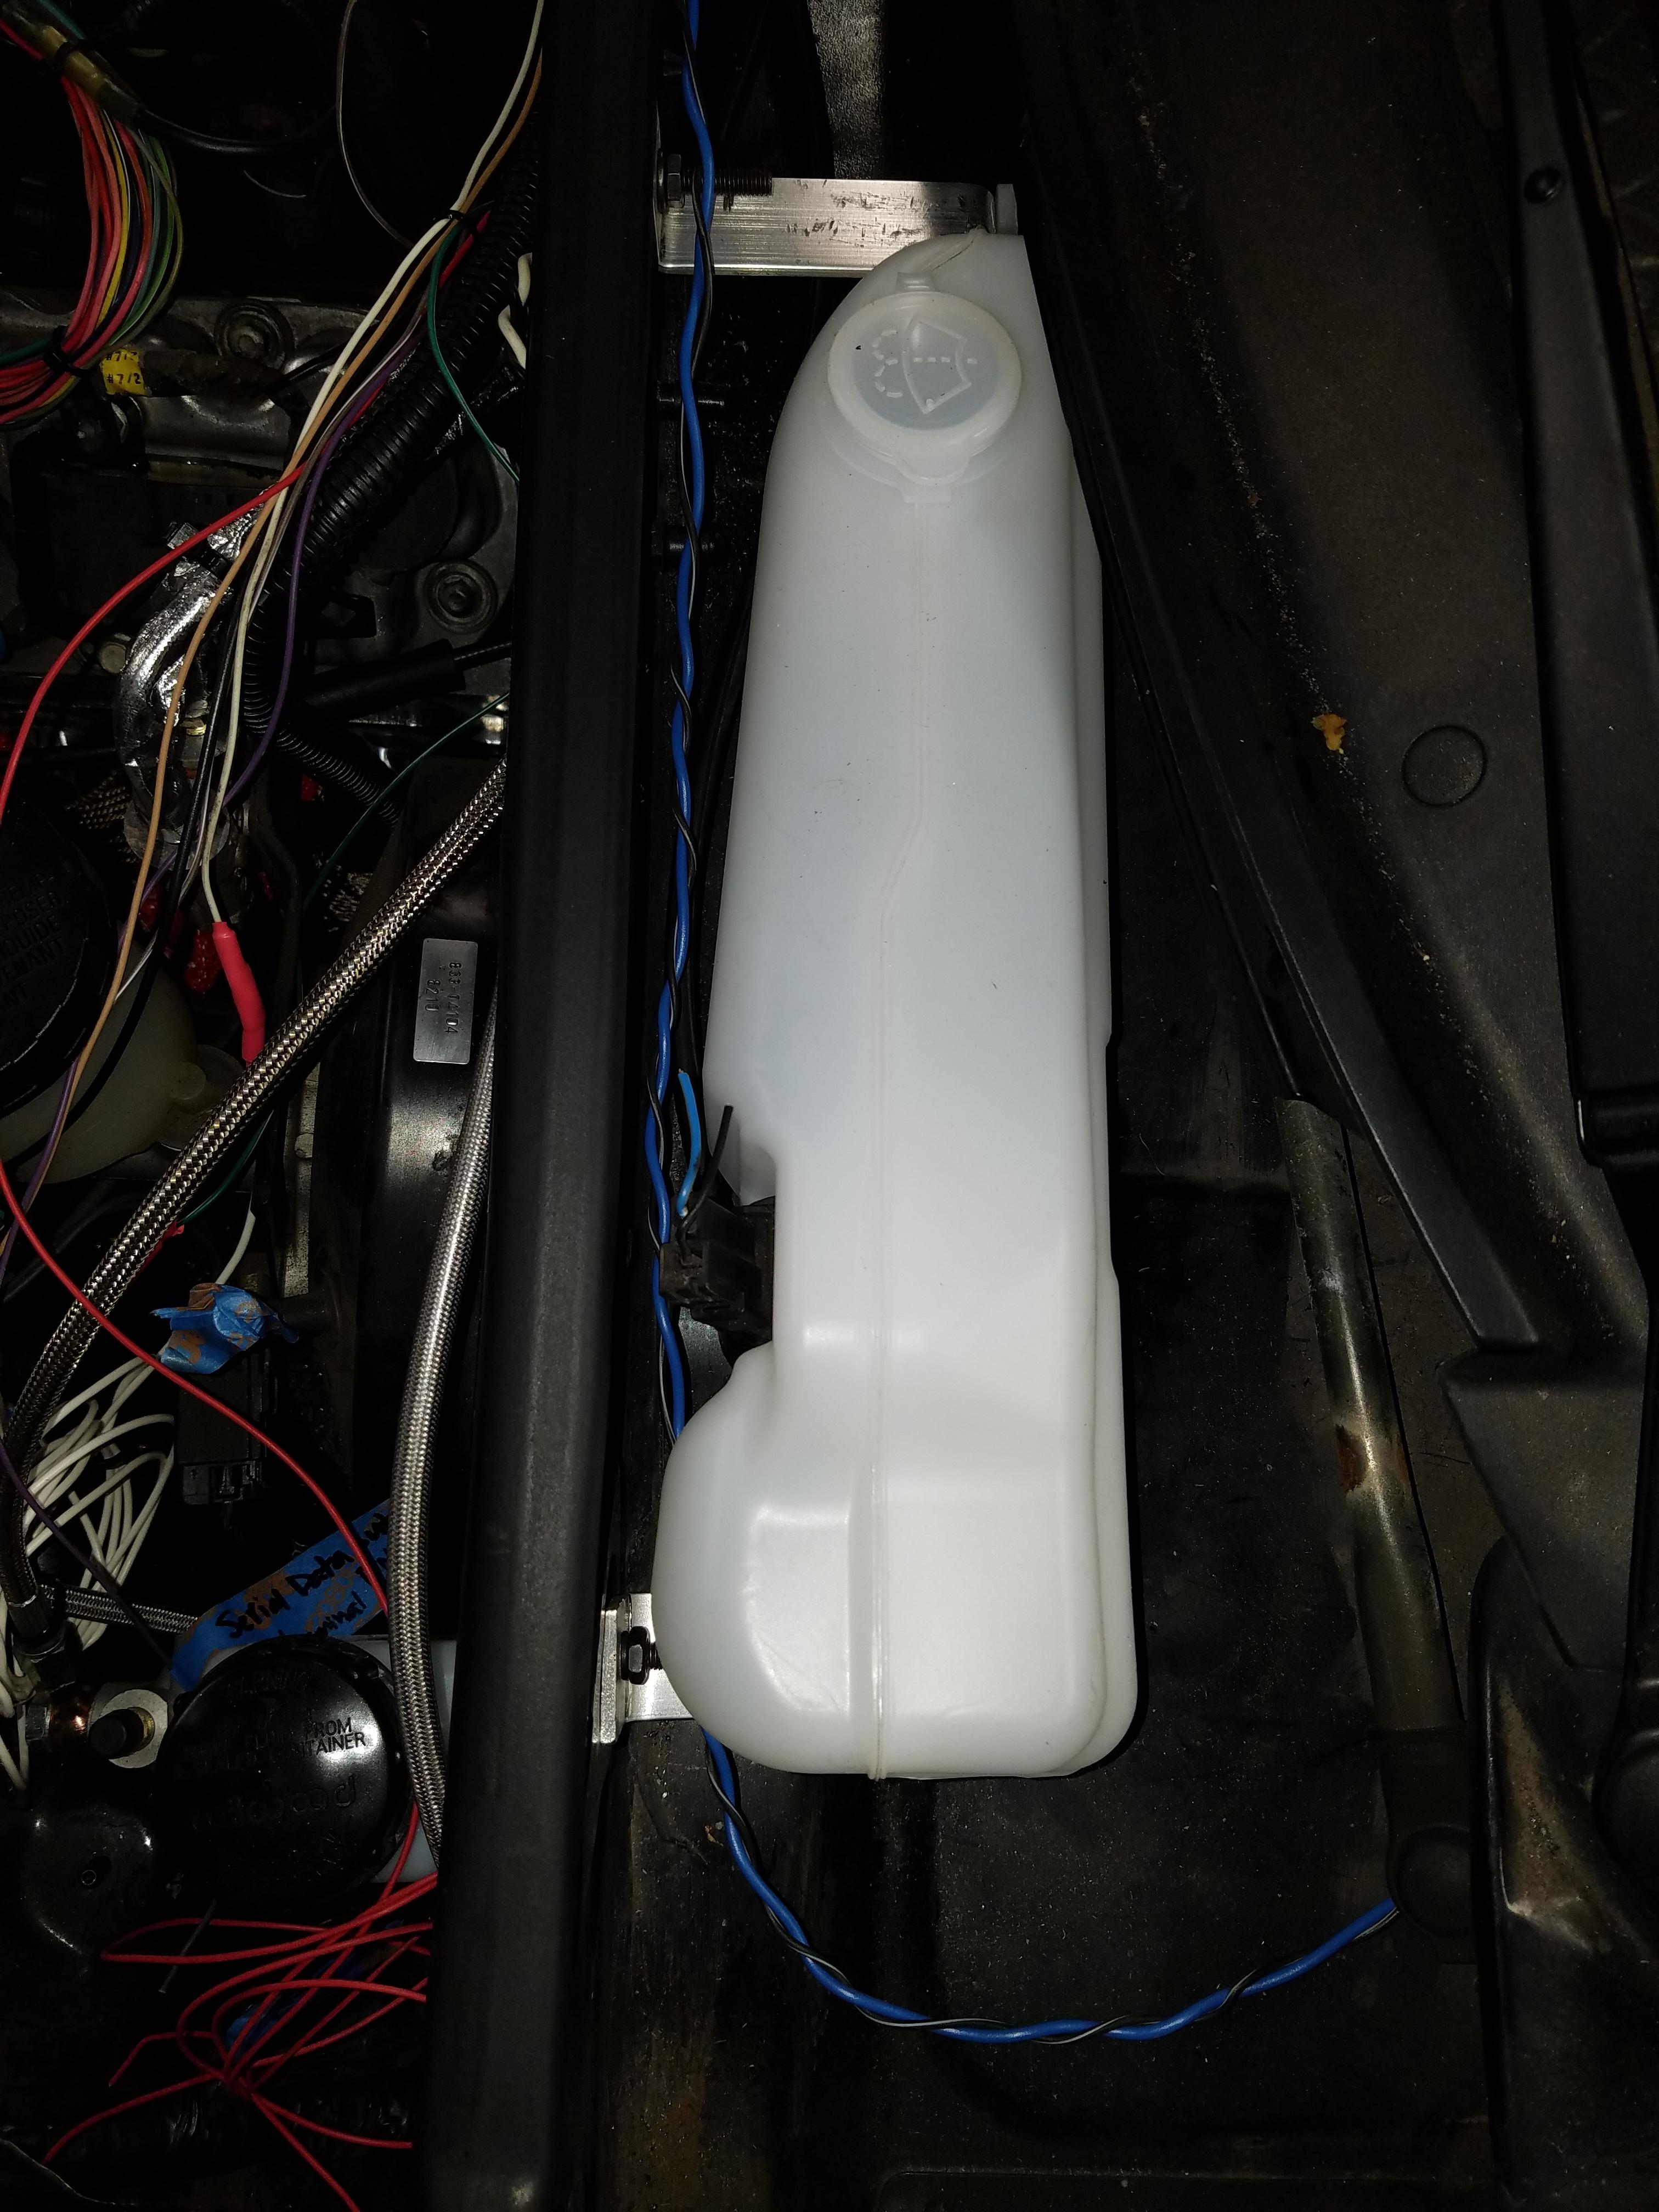
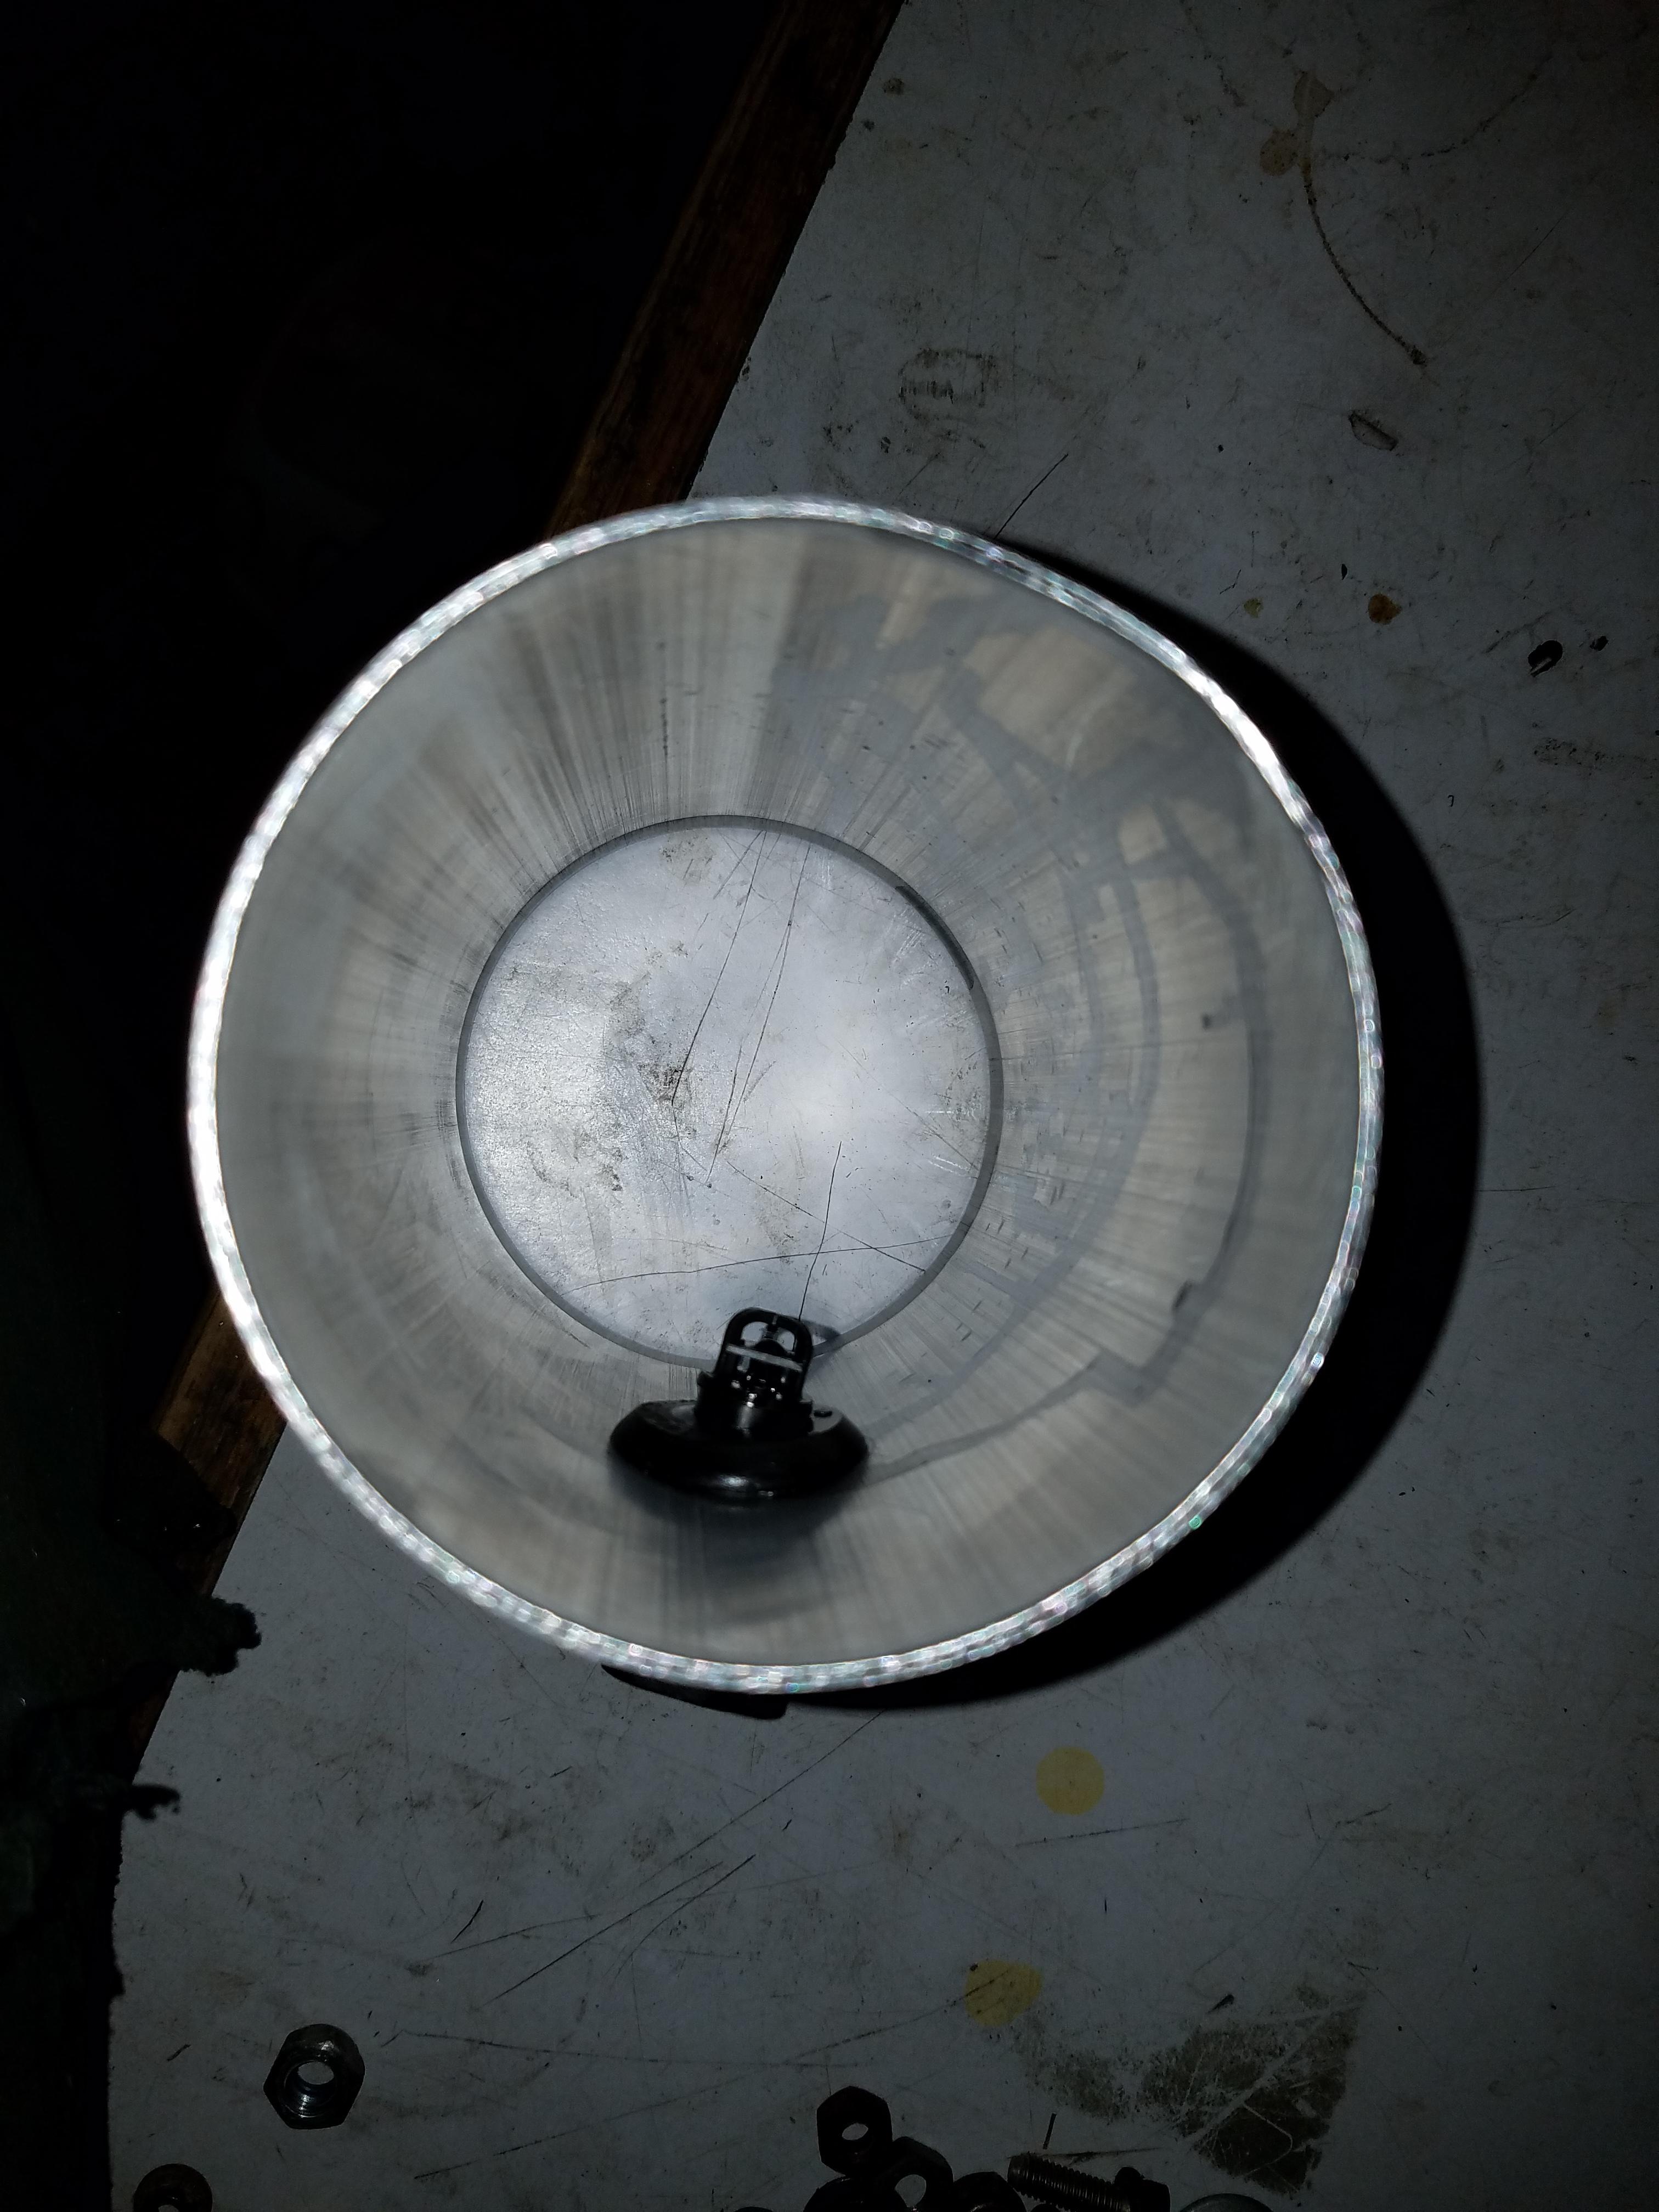
Since the PCM now inhabits the area where the washer bottle was, I needed a relocation solution. Flyin Miata sells the alternative washer bottle:
https://www.flyinmiata.com/suzuki-ca...er-bottle.html
Last I had checked this bottle was about $130 I think, but they seemed to have lowered the price by half (!) to $70 as of this post. There were and still are a lot of cheaper options for the same thing from overseas.
I ordered mine from https://www.amayama.com/en/genuine-catalogs using part number 3845080F00. The price shipped was $46 and I got it within a week or two from Japan - not too shabby.

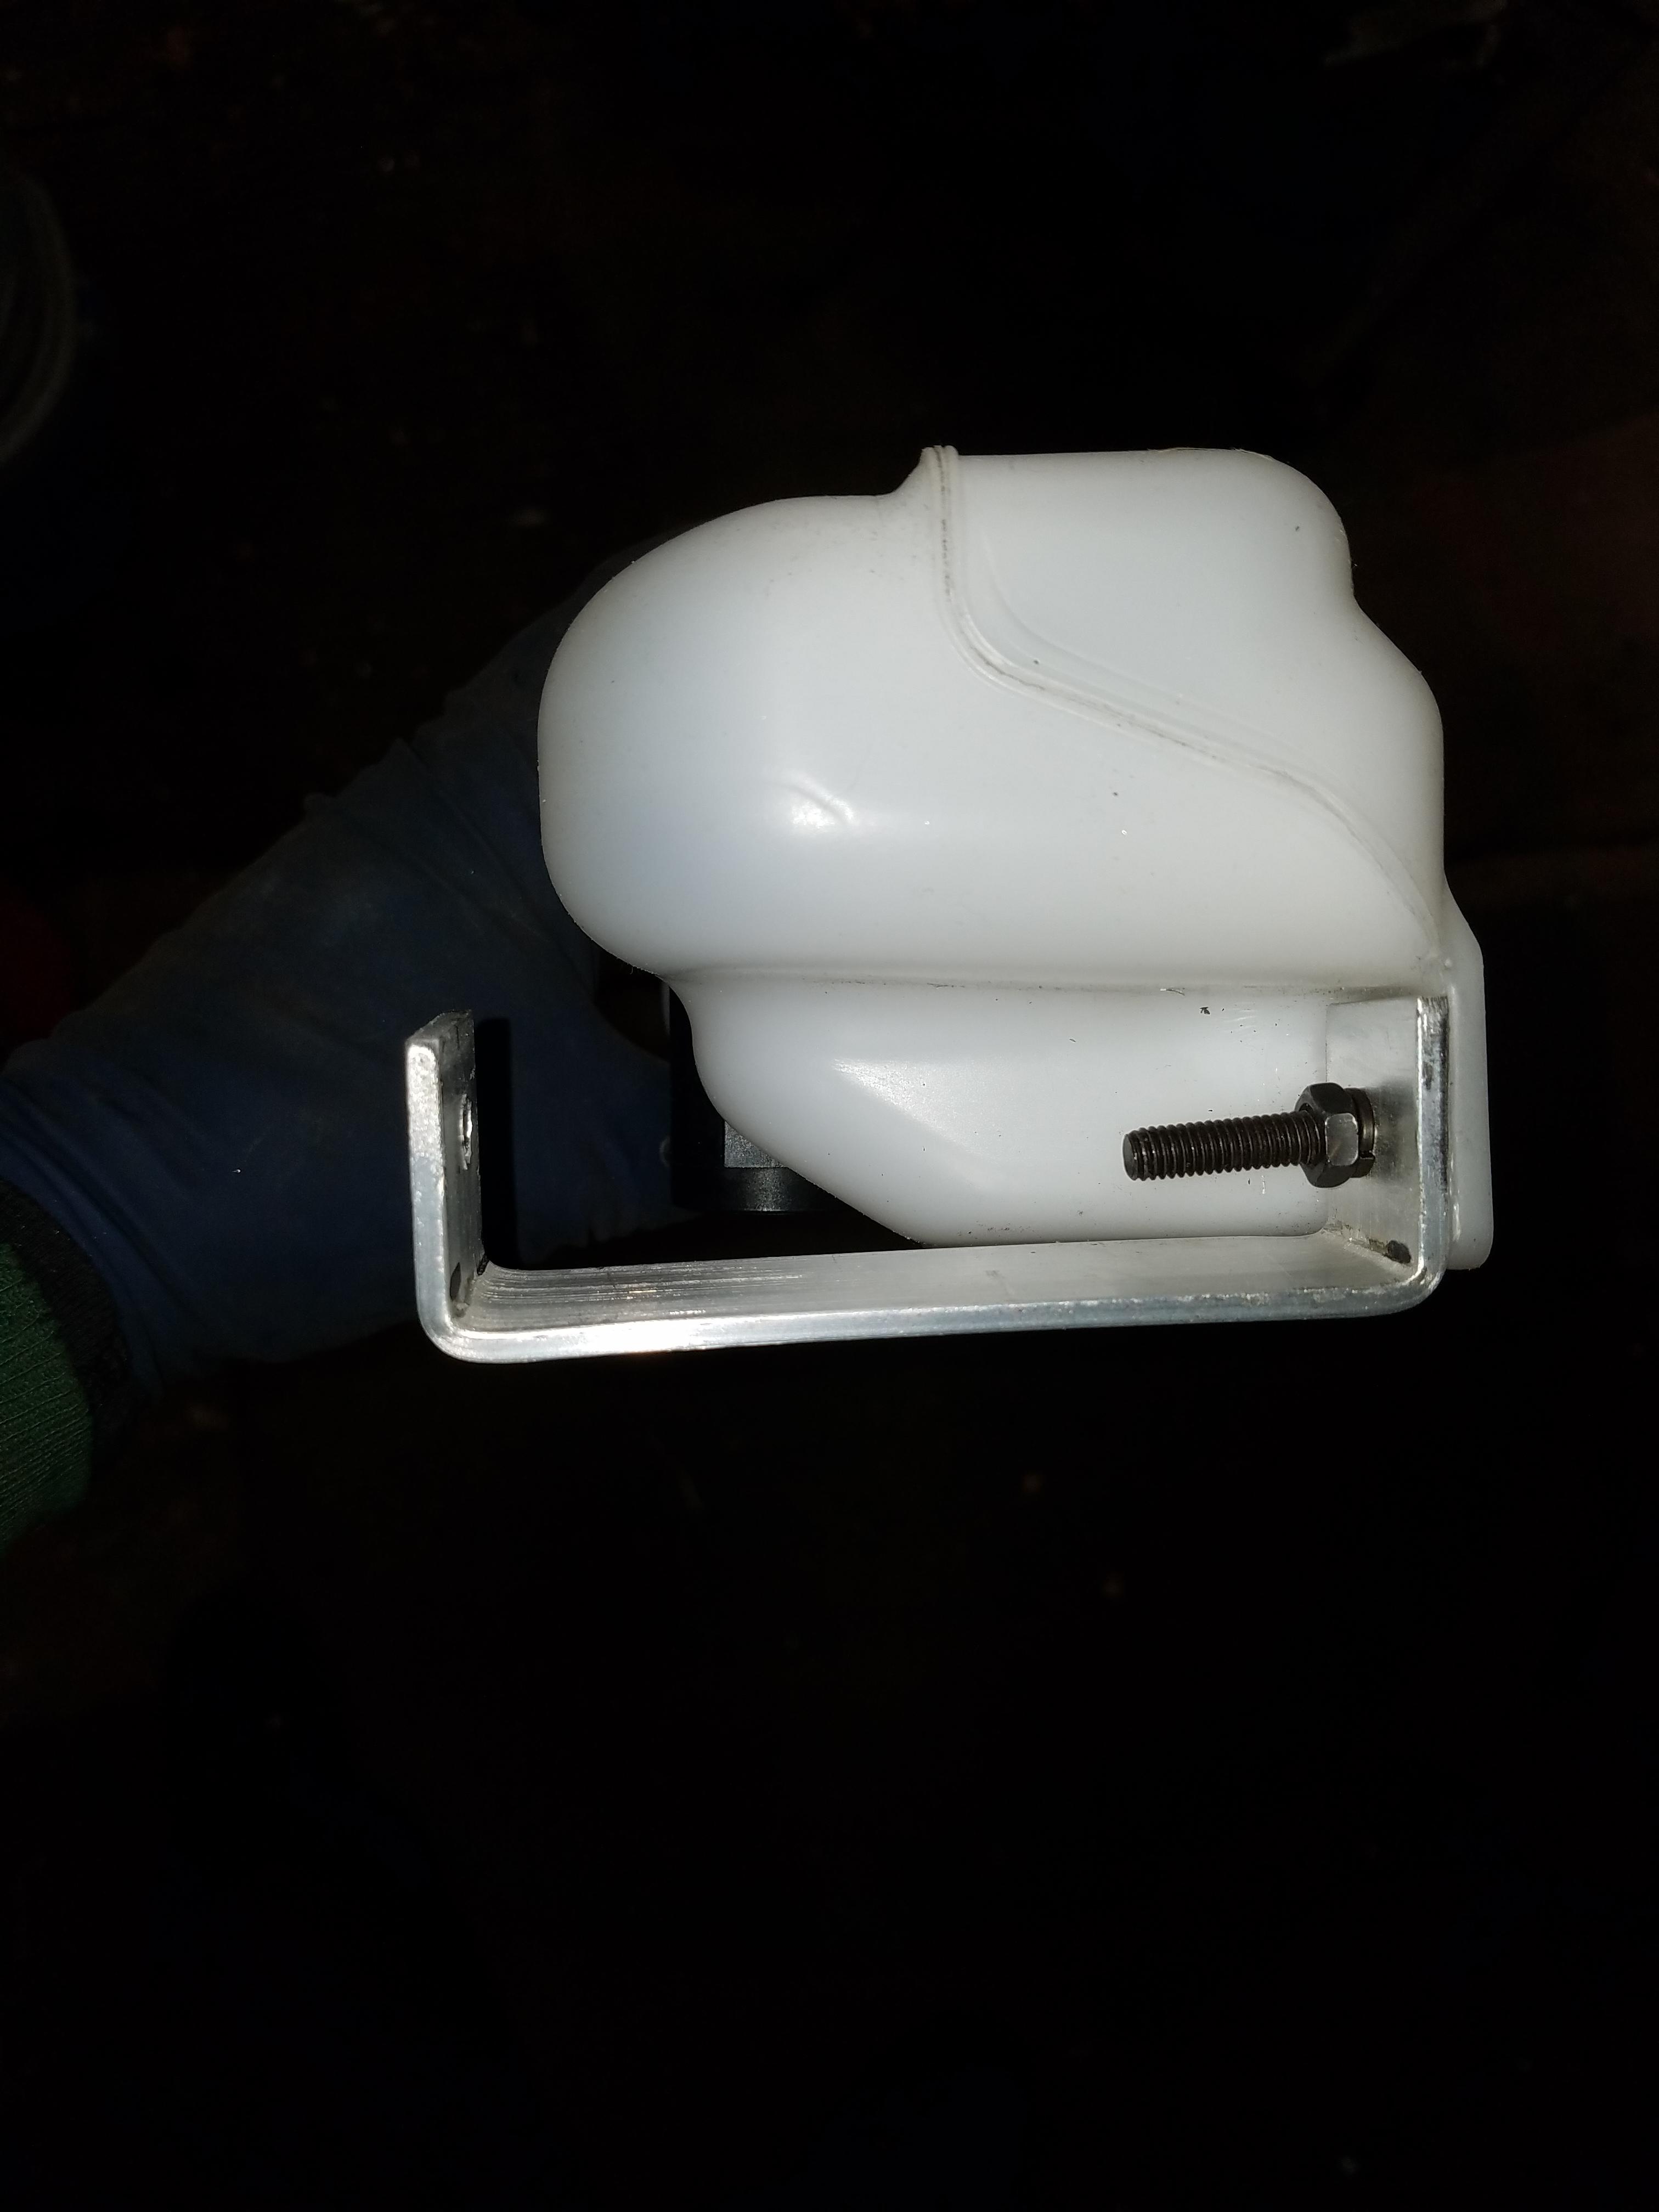
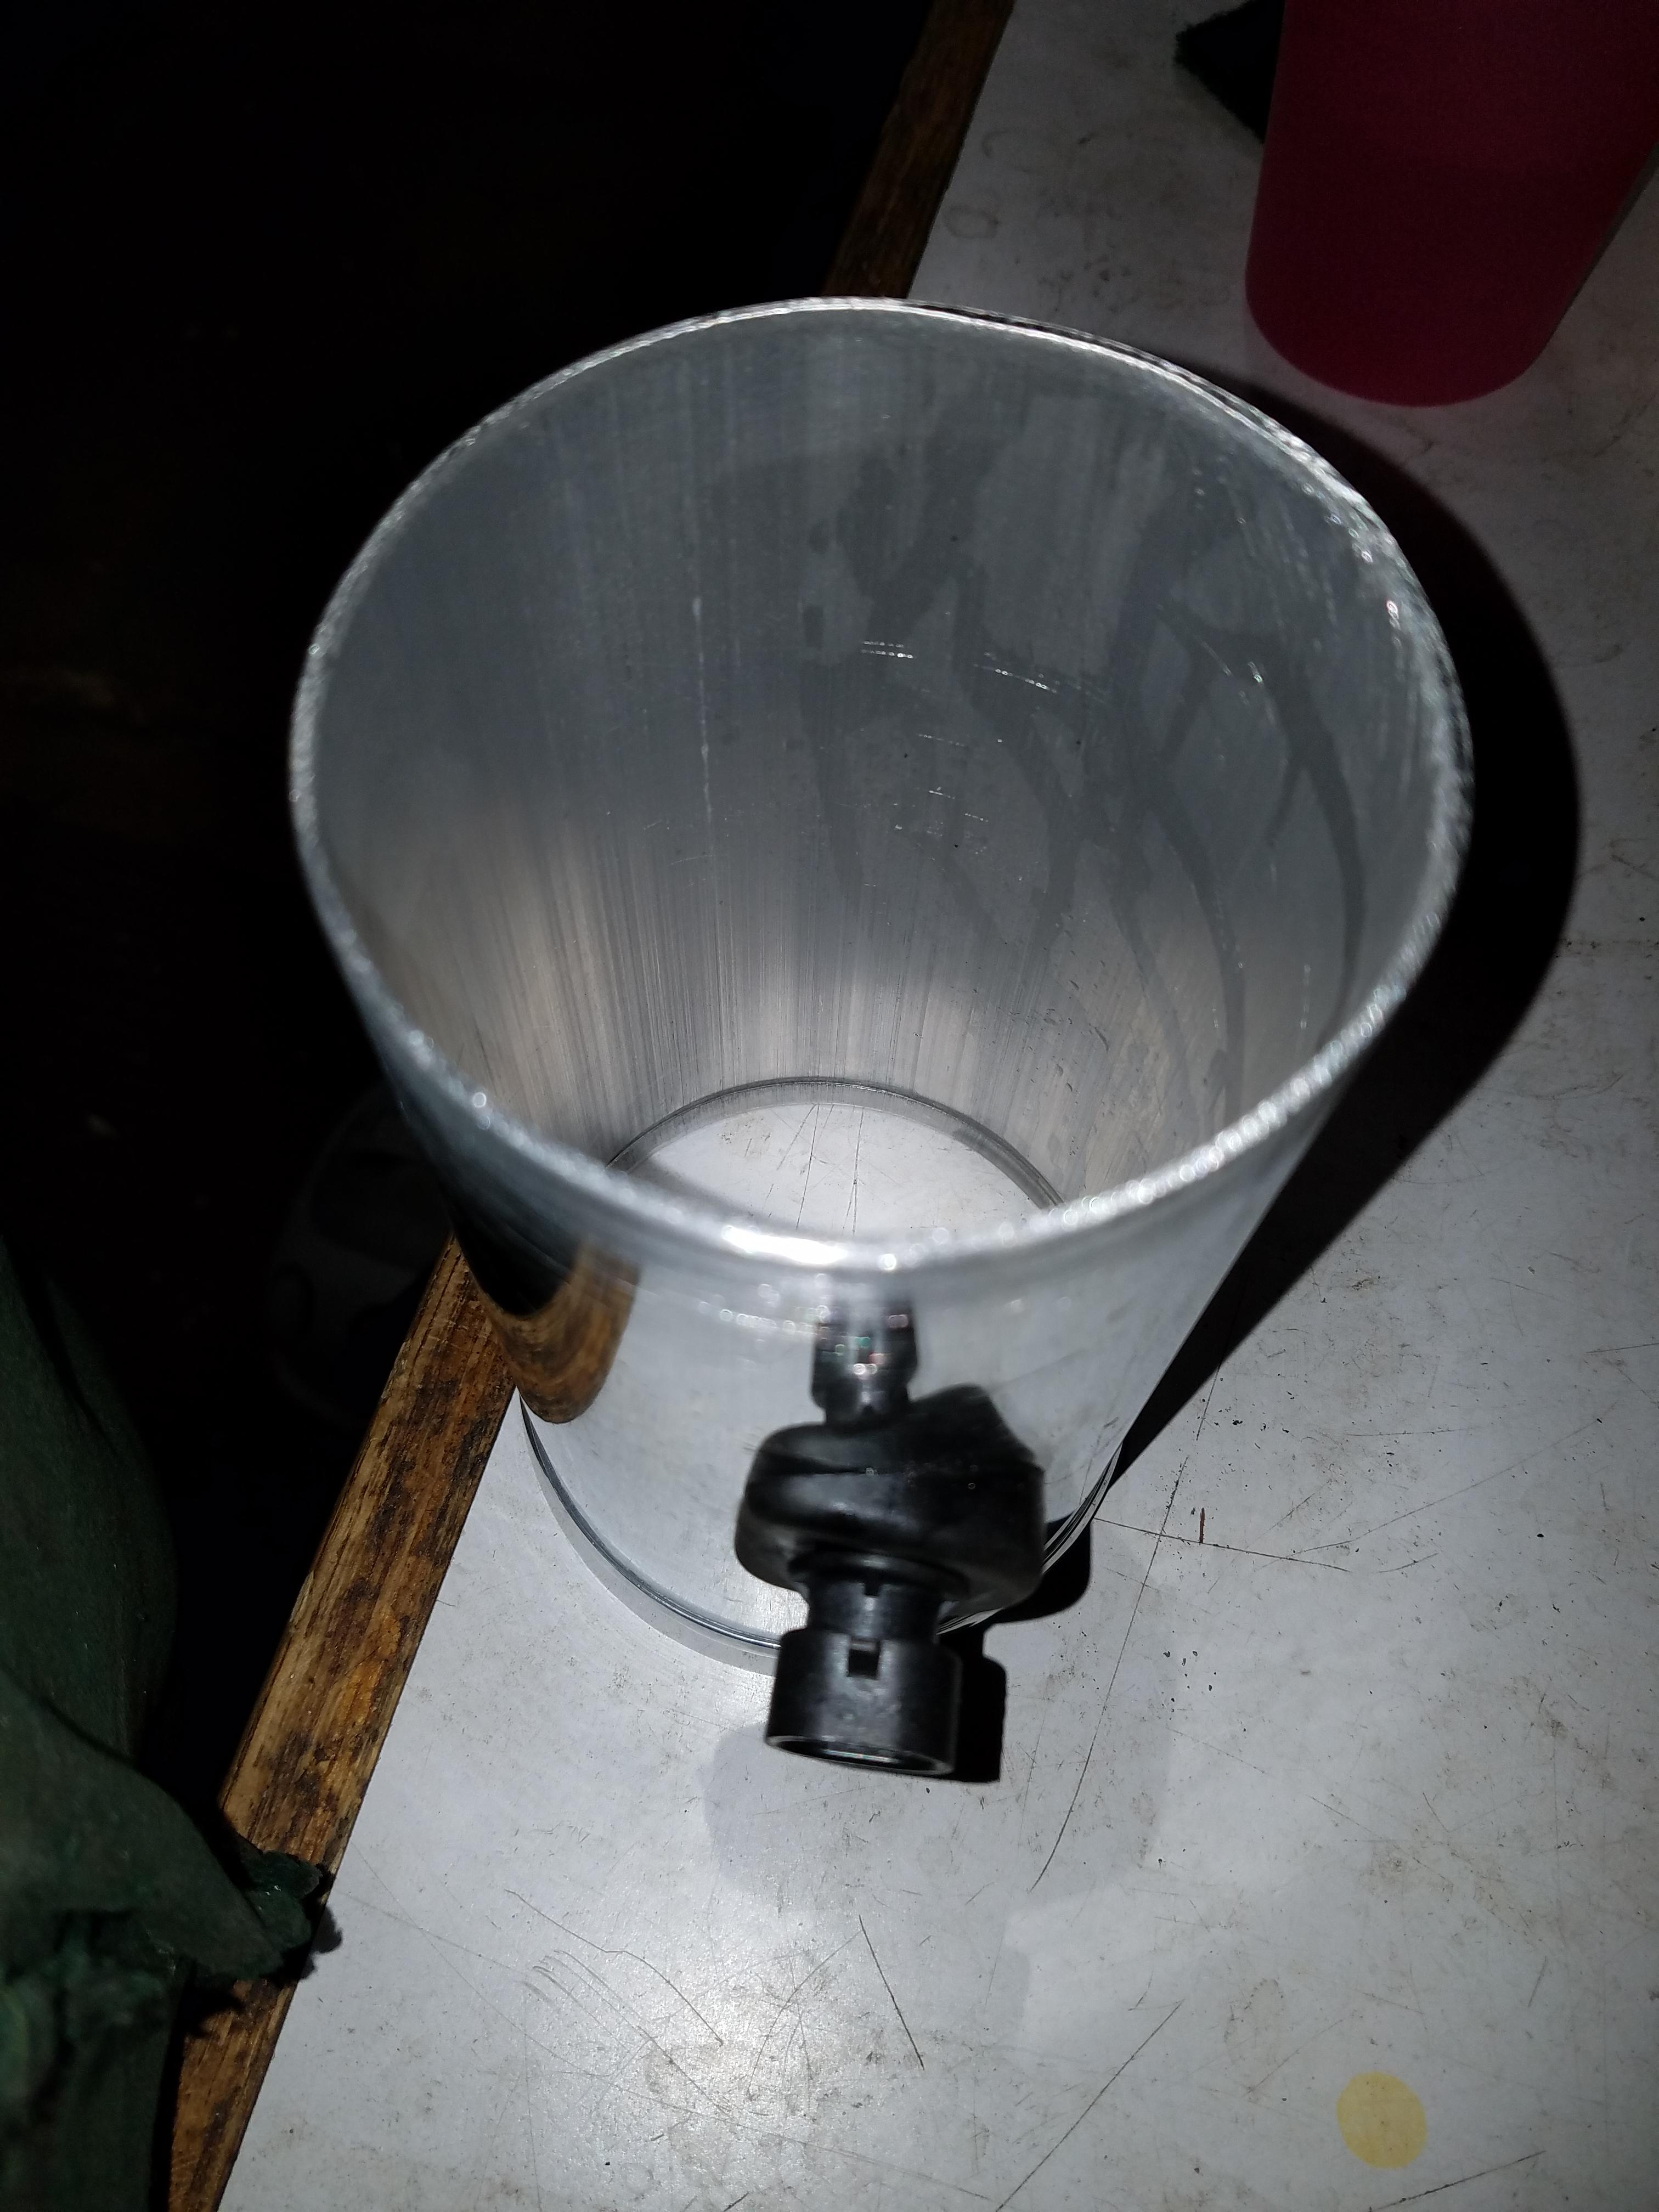
The oem motor fits right into the new bottle. The bottle is designed to fit in the cowl/drain area of the Miata. Capacity seems to be about the same. Strangely the picture on the FM site of this bottle shows it mounted with low point on the bottle where the motor sucks up washer fluid sitting too high in the picture. Any remaining fluid in the bottle will not get picked up very well. Maybe it�s me, or that bottle was shown for example purposes and not actually installed.
Anyway, I fab�d up some aluminum brackets to withstand the weather and will very securely mount the bottle in place. I extended the wiring to reach the new location. We will see once the hood is mounted if there are any clearance issues with the bottle or harness connector. The rubber hose might also reach, if not I�ll just extend it as well once the hood is installed. Seems like a nice option to clean up the engine bay in any case.
https://www.flyinmiata.com/suzuki-ca...er-bottle.html
Last I had checked this bottle was about $130 I think, but they seemed to have lowered the price by half (!) to $70 as of this post. There were and still are a lot of cheaper options for the same thing from overseas.
I ordered mine from https://www.amayama.com/en/genuine-catalogs using part number 3845080F00. The price shipped was $46 and I got it within a week or two from Japan - not too shabby.
The oem motor fits right into the new bottle. The bottle is designed to fit in the cowl/drain area of the Miata. Capacity seems to be about the same. Strangely the picture on the FM site of this bottle shows it mounted with low point on the bottle where the motor sucks up washer fluid sitting too high in the picture. Any remaining fluid in the bottle will not get picked up very well. Maybe it�s me, or that bottle was shown for example purposes and not actually installed.
Anyway, I fab�d up some aluminum brackets to withstand the weather and will very securely mount the bottle in place. I extended the wiring to reach the new location. We will see once the hood is mounted if there are any clearance issues with the bottle or harness connector. The rubber hose might also reach, if not I�ll just extend it as well once the hood is installed. Seems like a nice option to clean up the engine bay in any case.
 01-28-2017, 08:30 PM
#108
V8 Miata Enthusiast
Thread Starter
I was able to sort out the intake situation pretty cheaply using some pieces from Silicone Intakes Intercooler Pipe Fabrication
Here was my order:
1 x Silicone Reducer, 90� bend - 4.0" to 3.5" - Black (BRE000958) = $19.99
1 x 3.5" Silicone 45� Elbow, Black (SIL000408) = $19.99
1 x 1' Straight Aluminum Pipe, 3.5" (SIL000279) = $14.99
1 x Dual-Cone Air Filter - black, 3.5" inlet (AIR002008) = $14.99
You may want to measure the O.D. of your throttle body or MAF sensor plate for the right match. The 4” end of the 90� bend is not a perfectly snug fit on the throttle body, but with a hose clamp on it I think it will hold fine.
Unfortunately the 90� bend was not a perfect 90� either, more like 80�. When I brought this to their attention, they refunded the cost of the $20 piece from my order. Made the total price of this kit pretty reasonable ($50 + shipping).
Next challenge was to adapter the IAT (air intake temp) sensor to the intake. I picked up the correct two wire sensor and grommet from Amazon. Some later LS engines might have a 3 wire sensor or have the IAT integrated into the MAF sensor.
The IAT sensor (ACDelco 213-243) https://www.amazon.com/gp/product/B000C9JQVS
Grommet (Part# 14054892) https://www.amazon.com/gp/product/B00266IC06
The grommet is pretty important to create an airtight seal to the intake tubing an also space the part of the sensor so that it sits in the air stream at the right height.
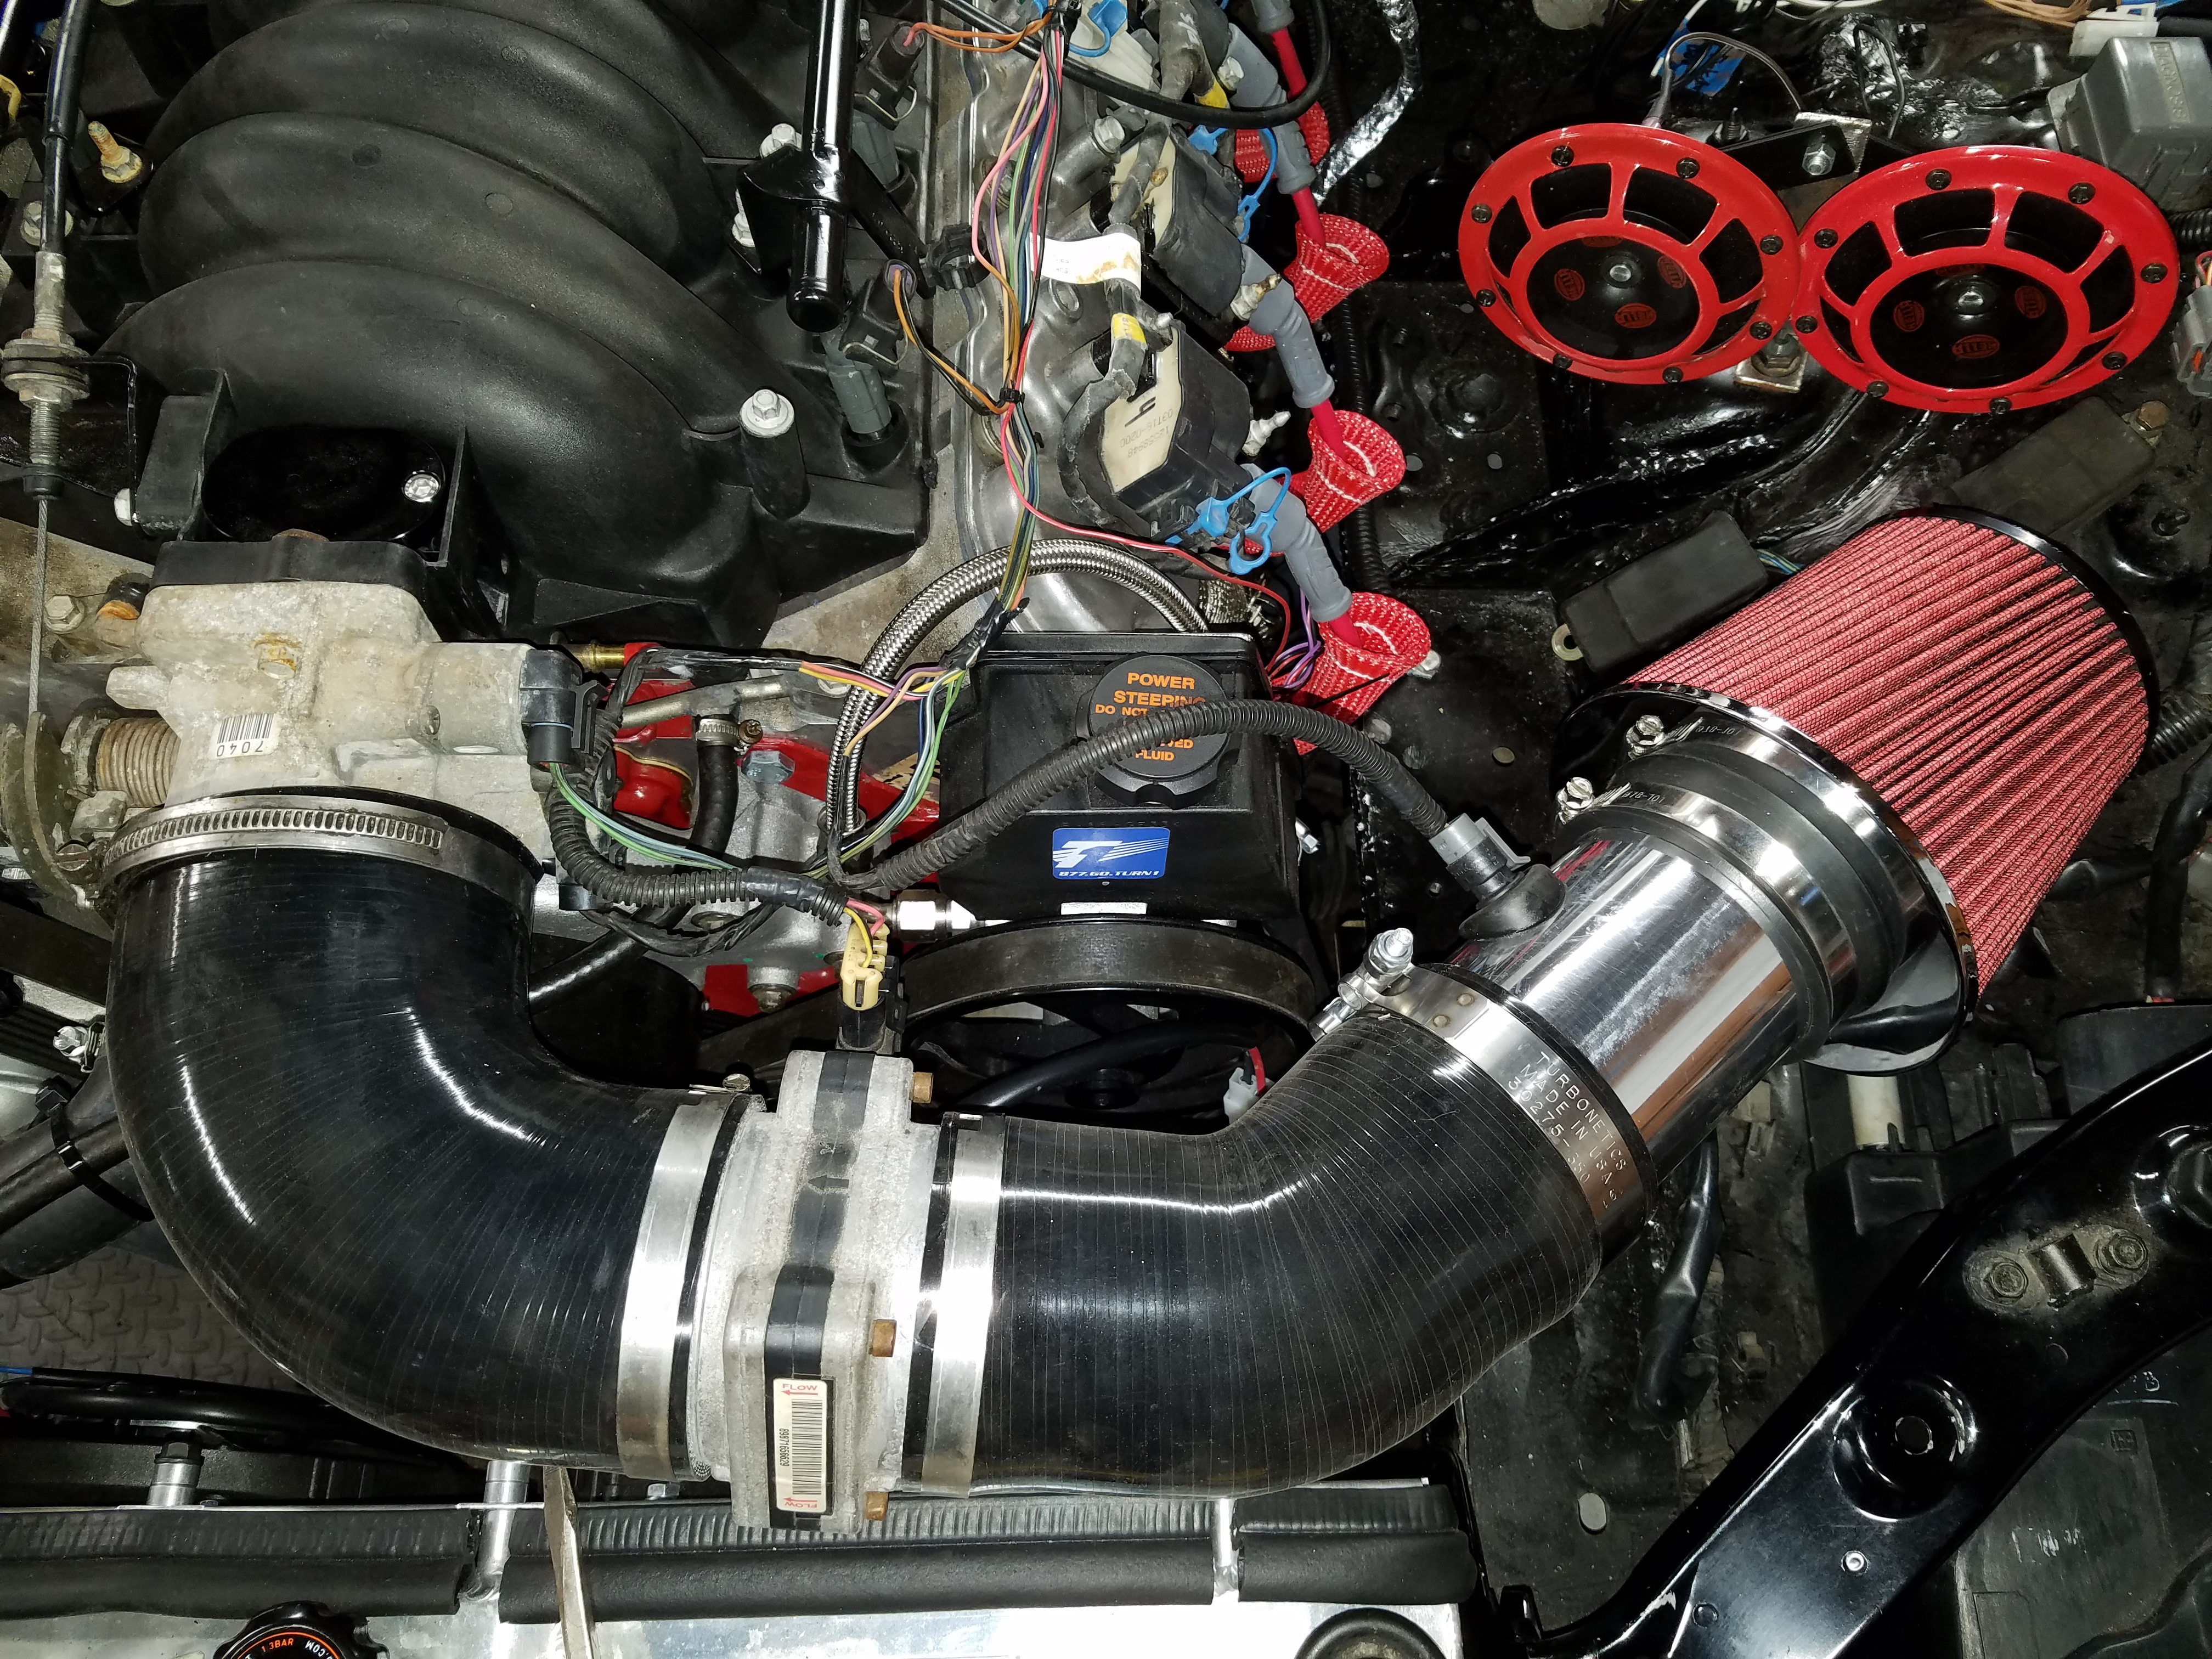
Fitted up the silicone bends and MAF sensor to see where it put me:
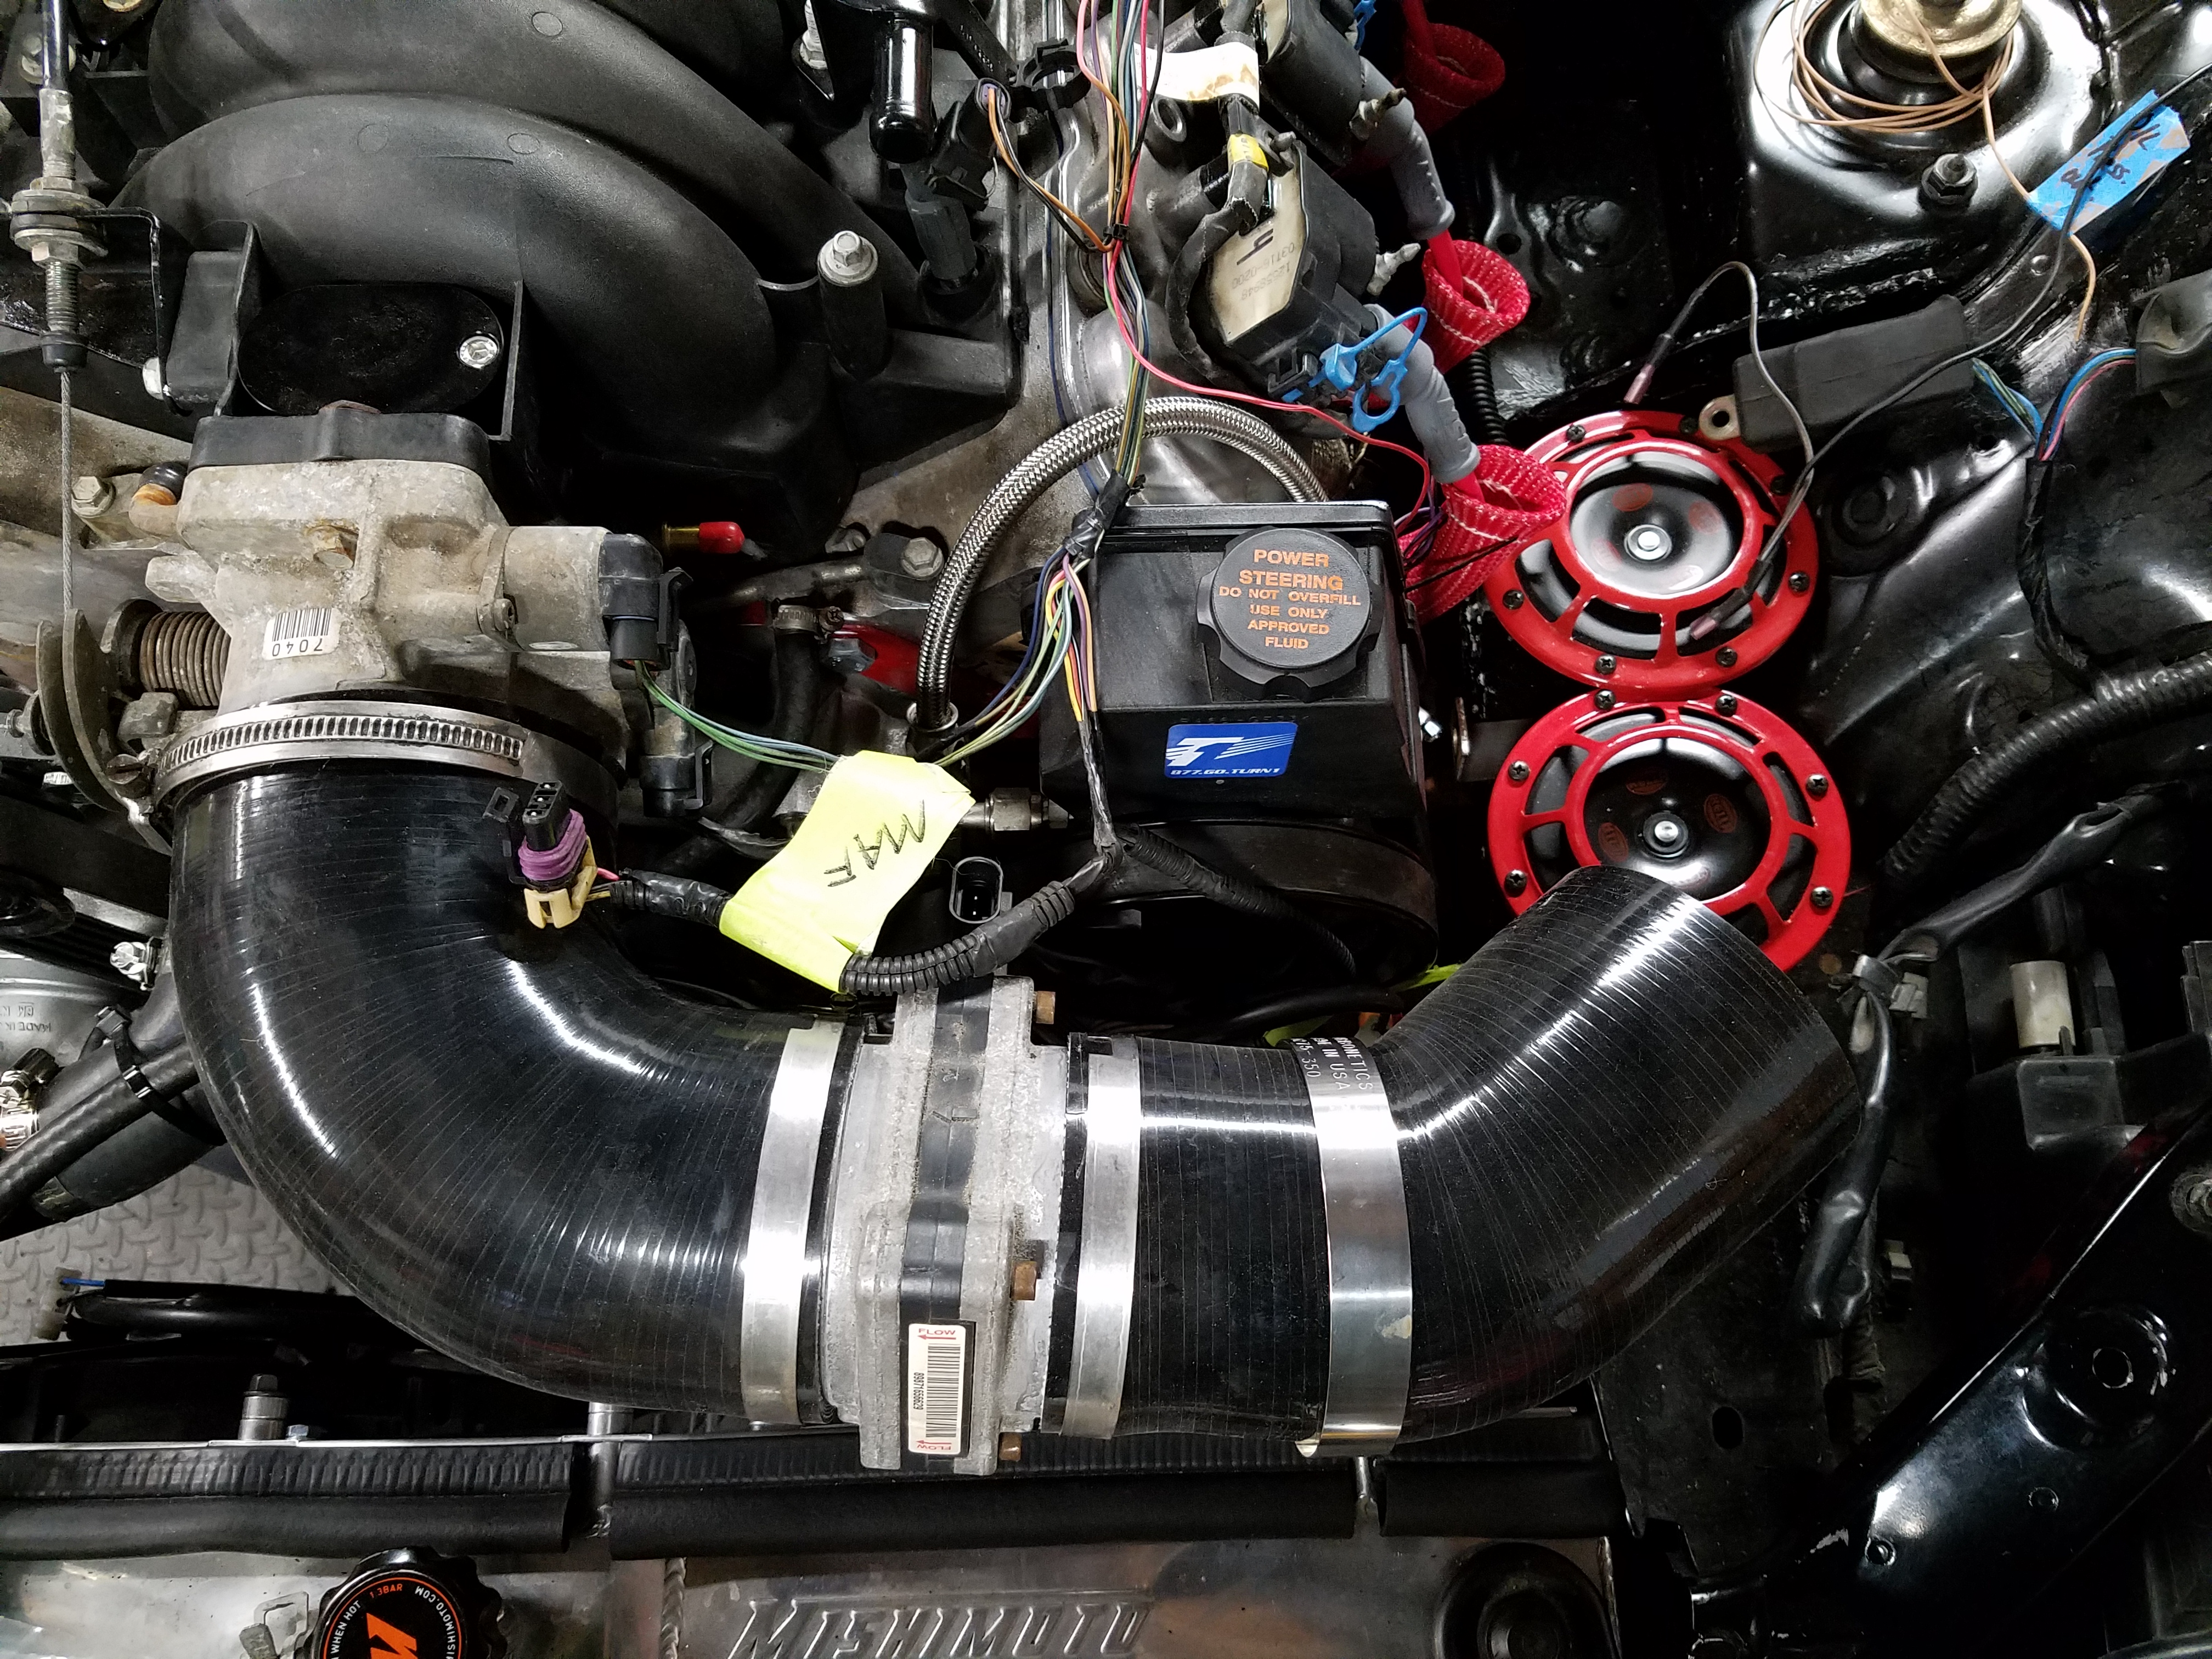
After some measurements, I only needed about 6” of the 12” section of aluminum pipe to place the air filter in the right spot. Flyin Miata seems to think that putting the air filter near the shock tower works the best. I’ve got my bandsaw setup with a metal cutting blade already, which will help me down the road shortly with my exhaust system. Made some marks and cut it in half.

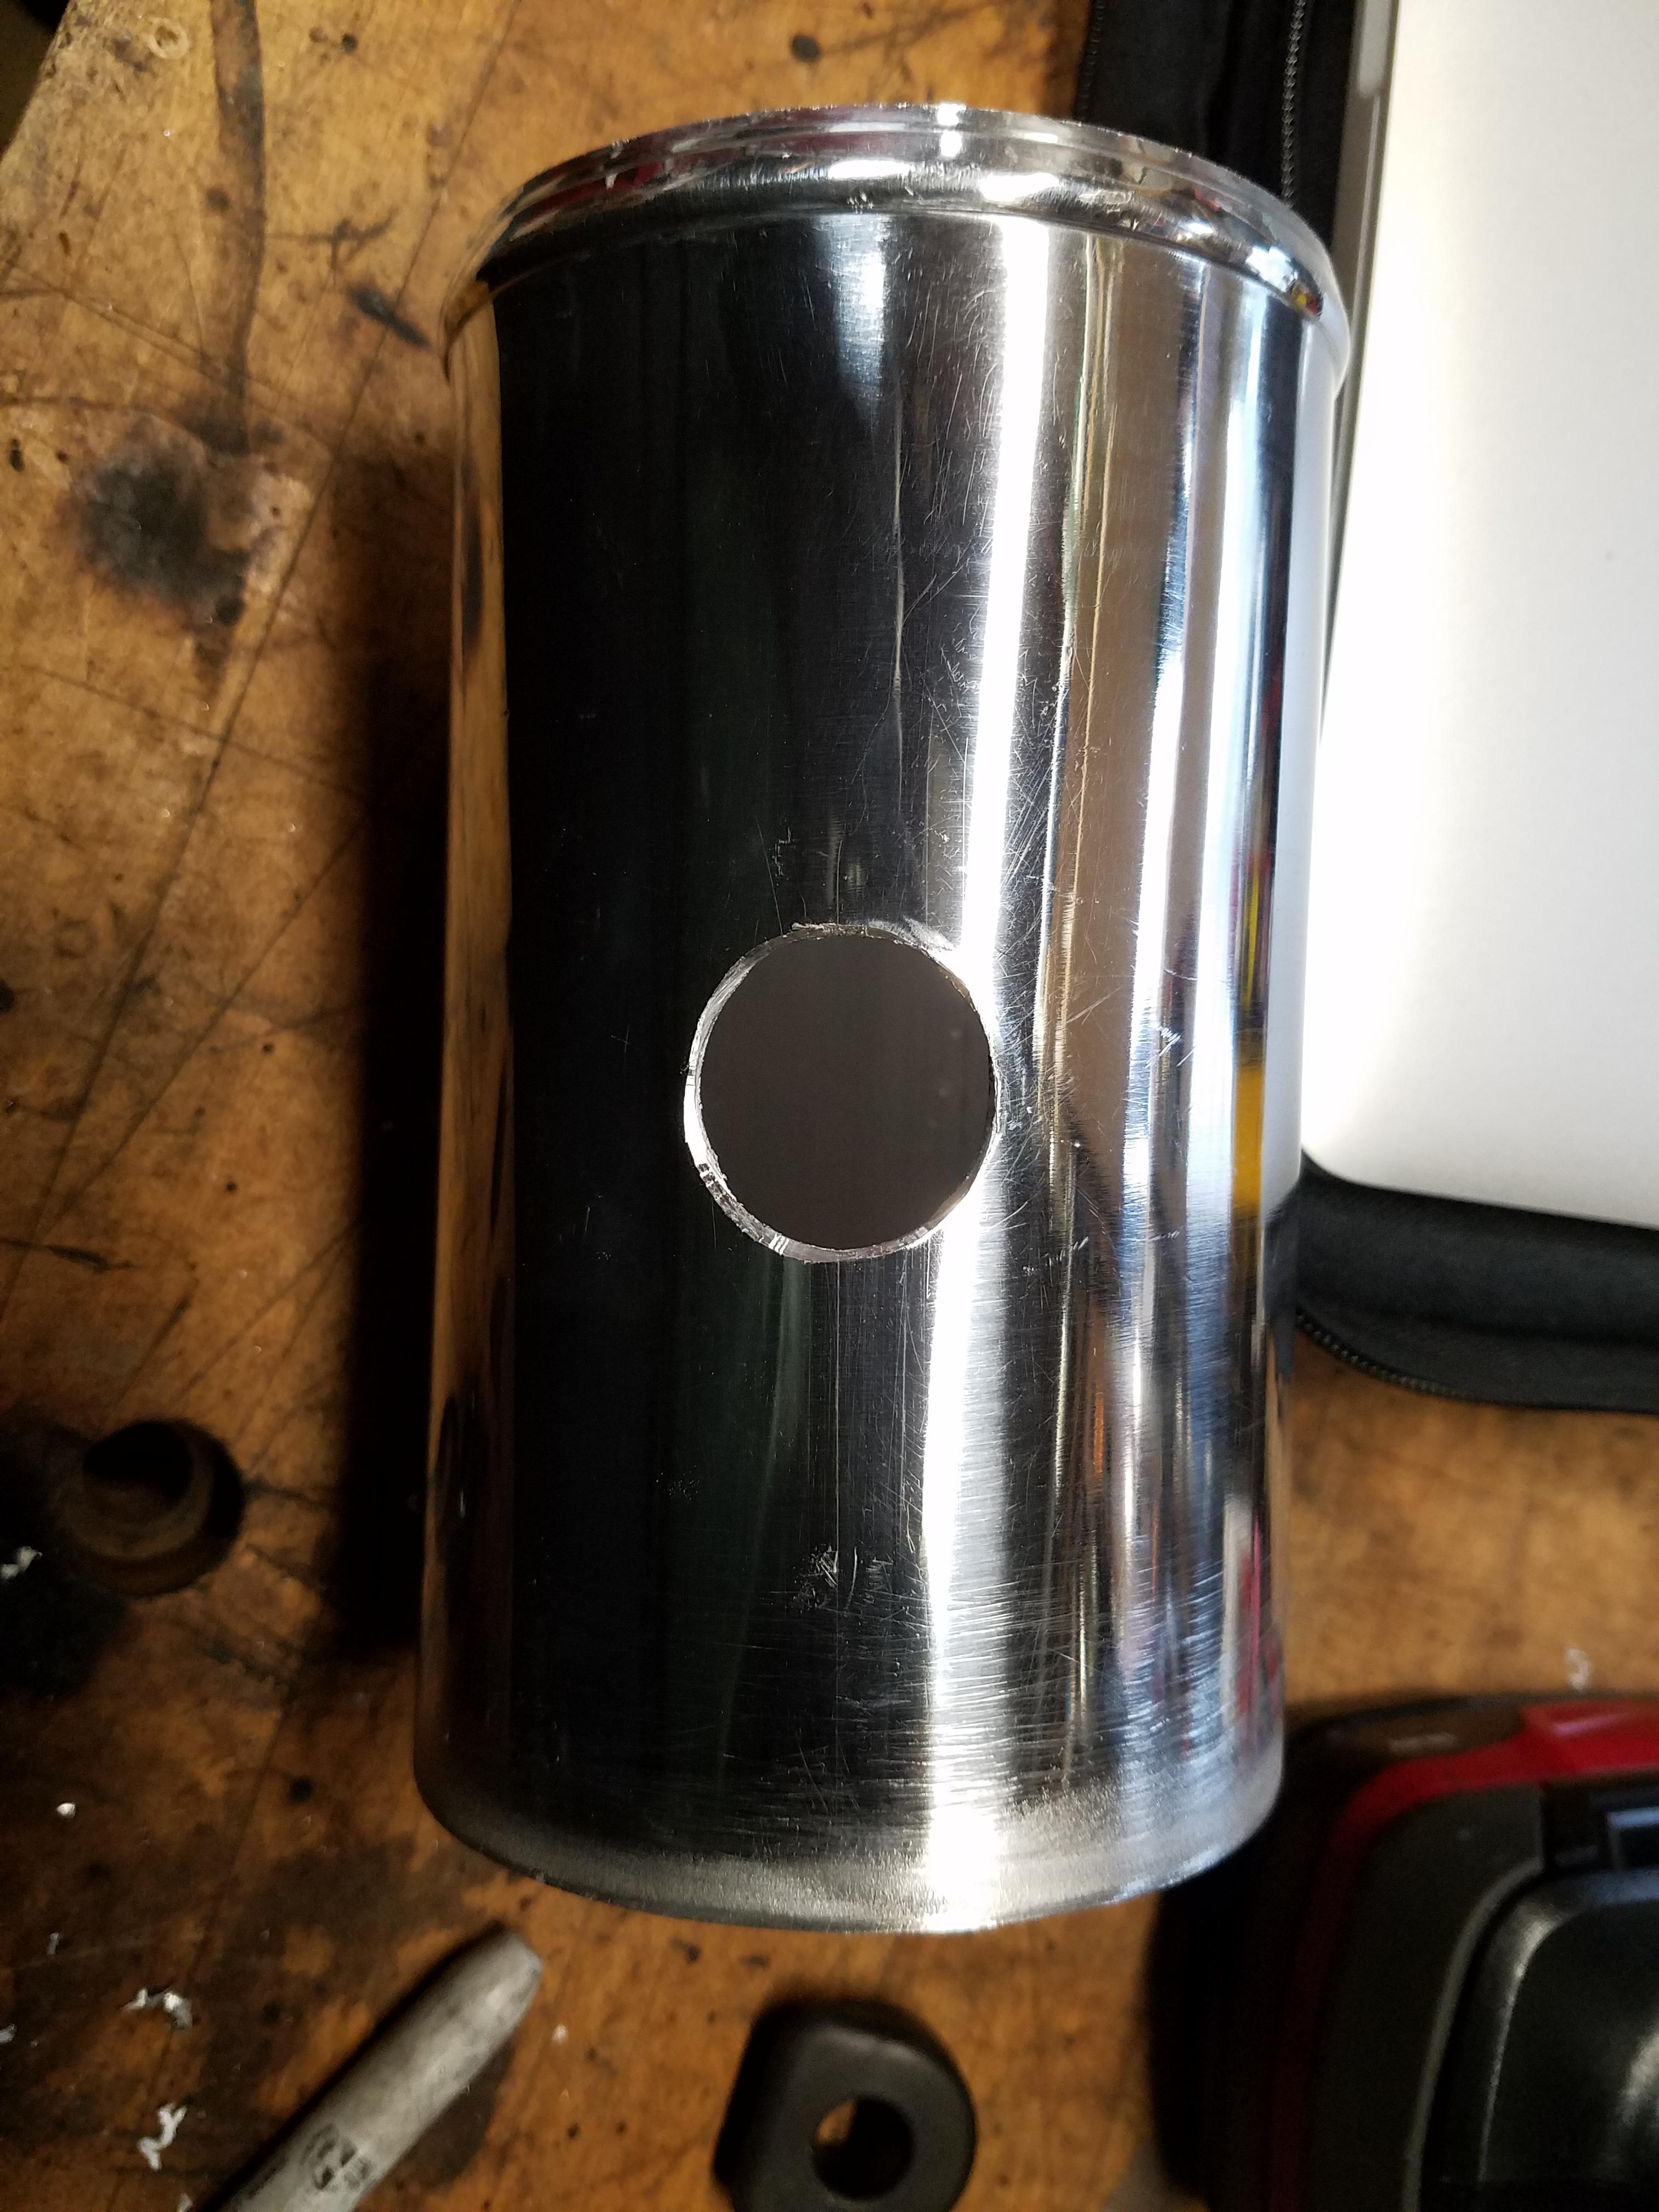
Cut a hole in the aluminum pipe with my big step drill

A hole of an appropriate size
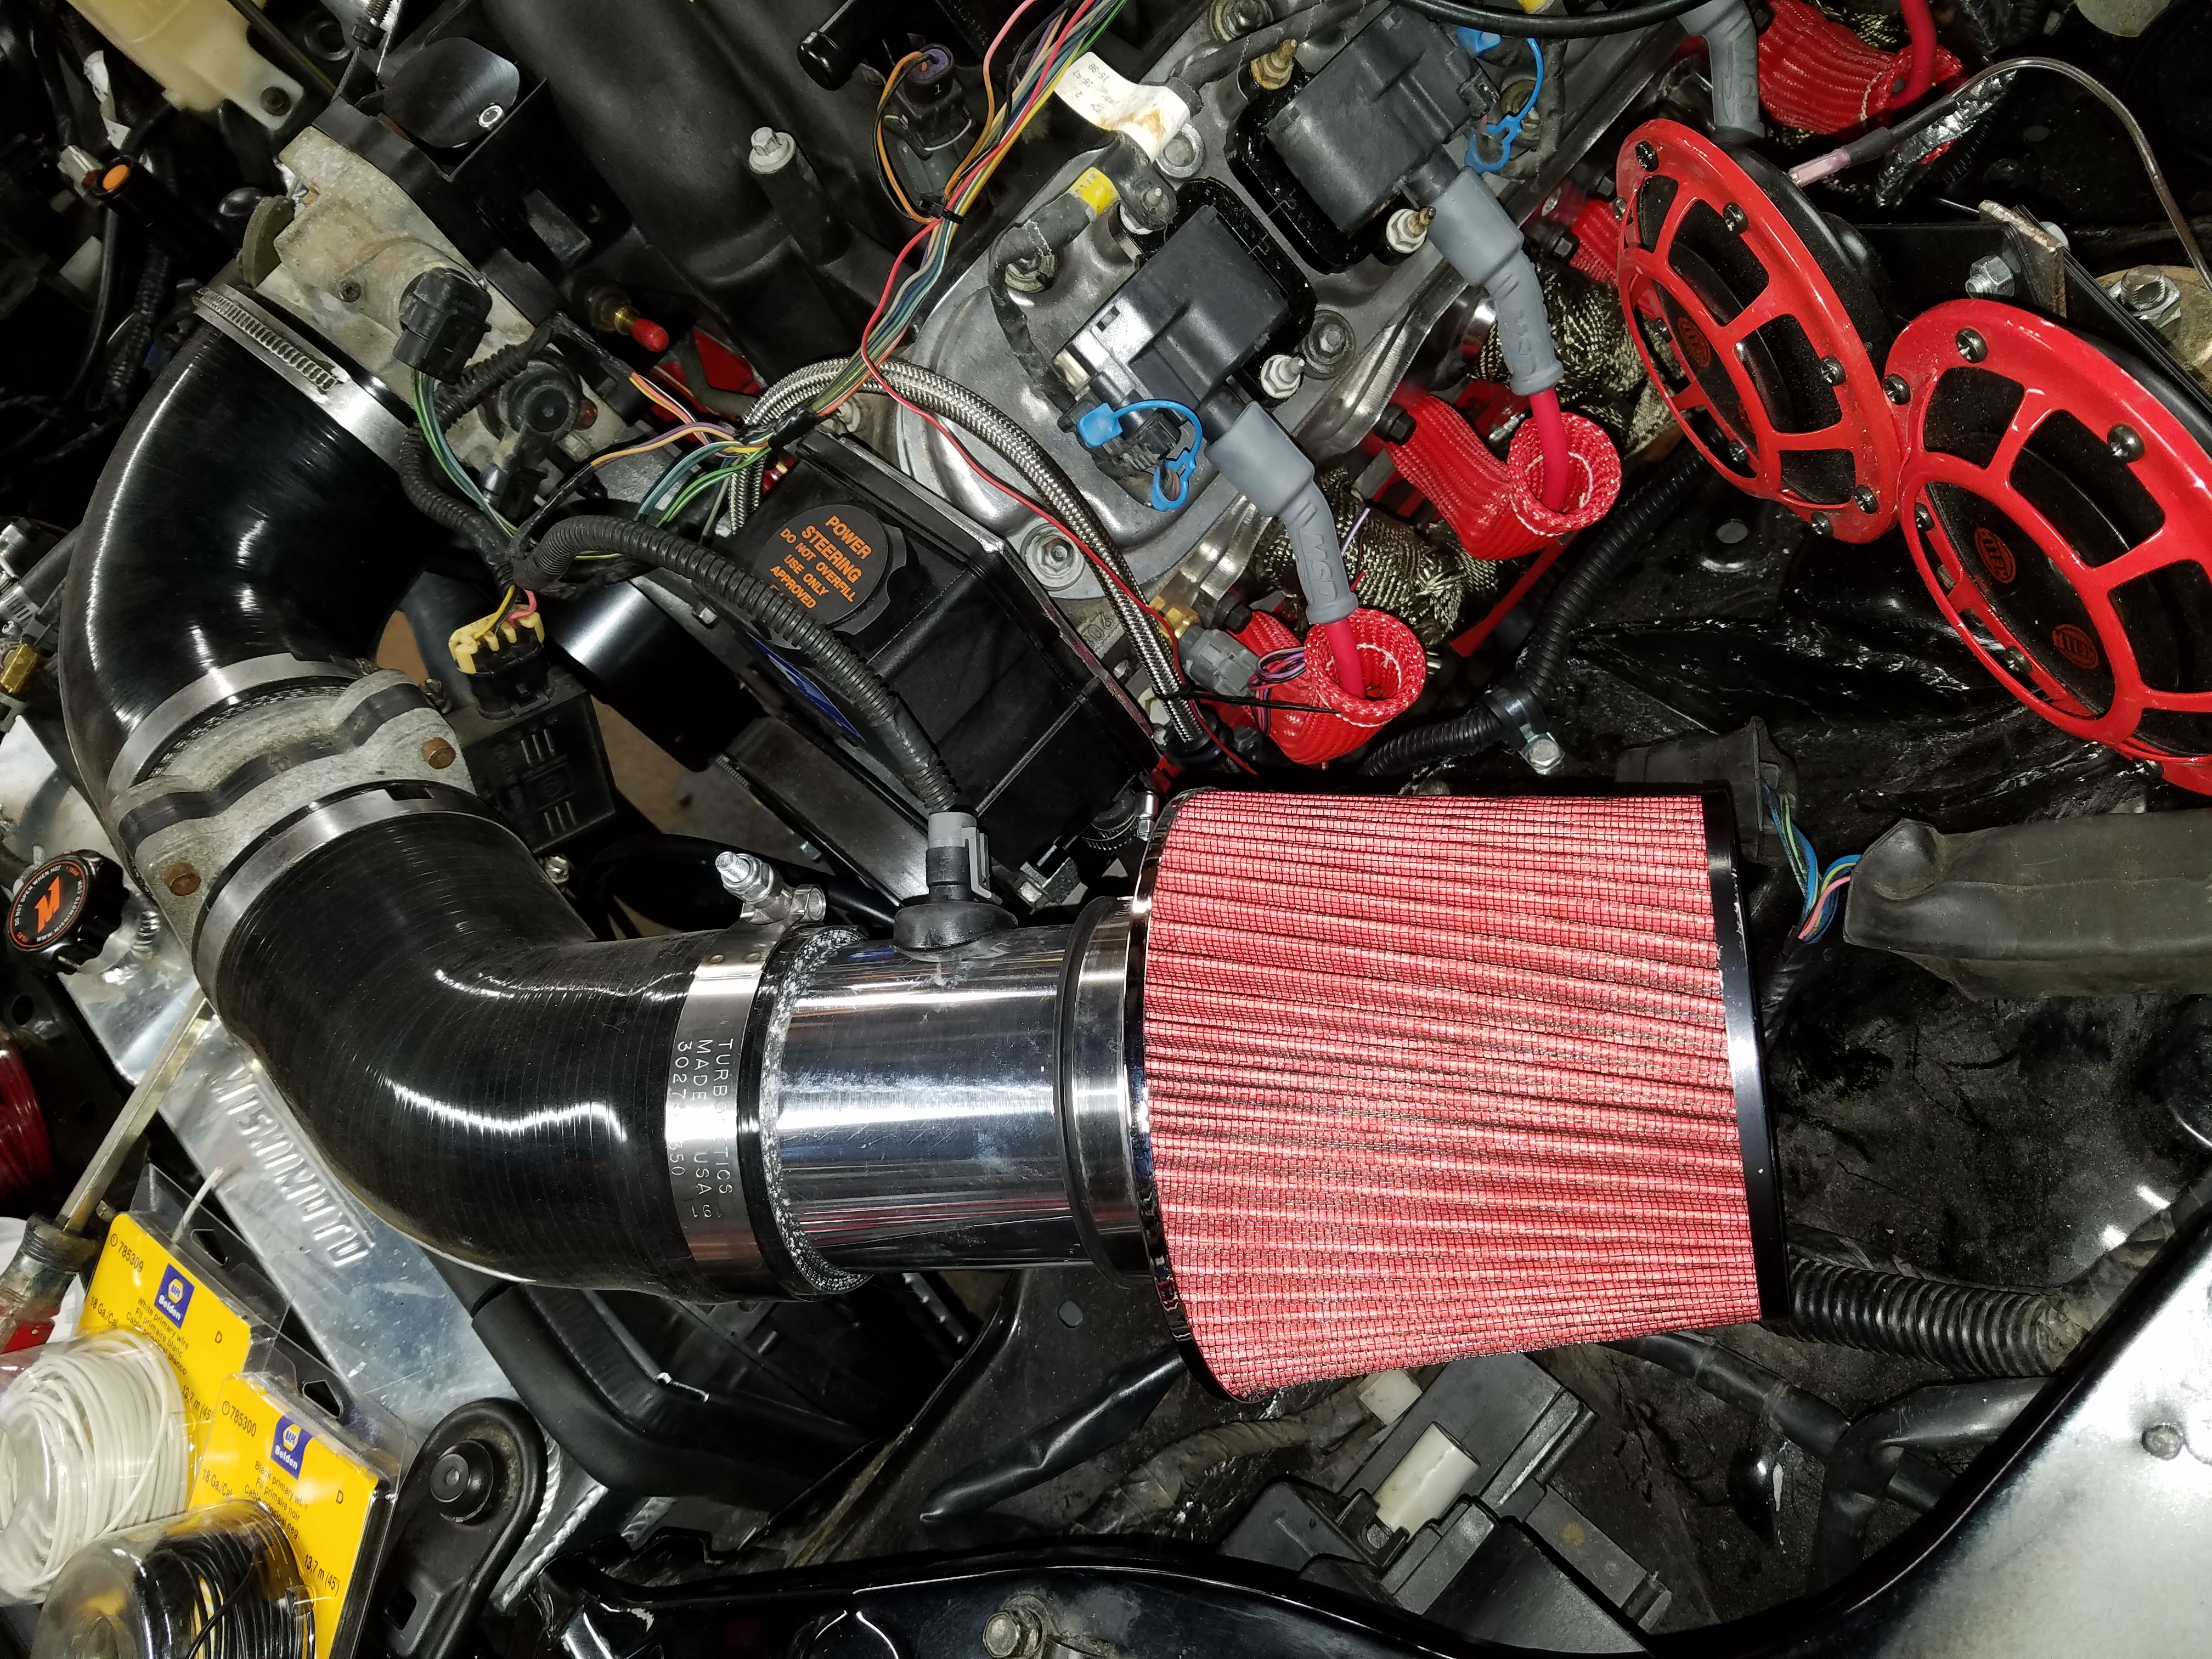
Installed grommet
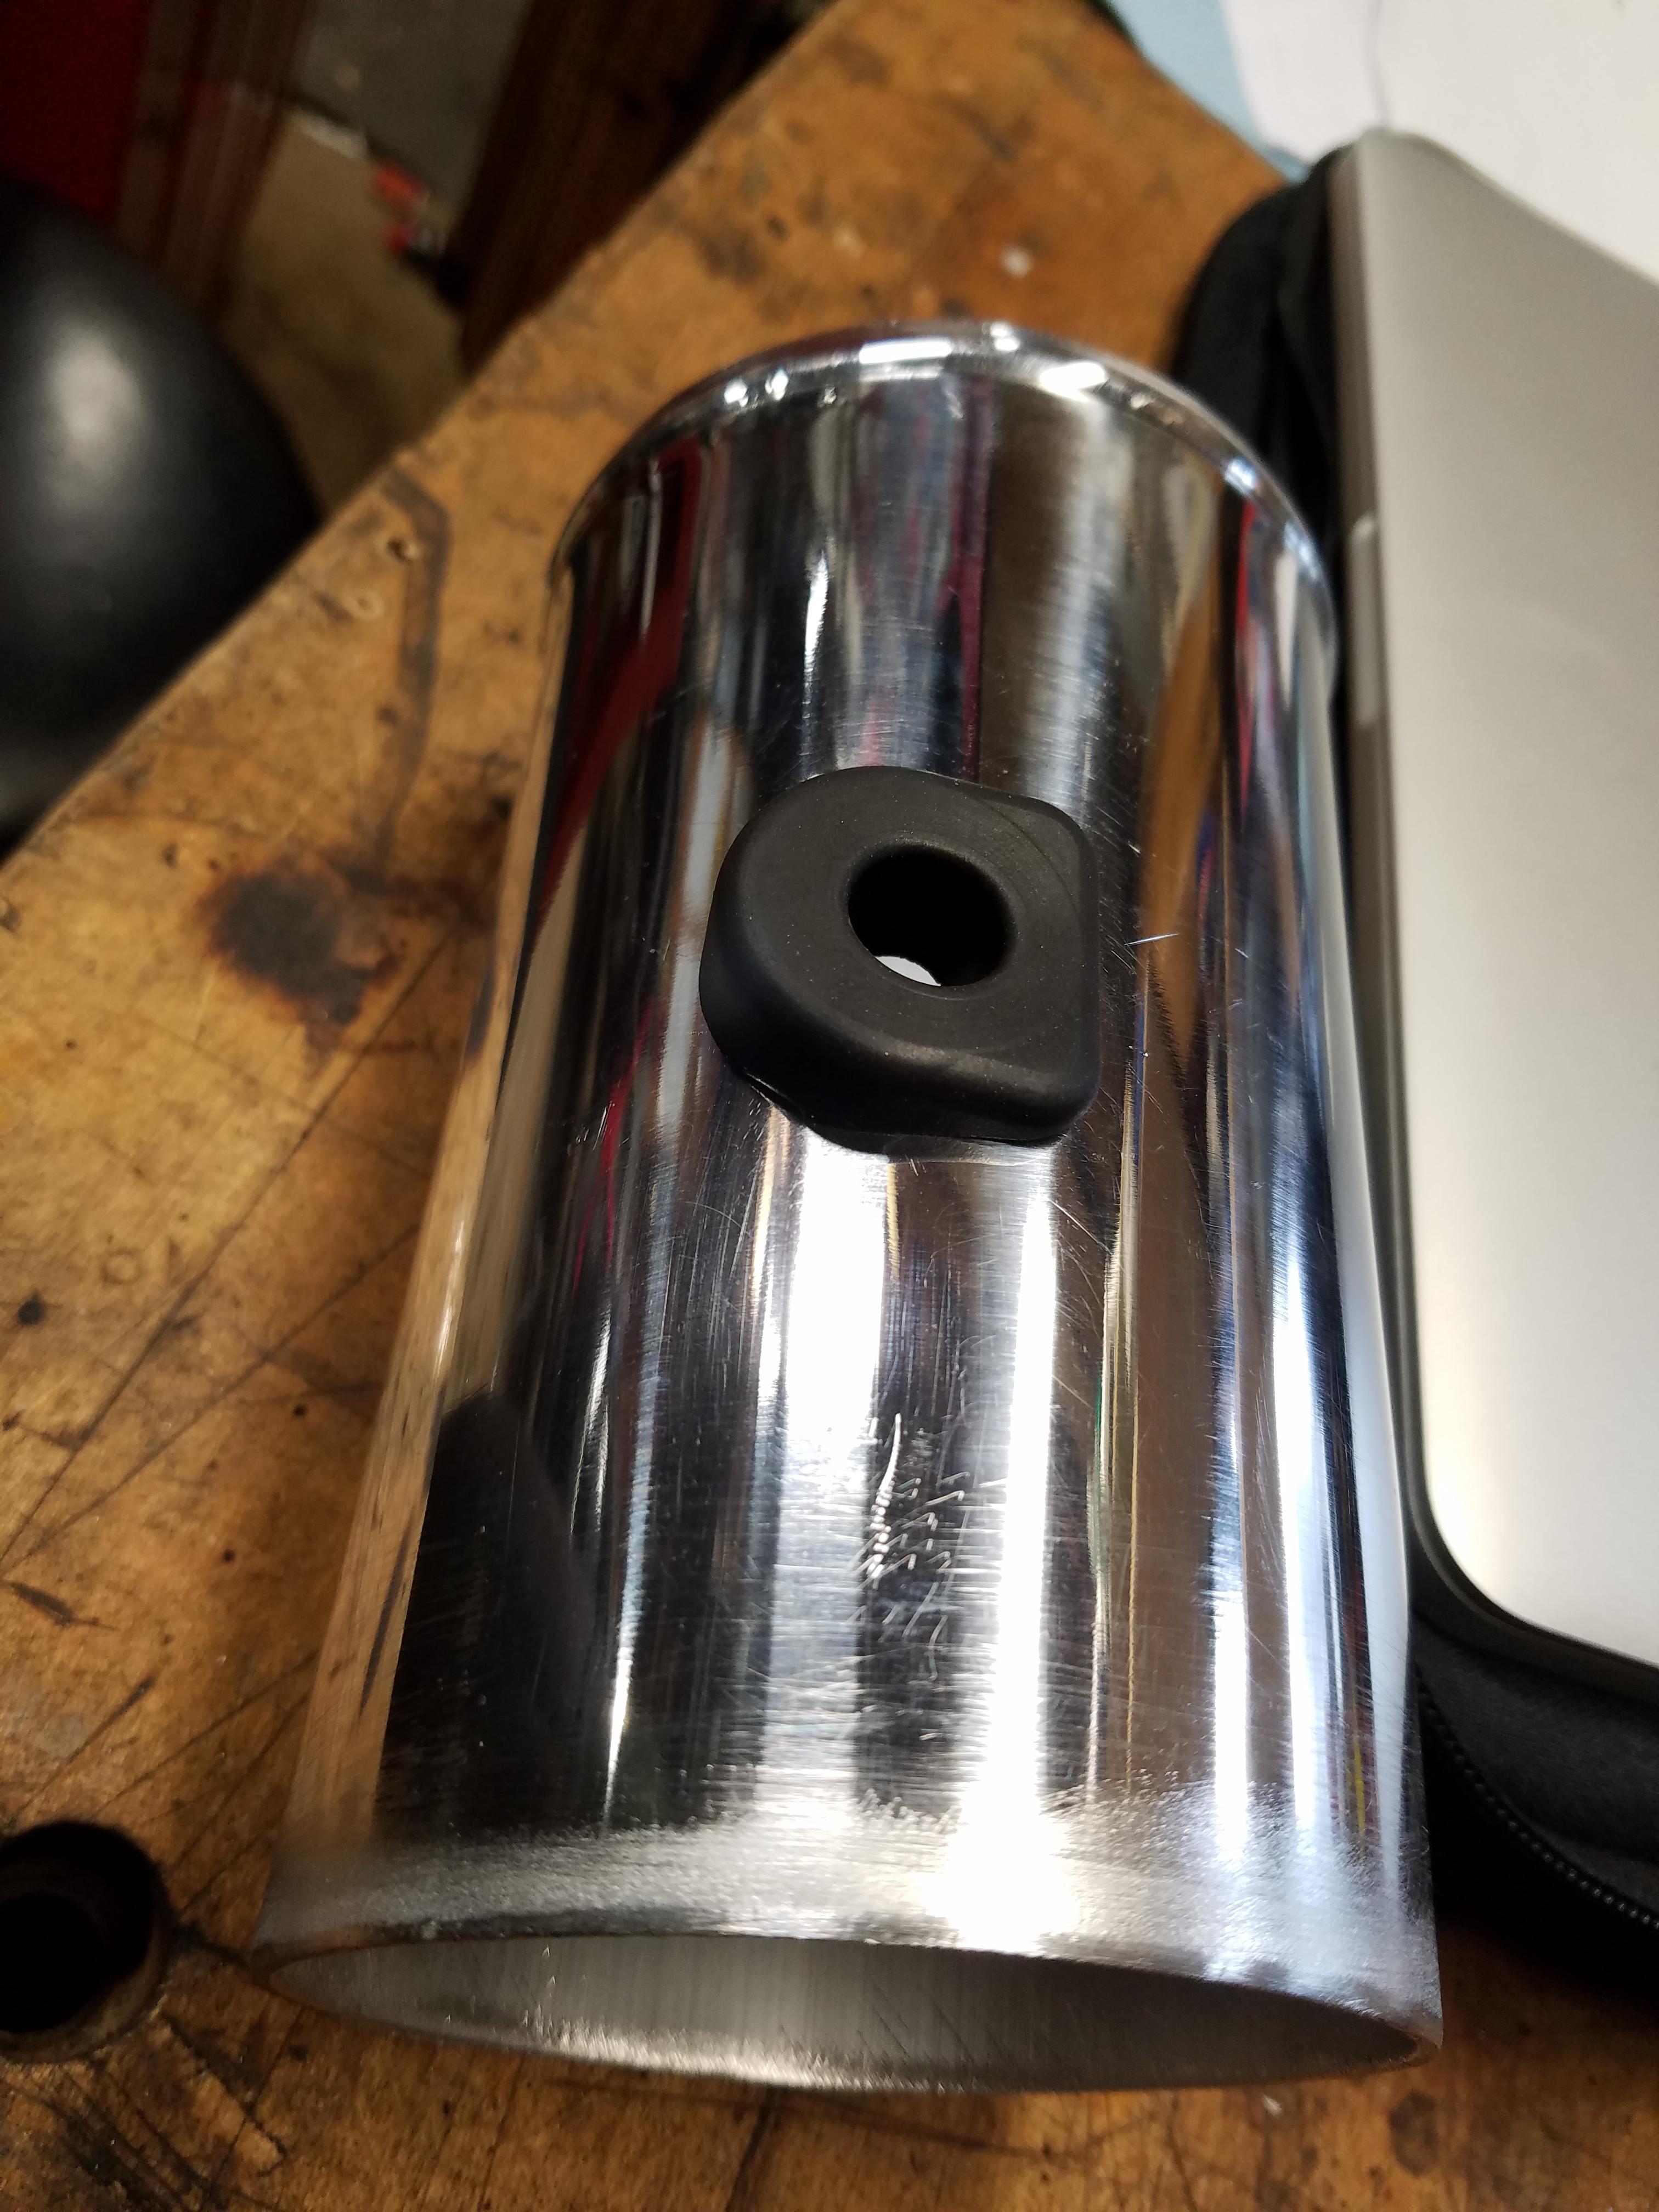
Installed the IAT. Needed to use the heat gun a bit on the grommet to loosen it up and slide the IAT in
Final install
Here was my order:
1 x Silicone Reducer, 90� bend - 4.0" to 3.5" - Black (BRE000958) = $19.99
1 x 3.5" Silicone 45� Elbow, Black (SIL000408) = $19.99
1 x 1' Straight Aluminum Pipe, 3.5" (SIL000279) = $14.99
1 x Dual-Cone Air Filter - black, 3.5" inlet (AIR002008) = $14.99
You may want to measure the O.D. of your throttle body or MAF sensor plate for the right match. The 4” end of the 90� bend is not a perfectly snug fit on the throttle body, but with a hose clamp on it I think it will hold fine.
Unfortunately the 90� bend was not a perfect 90� either, more like 80�. When I brought this to their attention, they refunded the cost of the $20 piece from my order. Made the total price of this kit pretty reasonable ($50 + shipping).
Next challenge was to adapter the IAT (air intake temp) sensor to the intake. I picked up the correct two wire sensor and grommet from Amazon. Some later LS engines might have a 3 wire sensor or have the IAT integrated into the MAF sensor.
The IAT sensor (ACDelco 213-243) https://www.amazon.com/gp/product/B000C9JQVS
Grommet (Part# 14054892) https://www.amazon.com/gp/product/B00266IC06
The grommet is pretty important to create an airtight seal to the intake tubing an also space the part of the sensor so that it sits in the air stream at the right height.
Fitted up the silicone bends and MAF sensor to see where it put me:
After some measurements, I only needed about 6” of the 12” section of aluminum pipe to place the air filter in the right spot. Flyin Miata seems to think that putting the air filter near the shock tower works the best. I’ve got my bandsaw setup with a metal cutting blade already, which will help me down the road shortly with my exhaust system. Made some marks and cut it in half.
Cut a hole in the aluminum pipe with my big step drill
A hole of an appropriate size
Installed grommet
Installed the IAT. Needed to use the heat gun a bit on the grommet to loosen it up and slide the IAT in
Final install
02-01-2017, 12:40 PM
#109
V8 Miata Enthusiast
Thread Starter
If you are referring to the washer bottle wiring, I left it loose/incomplete until the hood can go on. I have a feeling there might be some clearance issues with the hood. If not, then a final trim to the right length and a crimp connection will seal the deal. I will then secure the wires. Thanks
02-07-2017, 09:45 PM
#110
V8 Miata Enthusiast
Thread Starter
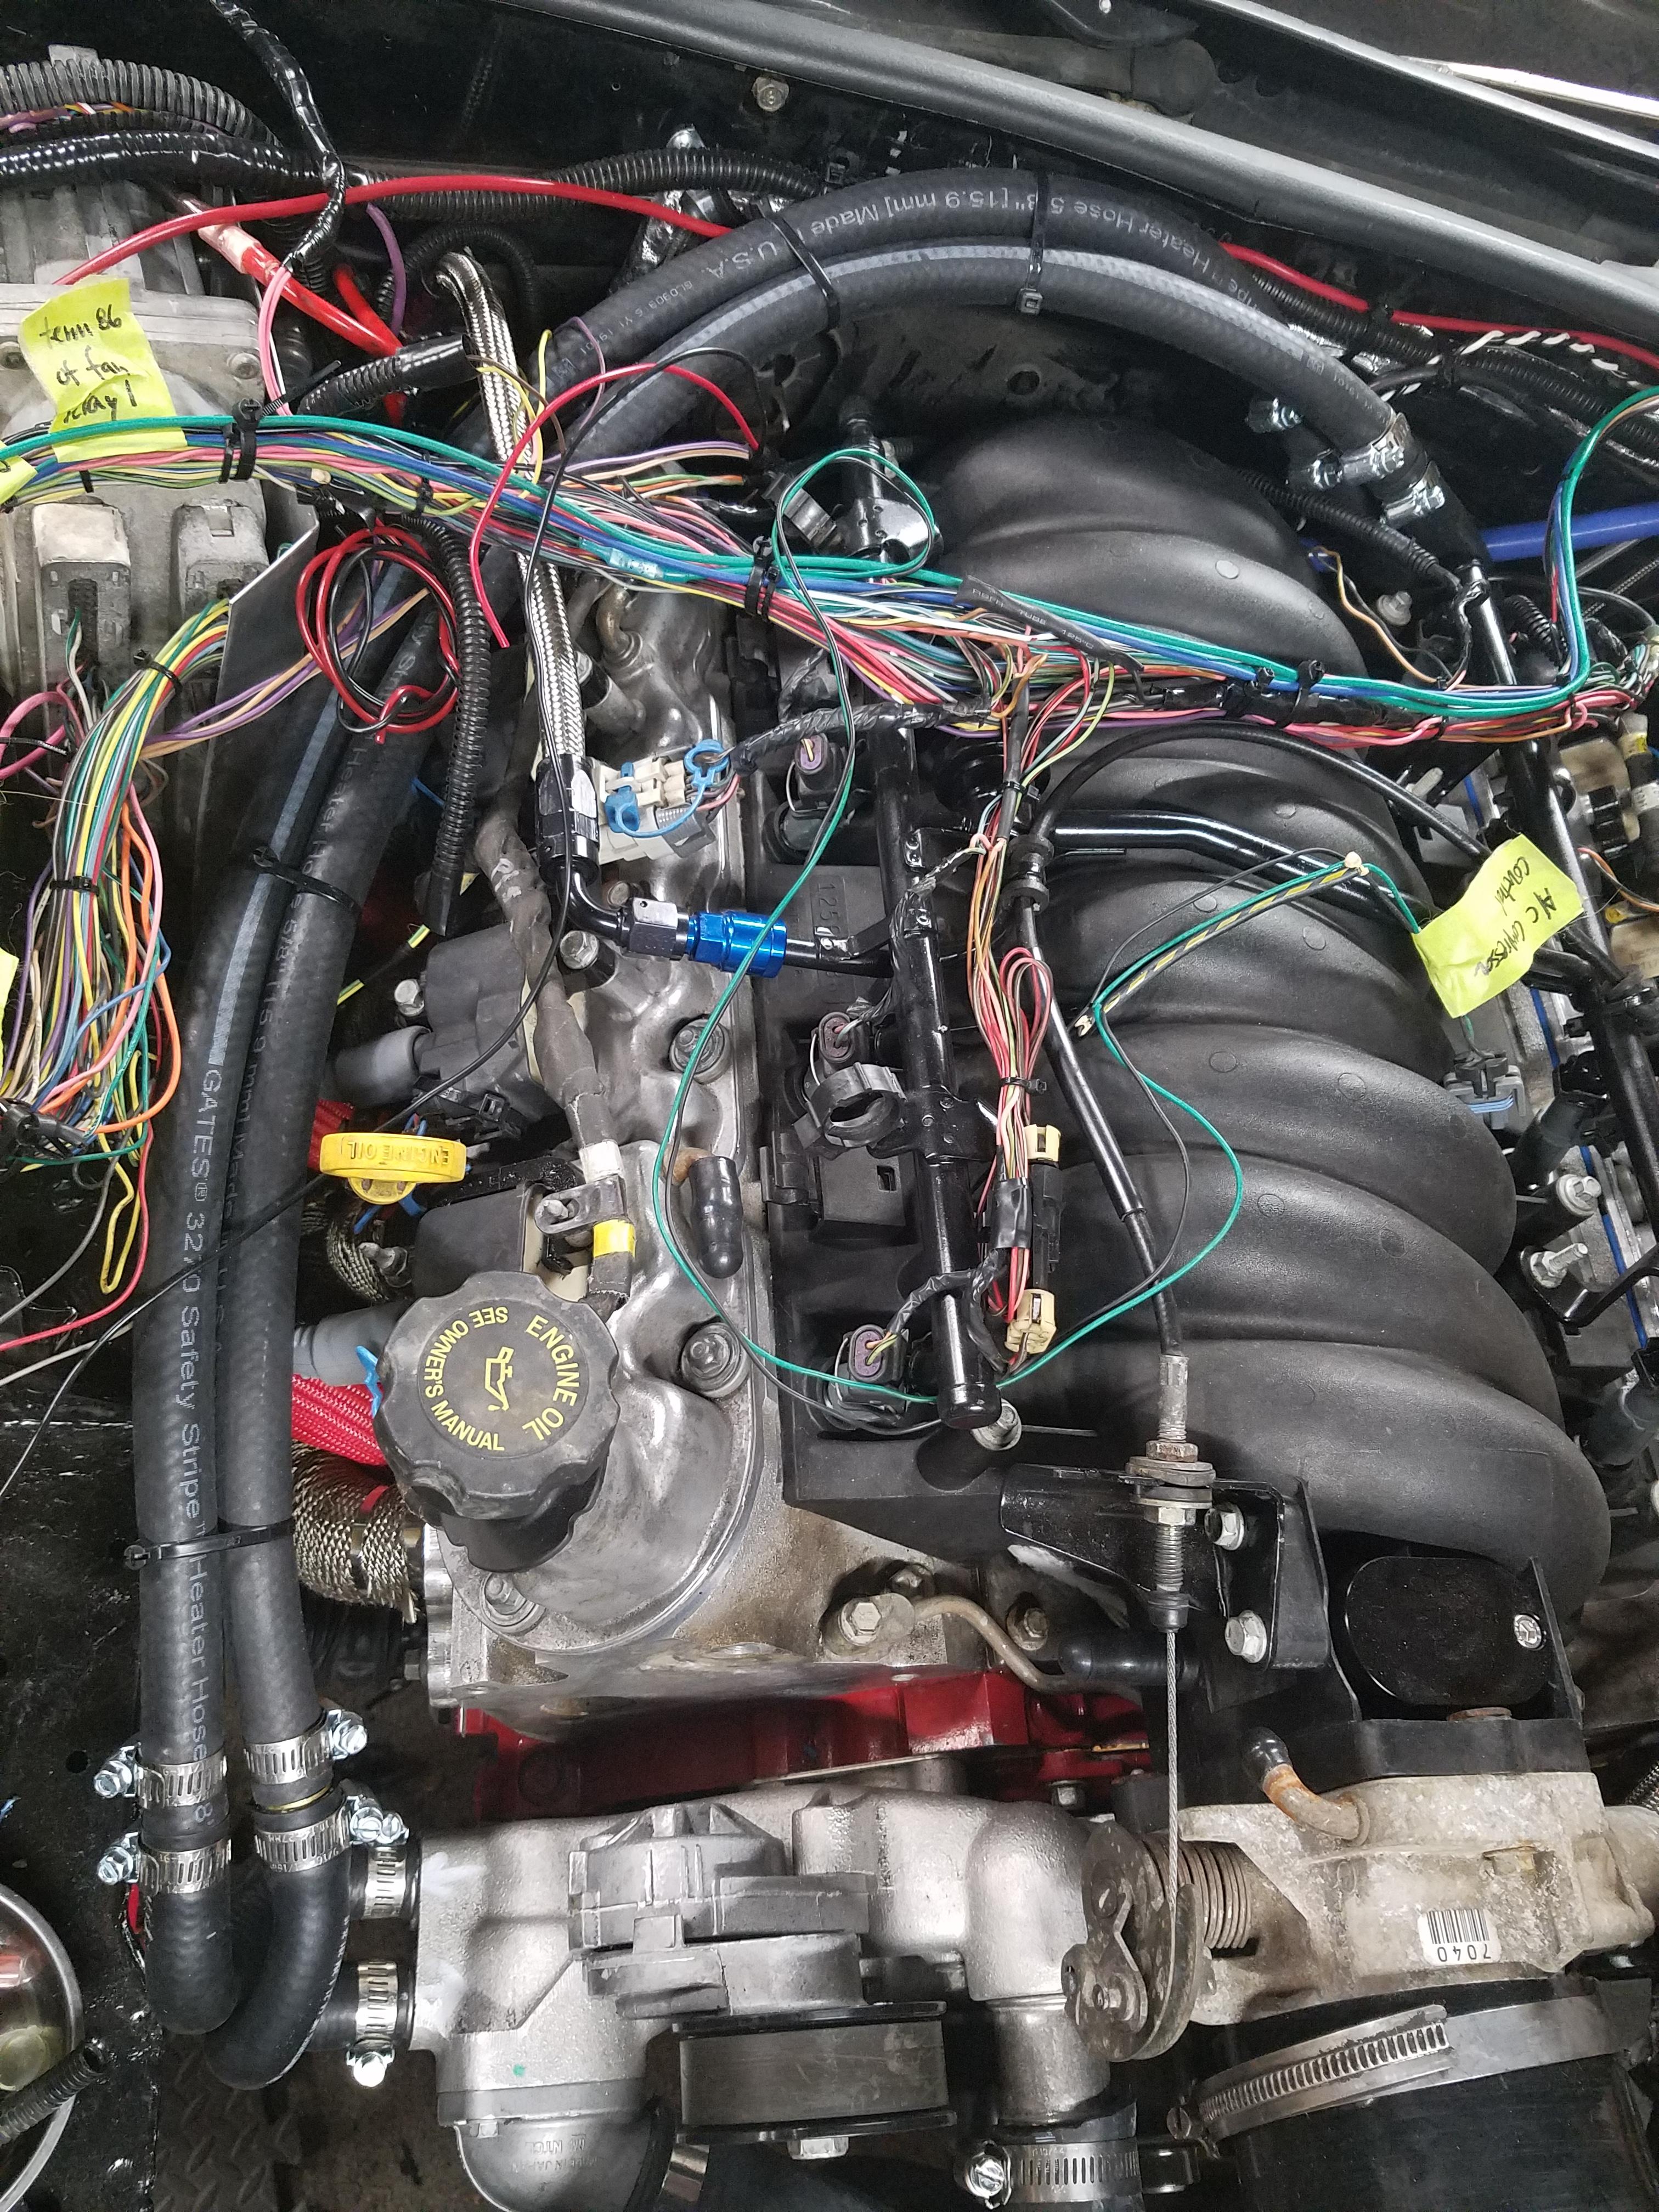
Still making progress on the build. Alot of the wiring is done, so I'll write up a post that goes over in pretty good detail my thoughts on the wiring stuff. I have to make the fuel pump relay connection and the car *should* start. I also want to verify I have oil pressure before I start it as well.
I was able to turn the engine over a few nights ago. At first I had nothing when I turned the key but I ultimately traced the problem to bad connection at the starter solenoid. I used the LS1 connector, but it seems the metal contact inside the connector was slighly bent out of shape, and was not making contact with the single pin on the solenoid. It's a tight fit with the oil pan dipstick there. I have a shorter starter than stock to clear the headers, so I'm wonddering if this tight clearance is normal. If the starter was 1/4" or more longer at the solenoid, I'd need to move the dipstick to get the starter solenoid connection plugged in.
Other than that, I also bypassed the clutch interlock so that I could turn it over w/out sitting in the car - since I don't have seats installed. I verified there were no strange noises from the engine as I cranked it, as I had not been able to do this in the almost year I've had it. No blown fuses or strange smells, etc.
I decided to fill up the engine with various fluids.

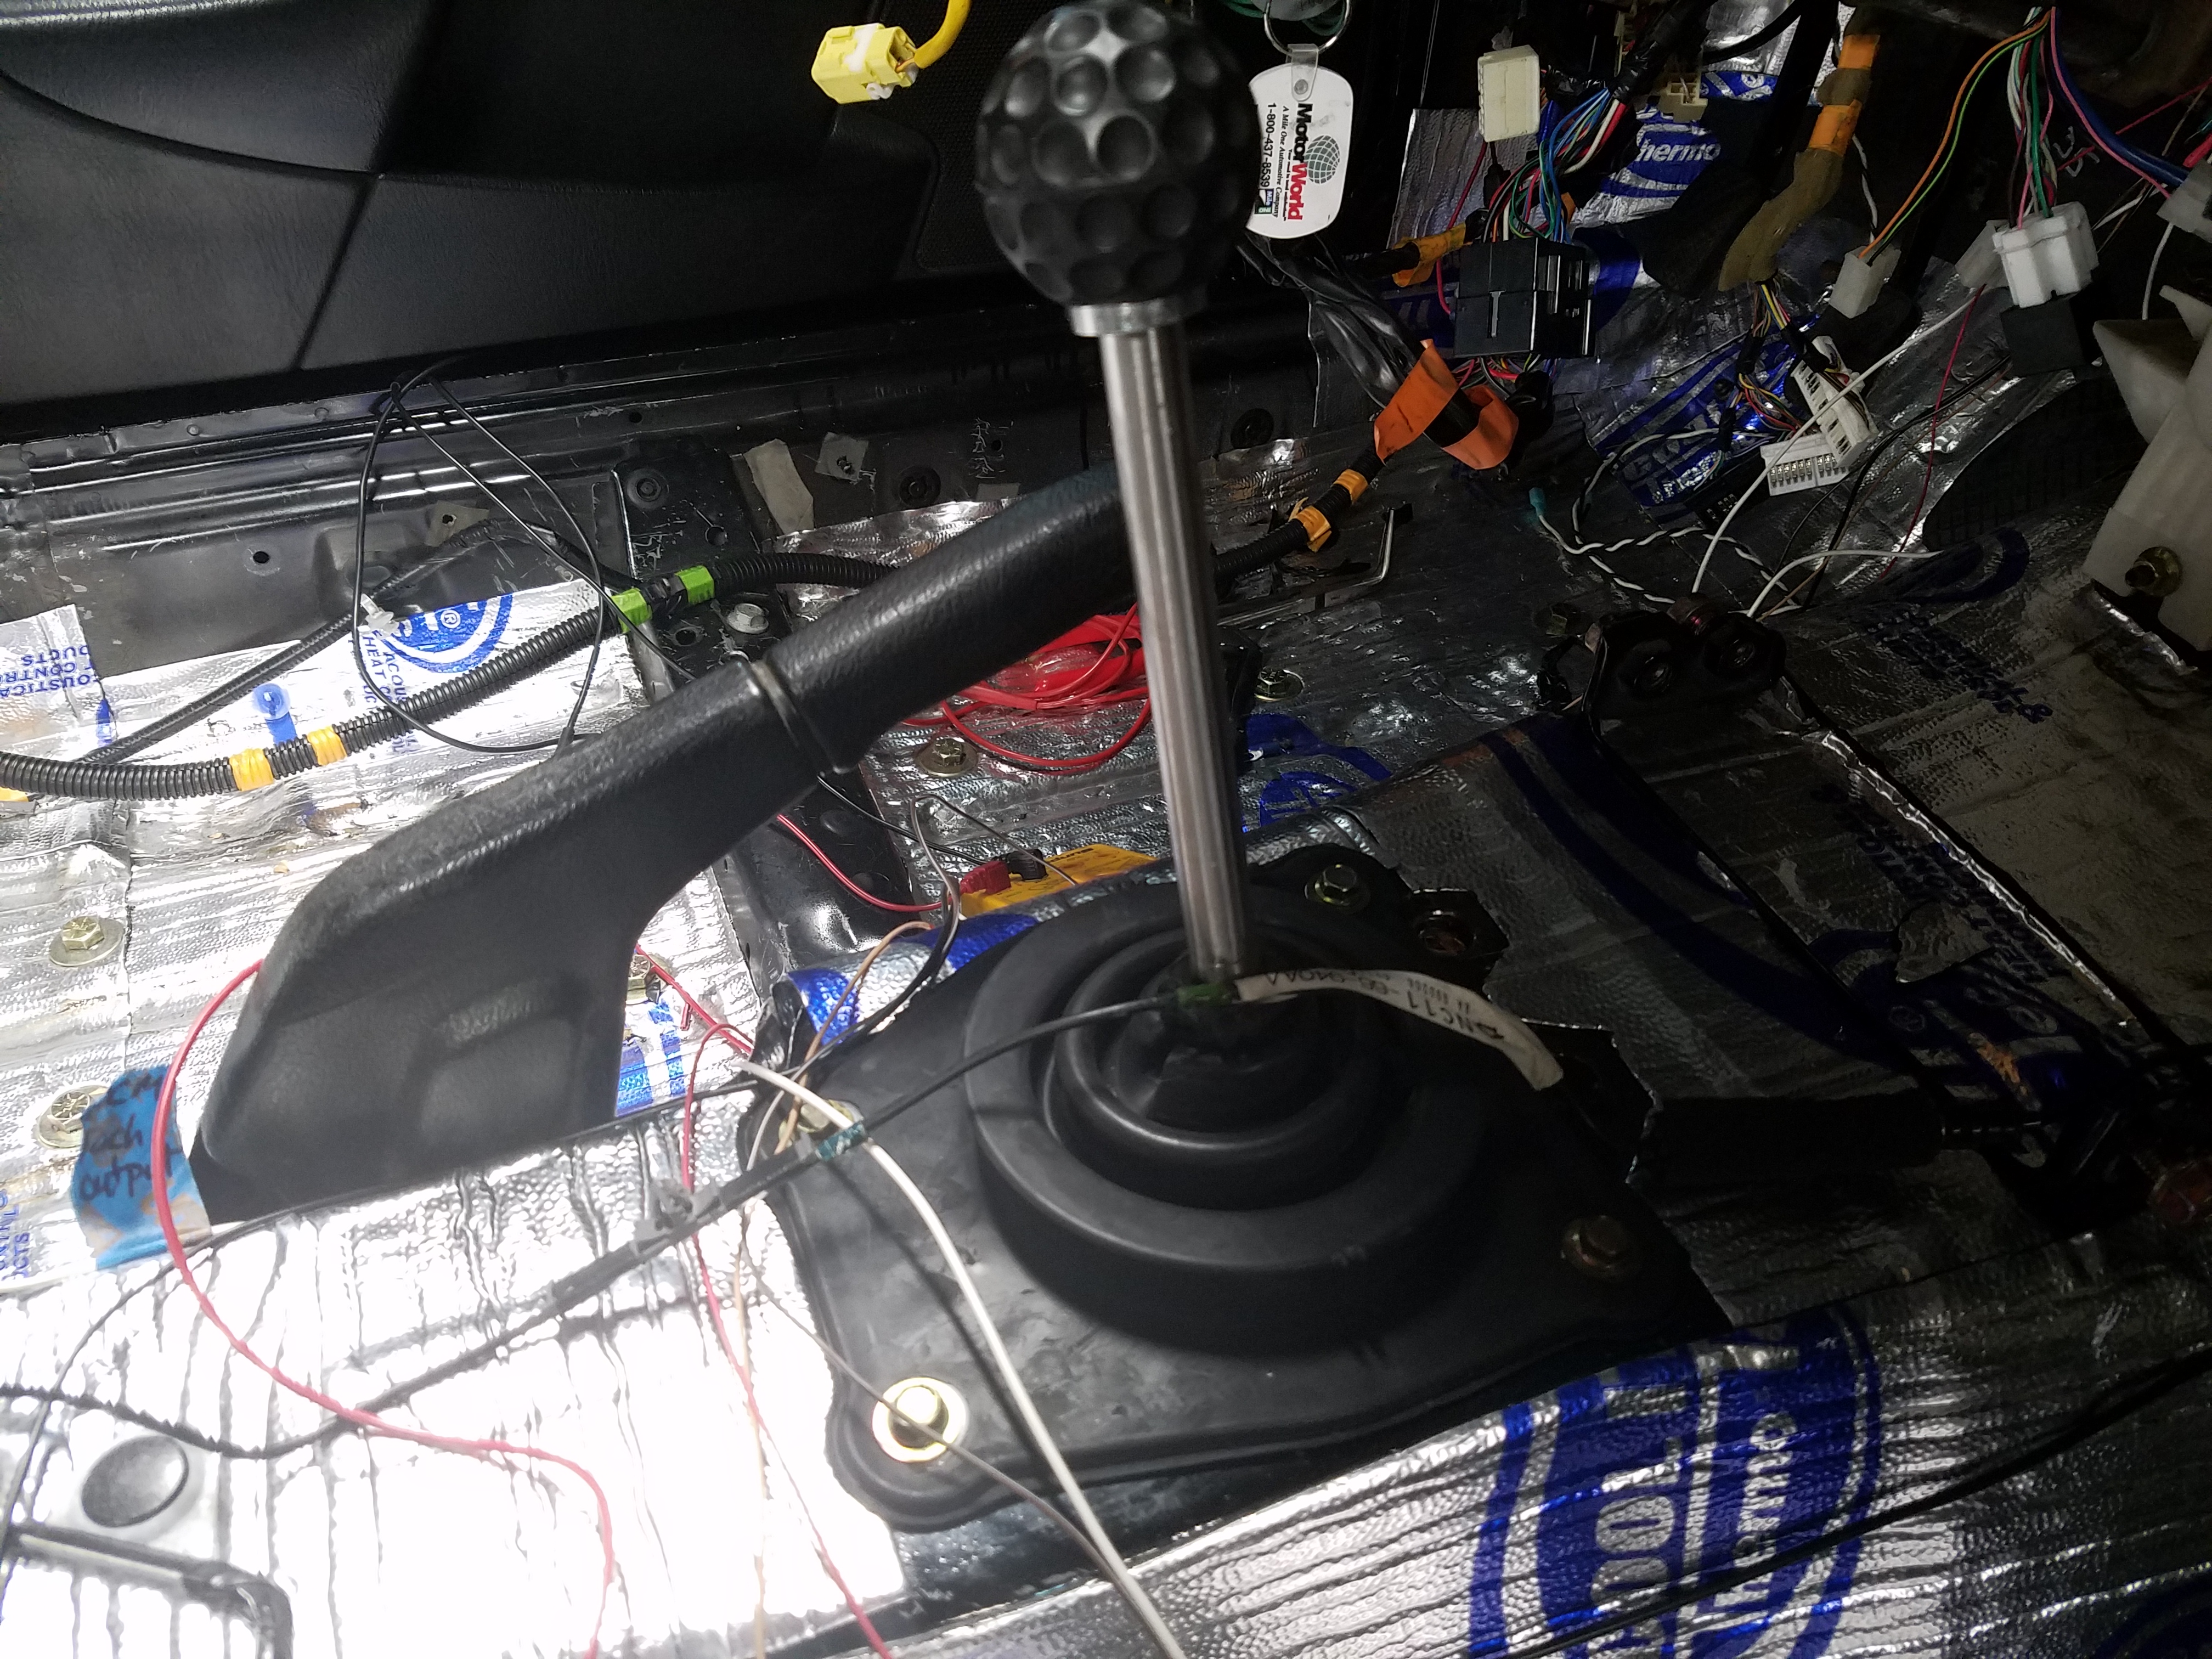
Installed the T56 shifter to keep the gear oil sealed in there. New shifter boot since I tore the old one during the engine removal WAYYYY back in September.
I was able to turn the engine over a few nights ago. At first I had nothing when I turned the key but I ultimately traced the problem to bad connection at the starter solenoid. I used the LS1 connector, but it seems the metal contact inside the connector was slighly bent out of shape, and was not making contact with the single pin on the solenoid. It's a tight fit with the oil pan dipstick there. I have a shorter starter than stock to clear the headers, so I'm wonddering if this tight clearance is normal. If the starter was 1/4" or more longer at the solenoid, I'd need to move the dipstick to get the starter solenoid connection plugged in.
Other than that, I also bypassed the clutch interlock so that I could turn it over w/out sitting in the car - since I don't have seats installed. I verified there were no strange noises from the engine as I cranked it, as I had not been able to do this in the almost year I've had it. No blown fuses or strange smells, etc.
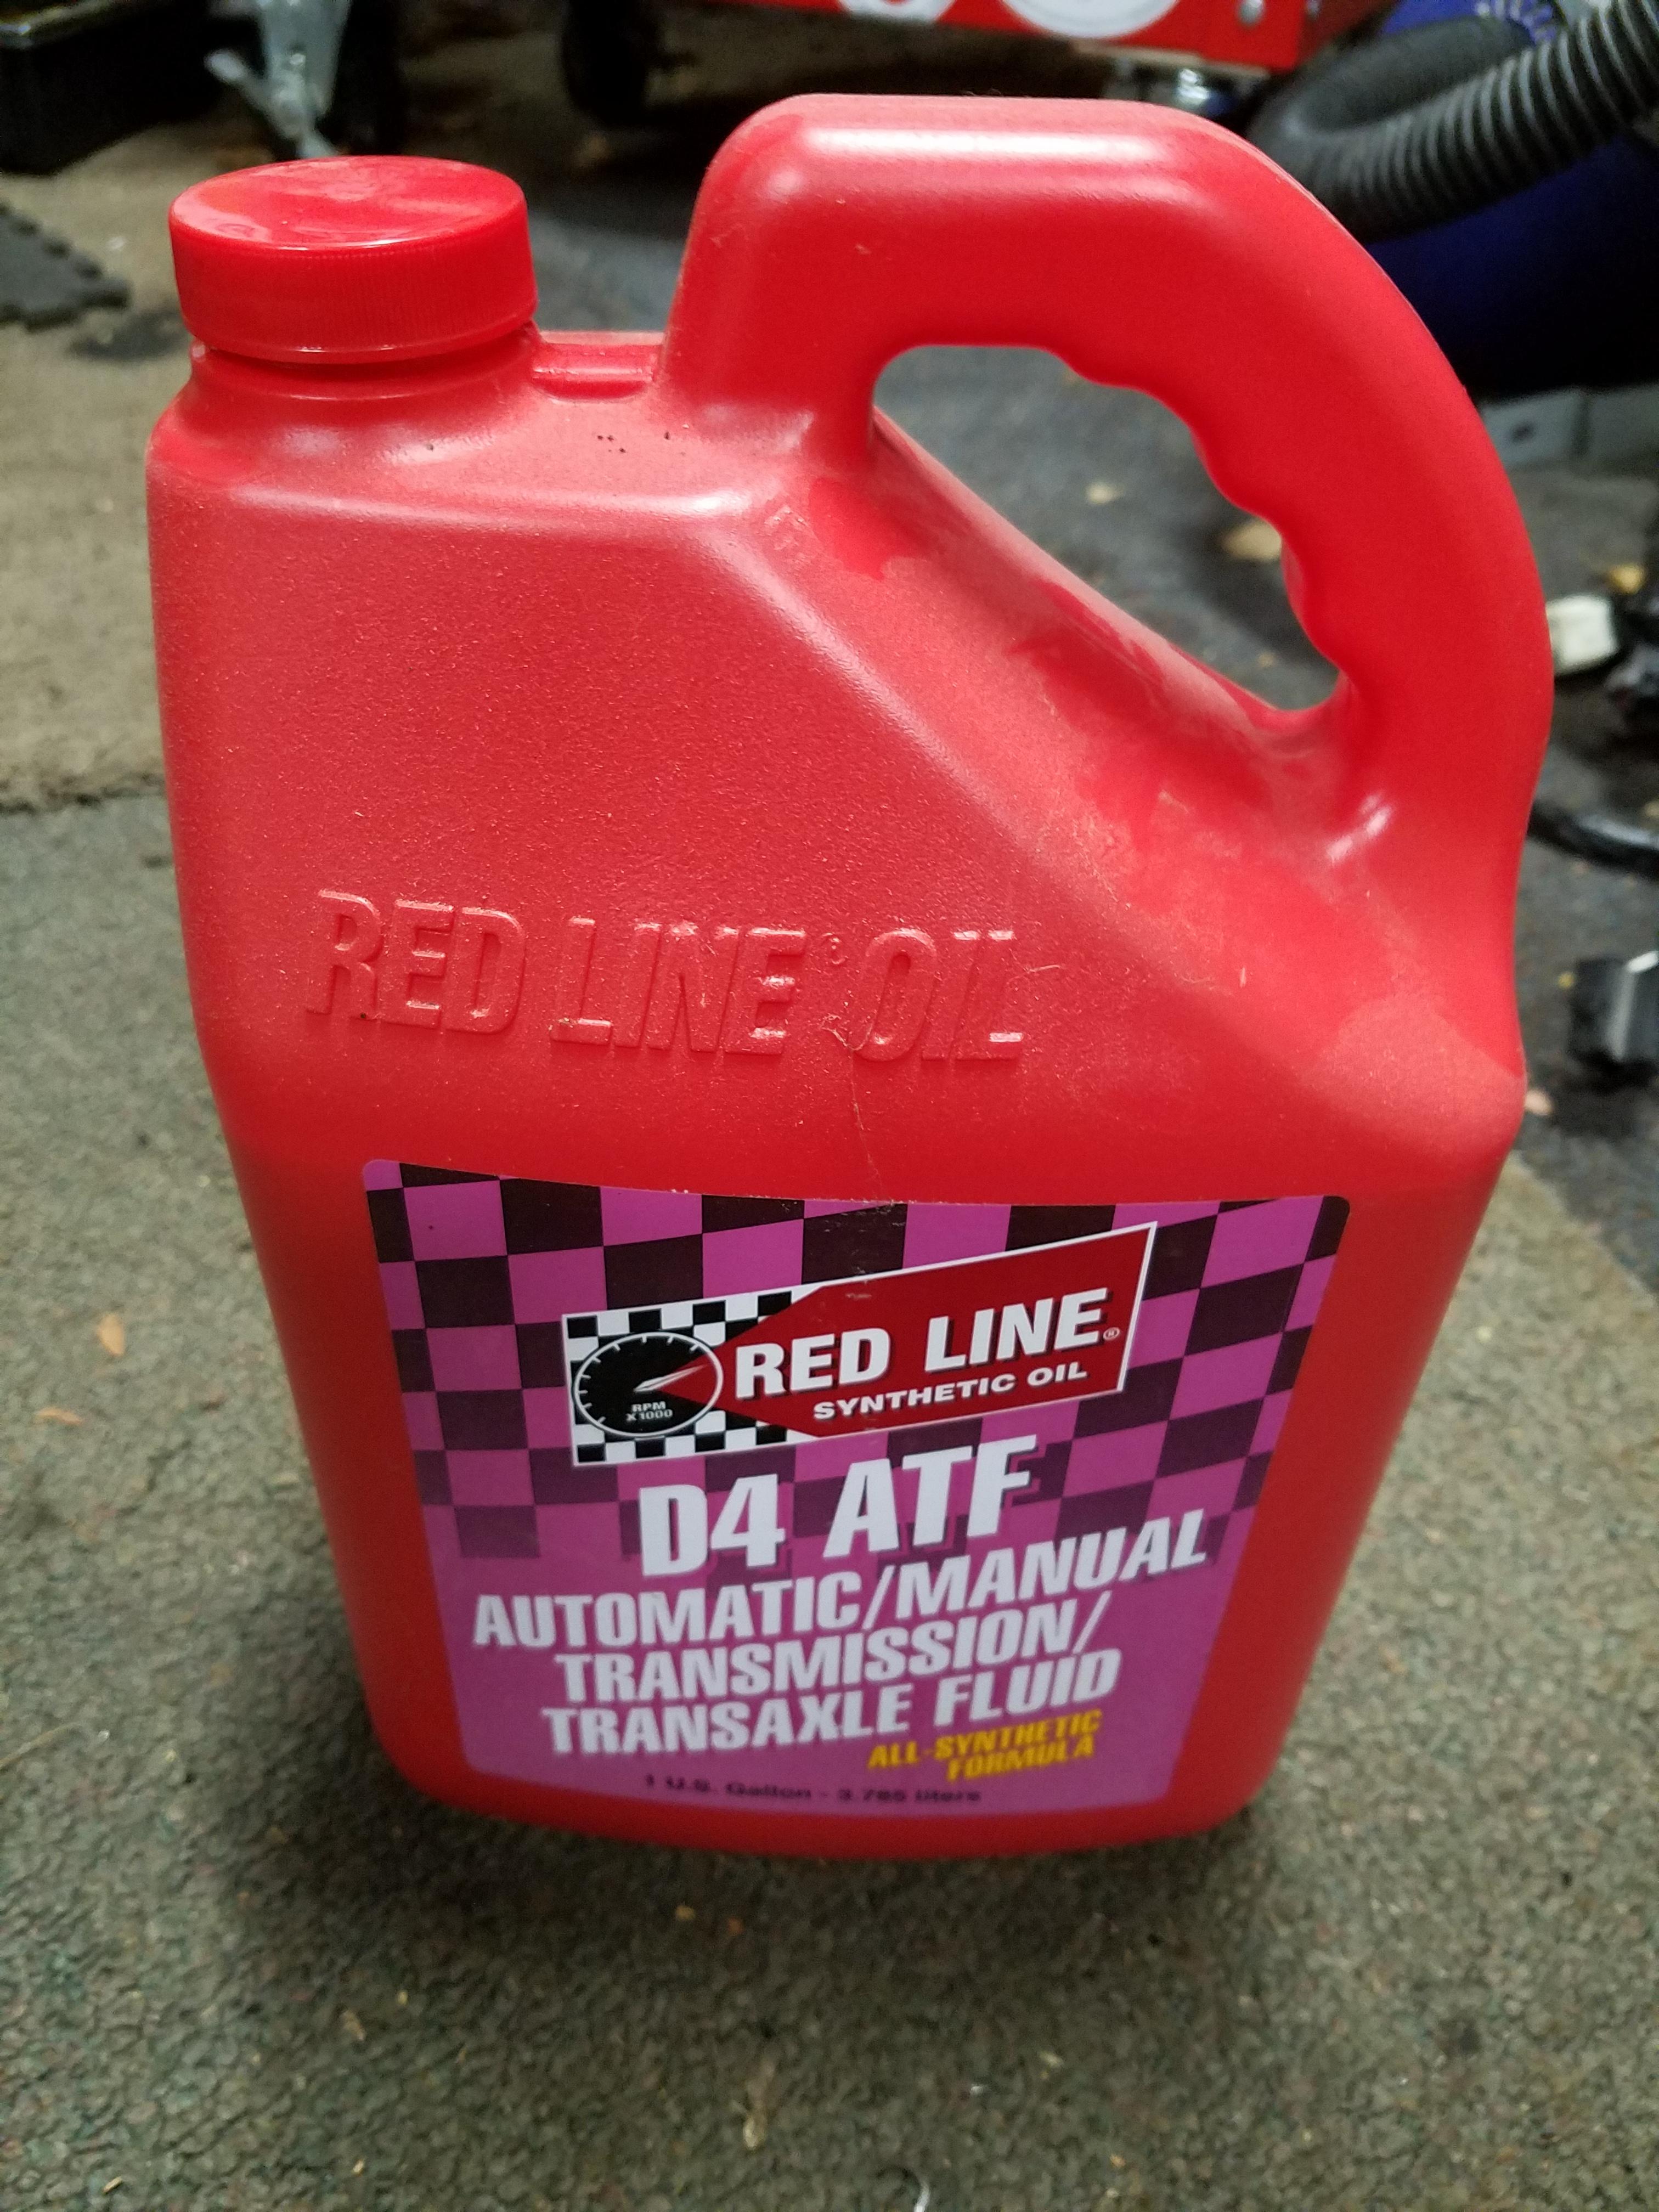
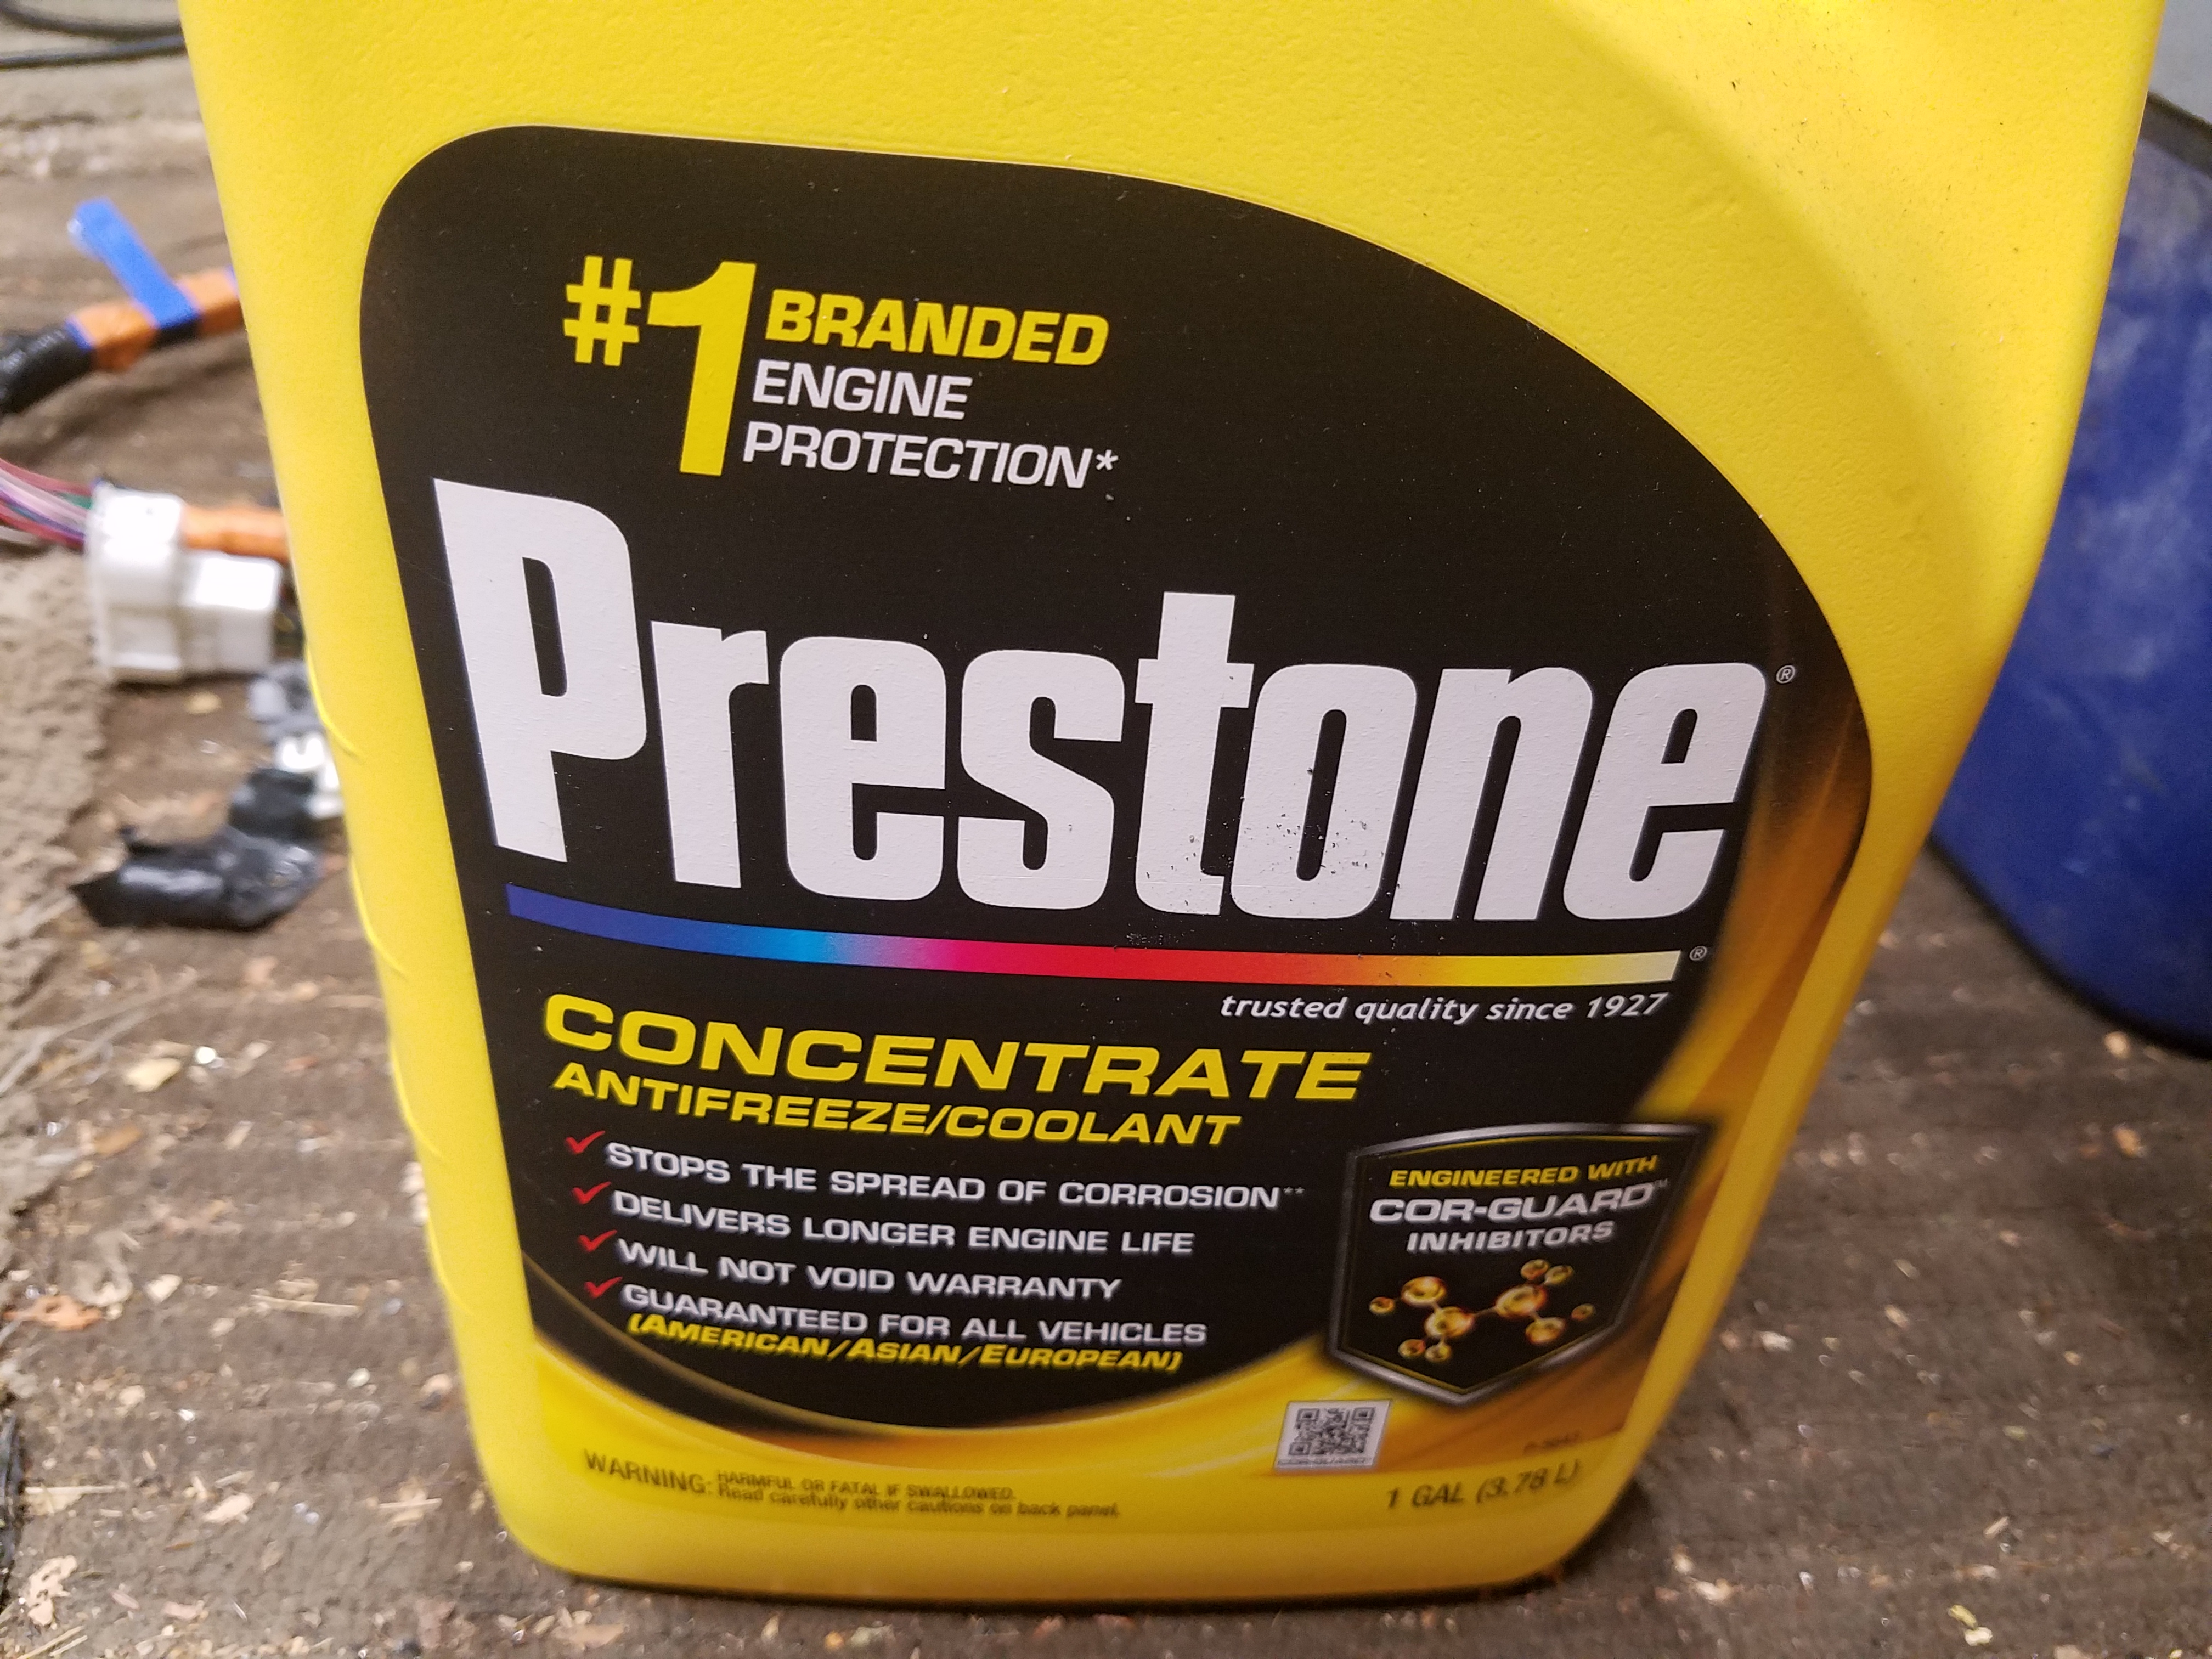
I decided to fill up the engine with various fluids.
- Mobil1 5w-30 for the engine, which I have on hand for other cars.
- Redline D4 ATF for the T56, which I have on hand for my M3 trans, and Subaru gear oil.
- Prestone coolant in a 50/50 distilled water mix for the cooling system.
- Royal Purple 75w-140, plus the required Ford Racing friction modifier for the Ford 8.8 diff
Installed the T56 shifter to keep the gear oil sealed in there. New shifter boot since I tore the old one during the engine removal WAYYYY back in September.
02-07-2017, 10:23 PM
#111
V8 Miata Enthusiast
Thread Starter
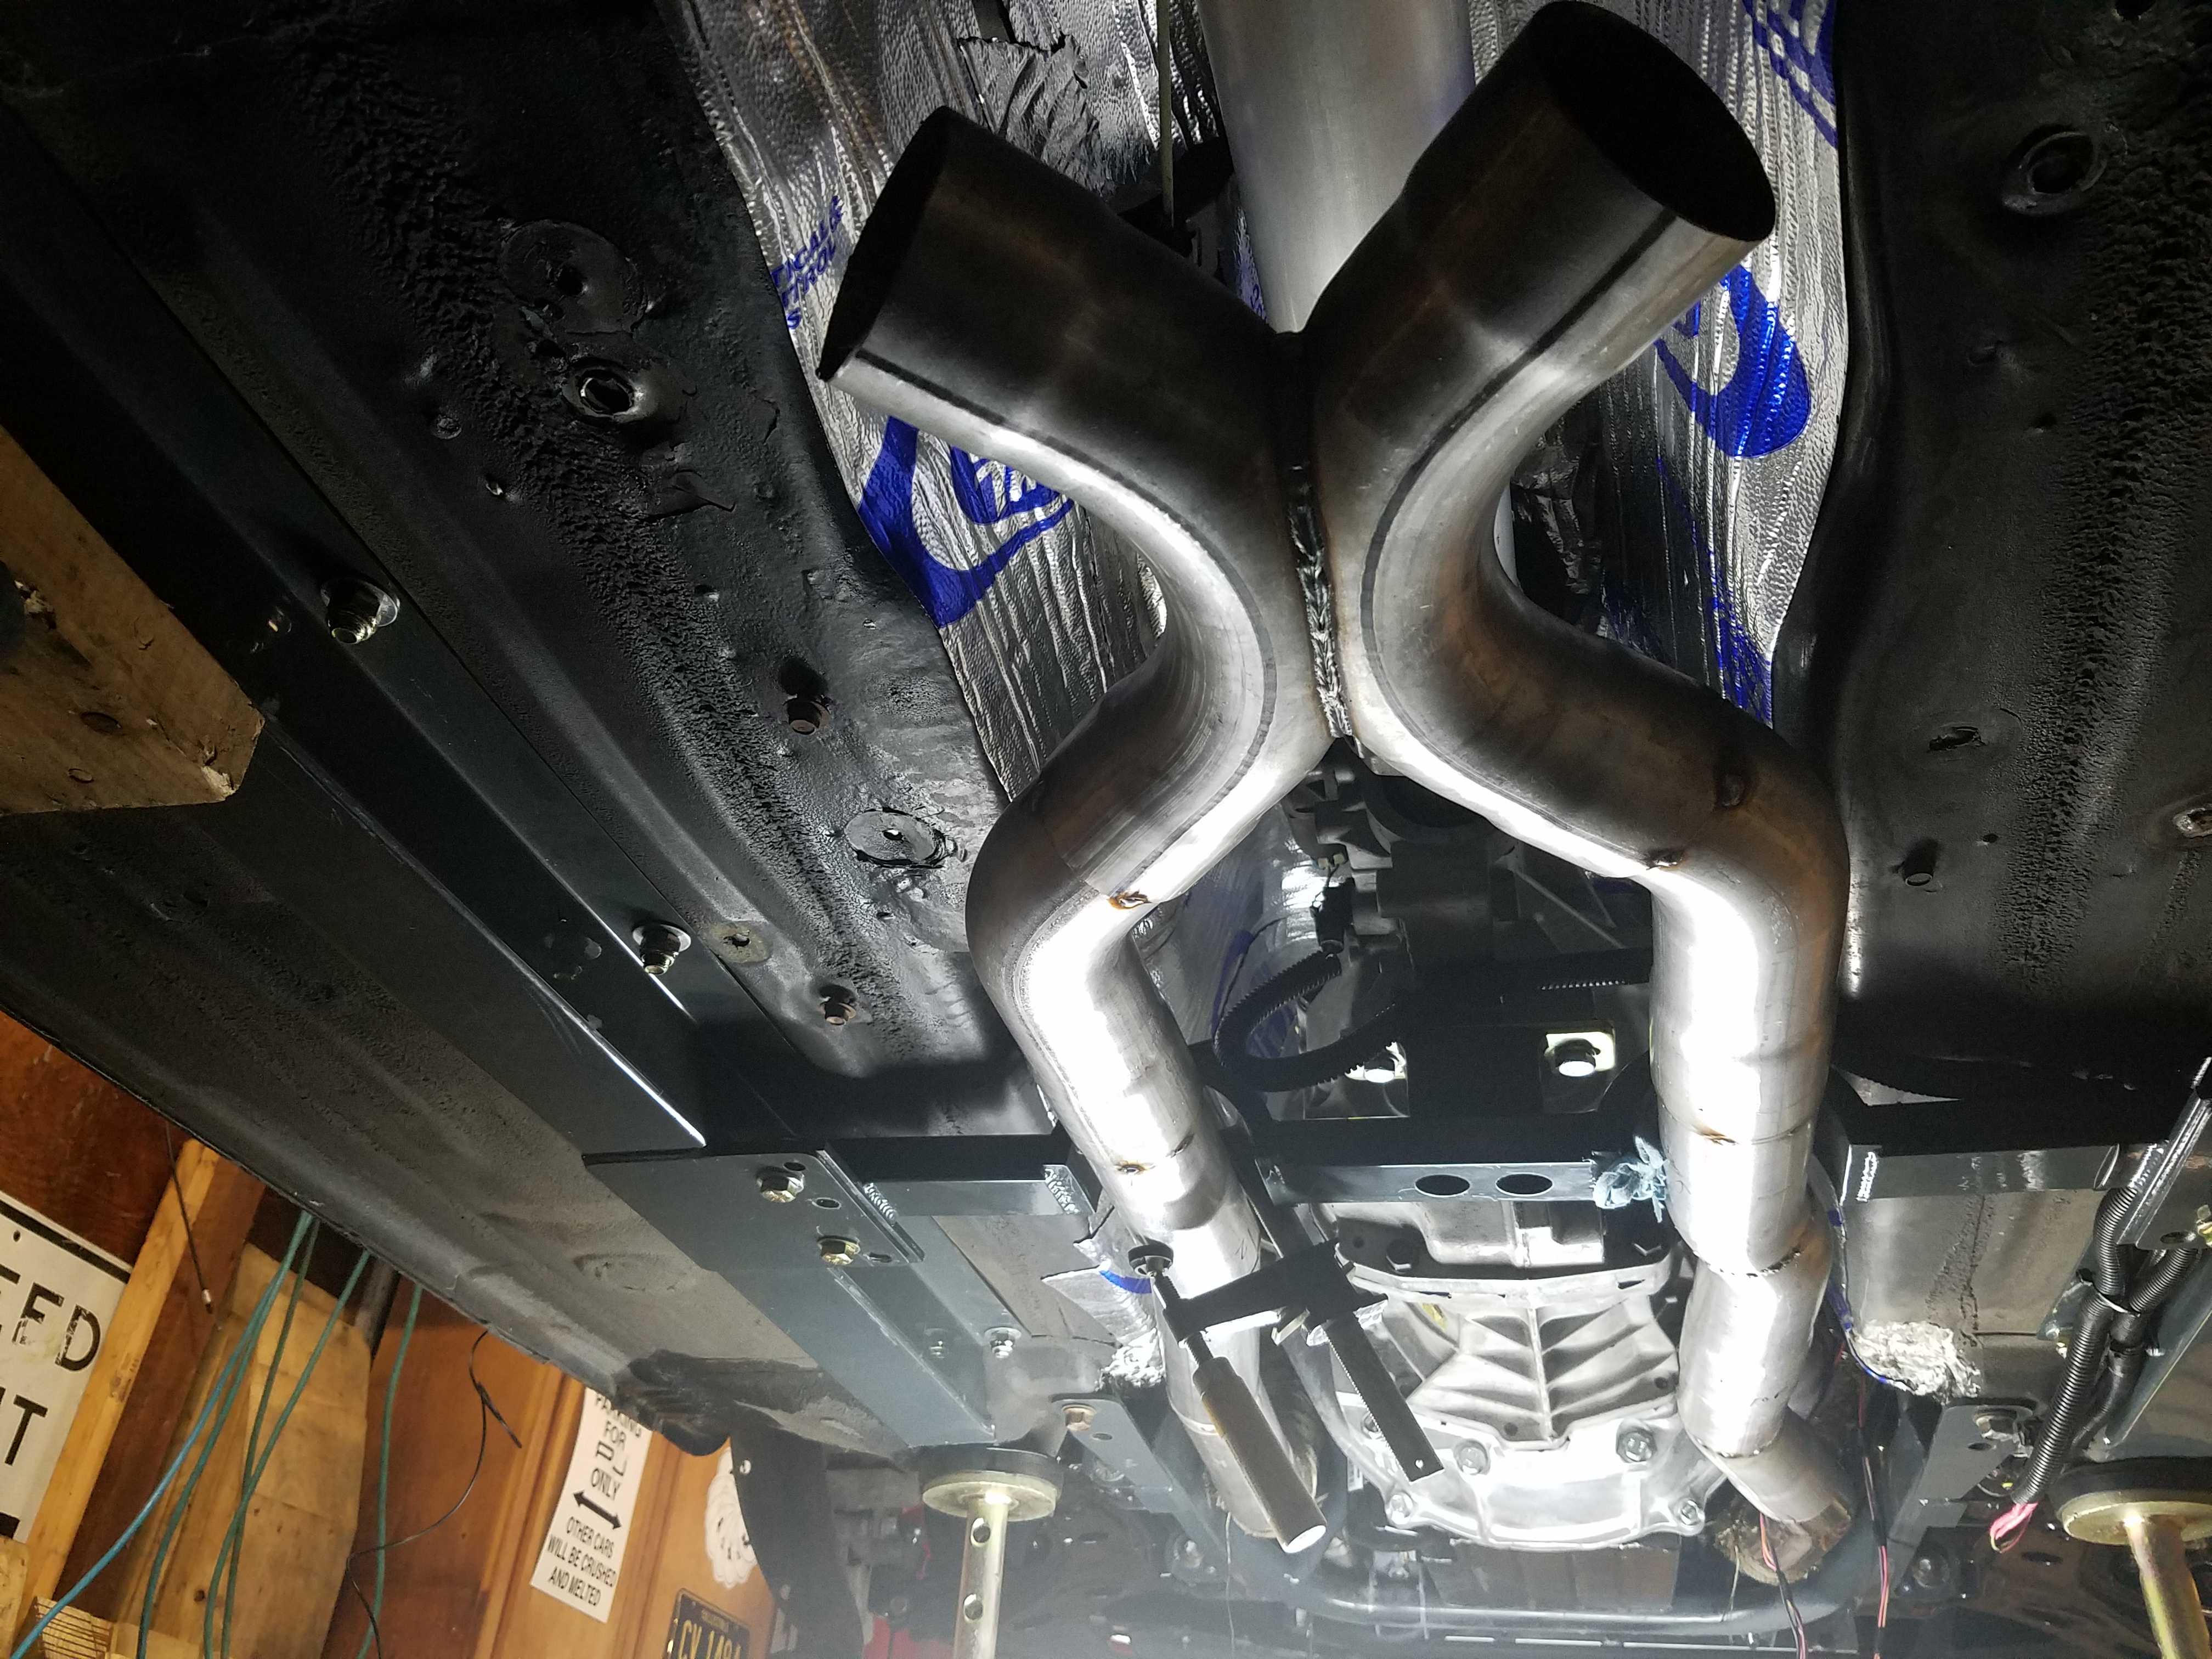
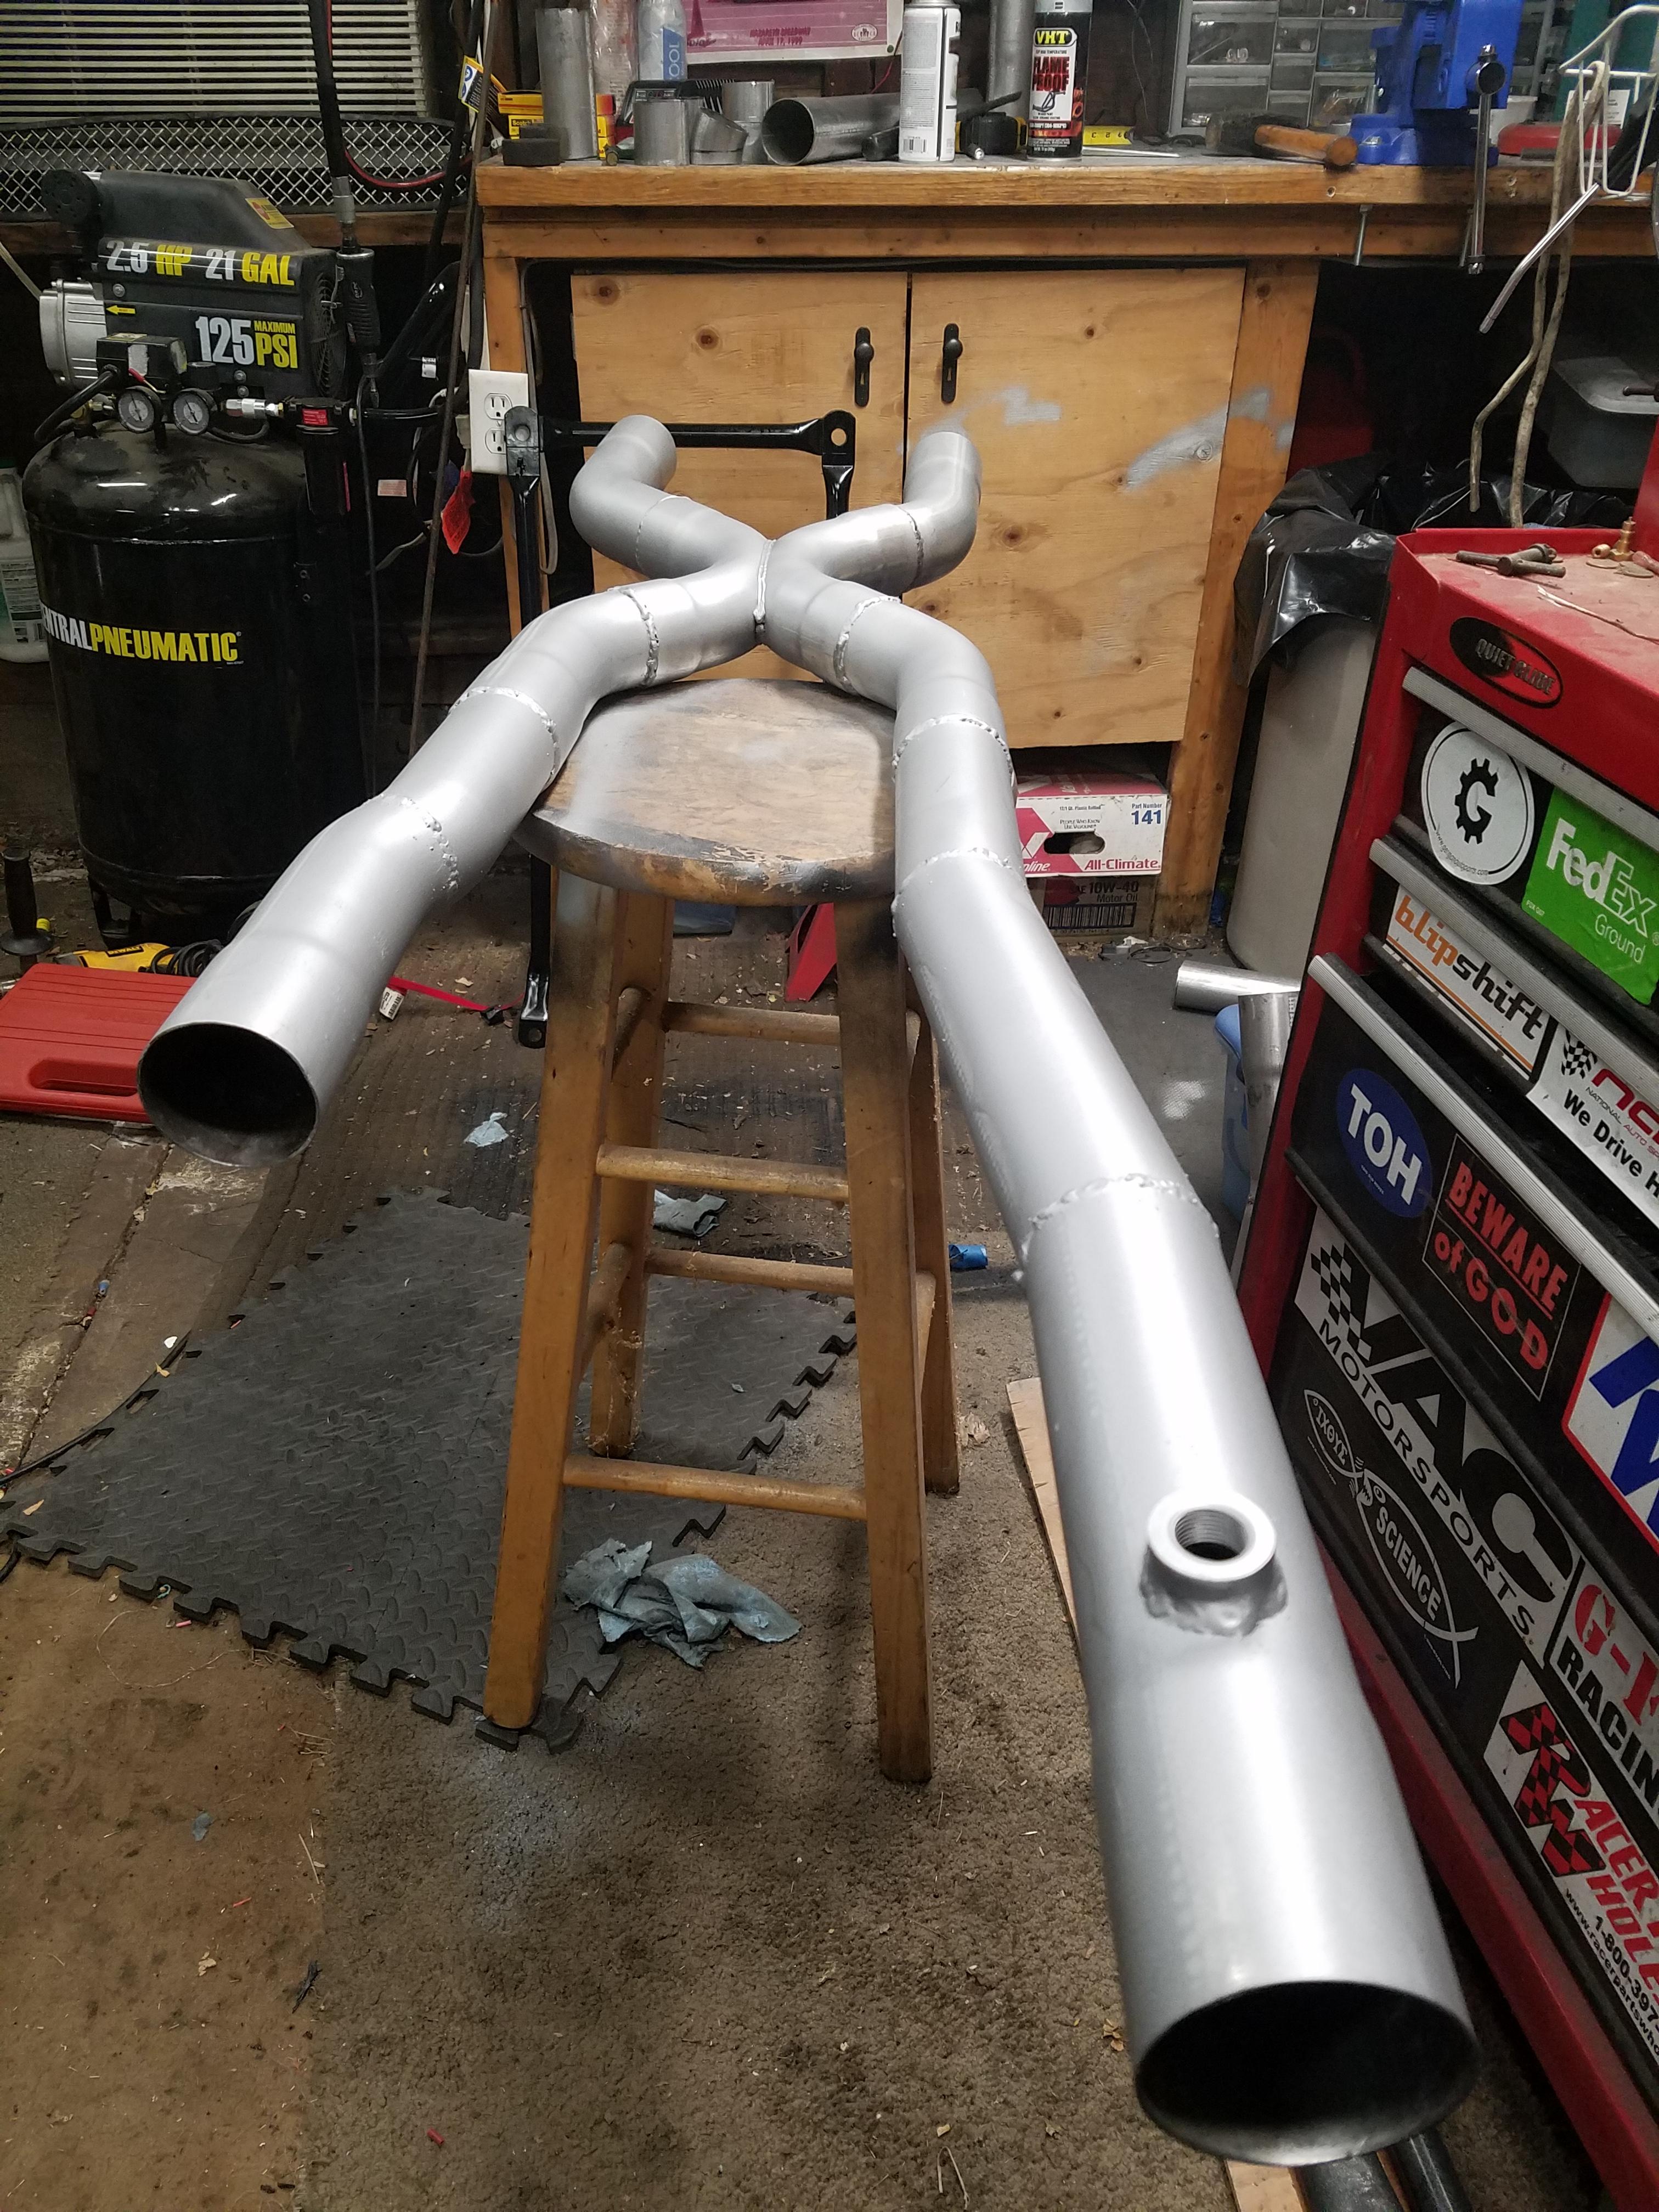
In preparation for the engine startup I decided to work on the exhaust system. Most of the work I do on the car right now is during weeknights so I didn't want to wake the dead with the first startup. 
So far this has been going swimmingly. The result of two nights and 6 hours of work:
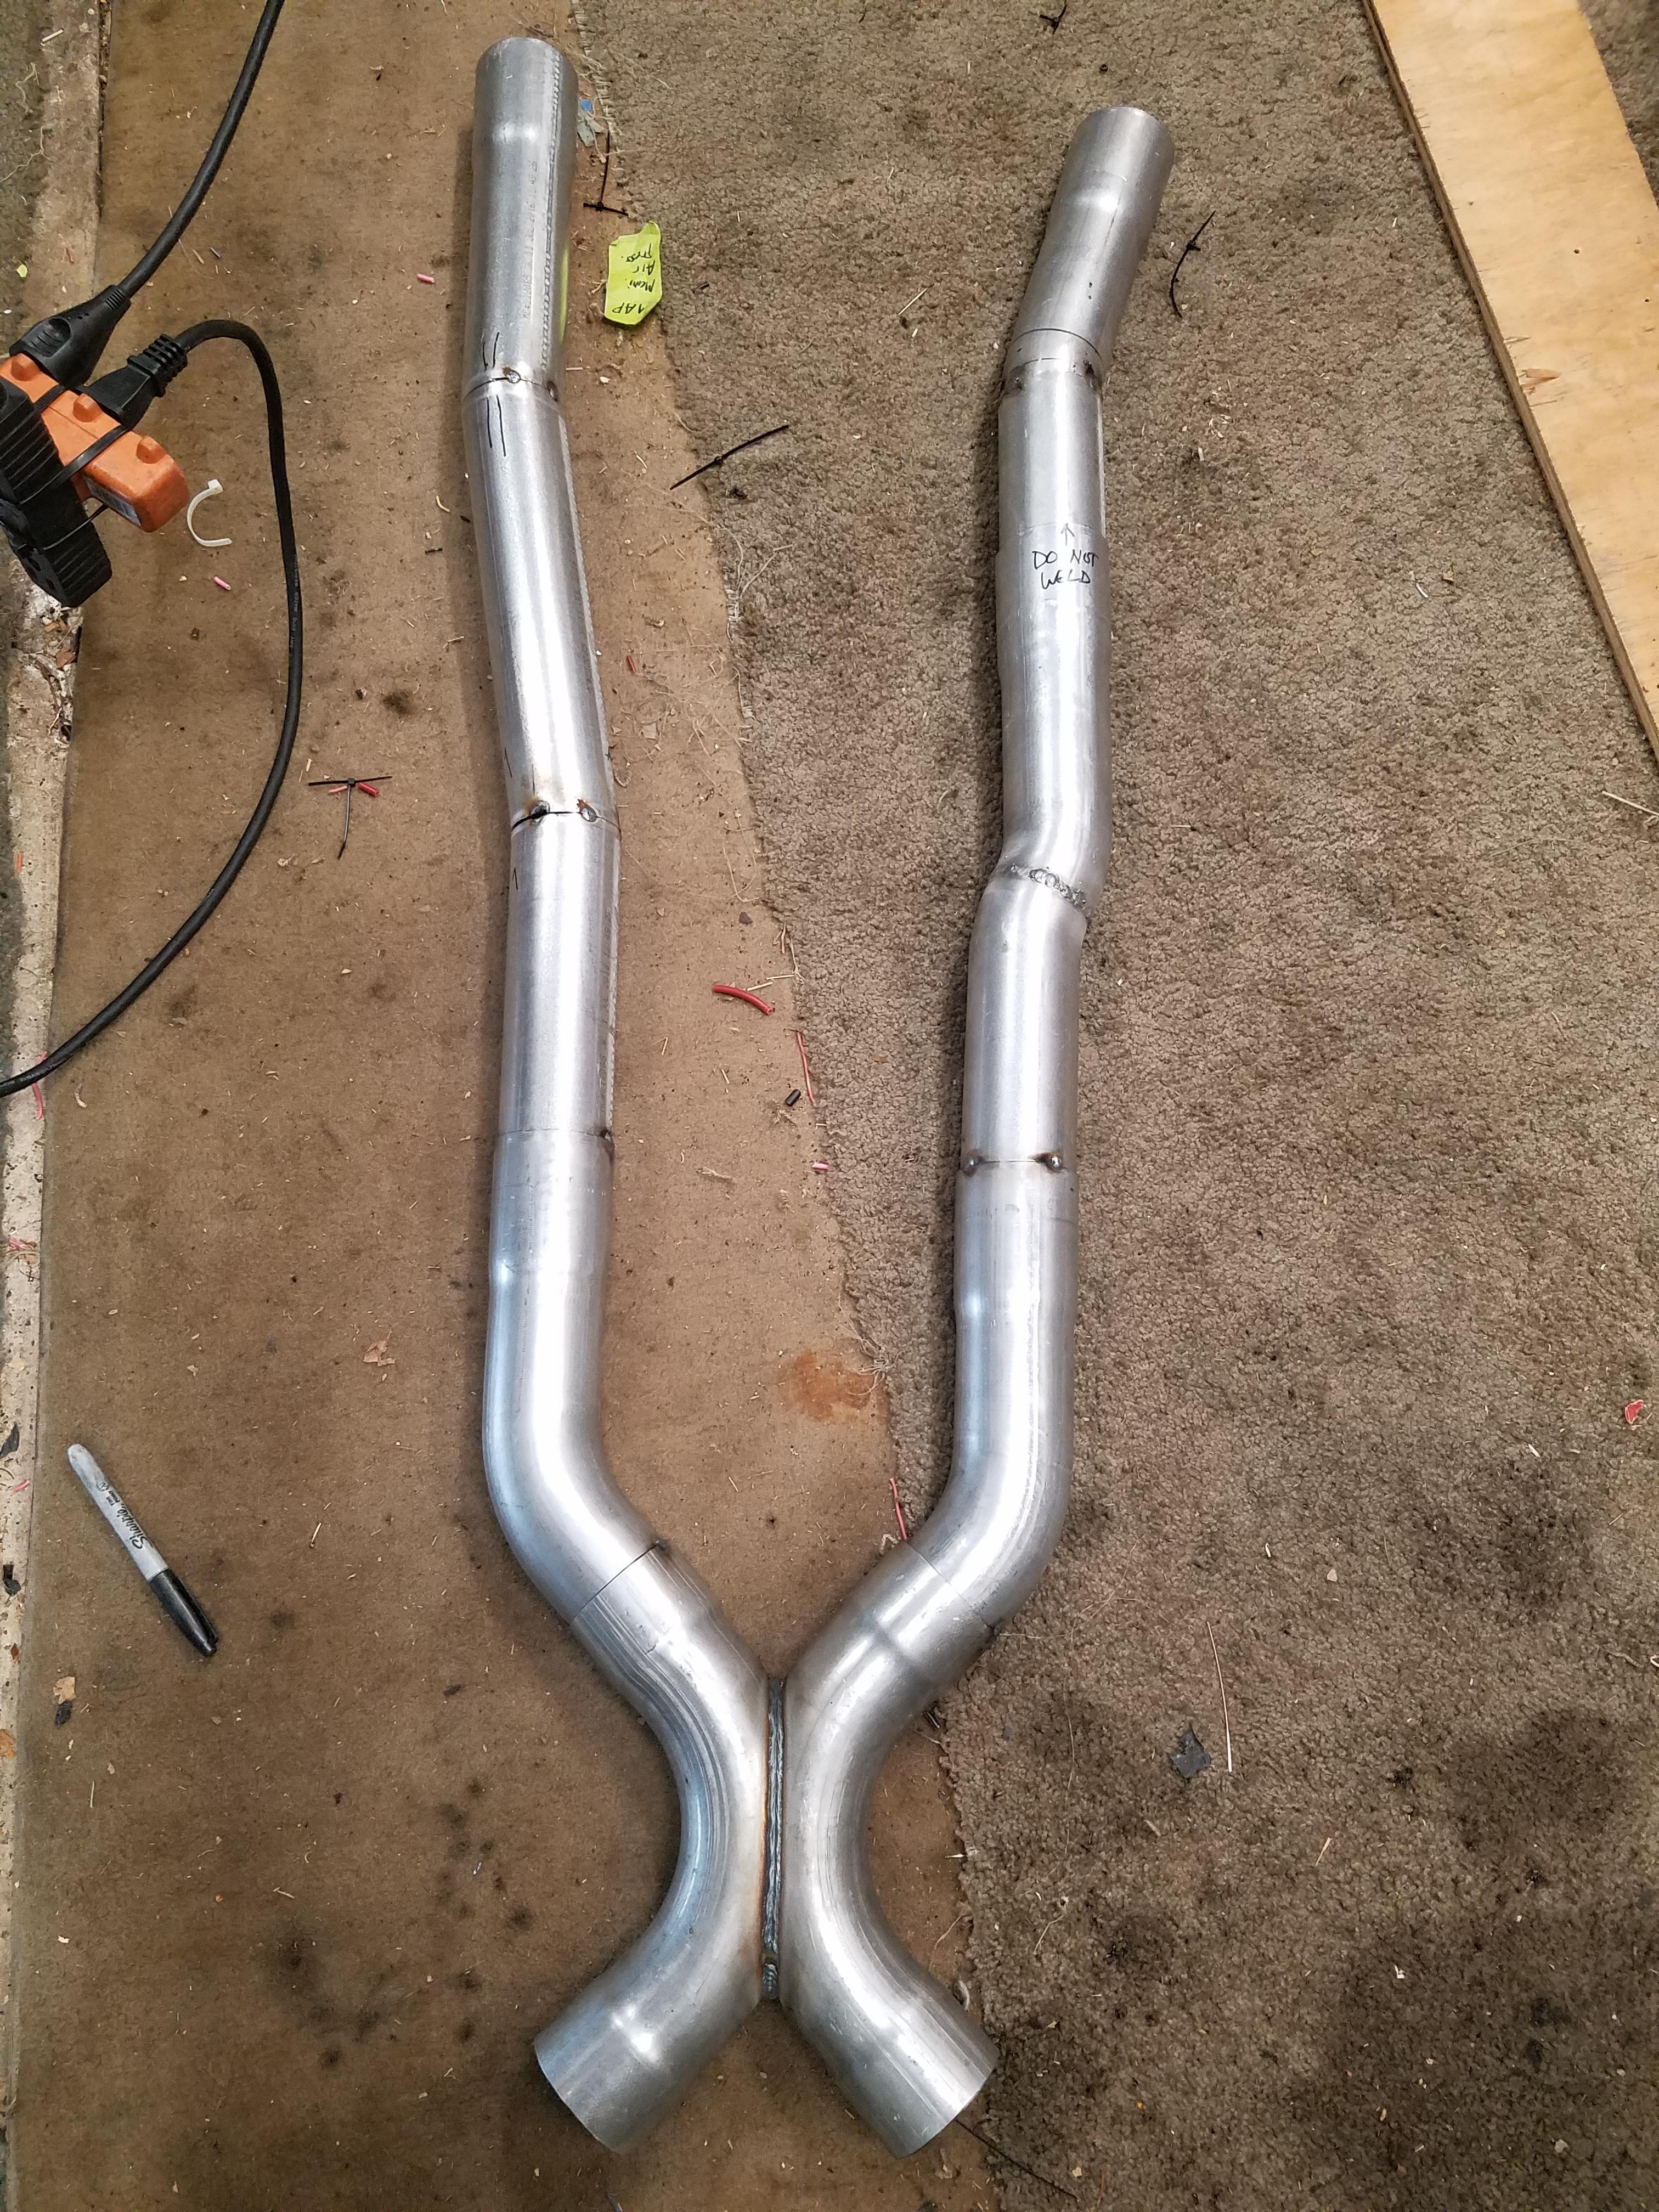
I'm using the 2.5" Summit Racing Universal Rod Builder Exhaust Kit SUM-670146
https://www.summitracing.com/parts/SUM-670146
The crossover pipe is a Flowtech Universal Off-Road X-Pipes 53620FLT
https://www.summitracing.com/parts/BIG-53620FLT
I would like to do something in stainless, but I don't have a TIG welder. This is my first exhaust, so MIGing a regular steel exhaust seemed like the natural step. The car will be a fair weather car, kept garaged, etc. so I'm not worried about it lasting over time. I will be coating it with some exhaust paint once it's all done.
The car will be registered as a Modified vehicle in Pennsylvania, so there are no Emissions restrictions and some guidelines around limited usage b/c of lack of emissions requirements. So there will be no catalytic converters on the car.
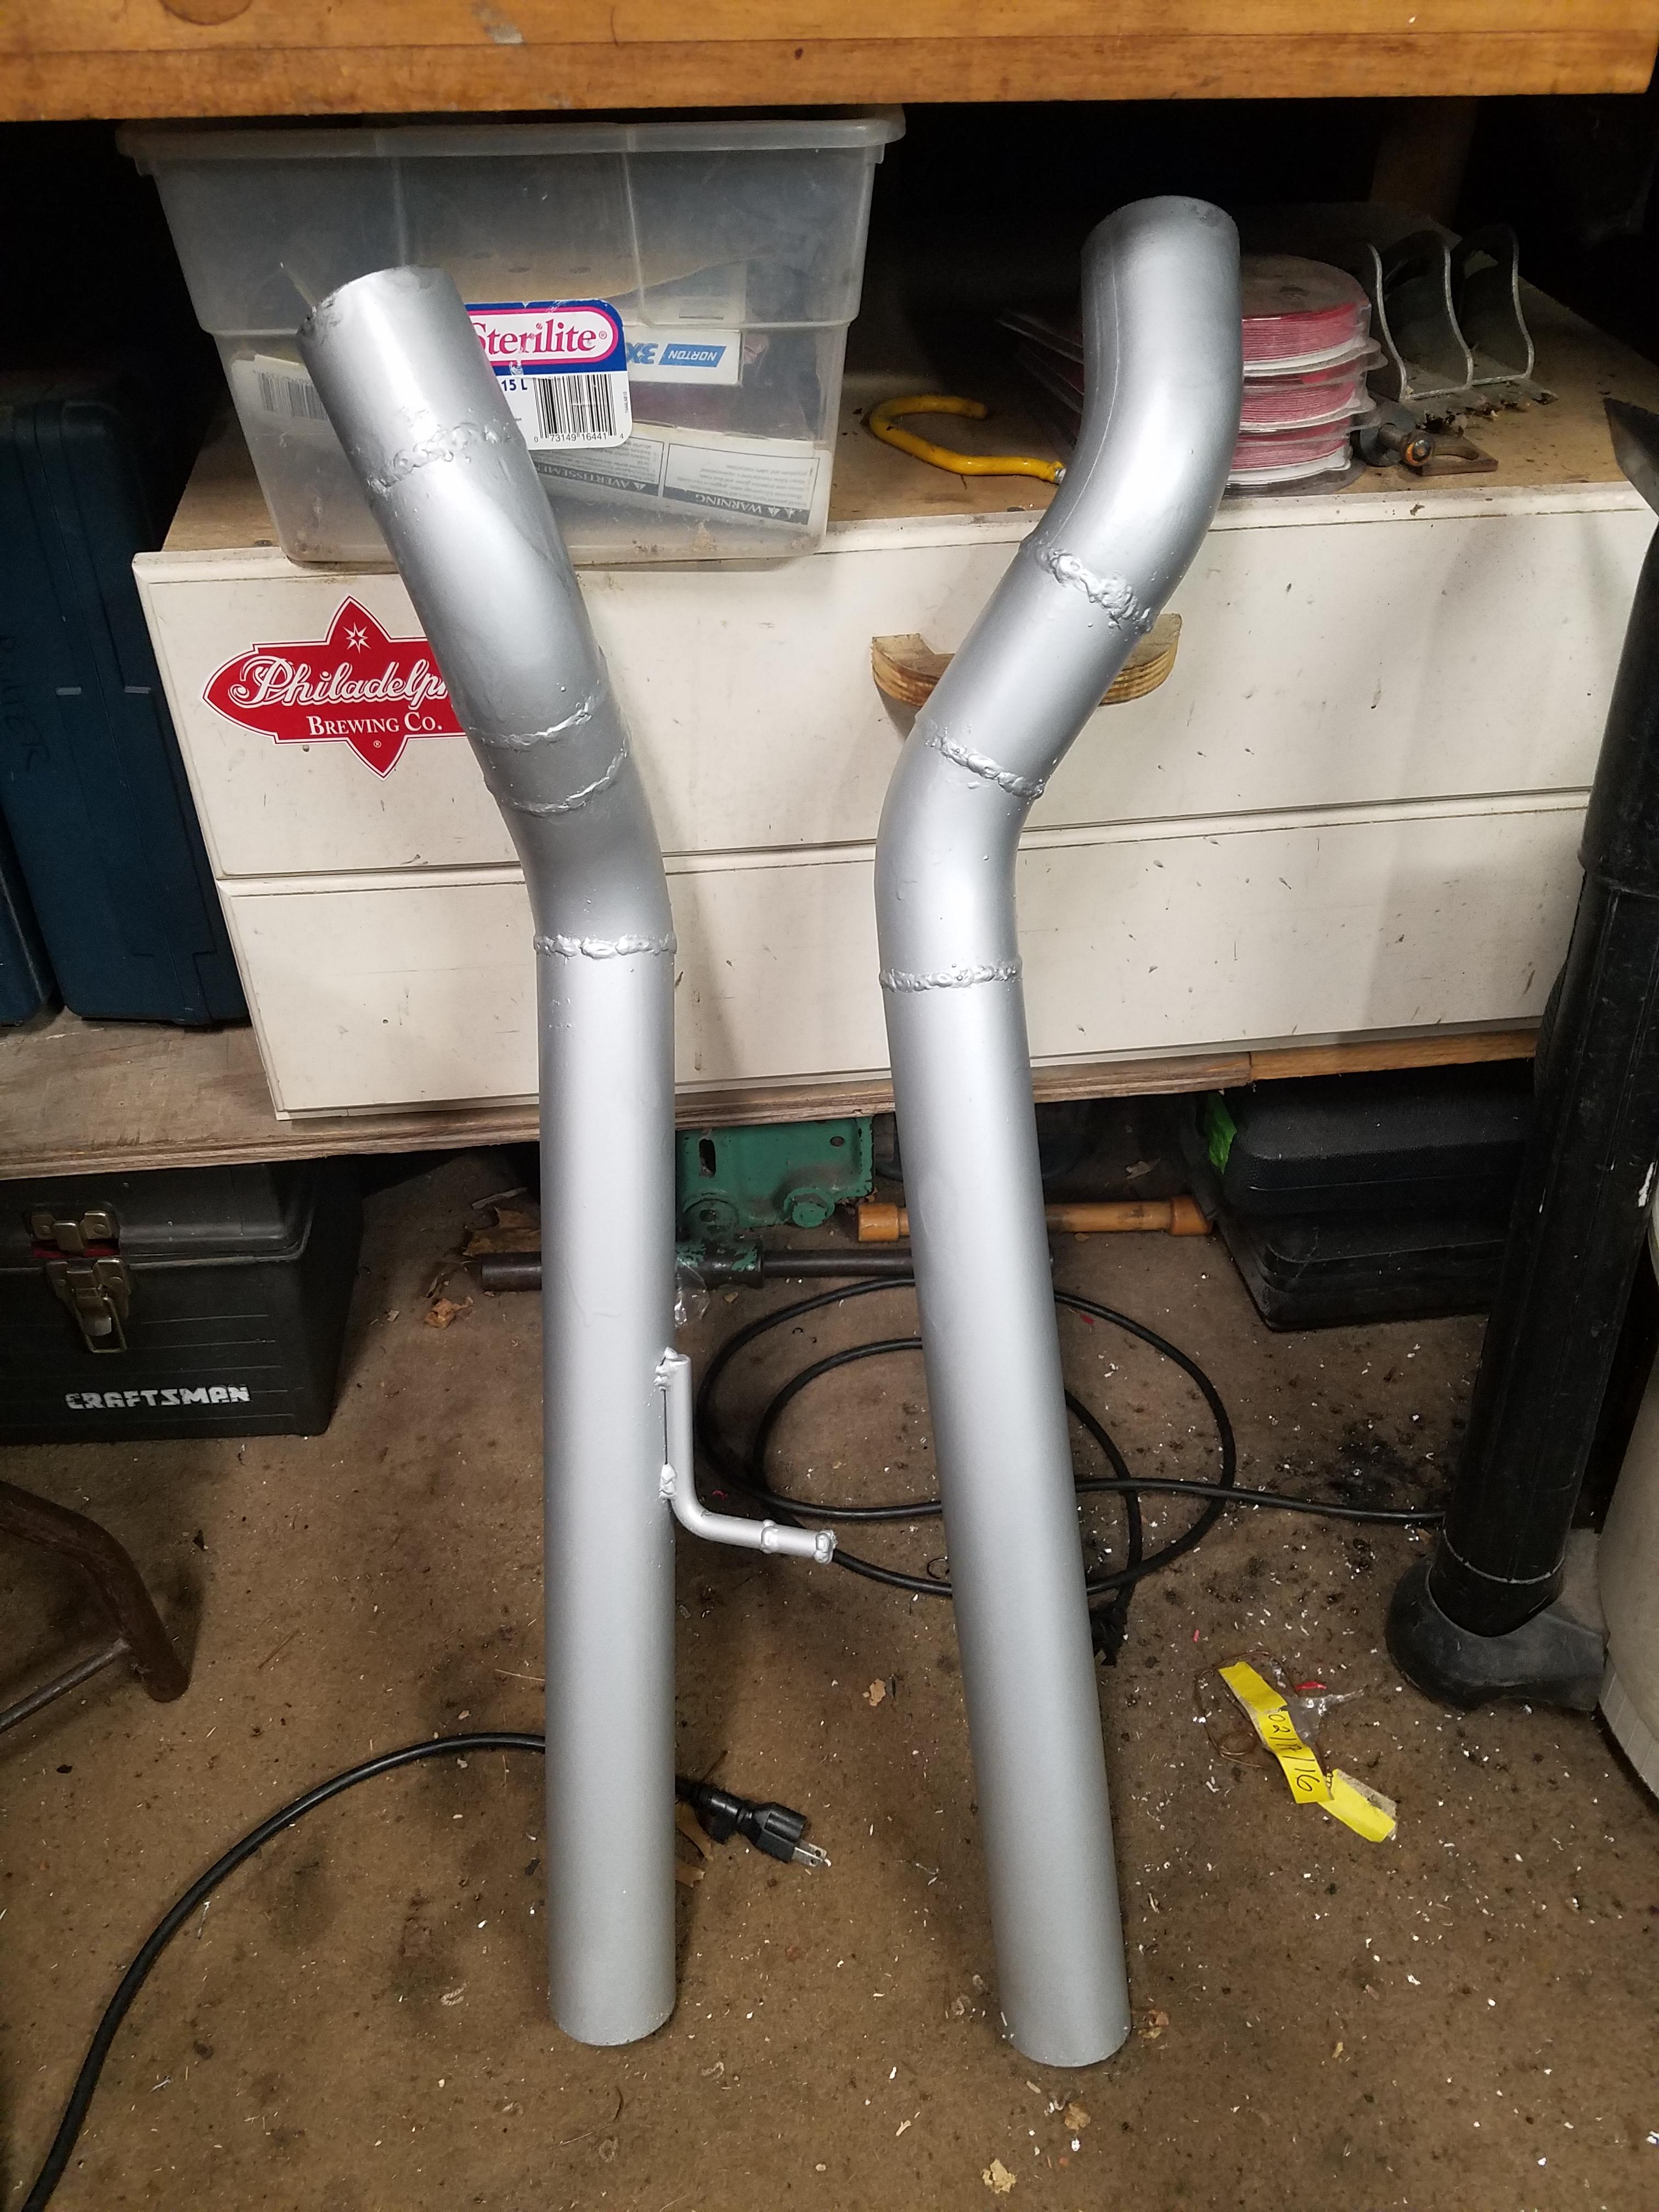
Sorry for the lack of detailed pictures on this step, I think things were moving along so quickly that I forgot. I started on the driver's side with a large straight pipe from the kit and then eyeballed two bends to zig-zag to line up with the half round cutouts on the trans crossmember.
I used a carpentry angle finder gauge to get a rough idea of what angle I needed and where I needed it on the pipe. I then made some pie cuts on the pipe to make the bend. The metal cutting blade on my bandsaw didn't seem up to the task and I didn't feel like forcing it, so I reverted to using a large metal cutting blade in my grinder. Once I was happy I tacked the pipe together on the ground and reinstalled it.
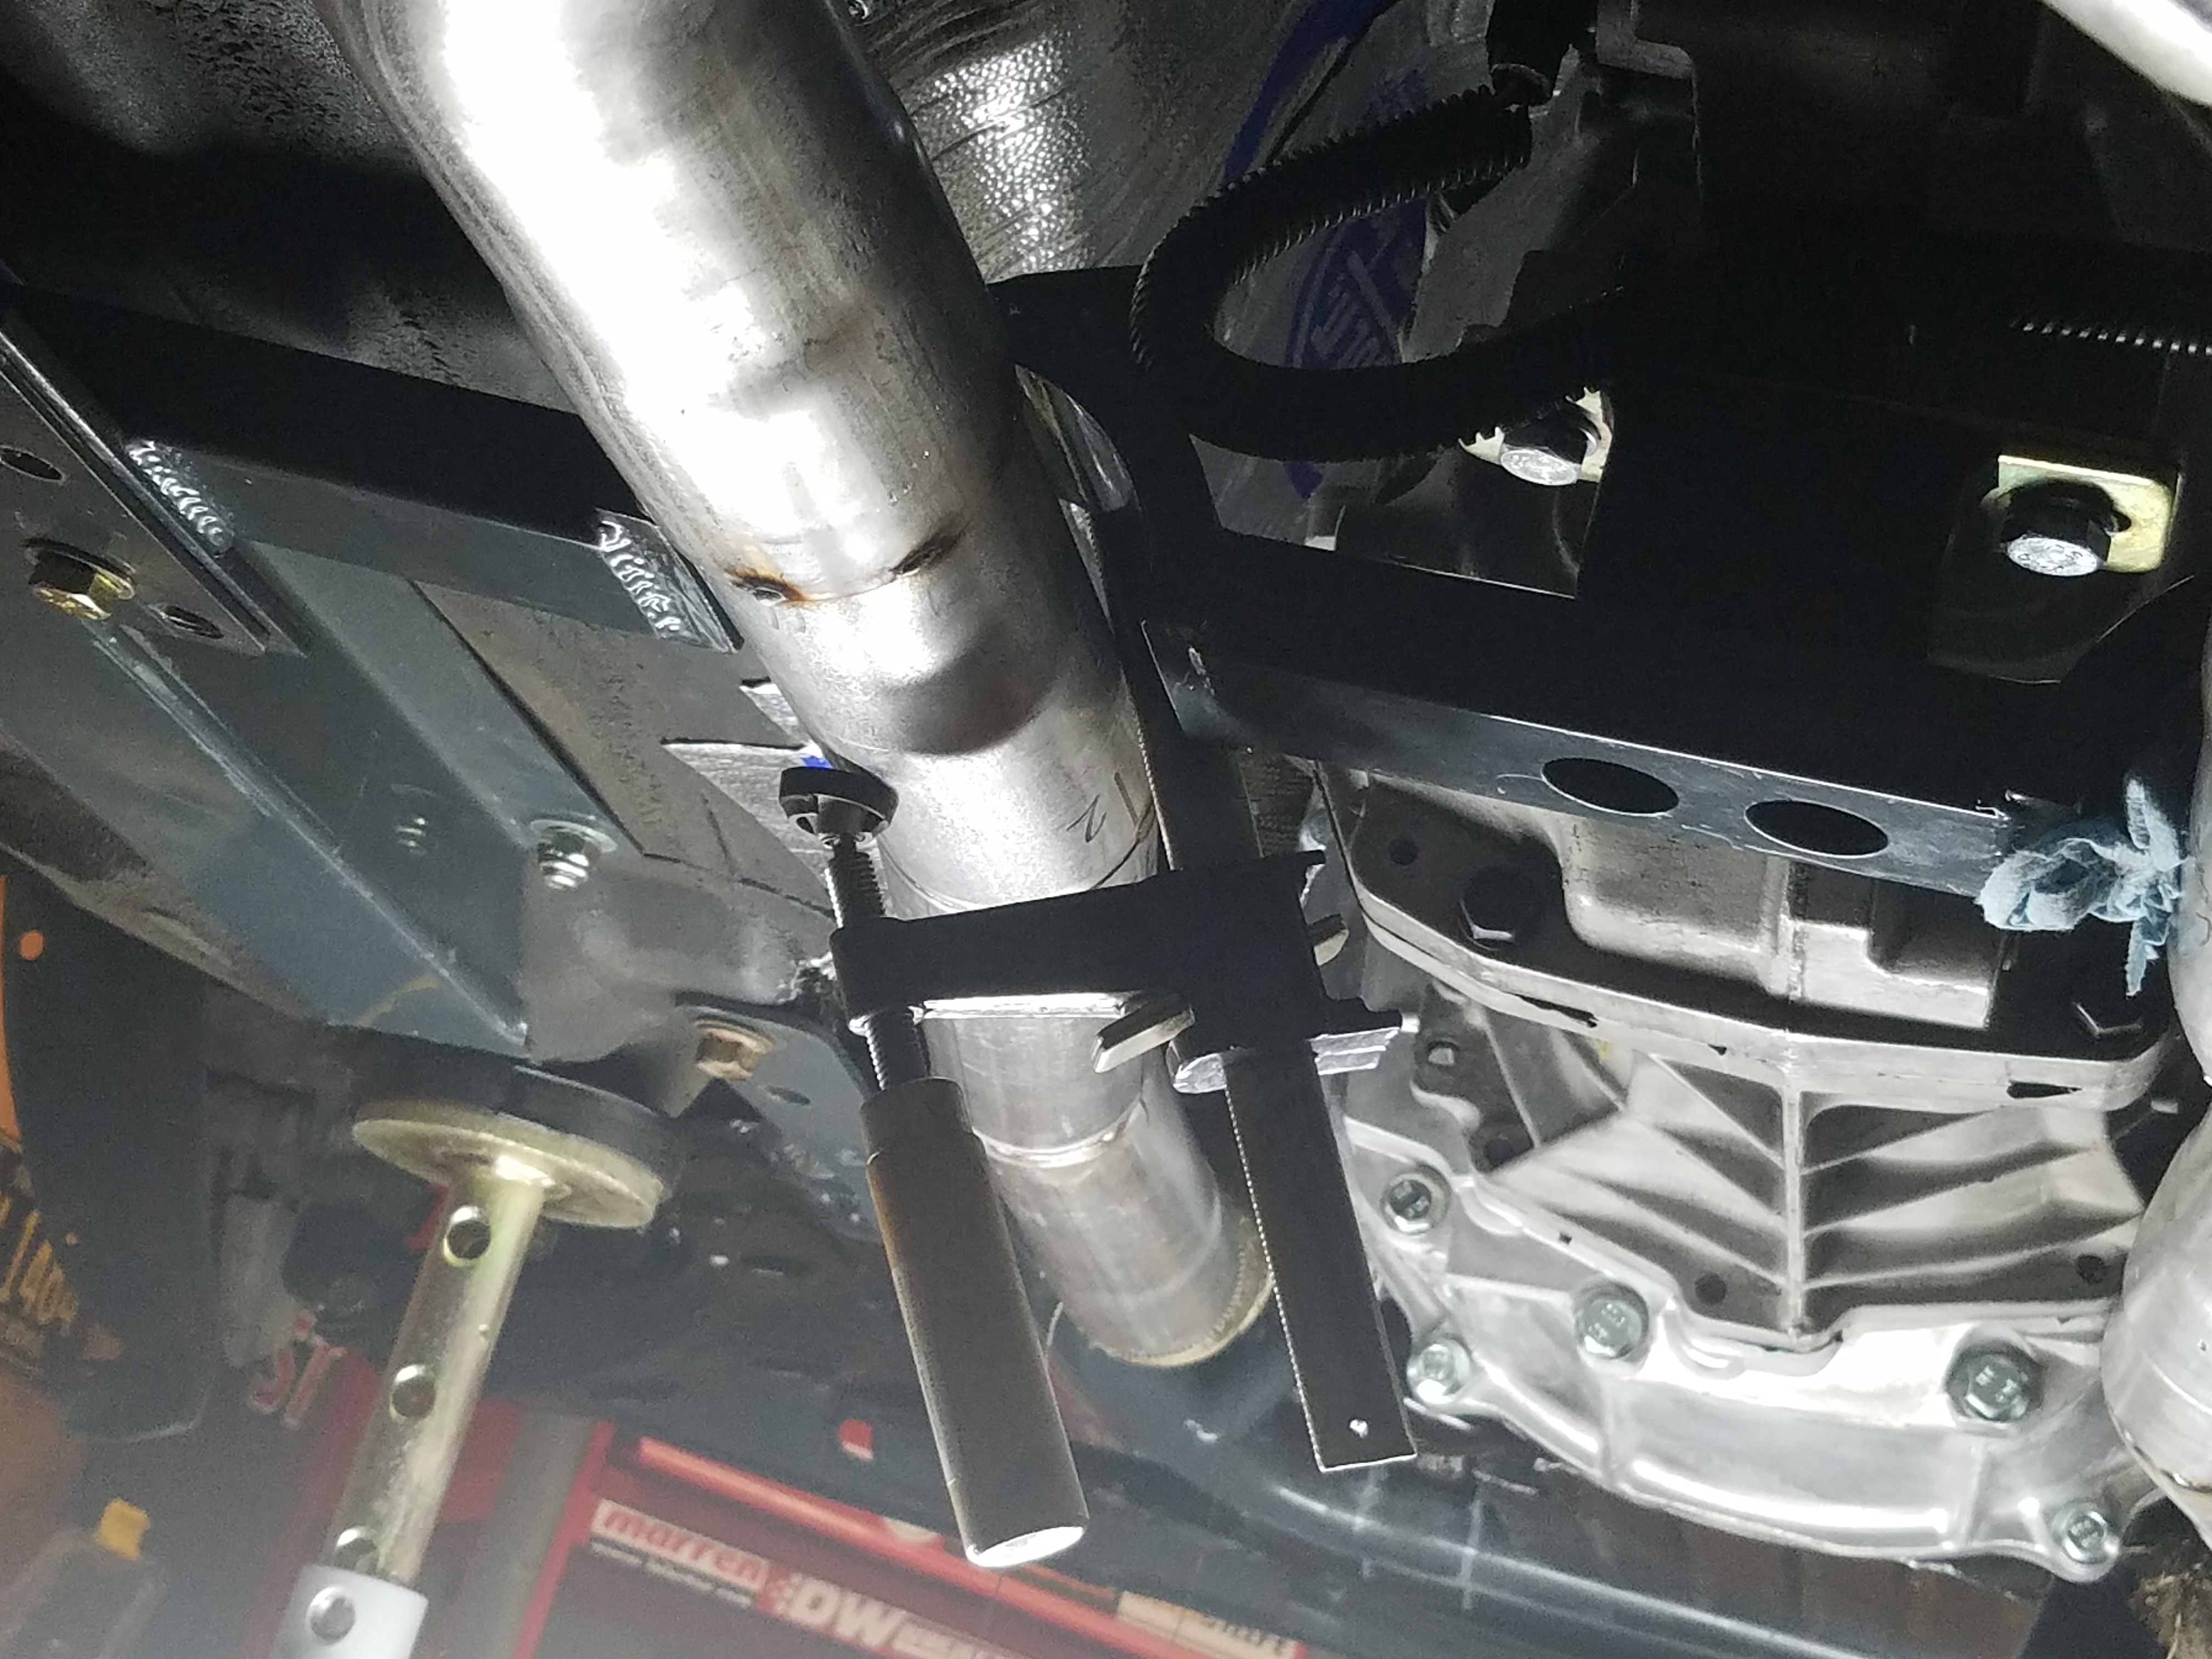
You can see in these pictures I used a clamp to hold it in the right position against the crossmember.
On the pass. side I started at the crossmember by making a little zig zag around the transmission towards the front of the car. Then I clamped it in place to fit up the crossover pipe. I just used the 45 degree pieces from the kit to meet up with the crossover pipe on either side and cut them at the right length to line up. What's nice with the slip joints is that depending on how tightly you push them together, you can still rotate them and wiggle them to get a 1/8" or 1/4" sometimes of movement so you line up with other pipes. Welding the connections together will seal up anything that doesn't perfectly line up.
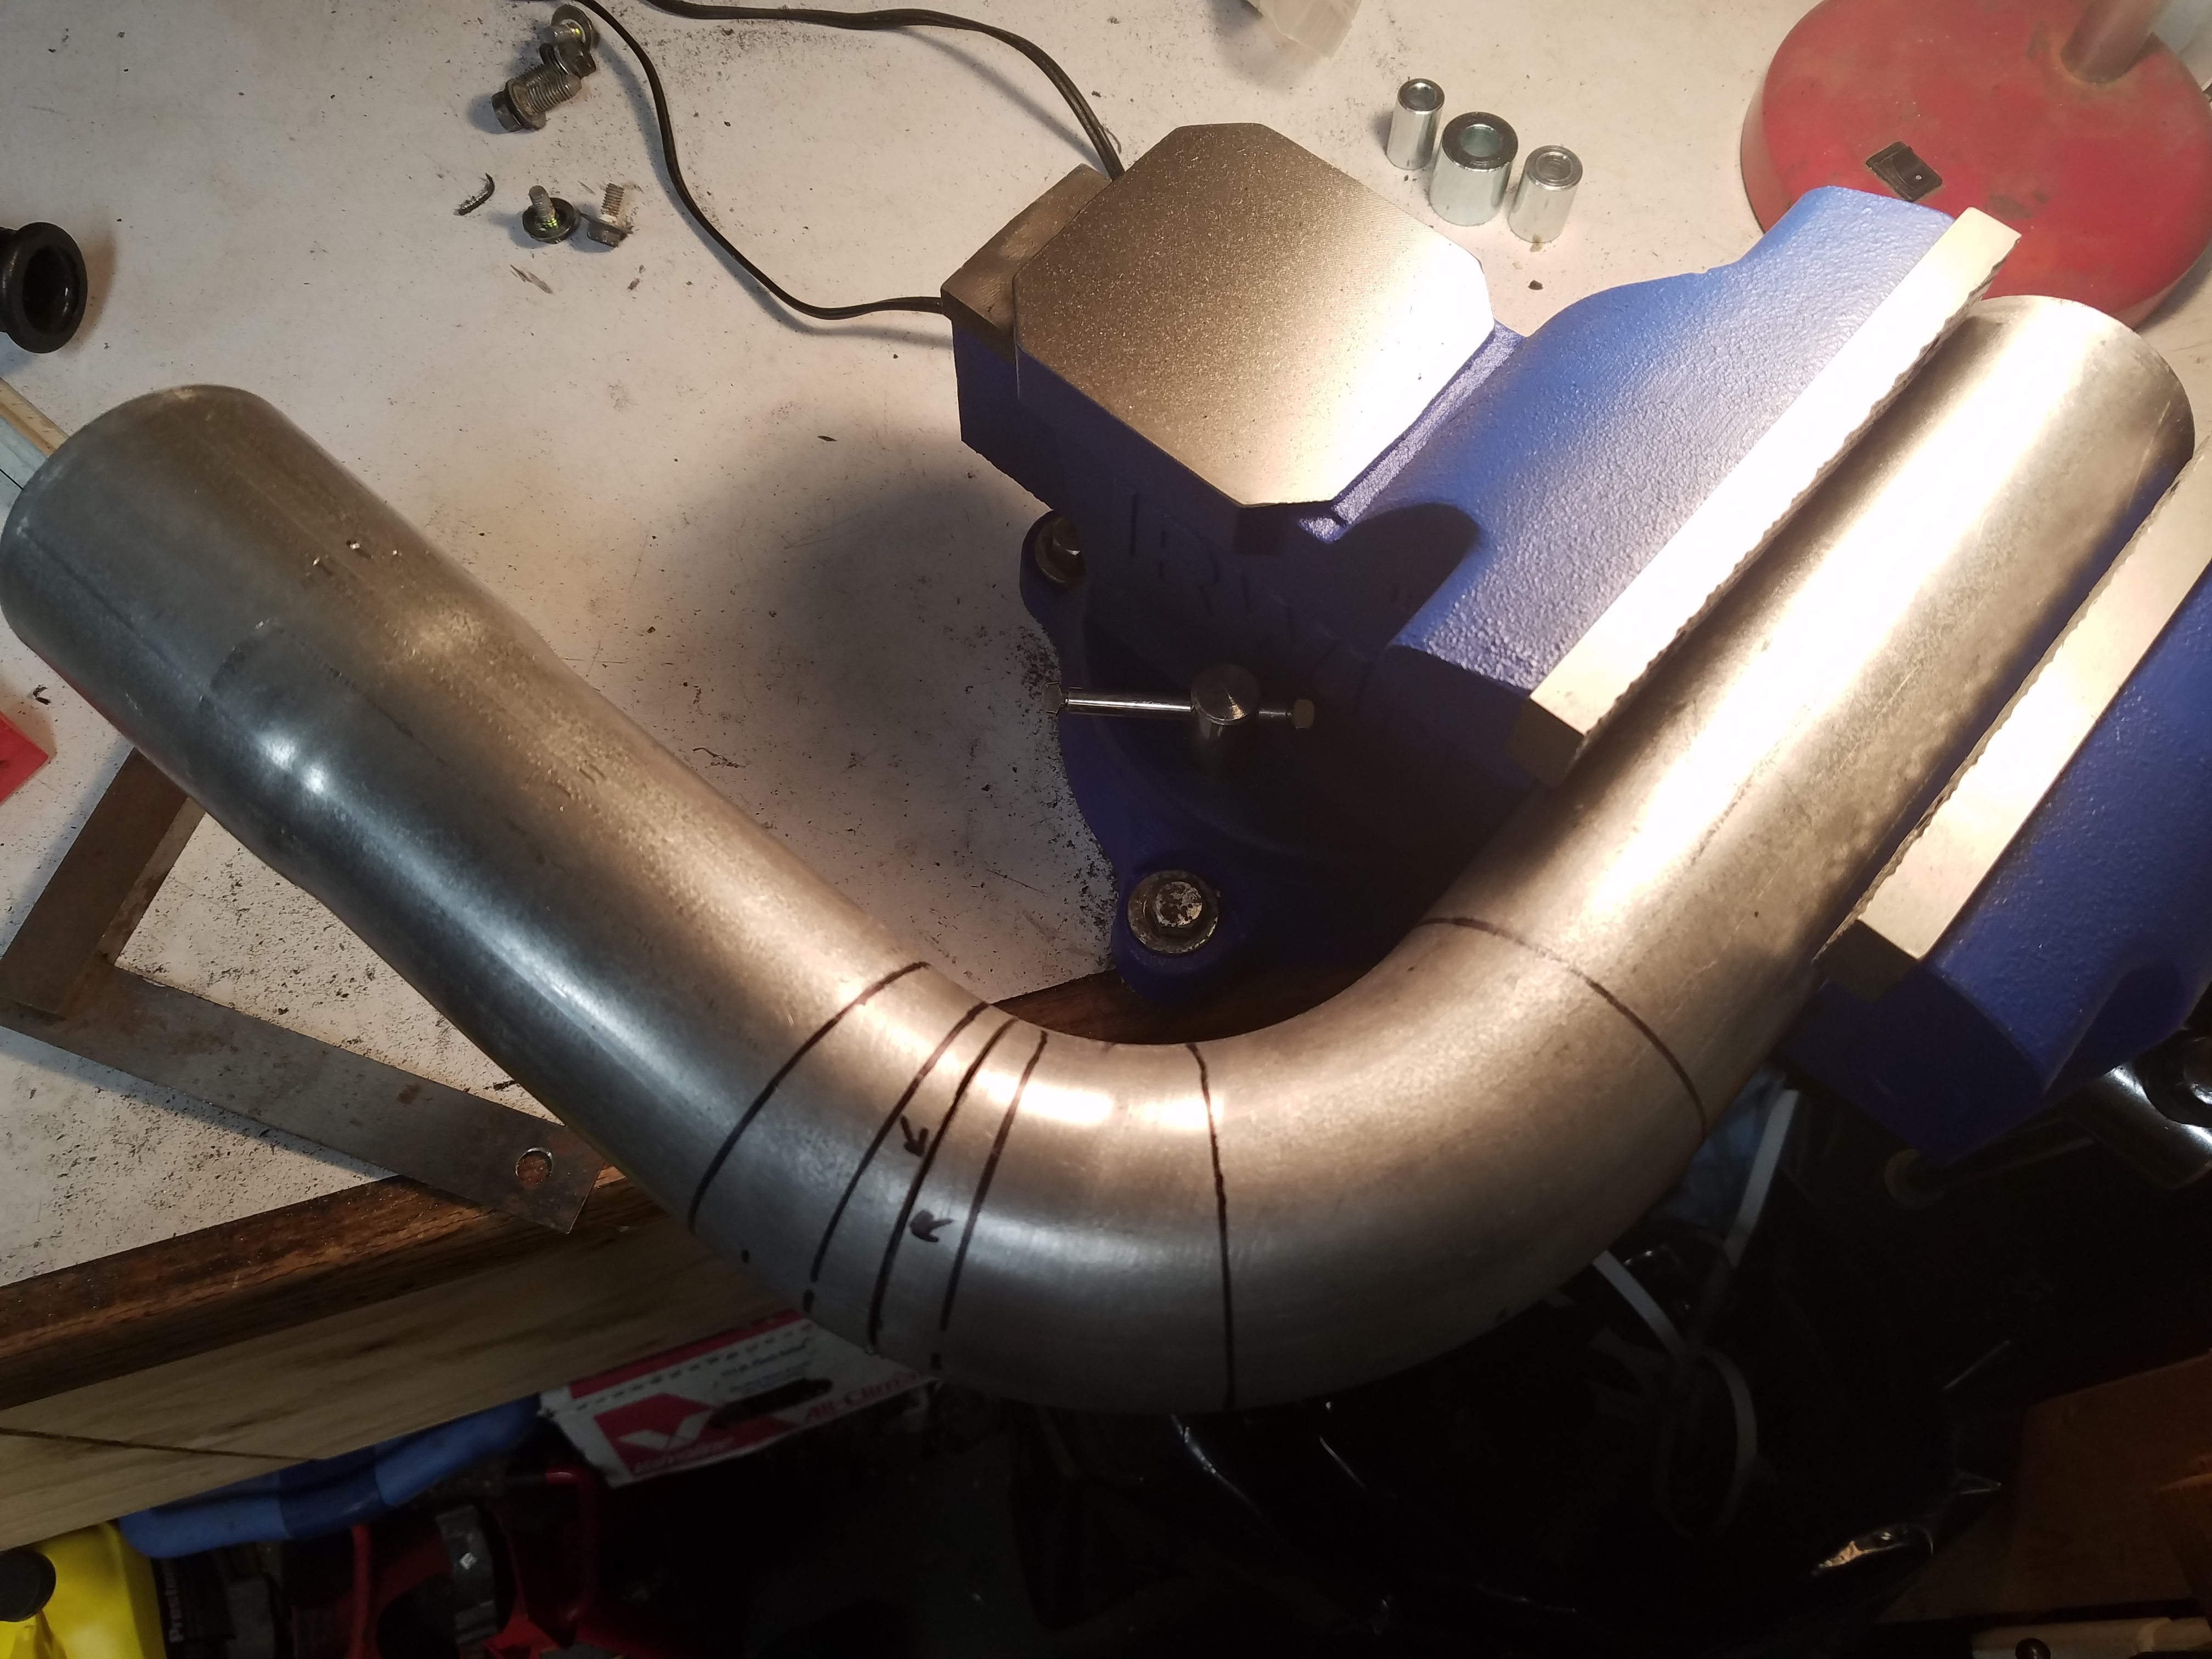
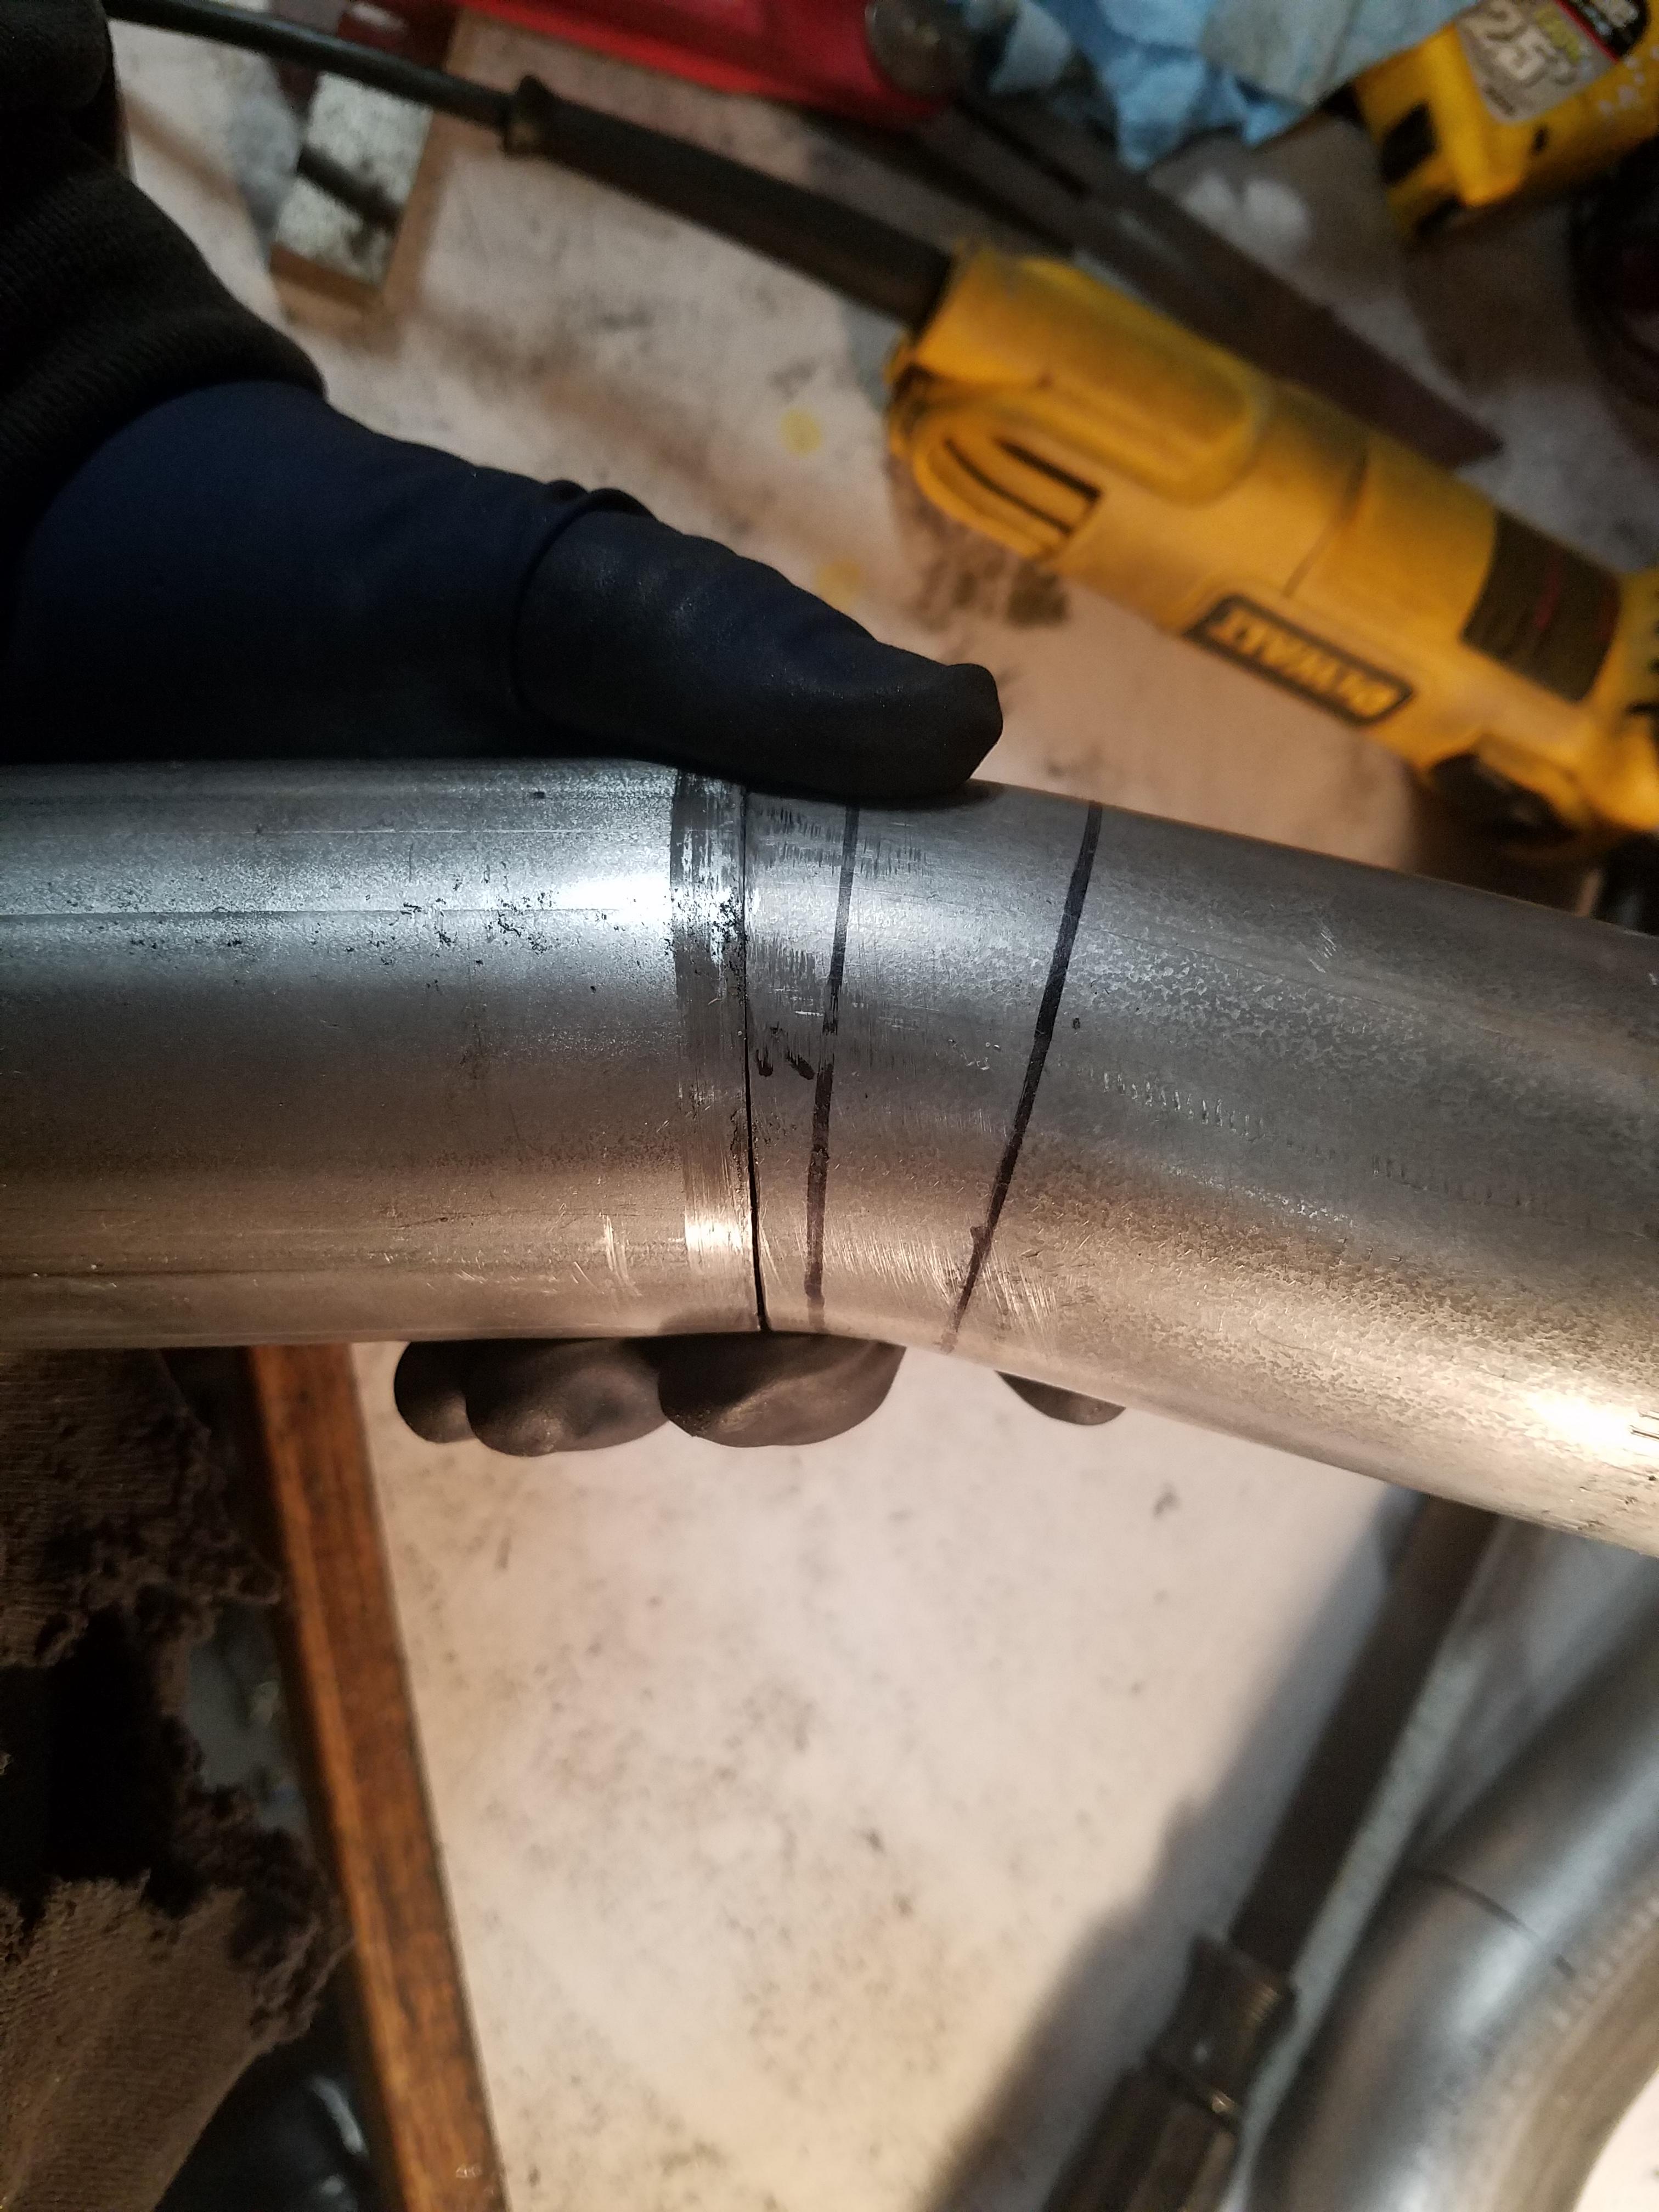
To finish up the pass. side and meet up with the header required a bit more thought. I took one of the 90 degree pieces from the kit and marked off the pipe in sections at 45 degrees, 22.5, etc. I just used some cardboard to bend around the inside and outside curves and made markings on the cardboard at the halfway points, and then worked my way down until I had the smaller sections marked off.

This is after the cut was made, using the angle finder and a machinist square to judge where the cut line would be that would match up with the angle I needed.
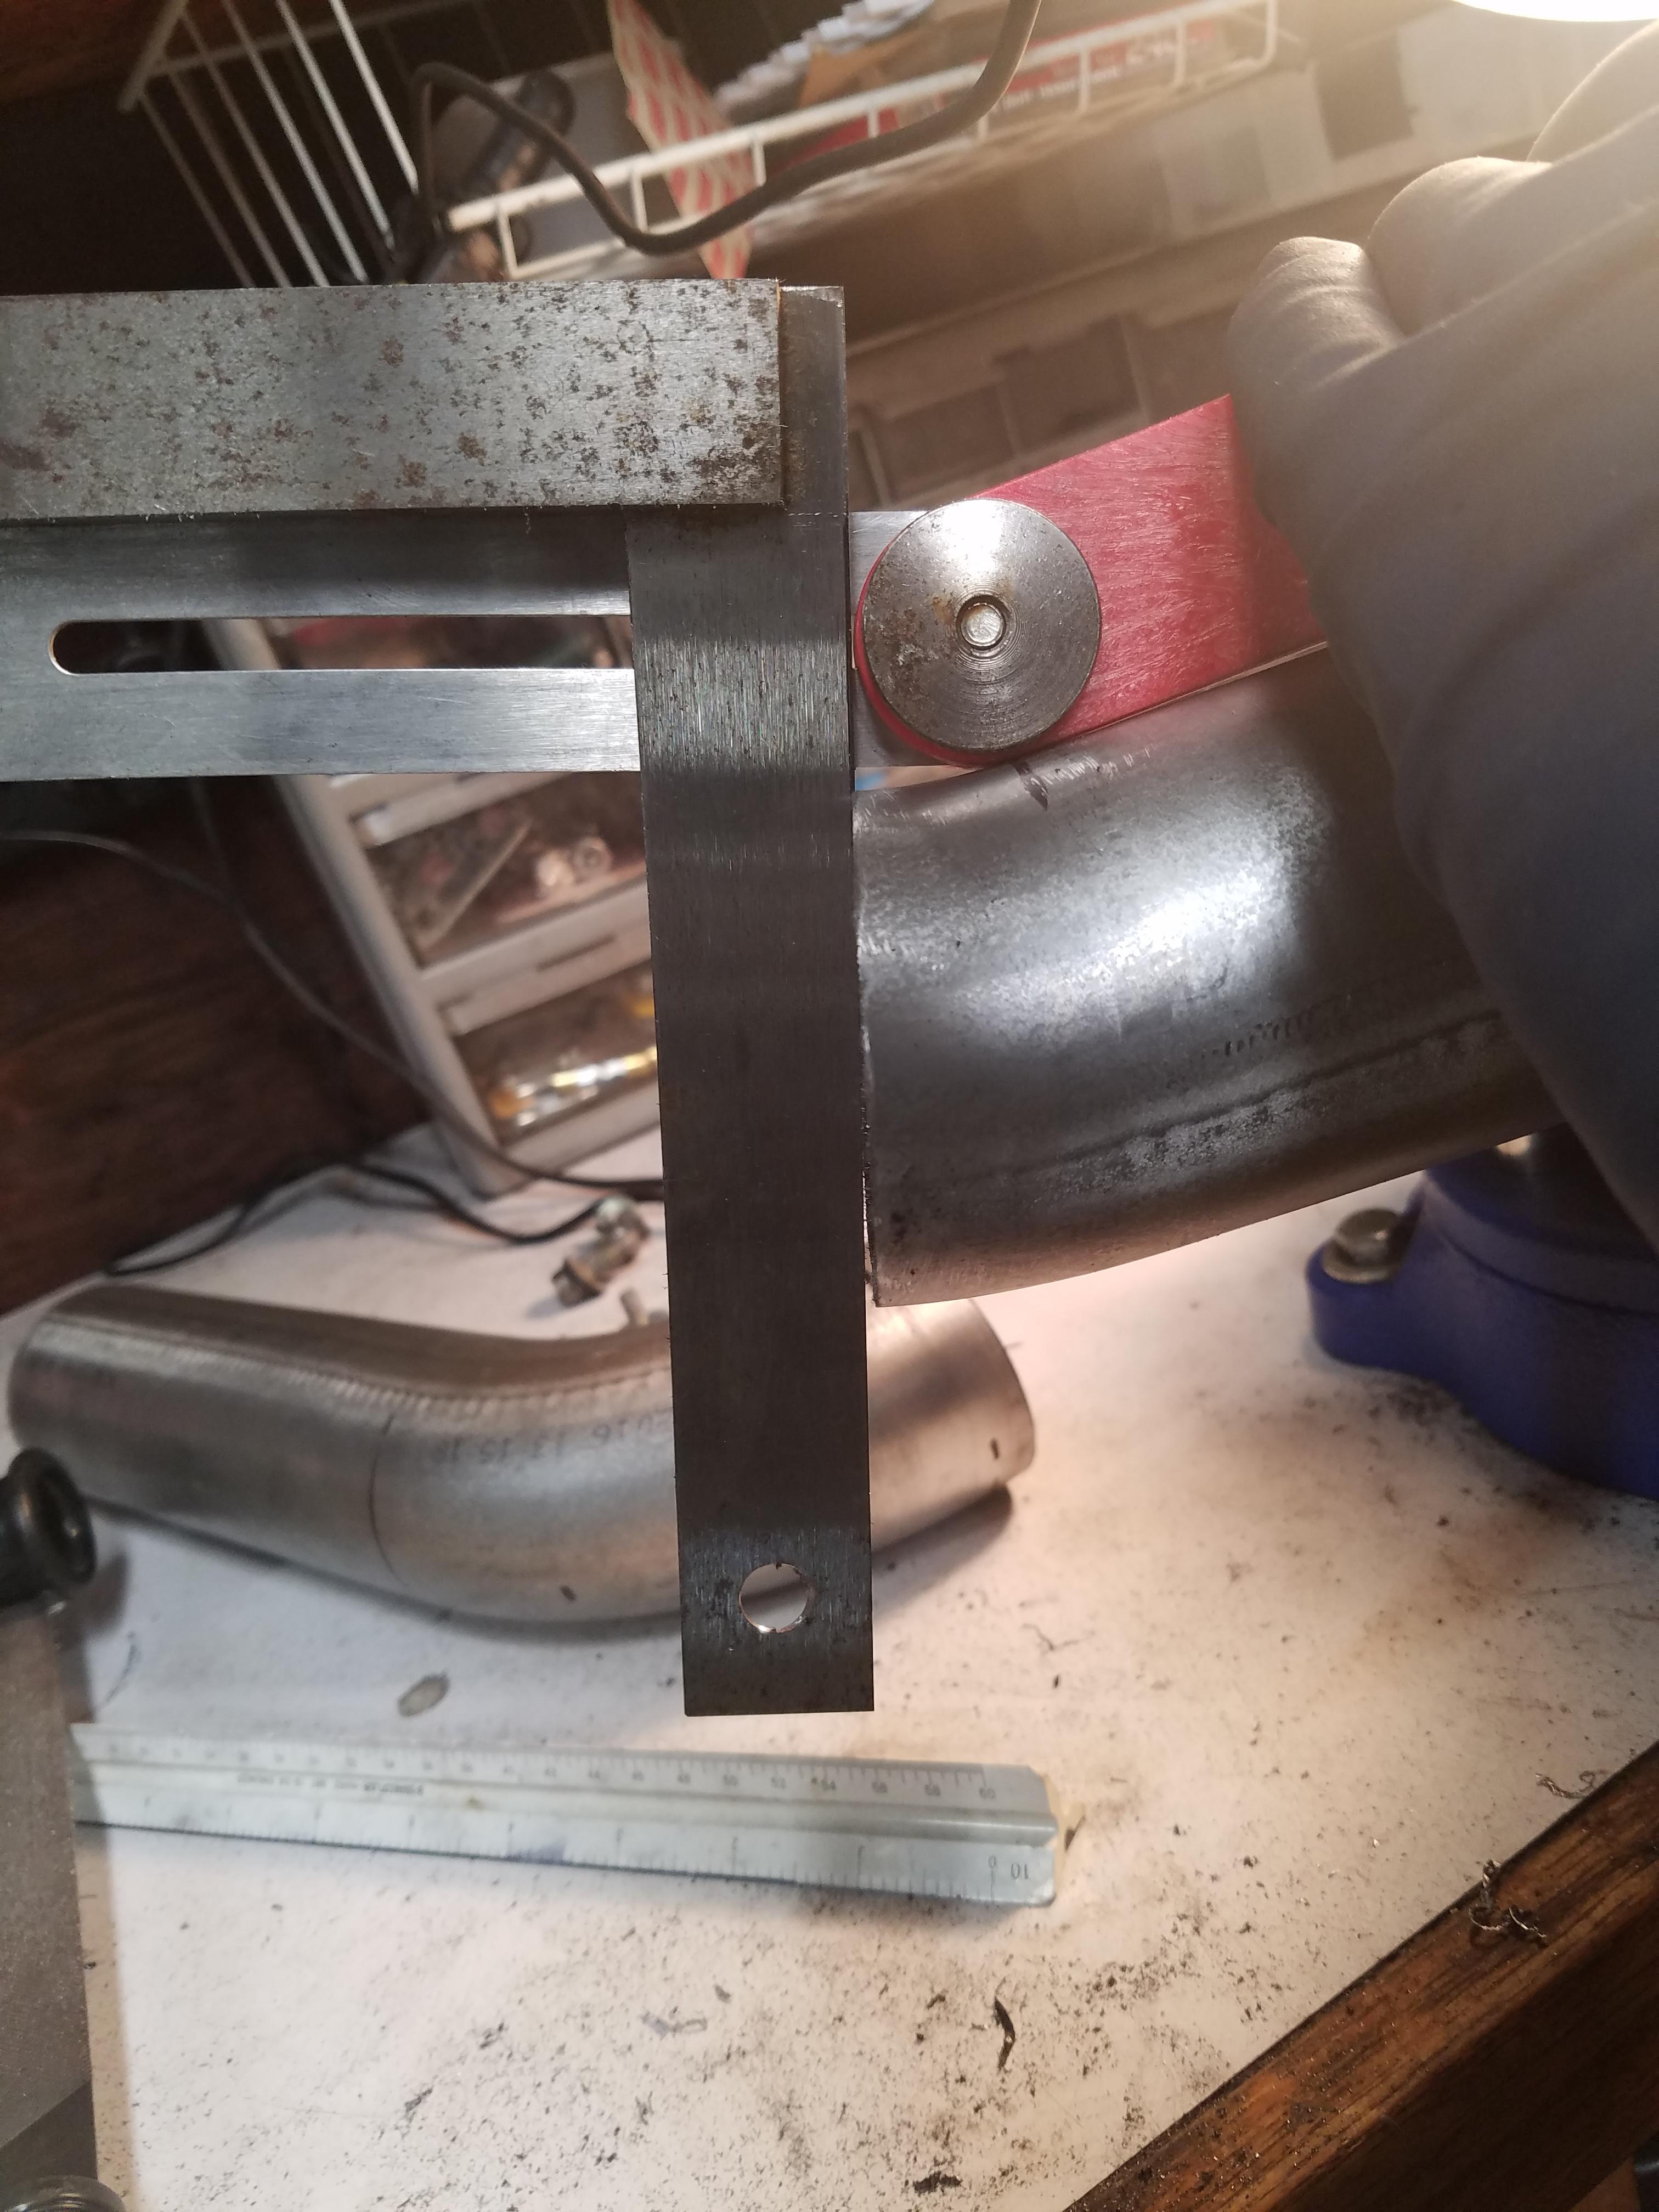
If the cut was square to the pipe you should not see any gaps when a normal section of pipe is fitted up
I measured what I needed for the short straight section of pipe and made sure it all lined up. It did, so I tacked it in. If you put at least 3 or 4 tacks around the pipe in a butt connection, it shouldn't move at all I've found.
That was enough doing geometry and welding on my back for one night, so I called it quits and pulled the exhaust system off the car for a full welding of the joints tomorrow night. Trying to take advantage of some warmer weather the last few days.
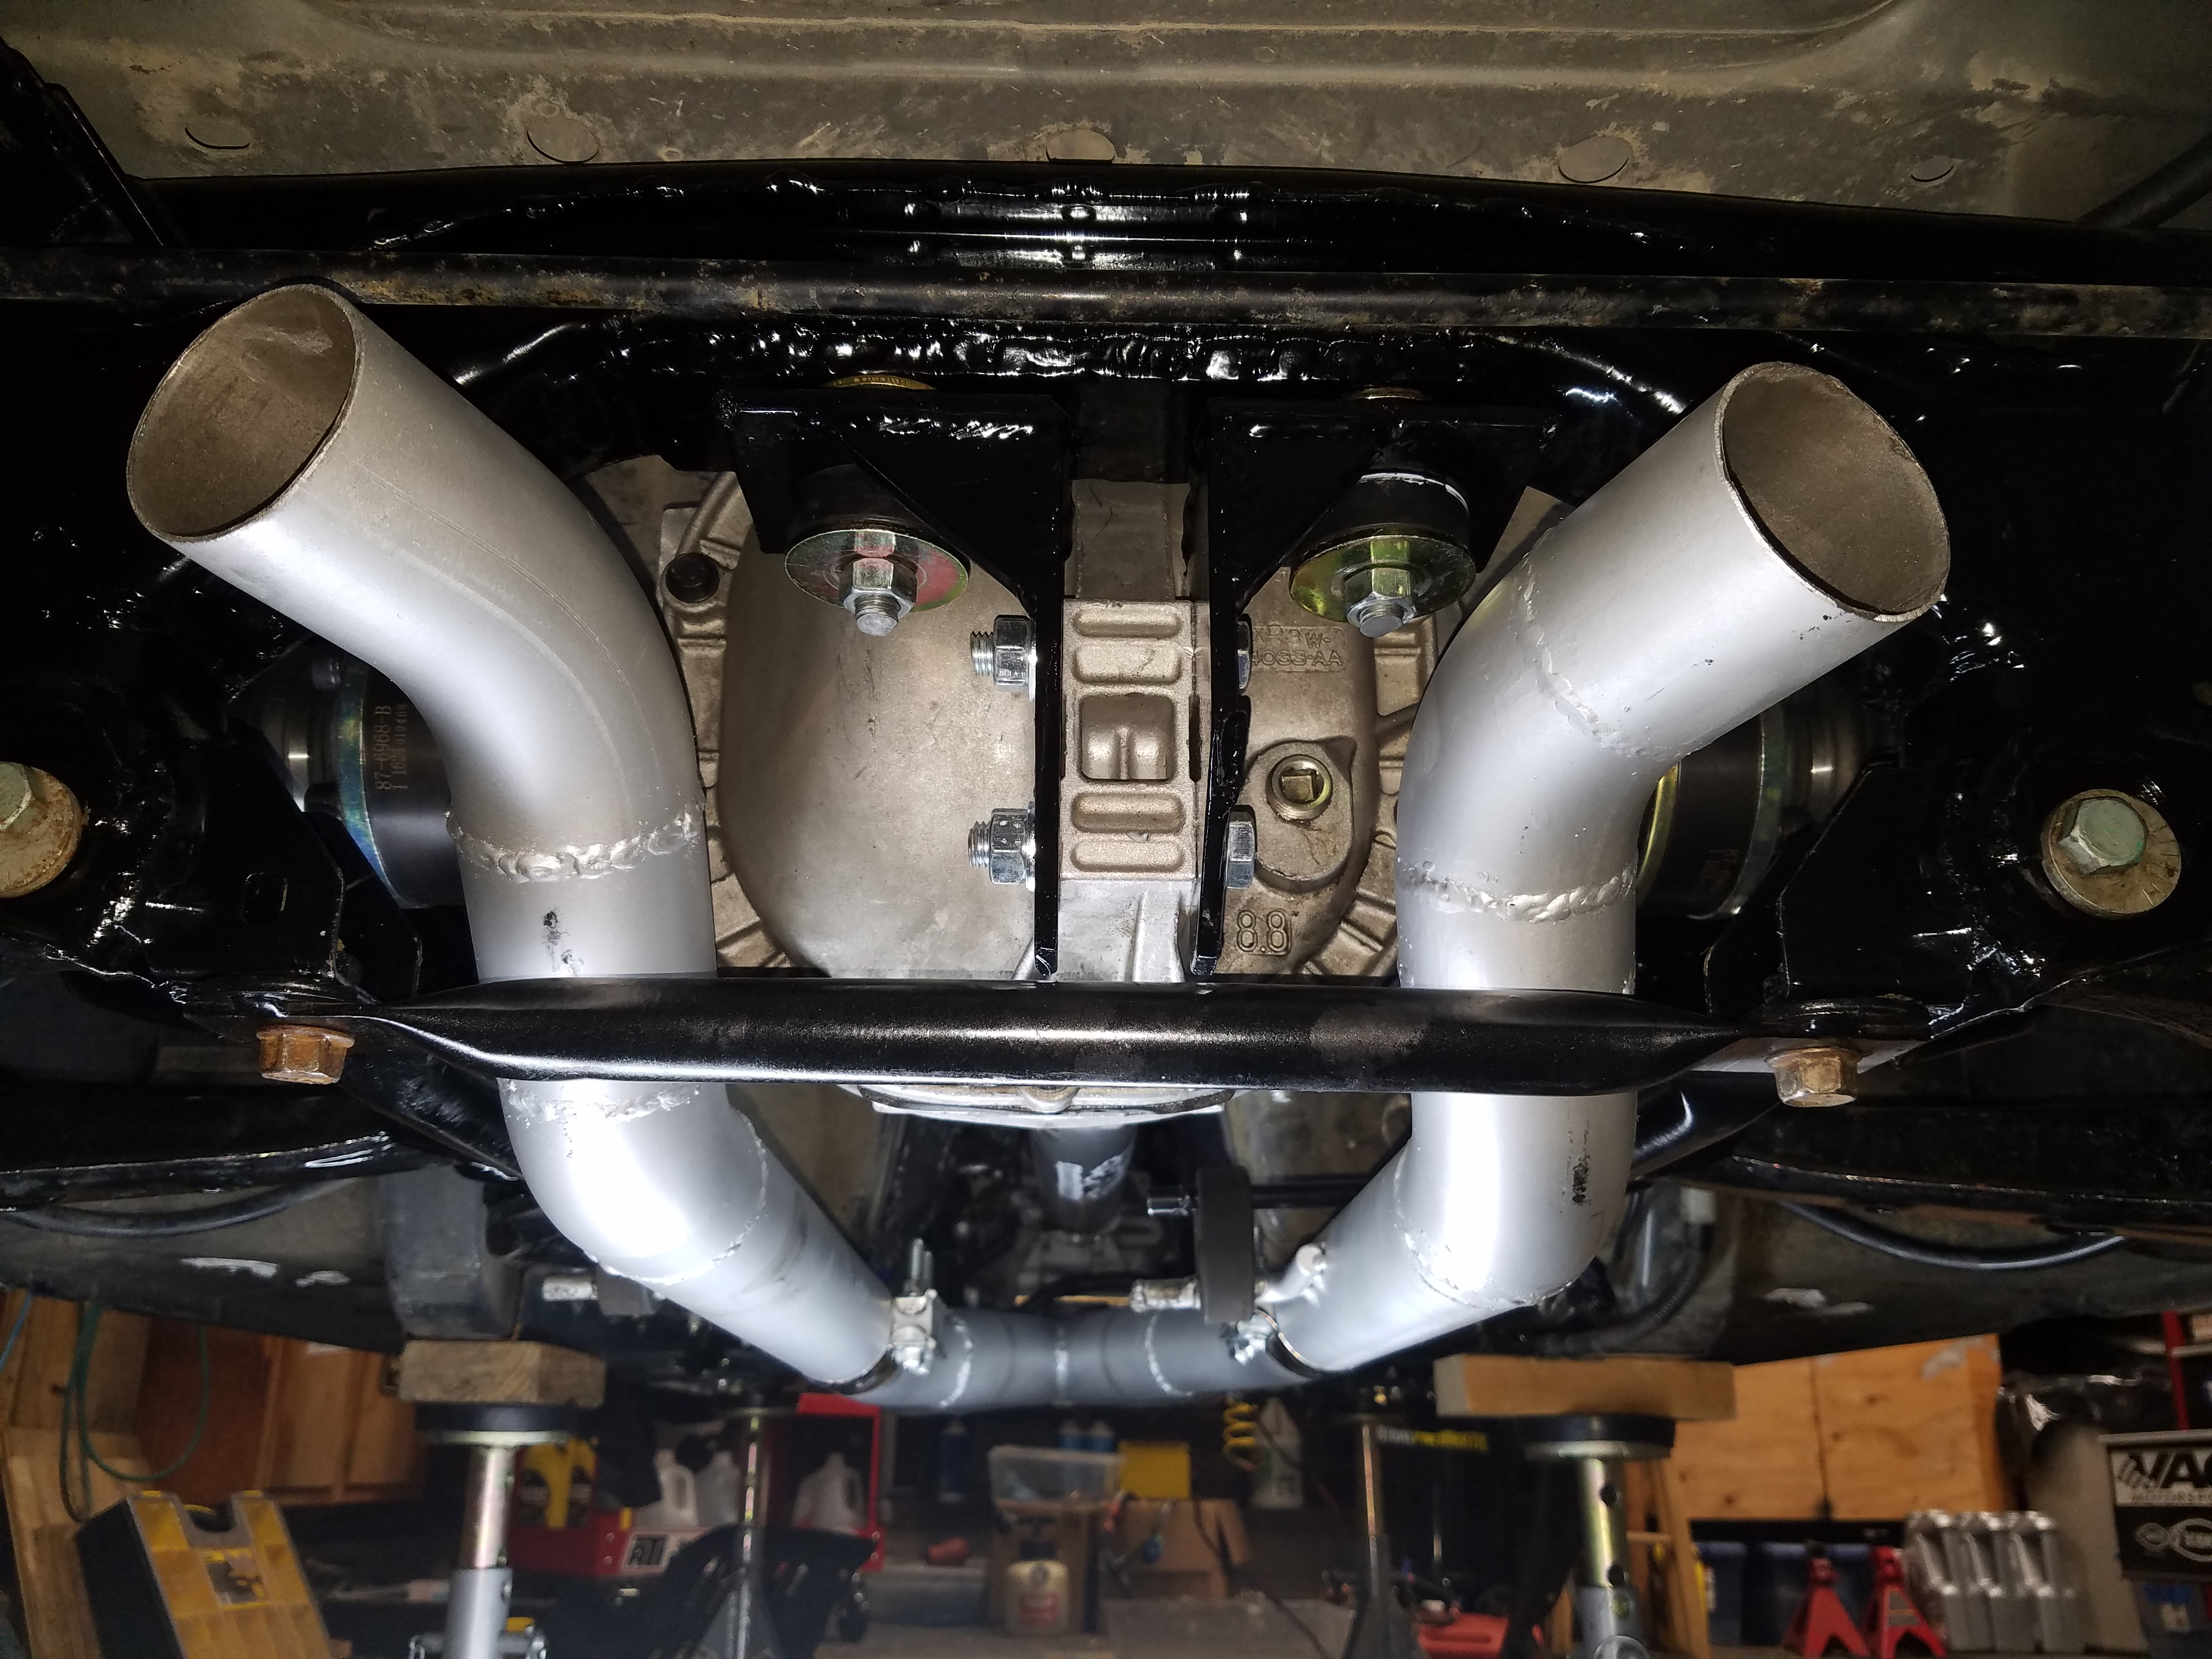
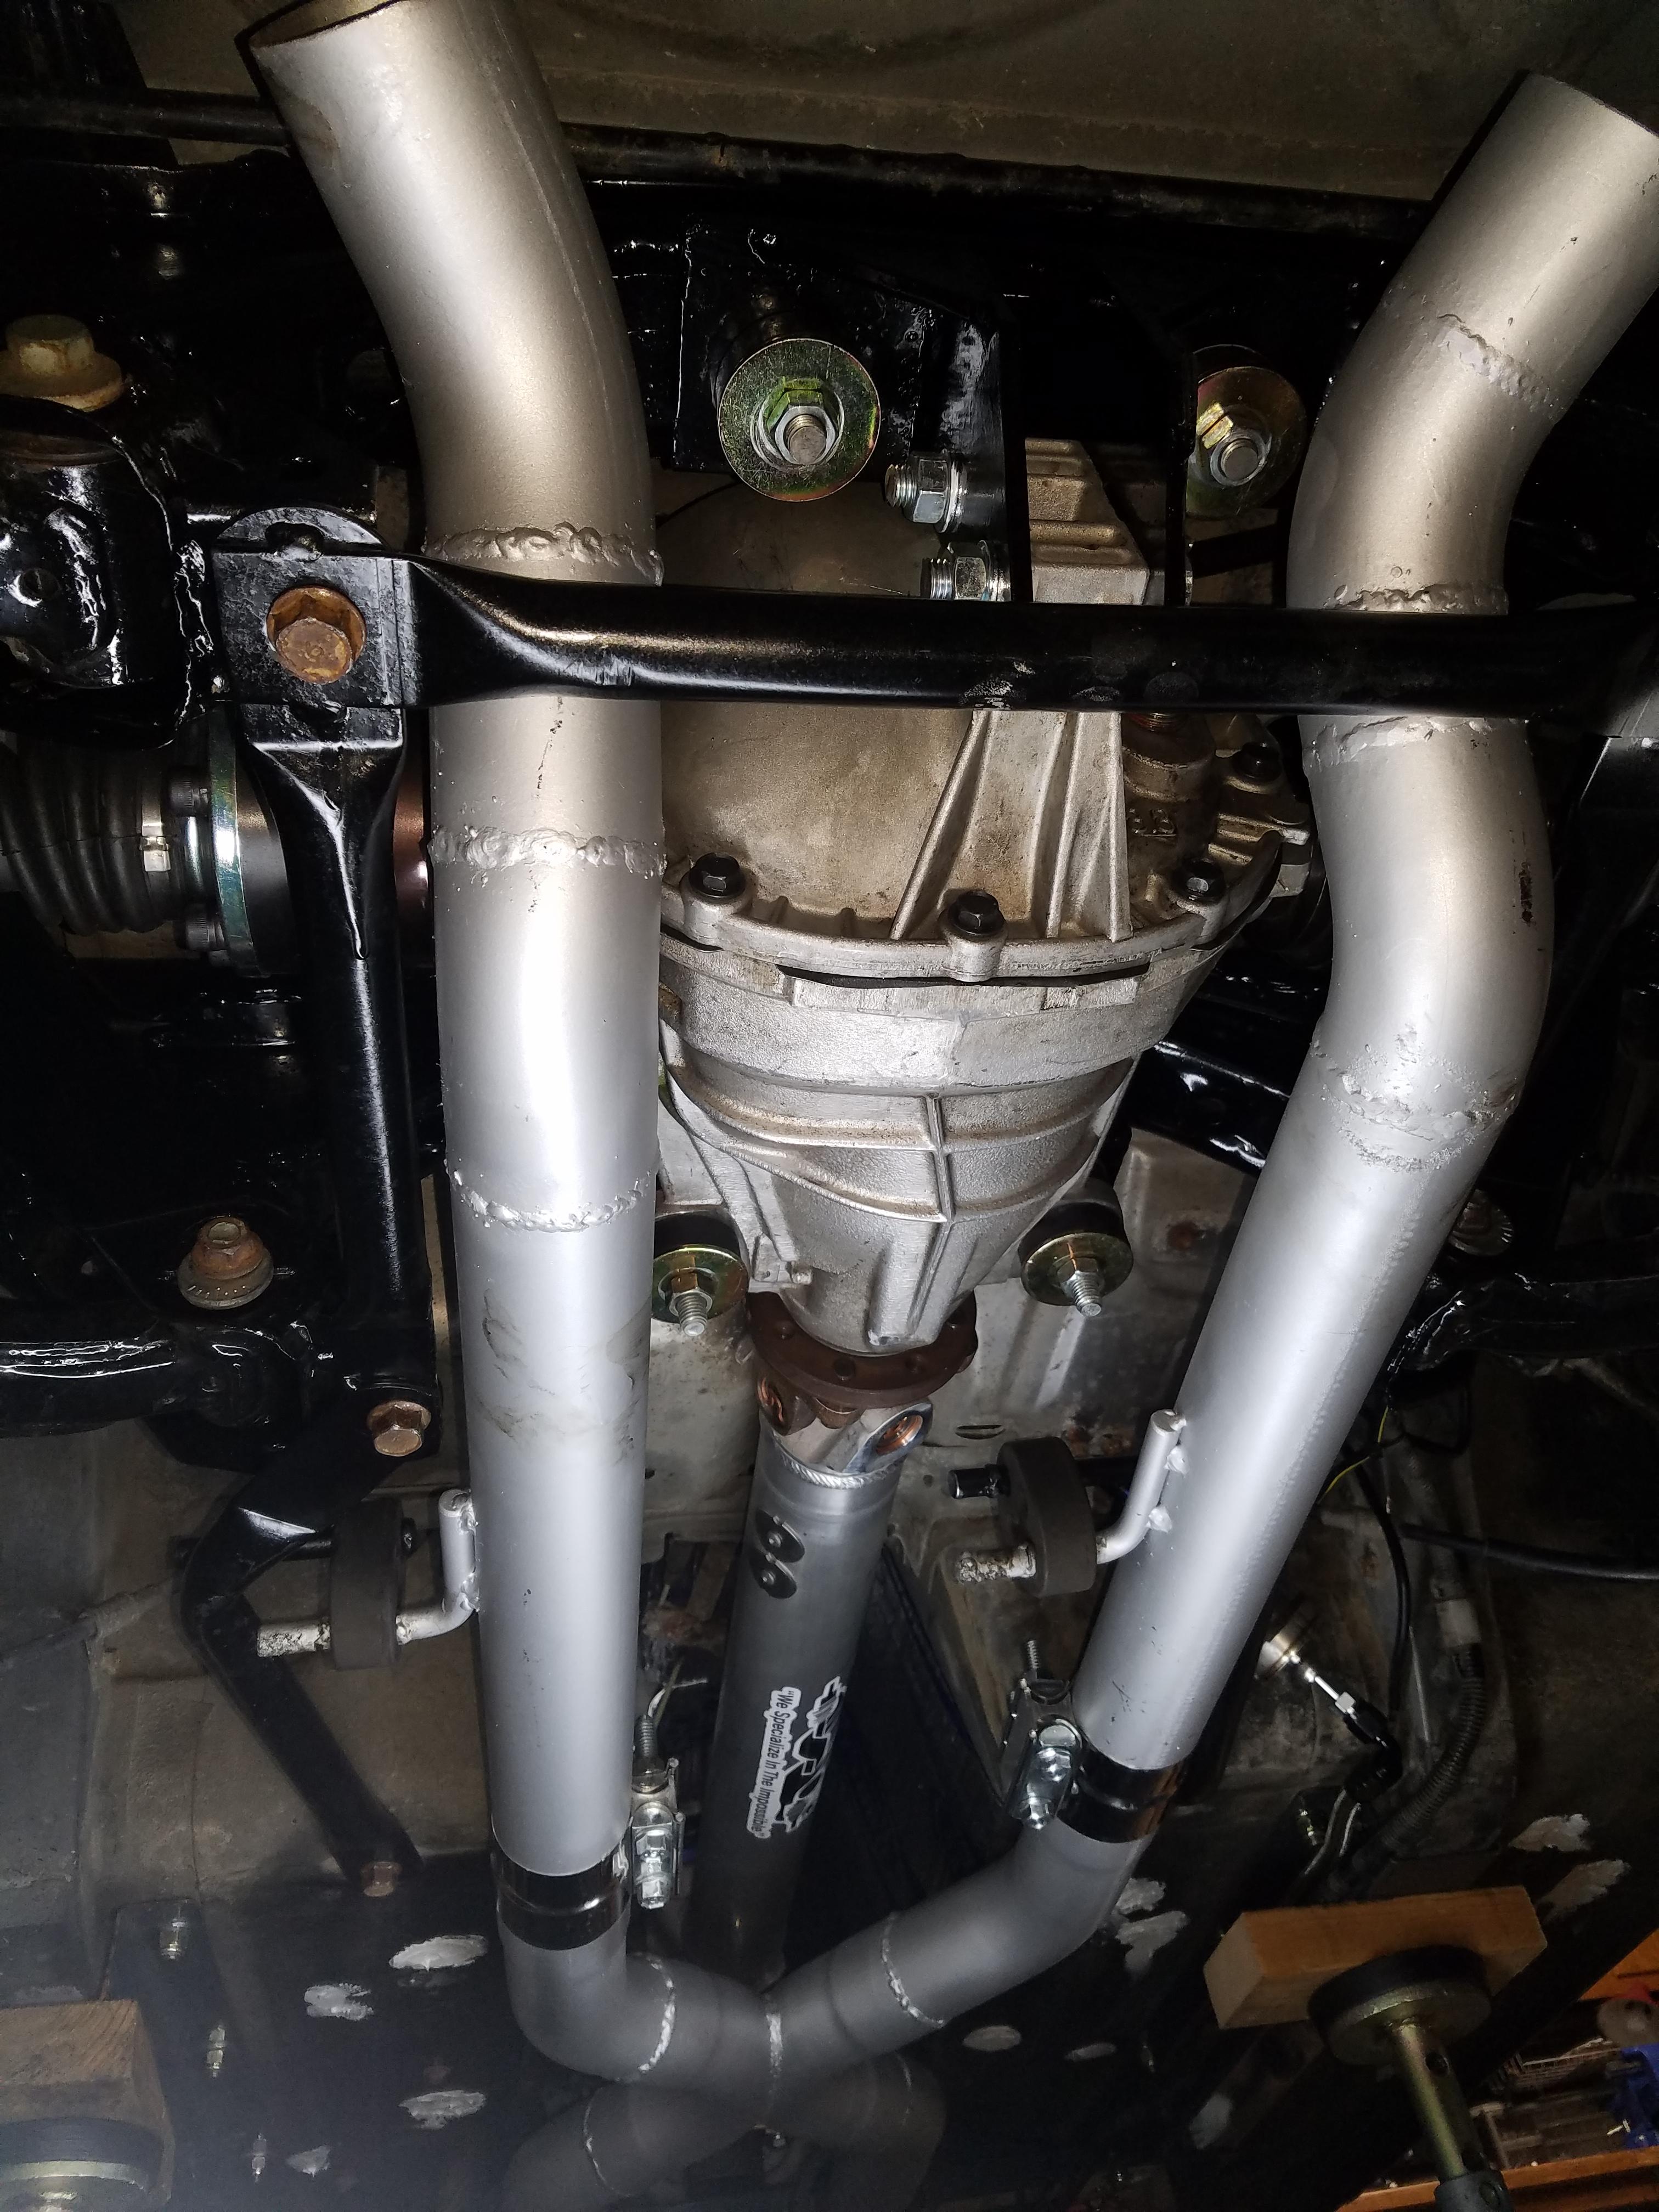
I like how things look for getting the pipe around the differential, as I had intentionally tried to get the diff is high up as I could for clearance reasons. It's pretty much a straight shot back to the diff and then a 45 degree up to meet up with whatever mufflers I decide to go with. I'll work on exhaust hangers later as well.
So far this has been going swimmingly. The result of two nights and 6 hours of work:
I'm using the 2.5" Summit Racing Universal Rod Builder Exhaust Kit SUM-670146
https://www.summitracing.com/parts/SUM-670146
The crossover pipe is a Flowtech Universal Off-Road X-Pipes 53620FLT
https://www.summitracing.com/parts/BIG-53620FLT
I would like to do something in stainless, but I don't have a TIG welder. This is my first exhaust, so MIGing a regular steel exhaust seemed like the natural step. The car will be a fair weather car, kept garaged, etc. so I'm not worried about it lasting over time. I will be coating it with some exhaust paint once it's all done.
The car will be registered as a Modified vehicle in Pennsylvania, so there are no Emissions restrictions and some guidelines around limited usage b/c of lack of emissions requirements. So there will be no catalytic converters on the car.
Sorry for the lack of detailed pictures on this step, I think things were moving along so quickly that I forgot. I started on the driver's side with a large straight pipe from the kit and then eyeballed two bends to zig-zag to line up with the half round cutouts on the trans crossmember.
I used a carpentry angle finder gauge to get a rough idea of what angle I needed and where I needed it on the pipe. I then made some pie cuts on the pipe to make the bend. The metal cutting blade on my bandsaw didn't seem up to the task and I didn't feel like forcing it, so I reverted to using a large metal cutting blade in my grinder. Once I was happy I tacked the pipe together on the ground and reinstalled it.
You can see in these pictures I used a clamp to hold it in the right position against the crossmember.
On the pass. side I started at the crossmember by making a little zig zag around the transmission towards the front of the car. Then I clamped it in place to fit up the crossover pipe. I just used the 45 degree pieces from the kit to meet up with the crossover pipe on either side and cut them at the right length to line up. What's nice with the slip joints is that depending on how tightly you push them together, you can still rotate them and wiggle them to get a 1/8" or 1/4" sometimes of movement so you line up with other pipes. Welding the connections together will seal up anything that doesn't perfectly line up.
To finish up the pass. side and meet up with the header required a bit more thought. I took one of the 90 degree pieces from the kit and marked off the pipe in sections at 45 degrees, 22.5, etc. I just used some cardboard to bend around the inside and outside curves and made markings on the cardboard at the halfway points, and then worked my way down until I had the smaller sections marked off.
This is after the cut was made, using the angle finder and a machinist square to judge where the cut line would be that would match up with the angle I needed.
If the cut was square to the pipe you should not see any gaps when a normal section of pipe is fitted up
I measured what I needed for the short straight section of pipe and made sure it all lined up. It did, so I tacked it in. If you put at least 3 or 4 tacks around the pipe in a butt connection, it shouldn't move at all I've found.
That was enough doing geometry and welding on my back for one night, so I called it quits and pulled the exhaust system off the car for a full welding of the joints tomorrow night. Trying to take advantage of some warmer weather the last few days.
I like how things look for getting the pipe around the differential, as I had intentionally tried to get the diff is high up as I could for clearance reasons. It's pretty much a straight shot back to the diff and then a 45 degree up to meet up with whatever mufflers I decide to go with. I'll work on exhaust hangers later as well.


 02-14-2017, 06:57 AM
#114
V8 Miata Enthusiast
Thread Starter
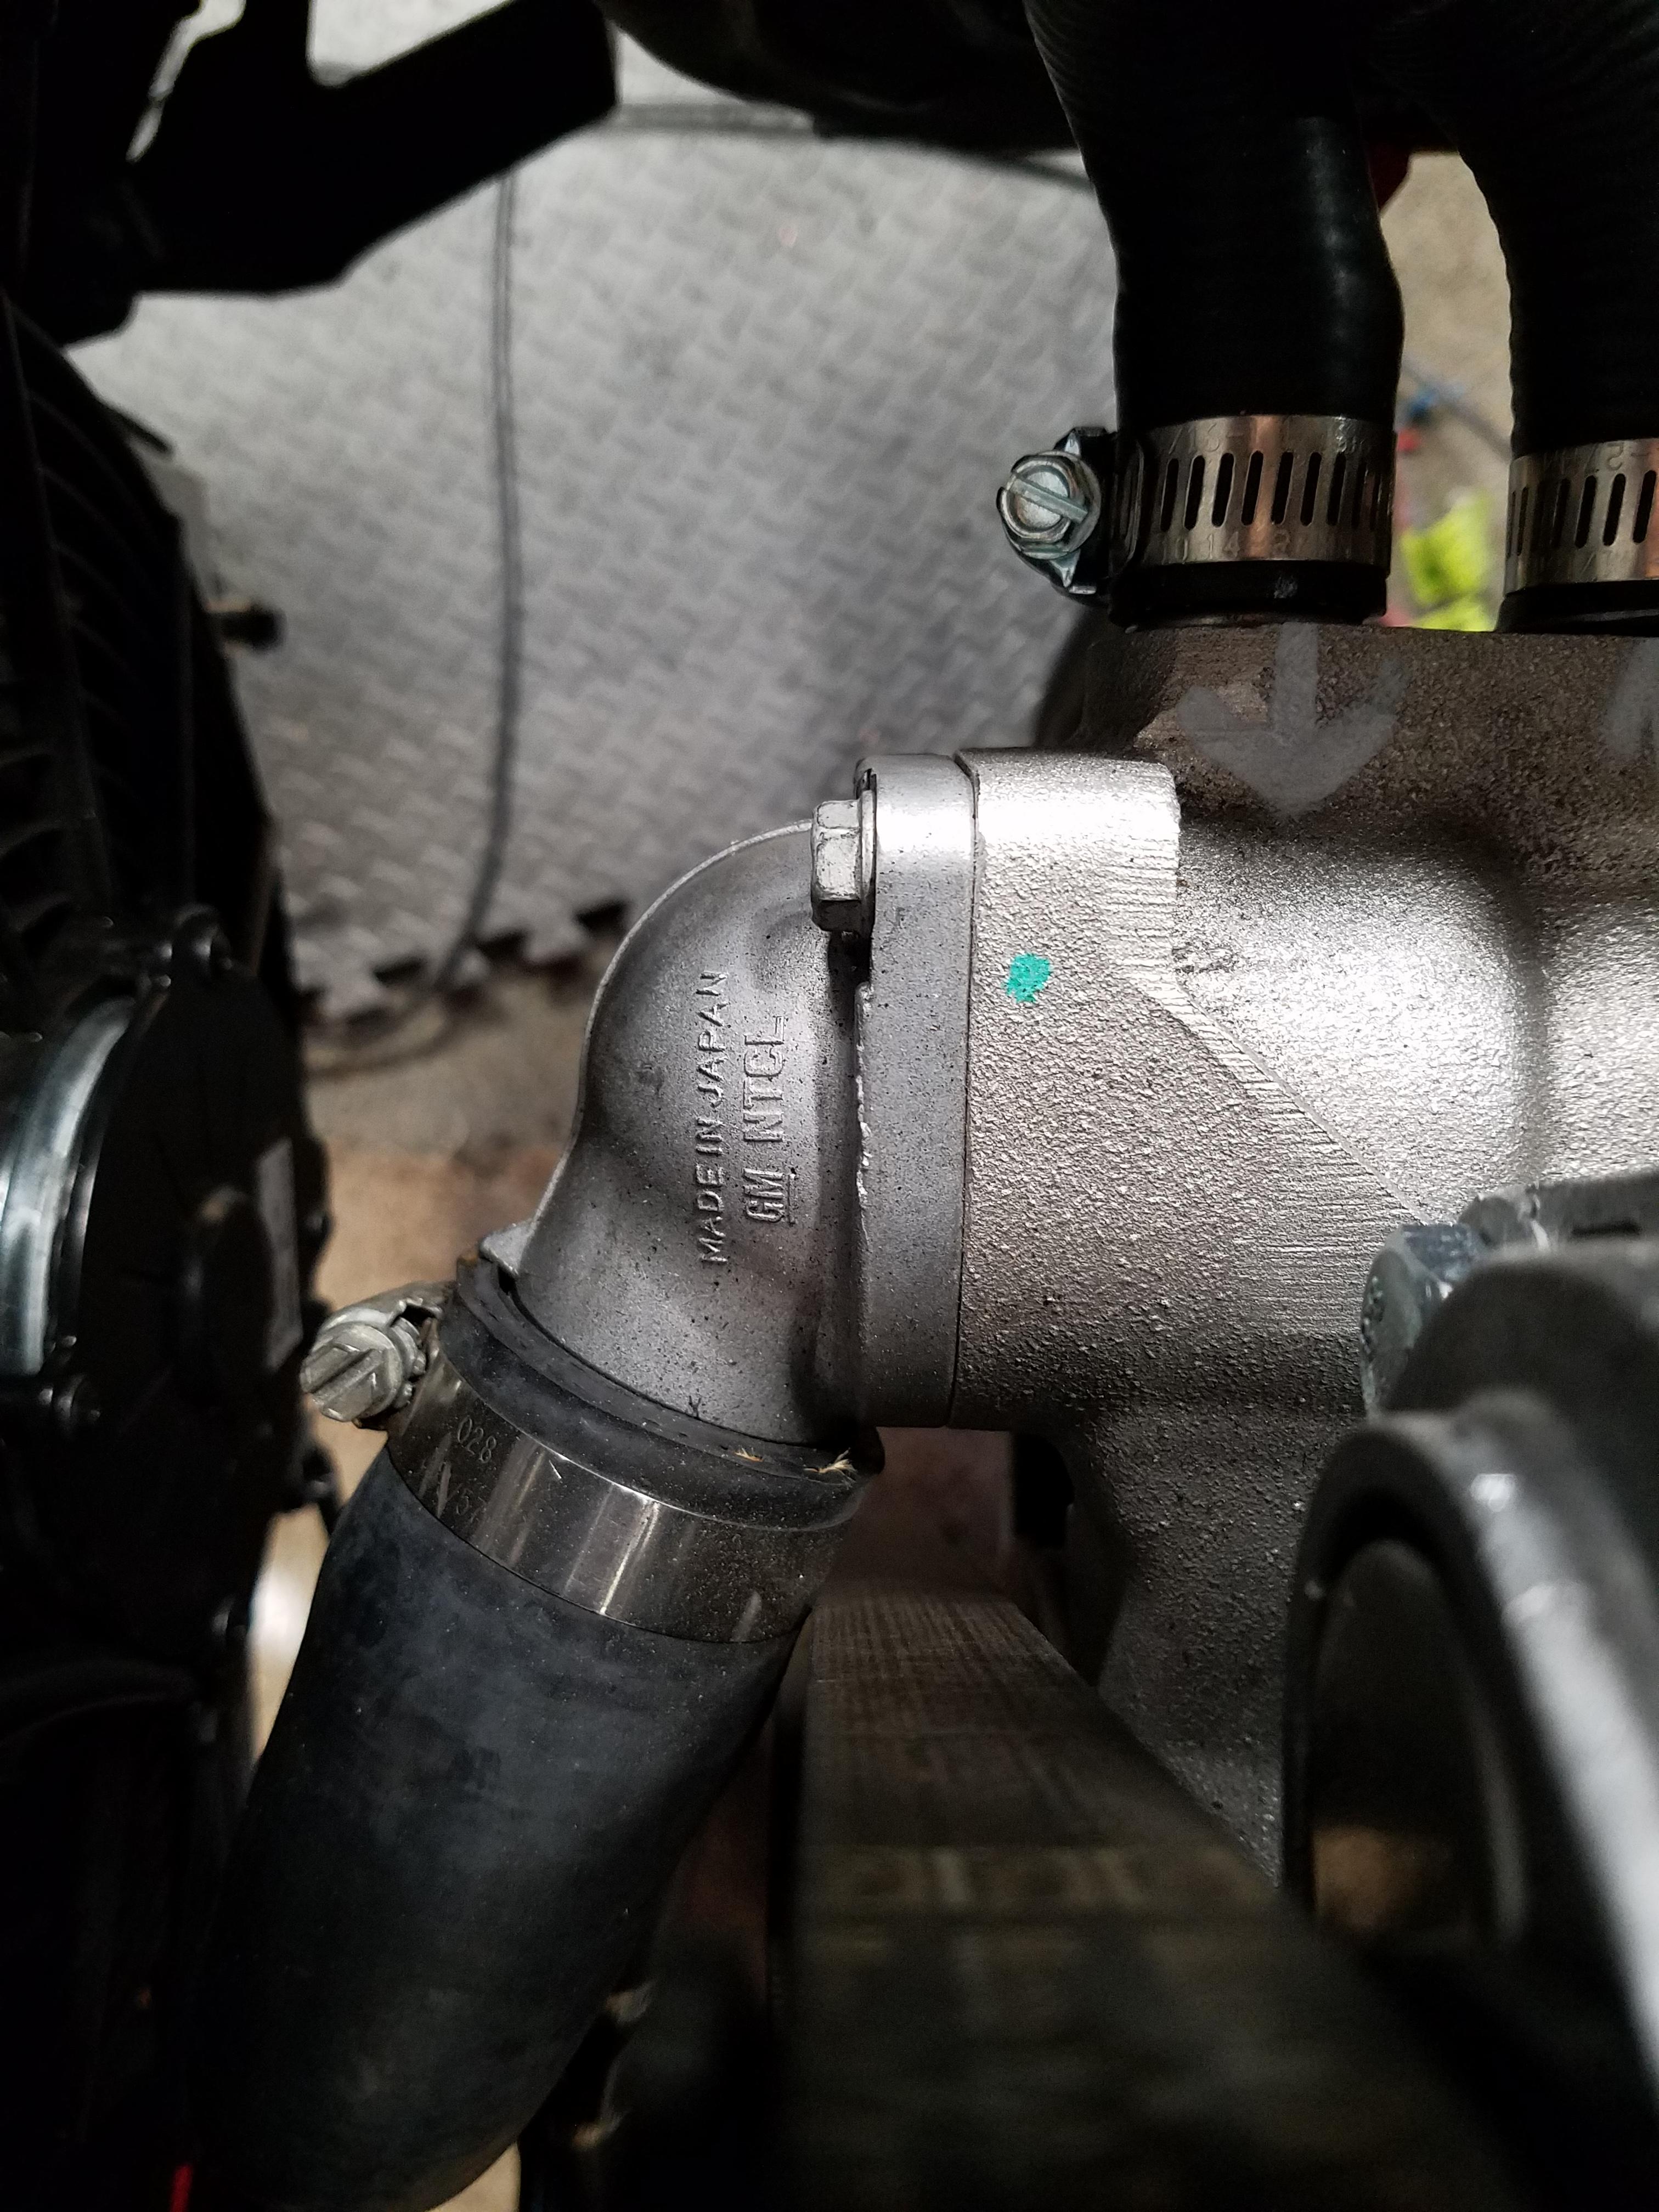
One thing I forgot to post was how I did the heater hose connections. I did some research and found some hoses that I think worked really well for the ls swap applications.
It mainly consists of molded bends that come off the water pump and heater box to allow some clearance with the frame of the car or engine, and also the right diameter for the outlets. You can then swivel these to fit your swap, and all are reasonably priced pieces.
This was used on the right side, water pump inlet:
ContiTech 1027AMZ8653
Left side, water pump outlet:
URO Parts 64 21 1 394 292 Heater Hose
Then I used two 90 degree molded heater hoses of the right diameter to come off the heater box connections:
Gates 28466 90 Degreees Molded Heater Hose
To help with the connections between the heater box and pump, I used four of these. I went in favor of brass as I didn't feel comfortable adding plastic to the system for longevity. They do make plaster heater hose couplers, which would certainly work fine here
Anderson Metals Brass Hose Fitting, Union, 5/8" x 5/8" Barb
The heater hose itself:
Gates 28491 5/8 Inch Polybag Heater Hose
The LS water pump connections are:
Inlet on the right, towards front of the car
Outlet on the left
Miata heater box connections are:
Inlet on the left, passenger side
Outlet on the right, driver's side
The final product installed:
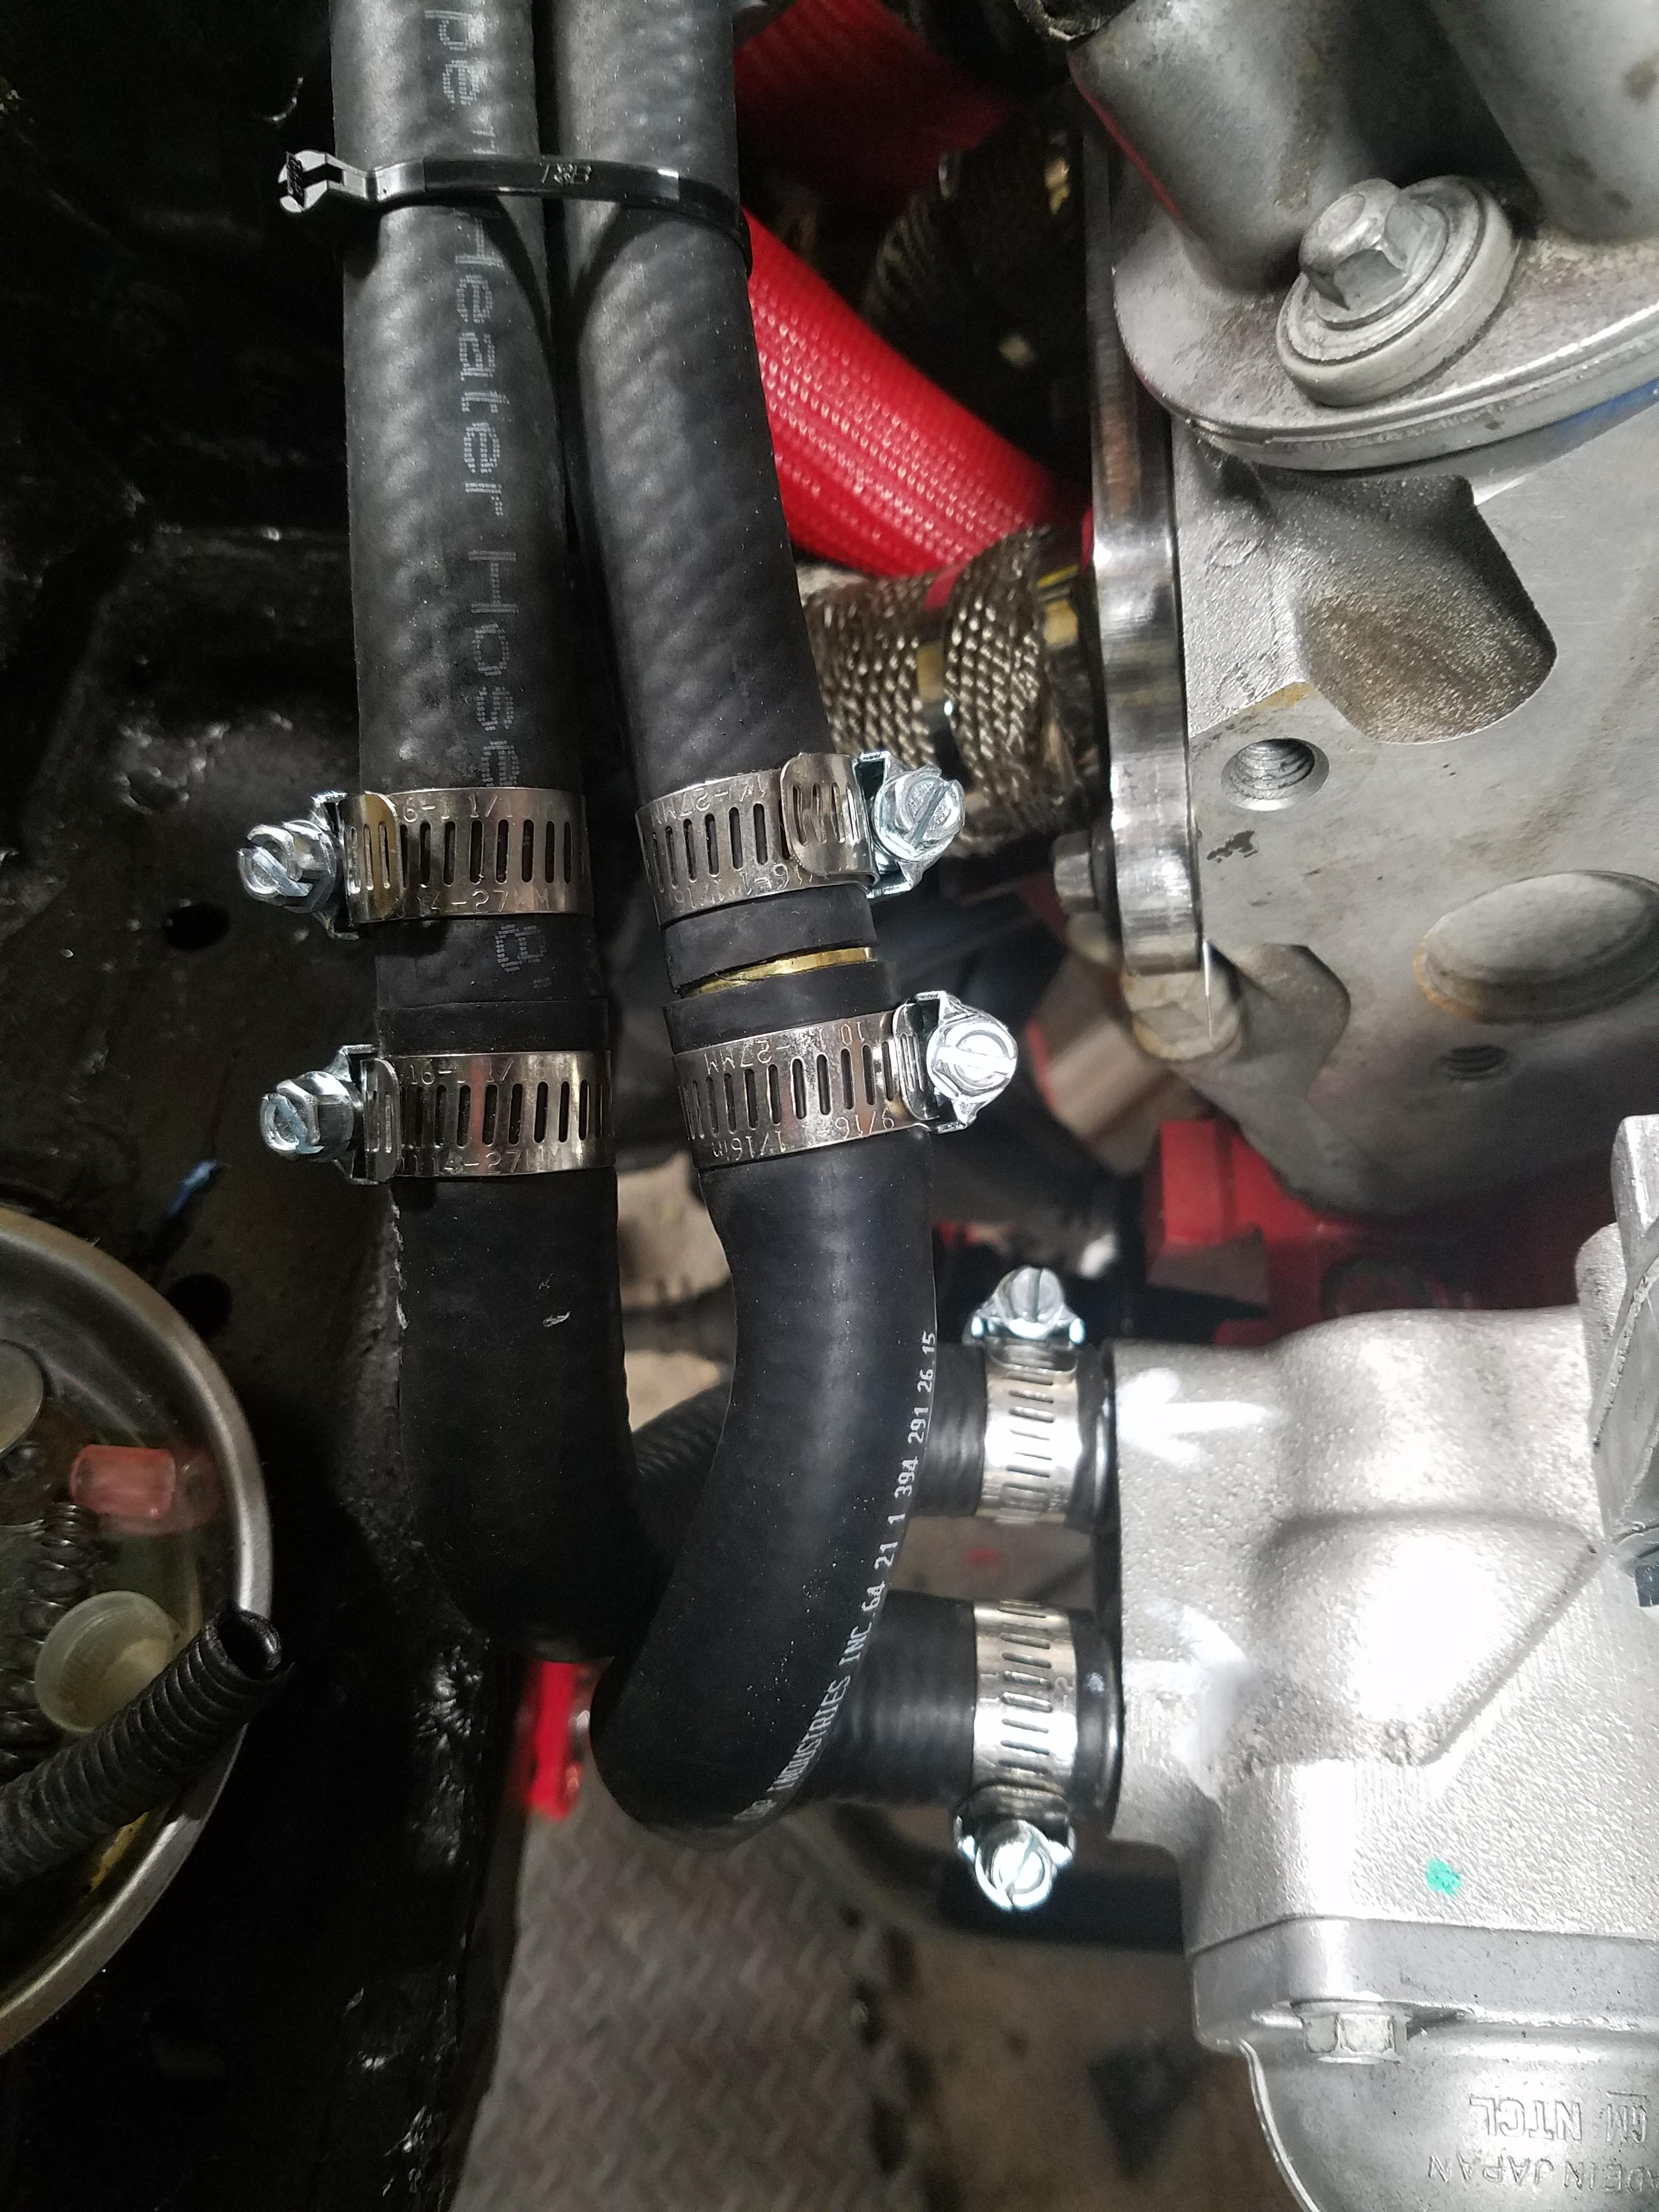
03-01-2017, 06:56 AM
#115
V8 Miata Enthusiast
Thread Starter
Still plugging along, with the finish line in sight.
Motor runs, though w/out any o2 sensors. I'll post a proper video of it when I can get some good video over the weekend. Getting some light lifter ticking but never really gave it a chance to warm up.
Exhaust is done and fitted. I have some Flowmaster Super 40s I borrowed from a friend that I've tested. Seems loud but that was with no clamps on them and the exhaust not fully welded. Pretty happy with the way it turned out. Getting the final bends around the diff and rear subframe brace was a bit of work.
I would recommend anyone doing this to buy a decent metal chopsaw. My bandsaw and blade were not up to this task, and using a cutting wheel worked ok, but doesn't guarantee decent square cuts. Good square and accurate cuts will make your life and welding much easier.
First startup was very loud and produced some evil looking smoke out of the pipes
Bulk of the system is painted
pieces that go around the diff
Rear subframe brace was used to make the exhaust hangers and was repainted
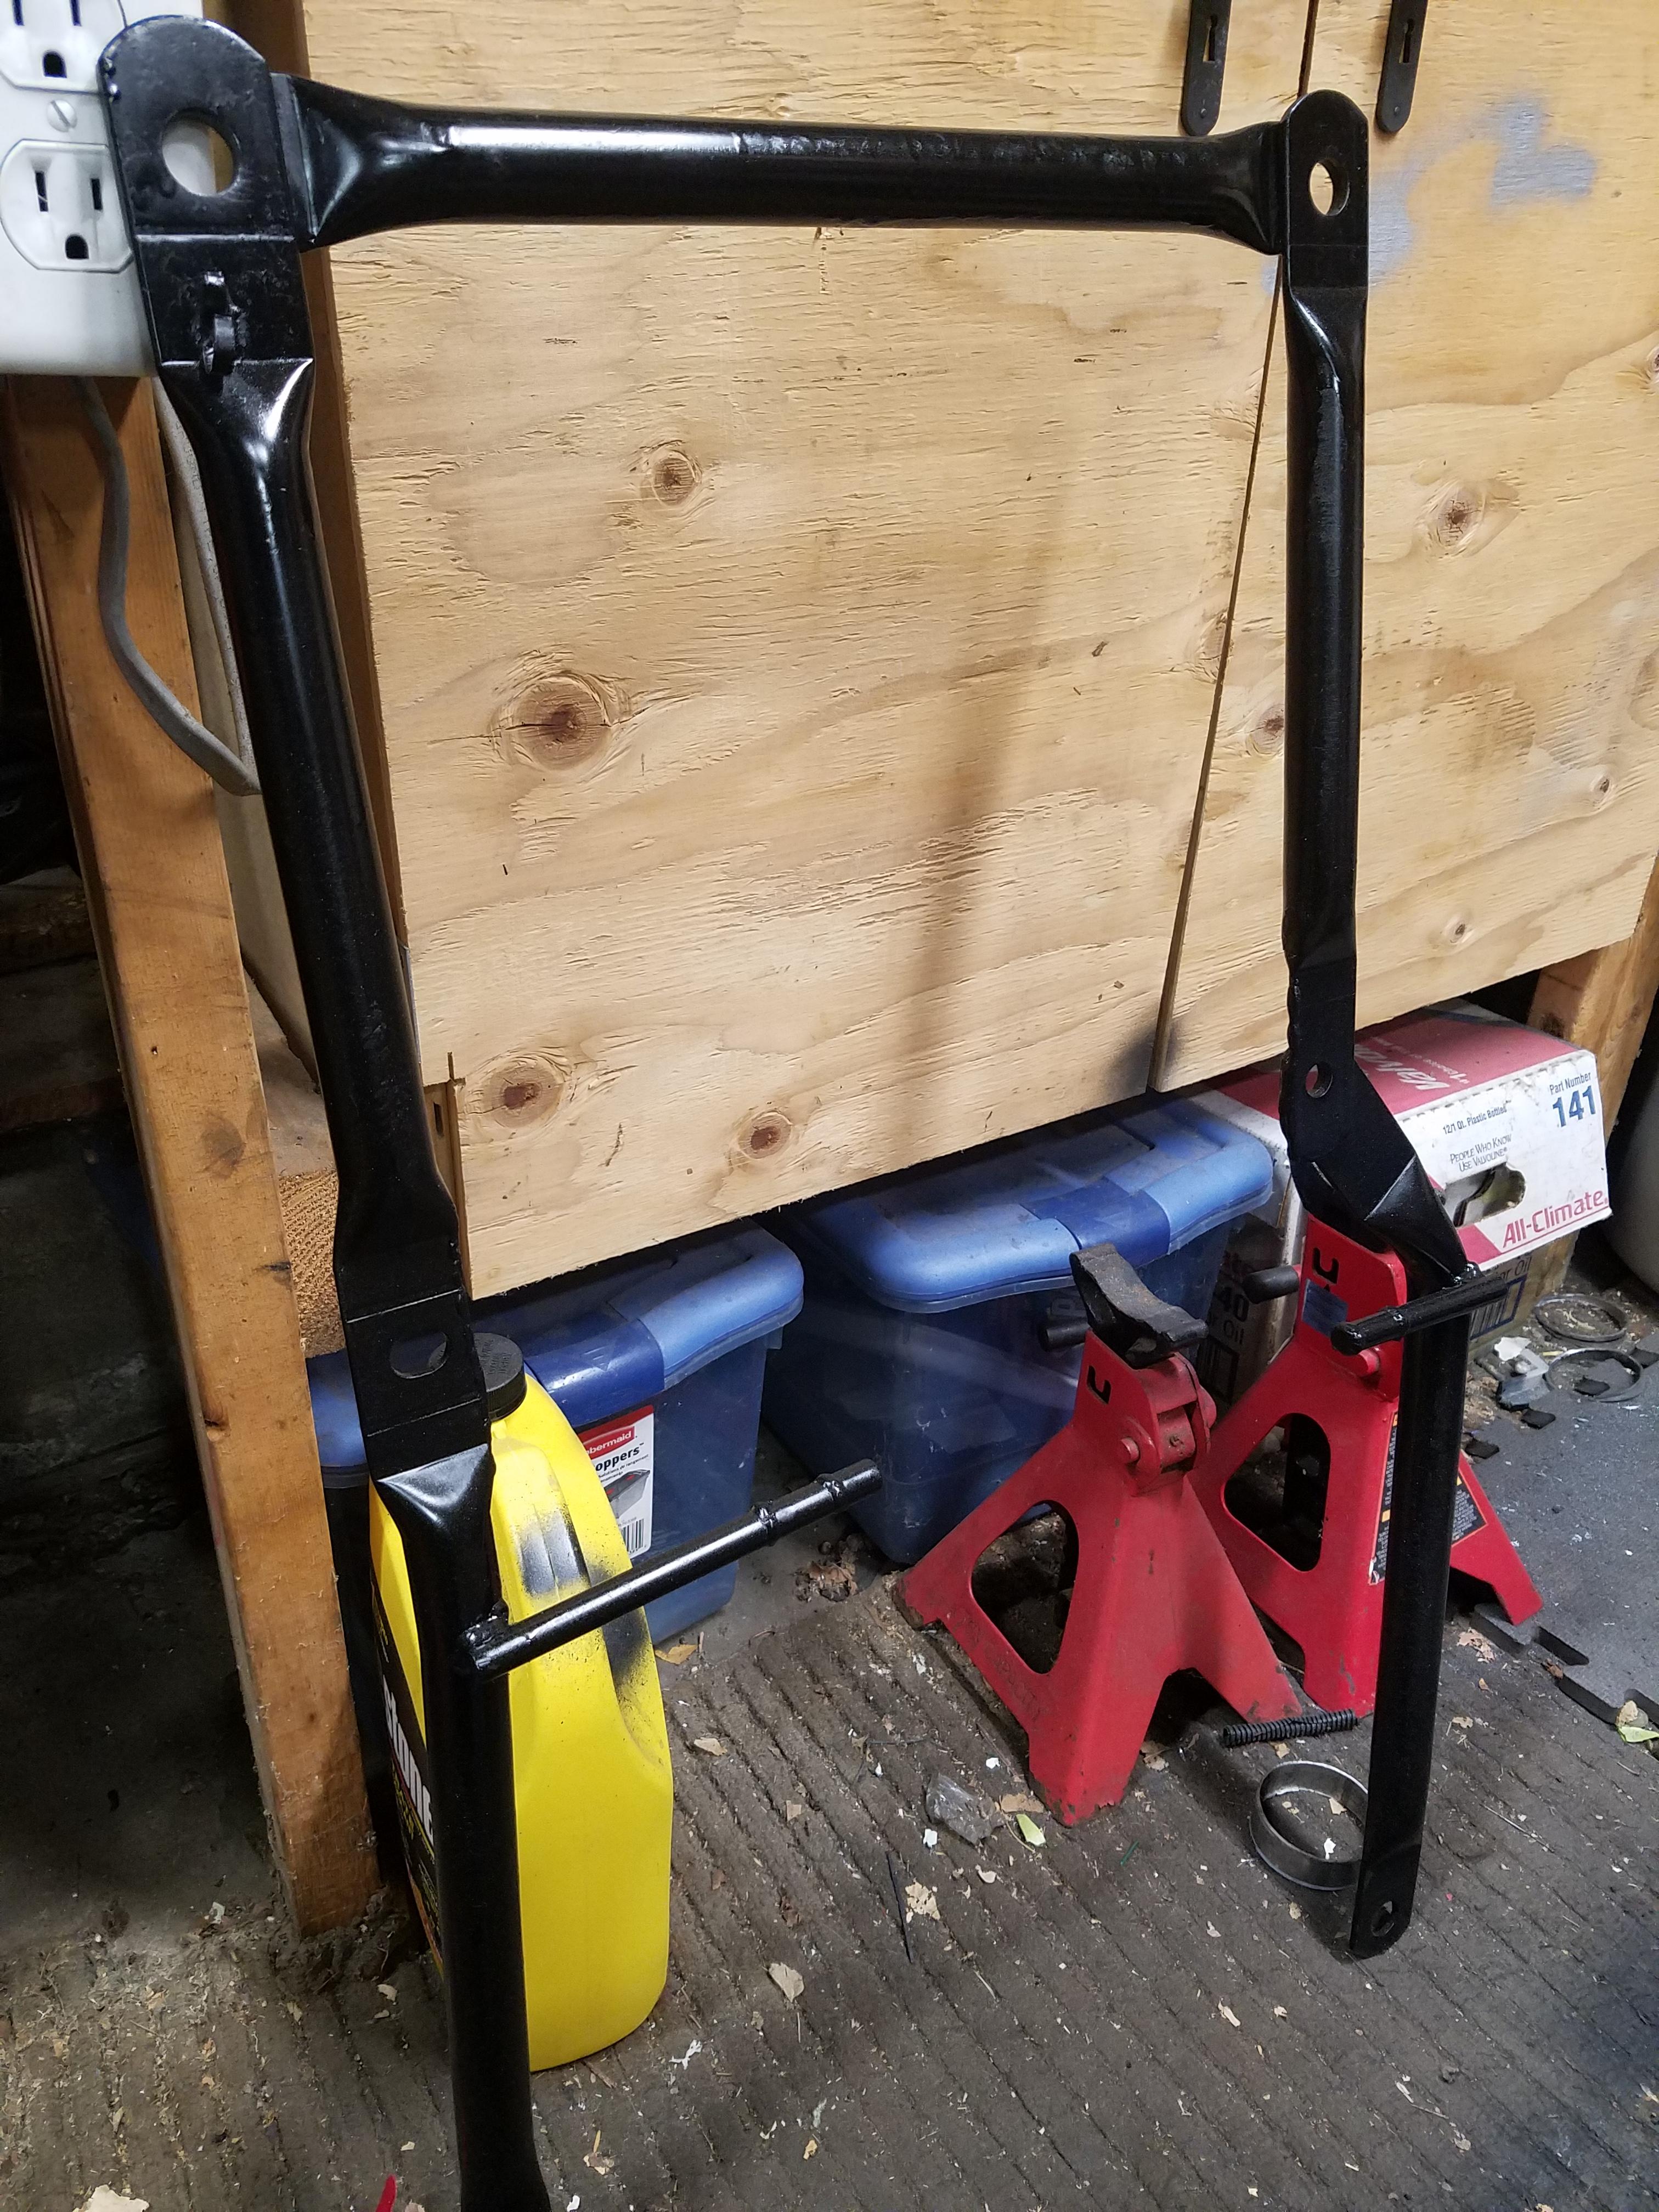
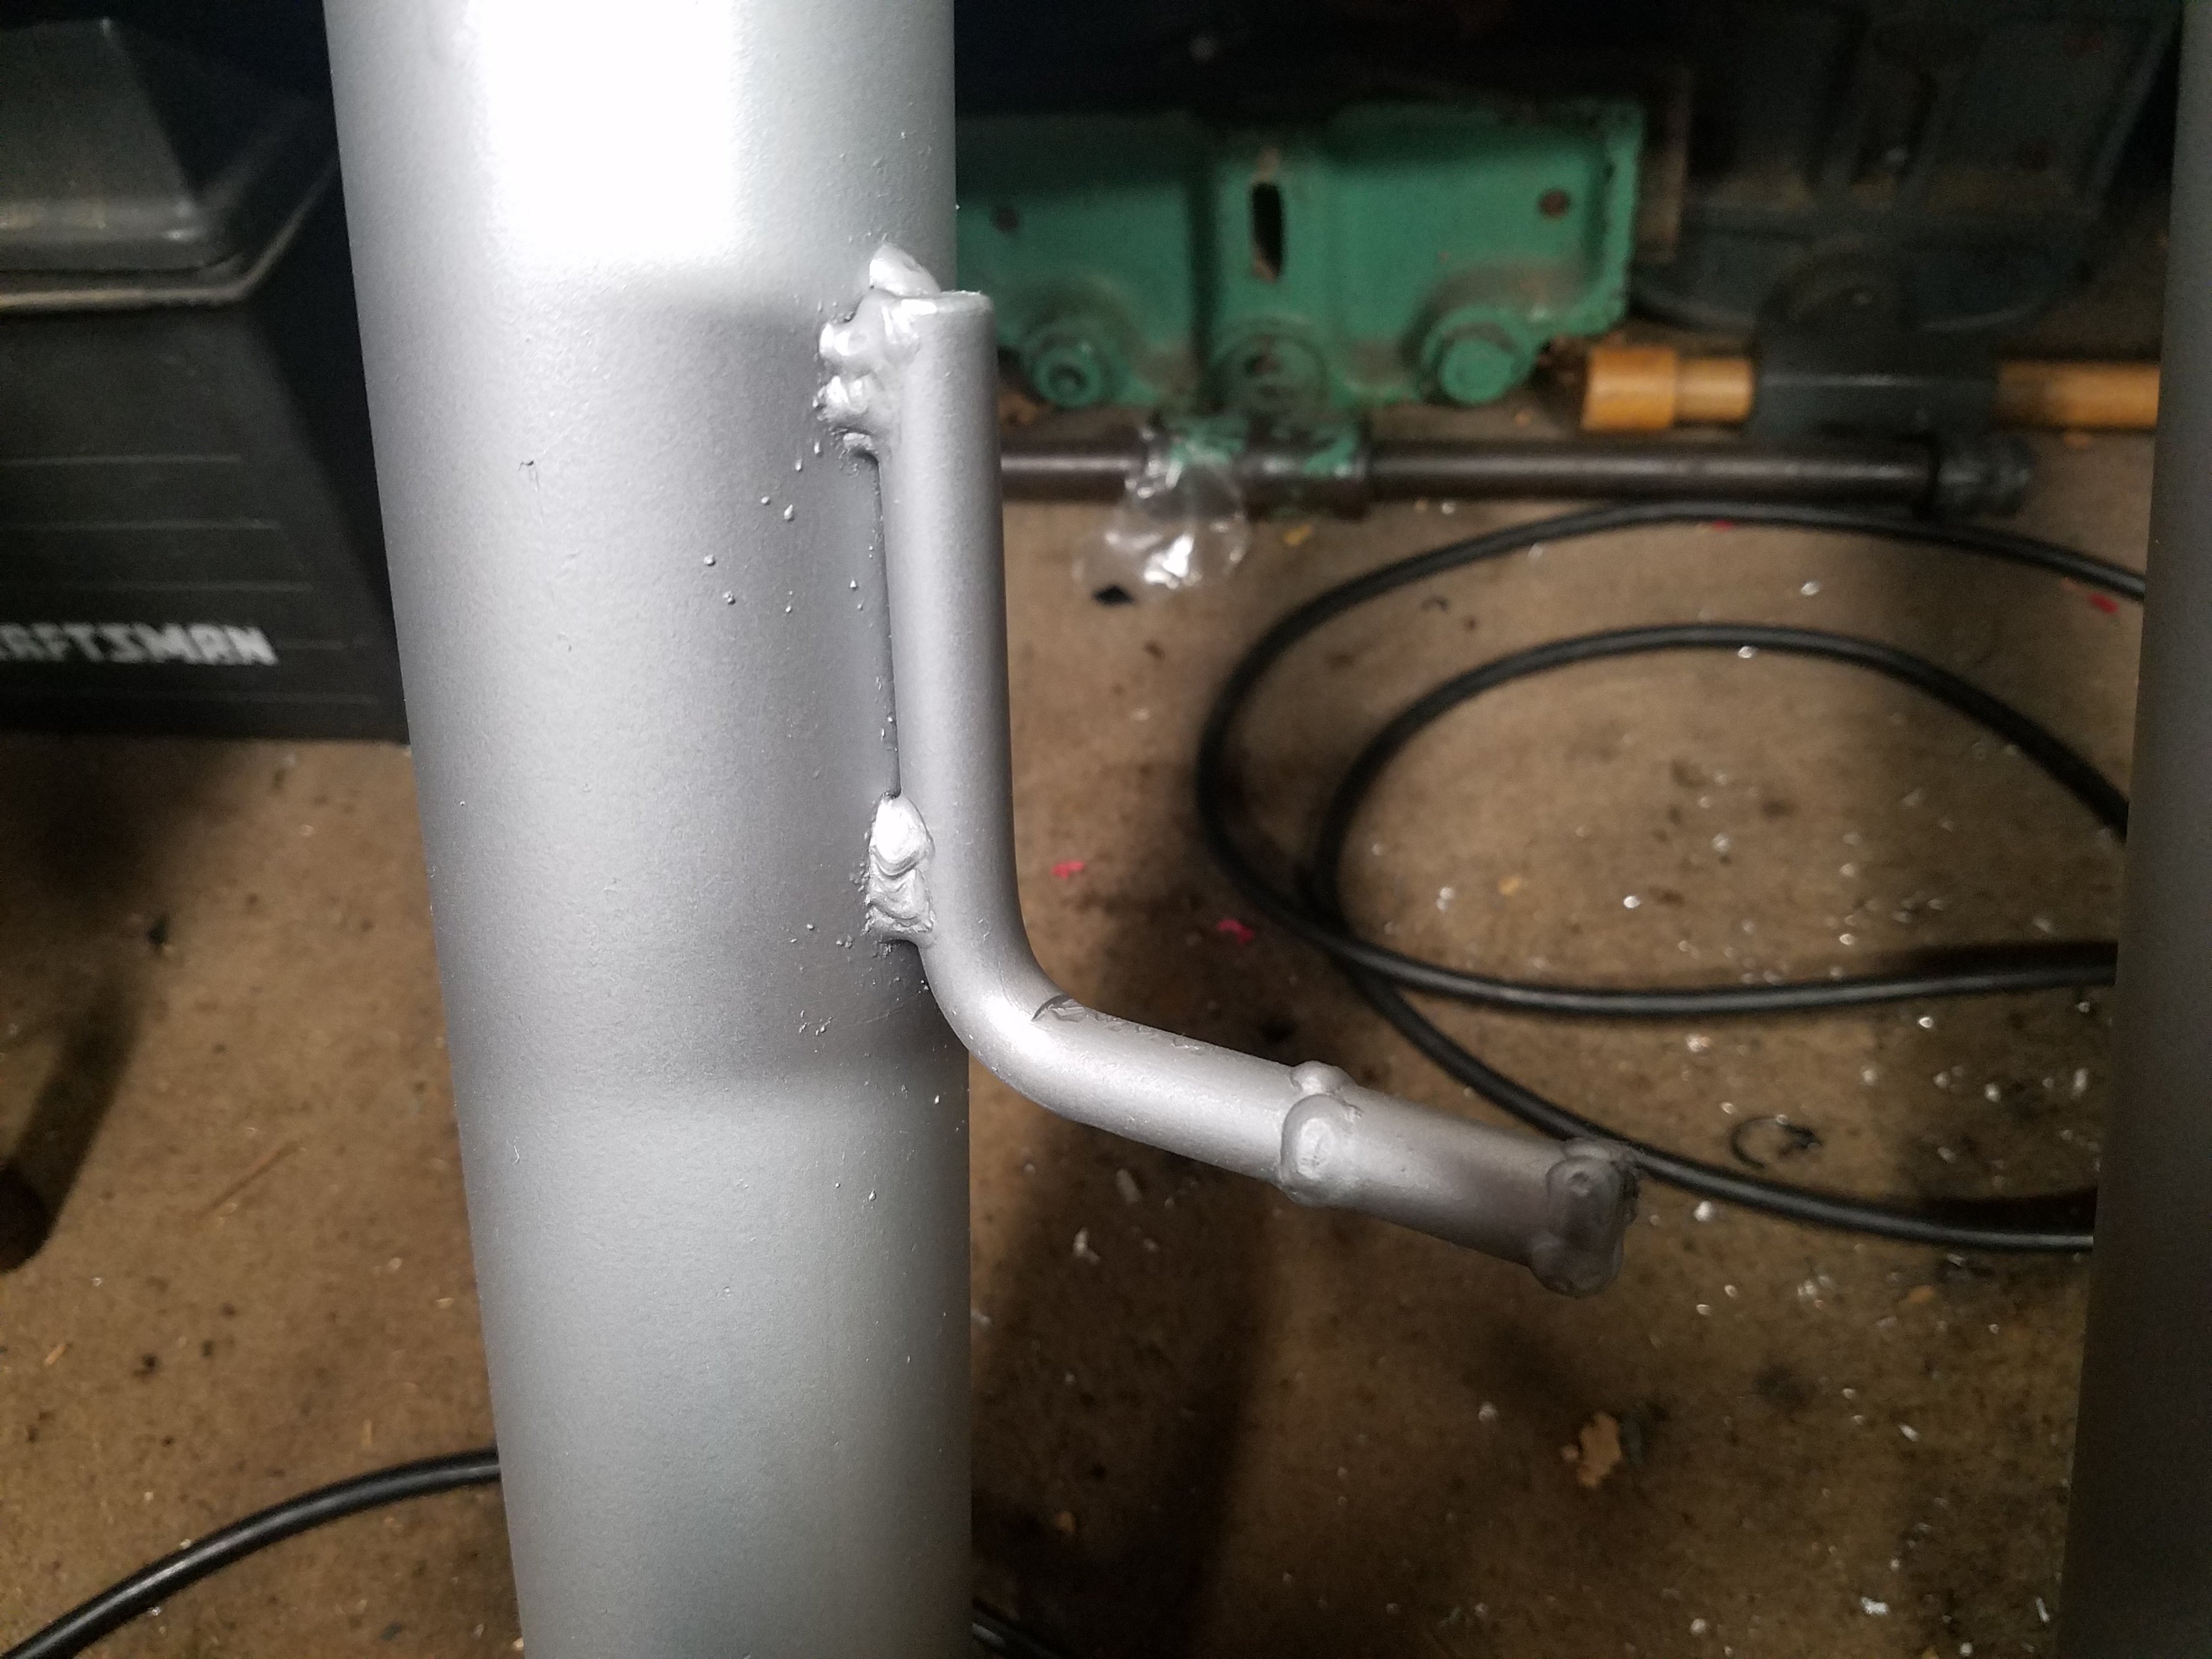
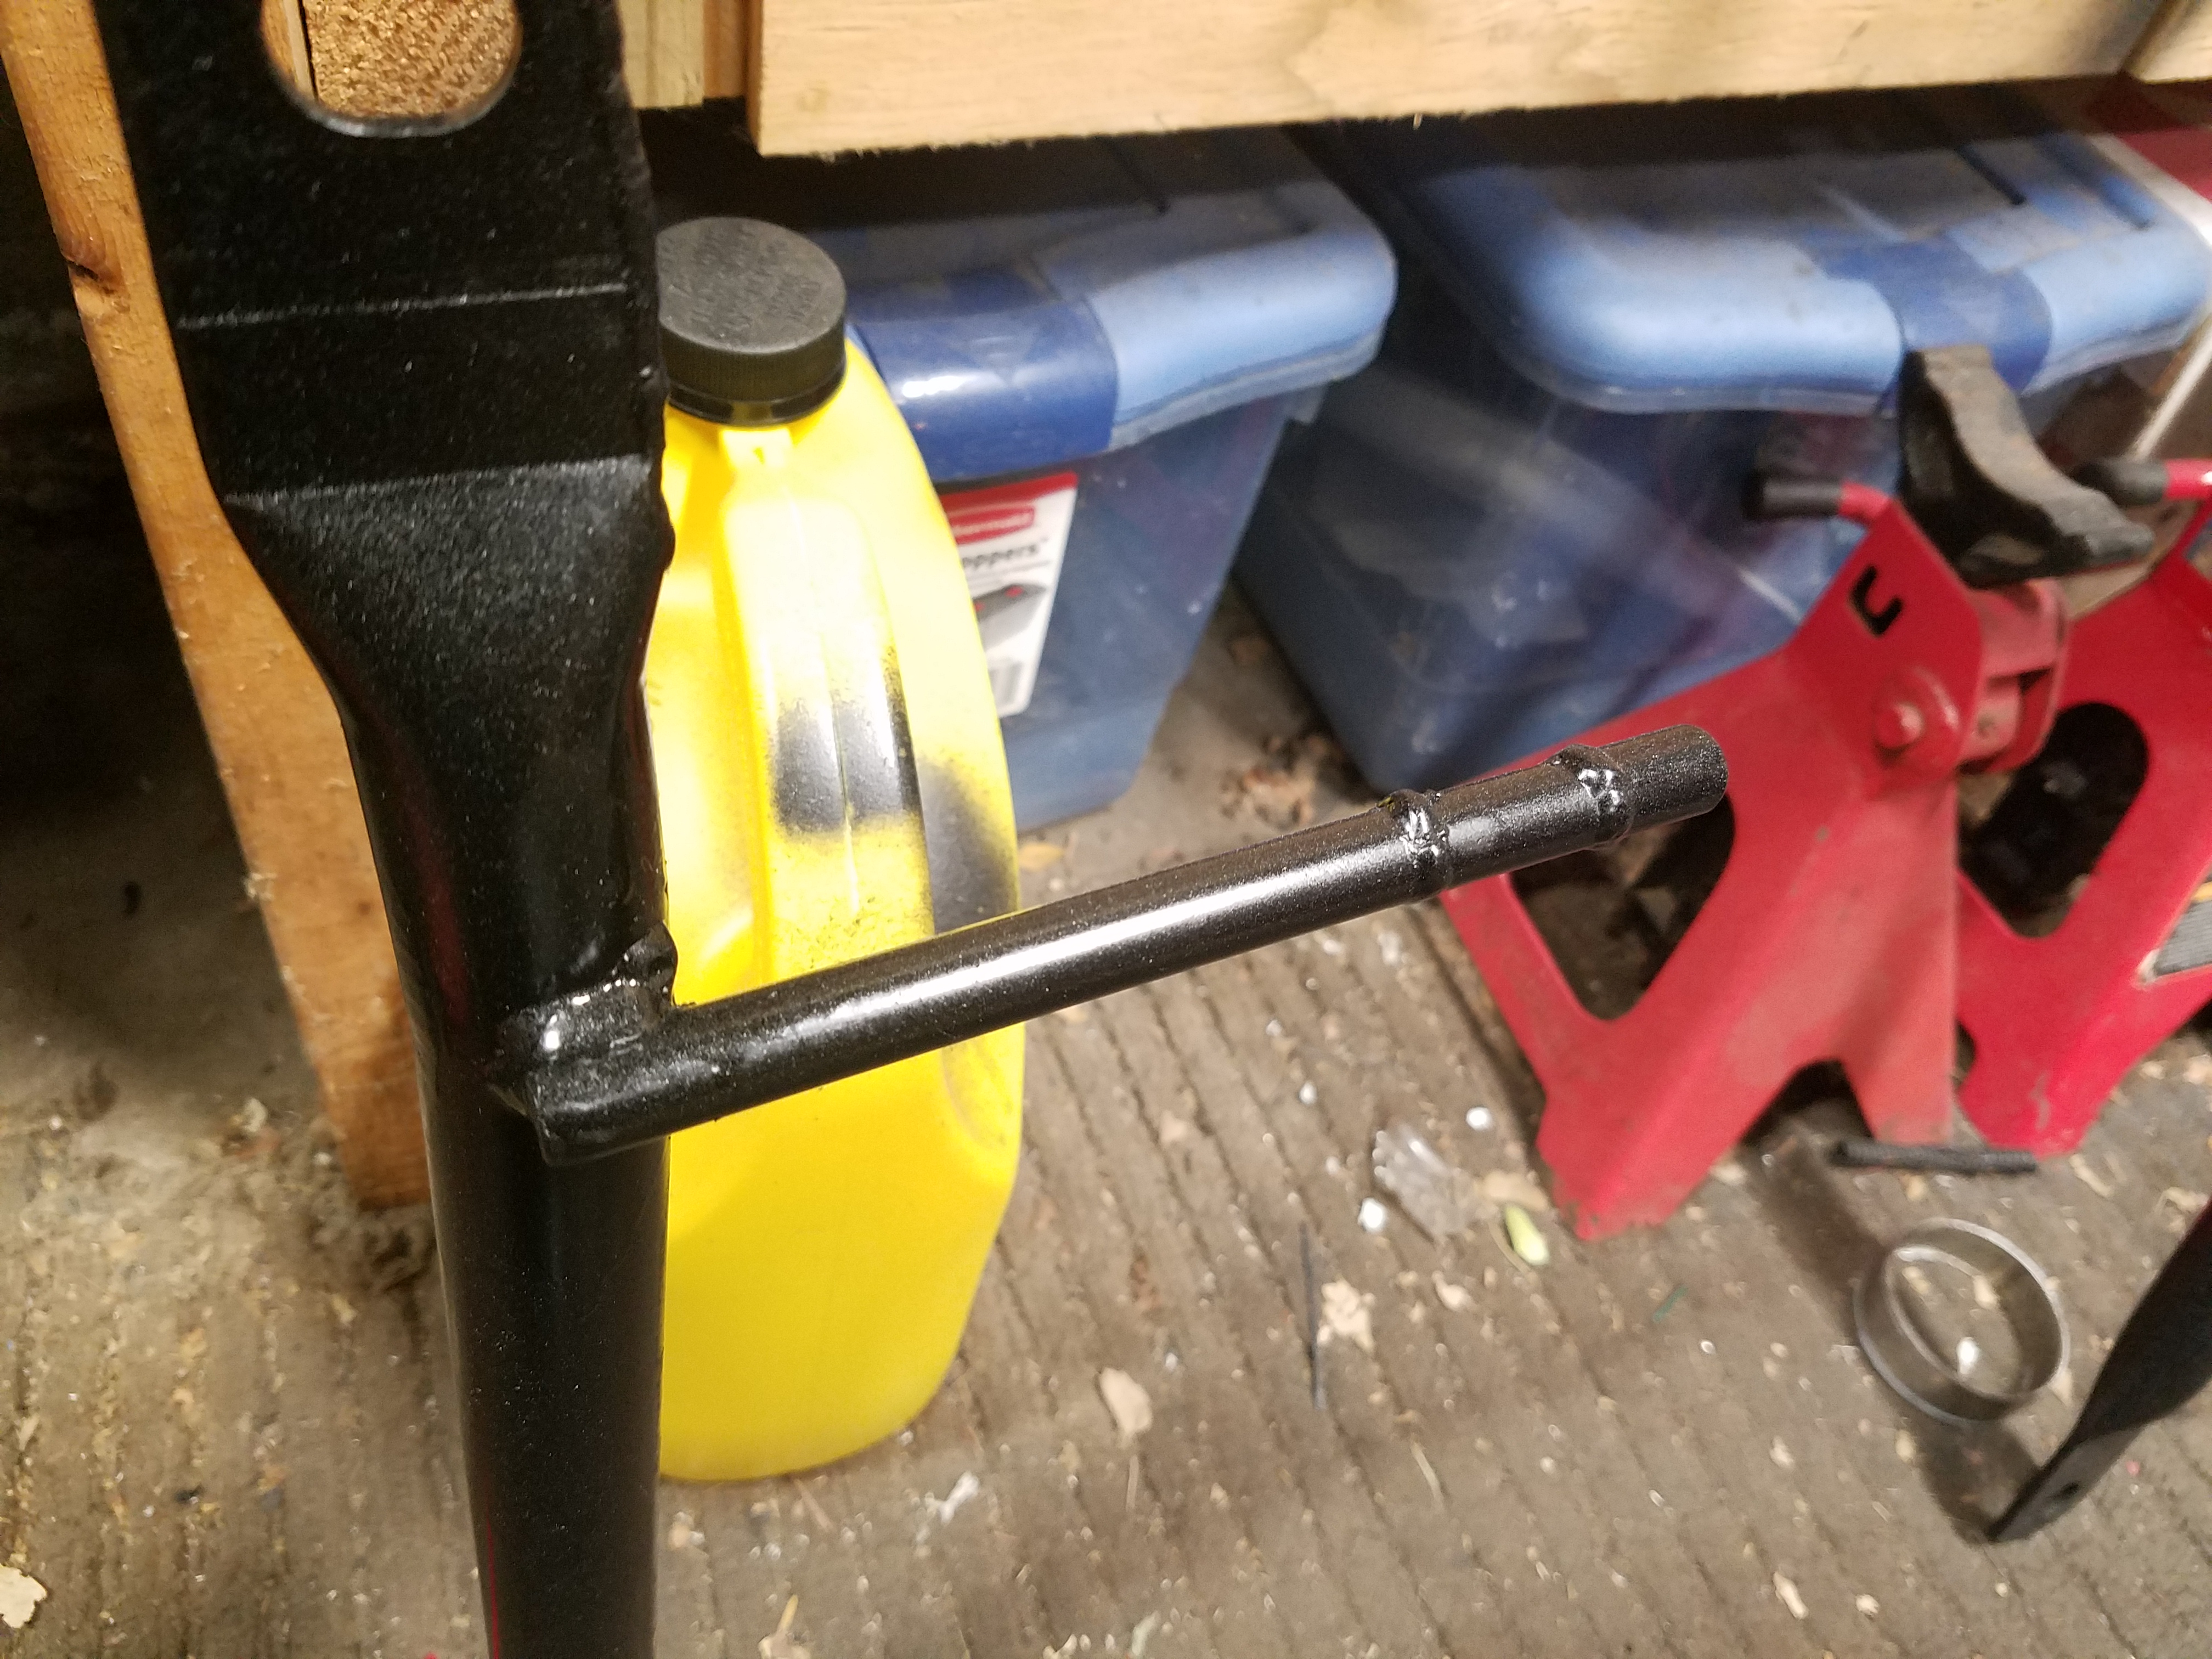
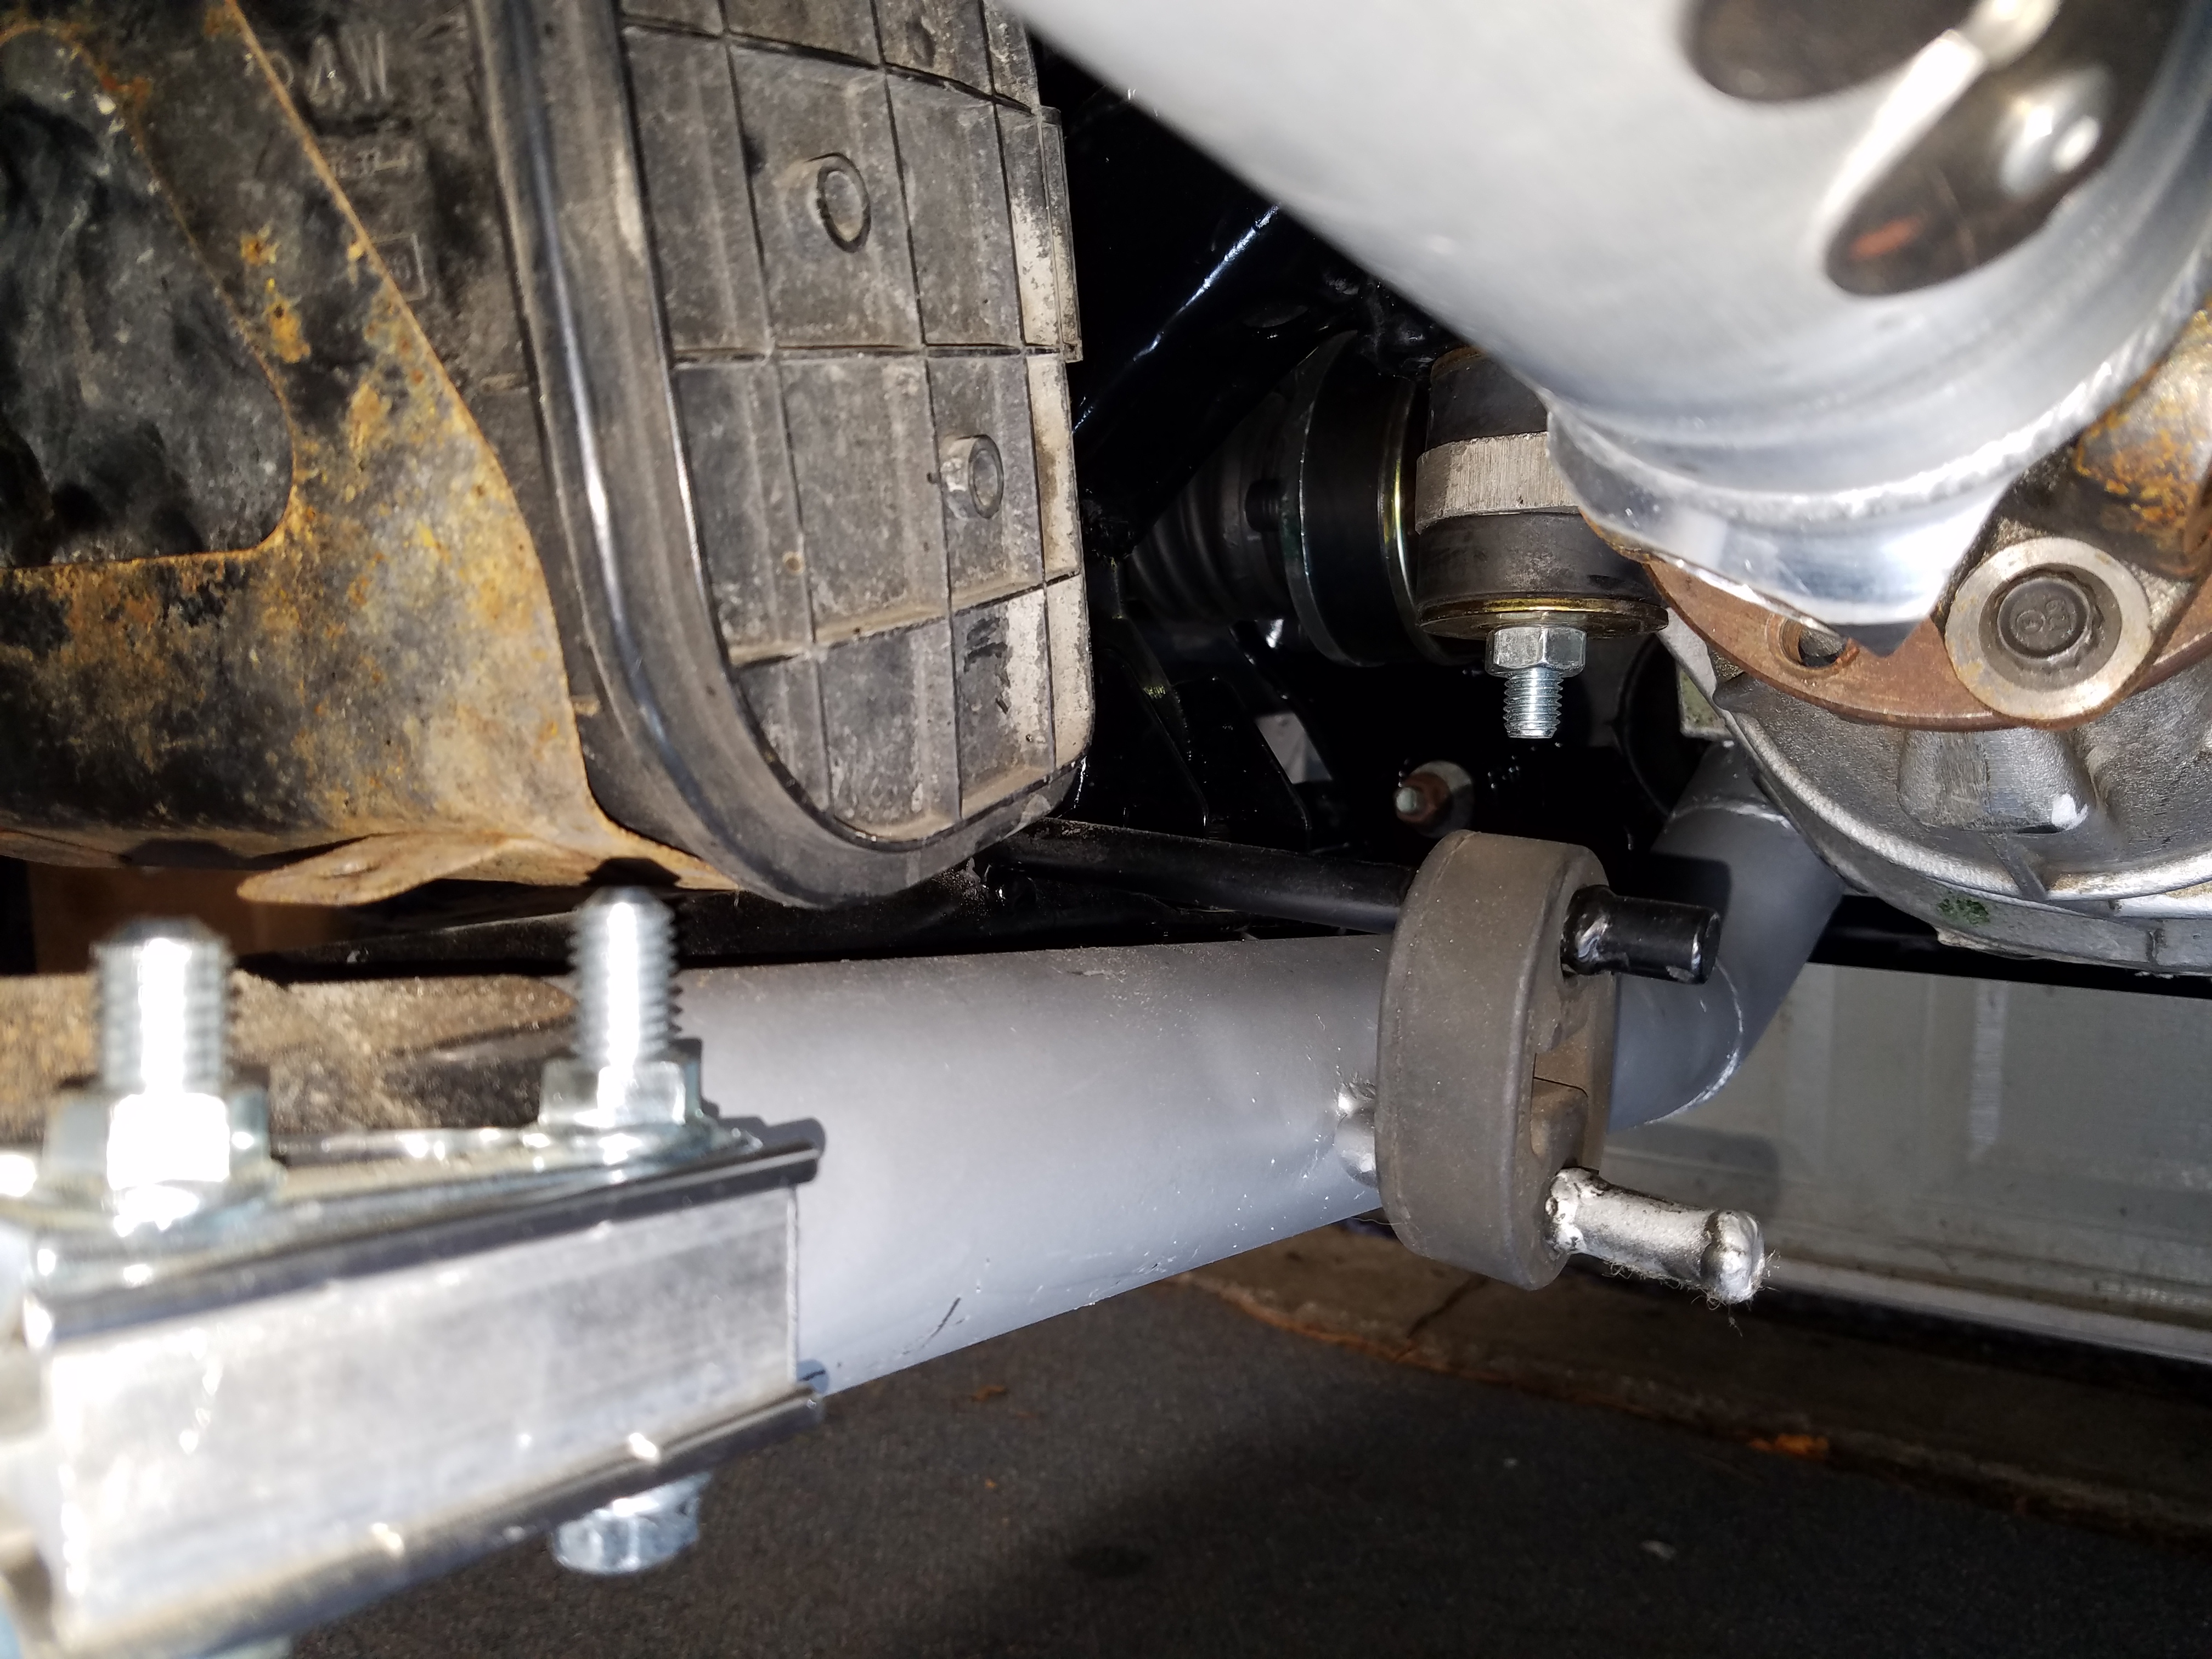
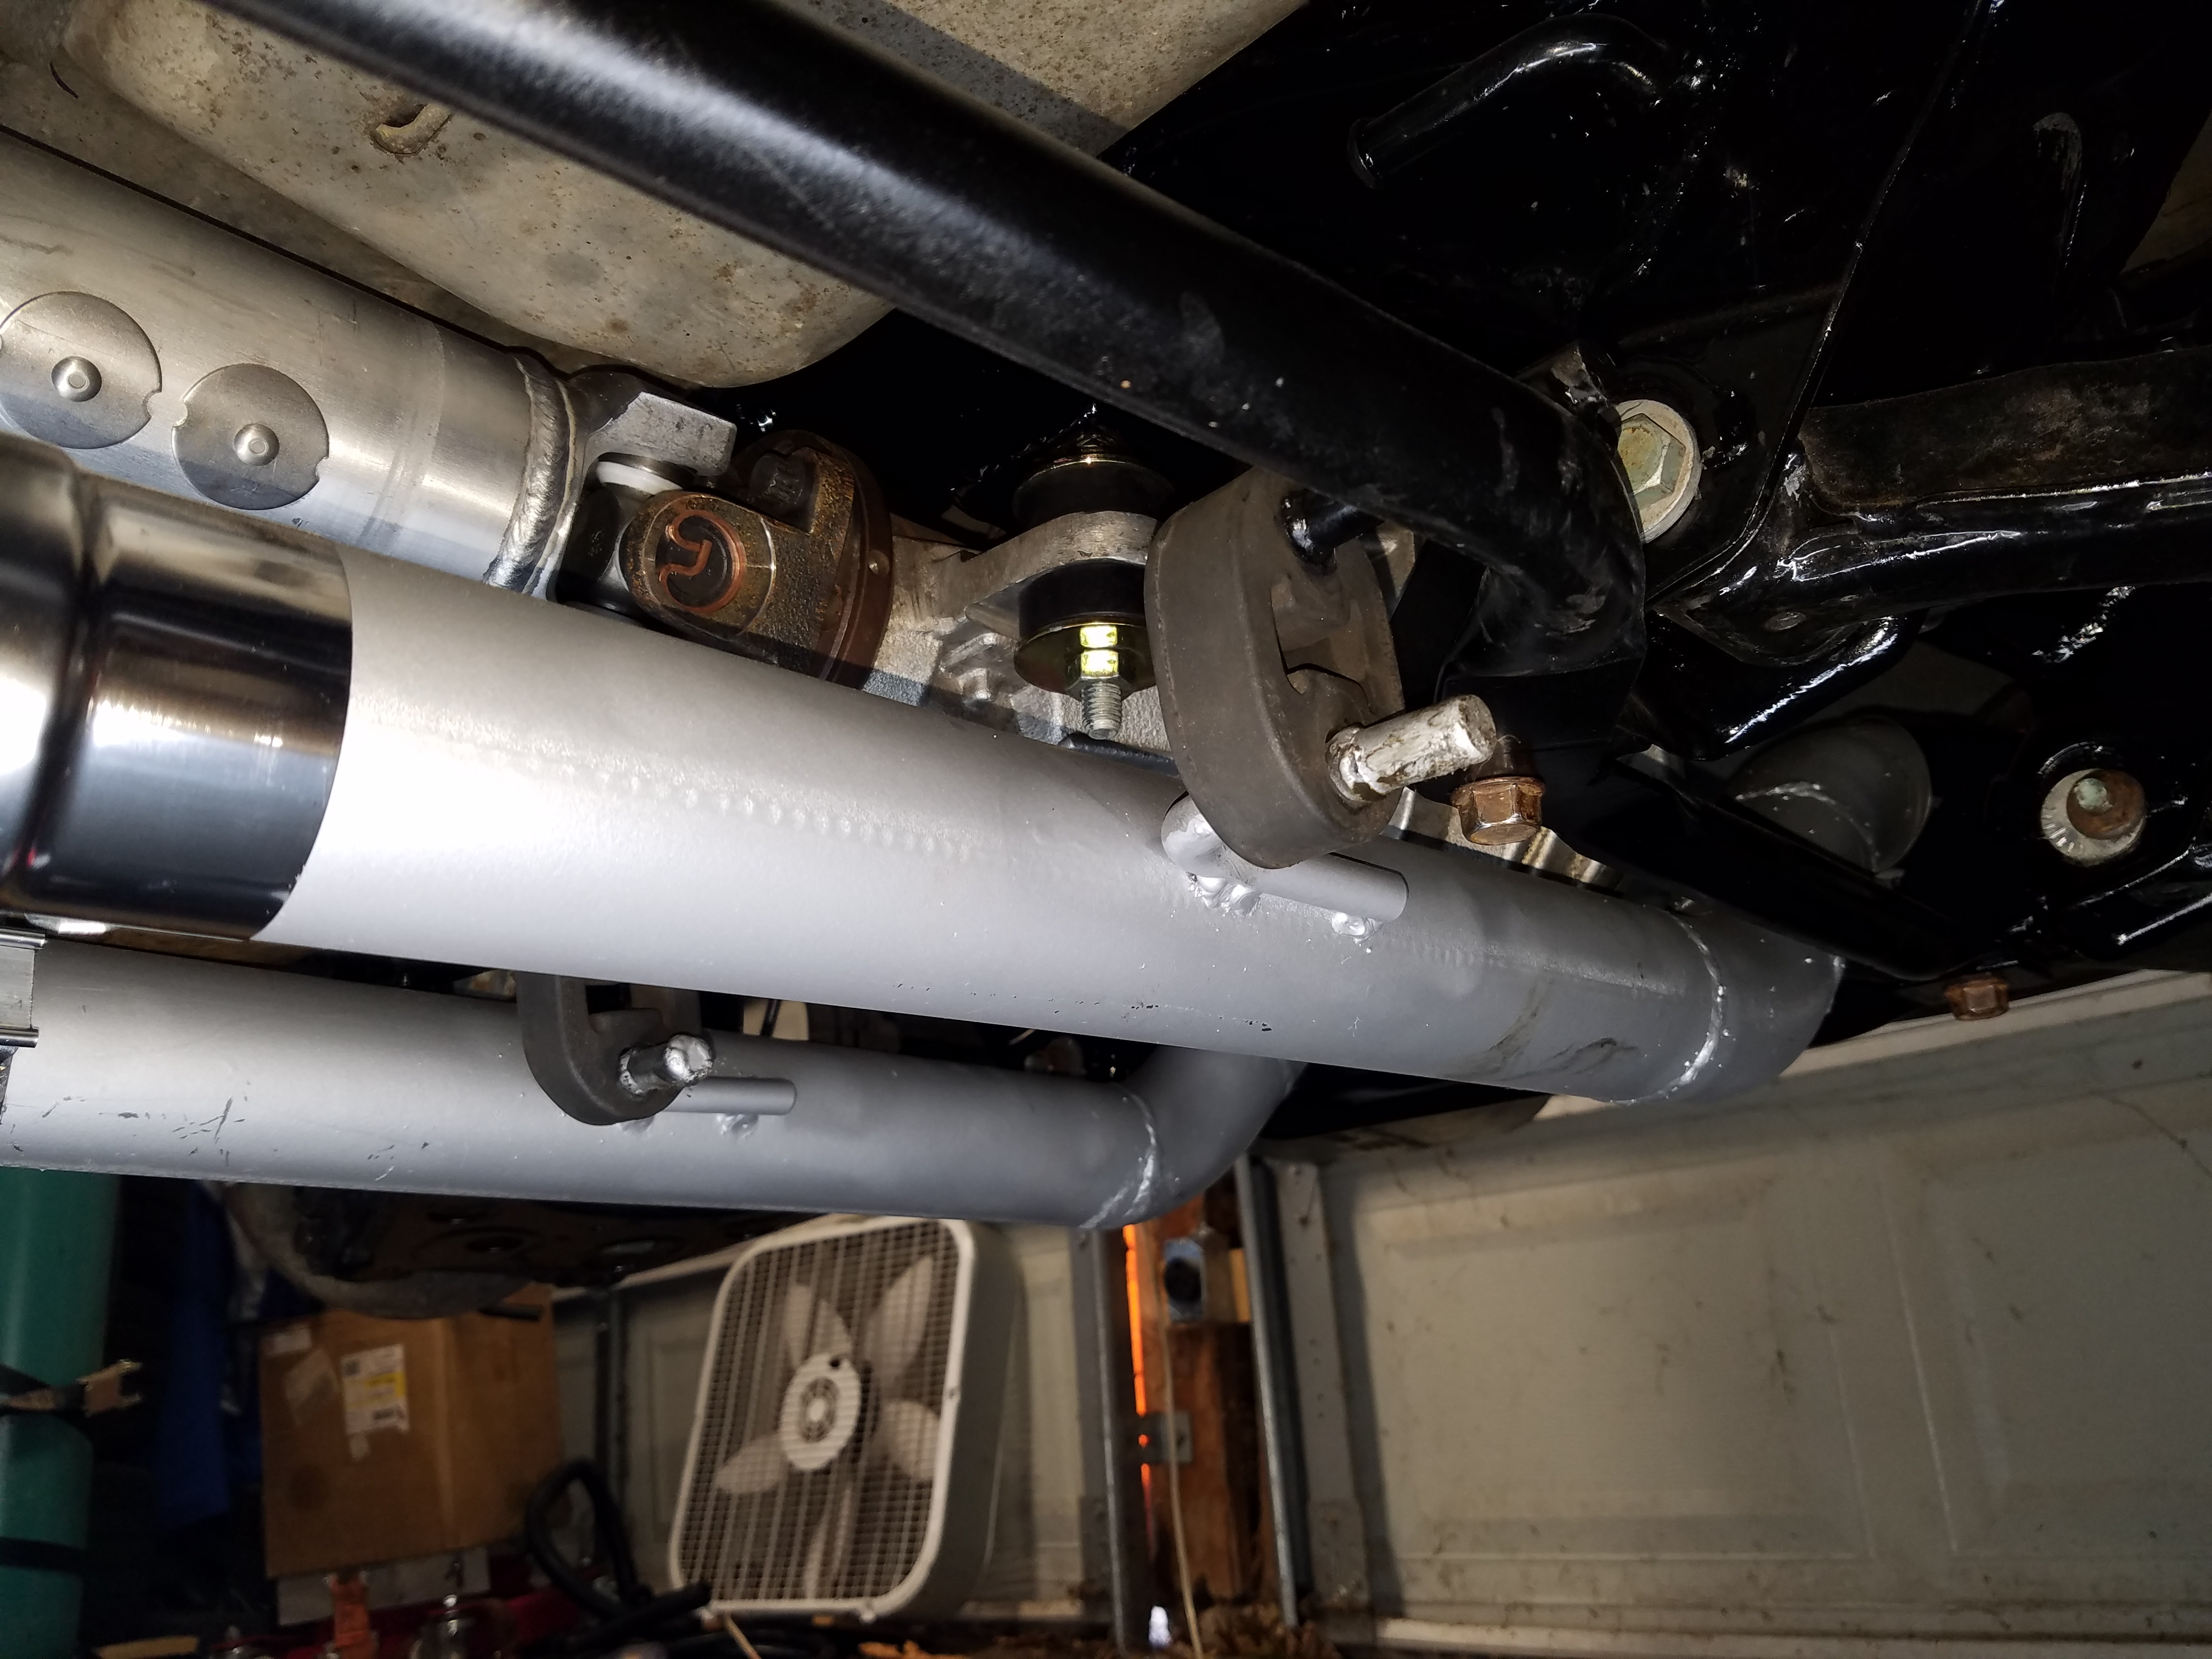
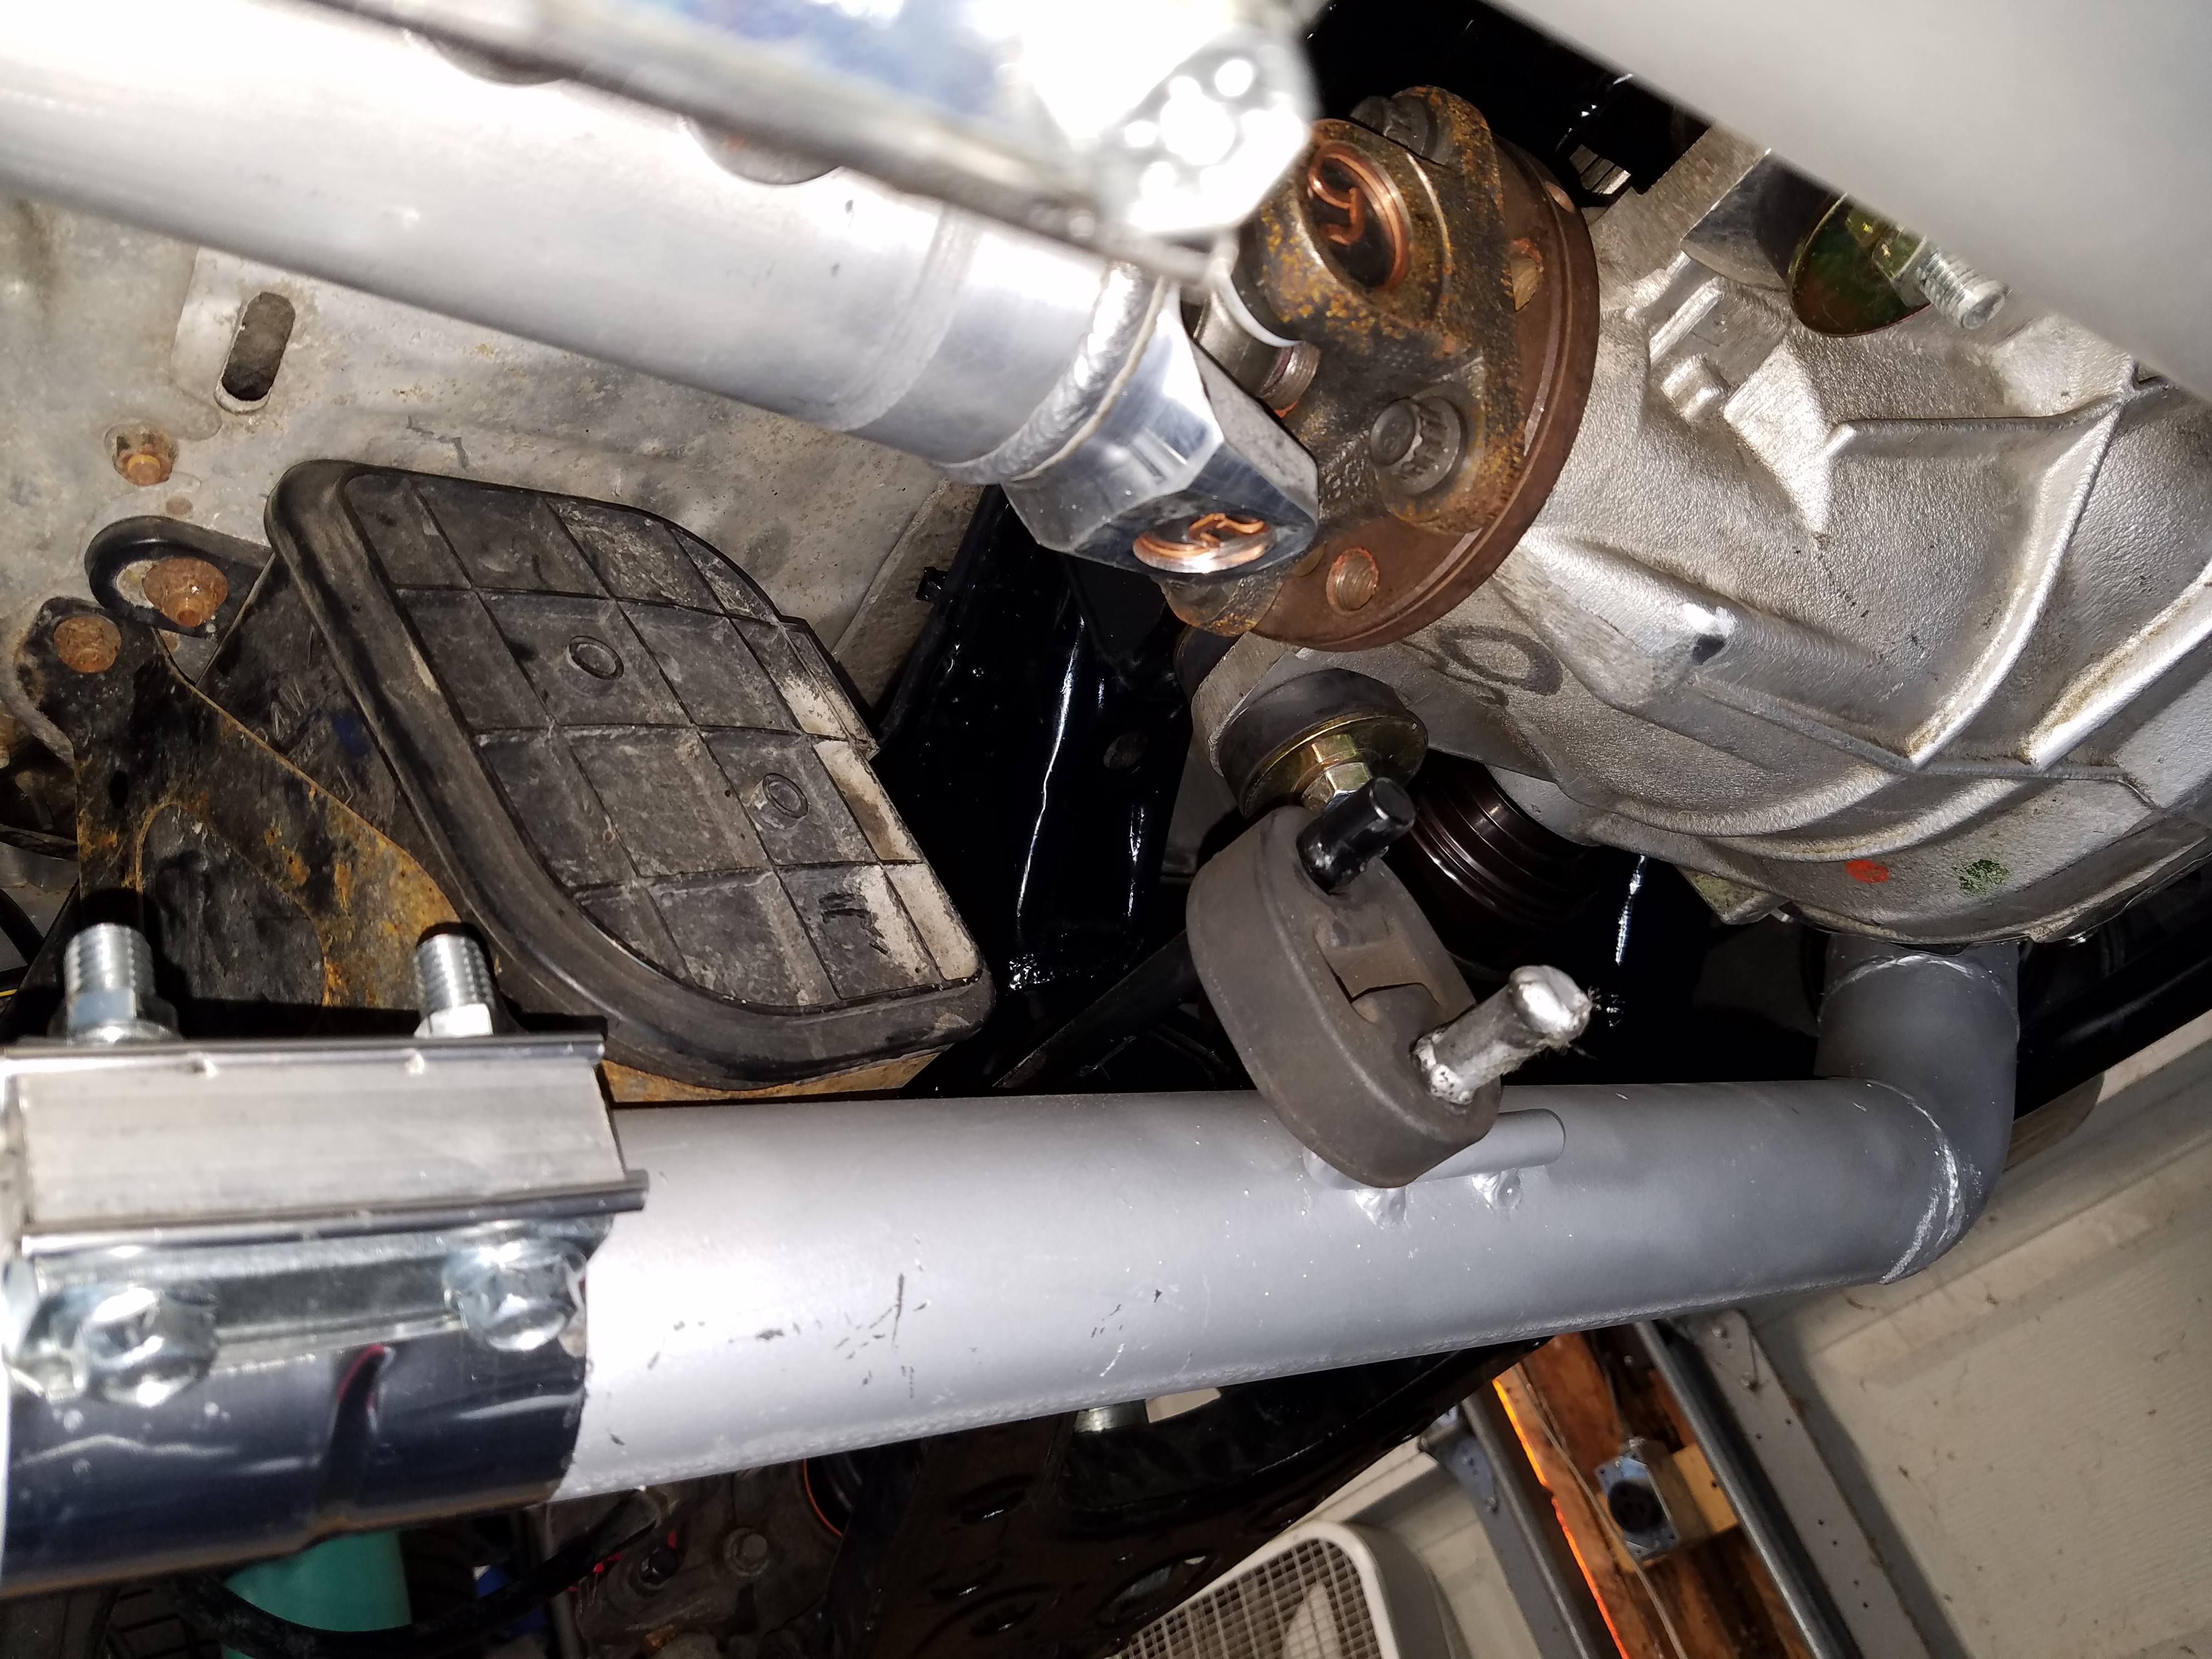
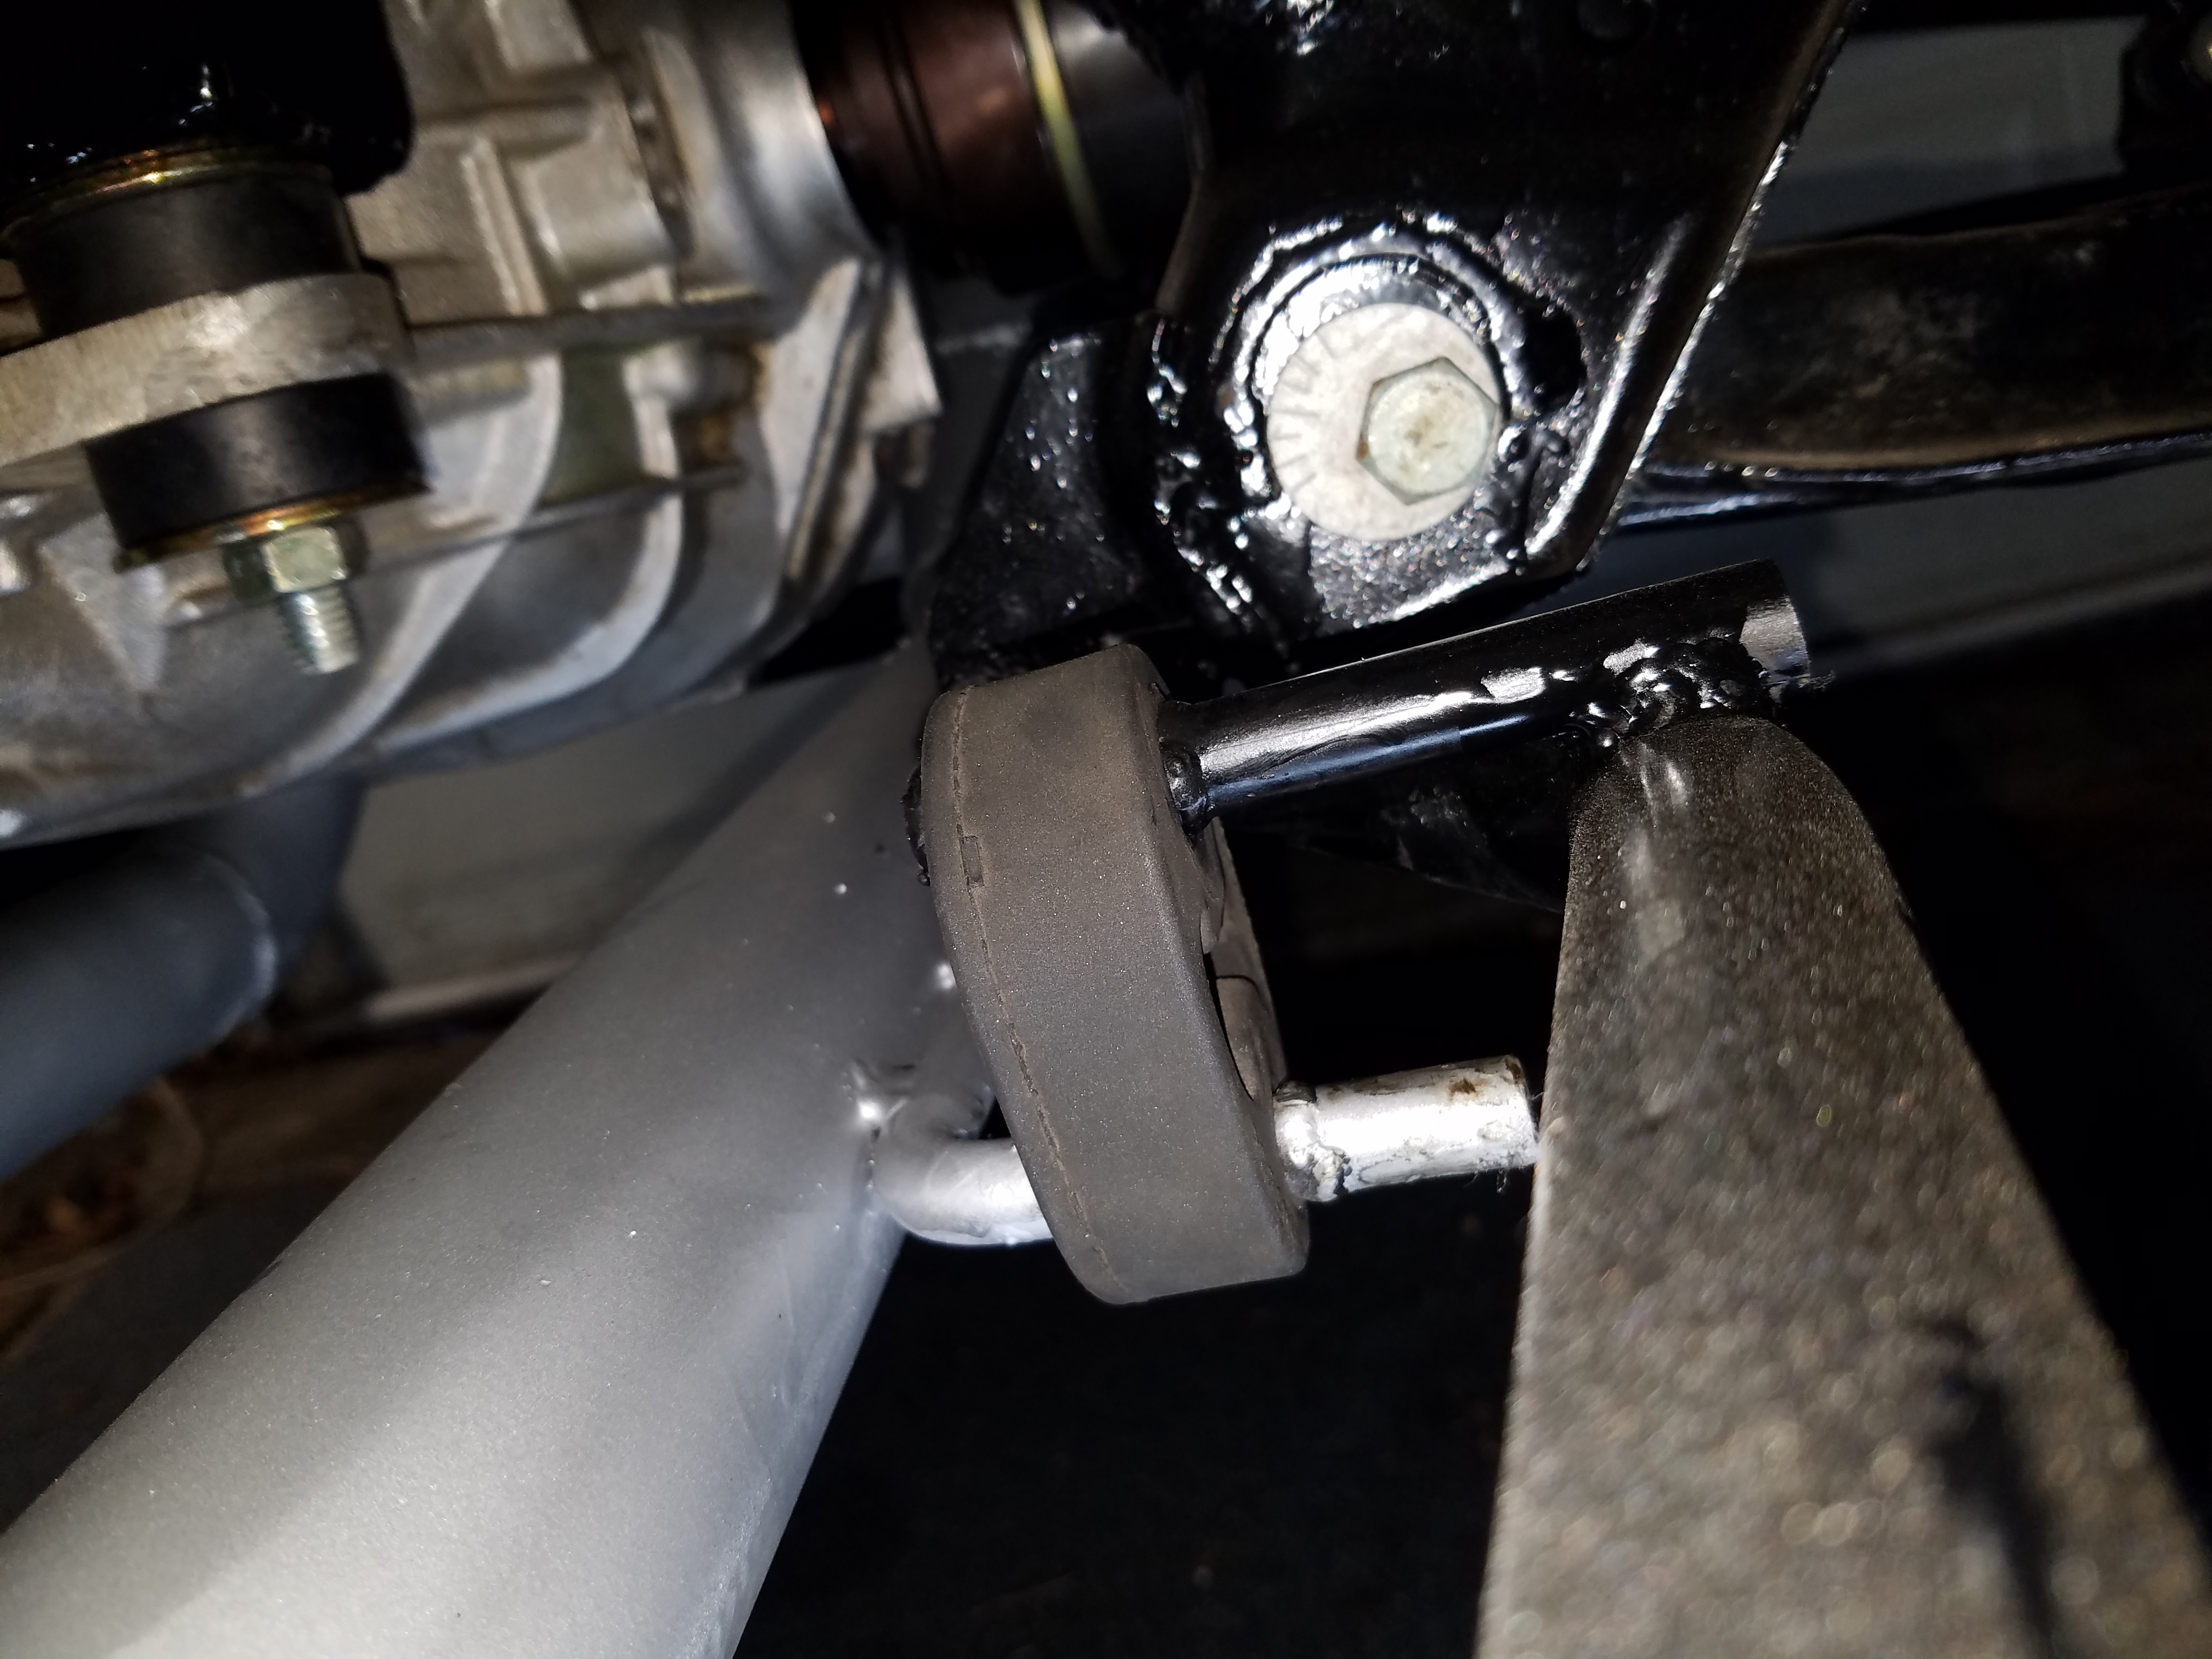
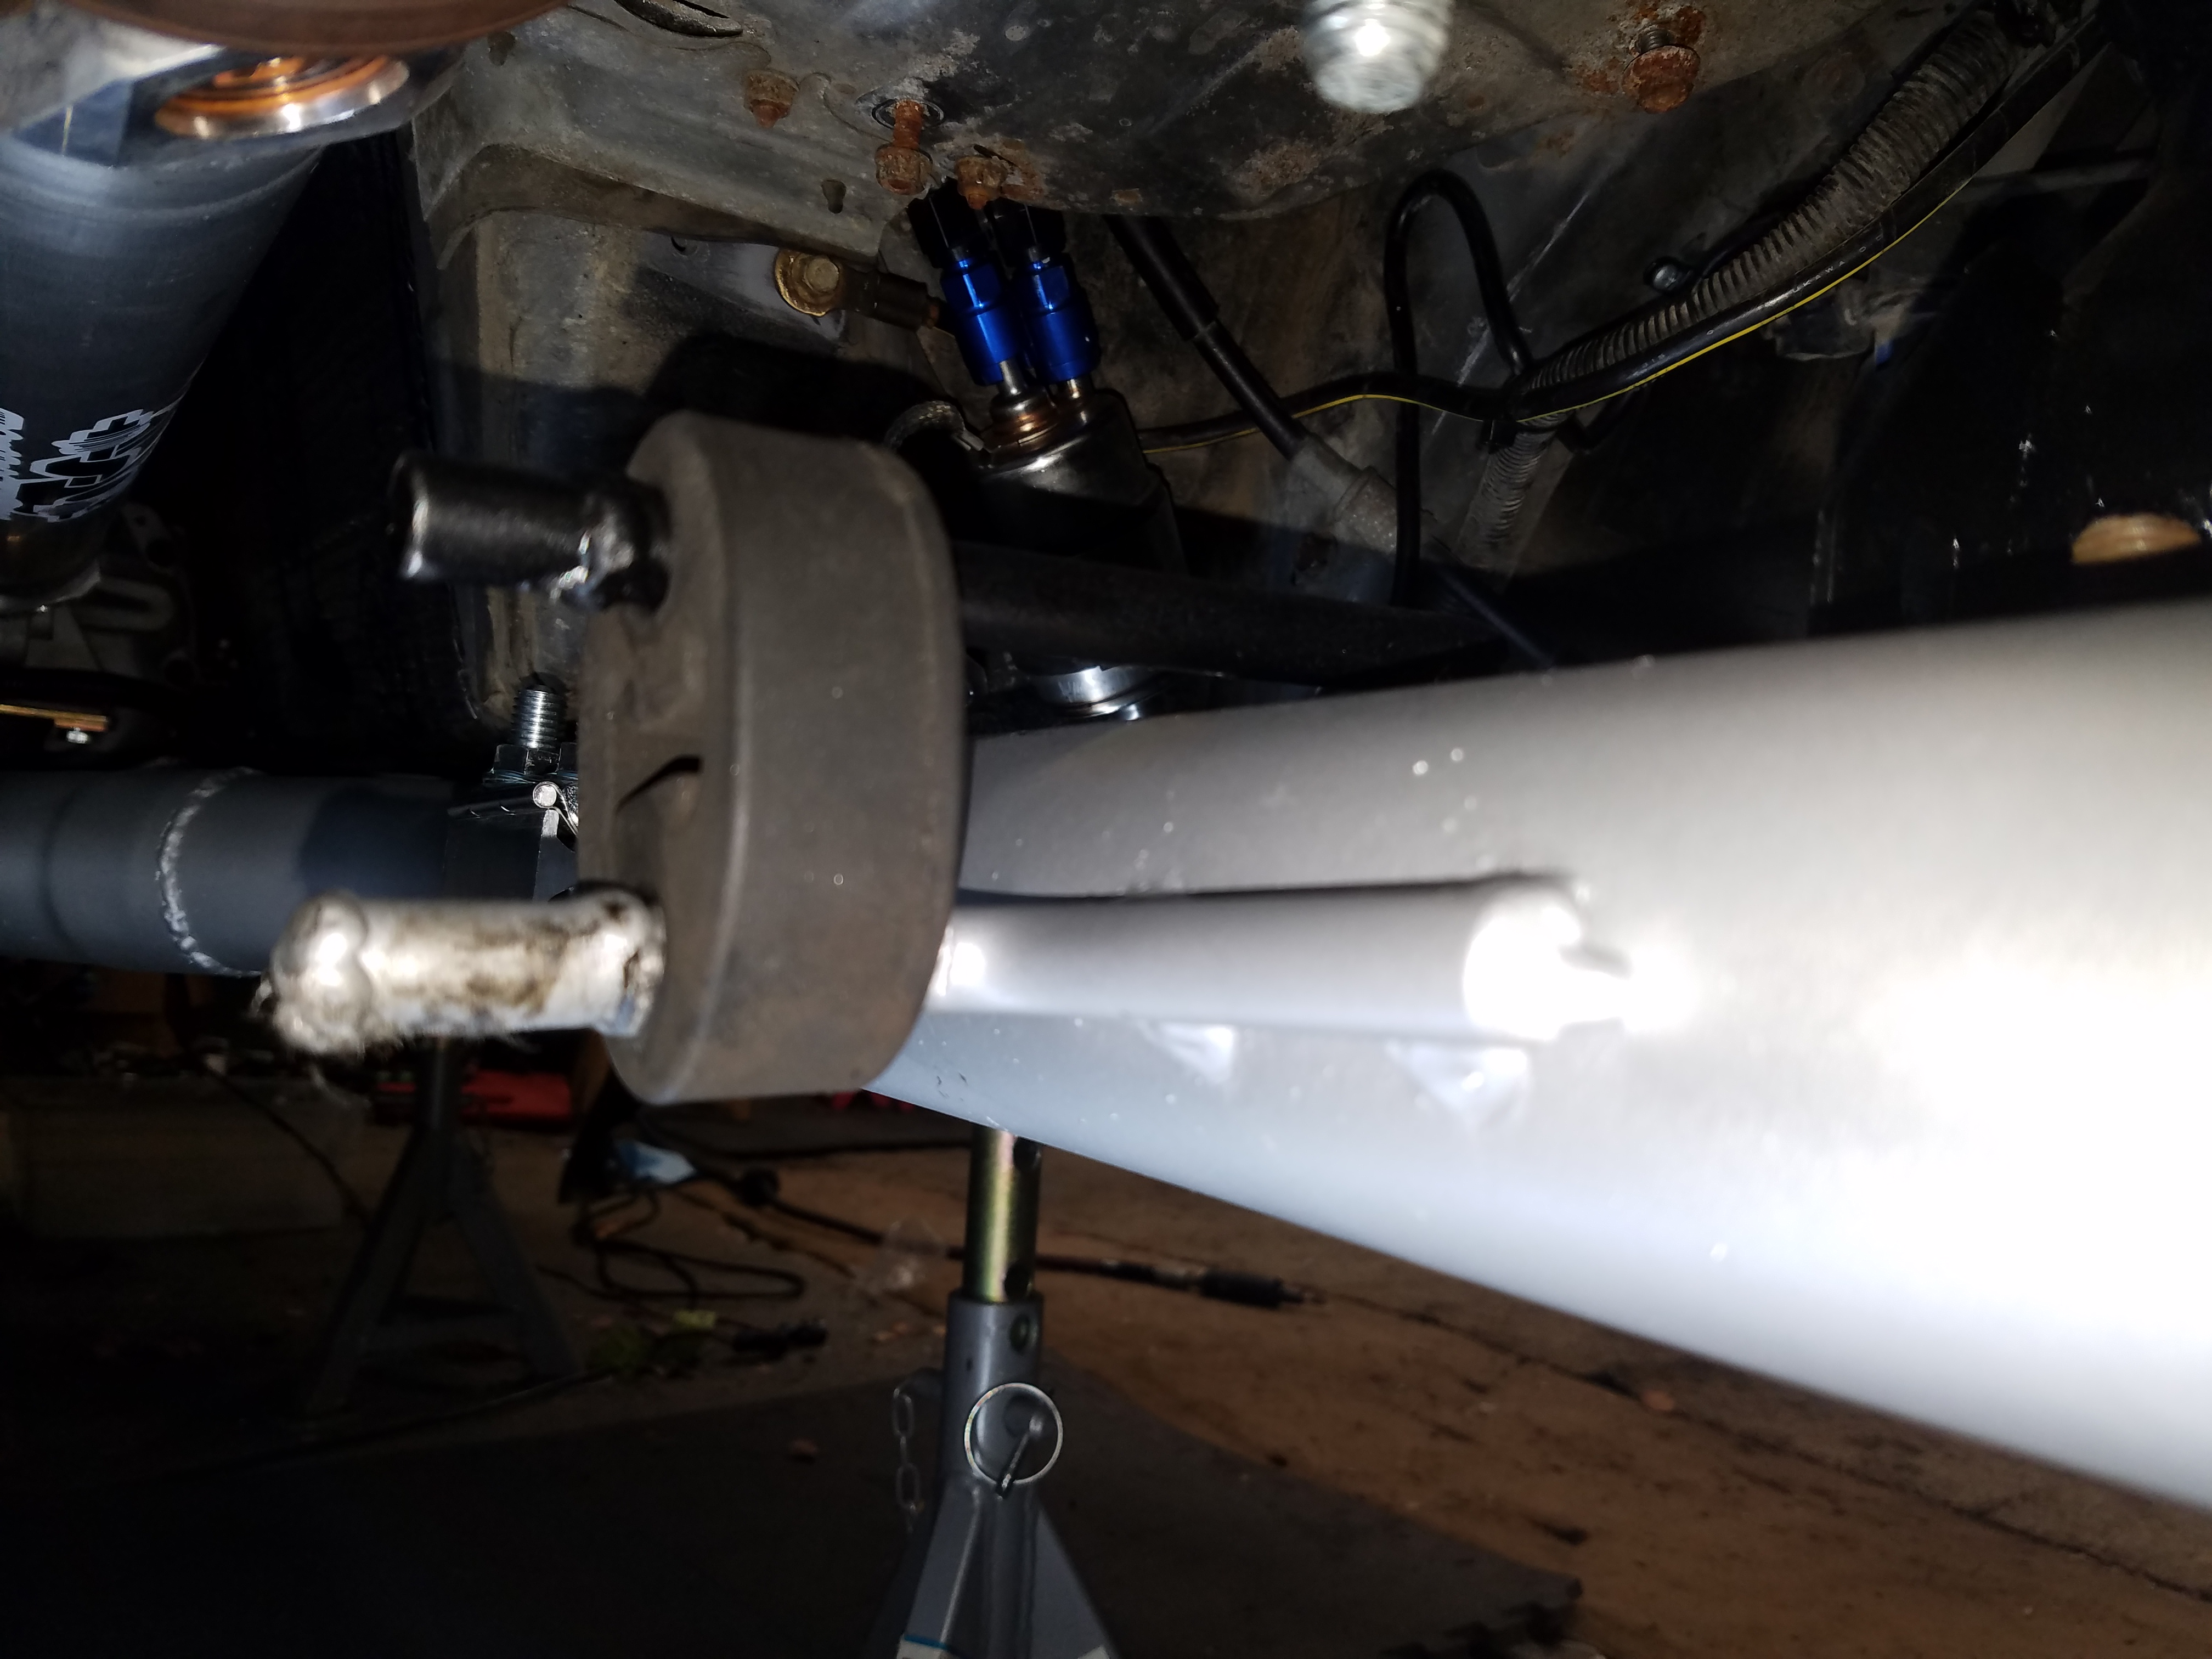
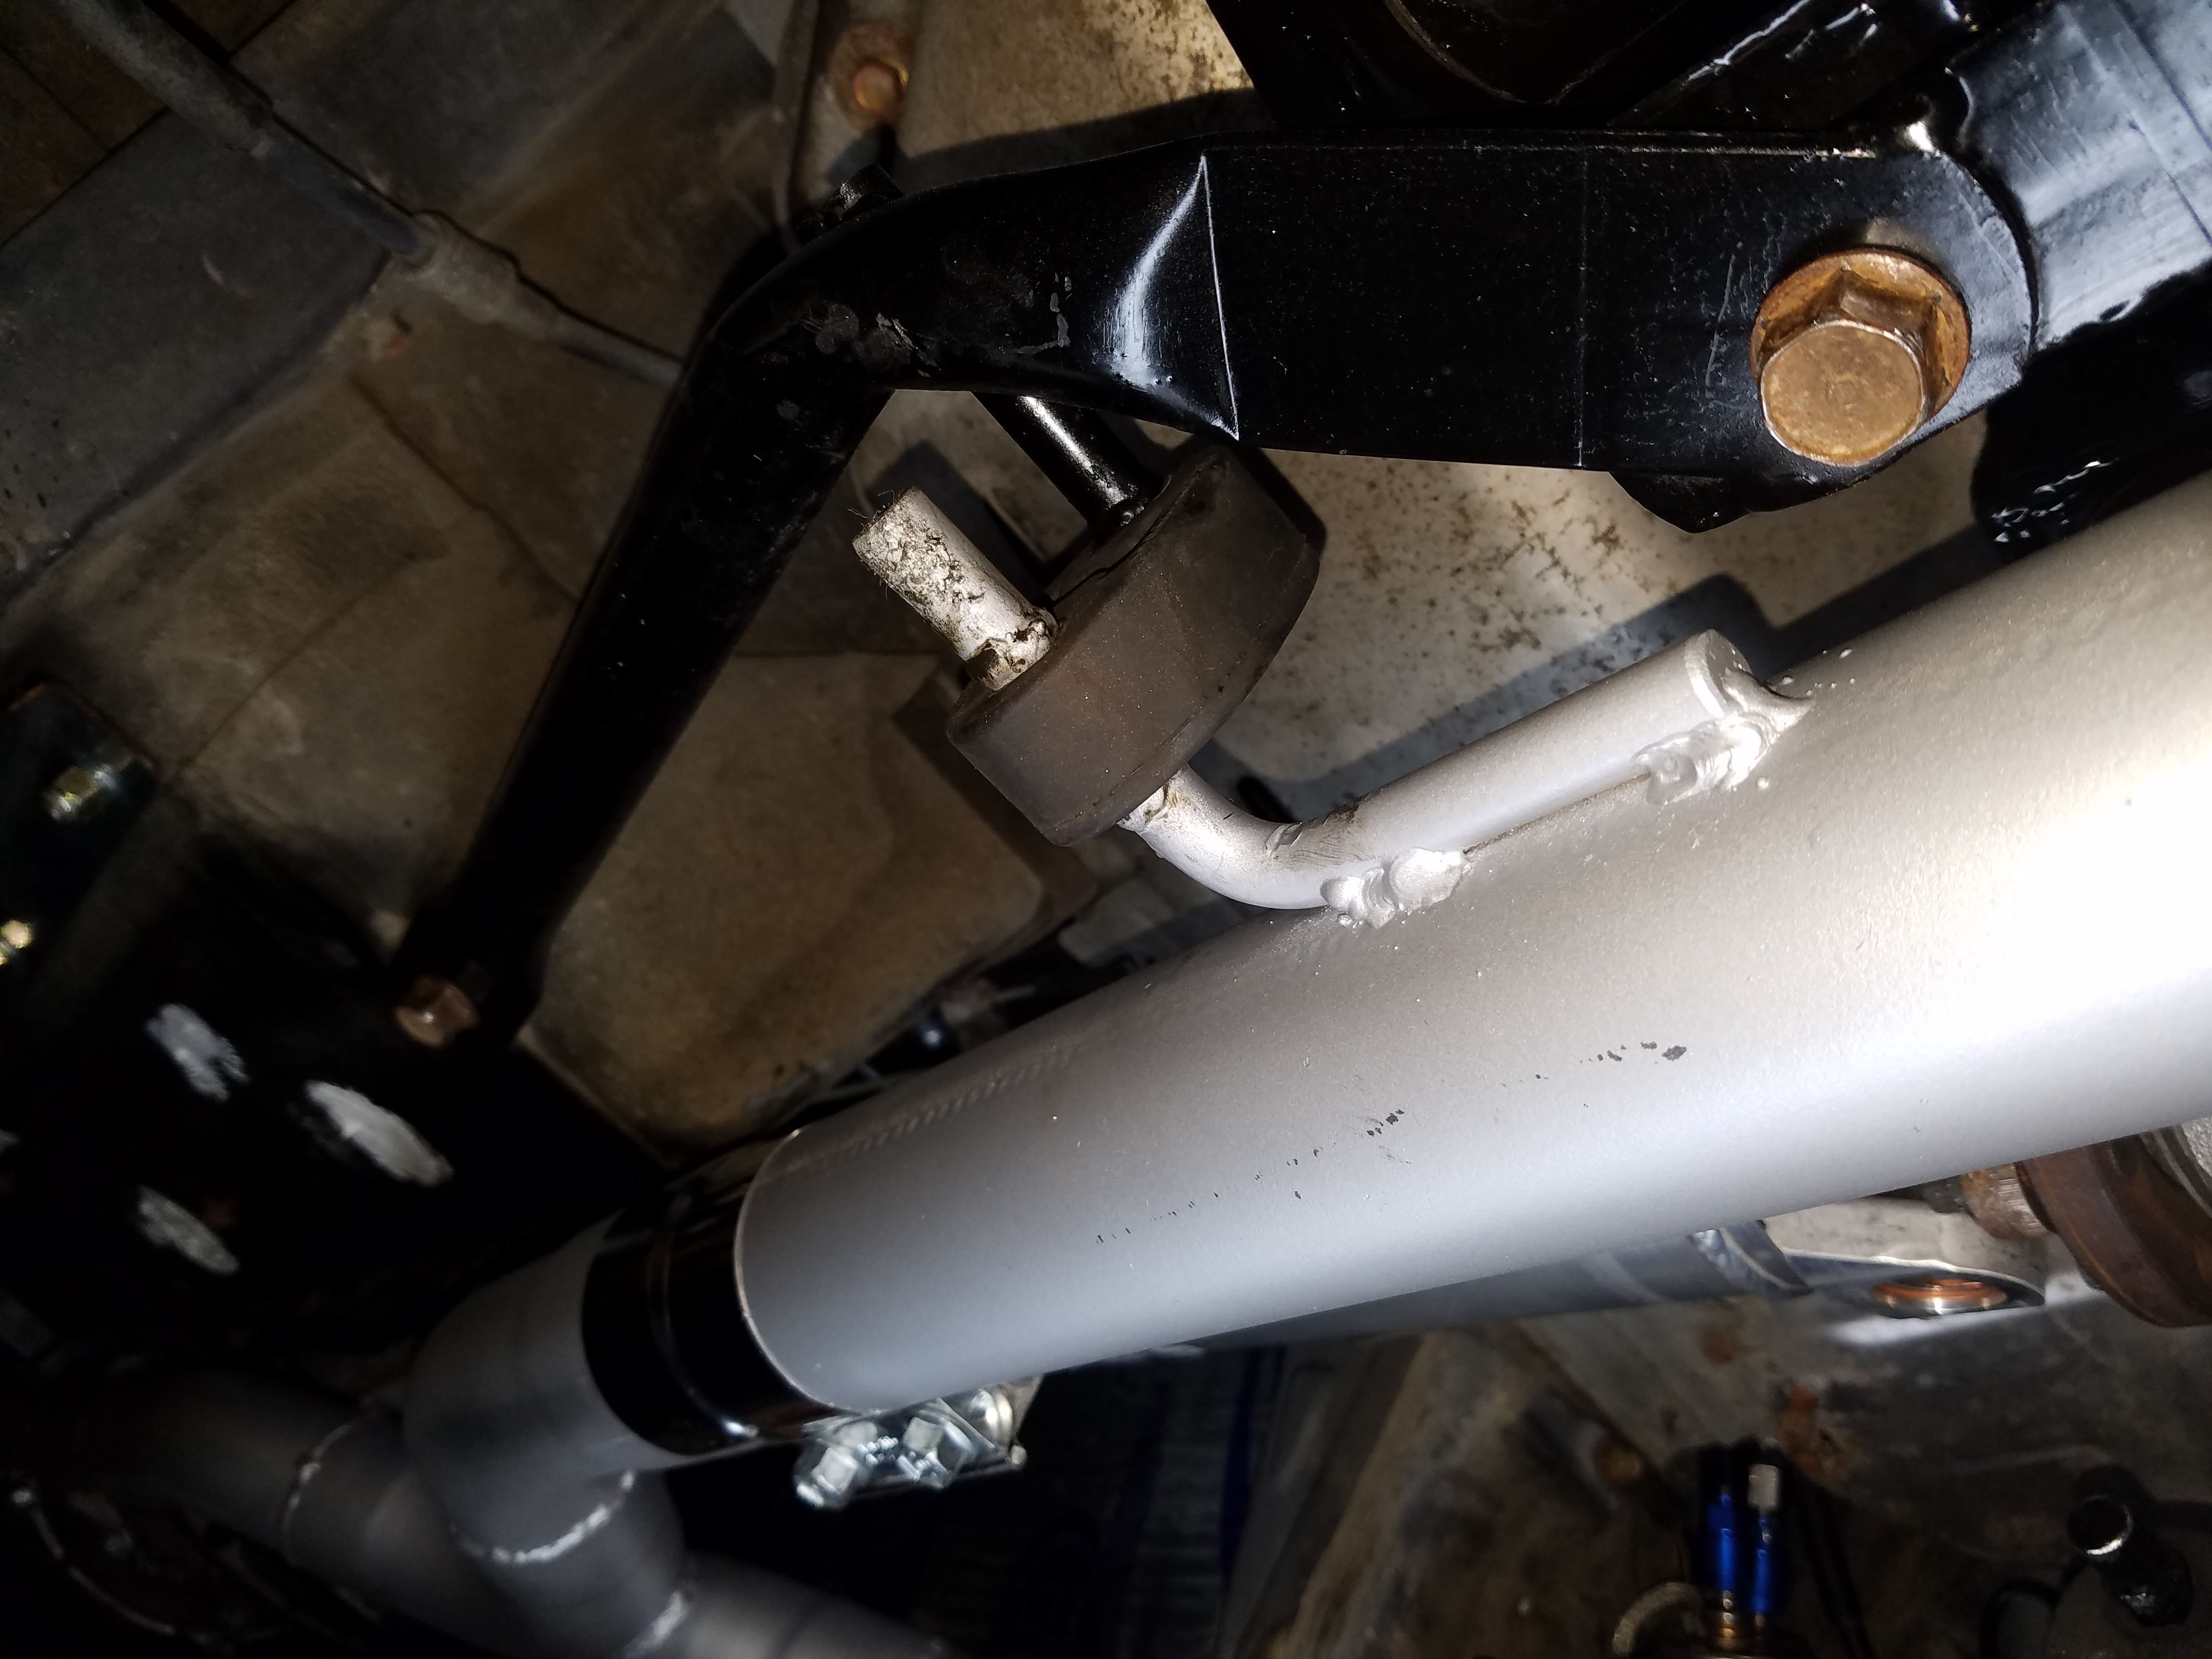
Closeup of DIY hangers. I used some 1/2" rod (I think) and some older rubber mounts from my Subaru. Then once I had the position right for the donuts I welded little beads on the hanger to keep the donut in place. Obviously don't do this with the rubber mounted
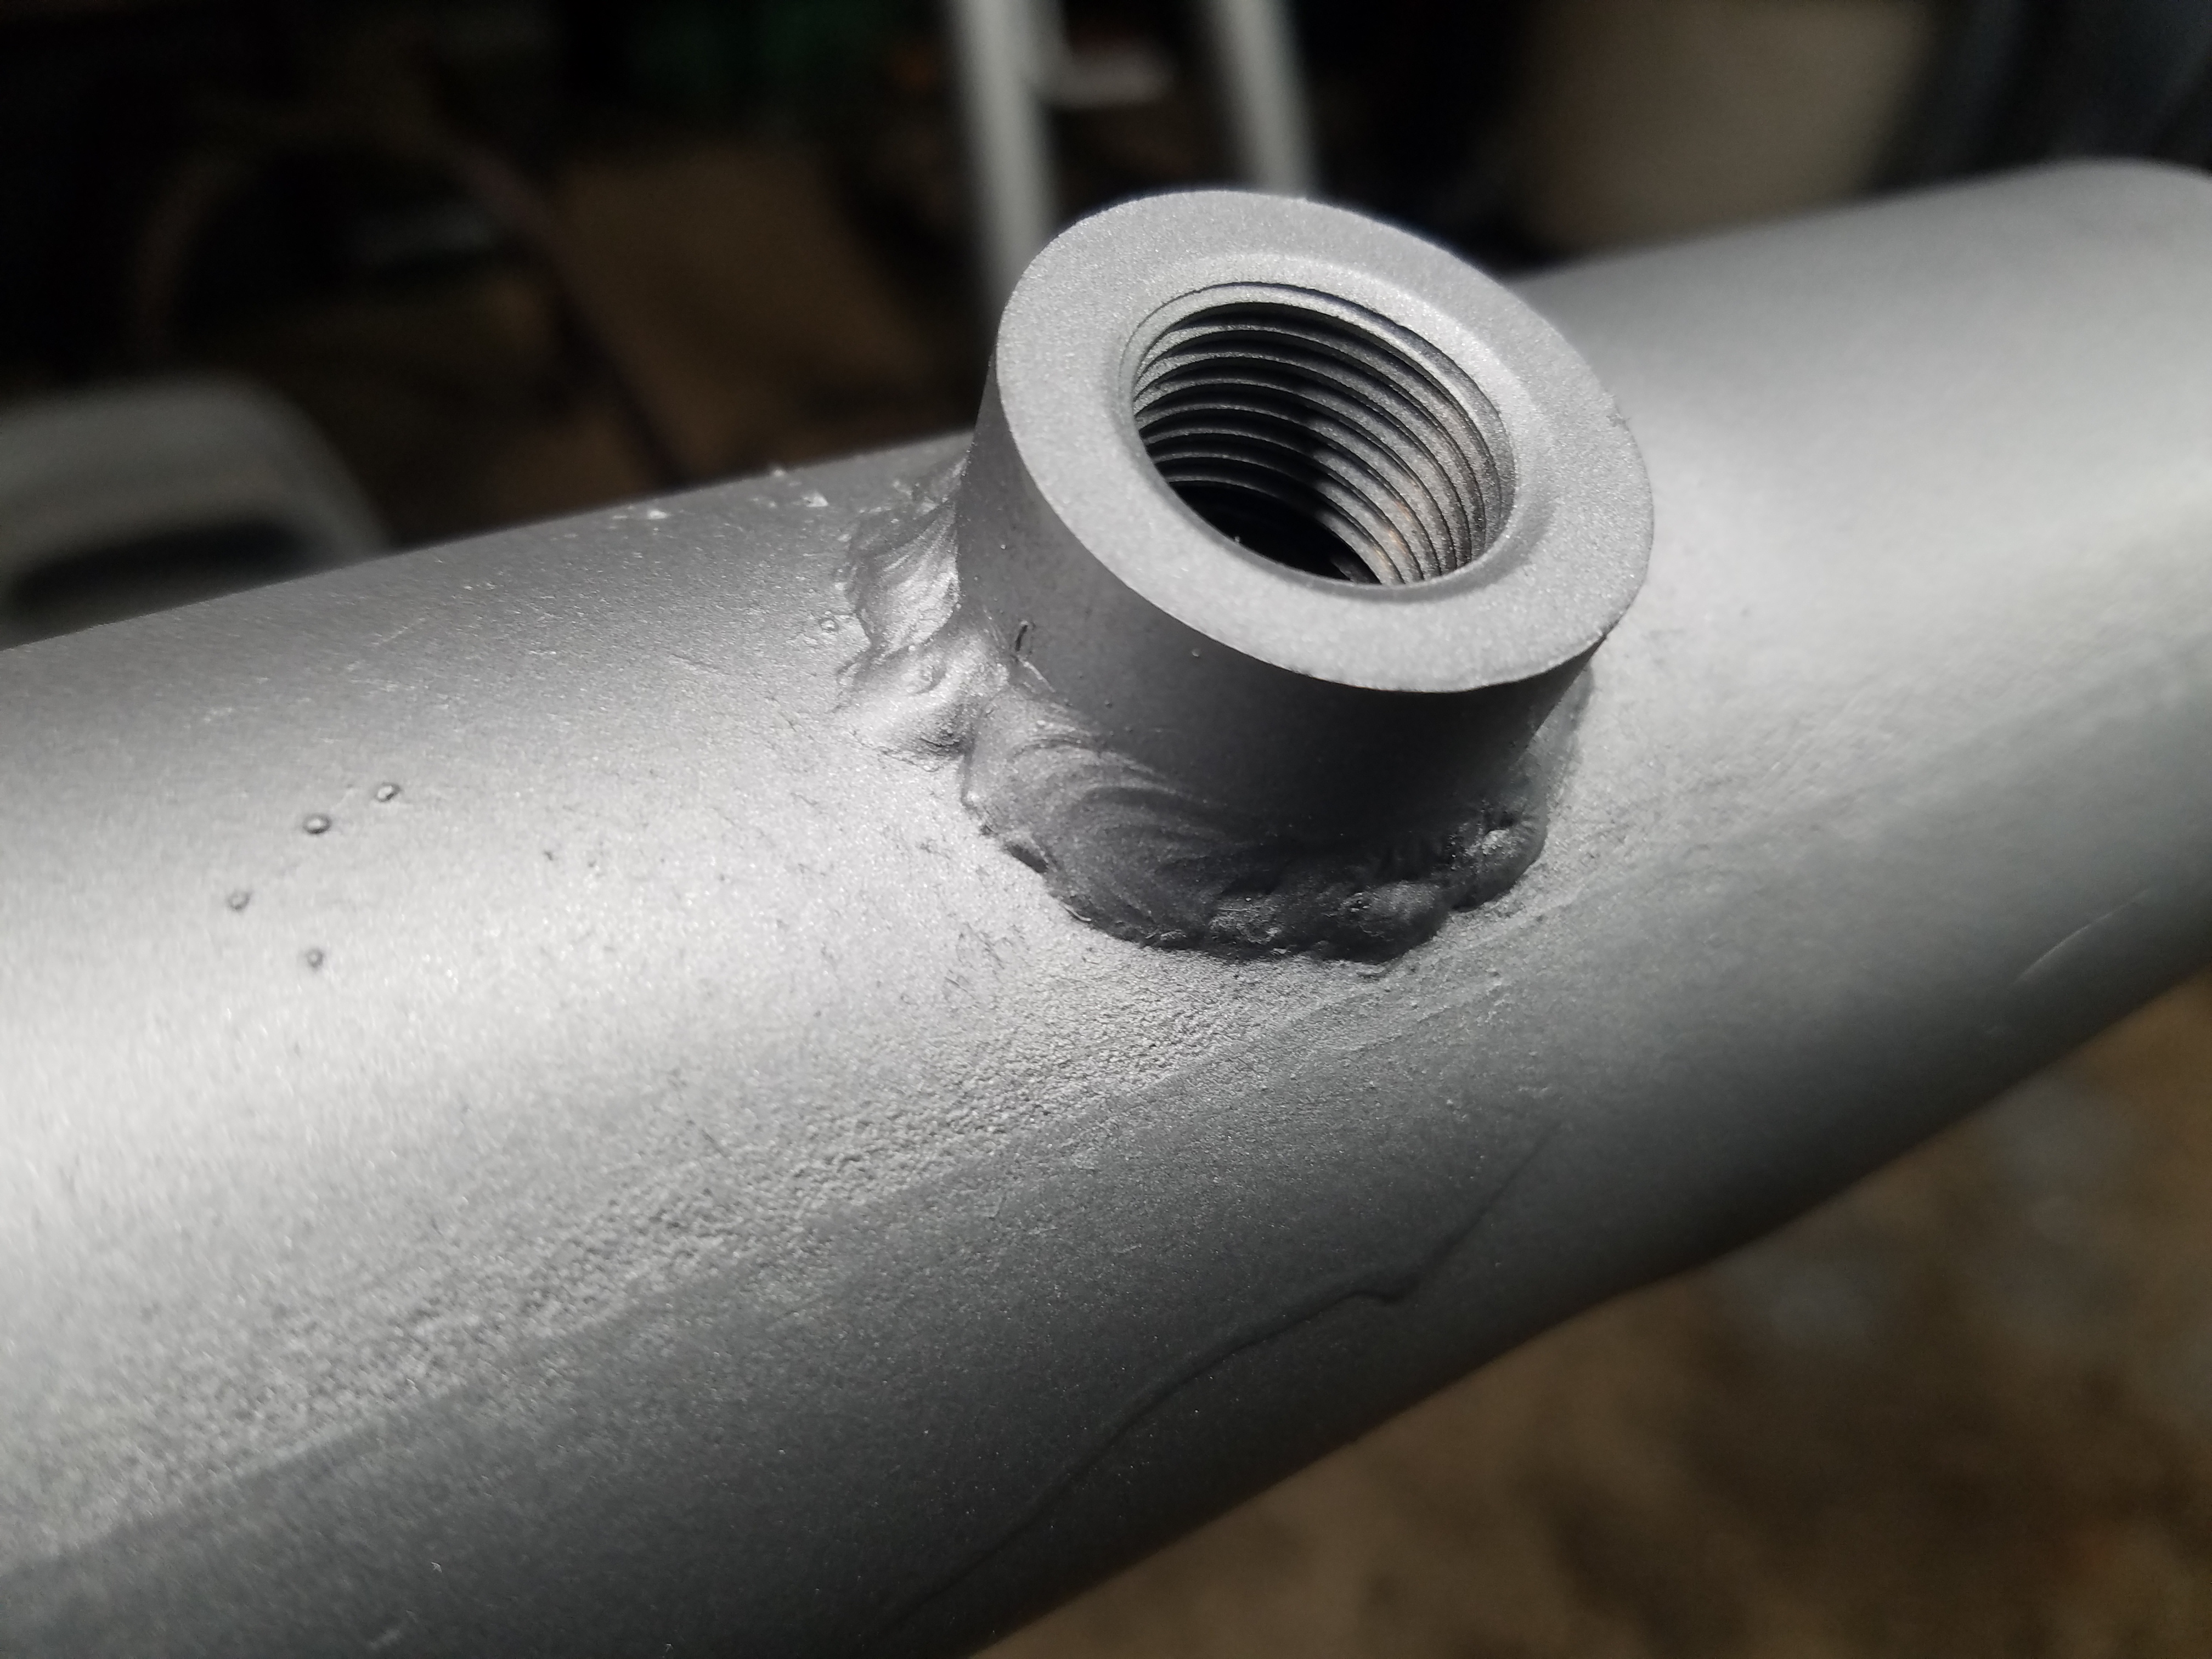
Found a good place for the o2 sensor bungs and welded them in
Will have final pics once all buttoned up
I'll be posting much more on the whole wiring setup as I complete that.
I have 15x9 6ULs in Tungsten with Toyo Proxes R1R 225/45ZR15 coming to me soon from Flyin Miata. They sell wheel/tire packages which are a good deal vs buying separately I think. Many places were out of stock on the 6ULs. A fender roller should arrive in the mail by the weekend and they might need massaging
Was also able to do any final application of seam sealer under the car and on other spots. Then installed the fenders and the hood. I needed to tweak the oil dipstick tube a bit for hood clearance and dent the hood for sufficient clearance for the oil filler neck and the clip that holds the hood prop. Car is looking like a car again from the outside.
On the interior I have the carpet, dash and center console back in. I have some new ebay rear deck and wall carpet coming as the original ones were pretty faded and beat up. Need to finish wiring CEL for the dash, OBD connector wires and some other little stuff on the inside, as well as the airbags and steering wheel, seats, etc.
Motor runs, though w/out any o2 sensors. I'll post a proper video of it when I can get some good video over the weekend. Getting some light lifter ticking but never really gave it a chance to warm up.
Exhaust is done and fitted. I have some Flowmaster Super 40s I borrowed from a friend that I've tested. Seems loud but that was with no clamps on them and the exhaust not fully welded. Pretty happy with the way it turned out. Getting the final bends around the diff and rear subframe brace was a bit of work.
I would recommend anyone doing this to buy a decent metal chopsaw. My bandsaw and blade were not up to this task, and using a cutting wheel worked ok, but doesn't guarantee decent square cuts. Good square and accurate cuts will make your life and welding much easier.
First startup was very loud and produced some evil looking smoke out of the pipes
Bulk of the system is painted
pieces that go around the diff
Rear subframe brace was used to make the exhaust hangers and was repainted
Closeup of DIY hangers. I used some 1/2" rod (I think) and some older rubber mounts from my Subaru. Then once I had the position right for the donuts I welded little beads on the hanger to keep the donut in place. Obviously don't do this with the rubber mounted
Found a good place for the o2 sensor bungs and welded them in
Will have final pics once all buttoned up
I'll be posting much more on the whole wiring setup as I complete that.
I have 15x9 6ULs in Tungsten with Toyo Proxes R1R 225/45ZR15 coming to me soon from Flyin Miata. They sell wheel/tire packages which are a good deal vs buying separately I think. Many places were out of stock on the 6ULs. A fender roller should arrive in the mail by the weekend and they might need massaging
Was also able to do any final application of seam sealer under the car and on other spots. Then installed the fenders and the hood. I needed to tweak the oil dipstick tube a bit for hood clearance and dent the hood for sufficient clearance for the oil filler neck and the clip that holds the hood prop. Car is looking like a car again from the outside.
On the interior I have the carpet, dash and center console back in. I have some new ebay rear deck and wall carpet coming as the original ones were pretty faded and beat up. Need to finish wiring CEL for the dash, OBD connector wires and some other little stuff on the inside, as well as the airbags and steering wheel, seats, etc.
03-01-2017, 08:07 AM
#117
V8 Miata Enthusiast
Thread Starter
2.5" pipe. This was the Summit Racing Universal Rod Builder Exhaust Kit
SUM-670146
https://www.summitracing.com/parts/SUM-670146
I also used their bungs:
WLK-88103
Fitting, Bung, Weld-In, Oxygen Sensor, Female 18mm x 1.5, Steel, Each
(Mfr. #: 88103)
One comment on the crossover, I liked the crossover pipe that creates an X-shape, vs. those that are more like an H-shape. You can make fewer bends in my opinion with the X-pipe. Since each pipe comes off the X at a 45 degree angle, you just need another 45 degree pipe to make another pipe that will end up straight with the body of the car, front to back.
Also you can just shorten your 45 degree pipe to adjust whether you want both pipes coming off the X-pipe to be closer or farther from each other.
Hope that makes sense.
03-01-2017, 08:40 AM
#118
V8 Miata Follower

Thanks for the info. I'm curious to see it all mounted up in the car with the hangers. I've just started thinking about how I want to mount the hangers, but I like your solution!
03-01-2017, 09:11 AM
#119
V8 Miata Enthusiast
Thread Starter
 03-05-2017, 06:33 PM
#121
V8 Miata Enthusiast
Thread Starter
Might be awhile before I do anything permanent with the mufflers. The mufflers aren't mine so I'm not going to make any modifications to them. I think on the passenger side I would use the existing body hanger and then DIY a hanger from the muffler case to it.
03-05-2017, 06:56 PM
#122
V8 Miata Enthusiast
Thread Starter
For some reason Youtube is not liking my uploads tonight, so not able to post video yet of the engine running. But it does sound badass.
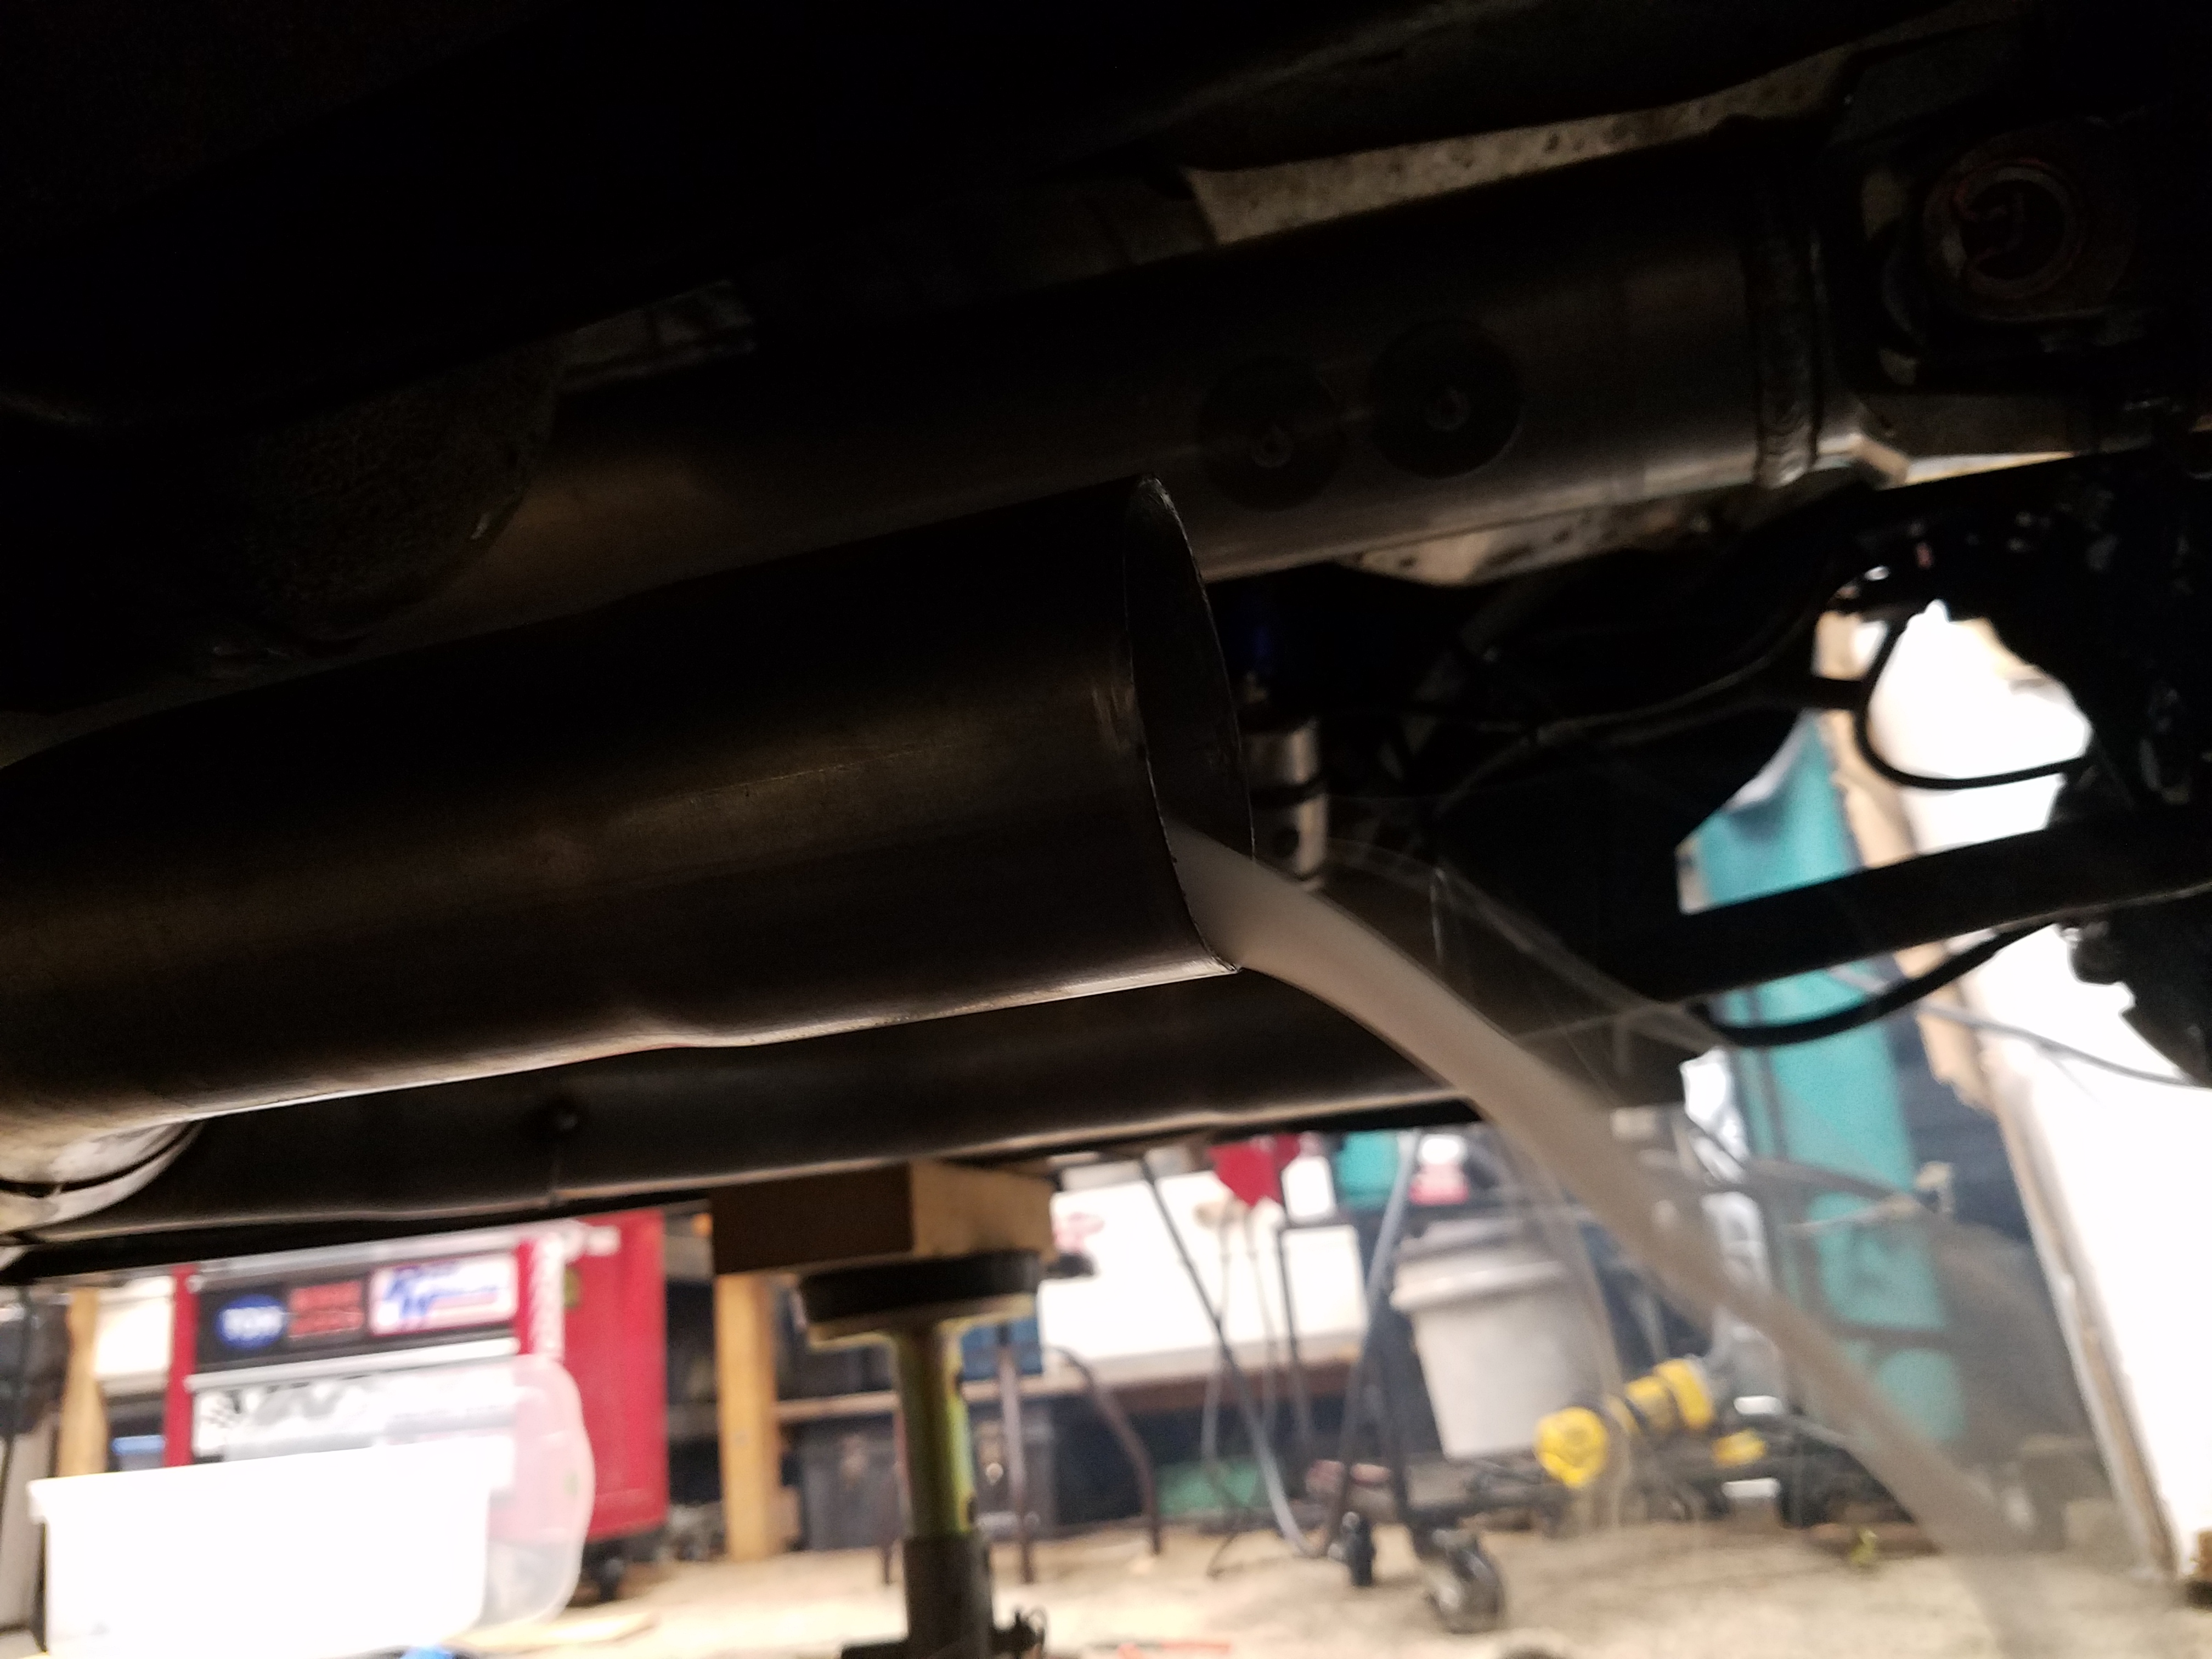
Here are some random pics of the exhaust hanging situation:
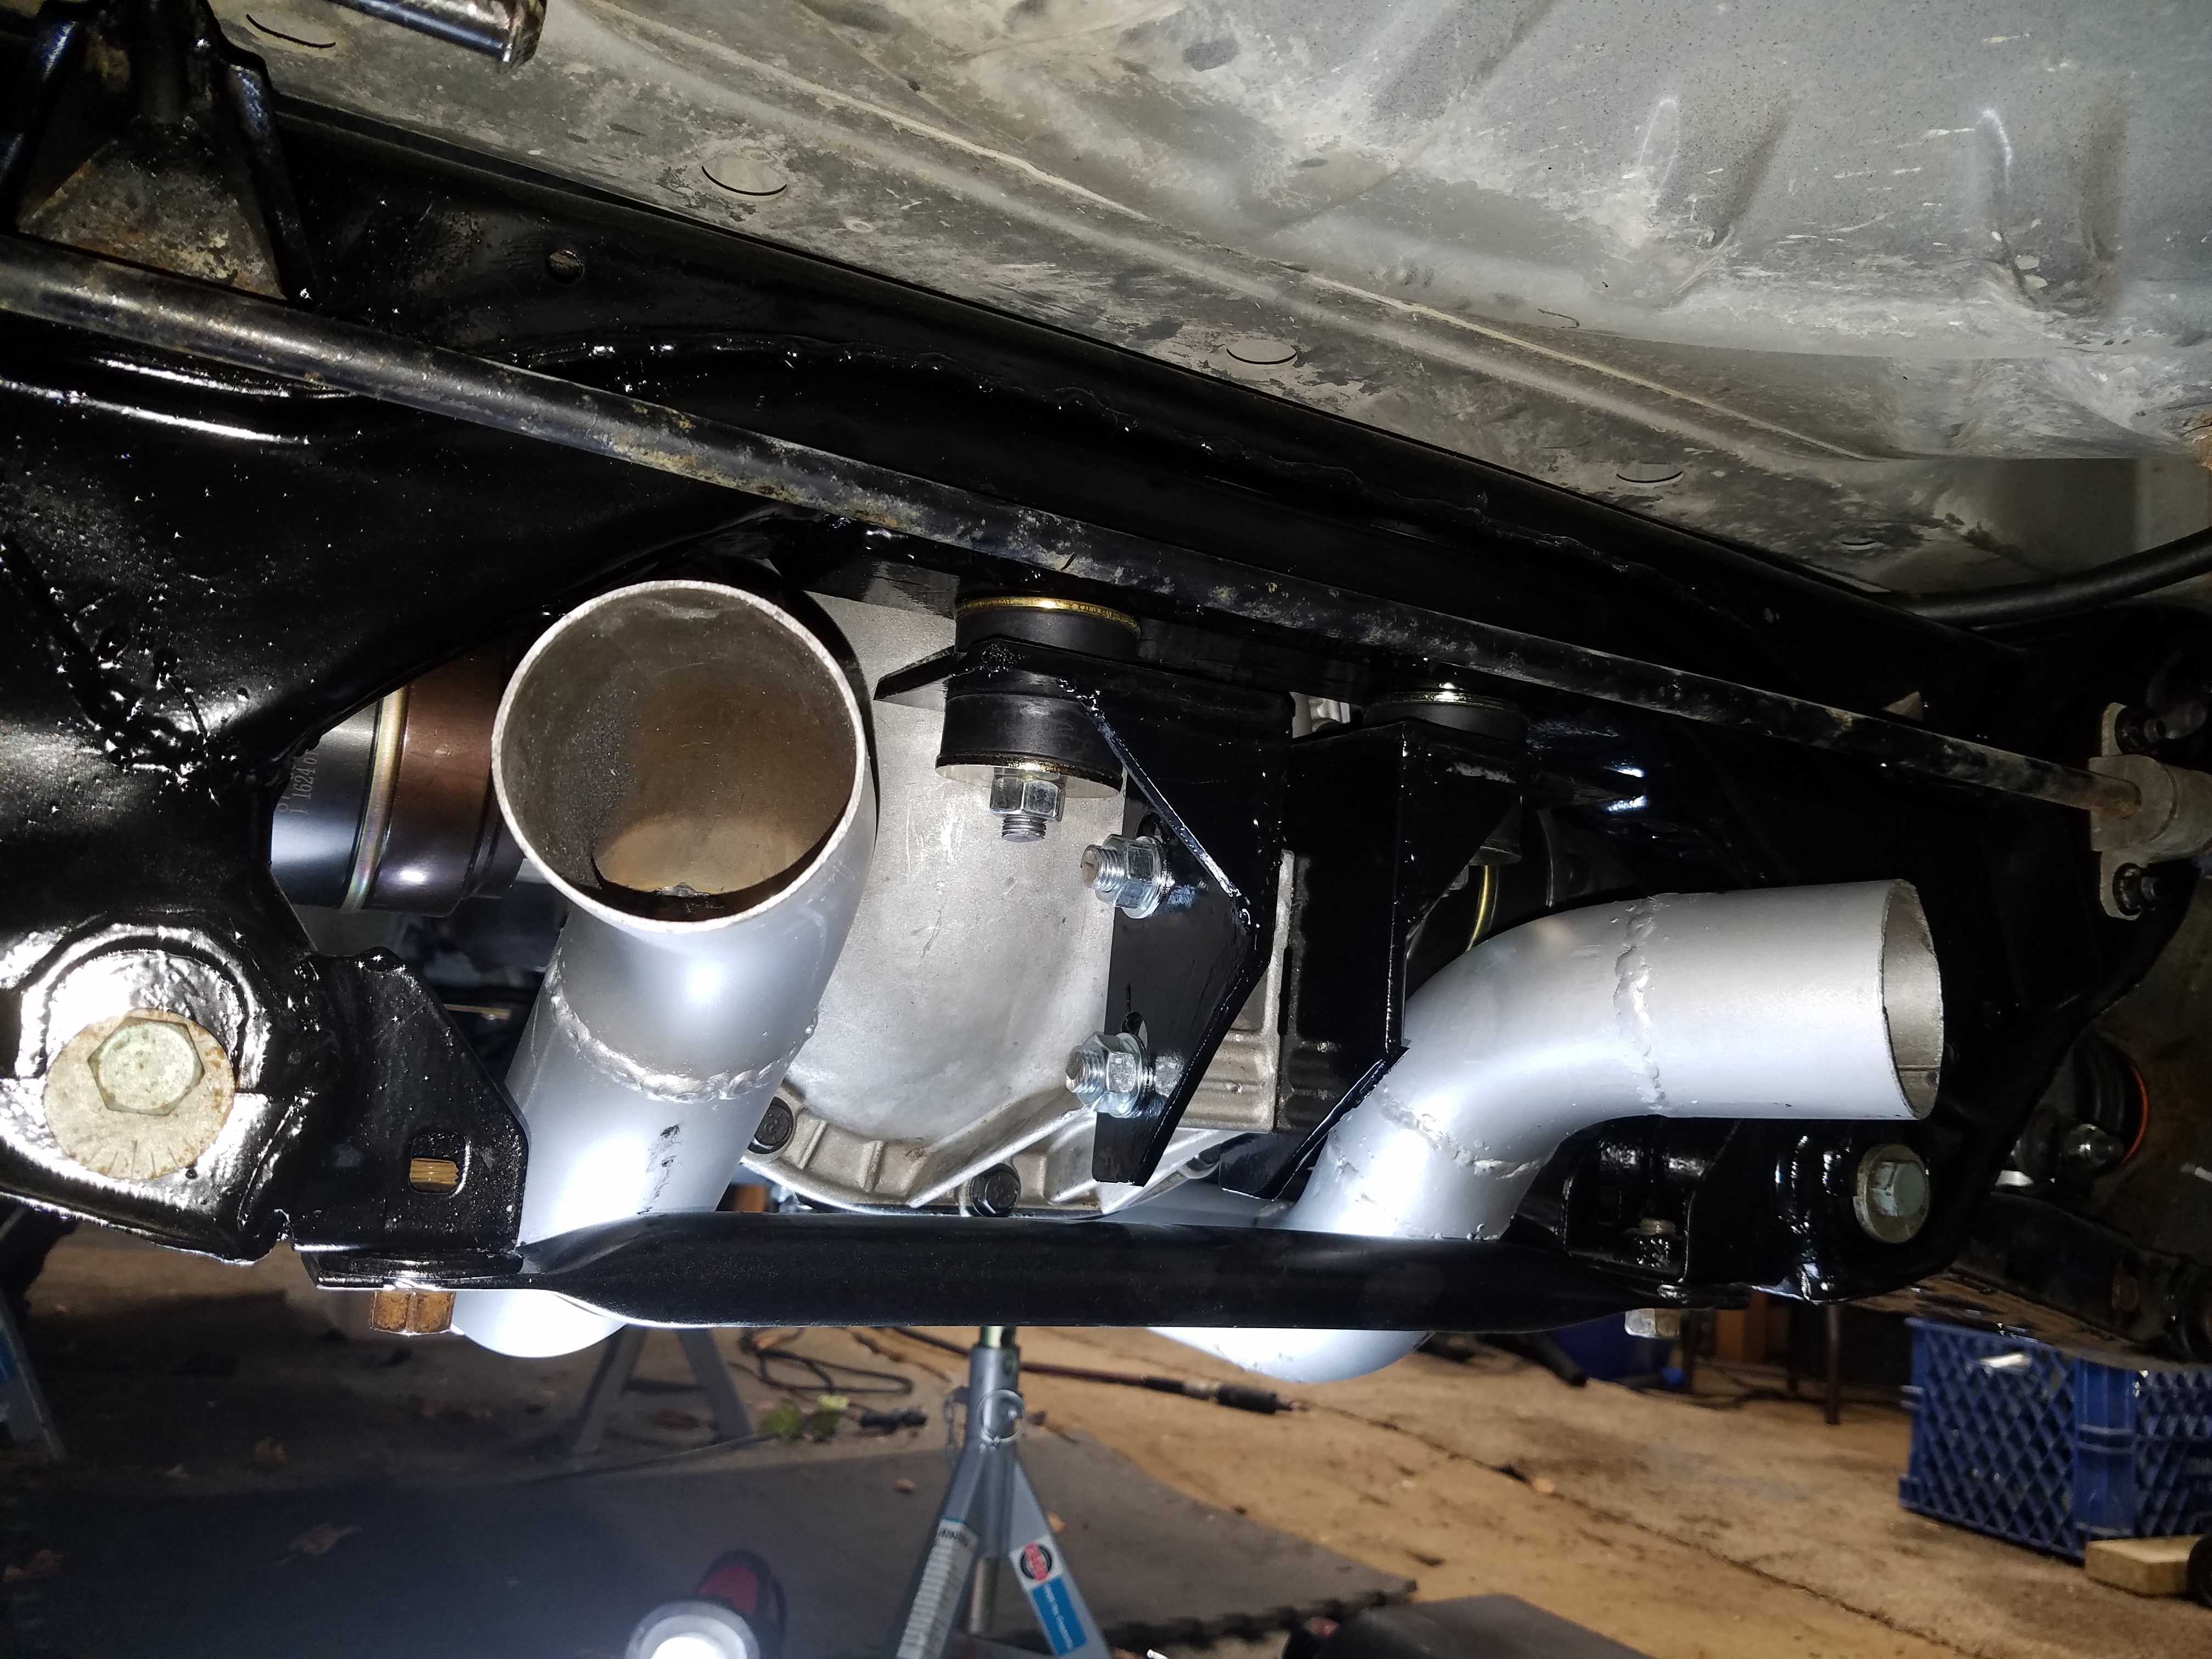
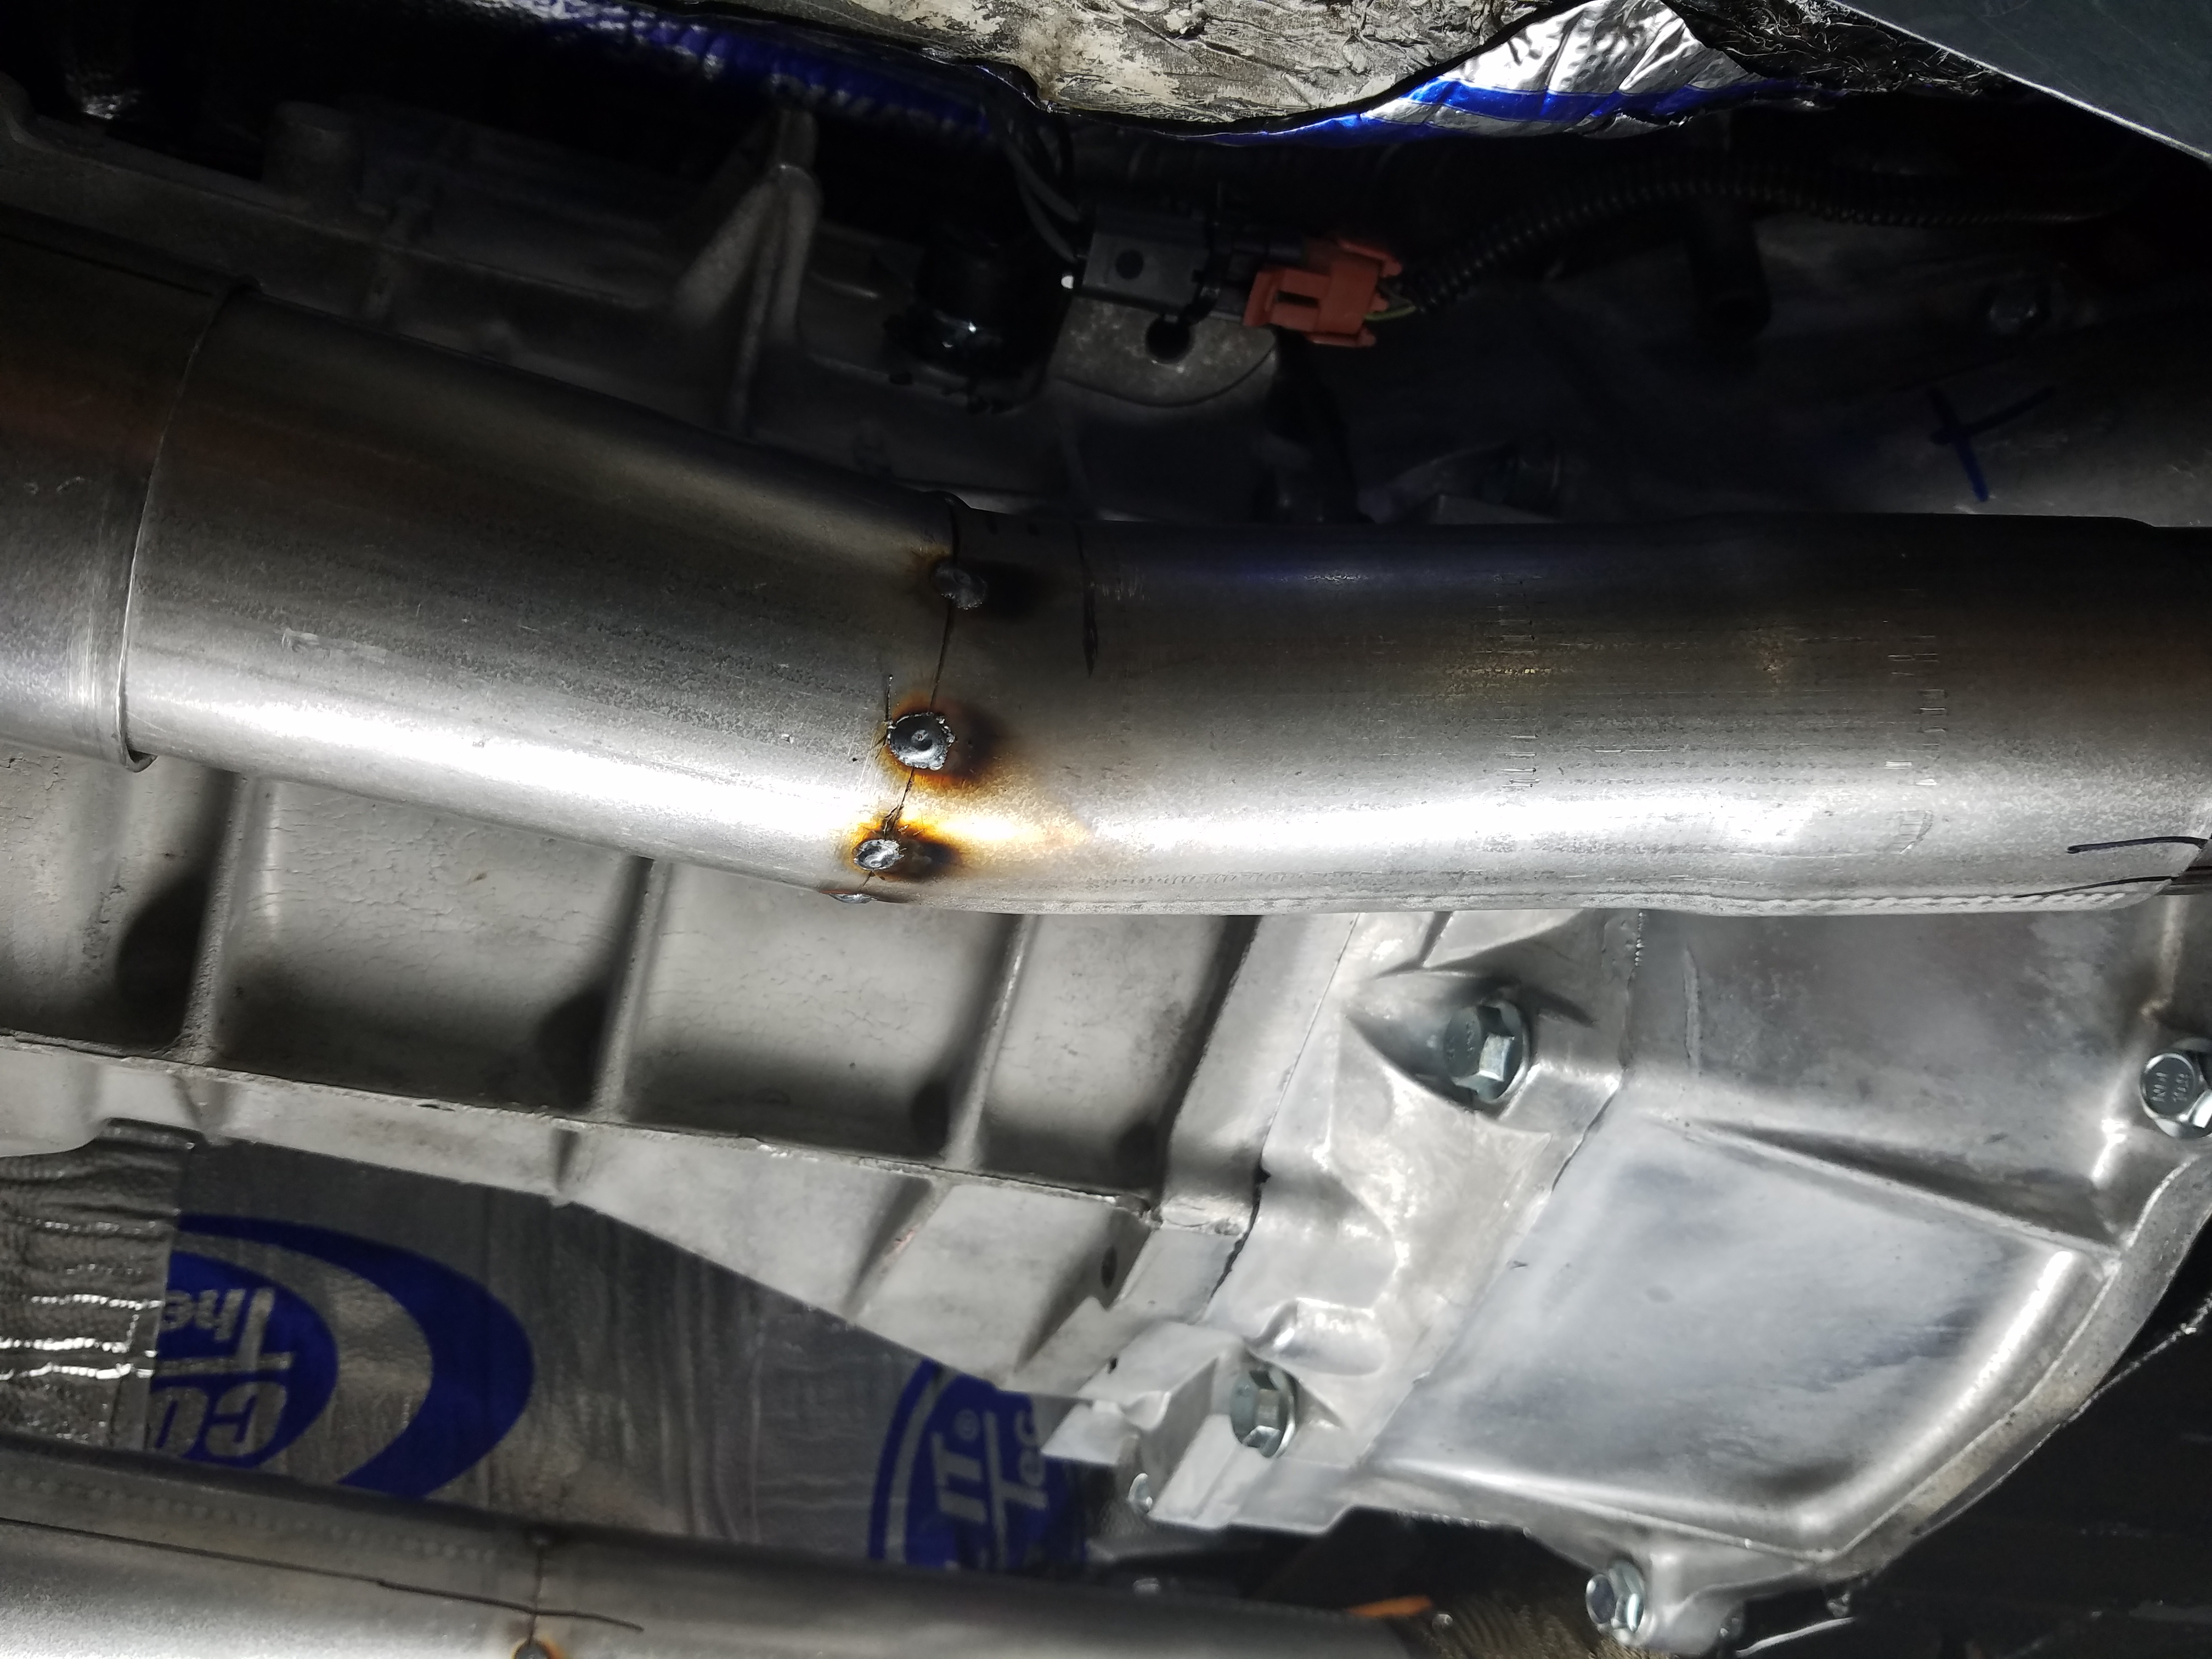
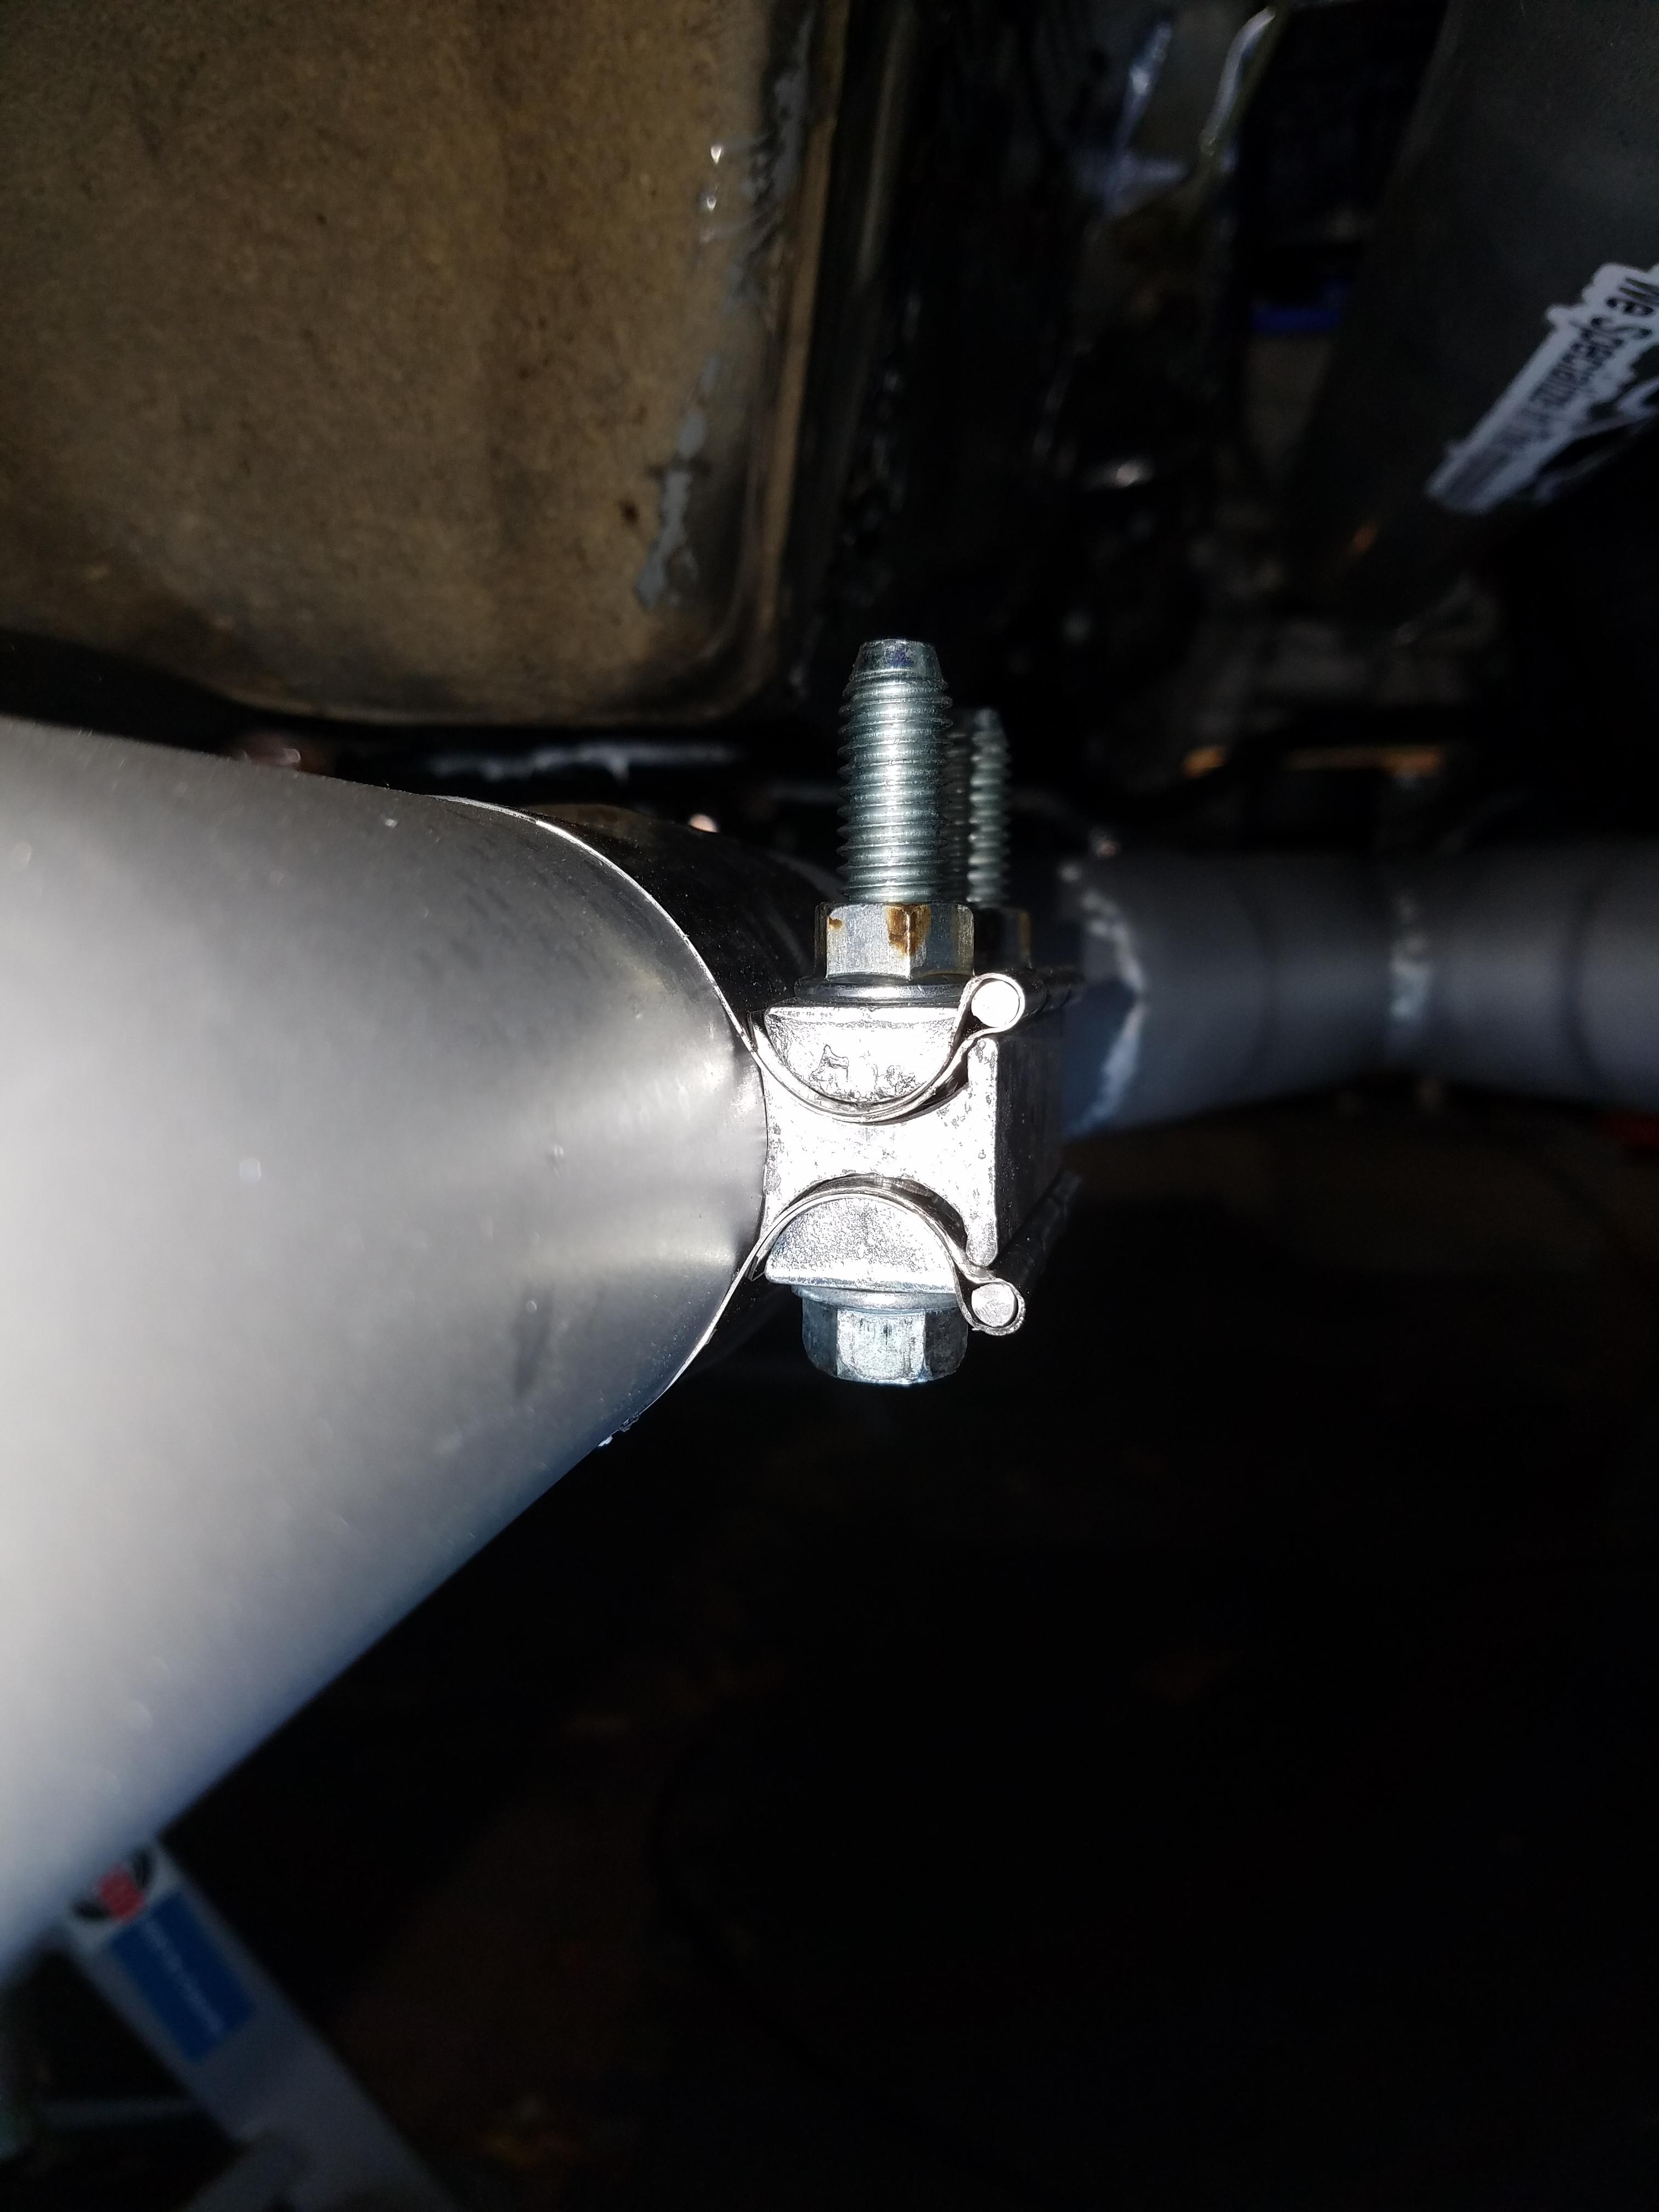
Seems like I'm not getting a full seal on the exhaust clamps:
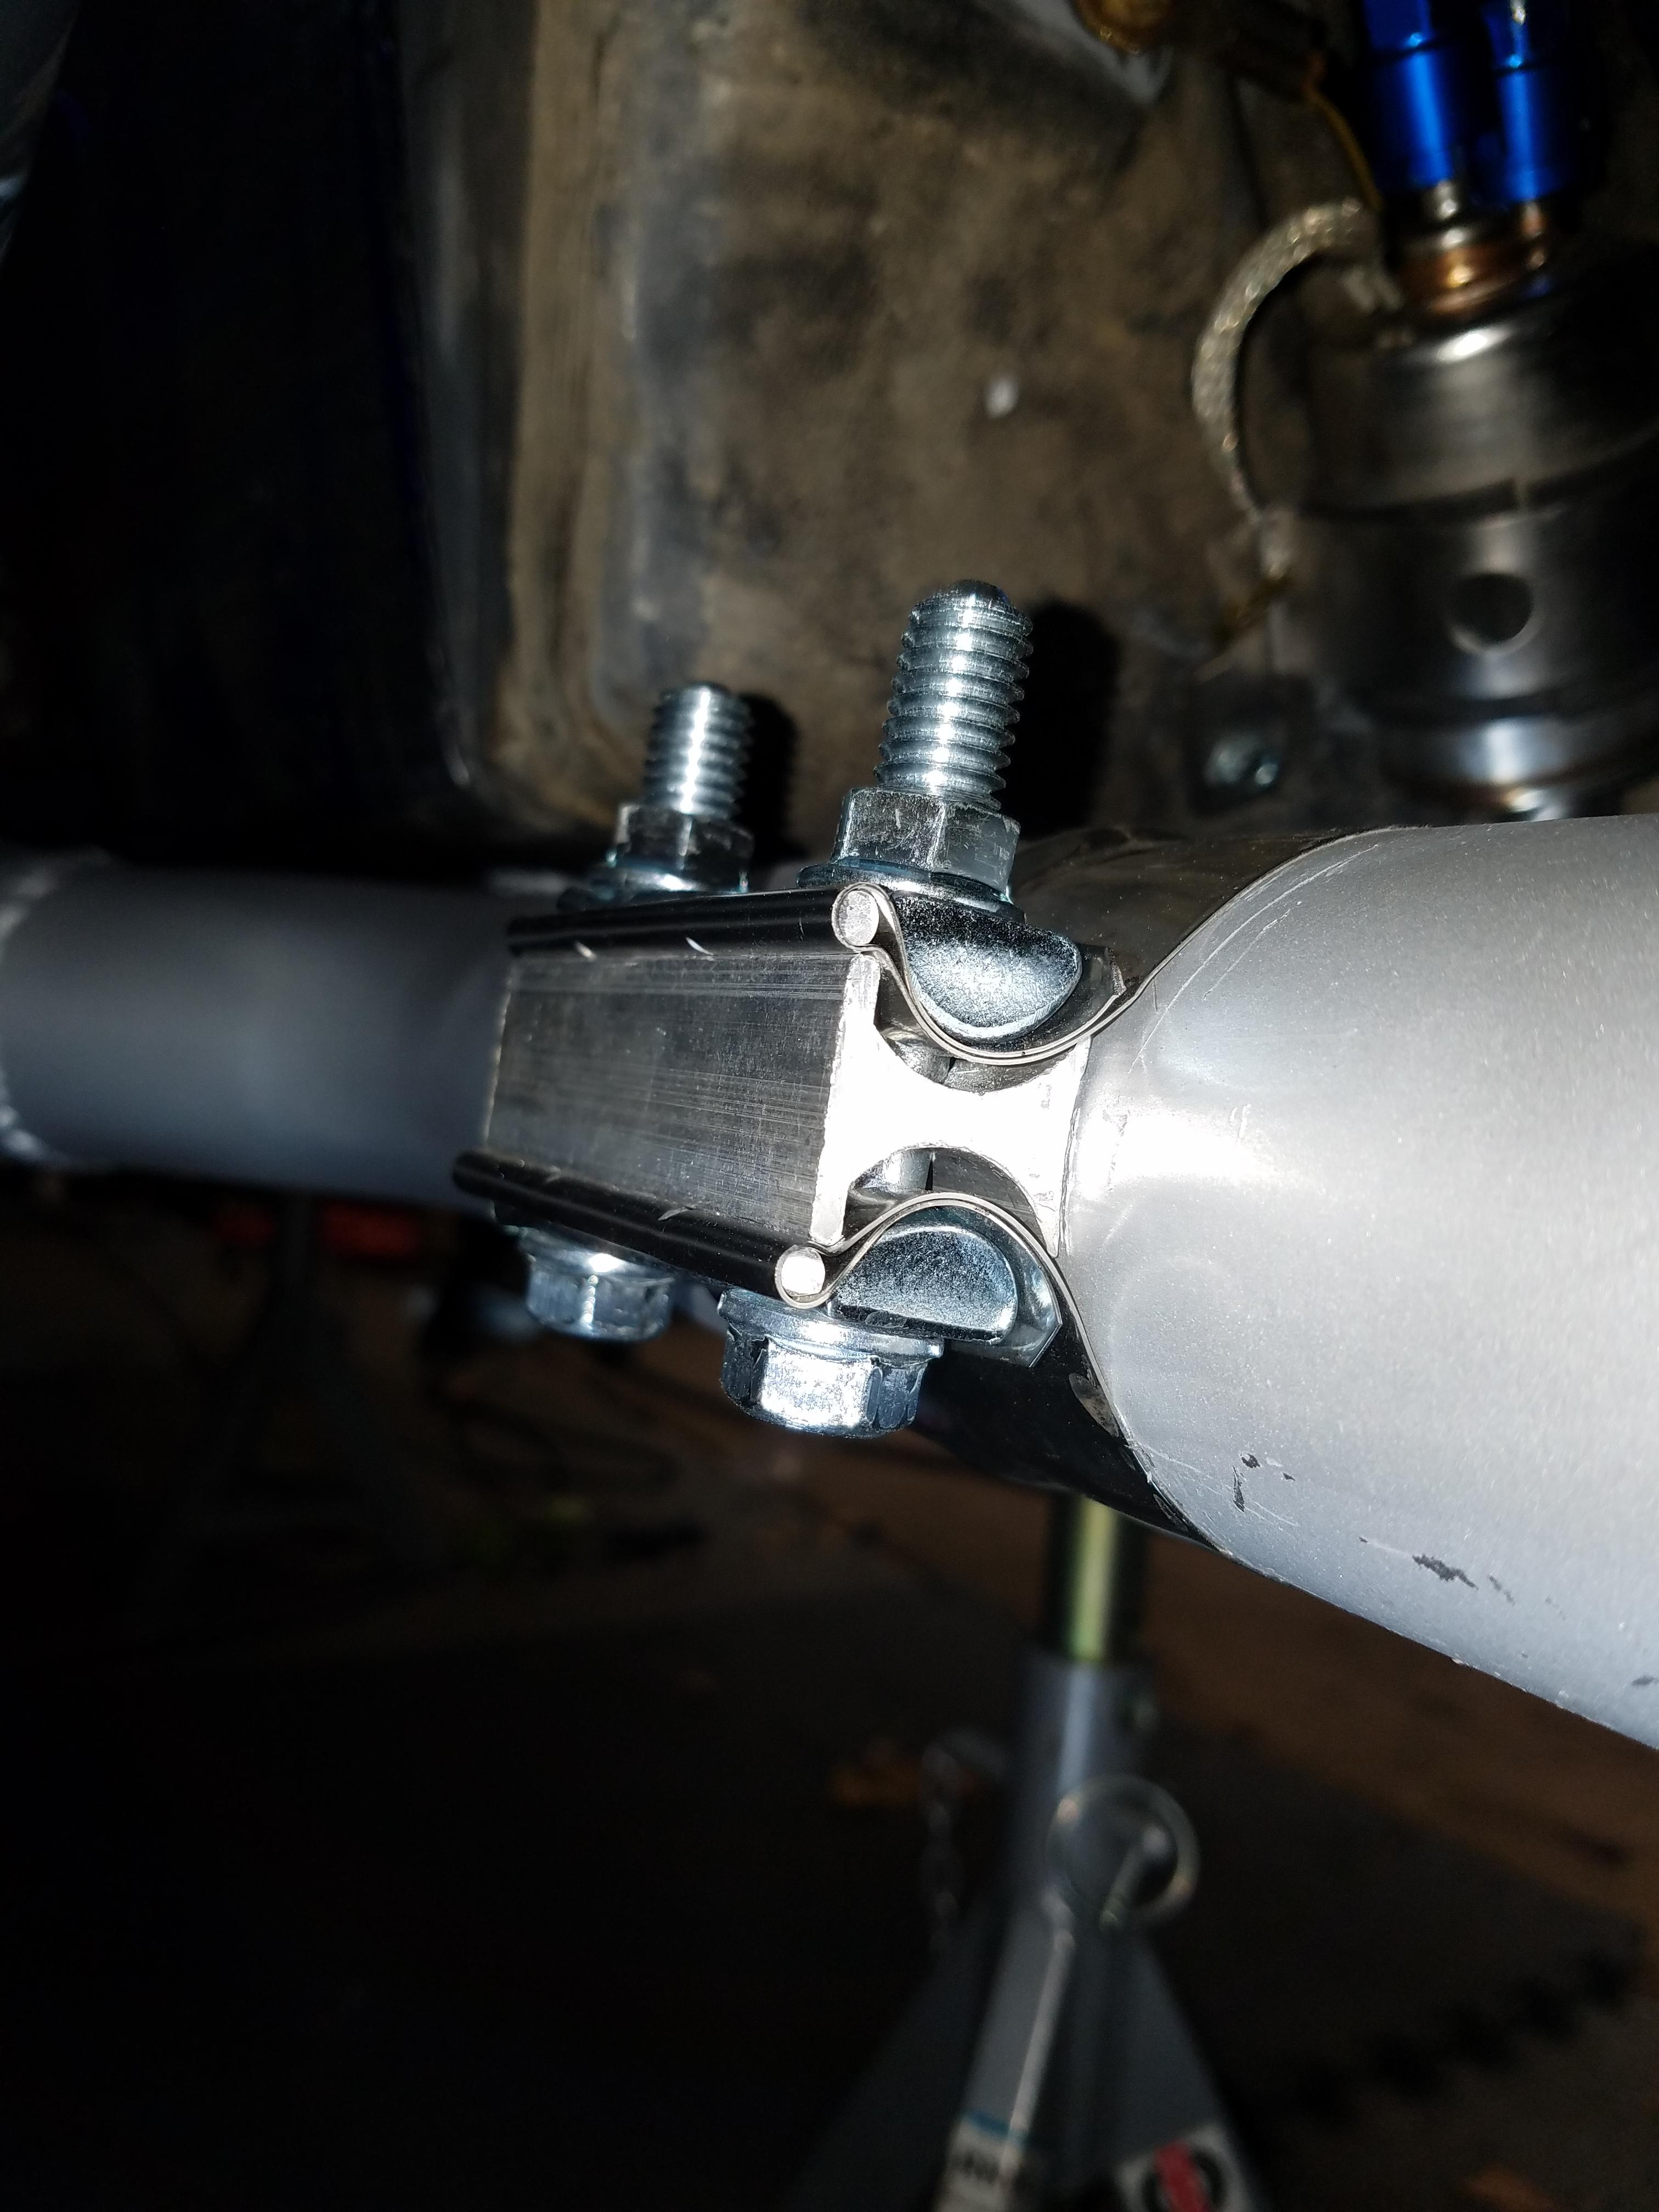
It should look like this:
The two exhaust hangers I have now are enough to hold the system in place happily for now, even with the mufflers installed. I'm using FlowMaster Super 40s in 2.5". I'm not going to do any muffler hangers for now until I decide what I want to use and will then weld in some hangers using the stock locations where possible.
Here are some random pics of the exhaust hanging situation:
Seems like I'm not getting a full seal on the exhaust clamps:
It should look like this:
The two exhaust hangers I have now are enough to hold the system in place happily for now, even with the mufflers installed. I'm using FlowMaster Super 40s in 2.5". I'm not going to do any muffler hangers for now until I decide what I want to use and will then weld in some hangers using the stock locations where possible.
Last edited by pj_mcgarvey; 03-05-2017 at 07:17 PM.
03-05-2017, 07:12 PM
#123
V8 Miata Enthusiast
Thread Starter
With the engine running now there are a few issues I need to address:
- The cooling system was literally being "pissy" with me. The coolant reservoir overflowed once the temp gaug hit 12 o'clock. Might be that the thermostat is not opening. What a shock to have finicky thermostat on a car that hasn't been run in awhile
- I couldn't get my bluetooth OBD reader to work. So not sure if it was the reader (which was cheap) or if the port was not functioning. I got a CEL shortly after the car was running so I know the PCM is able to throw codes, and the dash CEL was working. :-)
- Engine idle seemed high at 1000 or above. Need to verify using the OBD port that the PCM idle reading is matching the dash idle reading
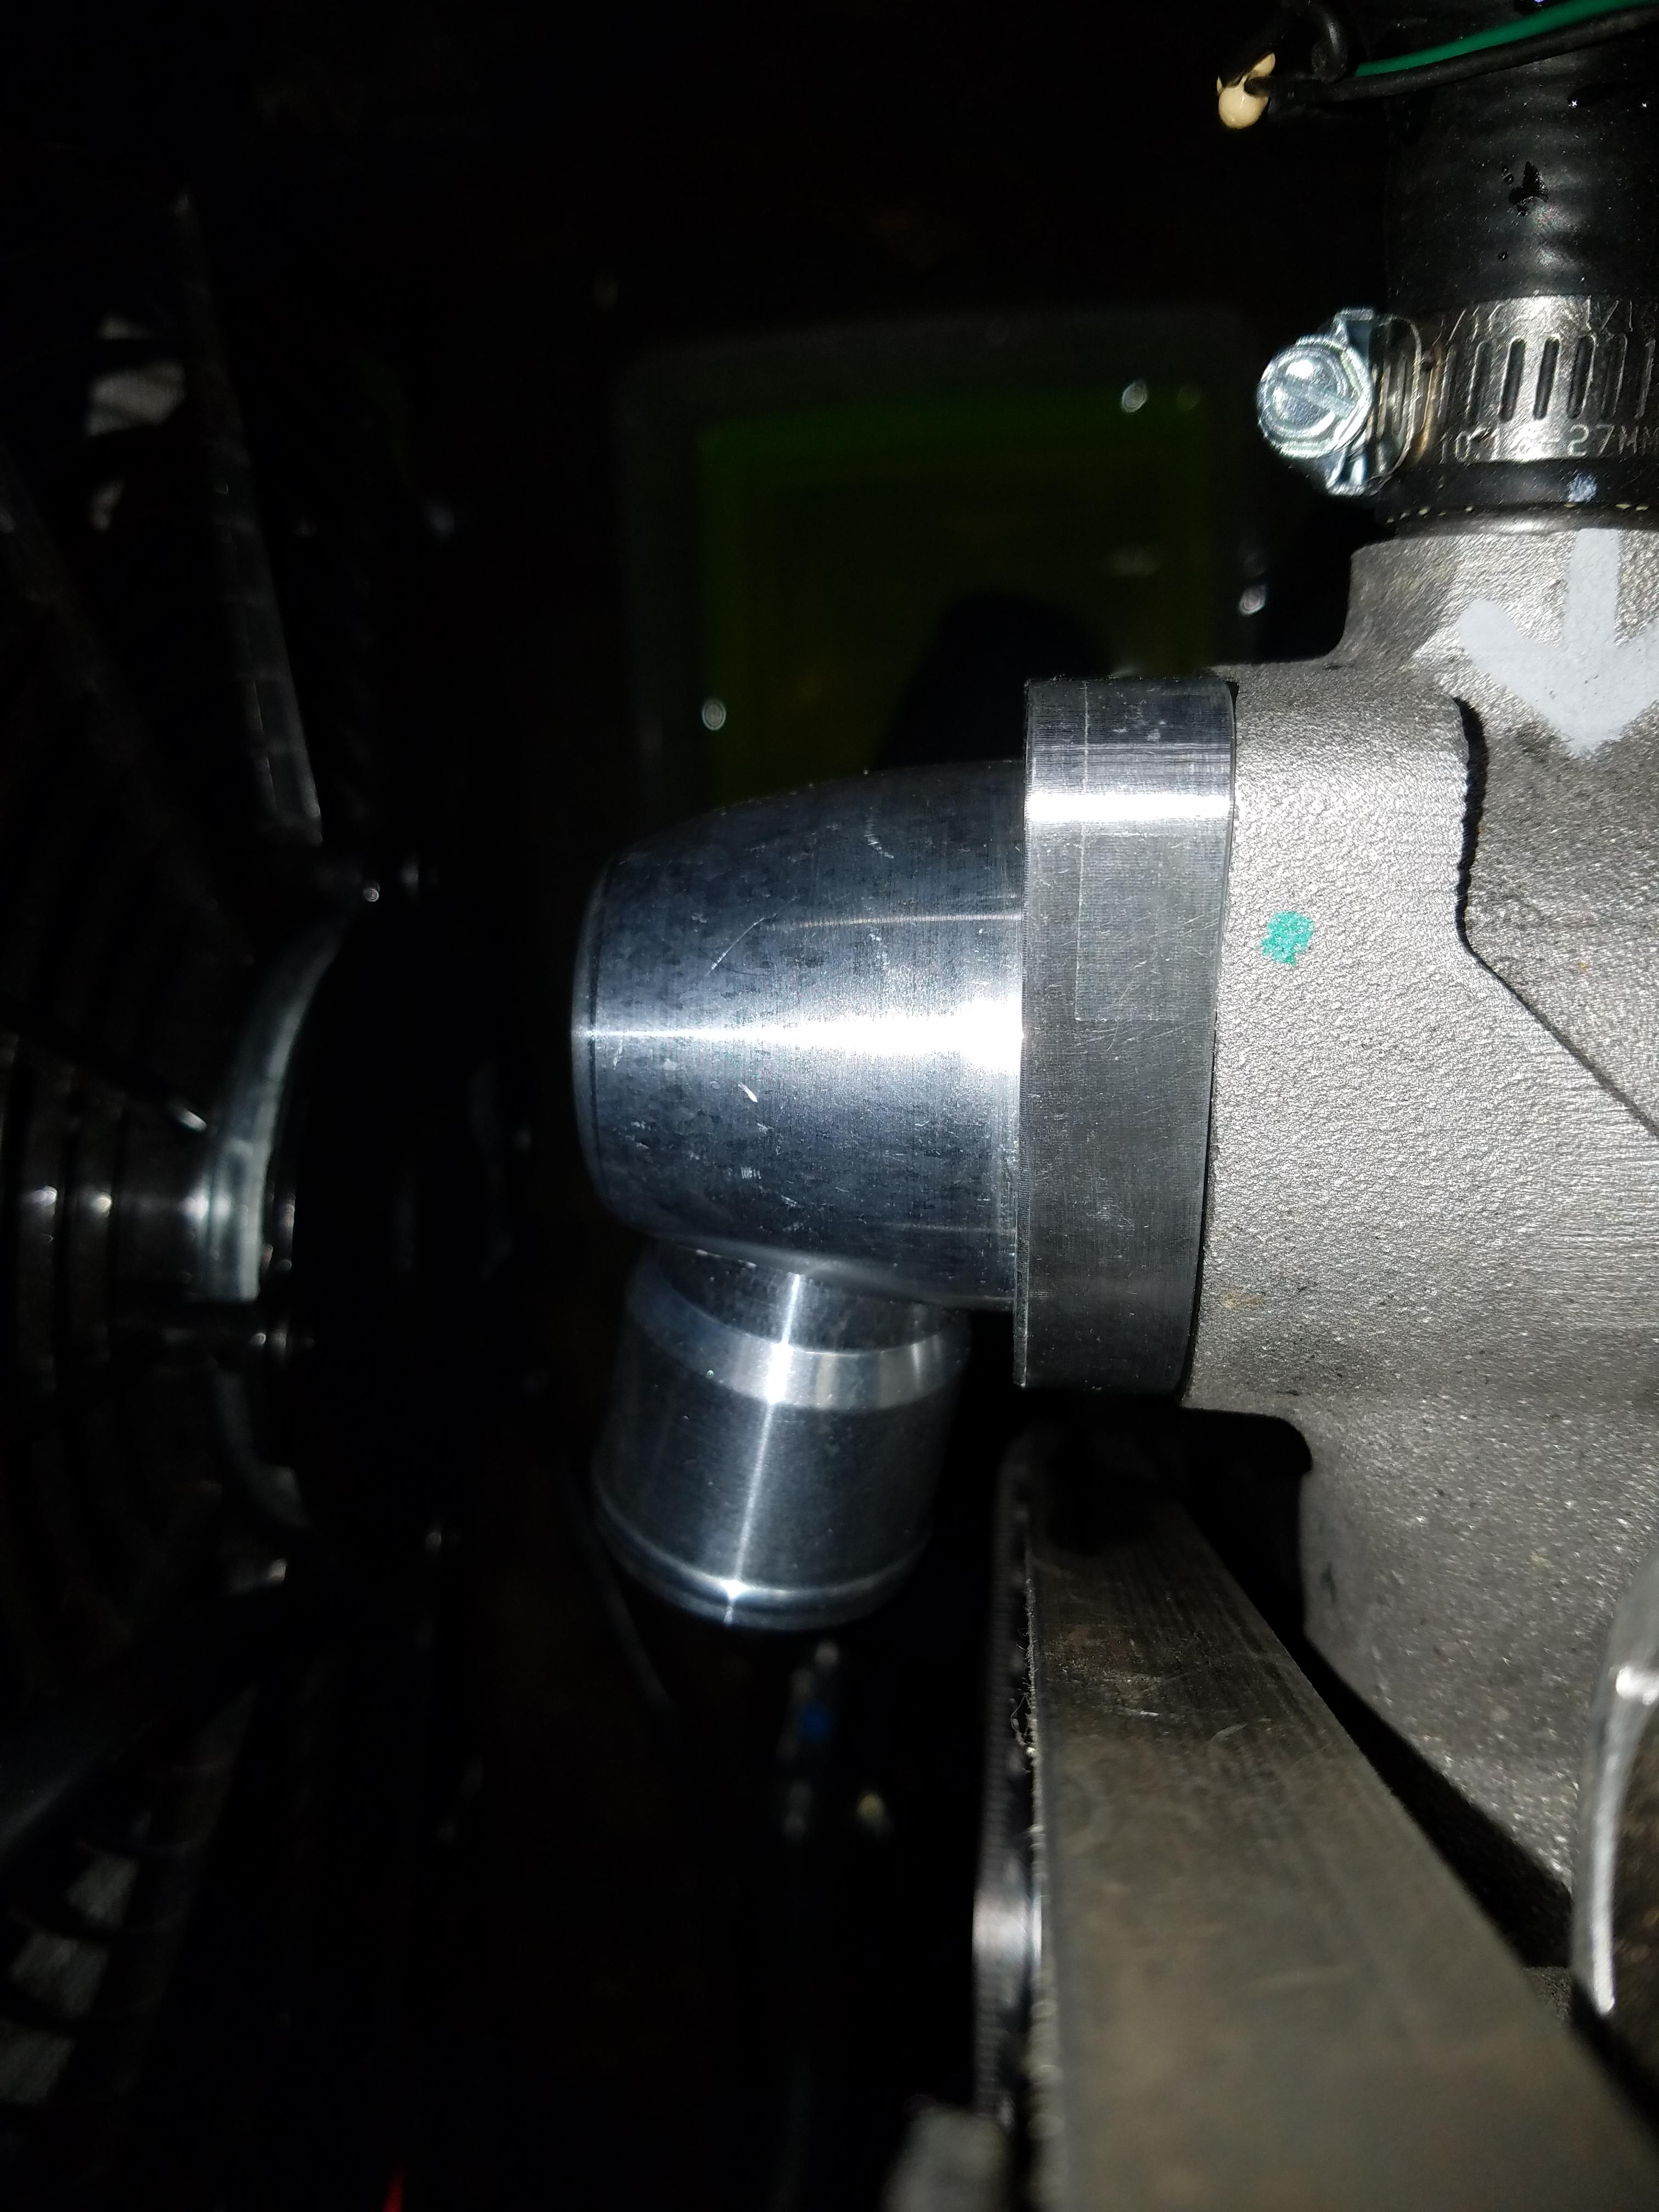
This was my clearance with the accessory belt and the existing thermostat housing flipped around towards the radiator. It ran fine with no rubbing but I knew this wasn't sustainable.
So I had to go all out on this one. I could have just flipped the thermostat back to it's original location facing away from the radiator, and reconfigured my hoses. I liked the way my hoses were routed so I researched another thermostat housing that might give more clearance and went with this one:
CSR 912LS1-1.5: 90� Swivel Thermostat Housing - Clear Chevy LS* | JEGS
and the matching thermostat: JEGS Performance Products 53220: HP Thermostat Pre-LT1 GM, Ford, AMC | JEGS
Yeah, I know, the price is a bit ridiculous. But as far as clearance it will do the job:
- The cooling system was literally being "pissy" with me. The coolant reservoir overflowed once the temp gaug hit 12 o'clock. Might be that the thermostat is not opening. What a shock to have finicky thermostat on a car that hasn't been run in awhile
- I couldn't get my bluetooth OBD reader to work. So not sure if it was the reader (which was cheap) or if the port was not functioning. I got a CEL shortly after the car was running so I know the PCM is able to throw codes, and the dash CEL was working. :-)
- Engine idle seemed high at 1000 or above. Need to verify using the OBD port that the PCM idle reading is matching the dash idle reading
This was my clearance with the accessory belt and the existing thermostat housing flipped around towards the radiator. It ran fine with no rubbing but I knew this wasn't sustainable.
So I had to go all out on this one. I could have just flipped the thermostat back to it's original location facing away from the radiator, and reconfigured my hoses. I liked the way my hoses were routed so I researched another thermostat housing that might give more clearance and went with this one:
CSR 912LS1-1.5: 90� Swivel Thermostat Housing - Clear Chevy LS* | JEGS
and the matching thermostat: JEGS Performance Products 53220: HP Thermostat Pre-LT1 GM, Ford, AMC | JEGS
Yeah, I know, the price is a bit ridiculous. But as far as clearance it will do the job:
03-05-2017, 07:47 PM
#124
V8 Miata Enthusiast
Thread Starter
In order to make the muffler fit easily I decided to remove the rear tie down points. I'm hoping I don't regret this in the future, but you can always use the rear subframe to tie the car down. <<Update from the future>> Removing these will prevent you from using some trailer hitches that bolt in between these mounts. But Bethania Garage/Hard Dog sells a Class I hitch that mounts to the bumper mounts - this worked great for me.
These are pretty bulky and really not in a good spot if you are trying to do a dual muffler setup. Plus I lost about a few pounds in the process.
My fear was that I'd put alot of effort into routing the muffler around it, only to have rubbing or clunking from the rear in high G corners. Just some work with a grinder and big hammer to knock them out, and touched up the bare metal with some black paint.
The hunk of metal removed
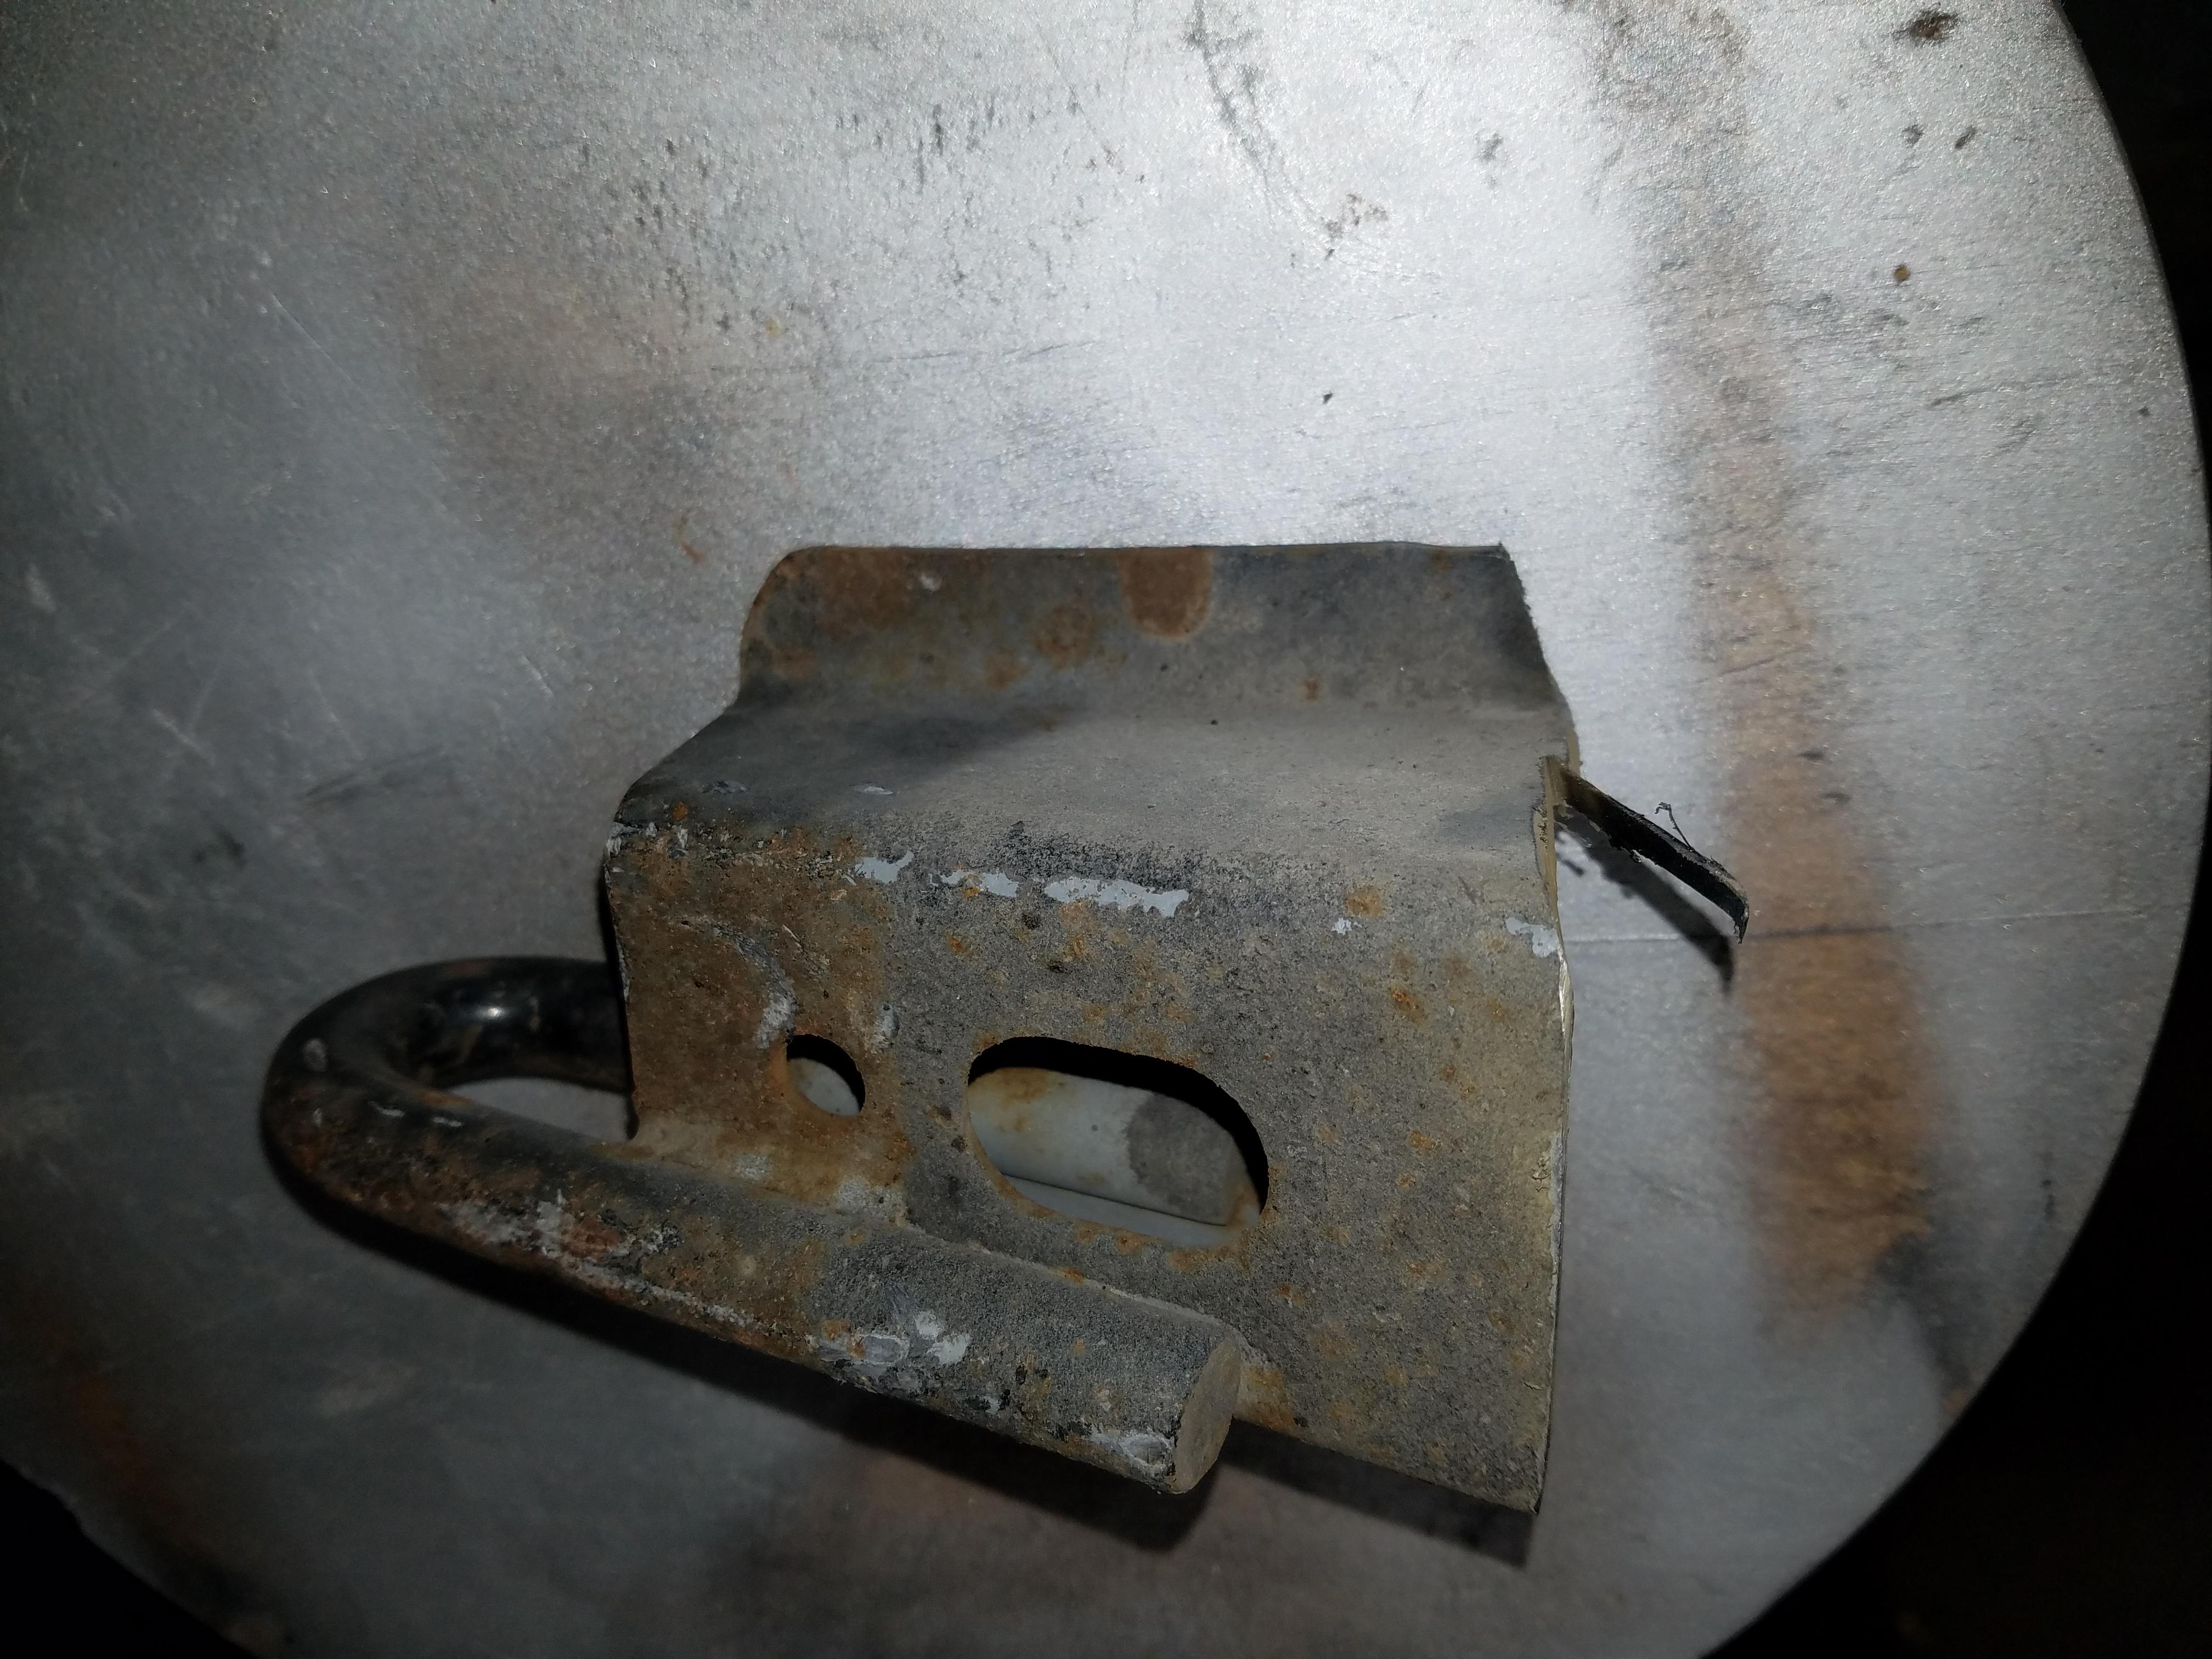
The cutaway area
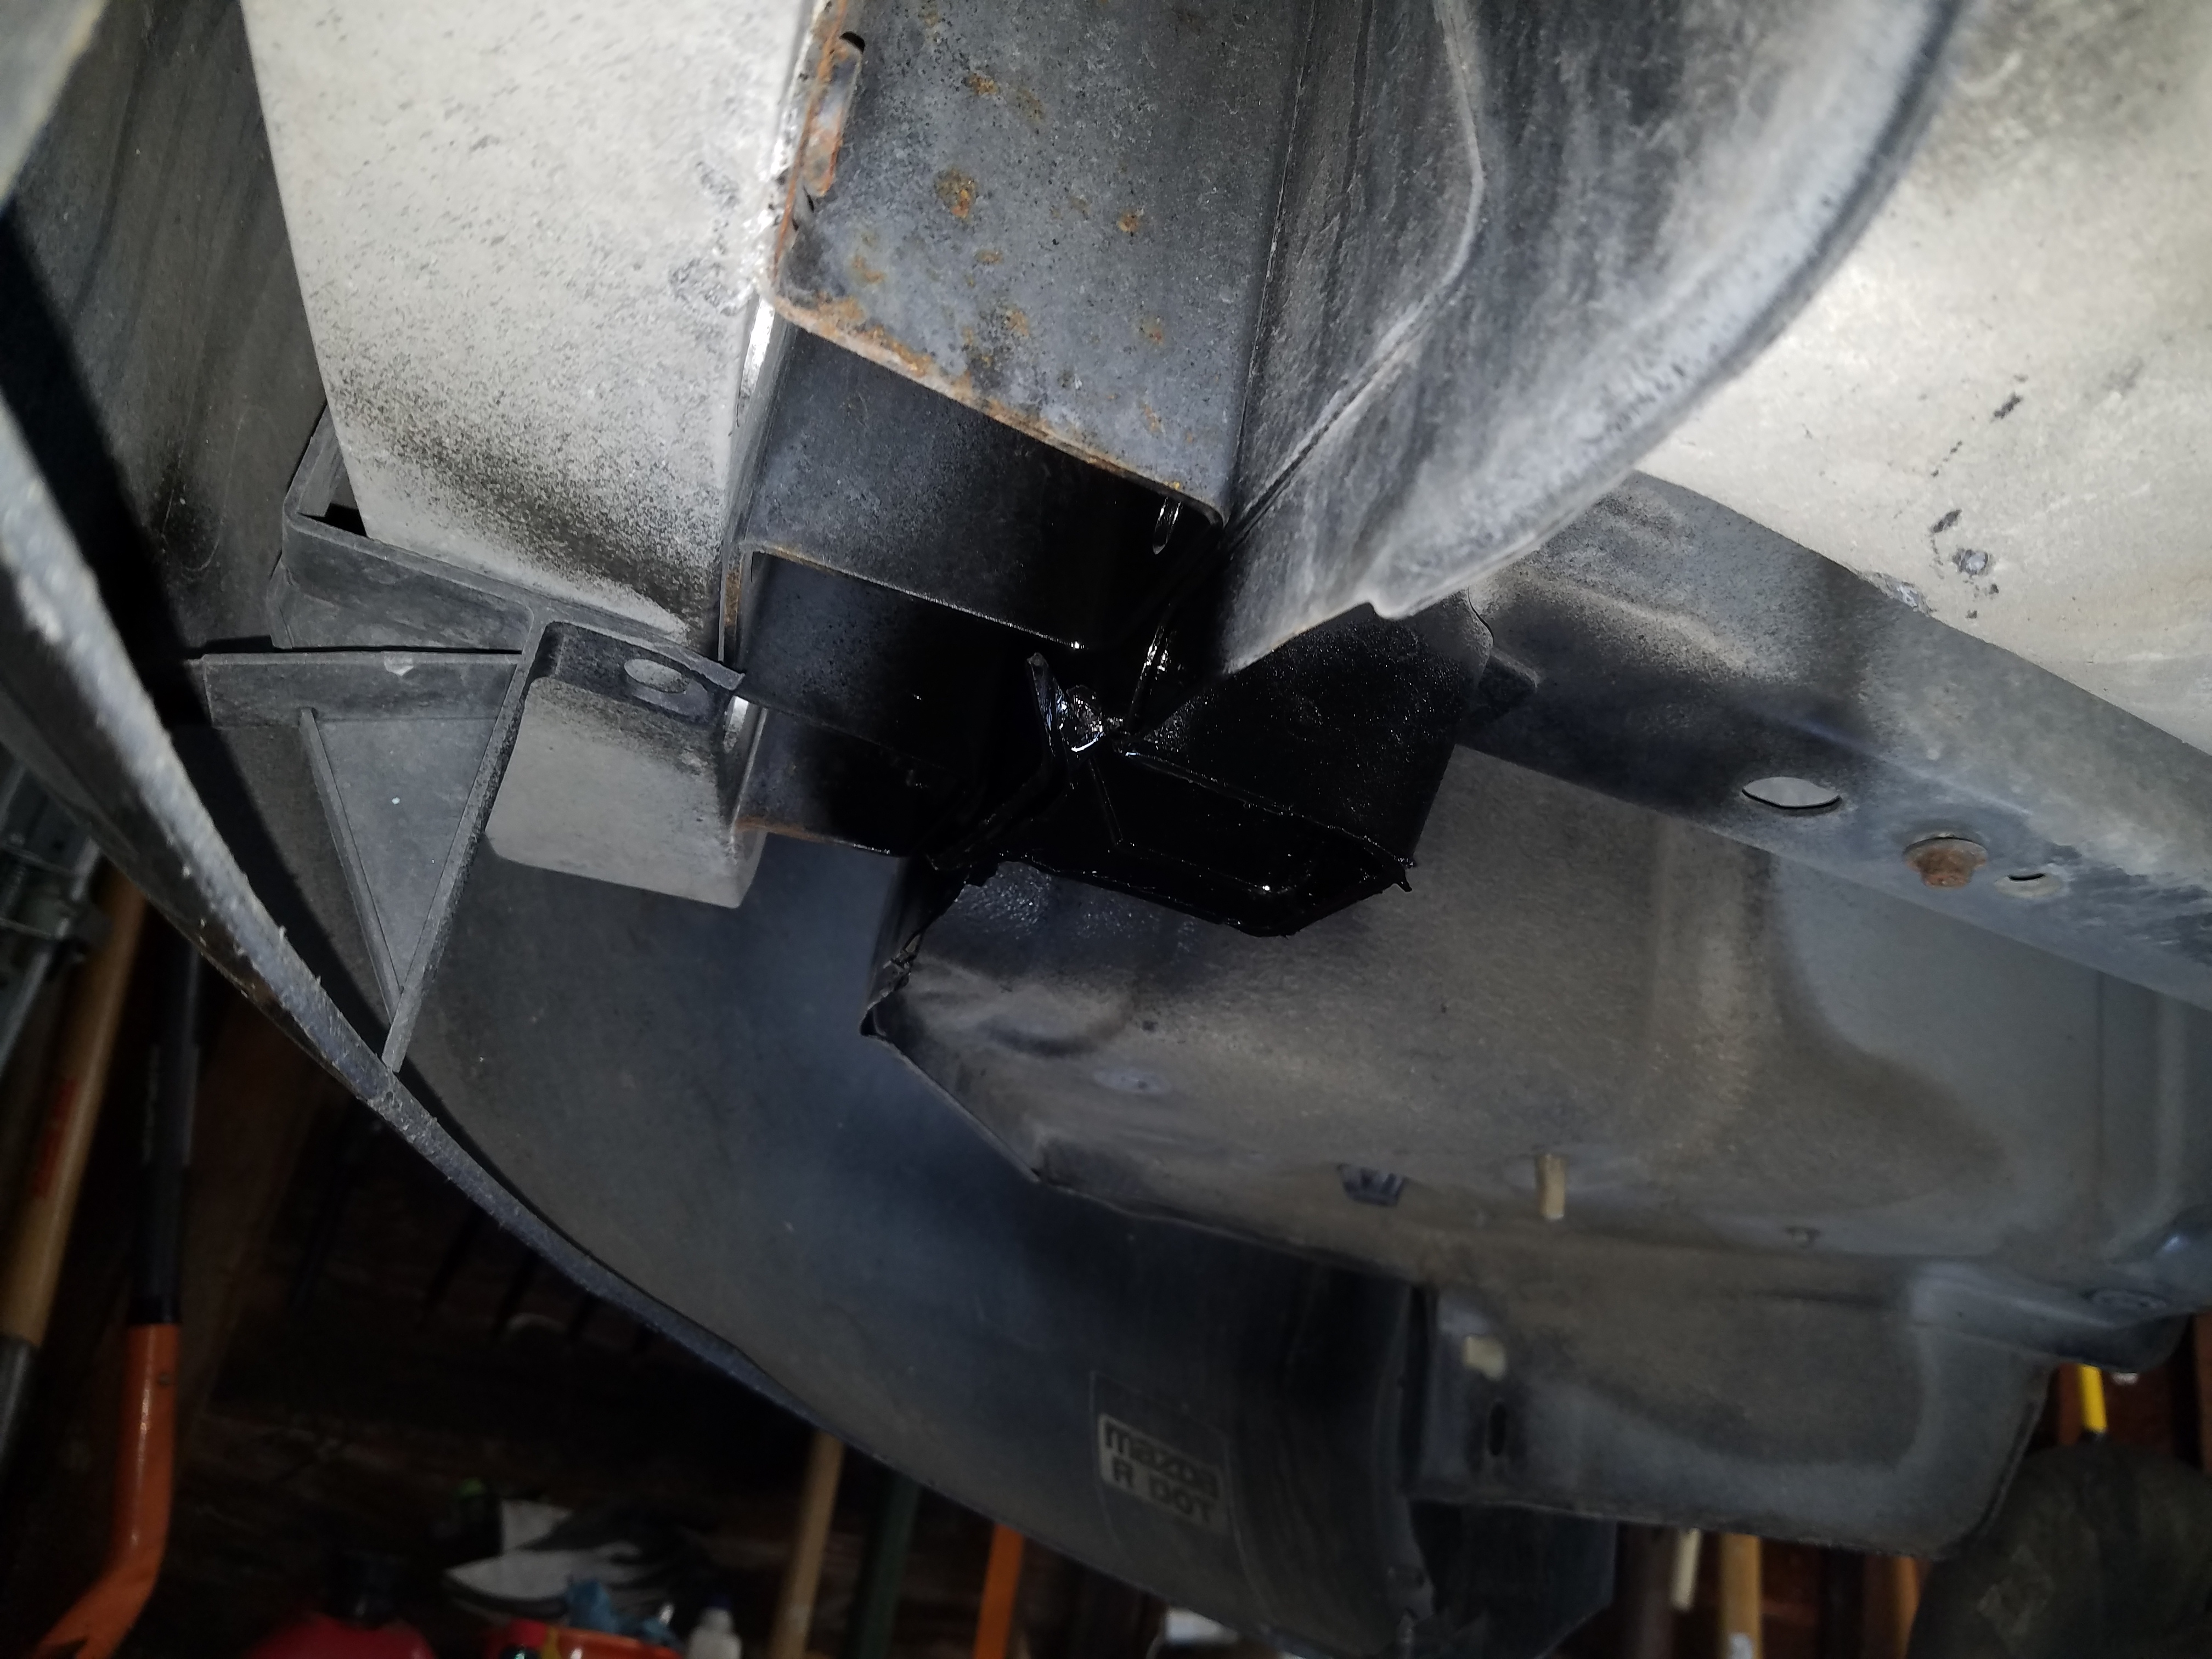
Alot more room to fit this muffler or another one
These are pretty bulky and really not in a good spot if you are trying to do a dual muffler setup. Plus I lost about a few pounds in the process.
My fear was that I'd put alot of effort into routing the muffler around it, only to have rubbing or clunking from the rear in high G corners. Just some work with a grinder and big hammer to knock them out, and touched up the bare metal with some black paint.
The hunk of metal removed
The cutaway area
Alot more room to fit this muffler or another one
Last edited by pj_mcgarvey; 08-01-2017 at 08:38 AM.
03-05-2017, 08:53 PM
#125
V8 Miata Enthusiast
Thread Starter
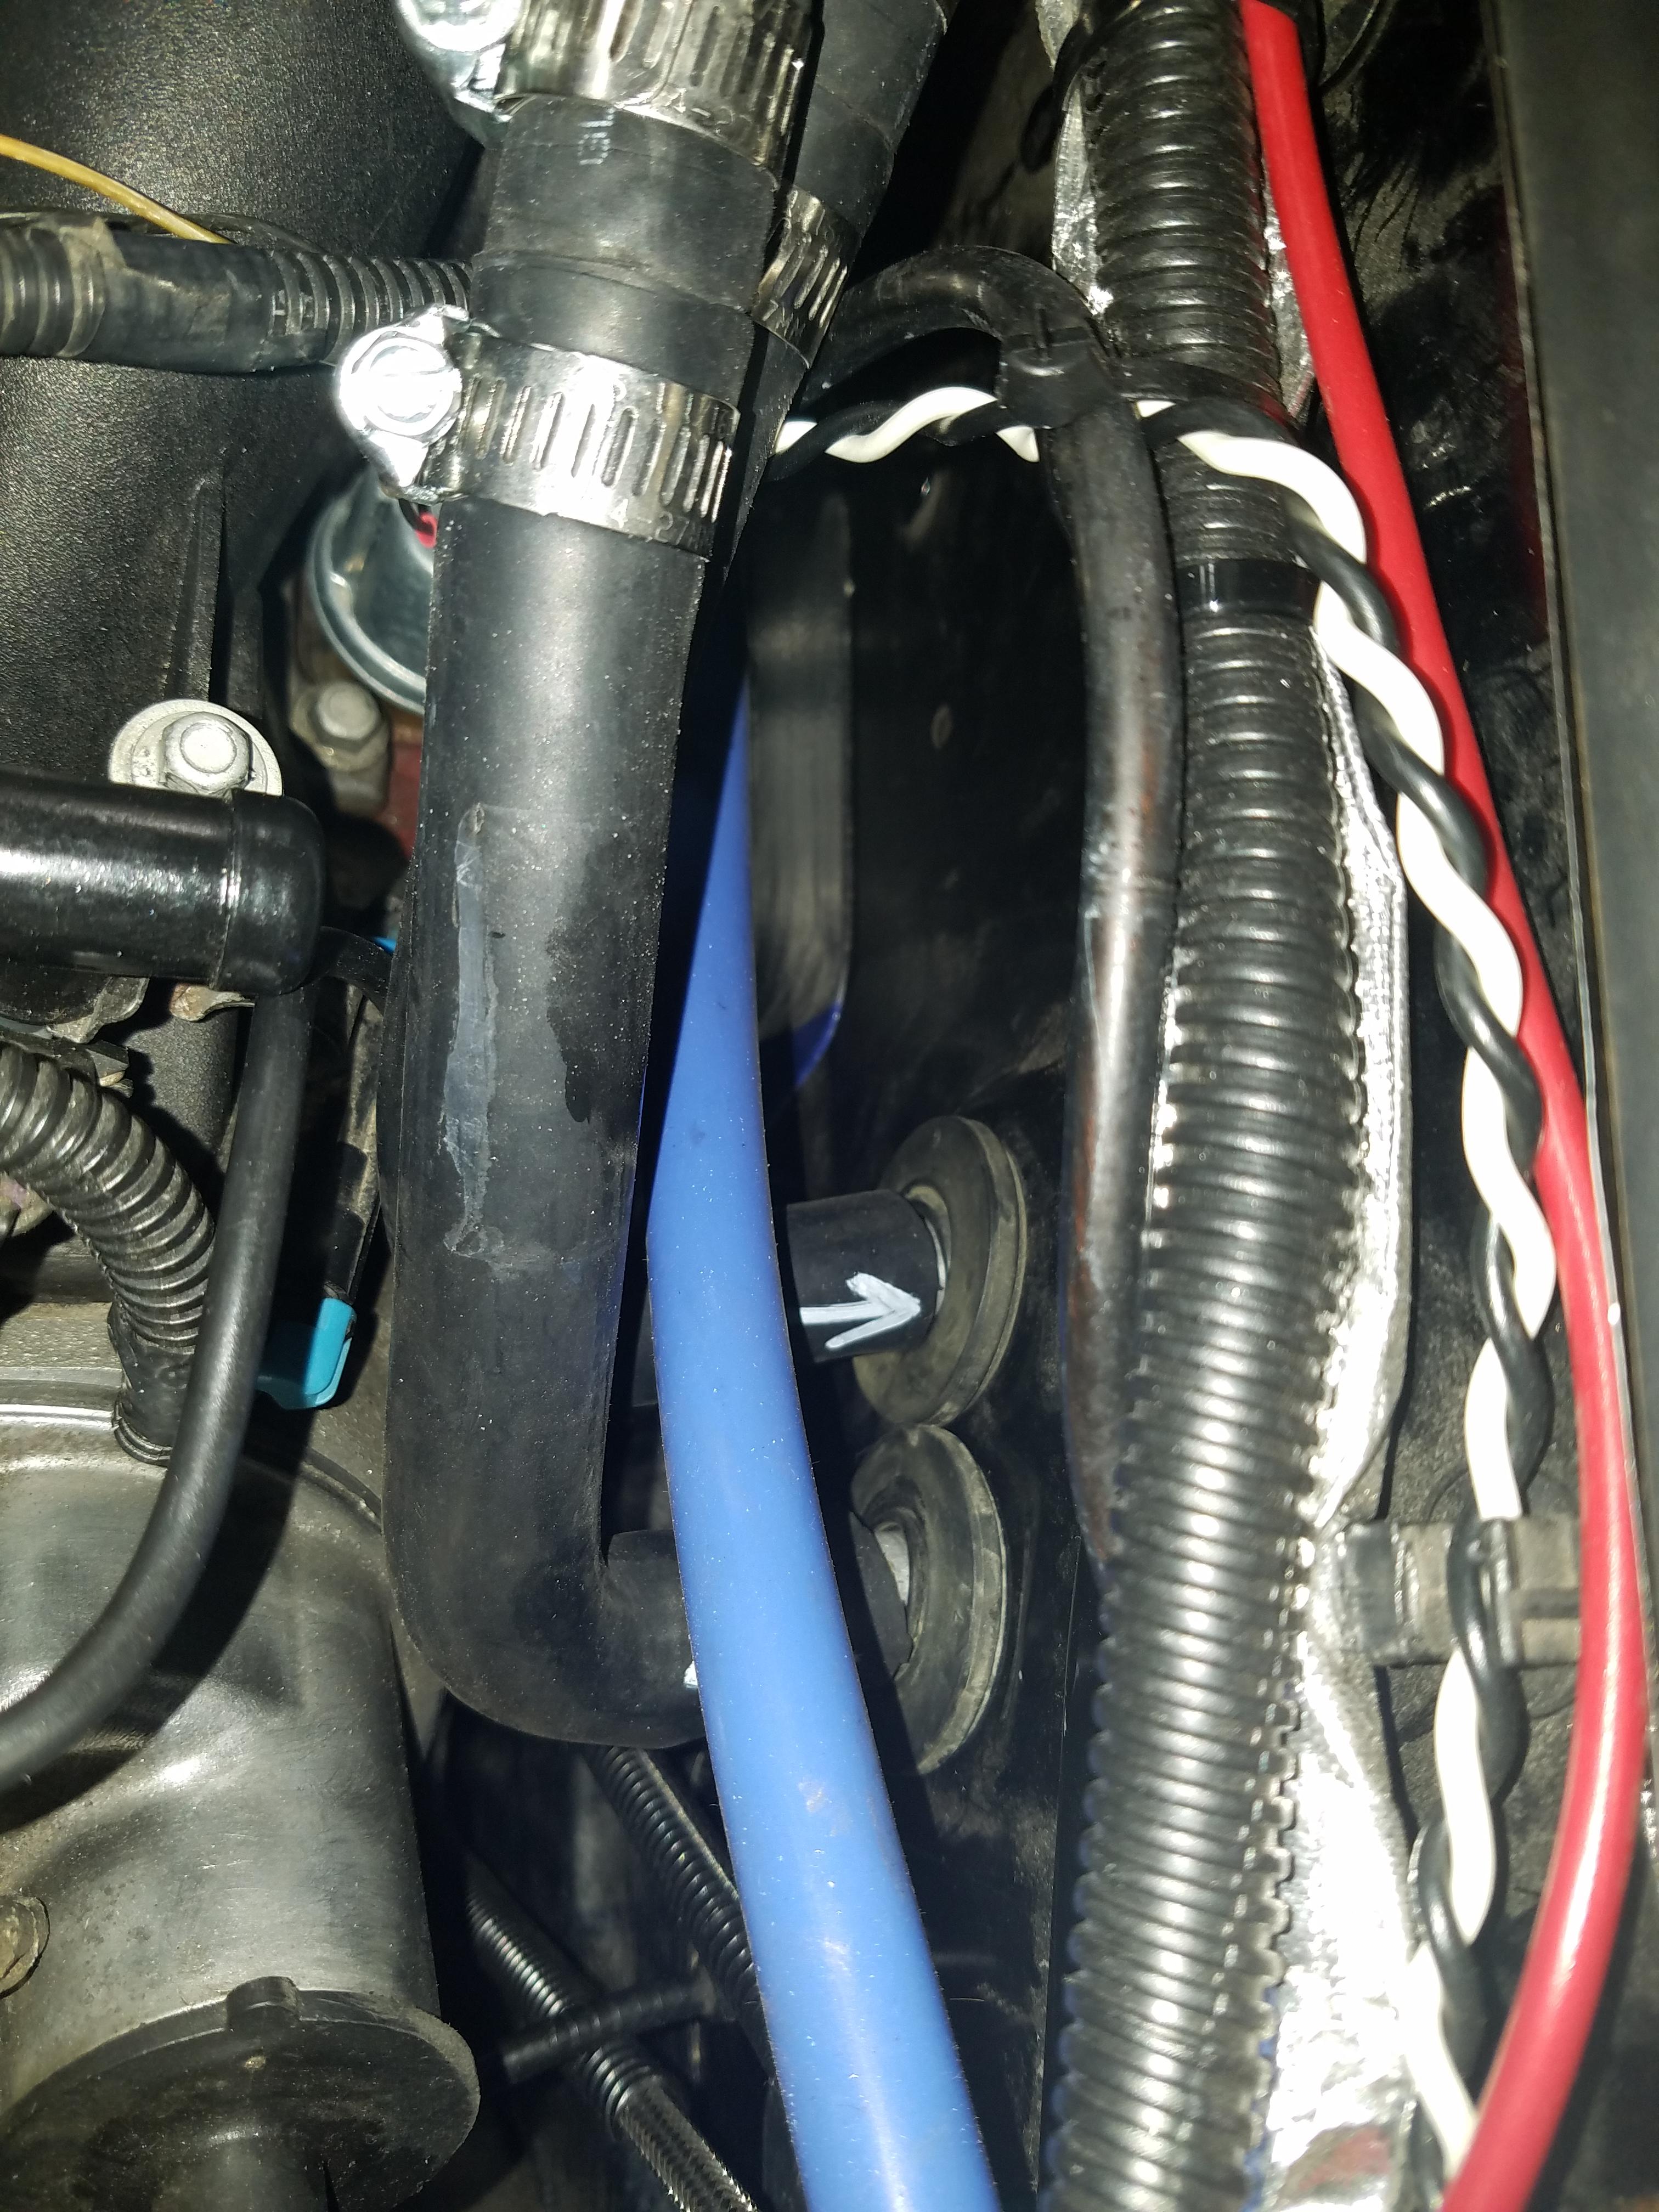
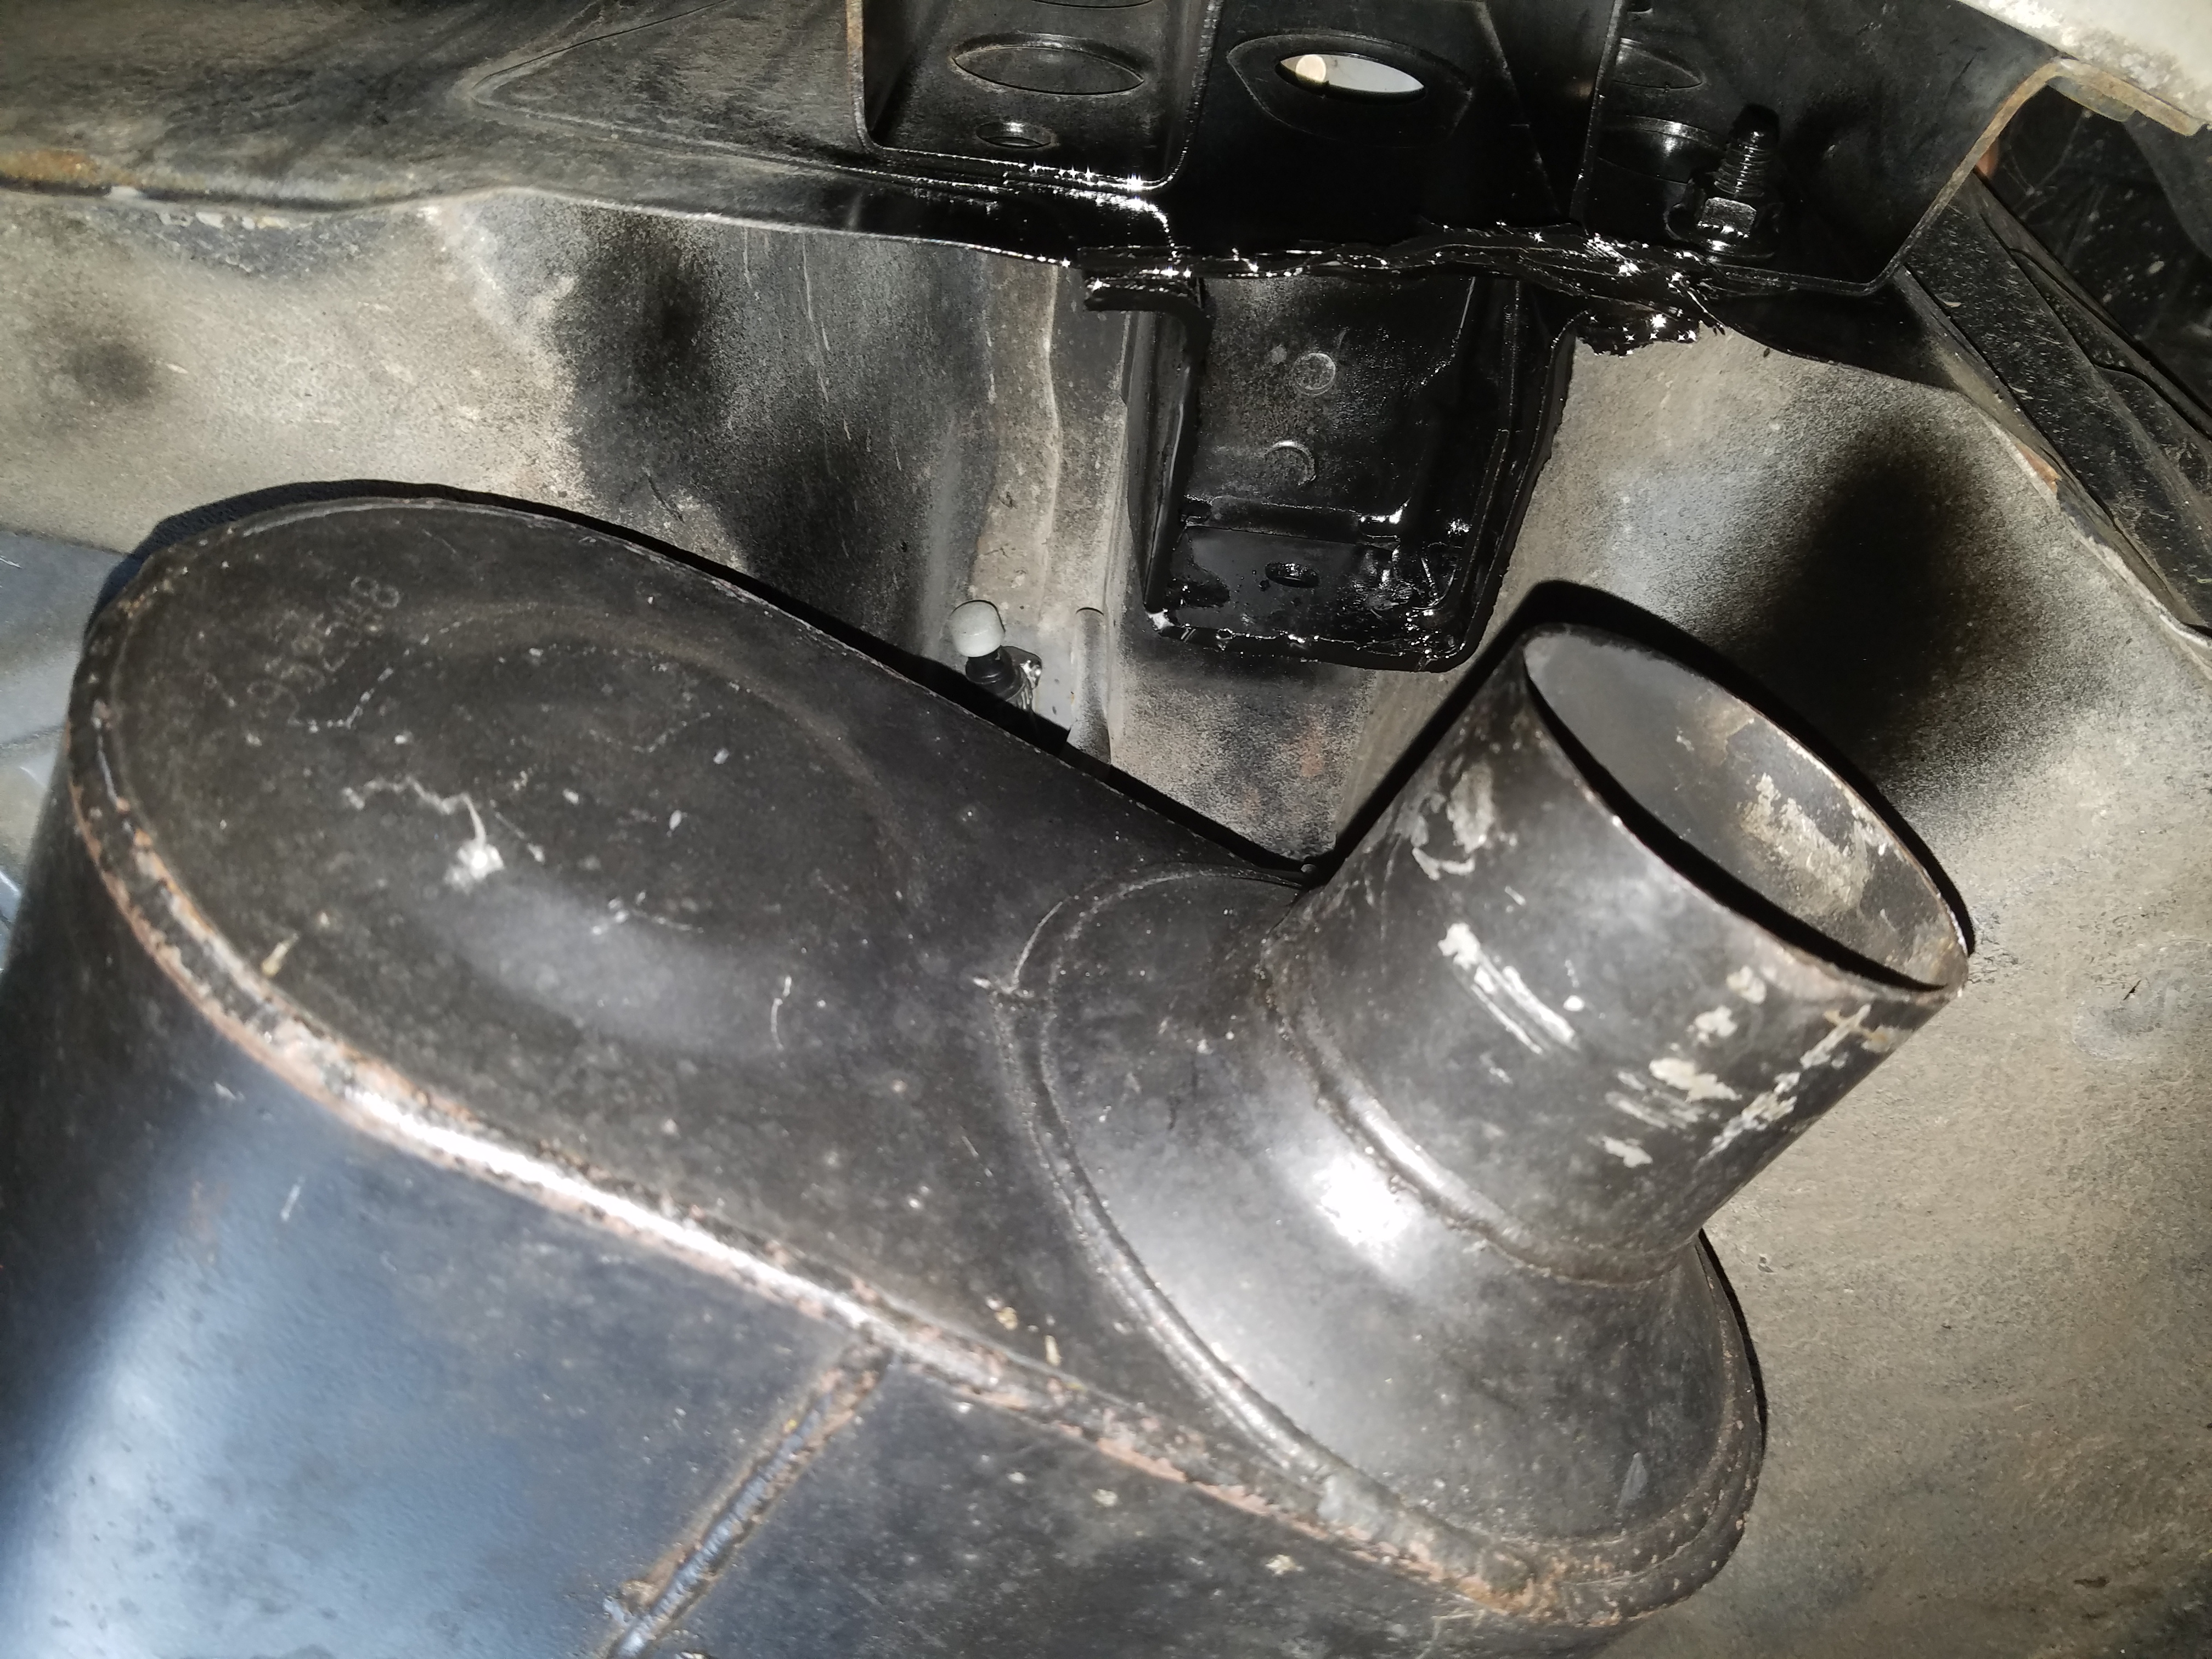
One thing I tried to put a little thought into was the emissions/fuel tank vent situation.
Since I had the room I decided to install the charcoal canister in the stock location. There is some tight clearance with the passenger side exhaust pipe:
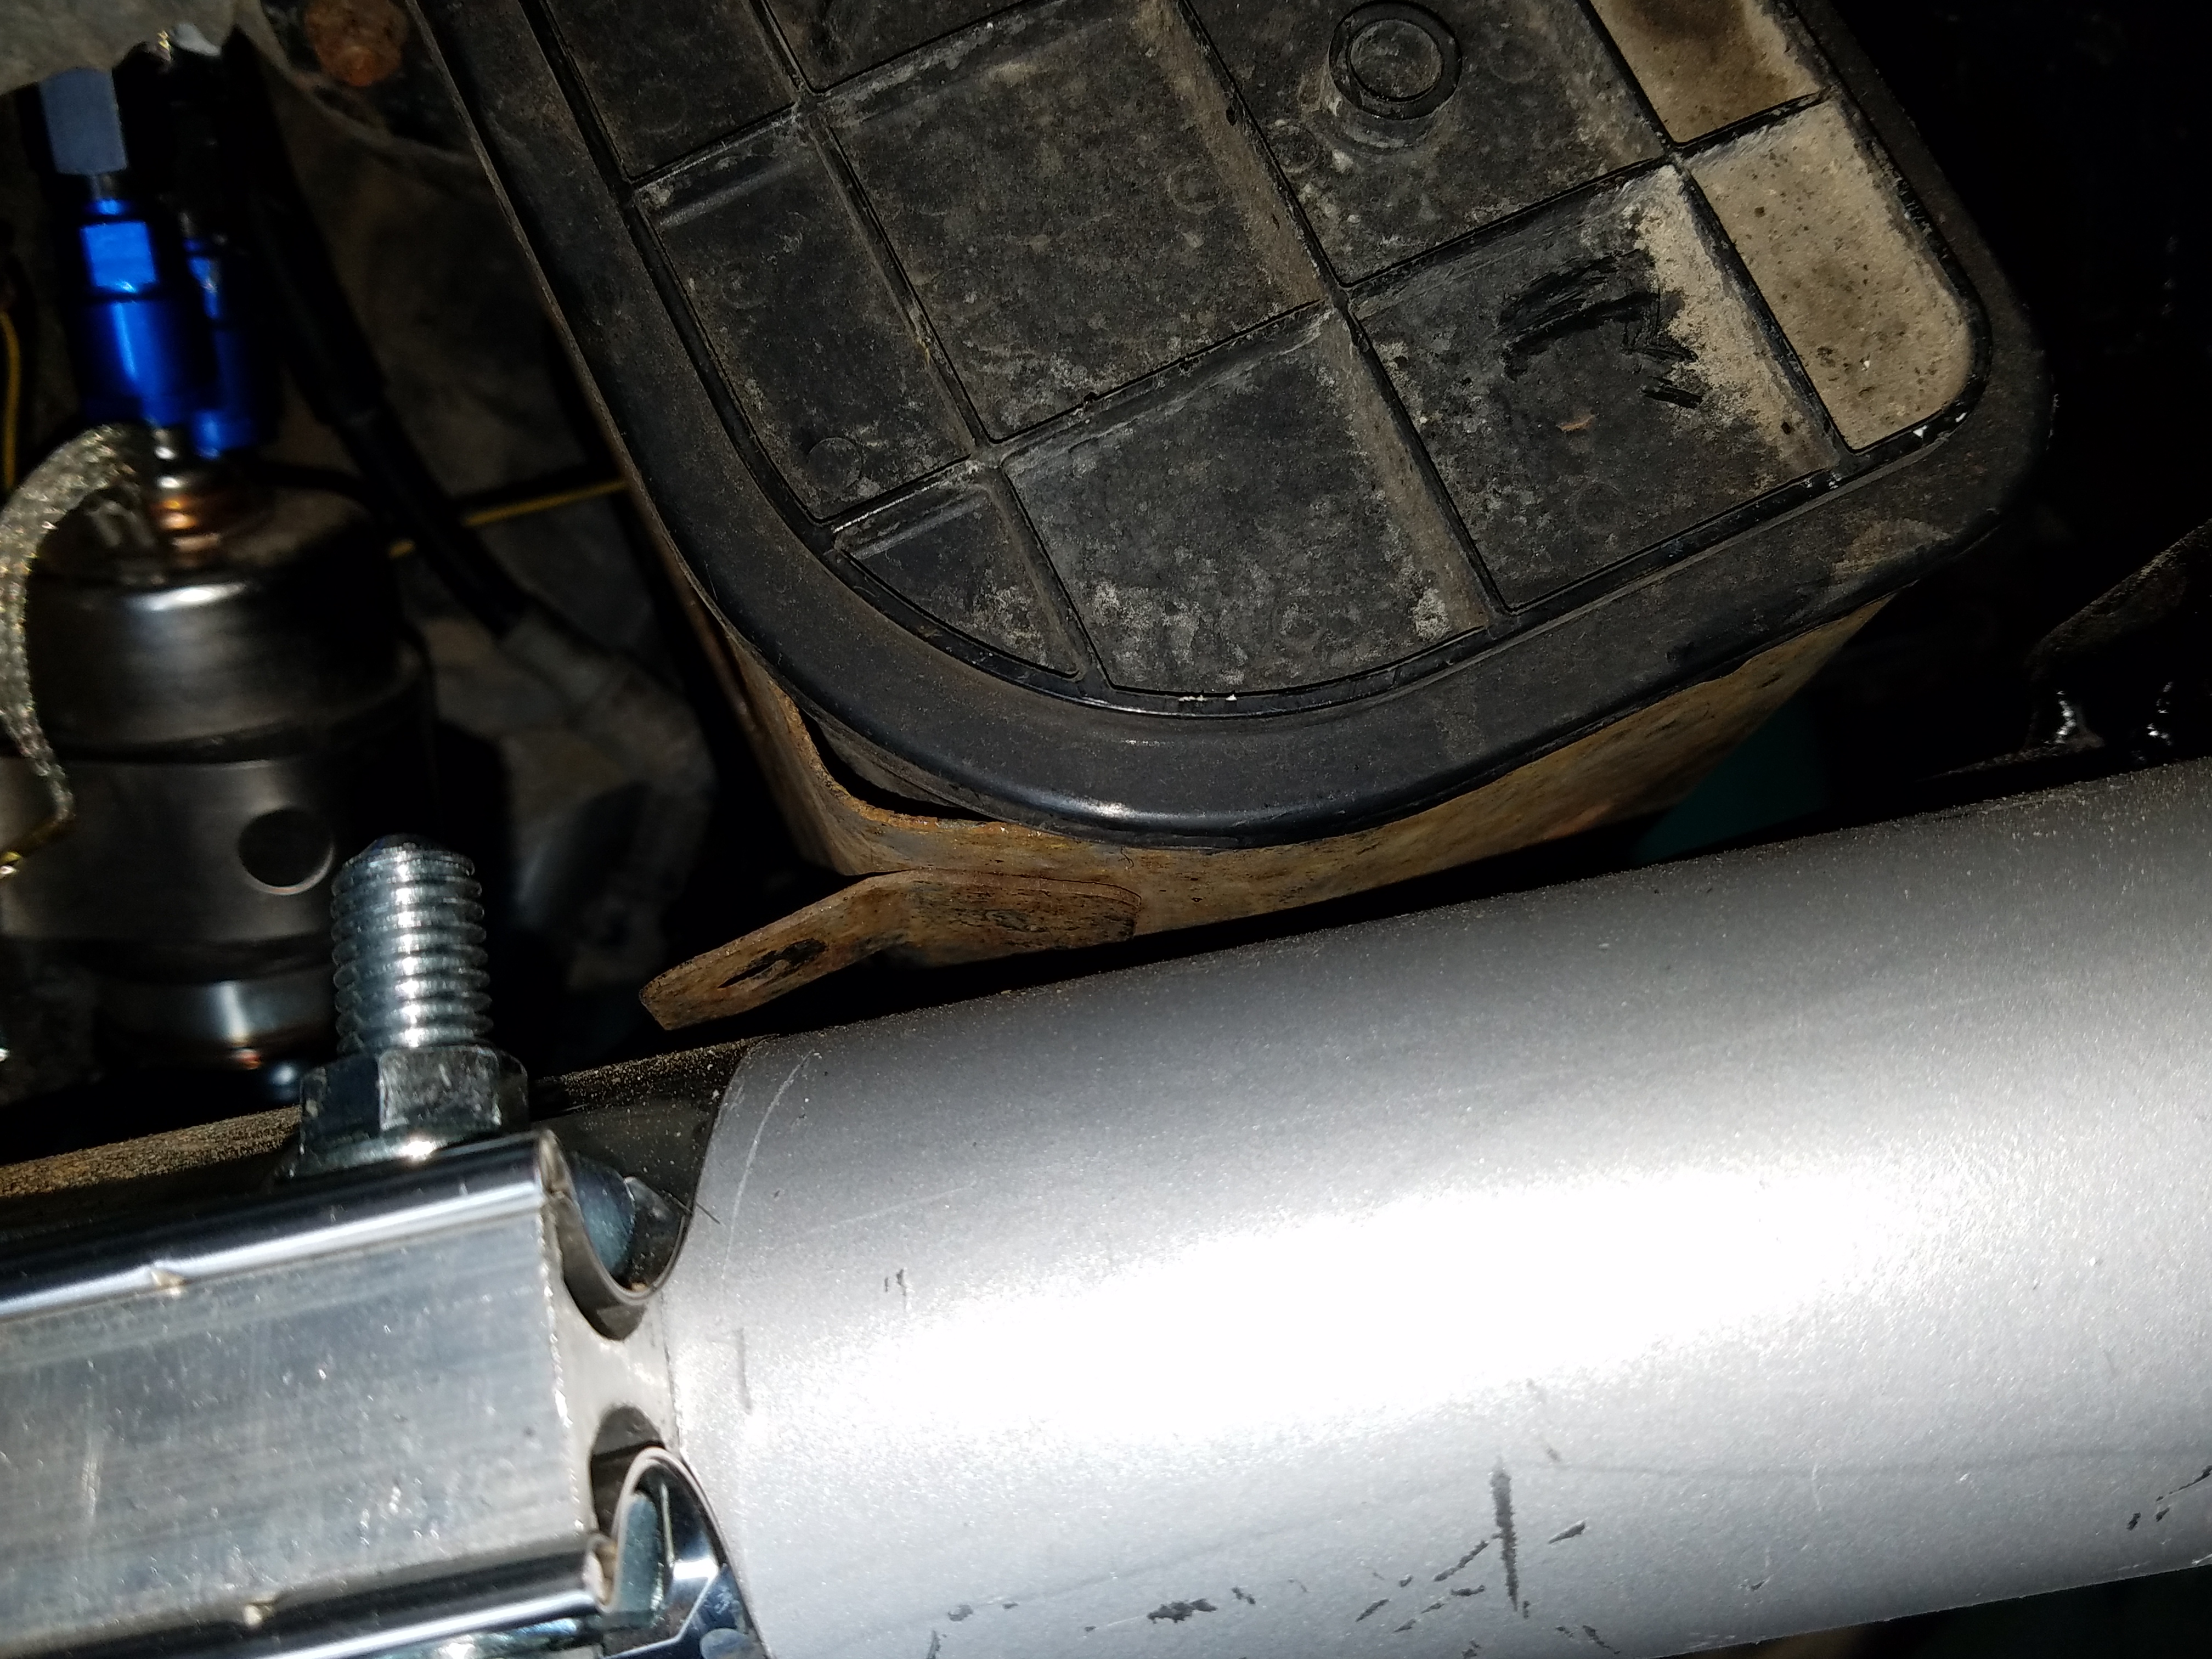
Starting at the top of the fuel tank my thought was to remove the tank pressure check valve (TPCV) since there is no longer any control signal coming from the Miata PCM. Though I'm not sure it gets a PCM signal, maybe it just needs power to open when there is enough pressure from the tank pressure sensor? I would also remove the check valve between the charcoal canister and the air filter underneath the car. There won't be any line running to the engine to burn off gas fumes so that could be left open to the air using the port on the charcoal canister.
Curious what others are doing.
Since I had the room I decided to install the charcoal canister in the stock location. There is some tight clearance with the passenger side exhaust pipe:
Starting at the top of the fuel tank my thought was to remove the tank pressure check valve (TPCV) since there is no longer any control signal coming from the Miata PCM. Though I'm not sure it gets a PCM signal, maybe it just needs power to open when there is enough pressure from the tank pressure sensor? I would also remove the check valve between the charcoal canister and the air filter underneath the car. There won't be any line running to the engine to burn off gas fumes so that could be left open to the air using the port on the charcoal canister.
Curious what others are doing.


