
95 LS Budget build


Thread Starter
V8 Miata Prot�g�

Joined: Nov 2014
Posts: 485
Likes: 37
From: South FL
Here we go, made some good progress last night and today. I'll do my best to explain everything I experienced.
Last night I removed the stock from subframe assembly and put the front of the car on jackstands. Then I moved inside the garage and started to assemble the engine/subframe assembly. After several attempts I figured the correct and from what I believe to be the only correct order to install everything together with my combo of parts.
The parts I'm using are
LM7 engine (mock up only while my engine is still waiting on heads)
V8R long tube headers
V8R subframe kit
T56 bellhousing Purchased from Summit racing
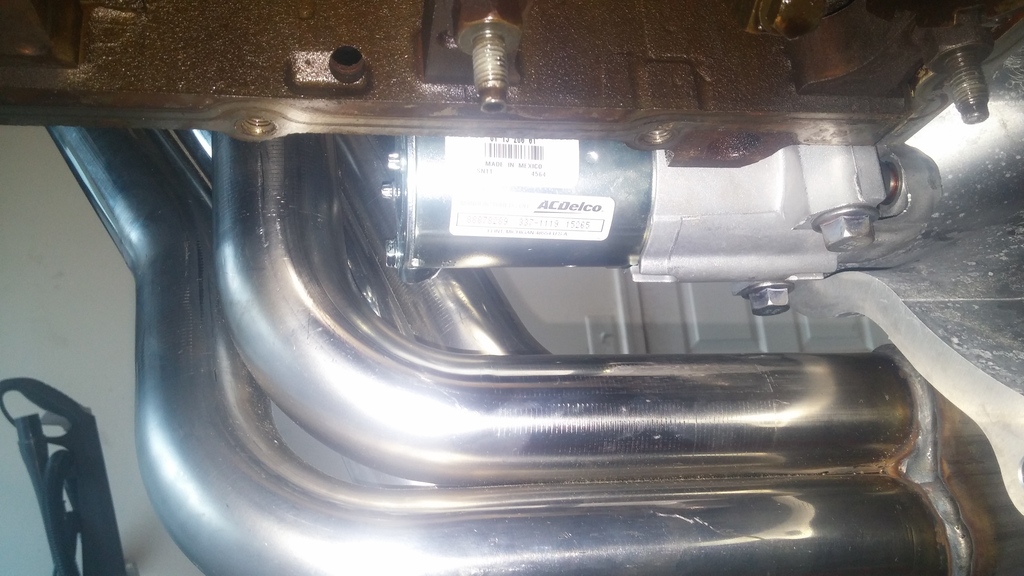
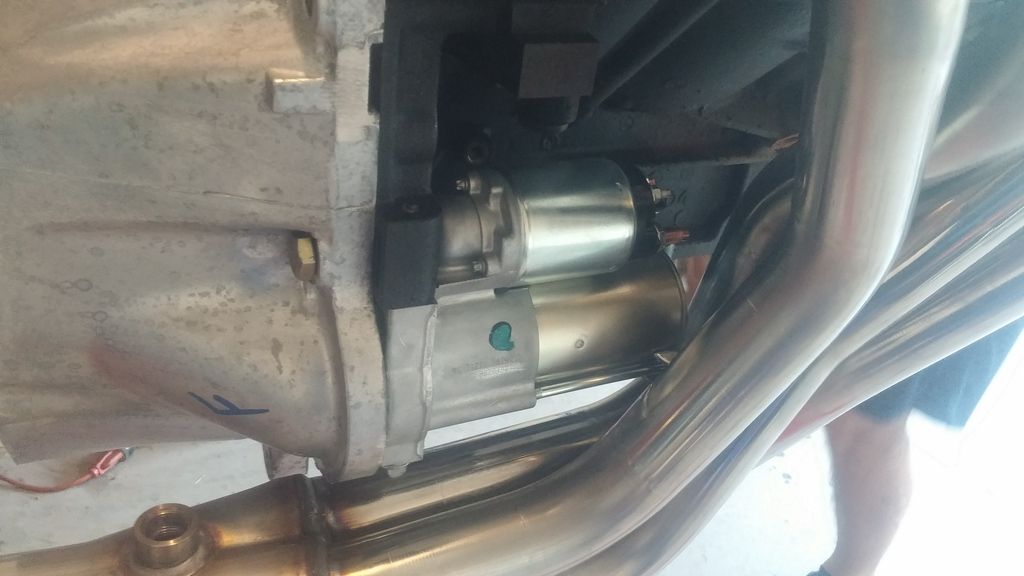
AC Delco starter #337-1119 or GM #88878289 This was purchased for a 2007 Suburban 1500 5.3L It's 6.5" long and clears the long tube headers. The only difference between this and a C6 Corvette starter is the number of teeth on the pinion. One is 9 and the other is 11. I can't remember which one is which right now. But unless you're running a super high compression engine I feel like this will be fine. The cost difference between this and the C6 Vette starter is significant. This was $137 on Amazon, and the C6 was like $270 with a $50 core because it was re-manufactured. Not to mention this one is 100% new, and is made in Mexico, not China. This starter uses 2 long bolts. part #11610787
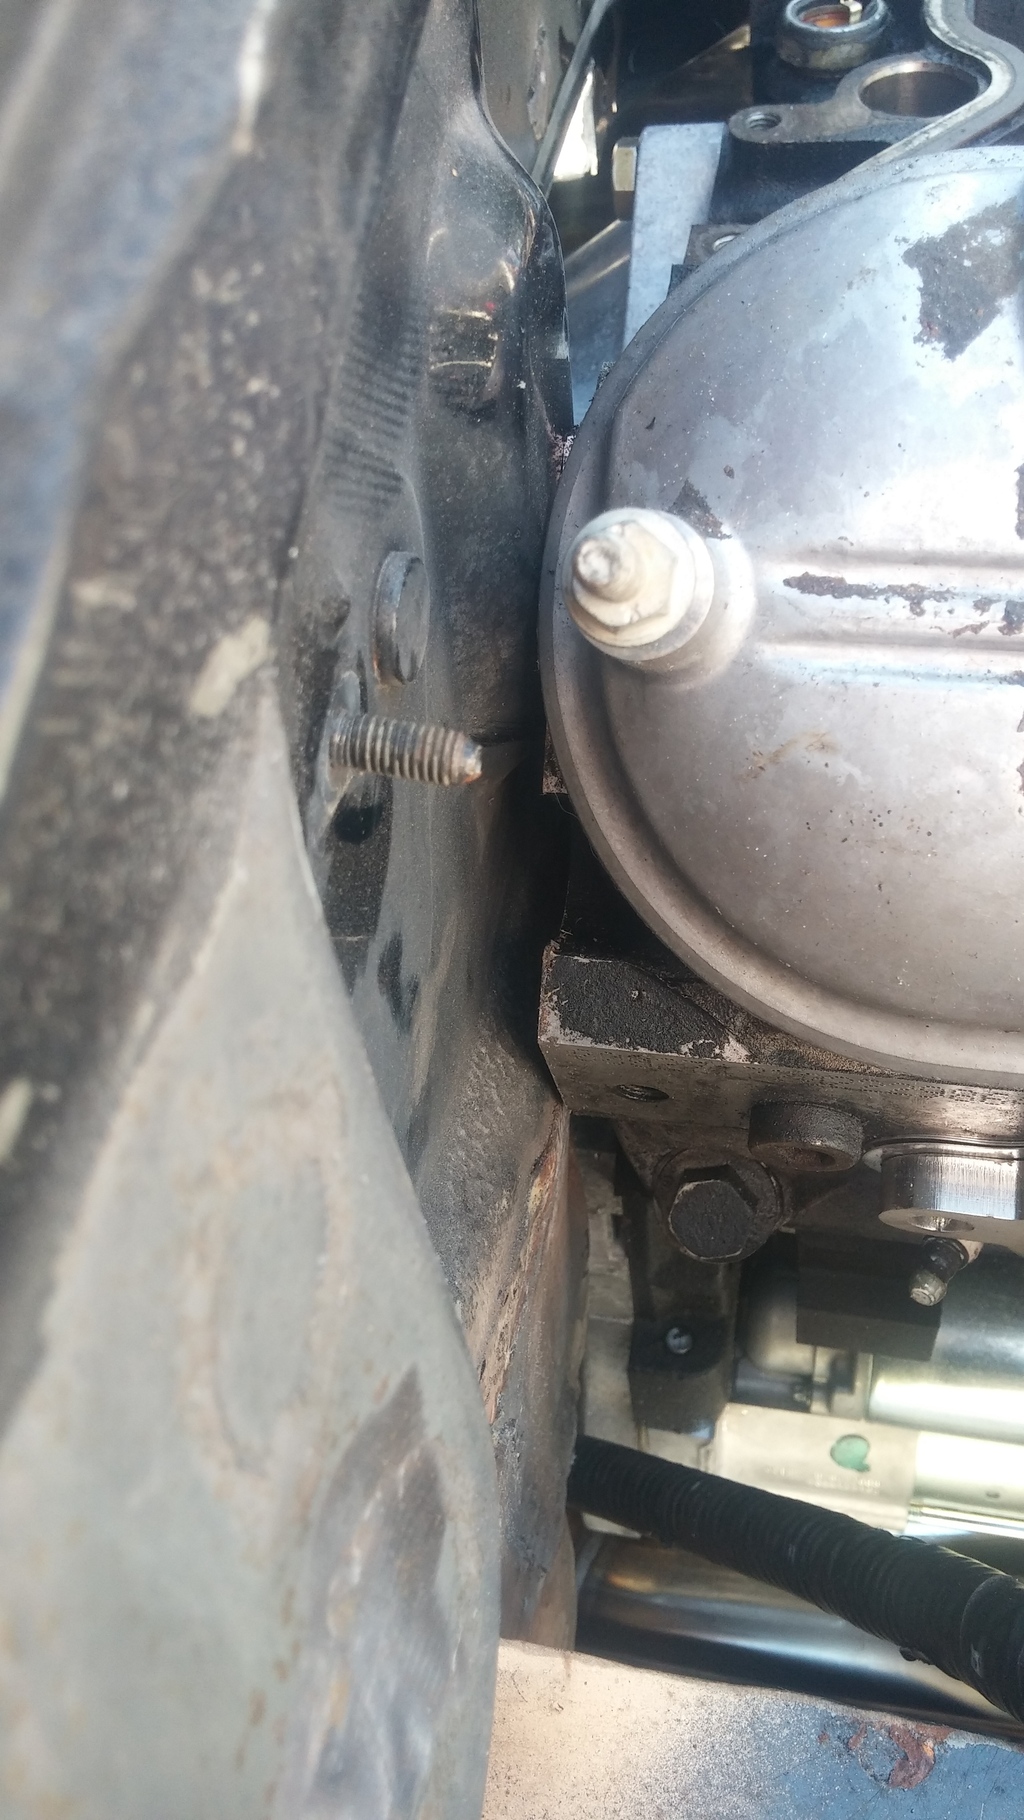
Here are some pictures of starter clearance. (I'll be using a heat wrap on final install)

Now to assemble everything this is the order I followed.
1. Hoist engine up
2.Install starter -use heatshielding if final install and make sure to leave access to the terminals
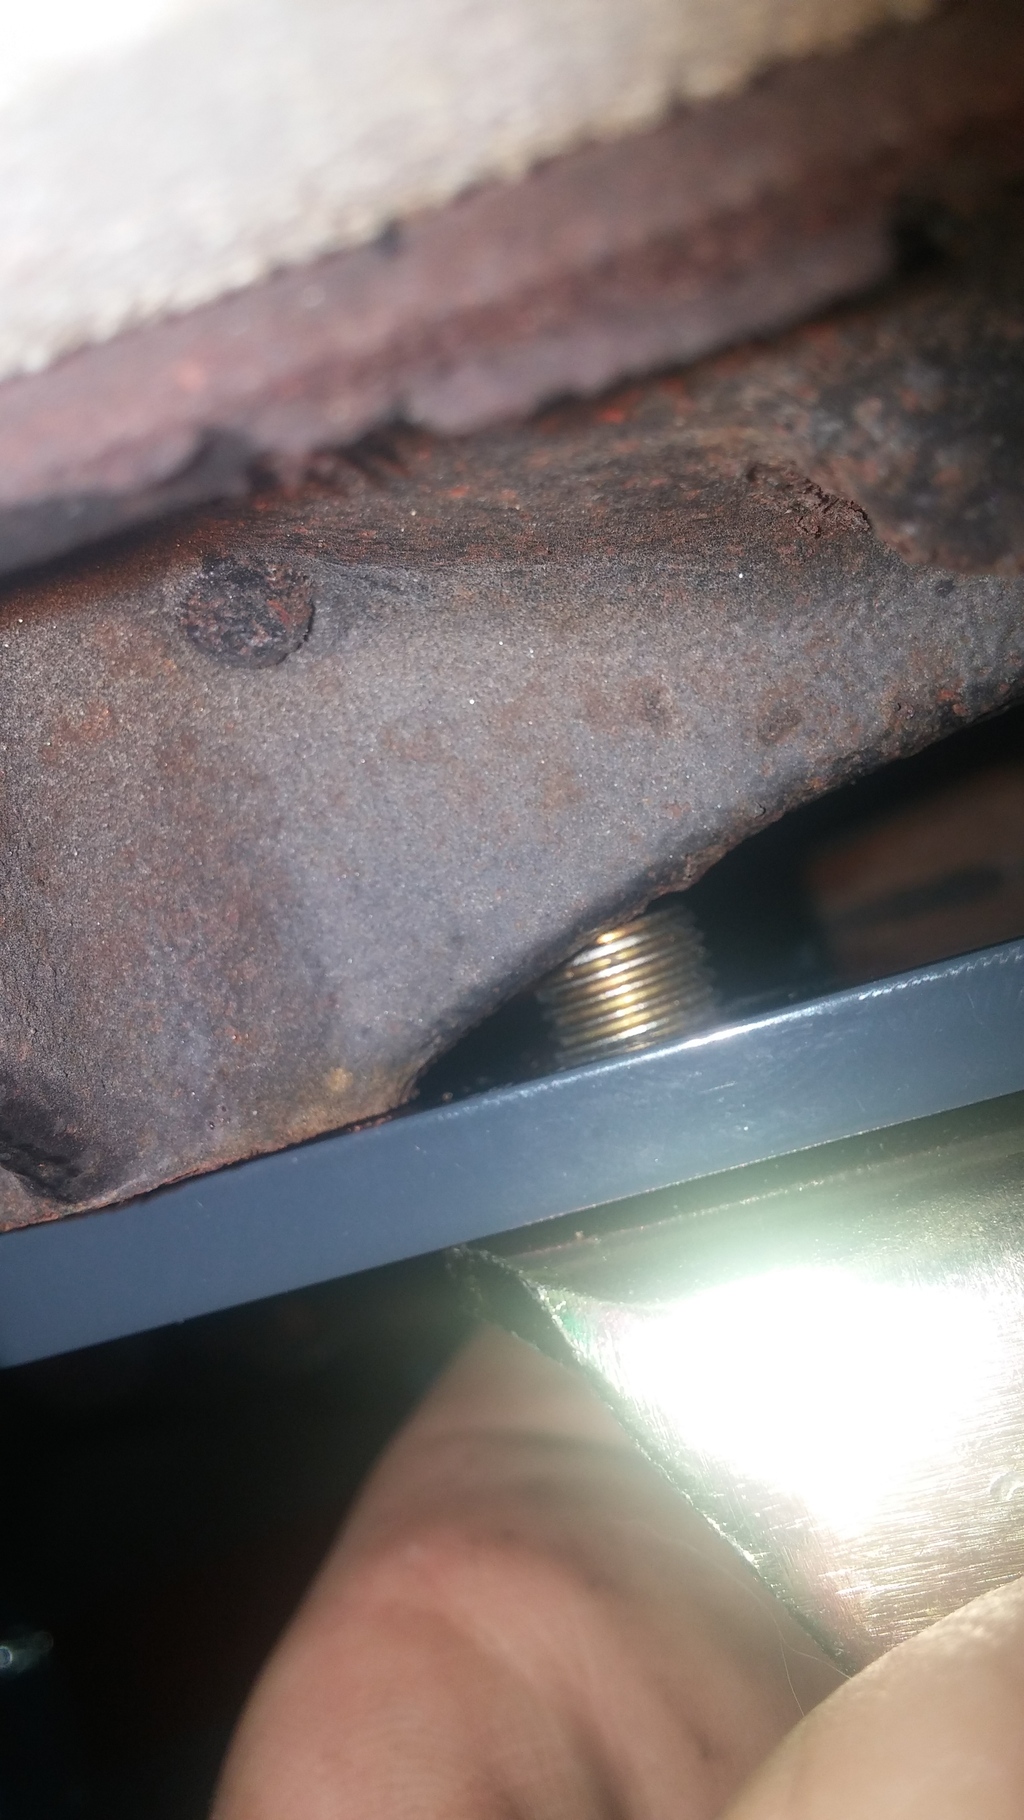
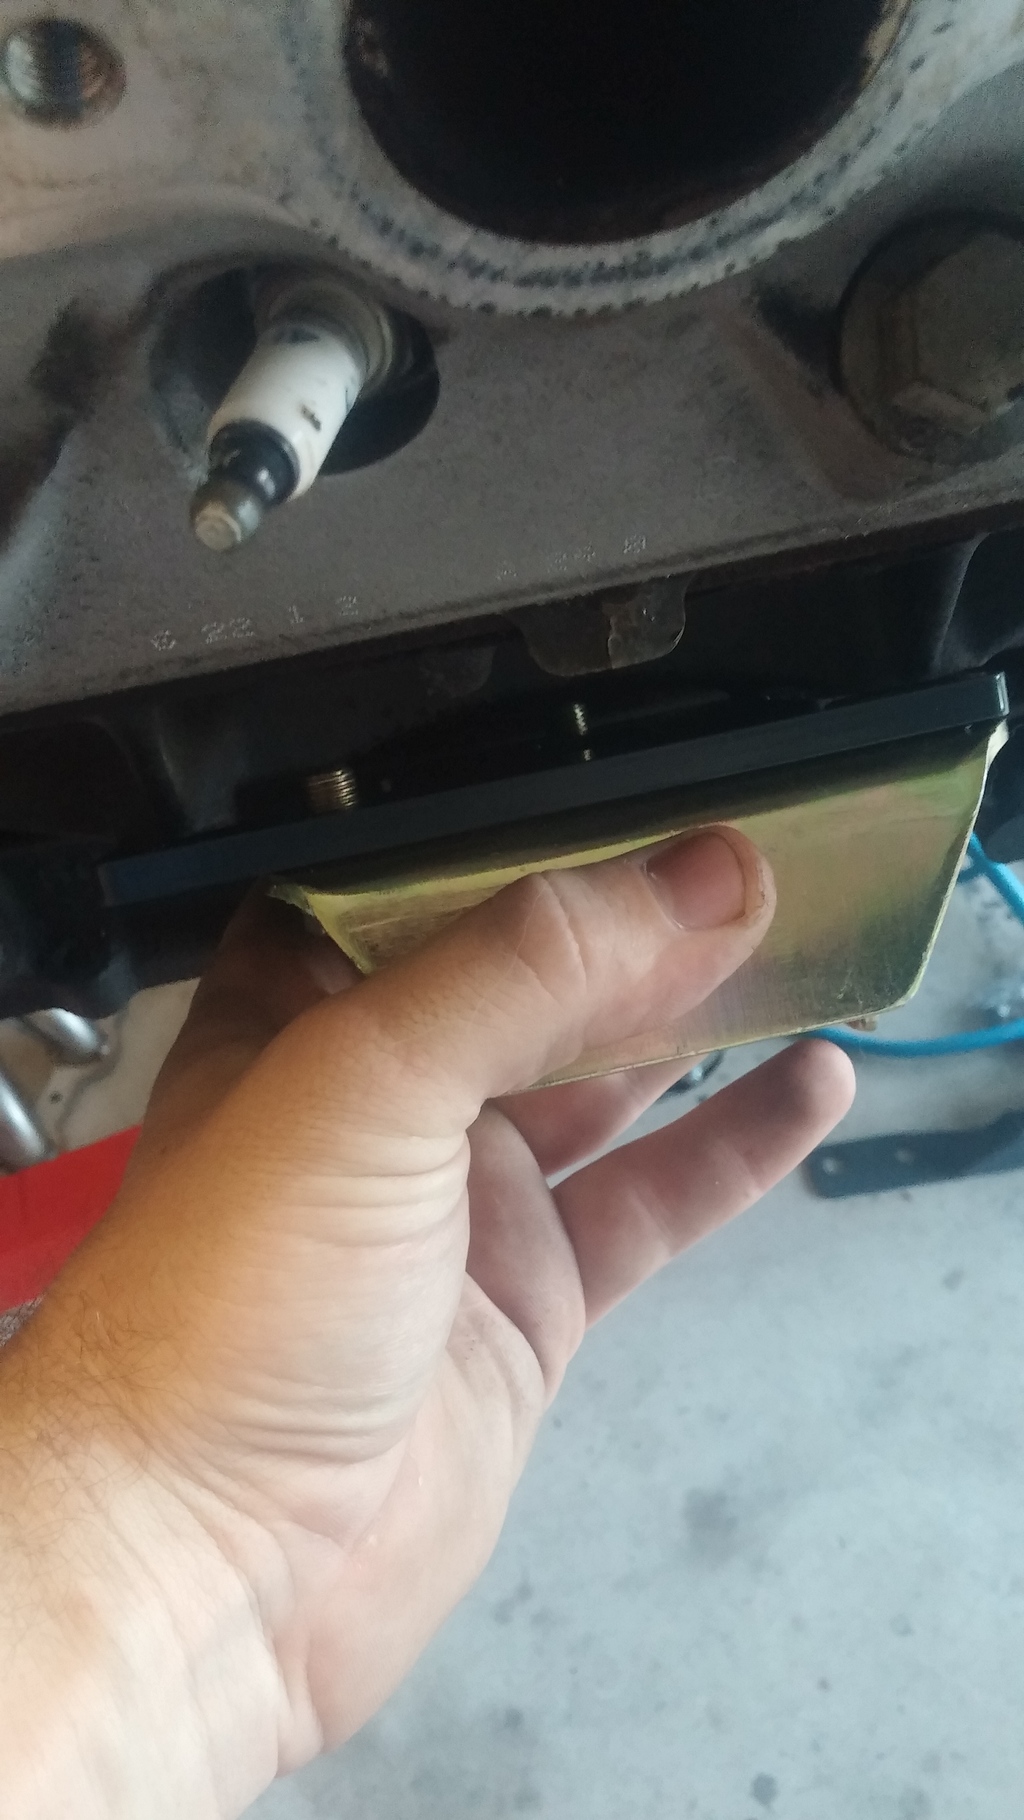
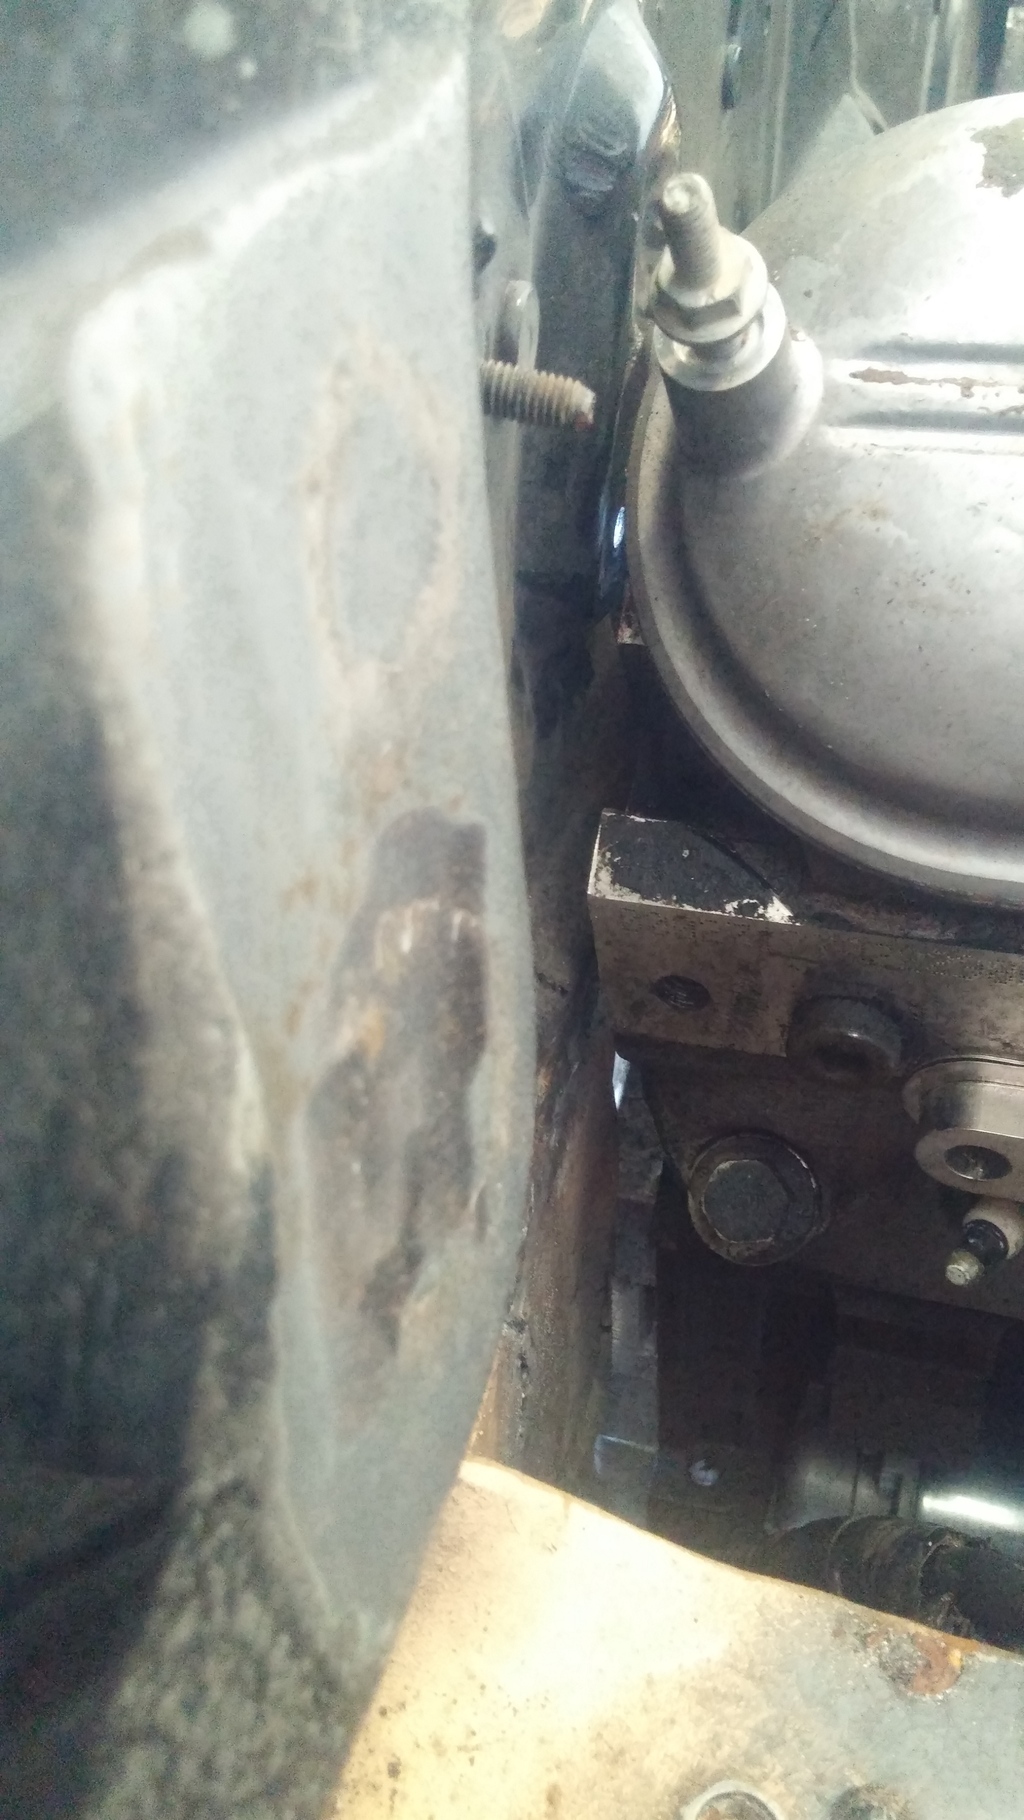
3. install motor mount plates loosely to engine. I had to trim one of the bolts that goes through the plate because it hit the gusseting on the engine block. There's a picture of this.
4.install flywheel, clutch, and bell housing.
5. Put the bolt through the drivers side mount and then the passenger side (first I tightened the bolts to the engine block and I couldn't get the through bolts in)
6. Place the mount heat shields in place
7. Tighten the mount to block bolts and the thru bolts for the mounts. Check clearance for the motor mount heat shields so they don't touch anything and make noise. I'll need to modify mine slightly.
8. Install the headers. The drivers side is straight forward. The passenger side took some fancy maneuvering but it went in. Slide the connector through the area in front of the starter and swing it down and back. Note that this is without the engine in the car or the oil pan on. I do not think you'd be able to install the headers with the engine in the car in this manner.
Here's the issue with the mount bolt. I just trimmed it flush with the plate it it worked perfect.
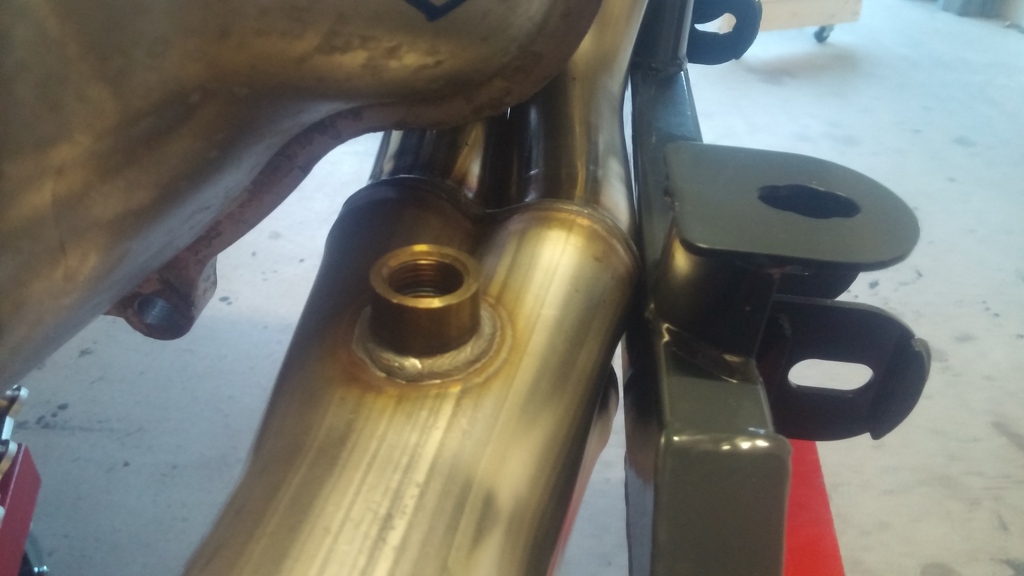
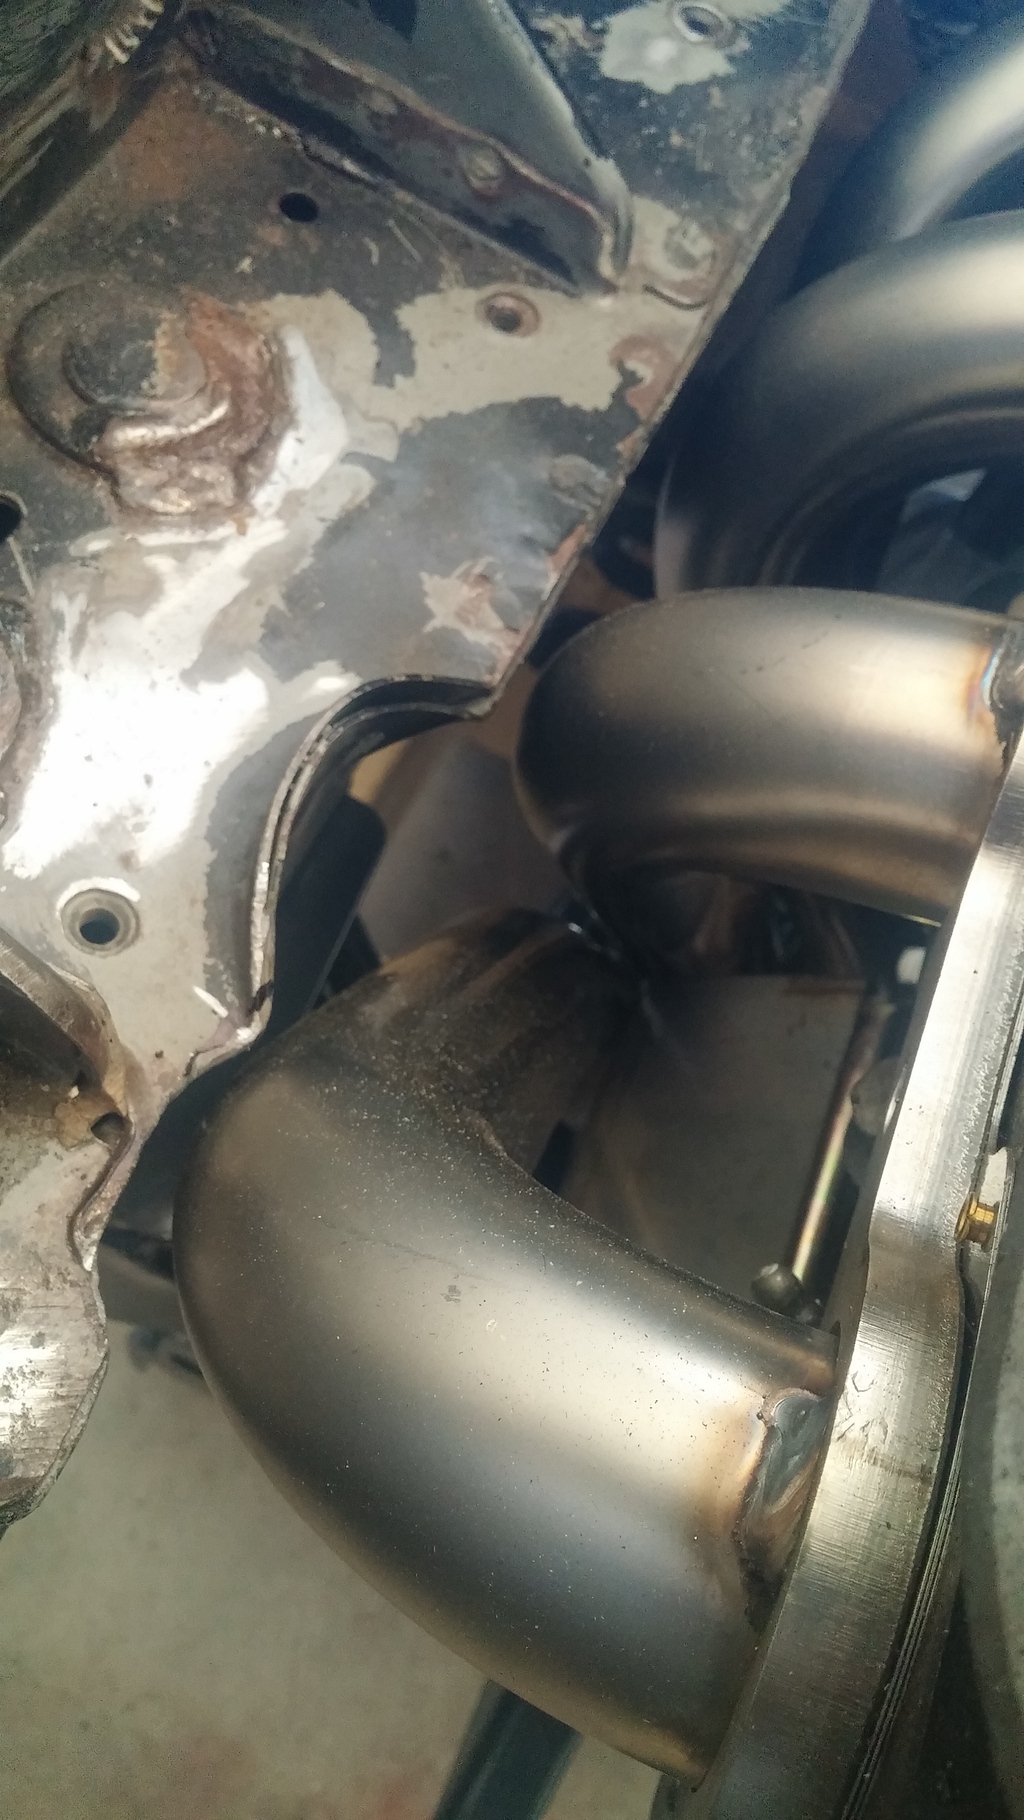
Clearance on the passenger side header is very tight. maybe this will change once everything is bolted up in the car.


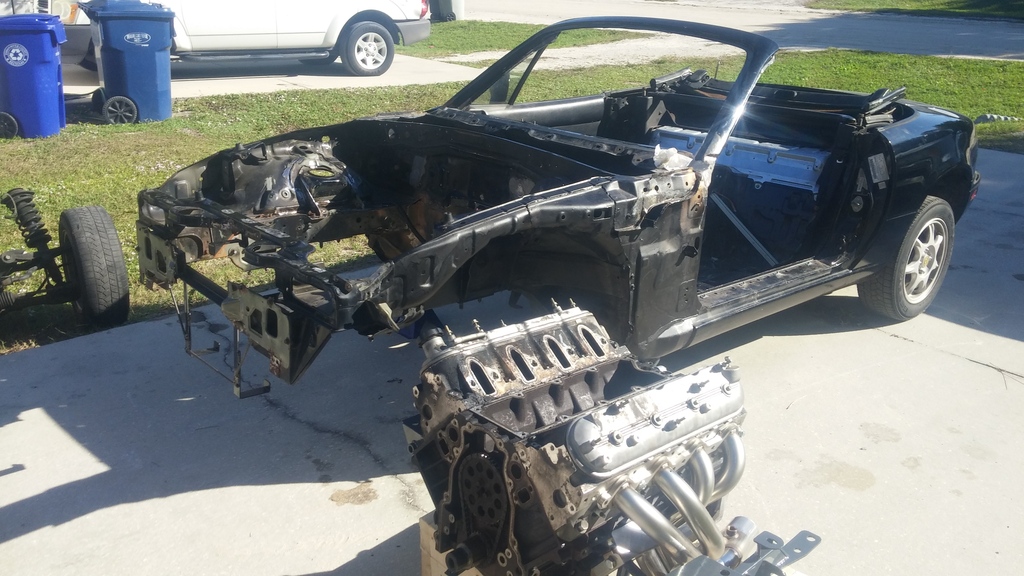
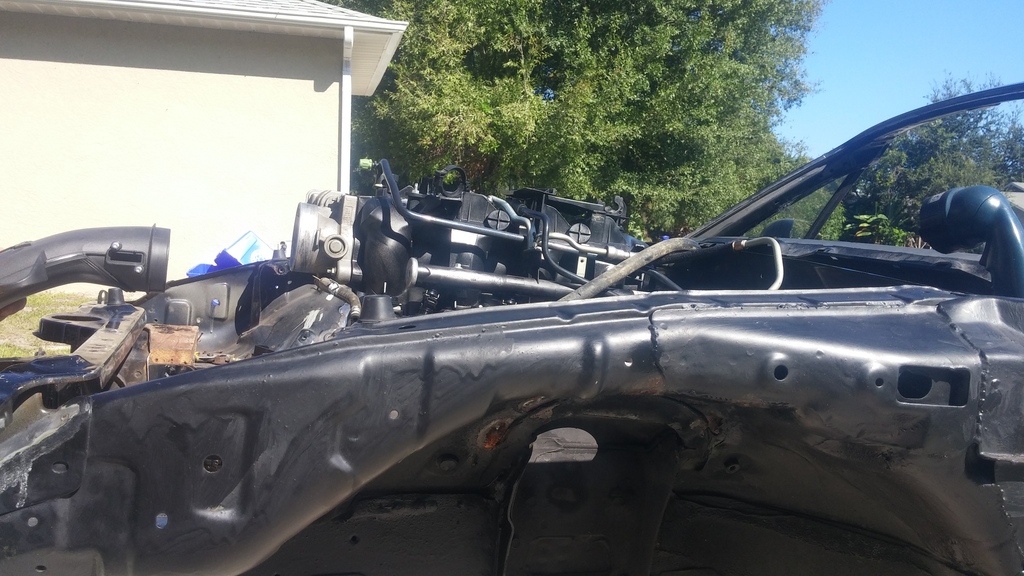
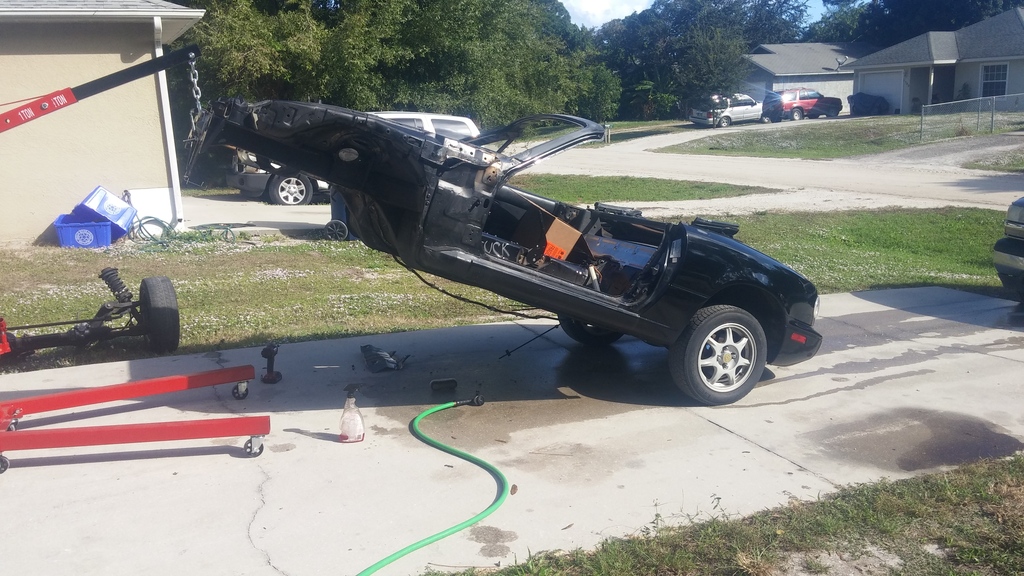
Now for test fitting. I first removed the stock subframe.
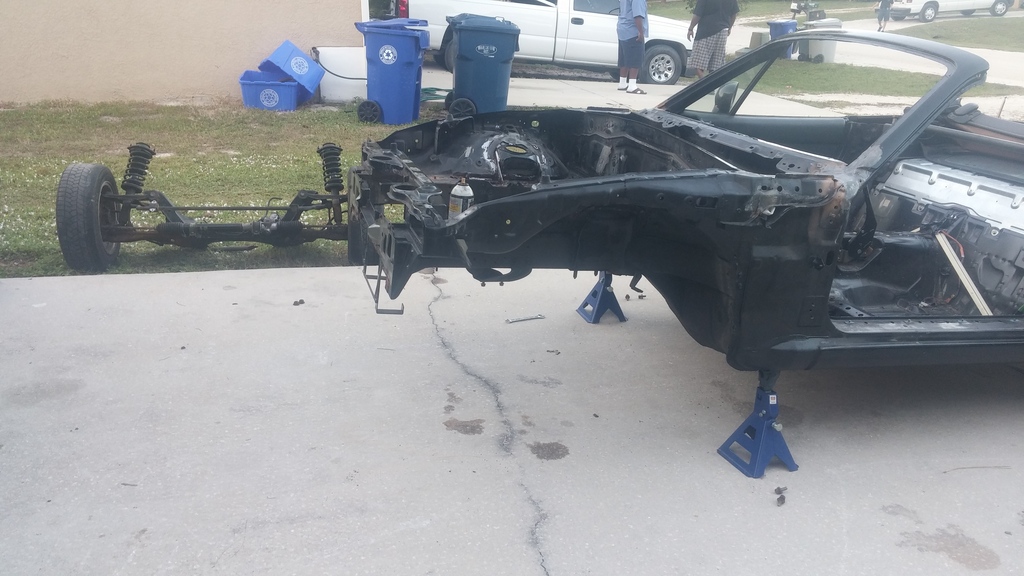
Then I rolled it to the side of the car, and lifted the front of the car from the welded in support with my engine hoist. This method worked very well IMO.
After lowering the car over the assembly I had to make some clearance a couple times. Here's some of the areas I had issues with in addition to the rear of the subframe where it's slanted back. It was touching and I had to smack the body a little to make clearance.
The front cylinder runner on the passenger side had some interference with the frame rail. Here's what I did.
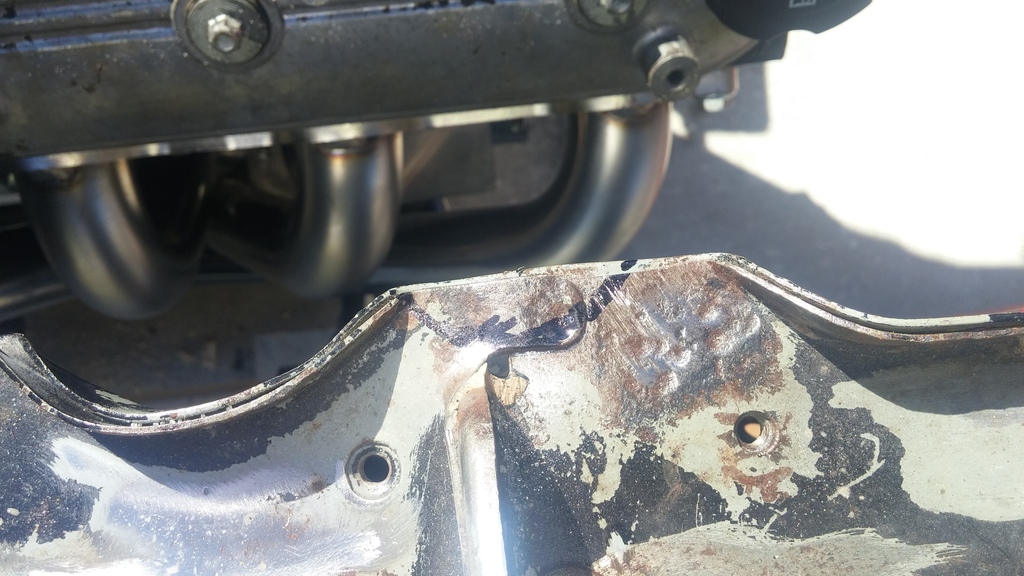
Here's the first rough cut..
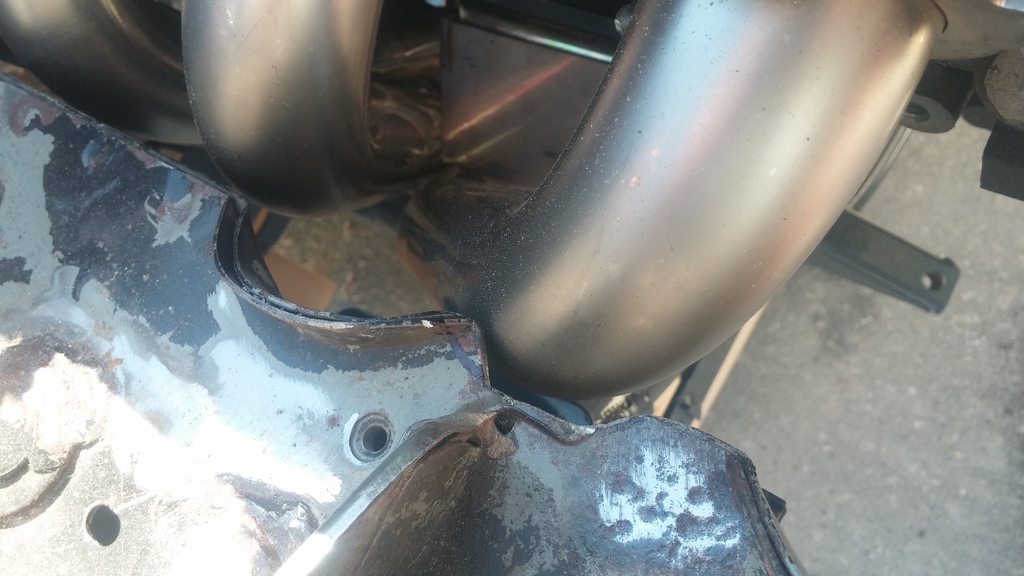
Here's the second. I'll end up trimming a little more off where you see the sharpie line but you get the idea.
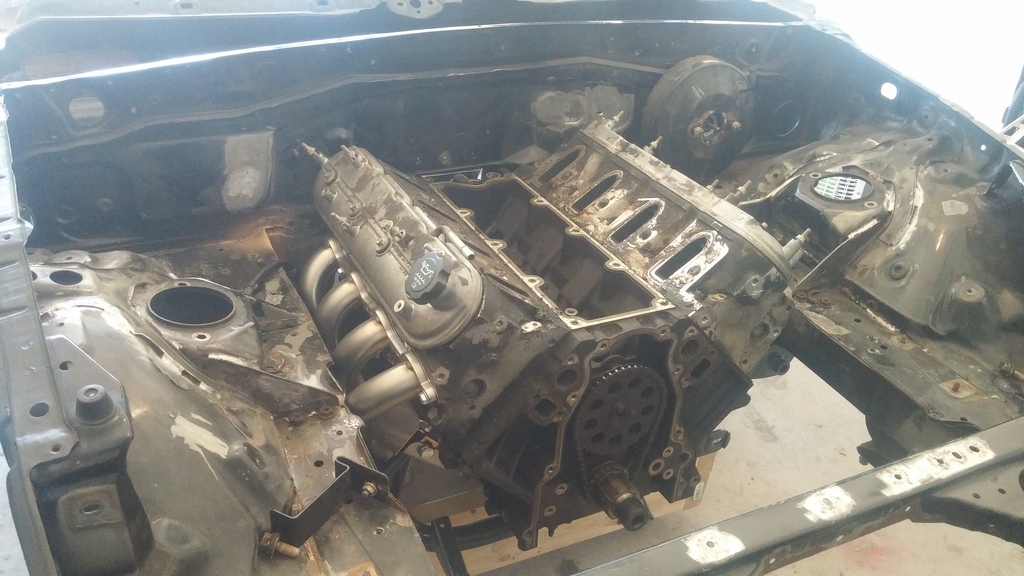
Here's the back of the passenger side cylinder head.
Before
After
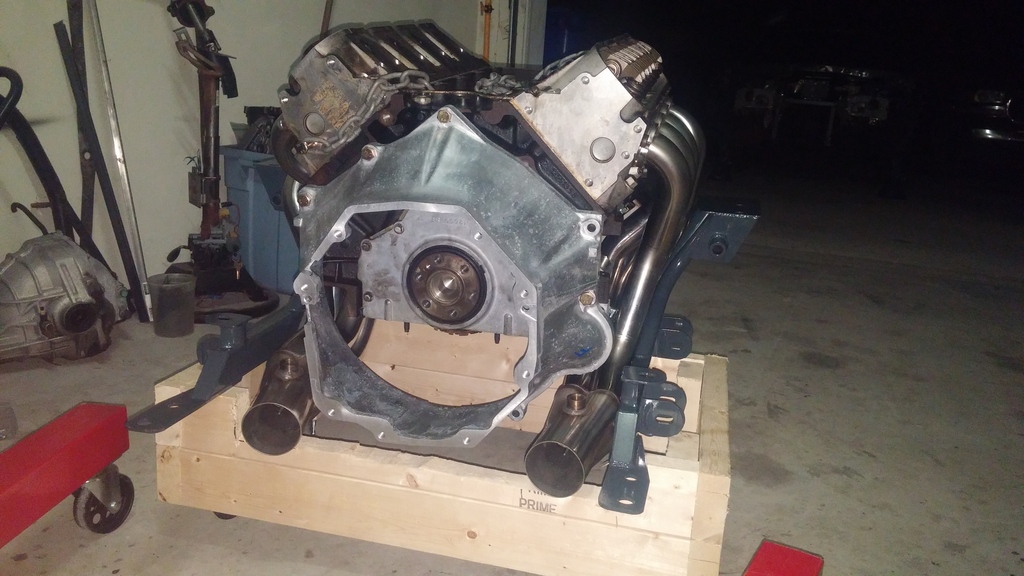
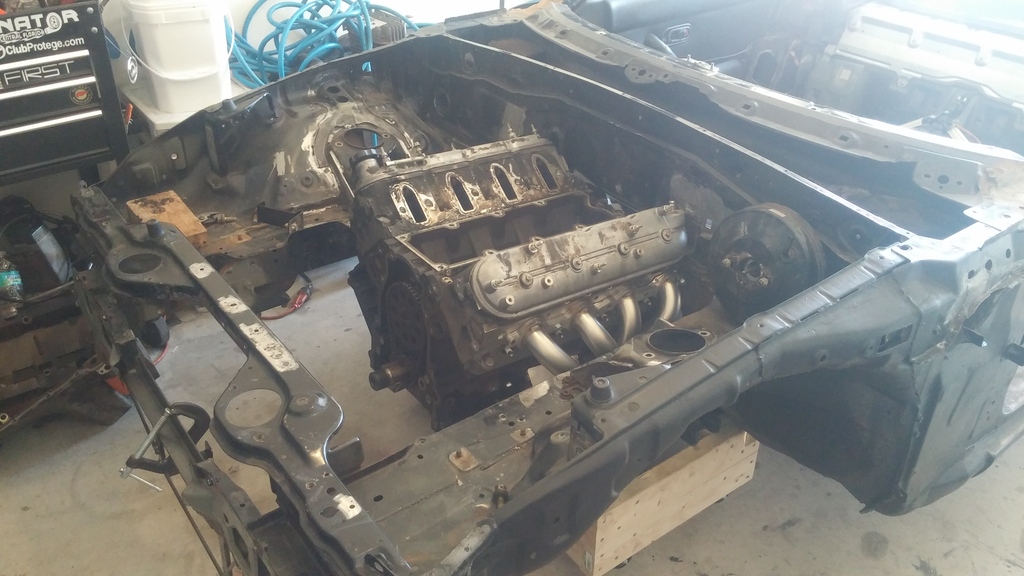
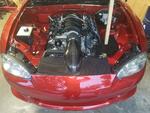
And here's the whole assembly finally!
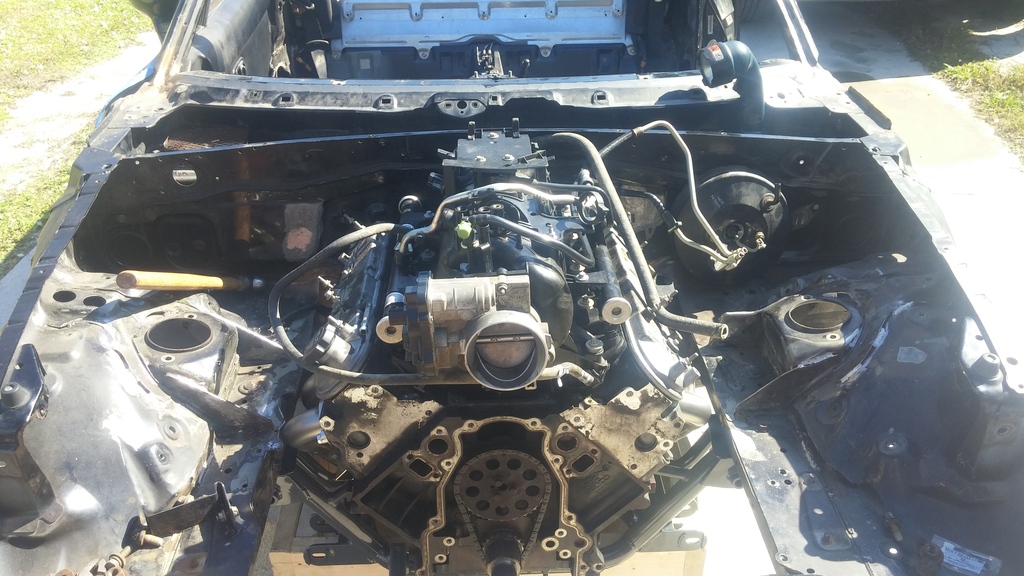
and for ***** and giggles, here's the truck intake plopped ontop. It doesn't fit all the way back either where the seam is on the firewall.
Last night I removed the stock from subframe assembly and put the front of the car on jackstands. Then I moved inside the garage and started to assemble the engine/subframe assembly. After several attempts I figured the correct and from what I believe to be the only correct order to install everything together with my combo of parts.
The parts I'm using are
LM7 engine (mock up only while my engine is still waiting on heads)
V8R long tube headers
V8R subframe kit
T56 bellhousing Purchased from Summit racing
AC Delco starter #337-1119 or GM #88878289 This was purchased for a 2007 Suburban 1500 5.3L It's 6.5" long and clears the long tube headers. The only difference between this and a C6 Corvette starter is the number of teeth on the pinion. One is 9 and the other is 11. I can't remember which one is which right now. But unless you're running a super high compression engine I feel like this will be fine. The cost difference between this and the C6 Vette starter is significant. This was $137 on Amazon, and the C6 was like $270 with a $50 core because it was re-manufactured. Not to mention this one is 100% new, and is made in Mexico, not China. This starter uses 2 long bolts. part #11610787
Here are some pictures of starter clearance. (I'll be using a heat wrap on final install)
Now to assemble everything this is the order I followed.
1. Hoist engine up
2.Install starter -use heatshielding if final install and make sure to leave access to the terminals
3. install motor mount plates loosely to engine. I had to trim one of the bolts that goes through the plate because it hit the gusseting on the engine block. There's a picture of this.
4.install flywheel, clutch, and bell housing.
5. Put the bolt through the drivers side mount and then the passenger side (first I tightened the bolts to the engine block and I couldn't get the through bolts in)
6. Place the mount heat shields in place
7. Tighten the mount to block bolts and the thru bolts for the mounts. Check clearance for the motor mount heat shields so they don't touch anything and make noise. I'll need to modify mine slightly.
8. Install the headers. The drivers side is straight forward. The passenger side took some fancy maneuvering but it went in. Slide the connector through the area in front of the starter and swing it down and back. Note that this is without the engine in the car or the oil pan on. I do not think you'd be able to install the headers with the engine in the car in this manner.
Here's the issue with the mount bolt. I just trimmed it flush with the plate it it worked perfect.
Clearance on the passenger side header is very tight. maybe this will change once everything is bolted up in the car.
Now for test fitting. I first removed the stock subframe.
Then I rolled it to the side of the car, and lifted the front of the car from the welded in support with my engine hoist. This method worked very well IMO.
After lowering the car over the assembly I had to make some clearance a couple times. Here's some of the areas I had issues with in addition to the rear of the subframe where it's slanted back. It was touching and I had to smack the body a little to make clearance.
The front cylinder runner on the passenger side had some interference with the frame rail. Here's what I did.
Here's the first rough cut..
Here's the second. I'll end up trimming a little more off where you see the sharpie line but you get the idea.
Here's the back of the passenger side cylinder head.
Before
After
And here's the whole assembly finally!
and for ***** and giggles, here's the truck intake plopped ontop. It doesn't fit all the way back either where the seam is on the firewall.
V8 Miata Participant
Joined: Sep 2014
Posts: 256
Likes: 23
From: Central Florida
Nice work. I had to make the same clearance on the passenger side pinch weld to clear the header tube.
In the end, this swap is incredible in the way everything is easily accessible......everything except the starter. I was ready to crank up the motor for the first time and went to tighten the power lead onto the starter stud and cracked it off without putting very much force on it all. Ugh, that was not the best day to put it mildly.
In the end, this swap is incredible in the way everything is easily accessible......everything except the starter. I was ready to crank up the motor for the first time and went to tighten the power lead onto the starter stud and cracked it off without putting very much force on it all. Ugh, that was not the best day to put it mildly.
V8 Miata Participant
Joined: Sep 2014
Posts: 256
Likes: 23
From: Central Florida
Thread Starter
V8 Miata Prot�g�
Joined: Nov 2014
Posts: 485
Likes: 37
From: South FL
As much as I'd like to I don't think I'm going to do hard lines. I was looking at it and it just looks intimidating. How hard was it really? And you have the 37* flare tool right?
V8 Miata Participant
Joined: Sep 2014
Posts: 256
Likes: 23
From: Central Florida
Not the easiest, I'll admit but Im glad I did it. Something I never have to worry about are my fuel lines deteriorating.
I do own the flare tool which youre welcome to use. Stng96 has it at the moment to finish his last flare in the engine bay.
I do own the flare tool which youre welcome to use. Stng96 has it at the moment to finish his last flare in the engine bay.
Last edited by ItsAllRigged; Oct 31, 2015 at 07:42 PM.
Thread Starter
V8 Miata Prot�g�
Joined: Nov 2014
Posts: 485
Likes: 37
From: South FL
I gotta ask, why do you guys think it's a good thing to do while the engine is in? I haven't got any parts for my fuel system yet, but I could order stuff this week if that's something that really should be done.

V8 Miata Zealot
Joined: Mar 2010
Posts: 1,220
Likes: 51
From: Canton, Georgia
Be sure to drill a hole on the left & right side of the firewall that you can run some gauge wiring through in the future if needed. You can always plug them off with rubber plugs if not needed. Mark the location that you want them while the engine is still in the car. You will be glad that you did.

V8 Miata Fan
Joined: Mar 2015
Posts: 49
Likes: 10
From: Pensacola, Florida
Be sure to drill a hole on the left & right side of the firewall that you can run some gauge wiring through in the future if needed. You can always plug them off with rubber plugs if not needed. Mark the location that you want them while the engine is still in the car. You will be glad that you did.

V8 Miata Fanatic
Joined: Feb 2015
Posts: 559
Likes: 83
From: Marion Illinois
I got my line really close to where I know it will be, and am saving the last little bit for final install.
Don't be afraid of the hardlines, they aren't bad at all.
Lastly, I feel like I have seen it before but now I am questioning, does the Fbody starter not work with the longtubes?
V8 Miata Participant
Joined: Sep 2014
Posts: 256
Likes: 23
From: Central Florida
Thread Starter
V8 Miata Prot�g�
Joined: Nov 2014
Posts: 485
Likes: 37
From: South FL
Be sure to drill a hole on the left & right side of the firewall that you can run some gauge wiring through in the future if needed. You can always plug them off with rubber plugs if not needed. Mark the location that you want them while the engine is still in the car. You will be glad that you did.
I've shaved my firewall of all other holes.
Good point. Not sure if it'll work for your build, but I just used the opening and the grommet from the now unused speedometer cable as my firewall pass-through for all my gauges, A/C command and OBD2 comms. Simply cut and remove the cable, rotate the assembly 180� and reinstall.
Correct. I checked a couple different year 6.0 silverado starters and they were 7" long vs the one I got was a 5.3 suburban which is 6.5". I listed the part number too and it's guaranteed to fit so I would just order it to take the easy way out.
Thread Starter
V8 Miata Prot�g�
Joined: Nov 2014
Posts: 485
Likes: 37
From: South FL
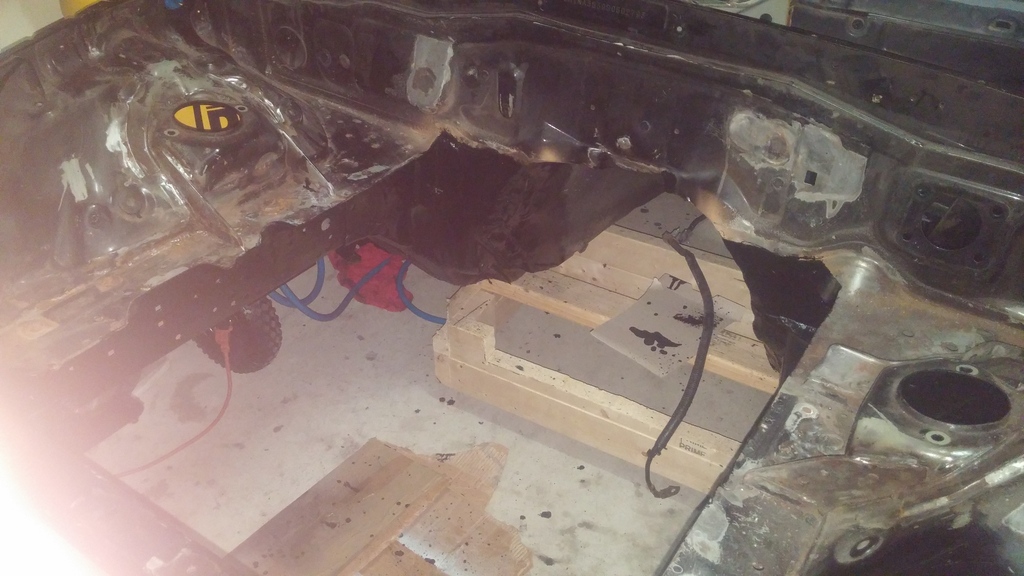
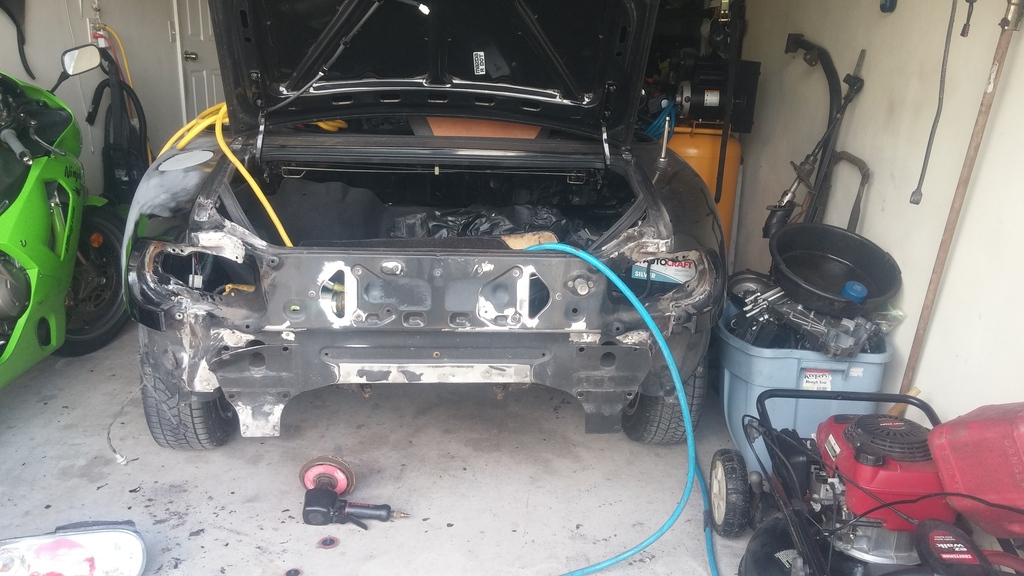
Got my tunnel welded up this weekend.
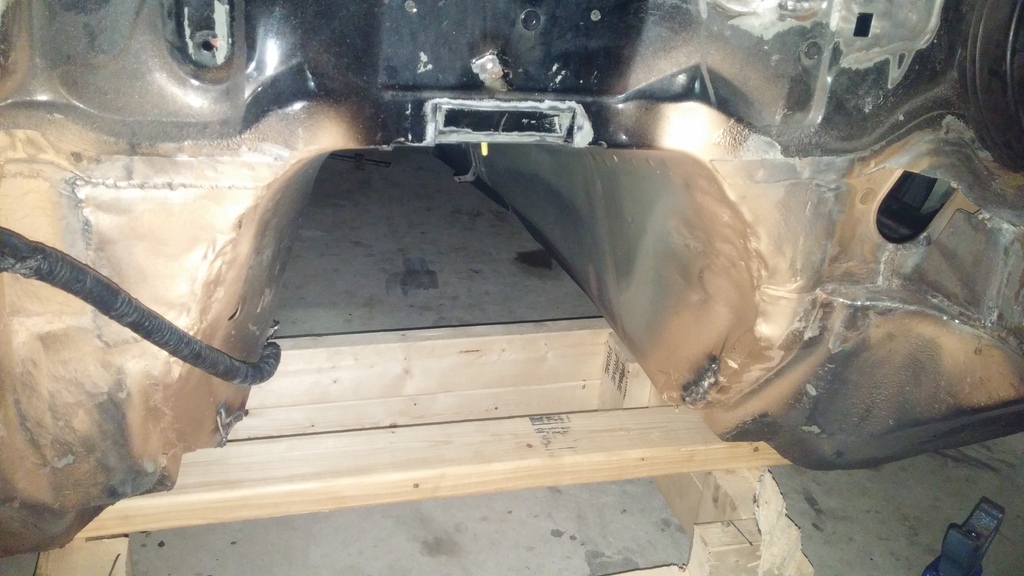
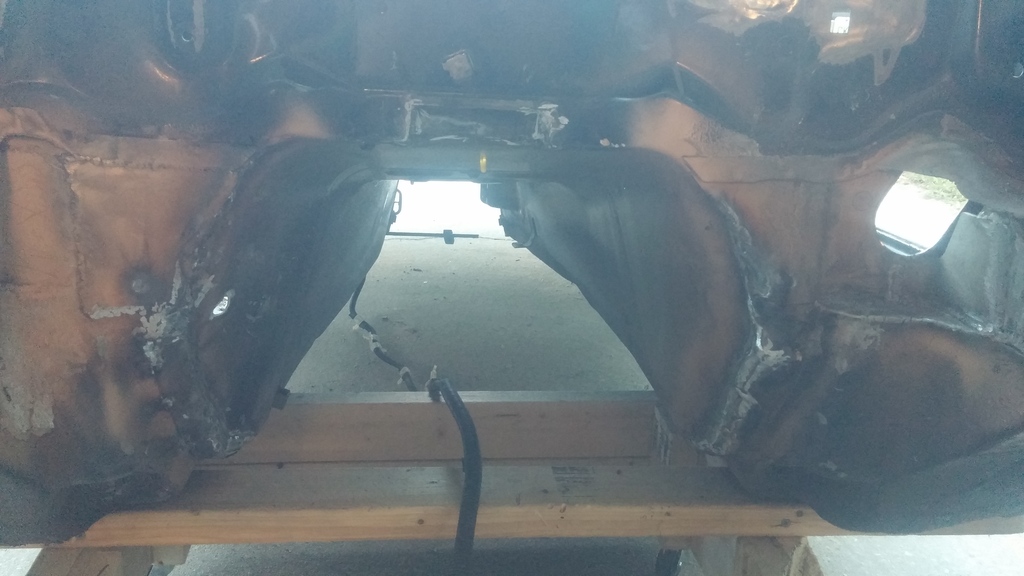
Pictures aren't very good though. Now this week I'll scuff the inside of the tunnel and the inside of the car so I can paint the lizard skin coating. Which brings me to my next picture.
In order to paint it needs to be cleaned first. I used purple power and a scrub brush.
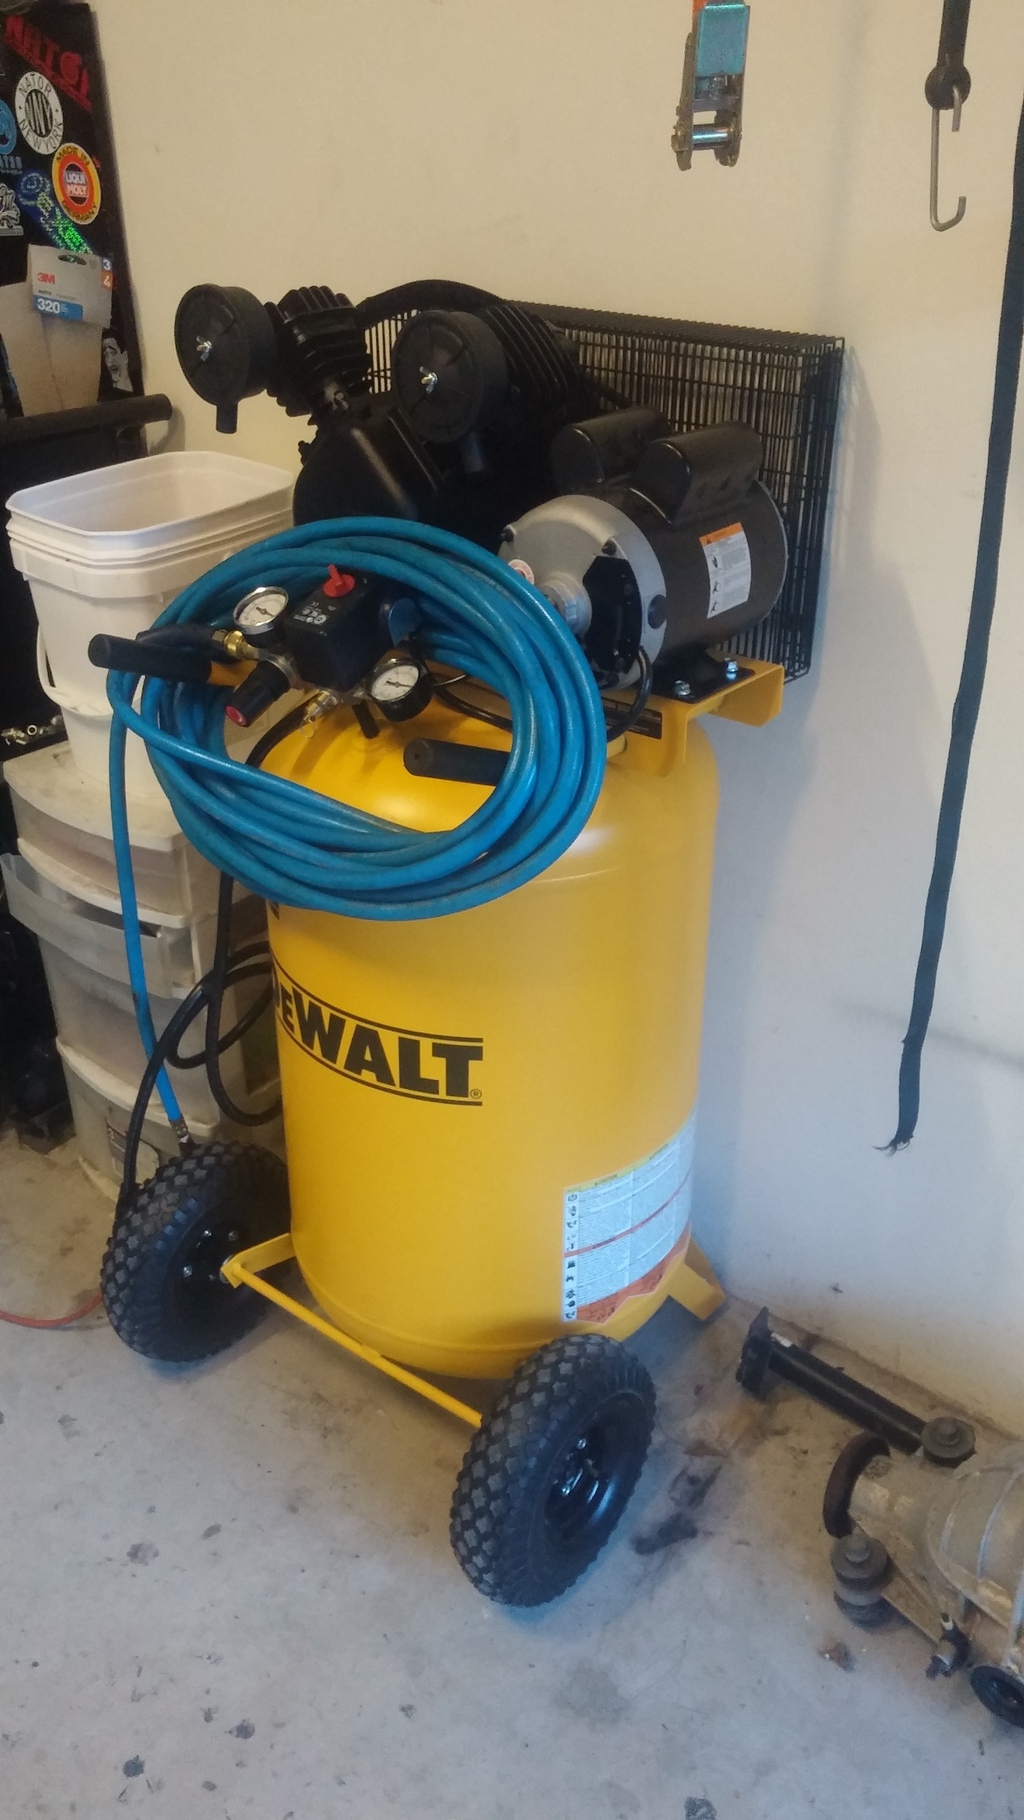
I went to get a spool of welding wire at Lowes and found this dewalt compressor on clearance for $235 from $450. It's 30 gallons. My compressor was getting old anyways so this is a nice upgrade
Pictures aren't very good though. Now this week I'll scuff the inside of the tunnel and the inside of the car so I can paint the lizard skin coating. Which brings me to my next picture.
In order to paint it needs to be cleaned first. I used purple power and a scrub brush.
I went to get a spool of welding wire at Lowes and found this dewalt compressor on clearance for $235 from $450. It's 30 gallons. My compressor was getting old anyways so this is a nice upgrade

Jim Stainer
Joined: Jul 2011
Posts: 2,462
Likes: 62
From: Sunny SW Minnesota
Love the lift! Did you check the gas pedal and ac evaporator before you welded it up? Asking because I didn't and had to redo it and yours looks like it's pretty wide. That is one of the things I think is way off in the flyin miata book. The top cut is useless and the side cuts they recommend are way too wide.
Thread Starter
V8 Miata Prot�g�
Joined: Nov 2014
Posts: 485
Likes: 37
From: South FL
Love the lift! Did you check the gas pedal and ac evaporator before you welded it up? Asking because I didn't and had to redo it and yours looks like it's pretty wide. That is one of the things I think is way off in the flyin miata book. The top cut is useless and the side cuts they recommend are way too wide.

Thread Starter
V8 Miata Prot�g�
Joined: Nov 2014
Posts: 485
Likes: 37
From: South FL
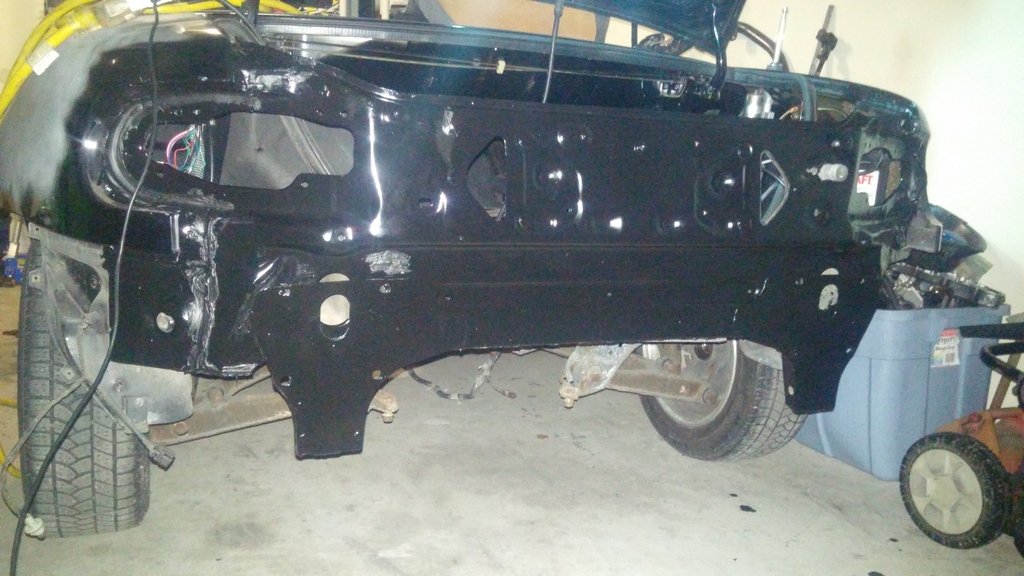
Did some painting with por15 this weekend.
-sides and underneath the frame rails in the engine bay
-seam welds in the tunnel and cabin
-core support and radiator mounts
-front fenderwells
-sides and underneath the frame rails in the engine bay
-seam welds in the tunnel and cabin
-core support and radiator mounts
-front fenderwells
Last edited by SupaDupaSteve; Mar 6, 2019 at 12:55 PM.

Thread Starter
V8 Miata Prot�g�
Joined: Nov 2014
Posts: 485
Likes: 37
From: South FL
Got the interior and the tunnel coated with Lizard skin today. Also sanded down the windshield channel.
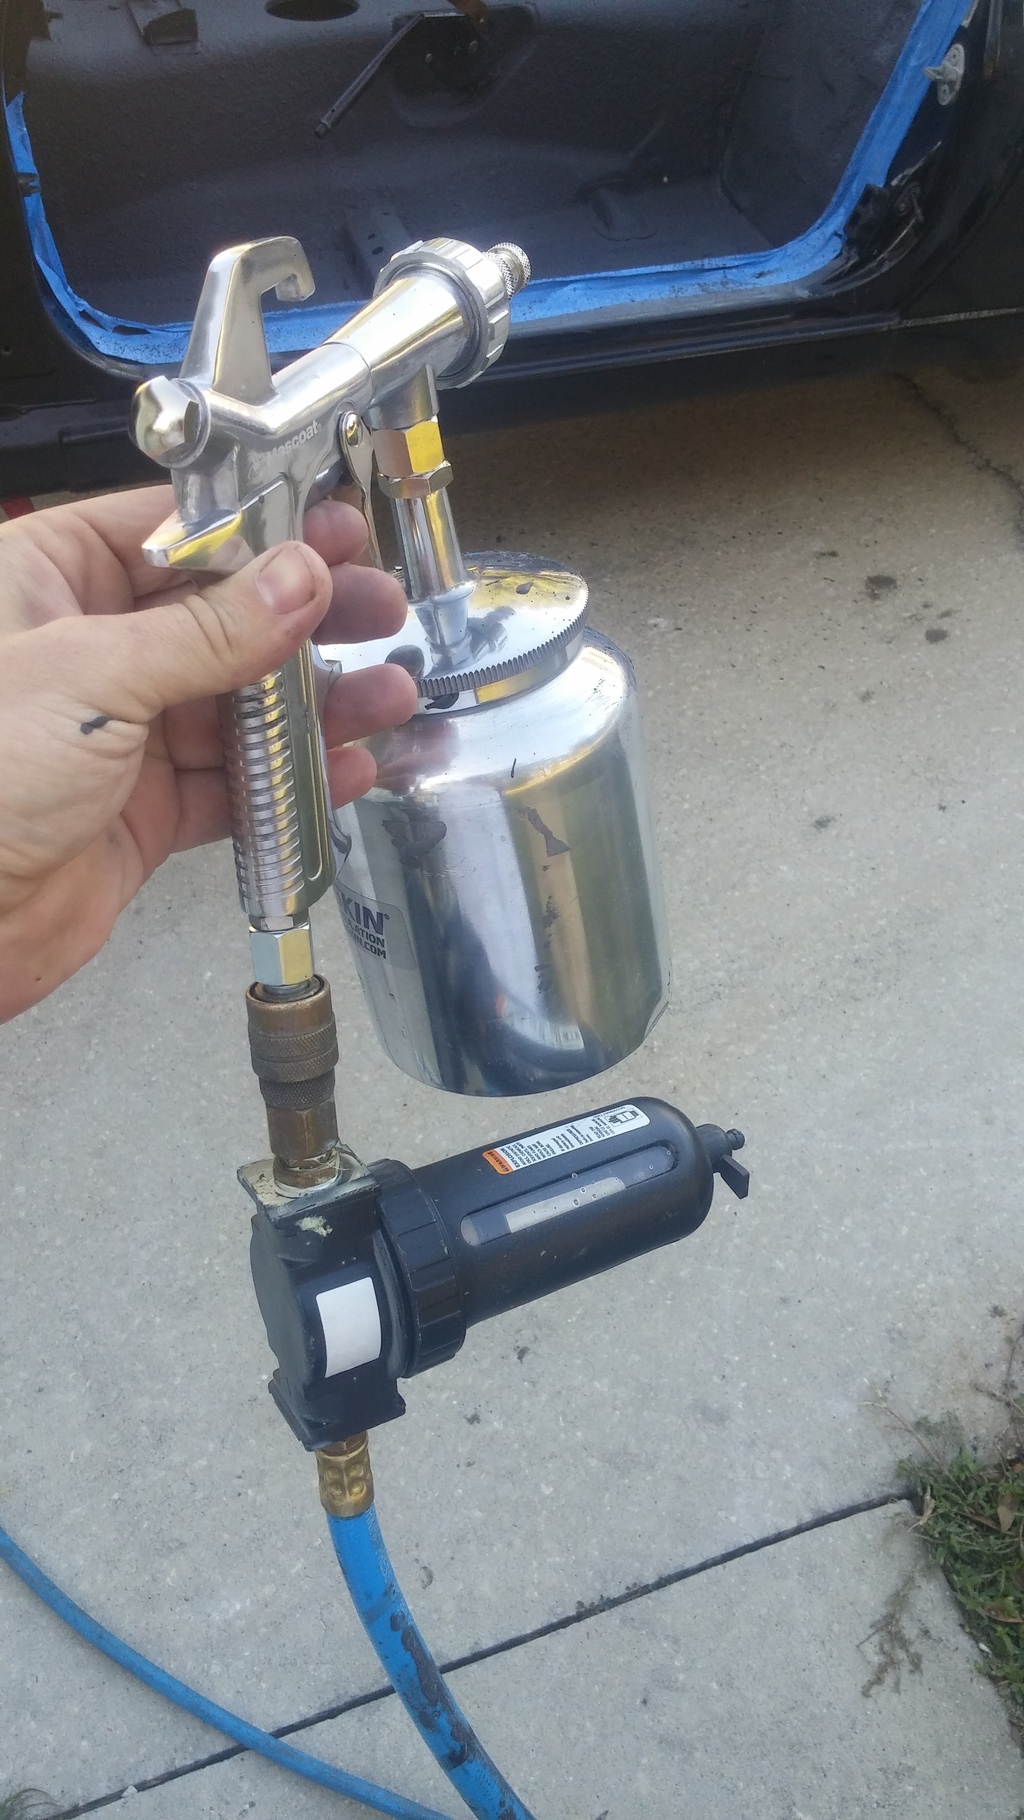
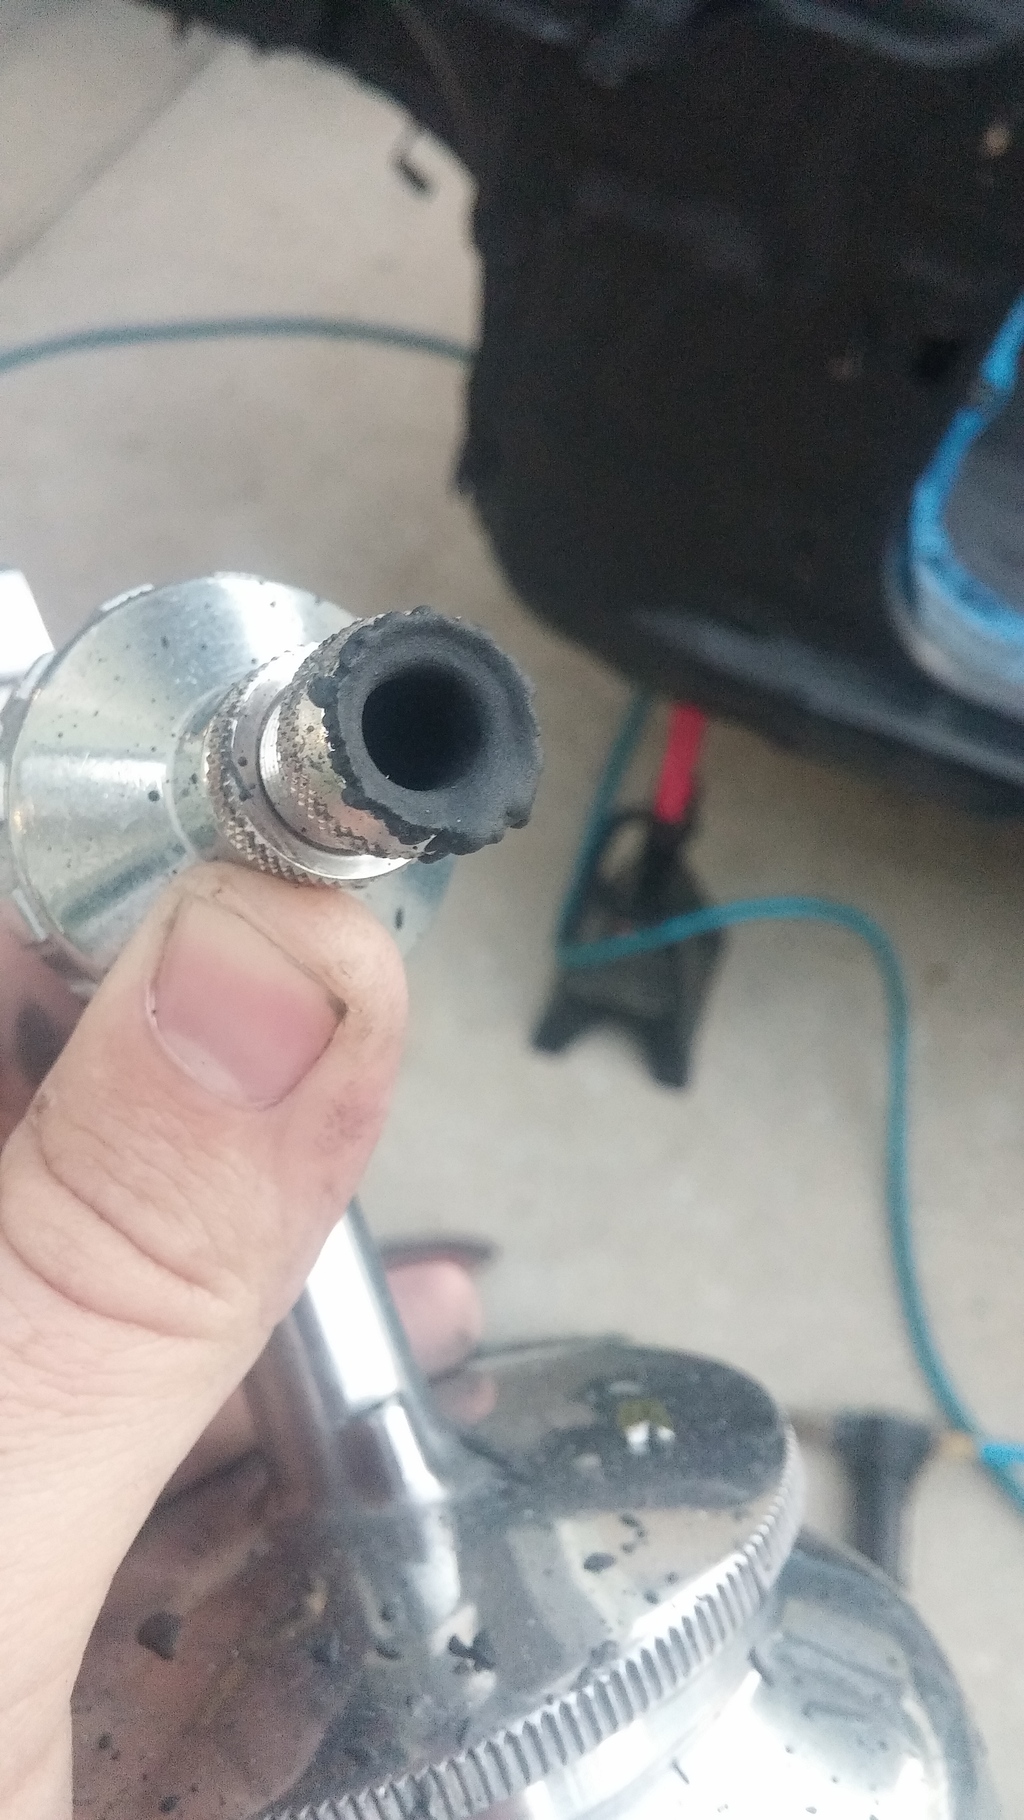
The instructions state that you need to use the Sound control first then the Ceramic insulation. 2 coats of each @ 20mil thickness per coat. Each coat needs to dry to the touch before the next is applied. There are different pressures that you spray each at due to the difference in viscosity. I cannot remember at the moment but if anyone is curious I can find the instruction sheet. As a last resort I used a water air seperator right before the gun. It definitely caught some water, IDK if it was all of it but I didn't notice any or see any ill effects.
Here's all the pictures.
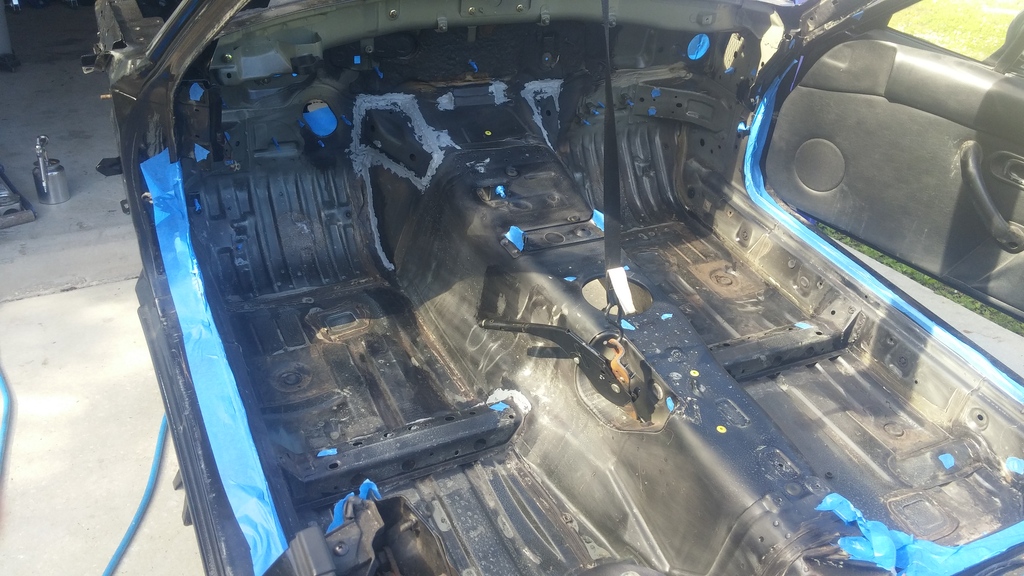
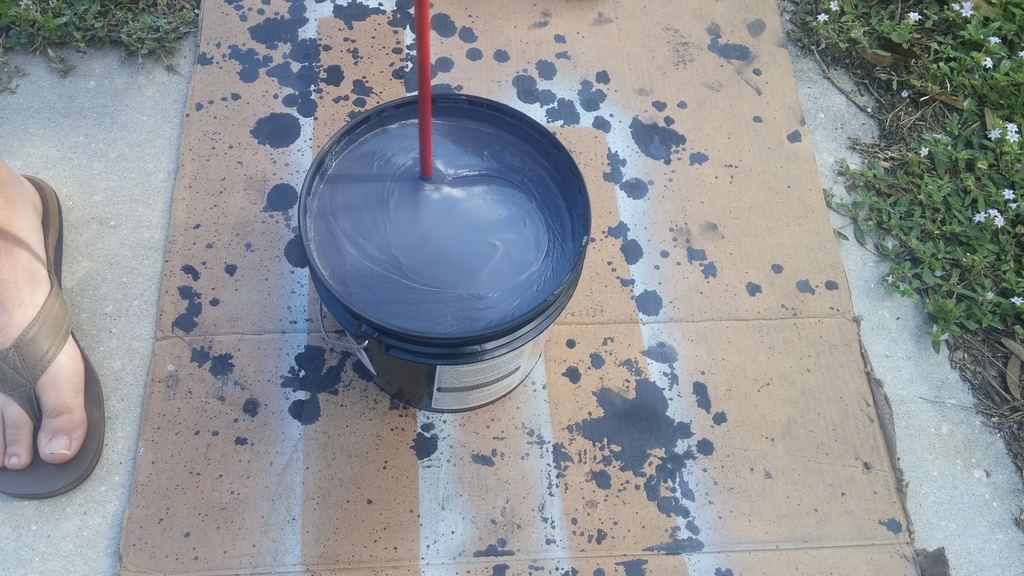

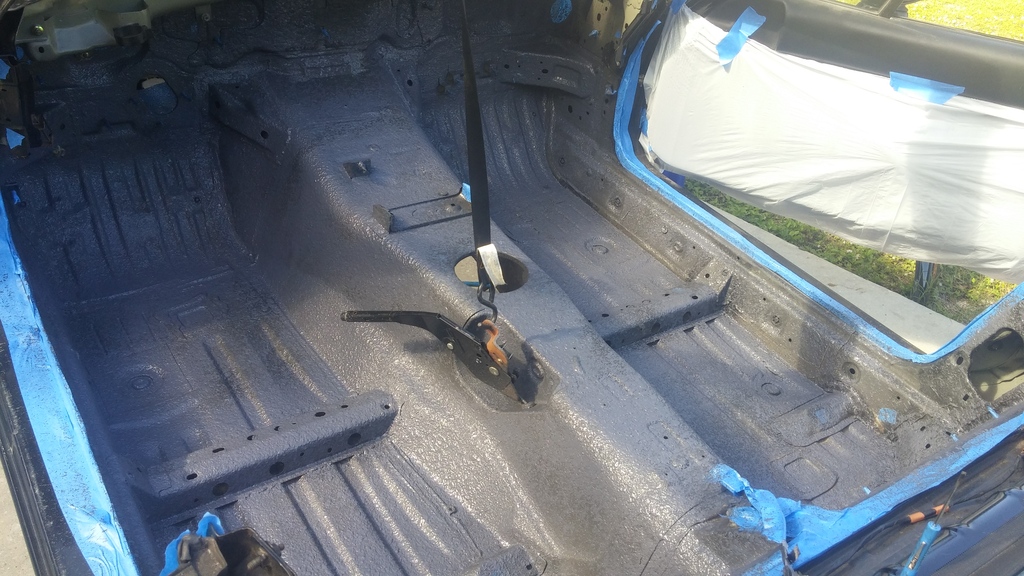
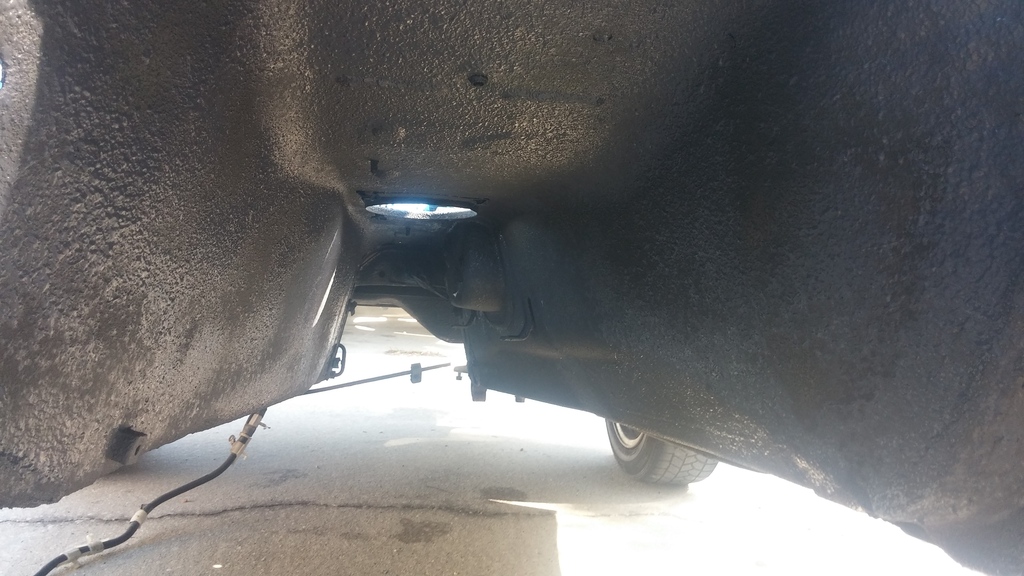
The pictures with it applied are only after the first coat. I'll take some pictures in the light tomorrow or the next day when it's fully cured.
The instructions state that you need to use the Sound control first then the Ceramic insulation. 2 coats of each @ 20mil thickness per coat. Each coat needs to dry to the touch before the next is applied. There are different pressures that you spray each at due to the difference in viscosity. I cannot remember at the moment but if anyone is curious I can find the instruction sheet. As a last resort I used a water air seperator right before the gun. It definitely caught some water, IDK if it was all of it but I didn't notice any or see any ill effects.
Here's all the pictures.
The pictures with it applied are only after the first coat. I'll take some pictures in the light tomorrow or the next day when it's fully cured.
V8 Miata Participant
Joined: Sep 2014
Posts: 256
Likes: 23
From: Central Florida
Nice progress.
I wish I wouldve been able to drive mine prior to spraying the Lizard Skin. Im sure it works well but hard to say how well. I did not replace the oem firewall insulation and I get a lot of heat coming through that area. Once I tear down for paint I will make sure to add that back in.
I have my fuel line stuff back from Stng96. If youve decided on hard fuel lines youre welcome to use them. I also have 20' of stainless 3/8 line that I double ordered if youre interested. Let me know.


