95 LS Budget build

 11-29-2015, 08:21 PM
#176
V8 Miata Prot�g�

Thread Starter

Nice progress.
I wish I wouldve been able to drive mine prior to spraying the Lizard Skin. Im sure it works well but hard to say how well. I did not replace the oem firewall insulation and I get a lot of heat coming through that area. Once I tear down for paint I will make sure to add that back in.
I have my fuel line stuff back from Stng96. If youve decided on hard fuel lines youre welcome to use them. I also have 20' of stainless 3/8 line that I double ordered if youre interested. Let me know.
 11-30-2015, 08:04 AM
#177
V8 Miata Fanatic

Go with the Hardlines, they aren't hard, and they look great when finished! I also have some excess 3/8 Stainless Line, and I've got at least one fitting that I can think of that you'll need. I think I used about half of what I bought, so you should be good with Dave's tubing, but if you mess up give me a shout!
 12-03-2015, 07:55 PM
#181
V8 Miata Fanatic
 12-03-2015, 08:11 PM
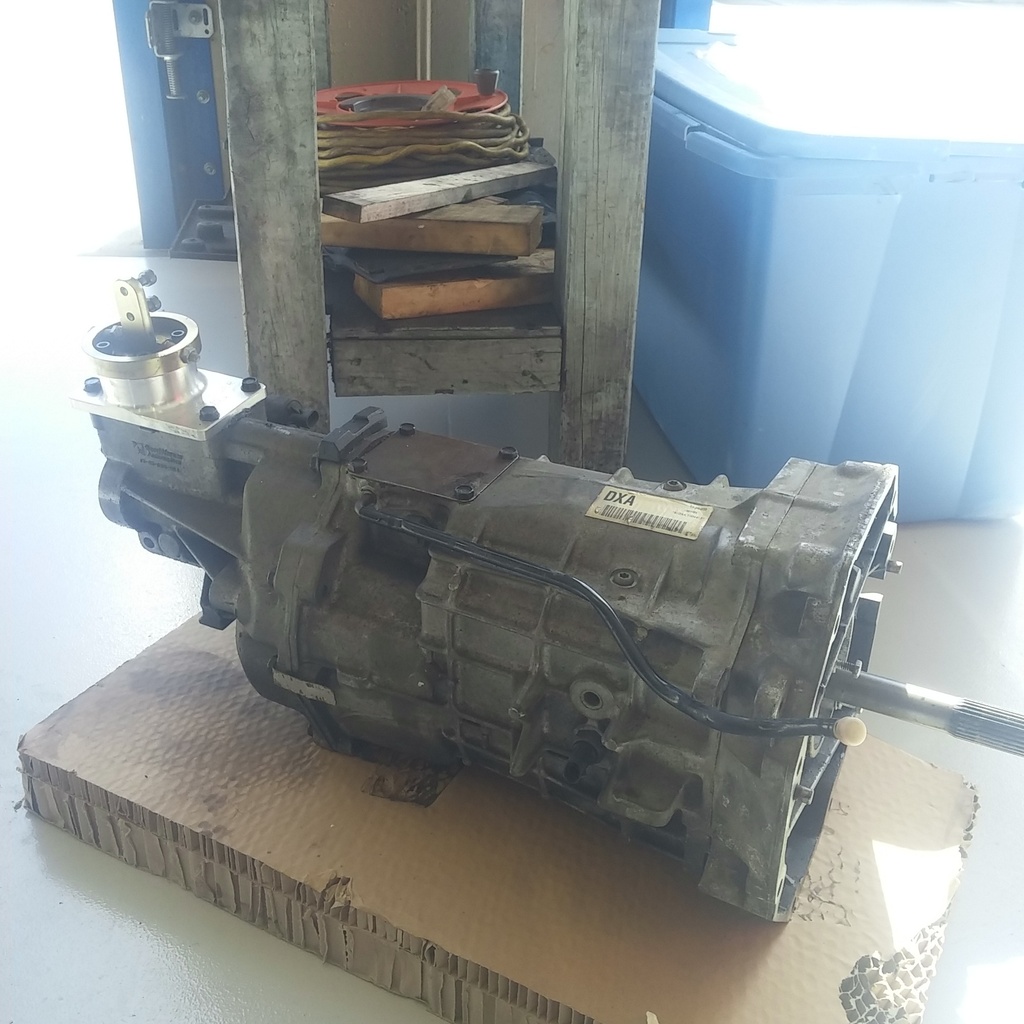
#182
V8 Miata Prot�g�
Thread Starter
I actually had the shipper use this guide to follow and it worked out really well and came out to 143lbs which worked out perfect as the UPS ground weight limit is 150lbs.
DIY: Safely Shipping Big Items (Transmissions / Cylinder Heads) - R3VLimited Forums
01-02-2016, 08:49 AM
#183
V8 Miata Prot�g�
Thread Starter
Well it's been a month since the last update. Been pinching pennies the last month trying to recoop the transmission cost and christmas shopping.
As of currently I'm trying to get everything done that needs to be done before paint. So I've purchased Aerocatch hood latches, a gt500 hood vent, and a front lip. This weekend I'll work on getting the vent and the aero catch latches installed.
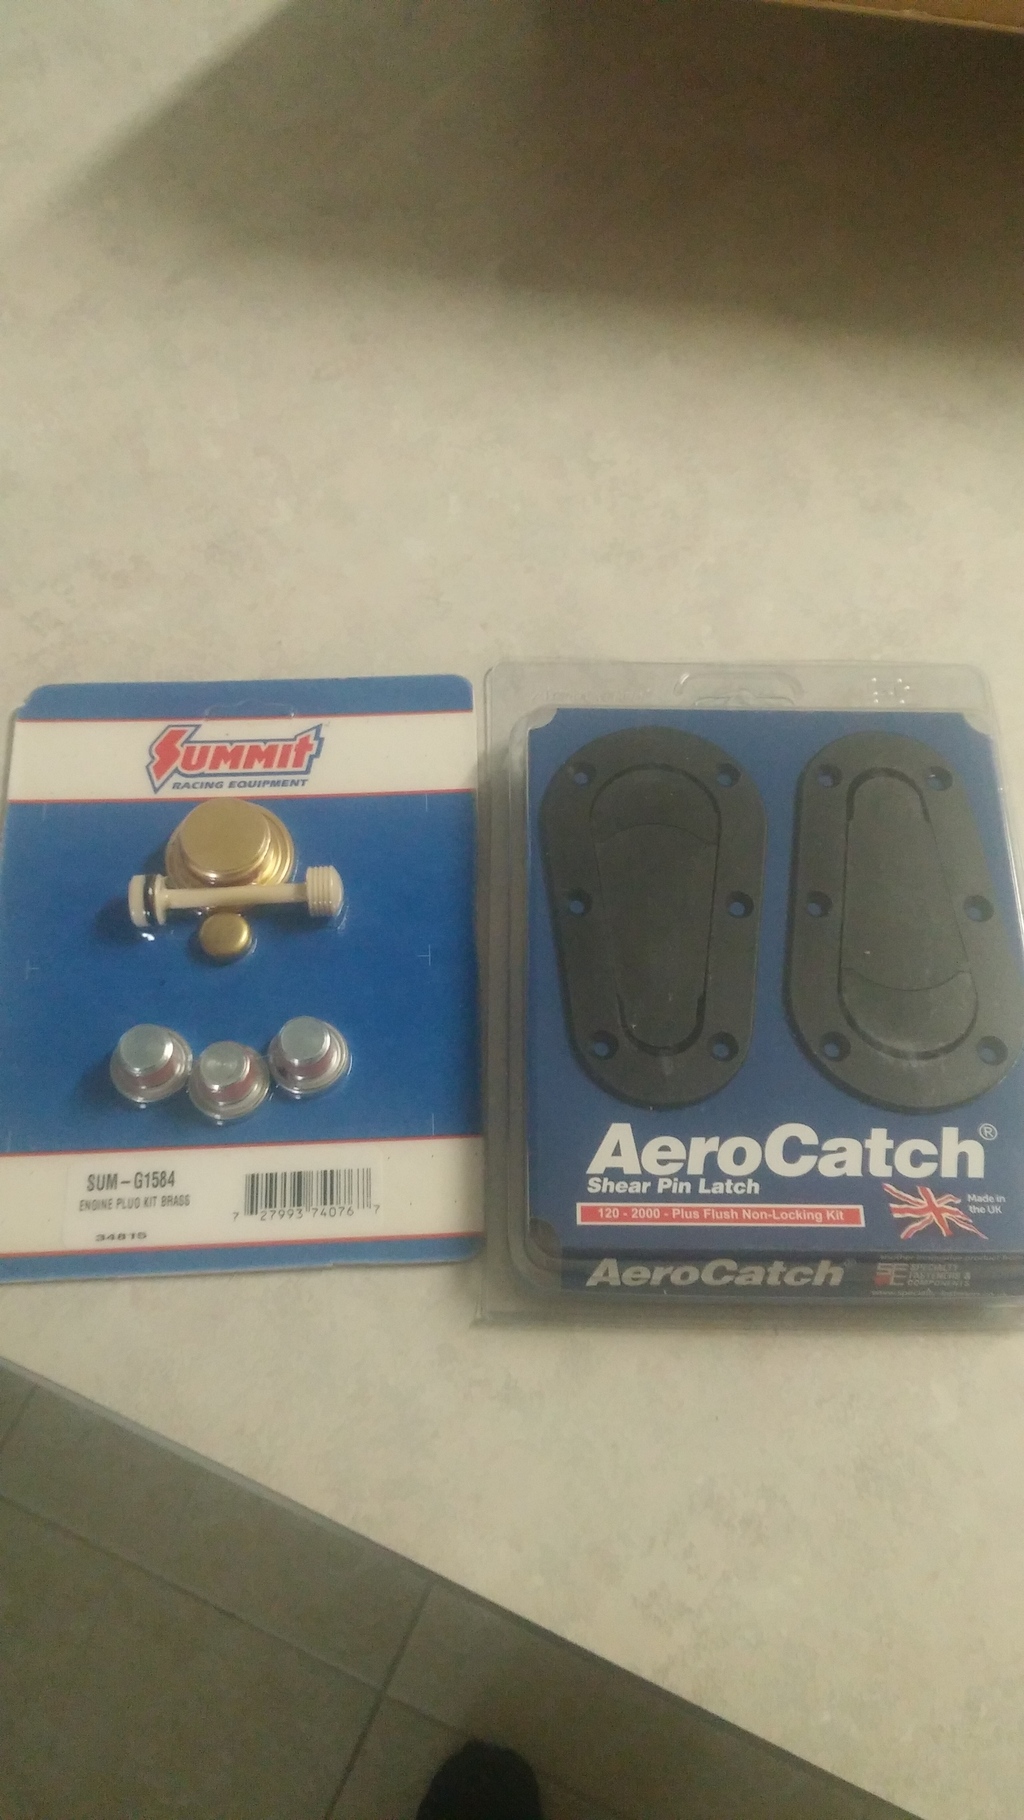
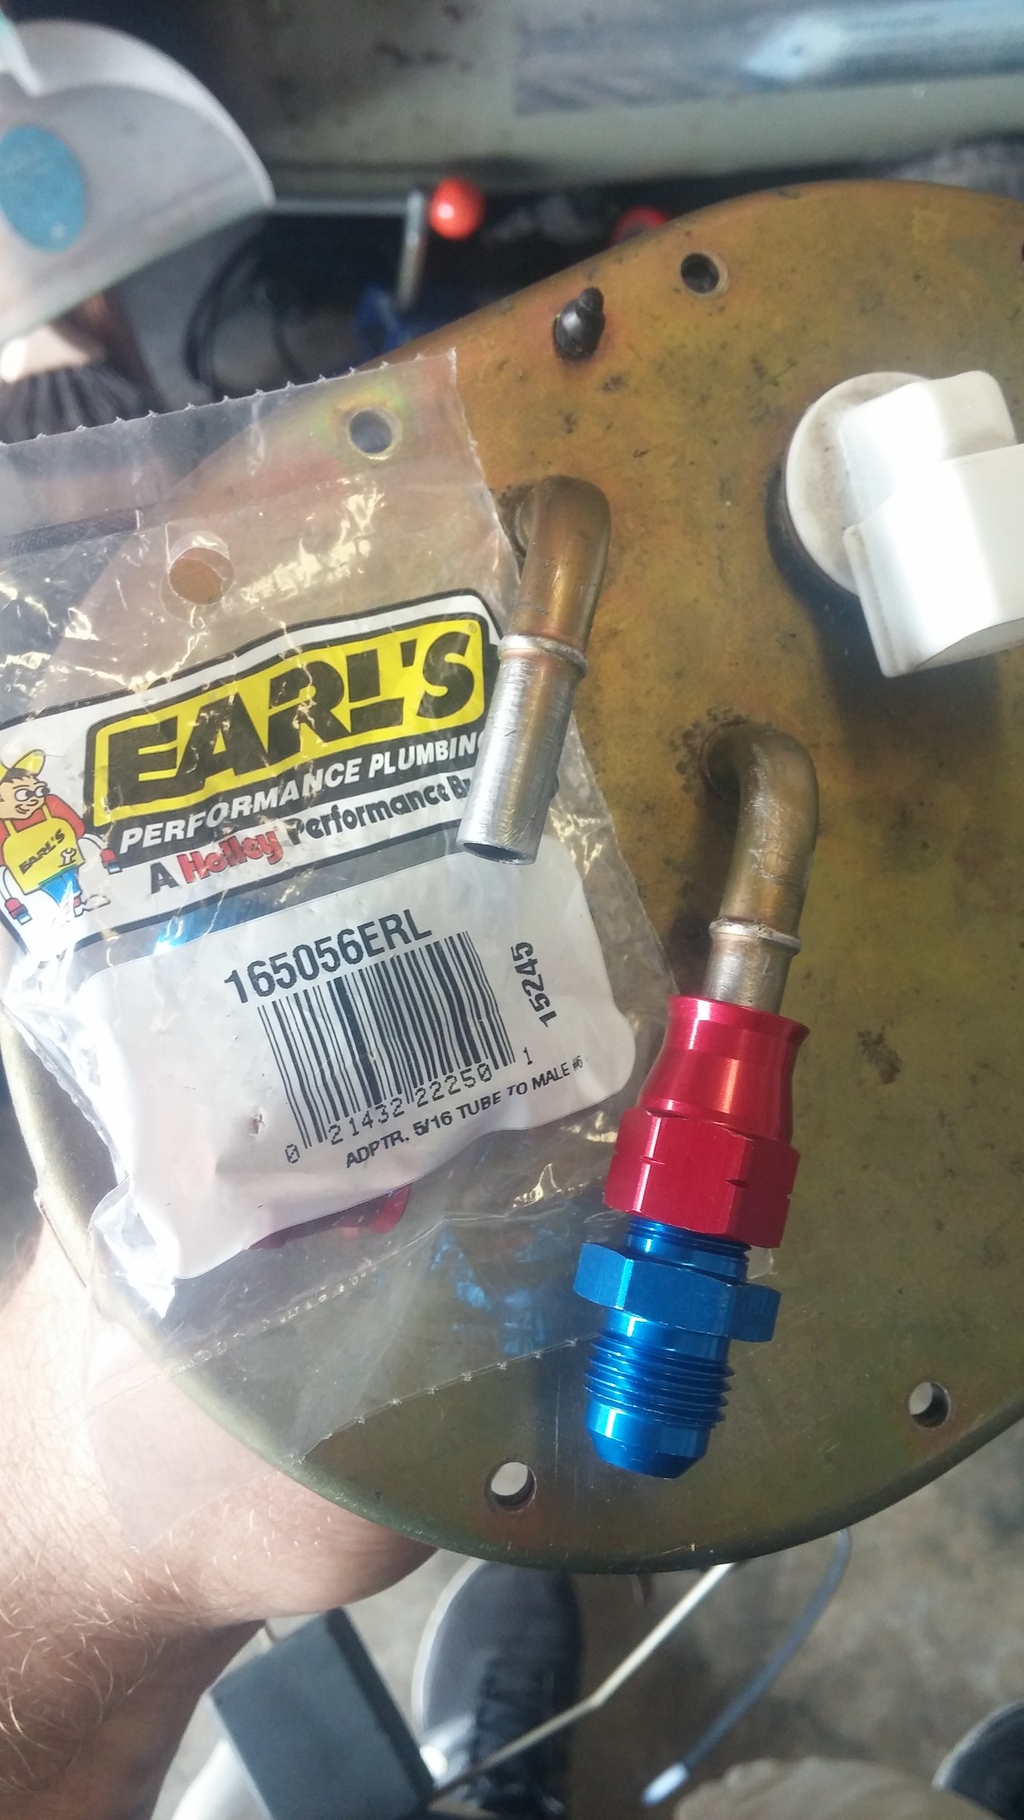
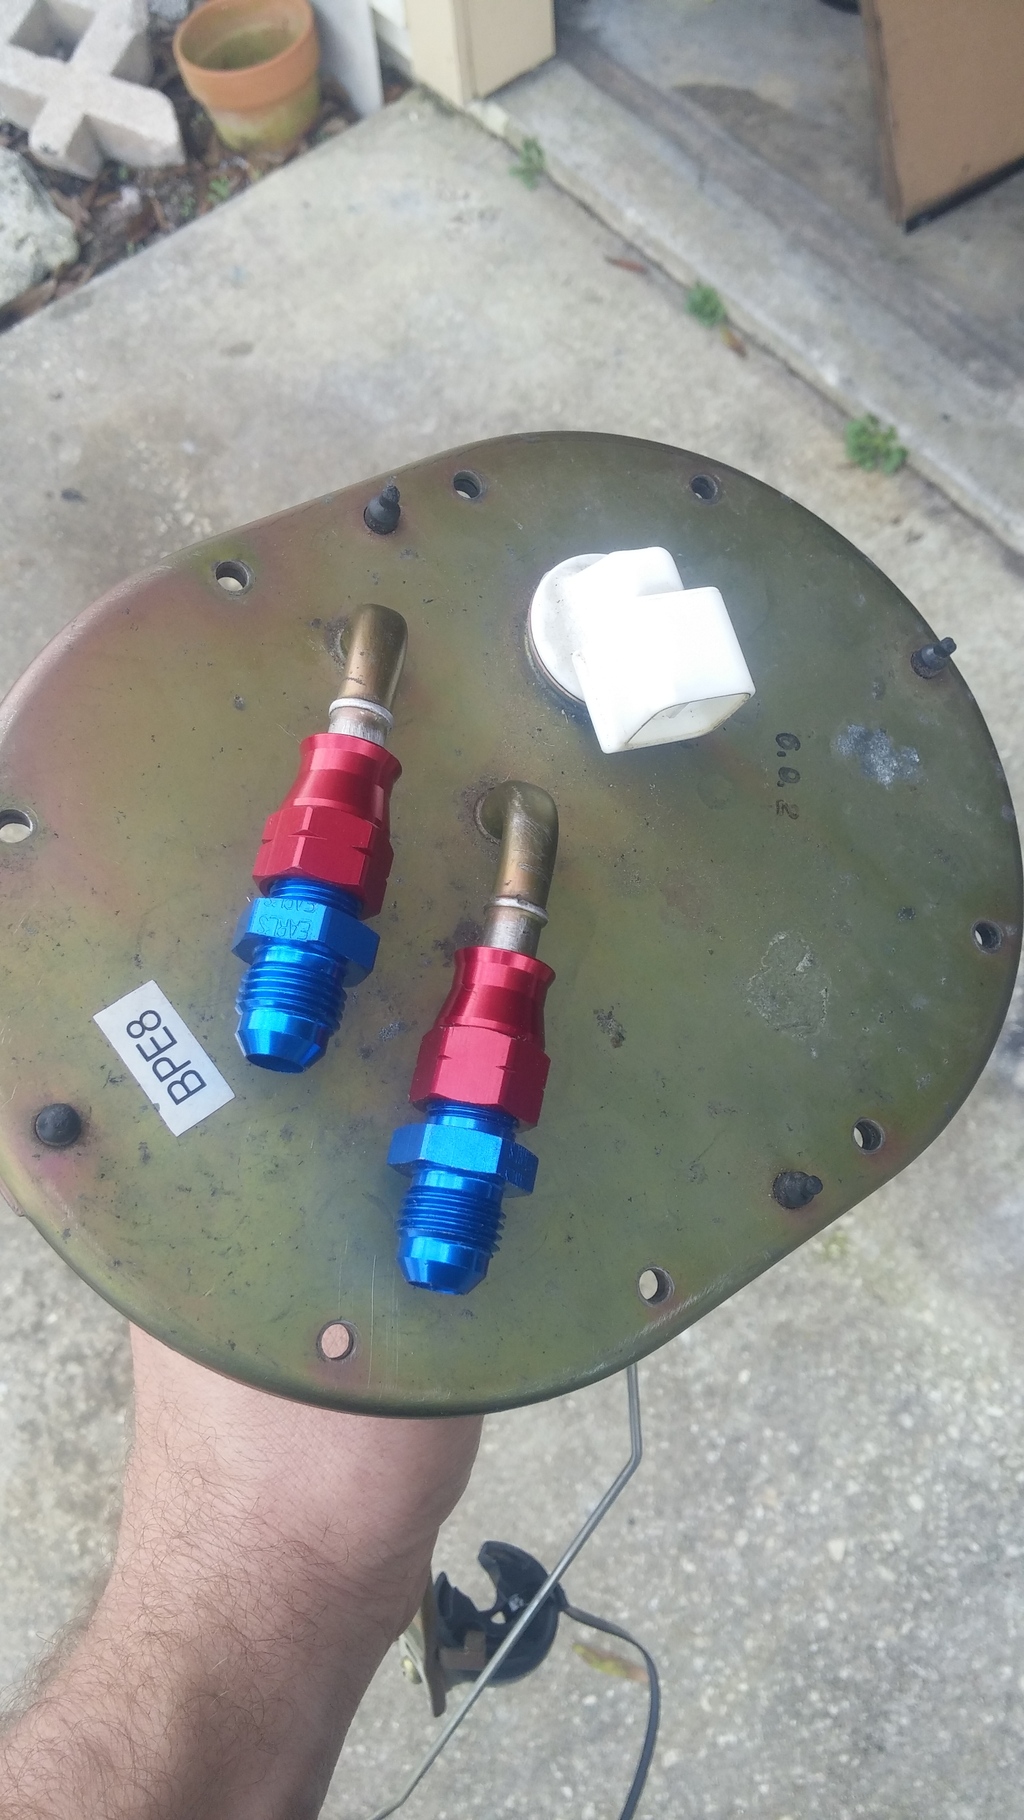
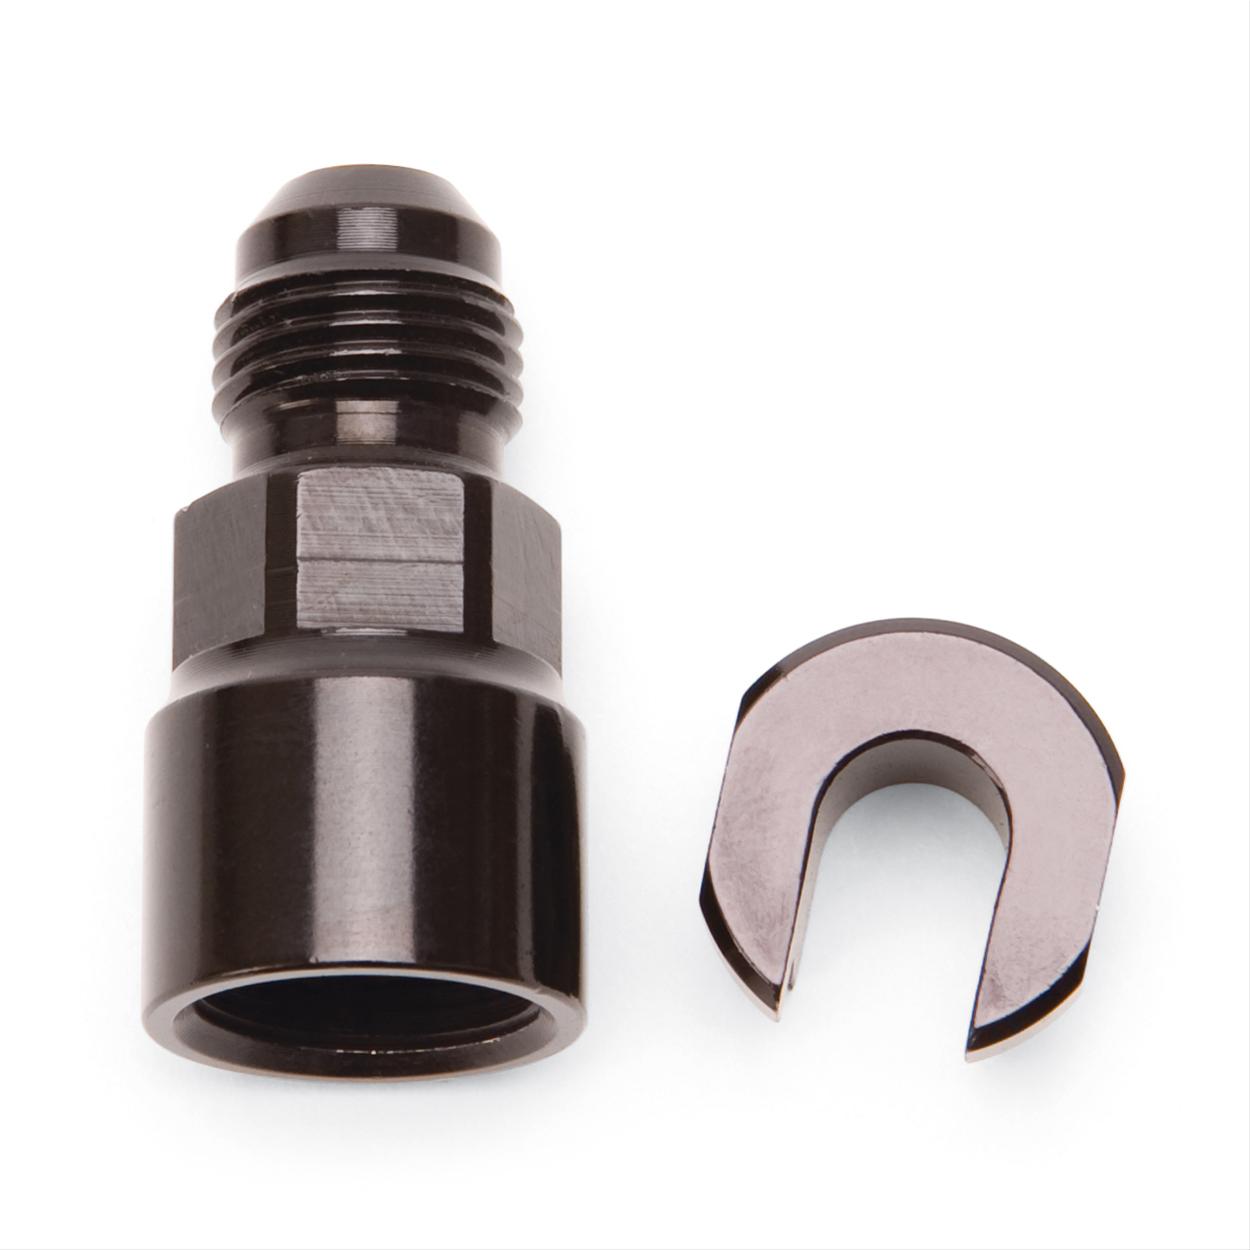
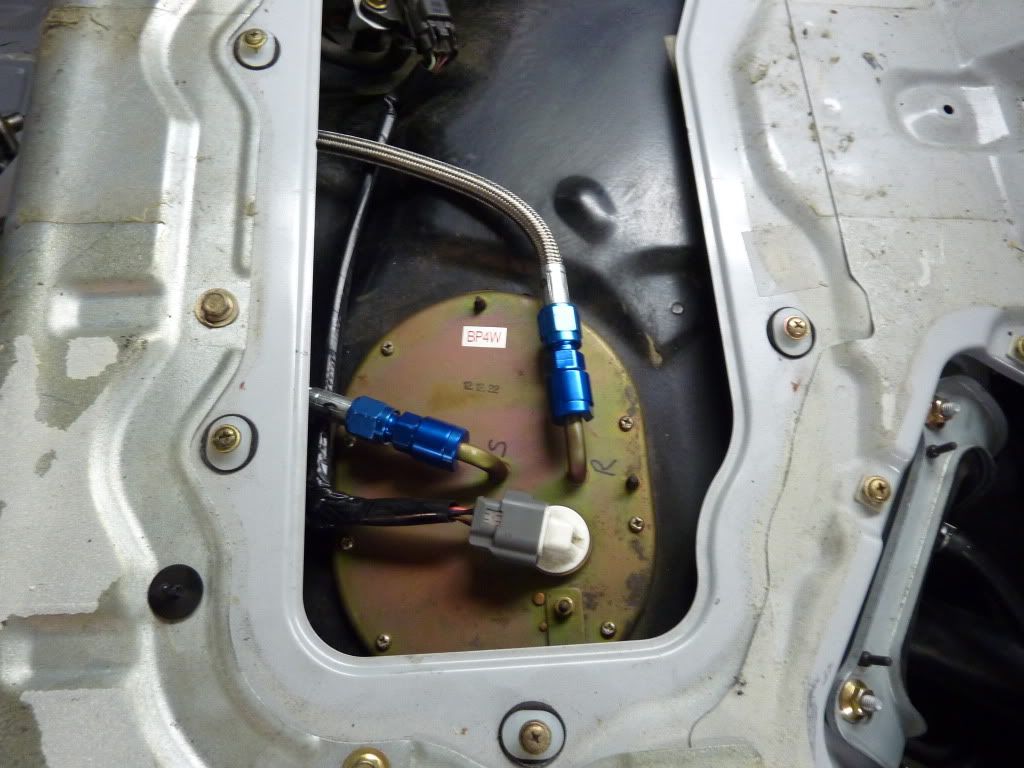
I also picked up some fittings to convert the 5/16 to -6AN.
As of currently I'm trying to get everything done that needs to be done before paint. So I've purchased Aerocatch hood latches, a gt500 hood vent, and a front lip. This weekend I'll work on getting the vent and the aero catch latches installed.
I also picked up some fittings to convert the 5/16 to -6AN.
01-02-2016, 10:23 AM
#184
V8 Miata Zealot

Are the Earl's fittings the ones with the rubber insert that "compresses" to the 5/16" hard line? If so, you may want to keep a close eye on them. I tried a set & they kept blowing off. I finally ended up using some steel compression fittings from Eaton.
01-02-2016, 11:37 PM
#185
V8 Miata Noob

Join Date: Jan 2015
Posts: 2
Likes: 0
Received 0 Likes
on
0 Posts
Those are the EFI fittings that go over the barb (haven't heard of any problems with those..). These appear to be the standard brass olive compression fittings after cutting the hose barb off.
 01-04-2016, 06:24 AM
#187
V8 Miata Prot�g�
Thread Starter
The ones I'm using are 2-piece and uses the barb to hold it on. Never had any issues with them.
Russell Push-On EFI Fittings 644113
Russell Push-On EFI Fittings 644113
 01-04-2016, 07:21 AM
#188
V8 Miata Fanatic
The ones I'm using are 2-piece and uses the barb to hold it on. Never had any issues with them.
Russell Push-On EFI Fittings 644113
Russell Push-On EFI Fittings 644113
I bought one of those vents too Steve, thats about the only thing I wish my car was an NA for, I think they look sick on NA's.
01-10-2016, 10:25 PM
#189
V8 Miata Prot�g�
Thread Starter
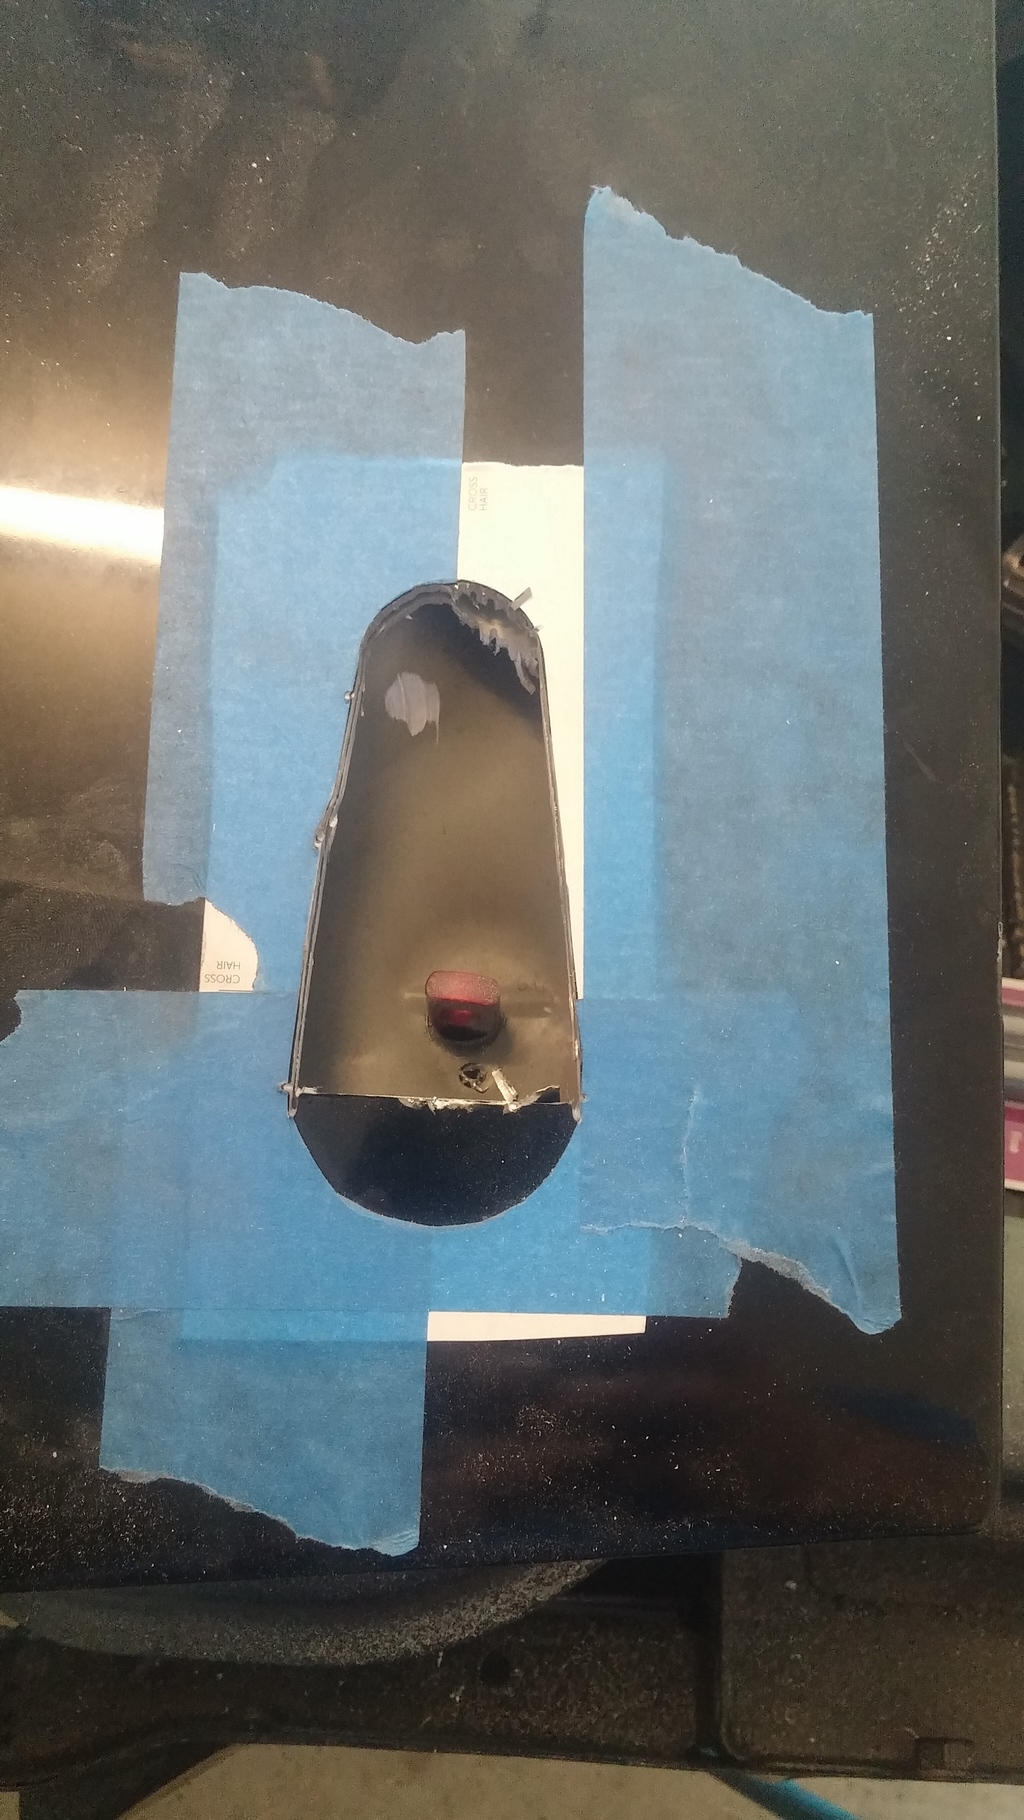
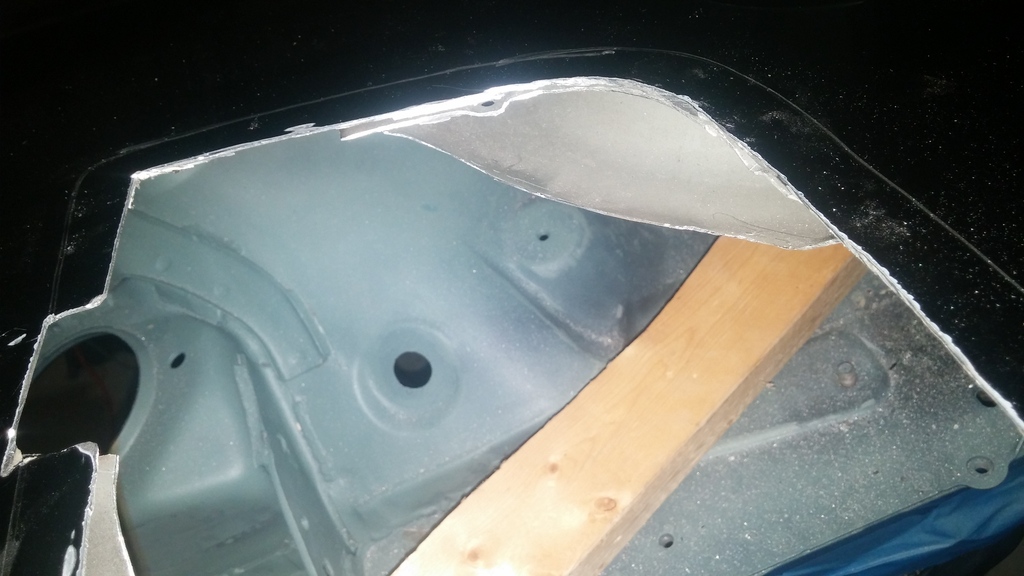
Got the hood all cut up for the vent and aerocatch latches.
The aerocatch's came with a stencil that you use as a guide for cutting. First you decide your pin location. I used the stock location for the rubber hood stops. Note they are not perfectly centered, they are 1/4" different from side to side. I didn't realize this till after. I just assumed. oh well, close enough for me.
anyways. drill your hole for you pin. put the pin in the location so you can verify the holes are in the correct location. Once you get the holes drilled you use the template's cross hairs and center them in the hole. Tape the stencil there and then cut the hood. The top skin is easy, cutting the bottom is more difficult. I'll let the pics do the talking.
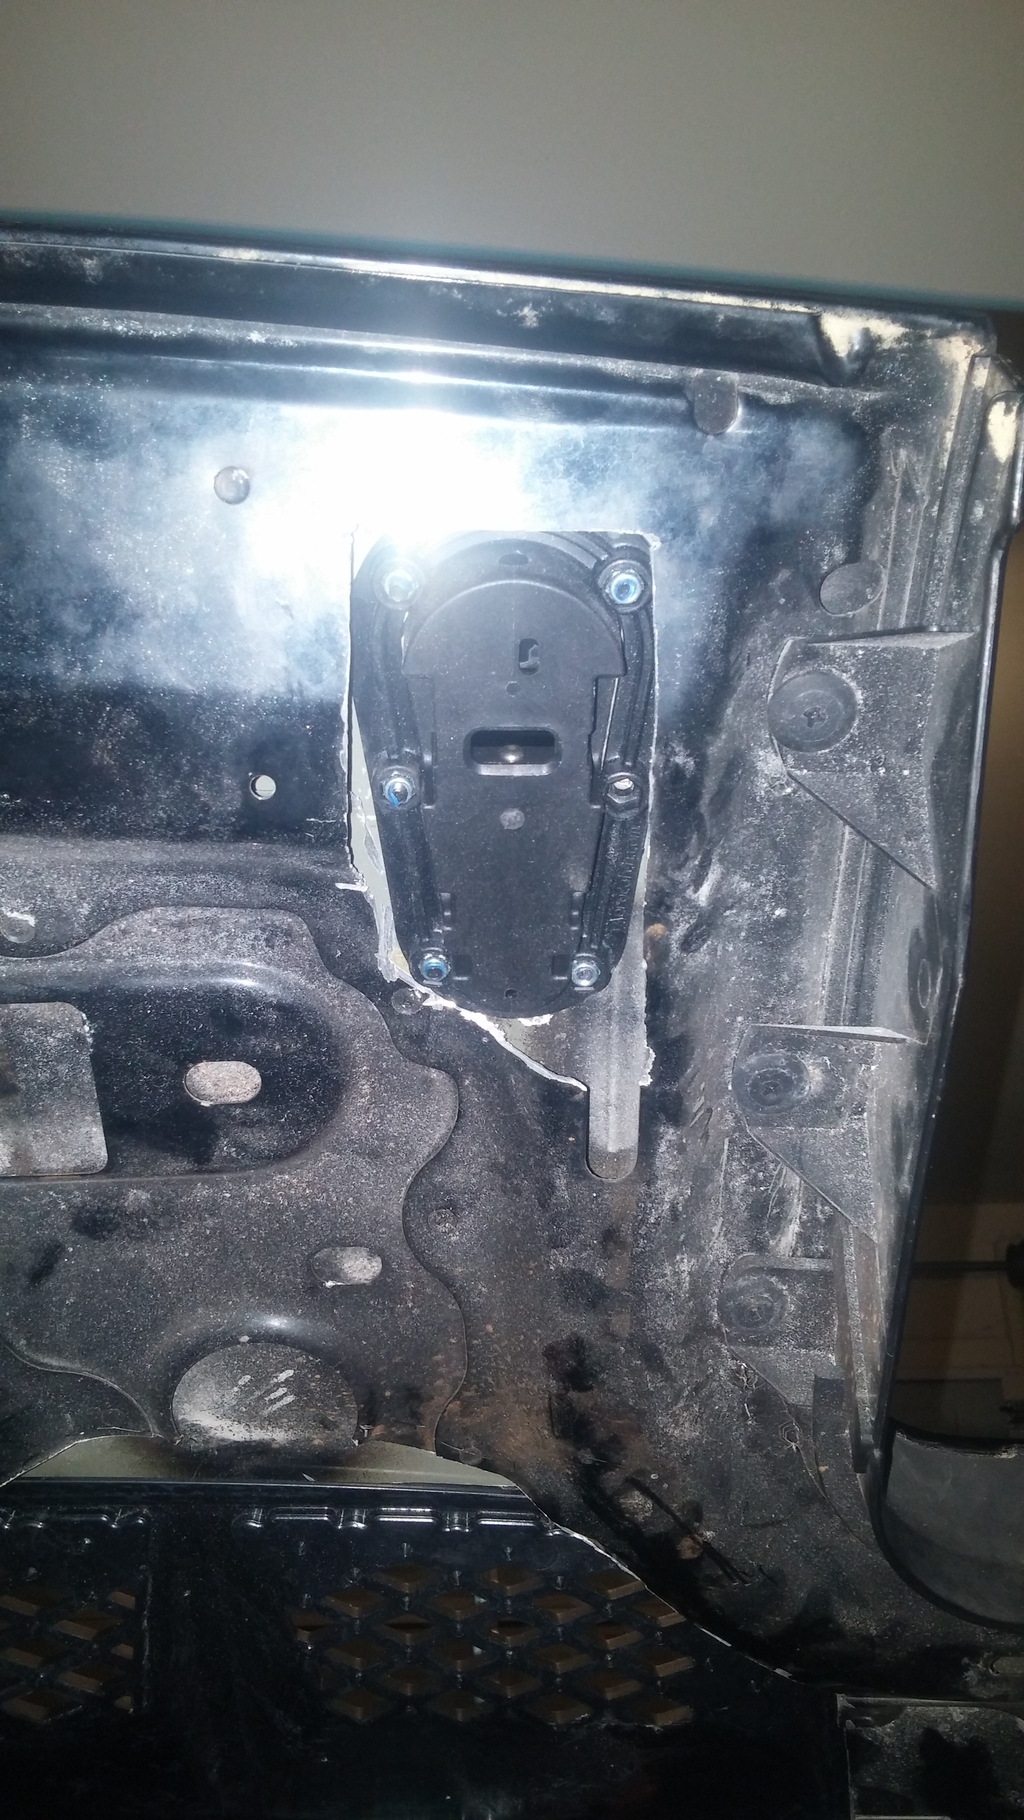
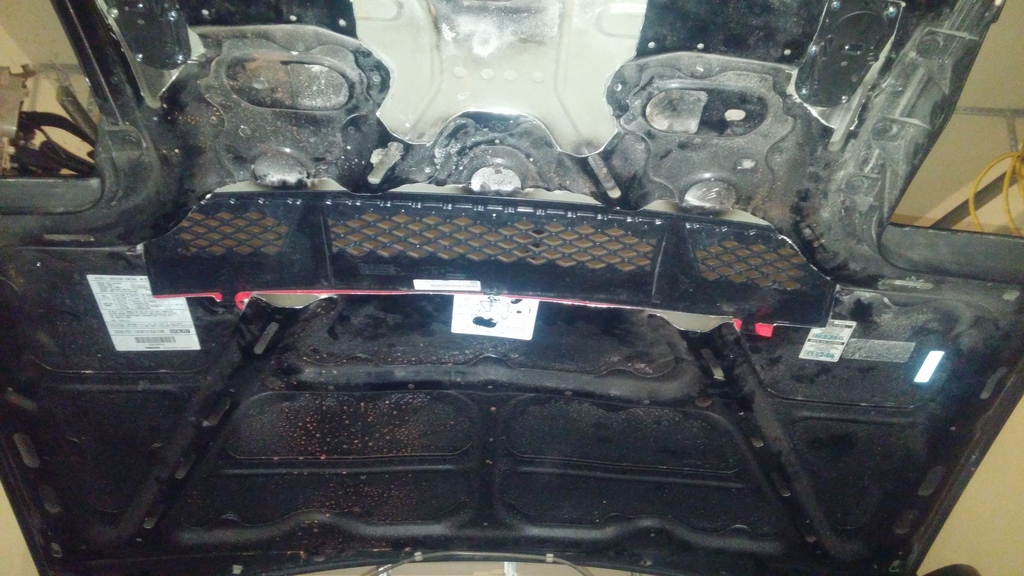
Here's the bottom. There's a "cage" that all the nuts go into. The way I've got mine cut they are pretty difficult to get to so I'd recommend using some strip caulk or similar to hold the nuts in there so they don't fall out.
Now the hood vent. First I did an outline of the overall size of the hoodvent. Then I carefully figured out the out line of where I needed to cut where the vent actually dipped in. I wouldn't recommend doing this on a hood that you aren't intending on painting.
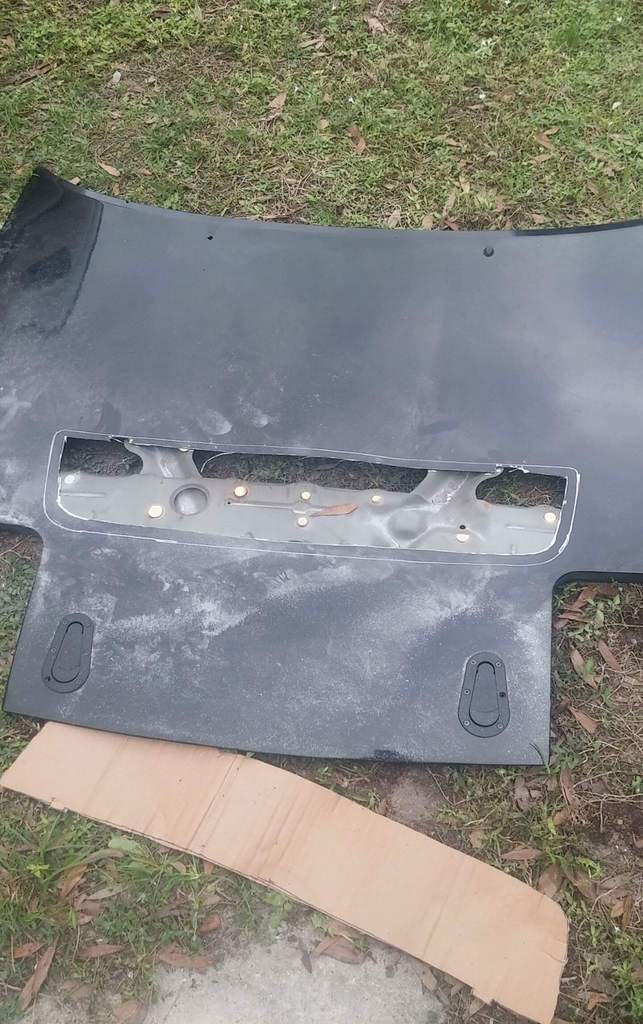
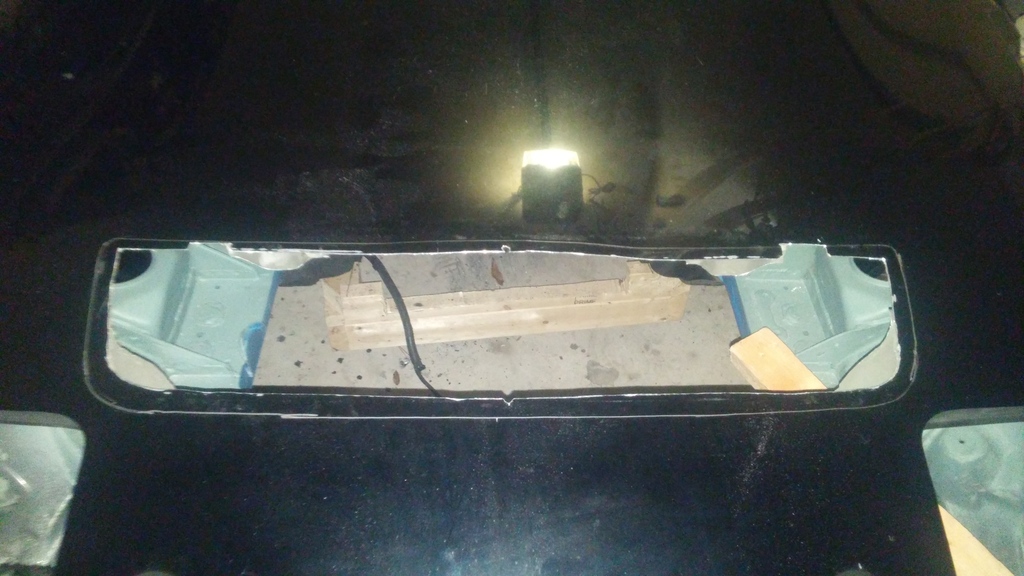
you can see here I left the corner structure to keep some rigidity.
The aerocatch's came with a stencil that you use as a guide for cutting. First you decide your pin location. I used the stock location for the rubber hood stops. Note they are not perfectly centered, they are 1/4" different from side to side. I didn't realize this till after. I just assumed. oh well, close enough for me.
anyways. drill your hole for you pin. put the pin in the location so you can verify the holes are in the correct location. Once you get the holes drilled you use the template's cross hairs and center them in the hole. Tape the stencil there and then cut the hood. The top skin is easy, cutting the bottom is more difficult. I'll let the pics do the talking.
Here's the bottom. There's a "cage" that all the nuts go into. The way I've got mine cut they are pretty difficult to get to so I'd recommend using some strip caulk or similar to hold the nuts in there so they don't fall out.
Now the hood vent. First I did an outline of the overall size of the hoodvent. Then I carefully figured out the out line of where I needed to cut where the vent actually dipped in. I wouldn't recommend doing this on a hood that you aren't intending on painting.
you can see here I left the corner structure to keep some rigidity.
02-08-2016, 08:32 PM
#190
V8 Miata Prot�g�
Thread Starter
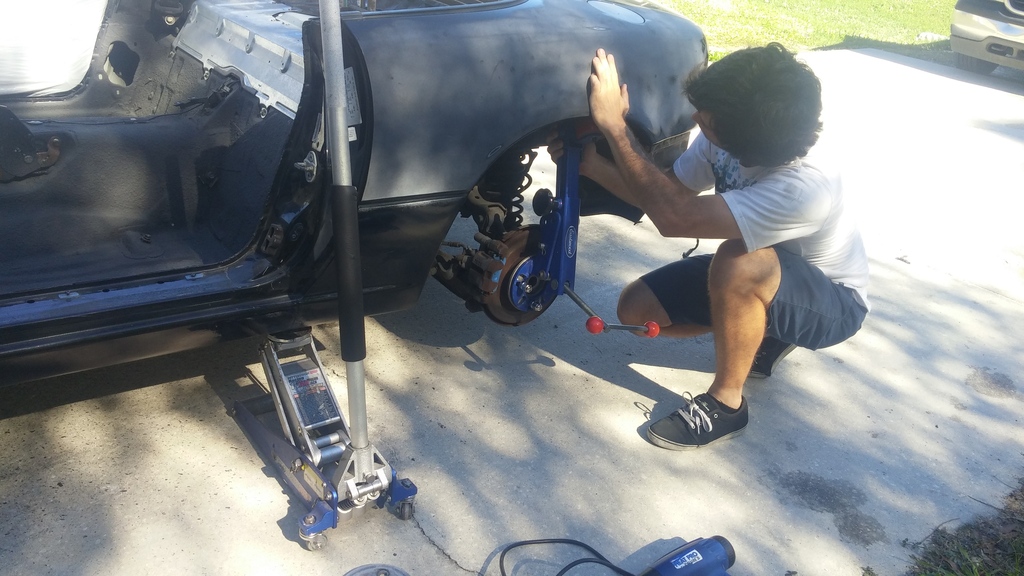
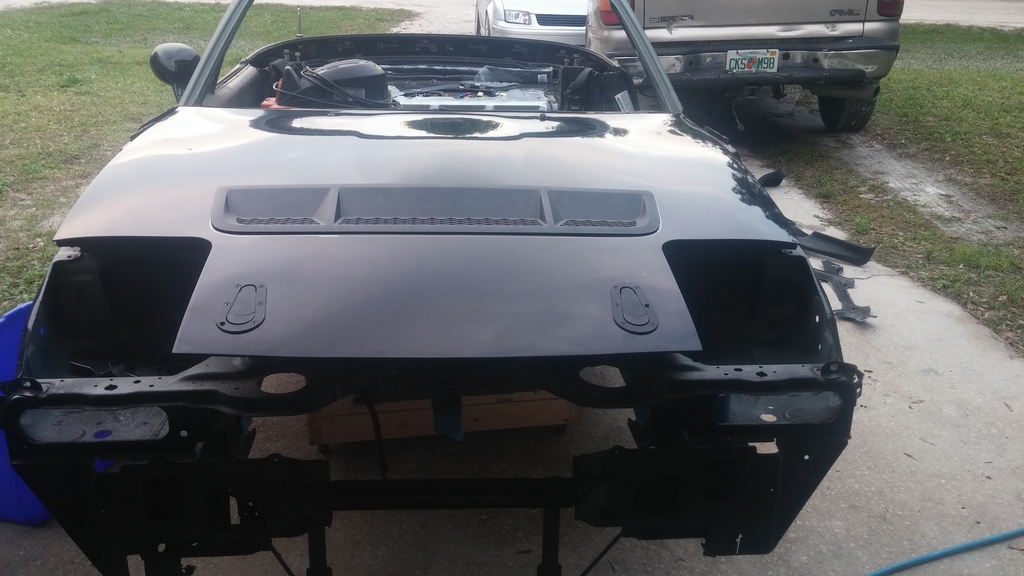
More pre paint mock up.
Clamped the lip to the bumper to make sure its in the right shape for the most part. Also, slid the radiator in to see how it's going to fit with it all. Looks more like an intercooler than a radiator. lol
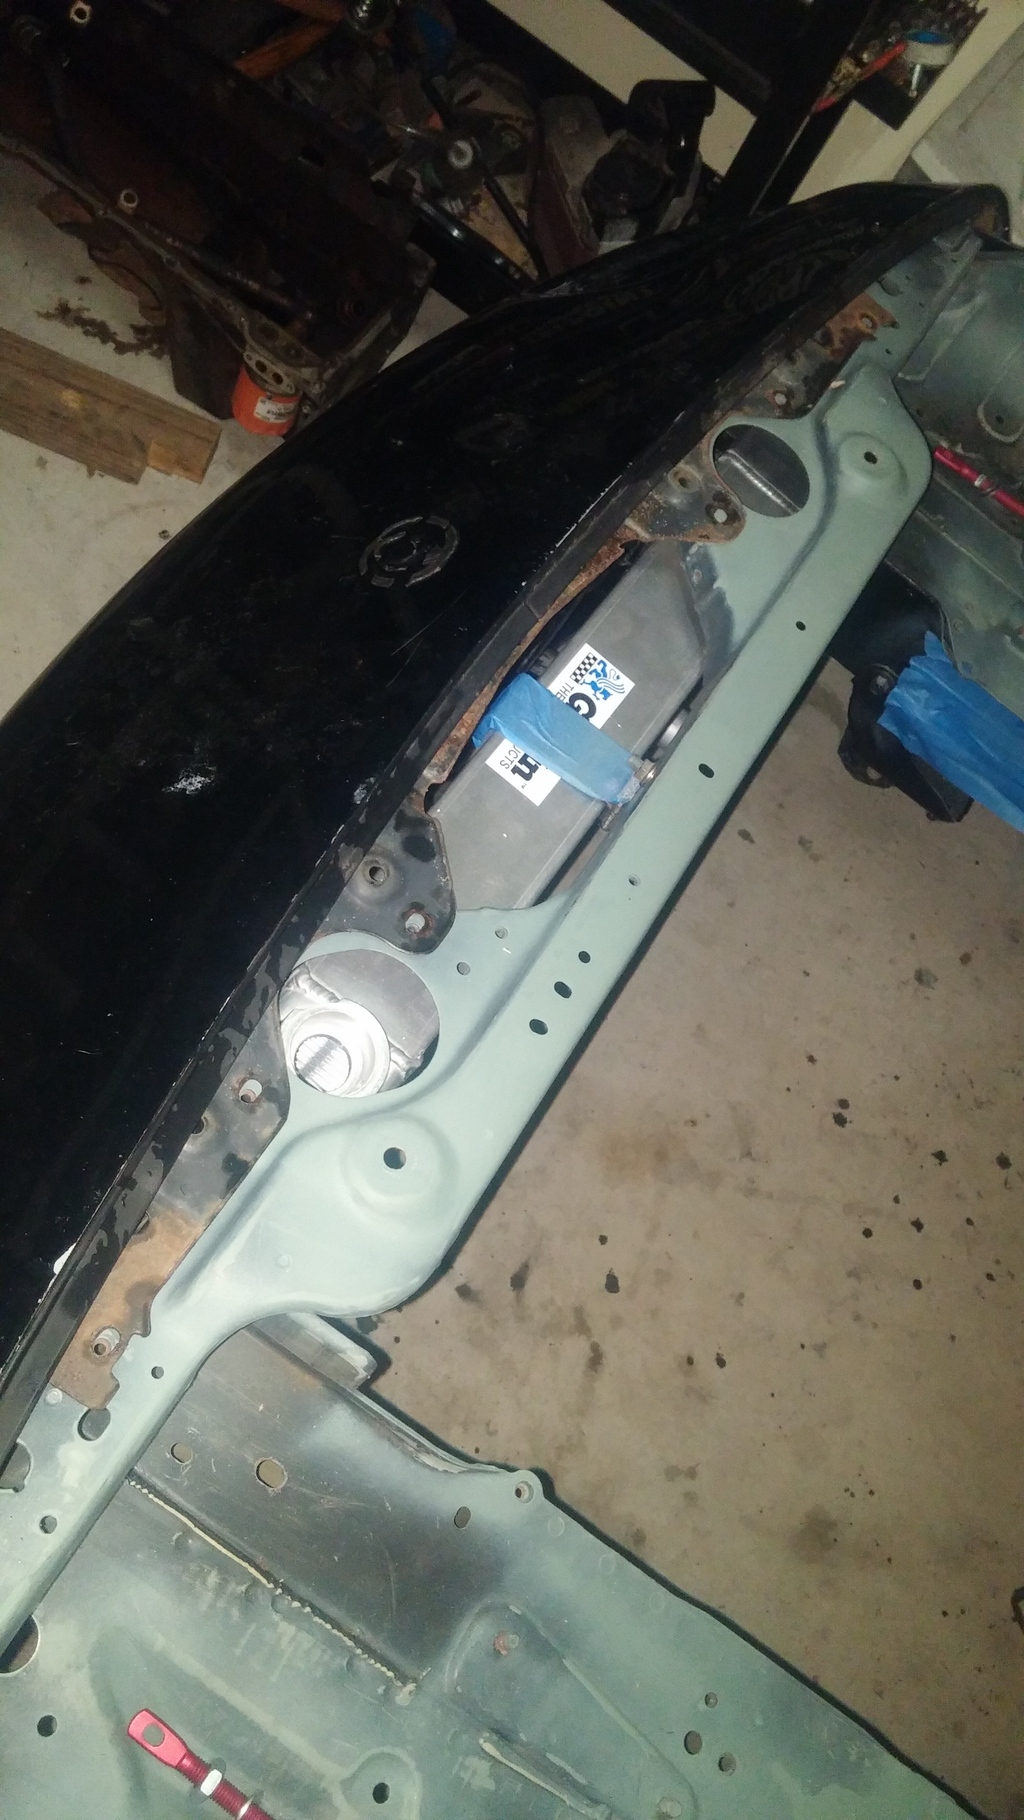
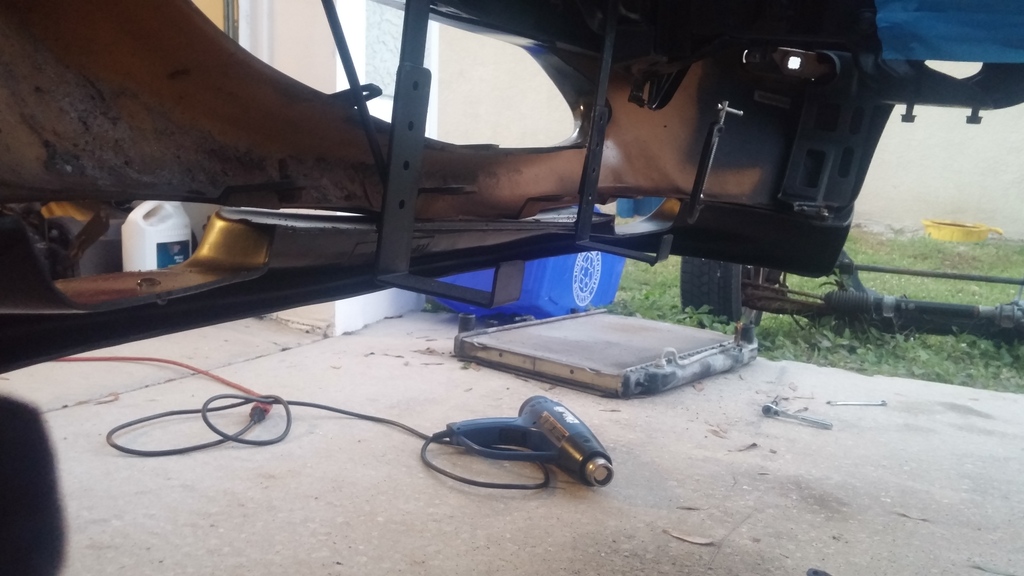
Clamped the lip to the bumper to make sure its in the right shape for the most part. Also, slid the radiator in to see how it's going to fit with it all. Looks more like an intercooler than a radiator. lol
02-13-2016, 05:37 AM
#191
V8 Miata Prot�g�
Thread Starter
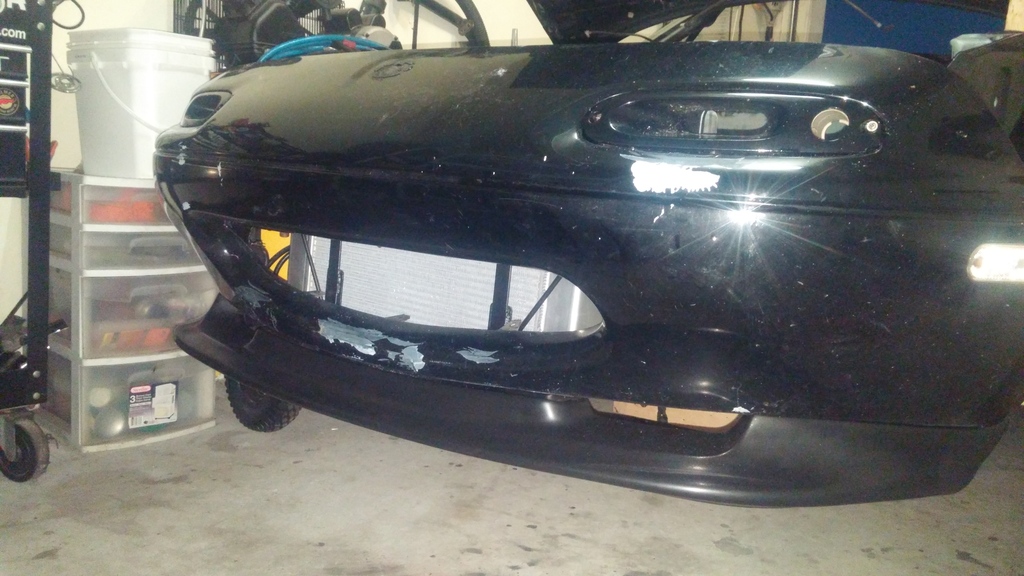
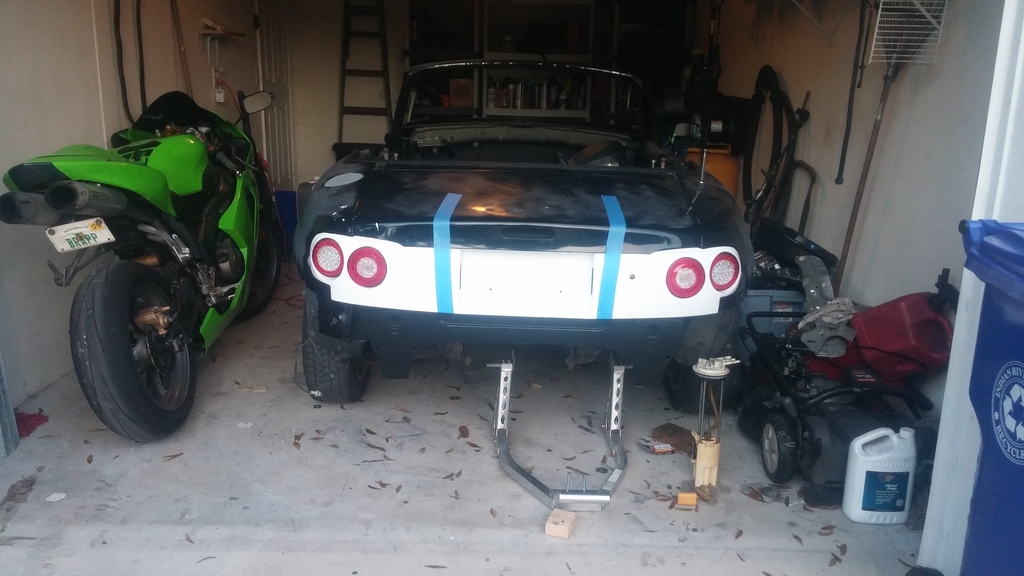
Well made a serious decision yesterday.. Sold the bike to give the Miata a step (or few) in the right direction. Also got my taillights in. Just need to pick up a new front bumper then it will be ready for paint.
02-27-2016, 08:41 AM
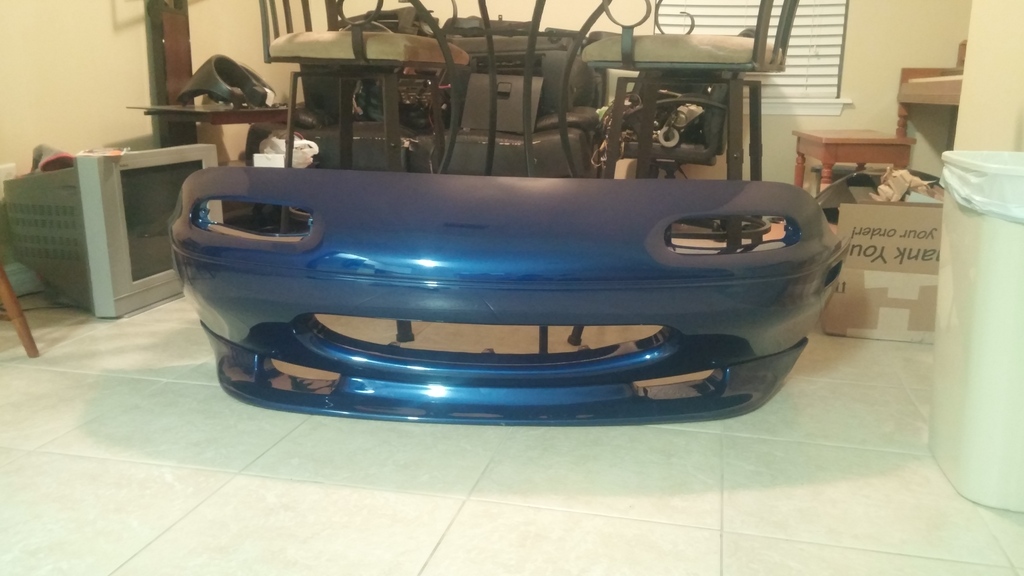
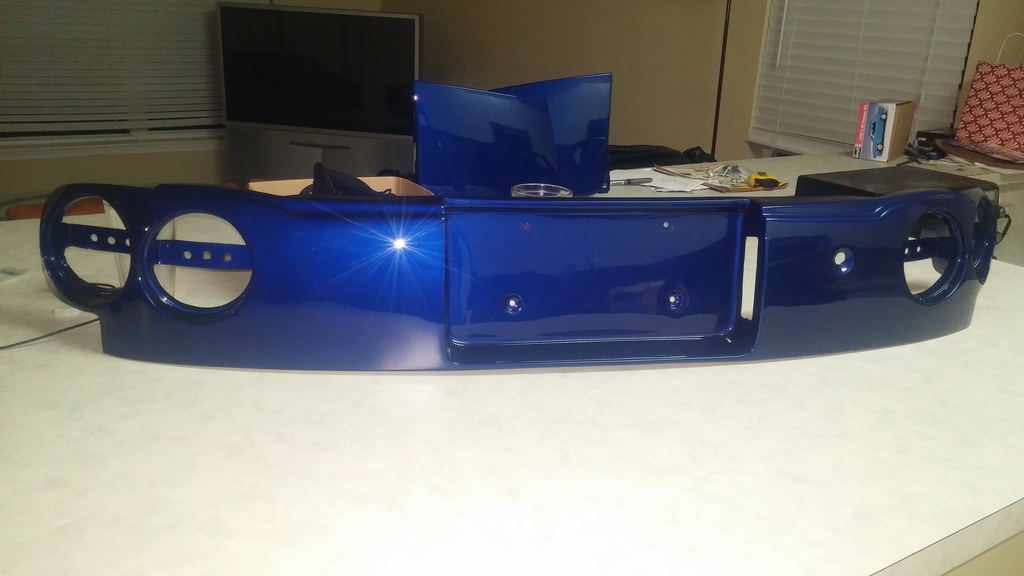
#193
V8 Miata Prot�g�
Thread Starter
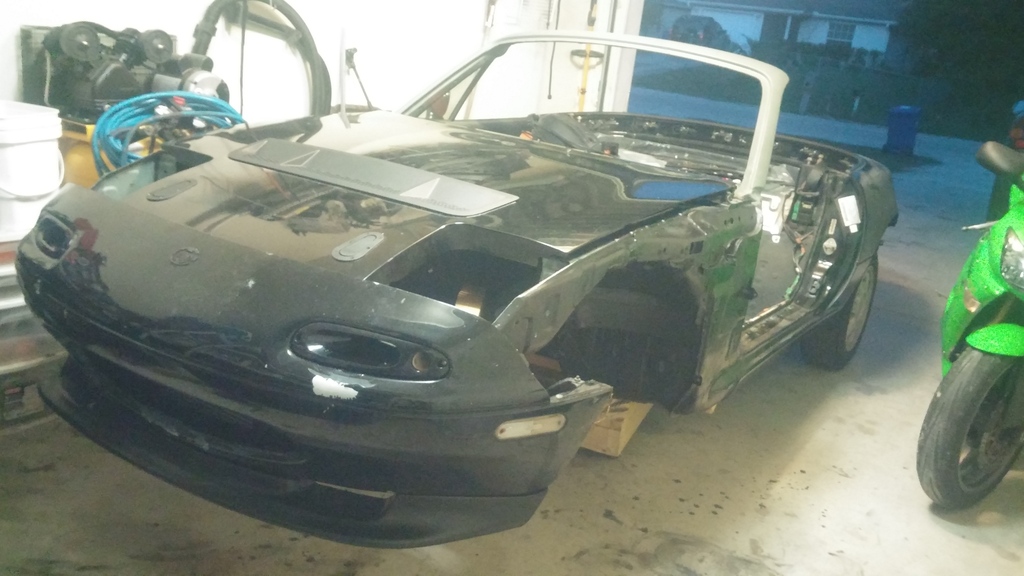
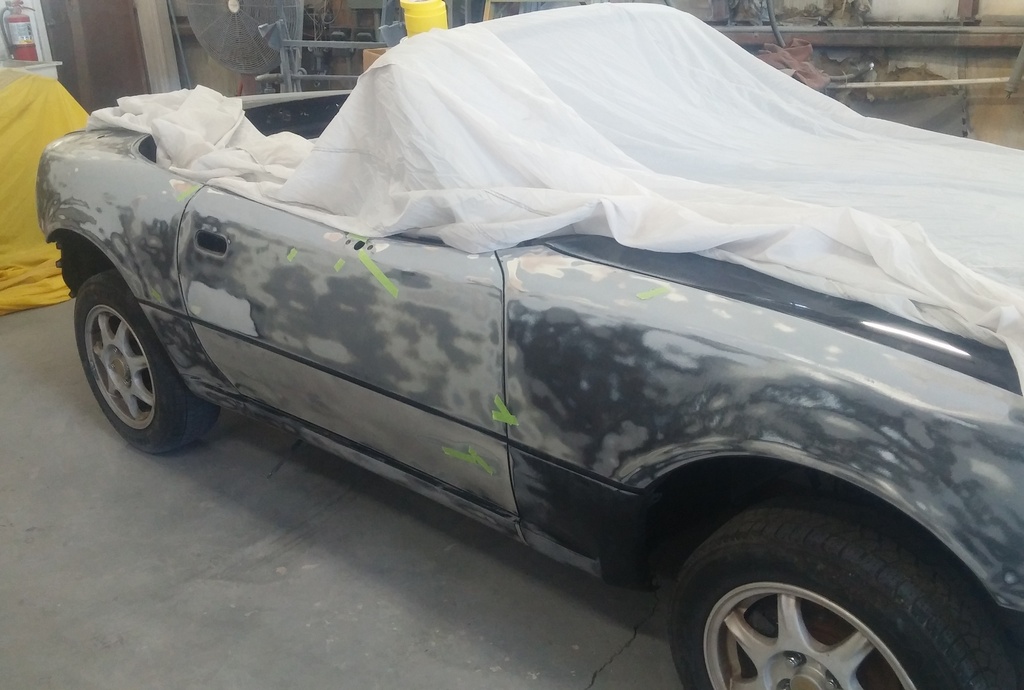
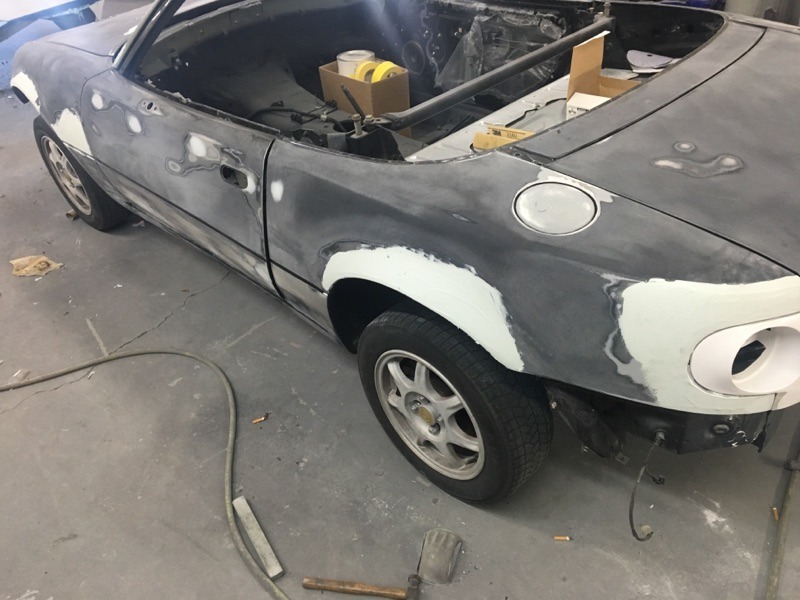
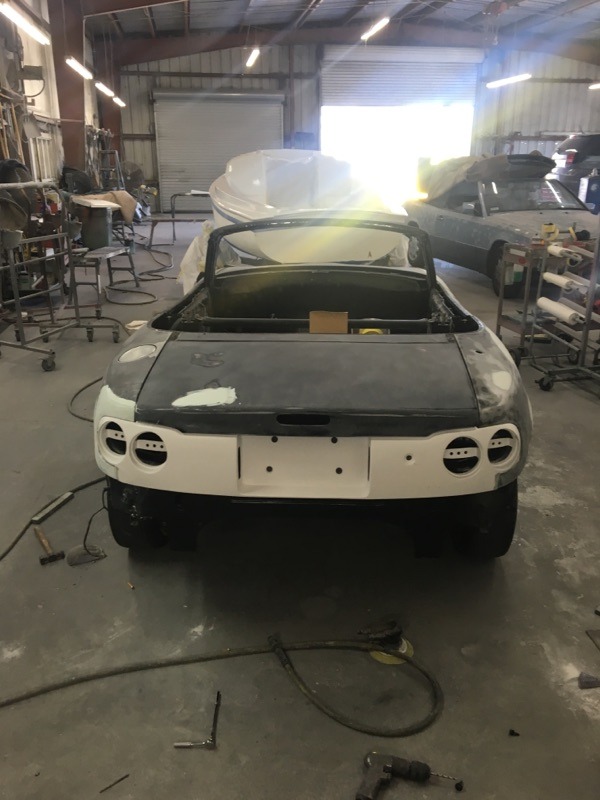
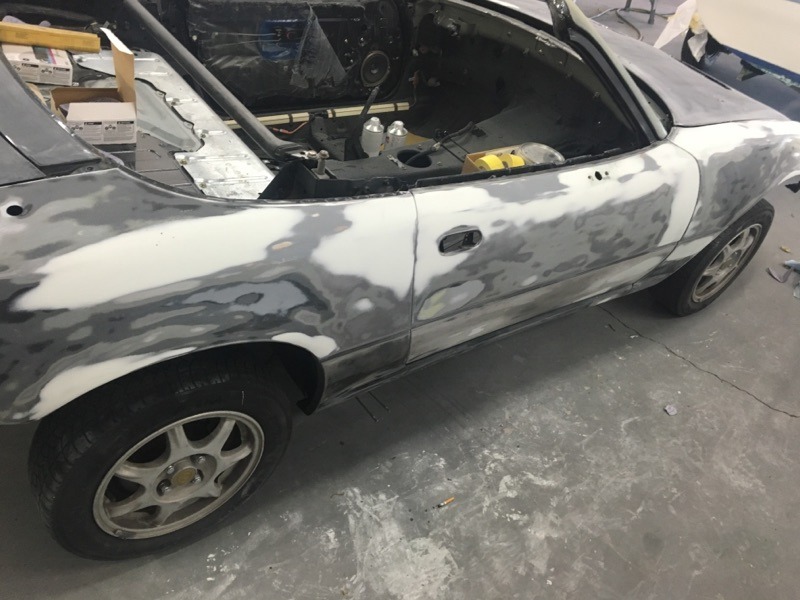
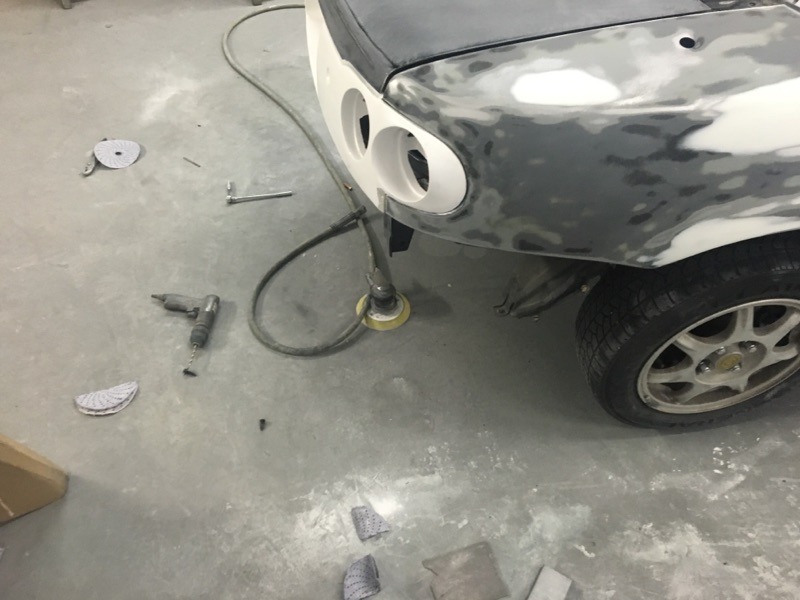
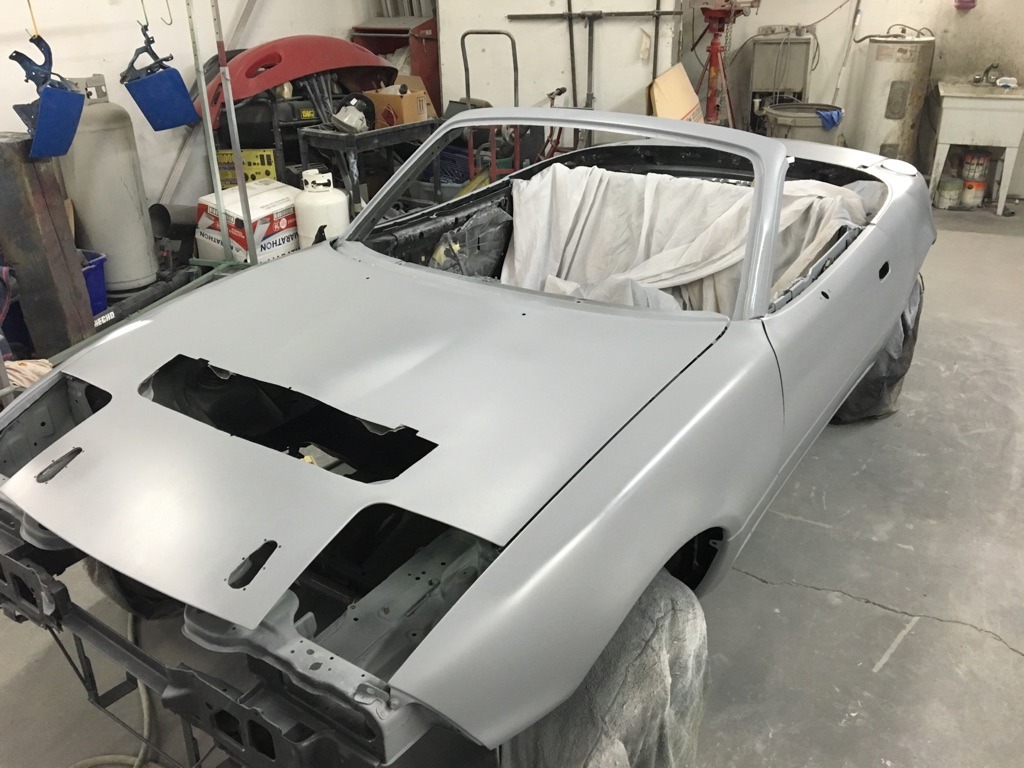
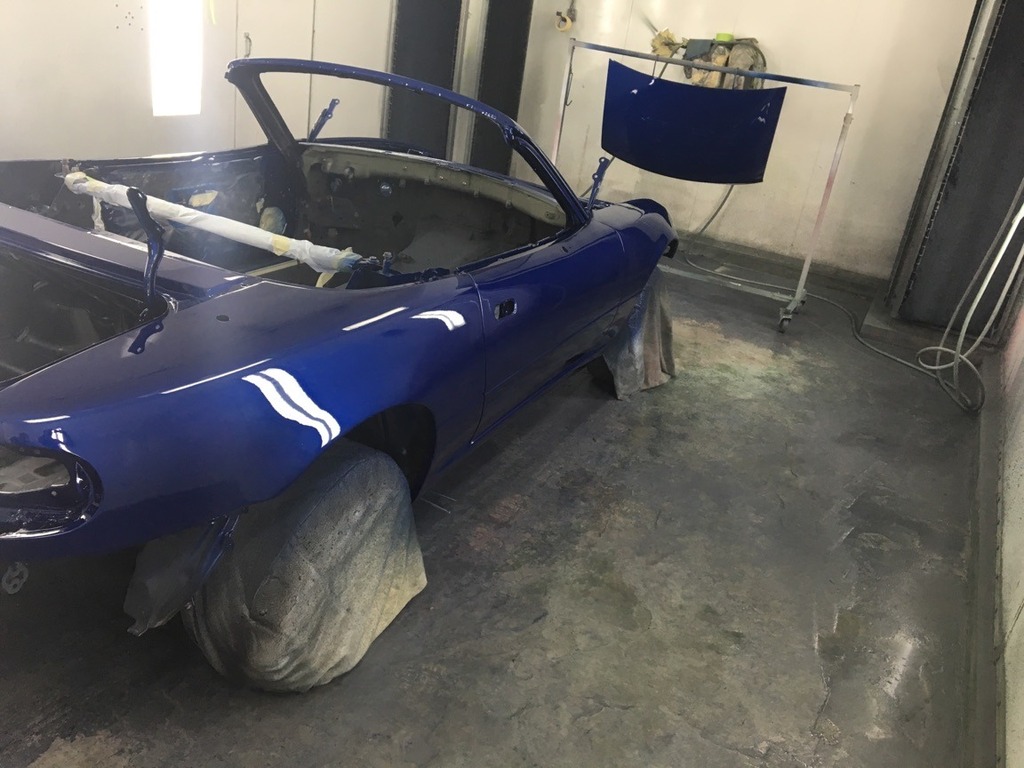
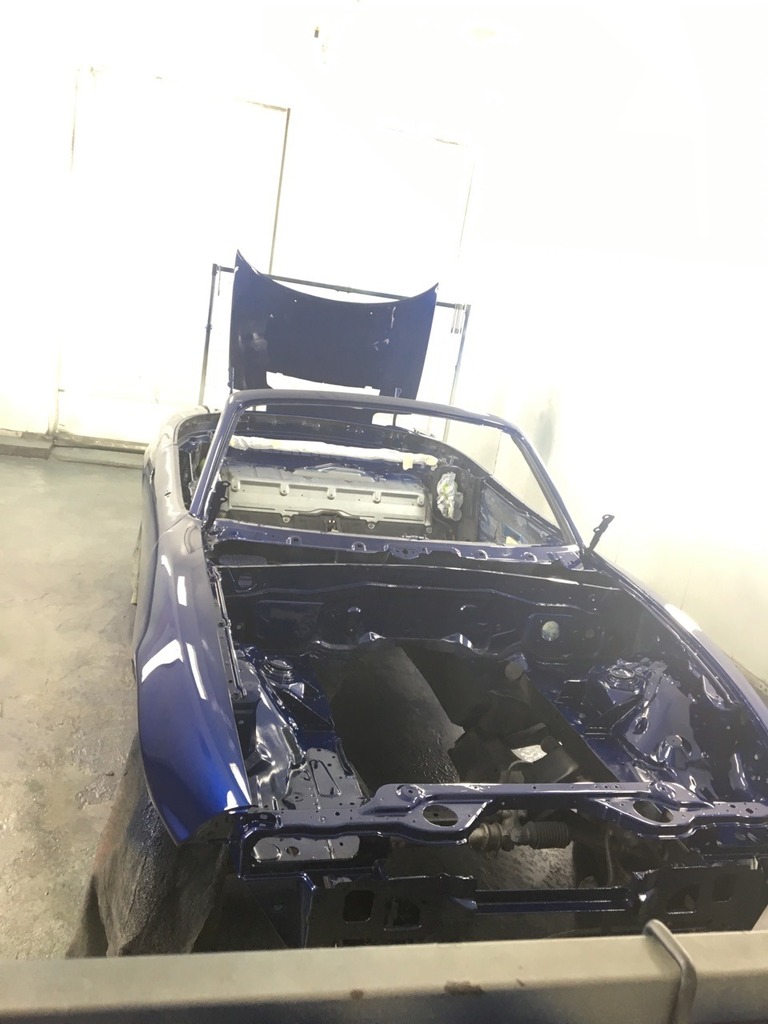
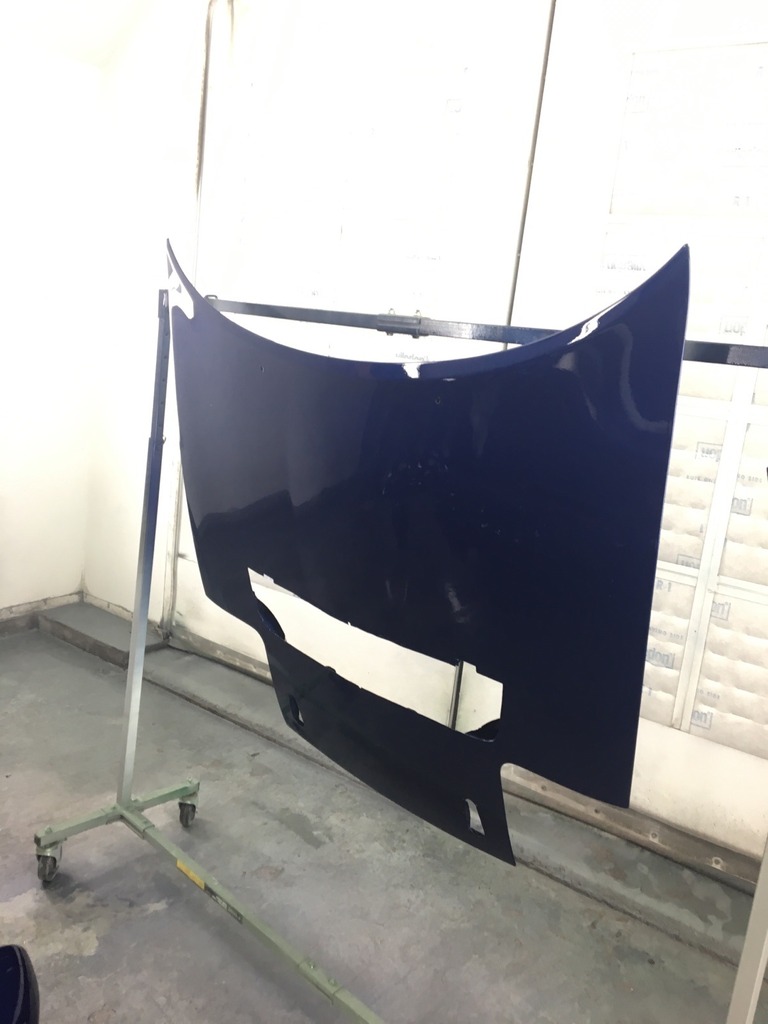
Went and picked up some headlight assemblies, a new front bumper, some trim pieces, and a 1.6 dash. Then dropped off the car at paint.
This is the only picture he's sent me so far, but it was last week. I'm anxious to see more progress. And I will say having an empty garage after over a year is pretty weird.
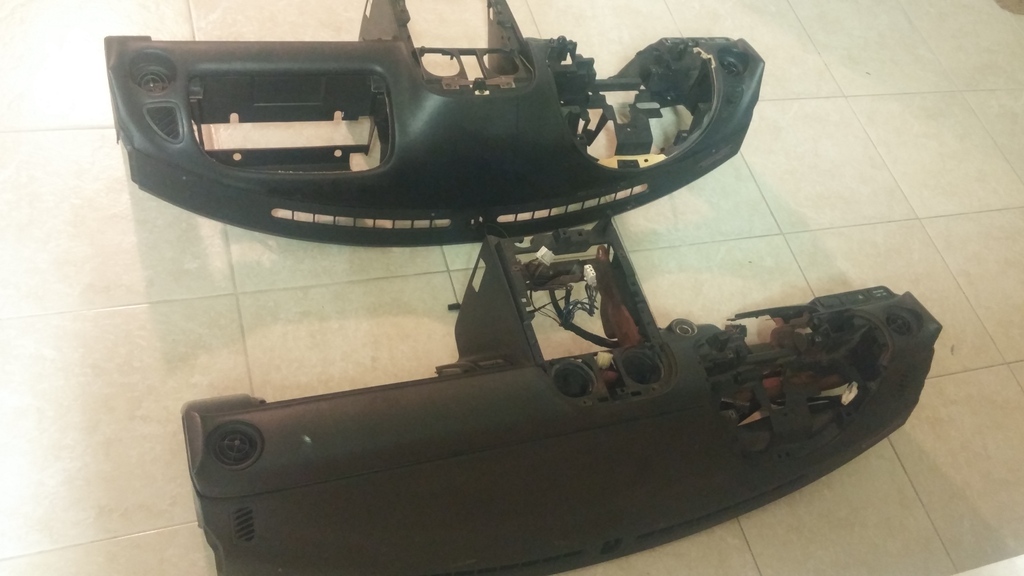
while the car is at paint I decided to swap over the dash stuff. Since I already modded the harness in my 1.8 dash to work with the NB cluster and the harness is pretty tricky to remove from the bar without breaking all the clips I decided to swap the bar and harness. well it fits just fine and such but the bar is slightly in the way of the 1.6 glove box. I'll have to modify it some to get it to fit, but no big deal. I'll also swap over the vin plate. The rivets aren't anything special, just black so I'll just use normal rivets and use something to color them black.
This is the only picture he's sent me so far, but it was last week. I'm anxious to see more progress. And I will say having an empty garage after over a year is pretty weird.
while the car is at paint I decided to swap over the dash stuff. Since I already modded the harness in my 1.8 dash to work with the NB cluster and the harness is pretty tricky to remove from the bar without breaking all the clips I decided to swap the bar and harness. well it fits just fine and such but the bar is slightly in the way of the 1.6 glove box. I'll have to modify it some to get it to fit, but no big deal. I'll also swap over the vin plate. The rivets aren't anything special, just black so I'll just use normal rivets and use something to color them black.
02-29-2016, 06:56 PM
#194
V8 Miata Fanatic
I, too, love the NA dash swap & did the same for my '94 several years before the V8 swap. ...Funny thing was that I did the swap between 2 complete cars and realized the VIN tags did not get changed out before completely bolting the first dash back in. Really wasn't too funny when I had to pull said dash back out to fix my mistake! I'm an expert at dash removal ever since.
 03-06-2016, 08:40 PM
#196
V8 Miata Prot�g�
Thread Starter
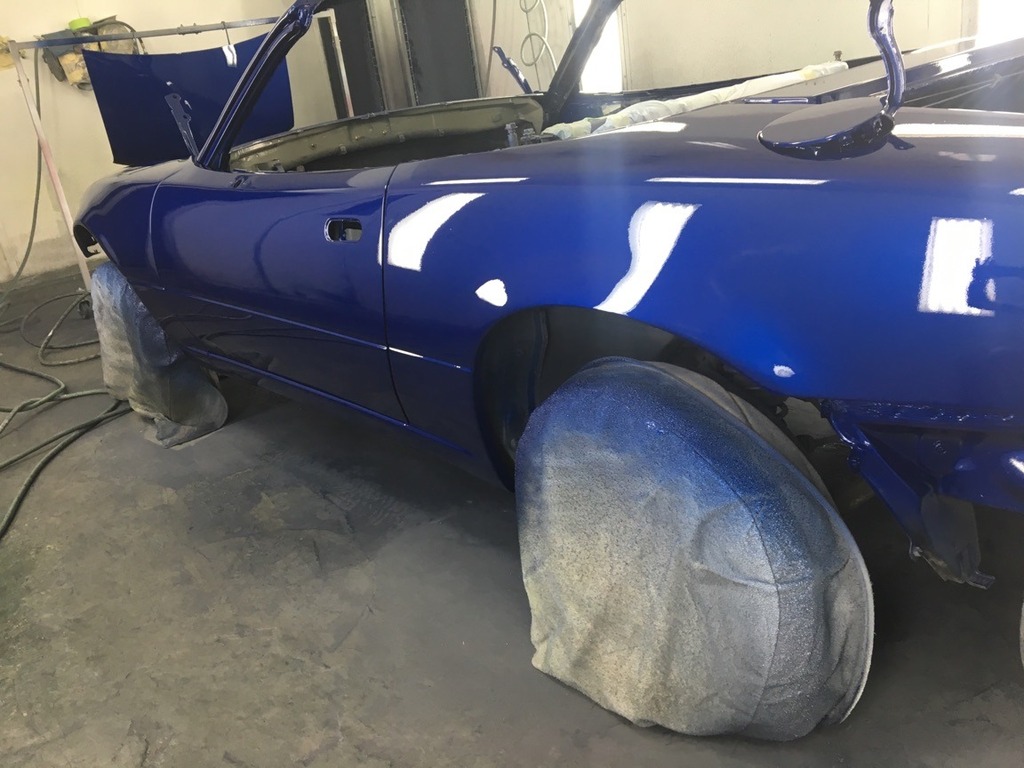
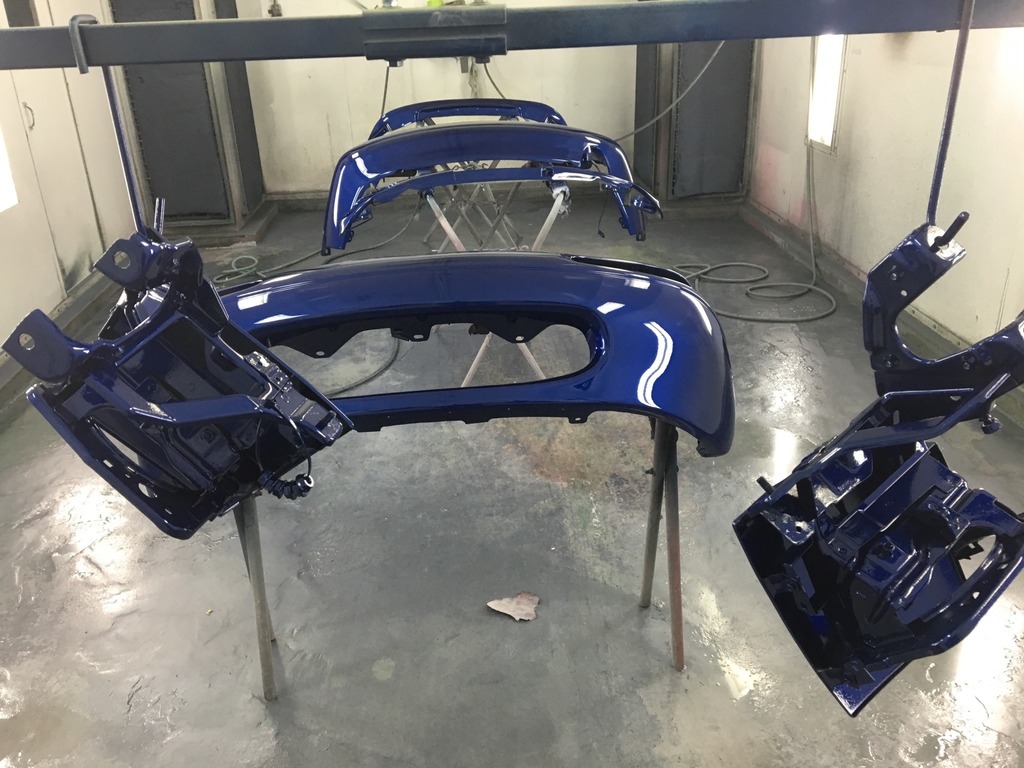
got some more pictures from the painter.
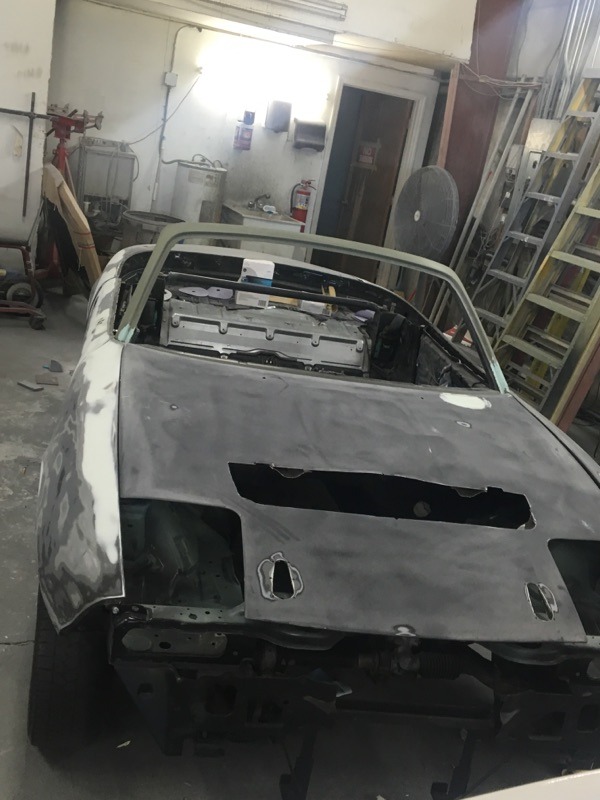
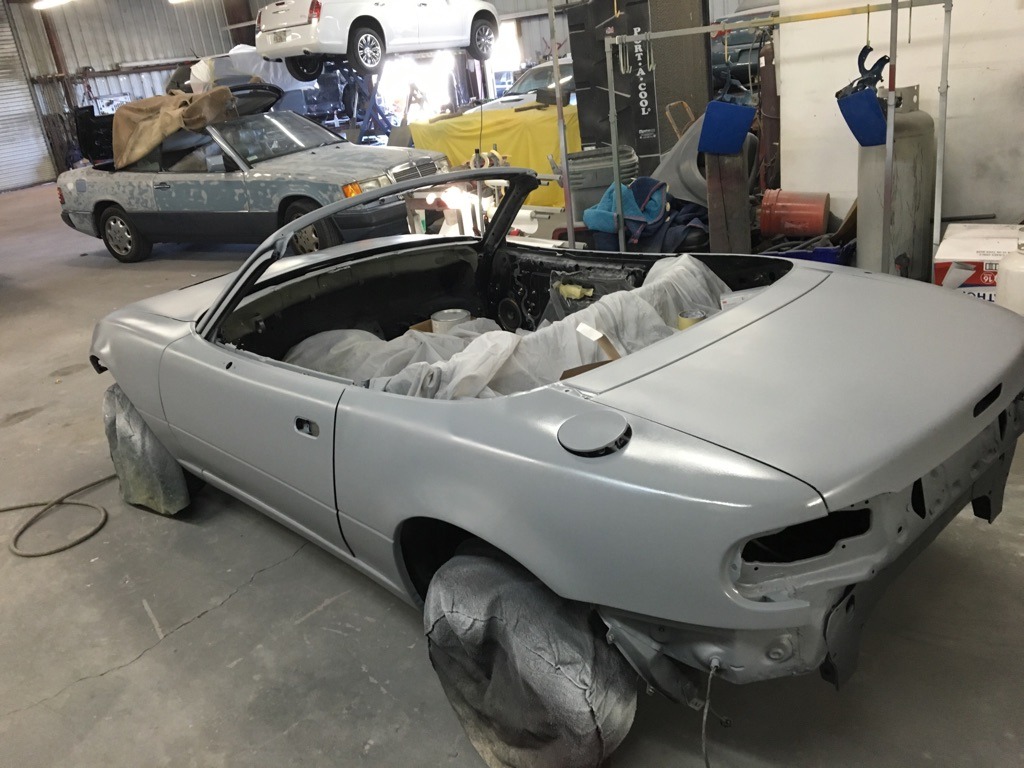
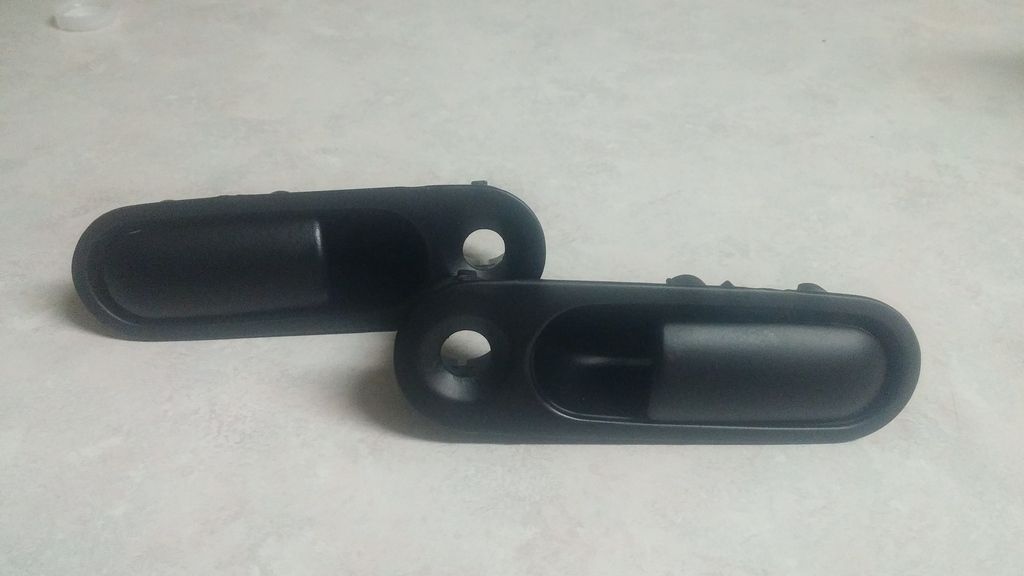
Also got a bunch of stuff sandblasted. Timing cover & valley pan will be wrinkle black to match the holley valve covers, door handles and the 2 little chrome pieces right in front of the deck lid will be satin black.

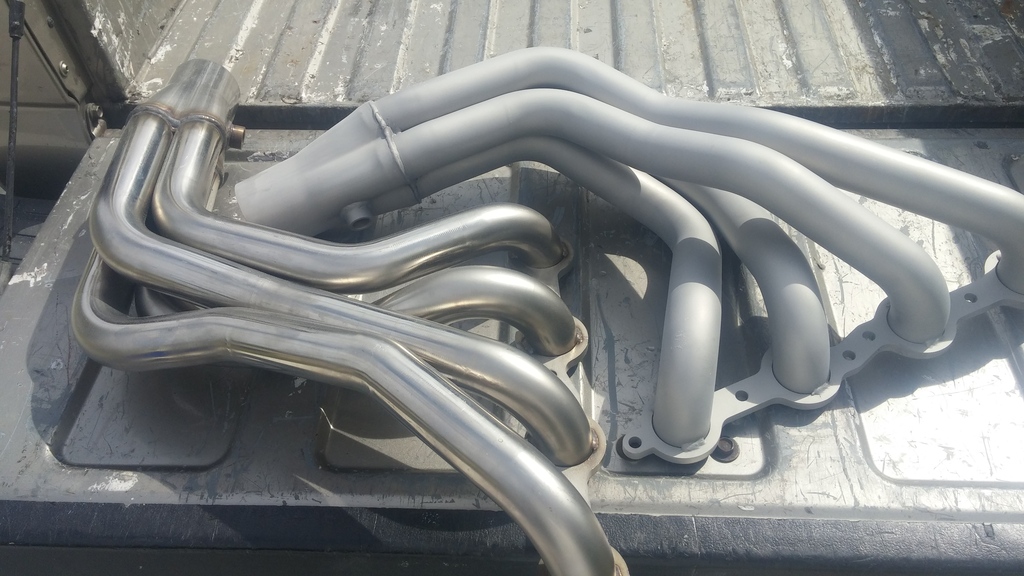
Sandblasted my longtubes too. I ordered Cerakote glacier silver which is supposed to insulate up to 2000*. Best part is that it's an air dry product, no baking required.
Also got a bunch of stuff sandblasted. Timing cover & valley pan will be wrinkle black to match the holley valve covers, door handles and the 2 little chrome pieces right in front of the deck lid will be satin black.
Sandblasted my longtubes too. I ordered Cerakote glacier silver which is supposed to insulate up to 2000*. Best part is that it's an air dry product, no baking required.
 03-17-2016, 09:45 PM
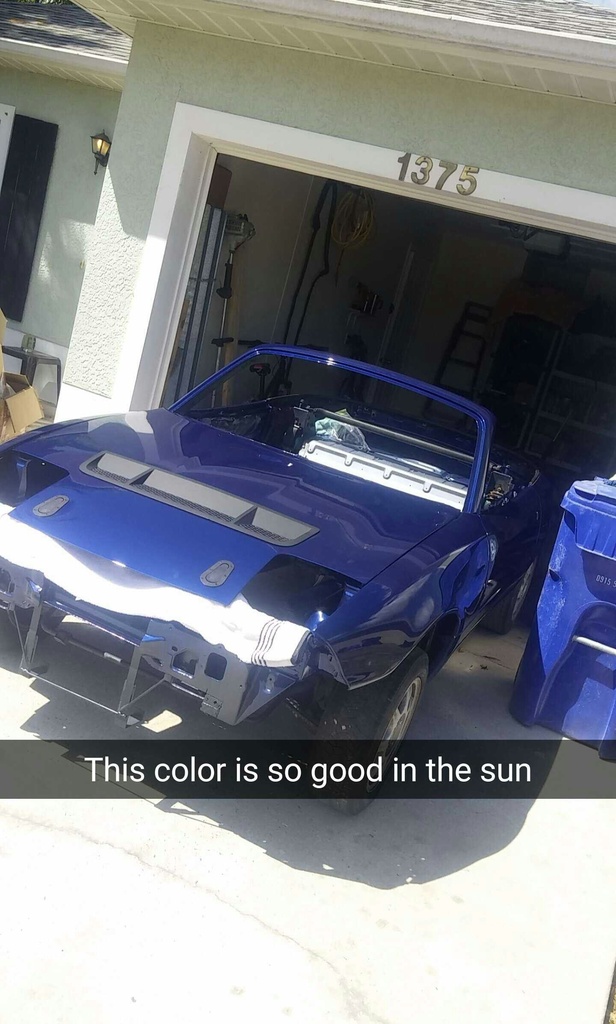
#199
V8 Miata Prot�g�
Thread Starter
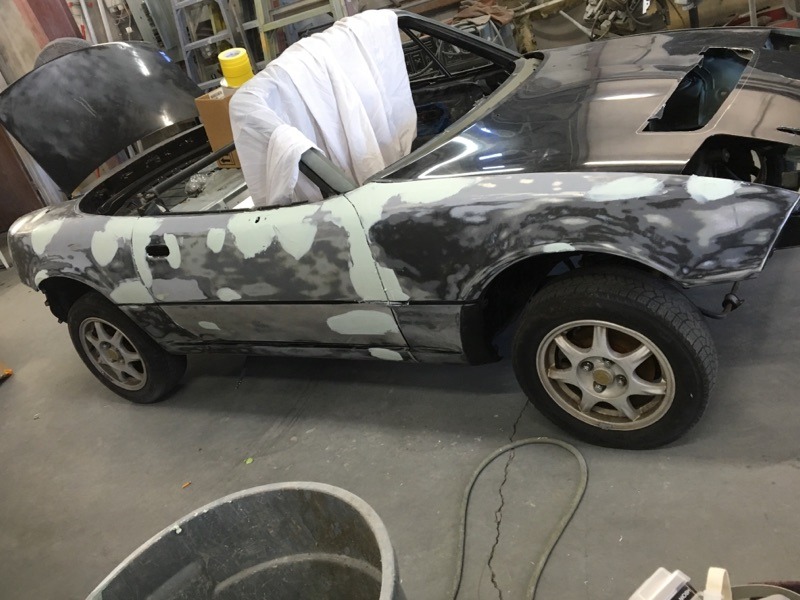
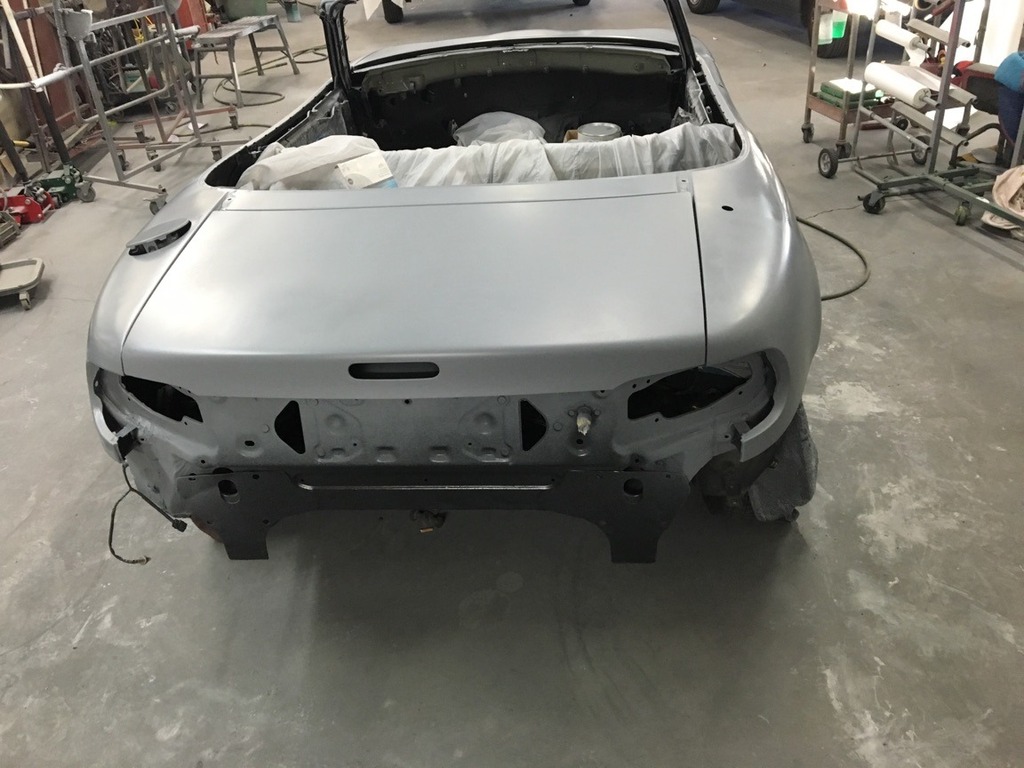
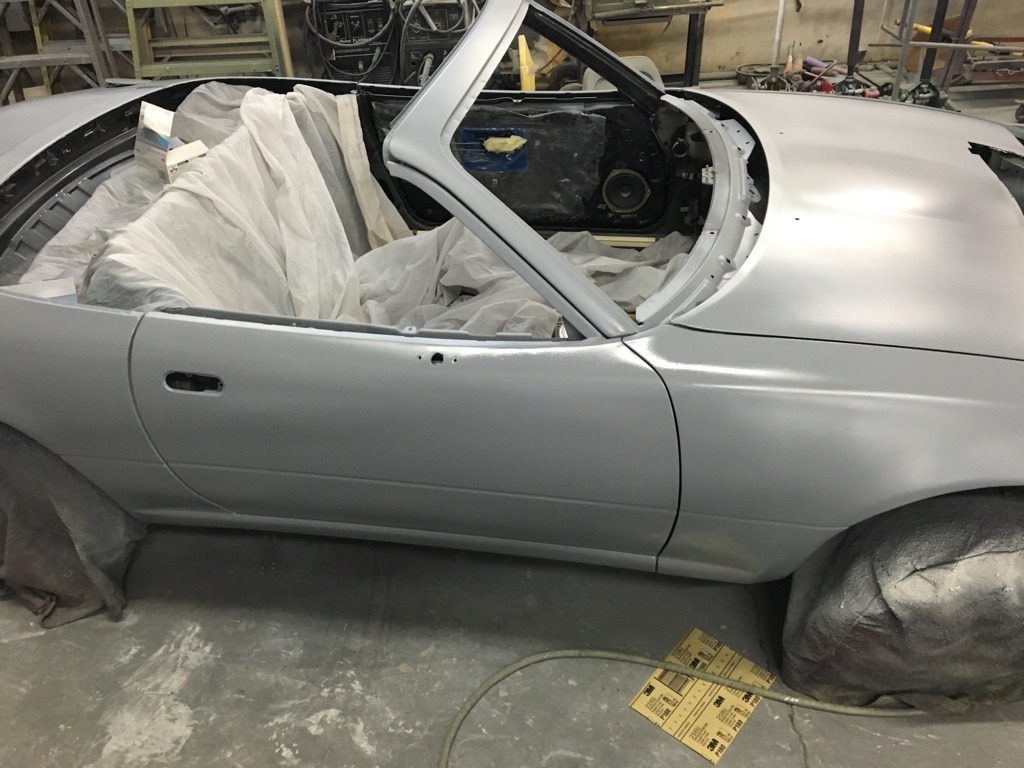
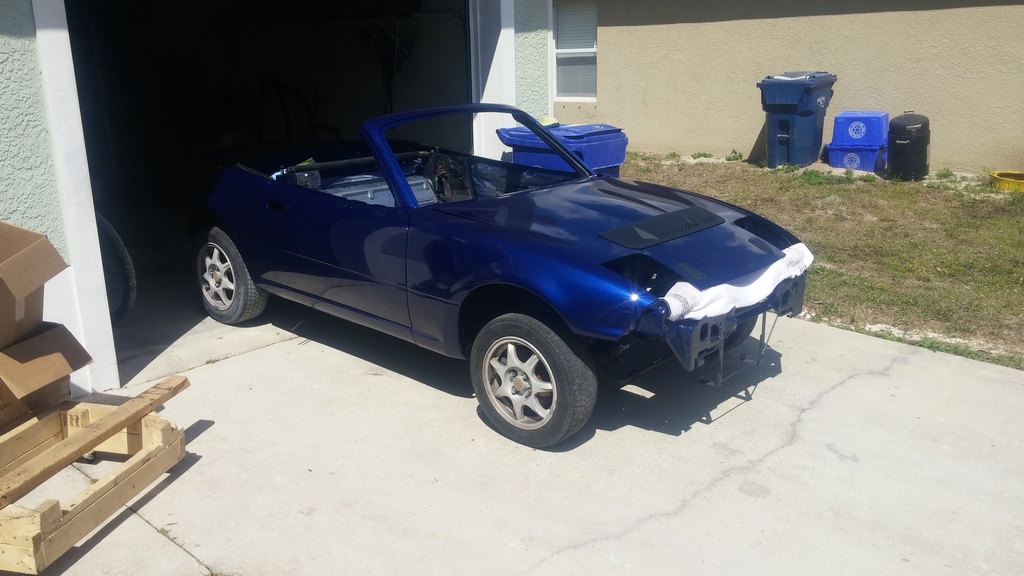
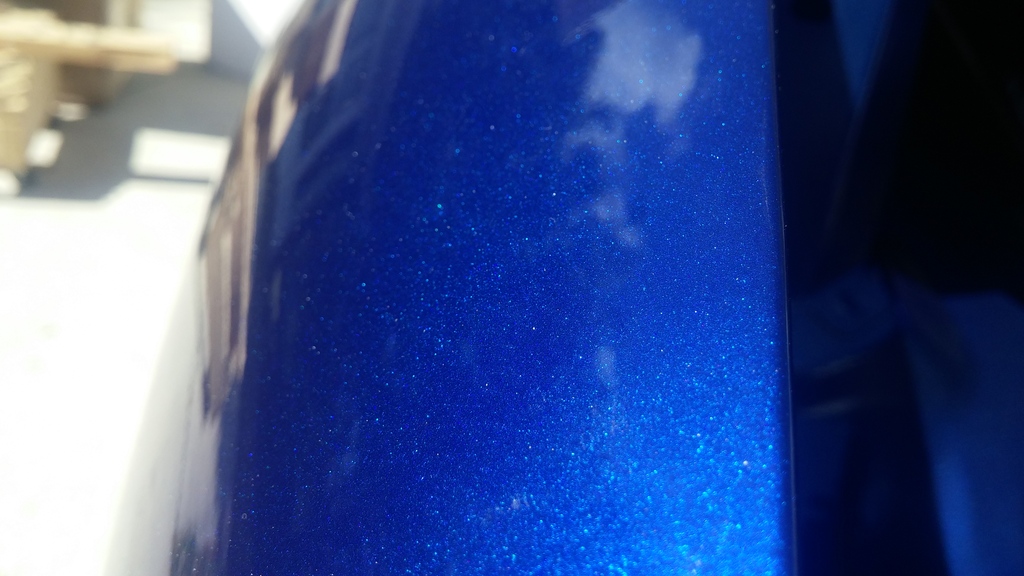
well folks, here it is. I'm officially in love with the color.
Also, finally cerakoted my headers. We will see how it holds up. I'm personally kind of skeptical but it has rave reviews.
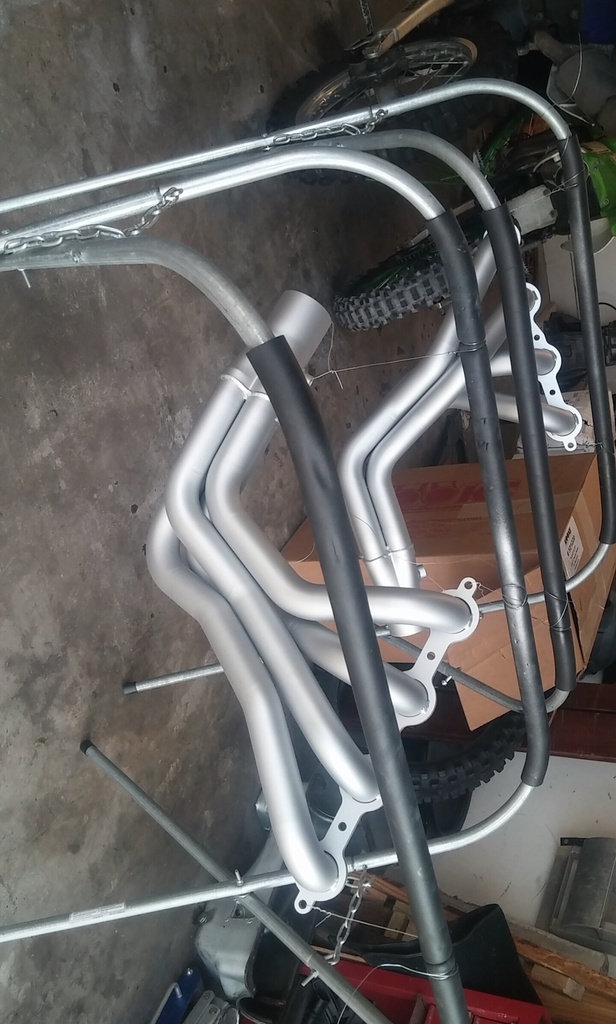
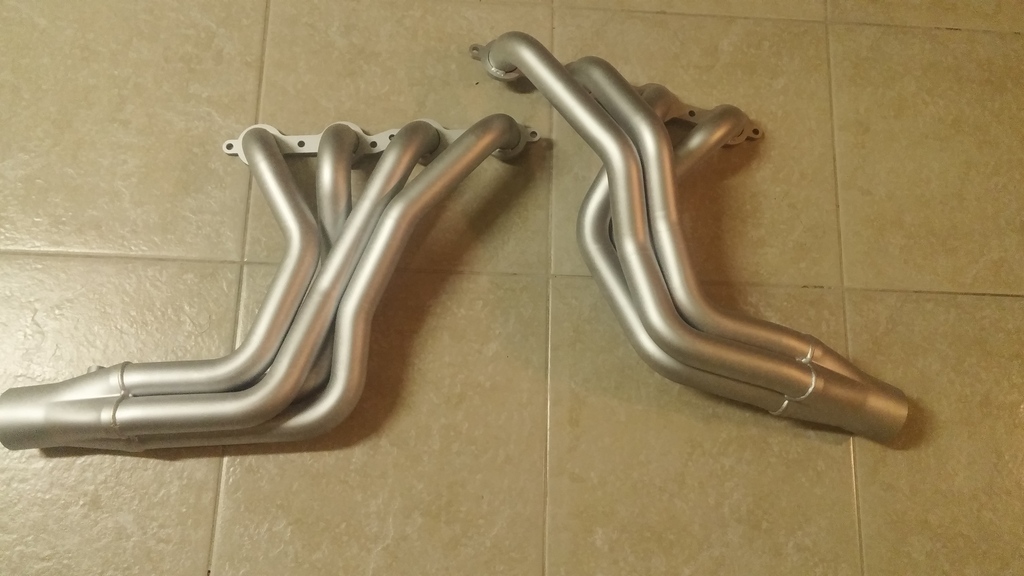
Also, finally cerakoted my headers. We will see how it holds up. I'm personally kind of skeptical but it has rave reviews.
The following users liked this post:
Underdog (03-25-2016)


