
Canadian Monster Miata SN95 Build


Thread Starter
V8 Miata Fan
Joined: Sep 2015
Posts: 25
Likes: 2
From: Victoria BC Canada
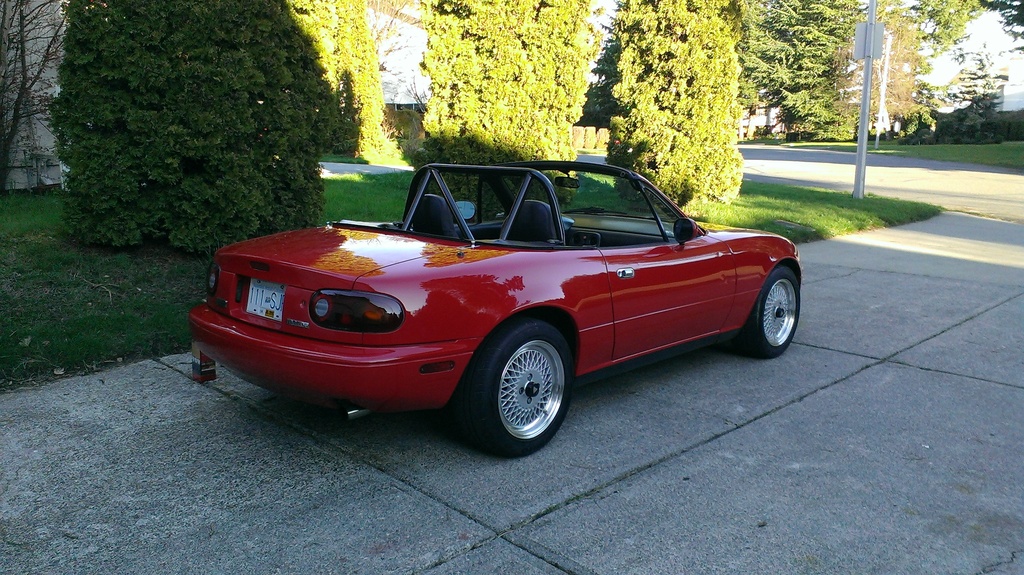
Hi guys I've been a long time reader of this forum but now I think its time for me to start a build thread of my own. The car is a 1990 with 185,000km, I have done some light mods to the car but the drive train is stock.
A few weeks back I found some FFR axles and an 8.8 thunderbird diff with limited slip and 3.27 gears on craigslist which I picked up to start the project rolling.

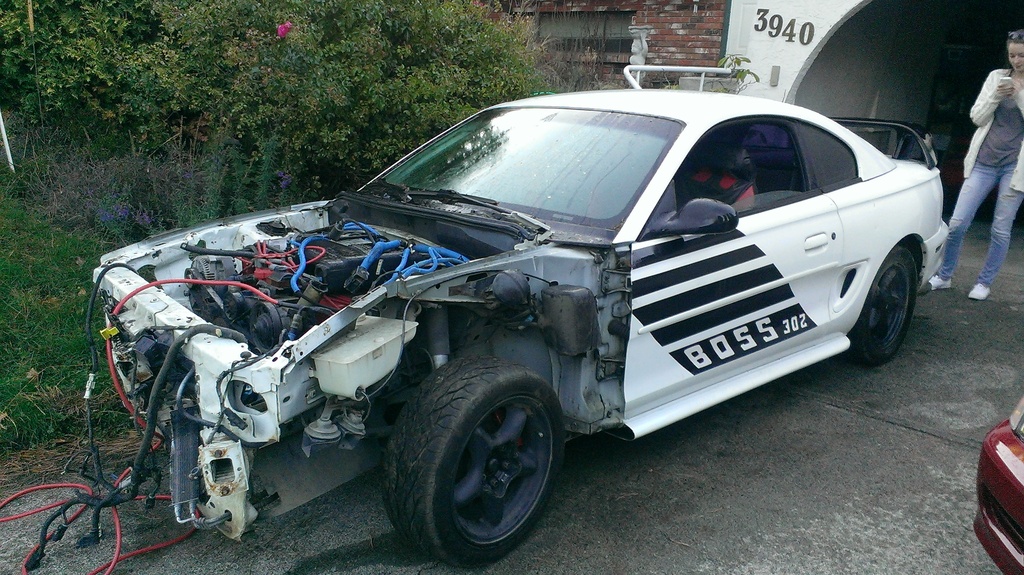
Today I picked up a wrecked SN95 with a T5 from a local scrap car guy. The engine and trans were apparently built for boost. I'm hoping to part out some of the car to make some money back but we will see what I can get rid of.
I'm a fairly capable fabricator and work part time in a machine shop while attending university for mechanical engineering, over the next couple months there will likely be very few updates due to my busy schedule but I hope to dive into this project fully in January 2016.
I'll be using martins hubs and thinking about using his subframe, oil pan and headers to save me a bunch of time and effort. The 8.8 I will mount myself similar to some methods I've found online. If anybody has any tips / comments / suggestions about the build or the SN95 working with the martin subframe etc it would be greatly appreciated.
Thanks a lot guys I'm looking forward to getting to know the community!!

A few weeks back I found some FFR axles and an 8.8 thunderbird diff with limited slip and 3.27 gears on craigslist which I picked up to start the project rolling.

Today I picked up a wrecked SN95 with a T5 from a local scrap car guy. The engine and trans were apparently built for boost. I'm hoping to part out some of the car to make some money back but we will see what I can get rid of.

I'm a fairly capable fabricator and work part time in a machine shop while attending university for mechanical engineering, over the next couple months there will likely be very few updates due to my busy schedule but I hope to dive into this project fully in January 2016.
I'll be using martins hubs and thinking about using his subframe, oil pan and headers to save me a bunch of time and effort. The 8.8 I will mount myself similar to some methods I've found online. If anybody has any tips / comments / suggestions about the build or the SN95 working with the martin subframe etc it would be greatly appreciated.
Thanks a lot guys I'm looking forward to getting to know the community!!
Last edited by MilesLA; Dec 23, 2015 at 12:48 PM.


Thread Starter
V8 Miata Fan
Joined: Sep 2015
Posts: 25
Likes: 2
From: Victoria BC Canada
Quick update for the build since I haven't added anything since late September.
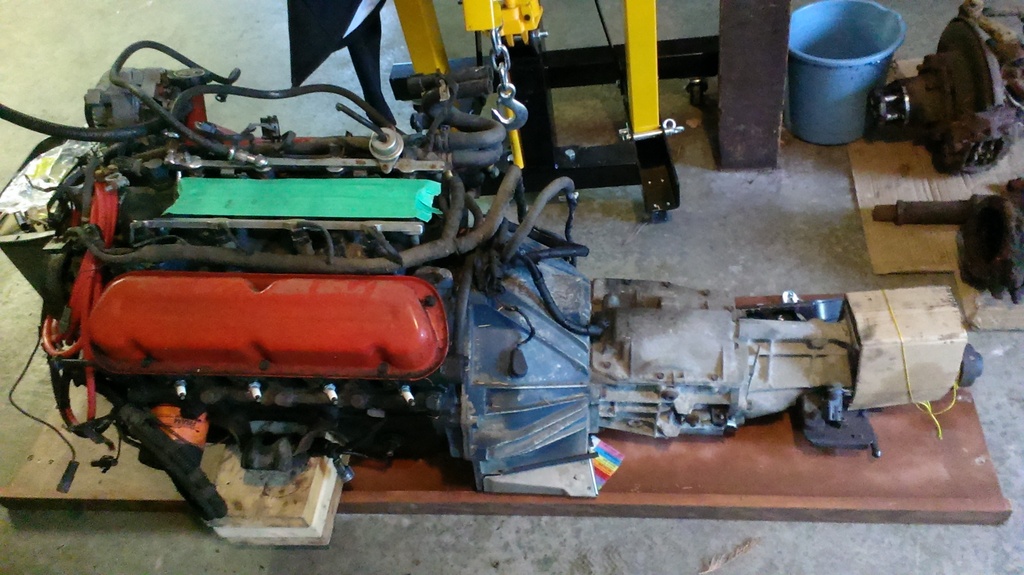
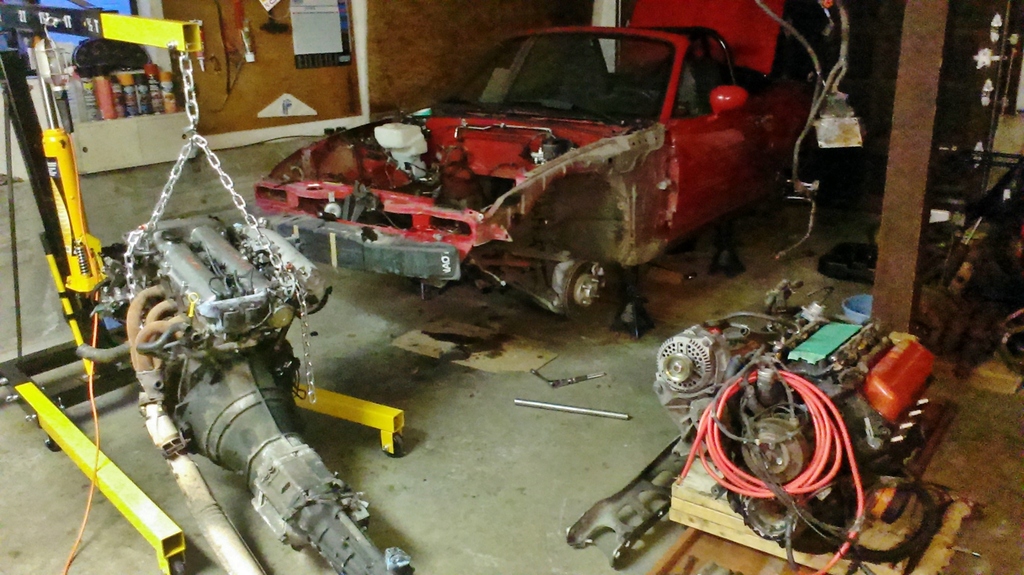
I harvested the engine and transmission from the parts mustang and sold the body to someone who wanted it for the rear end and front spindles. Spent a while talking to Martin and eventually placed the order for sub frame, hubs, oil pan, headers and engine mounts.
Since then I've advertised and sold my 1.6 engine, trans and diff. The car is basically just a shell right now waiting for the new parts. I have also ordered BC Racing coilovers with custom 670lb front, 450lb rear spring rates. Also recently picked up a set of fixed back racing seats.
The Martin parts arrived about three weeks ago and now that I'm finished school for the next four months I'll be diving into this project, starting with cutting out the engine bay corners and doing some transmission tunnel bashing.
I will also be converting the longer bellhousing'd SN95 T5 to work with the stock miata slave, if anybody has any tips on doing this (not sure how many people really go with that longer bellhousing) it would be appreciated. I've seen people use other master / slaves but I don't see why I wouldn't be able to work with the stock miata parts as long as I get the slave in the right place so it has a long enough throw.
I harvested the engine and transmission from the parts mustang and sold the body to someone who wanted it for the rear end and front spindles. Spent a while talking to Martin and eventually placed the order for sub frame, hubs, oil pan, headers and engine mounts.

Since then I've advertised and sold my 1.6 engine, trans and diff. The car is basically just a shell right now waiting for the new parts. I have also ordered BC Racing coilovers with custom 670lb front, 450lb rear spring rates. Also recently picked up a set of fixed back racing seats.

The Martin parts arrived about three weeks ago and now that I'm finished school for the next four months I'll be diving into this project, starting with cutting out the engine bay corners and doing some transmission tunnel bashing.
I will also be converting the longer bellhousing'd SN95 T5 to work with the stock miata slave, if anybody has any tips on doing this (not sure how many people really go with that longer bellhousing) it would be appreciated. I've seen people use other master / slaves but I don't see why I wouldn't be able to work with the stock miata parts as long as I get the slave in the right place so it has a long enough throw.
Last edited by MilesLA; Dec 23, 2015 at 12:51 PM.

V8 Miata Fanatic
Joined: Feb 2015
Posts: 559
Likes: 83
From: Marion Illinois
Looks like you've got a great start to the project, I don't know much about the ford conversions so I can't help you with the bellhousing issue. How far along are you with the ME degree?

V8 Miata Fanatic
Joined: Mar 2014
Posts: 636
Likes: 37
From: SW Ont.
Great start for sure.
You're going to be spending some time trying to make that larger bellhousing fit. I would try to find a used foxbody bell. Find Miata Mike's SN95 build for more details. I think all you need is the fox bell and an adaptor plate due to the longer input shaft.
Please post lots. It's going to be a boring winter for me with mine away till spring.
edited to add:
In the meantime if you come across a deal on a US model washer bottle, grab it- the larger Can. spec one will get in the way of the intake tract.

V8 Miata Fanatic

Joined: Oct 2012
Posts: 550
Likes: 34
From: Fuquay Varina, NC
Thread Starter
V8 Miata Fan
Joined: Sep 2015
Posts: 25
Likes: 2
From: Victoria BC Canada
stng_96
I just finished up third year actually, its a four year course here with a bunch of work experienxe periods between the school semesters, so over the next four months I'll just be working and building the V8!
MX-Brad, Thanks for the tip, I'll keep an eye out for both a US spec washer bottle and fox bell, I have seen Miata Mikes build where he swaped to the fox one but we'll see how much hammering I'm willing to do before I give up!
How far along are you with the ME degree?
MX-Brad, Thanks for the tip, I'll keep an eye out for both a US spec washer bottle and fox bell, I have seen Miata Mikes build where he swaped to the fox one but we'll see how much hammering I'm willing to do before I give up!
Thread Starter
V8 Miata Fan
Joined: Sep 2015
Posts: 25
Likes: 2
From: Victoria BC Canada
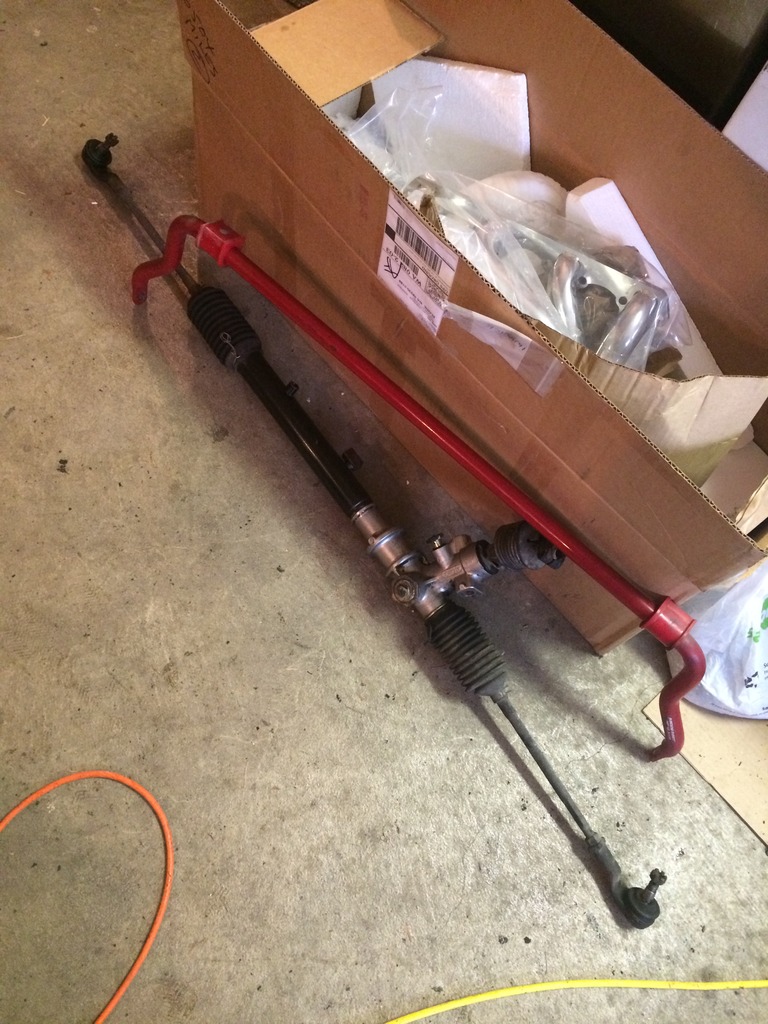
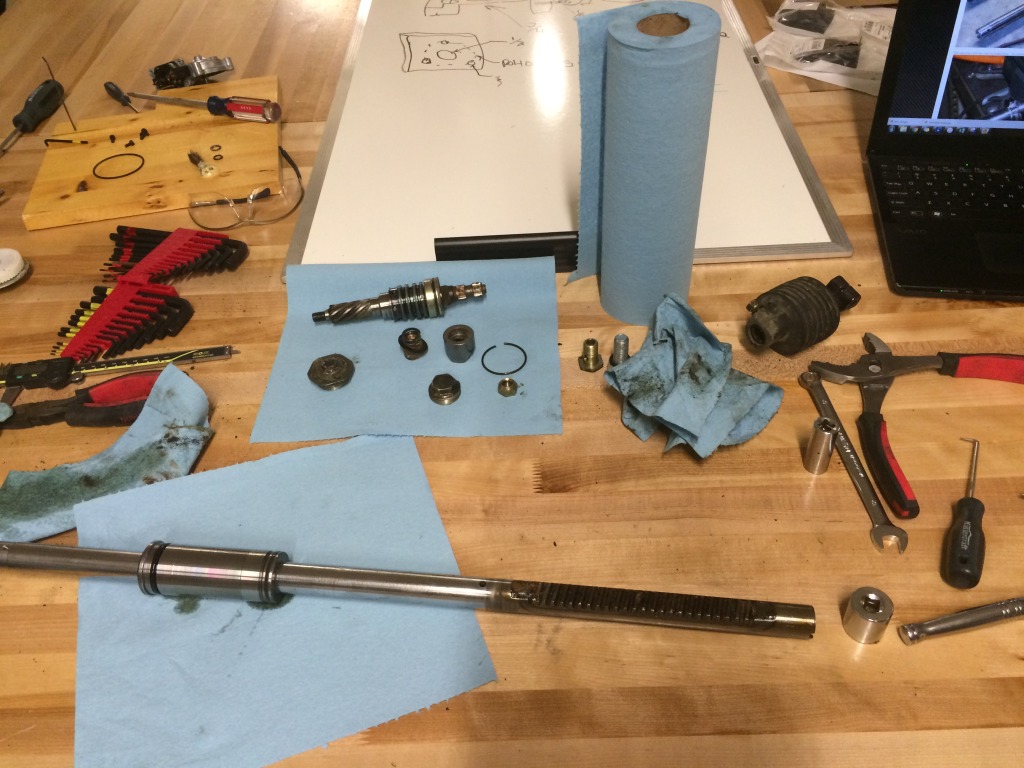
Got a fair amount of stuff done today. Started off with pulling the old power steering rack and proceeded to clean it up (it was very greasy). I will be depowering the rack for this build, so I removed all of the old lines from it for now.
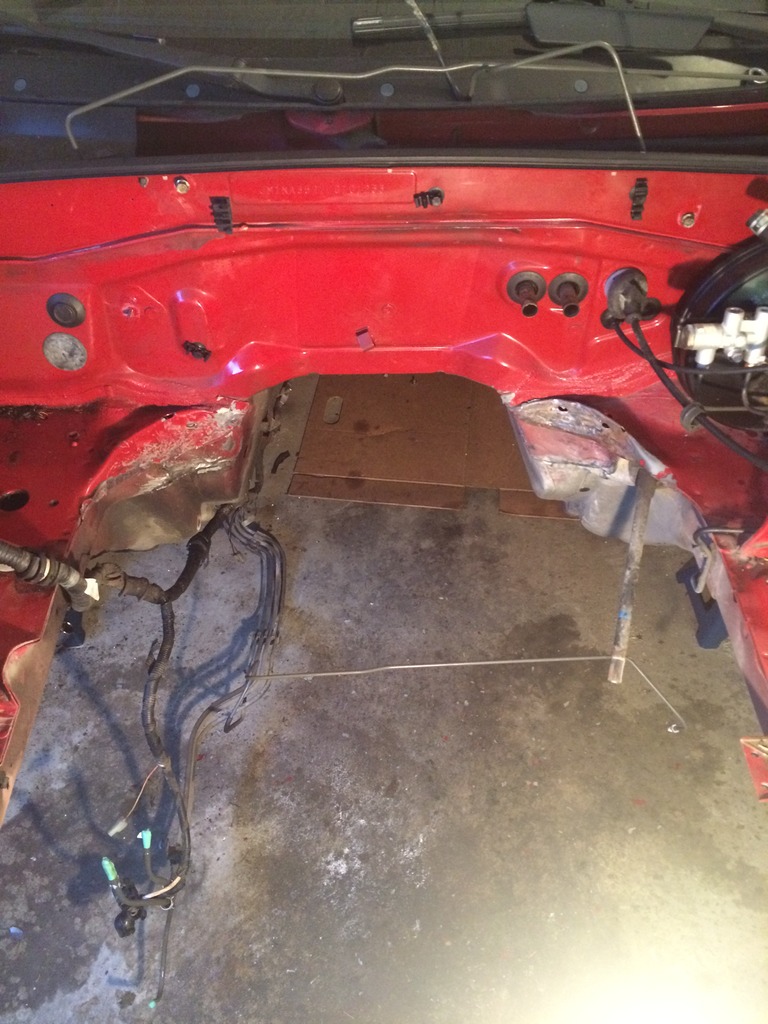
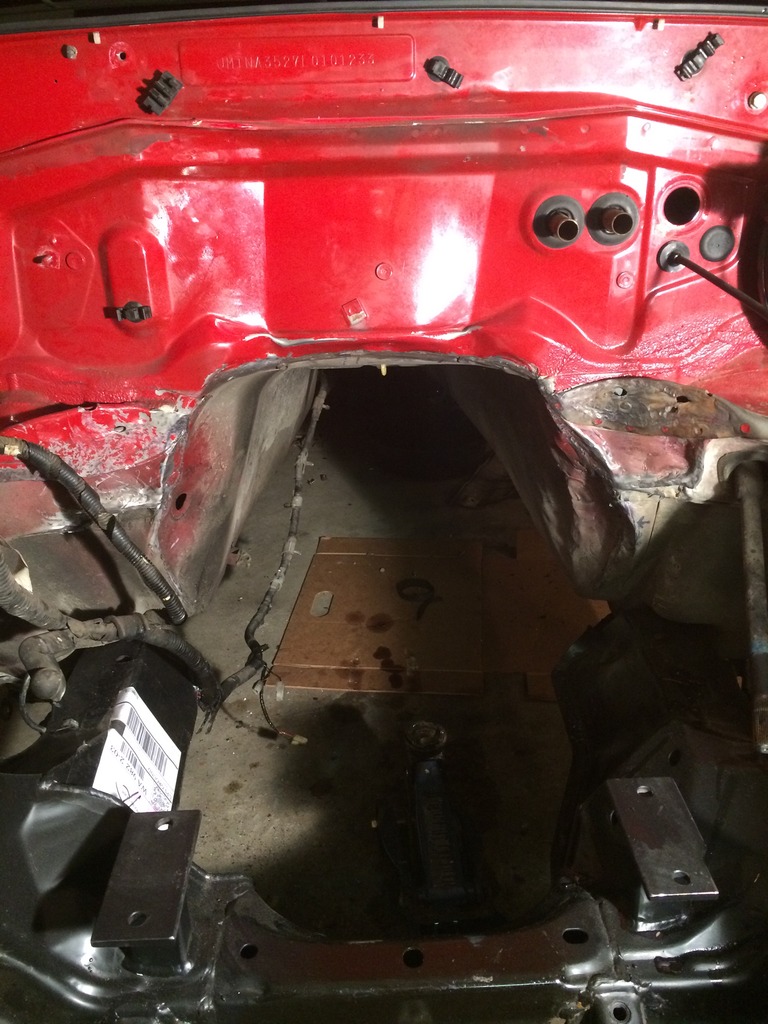
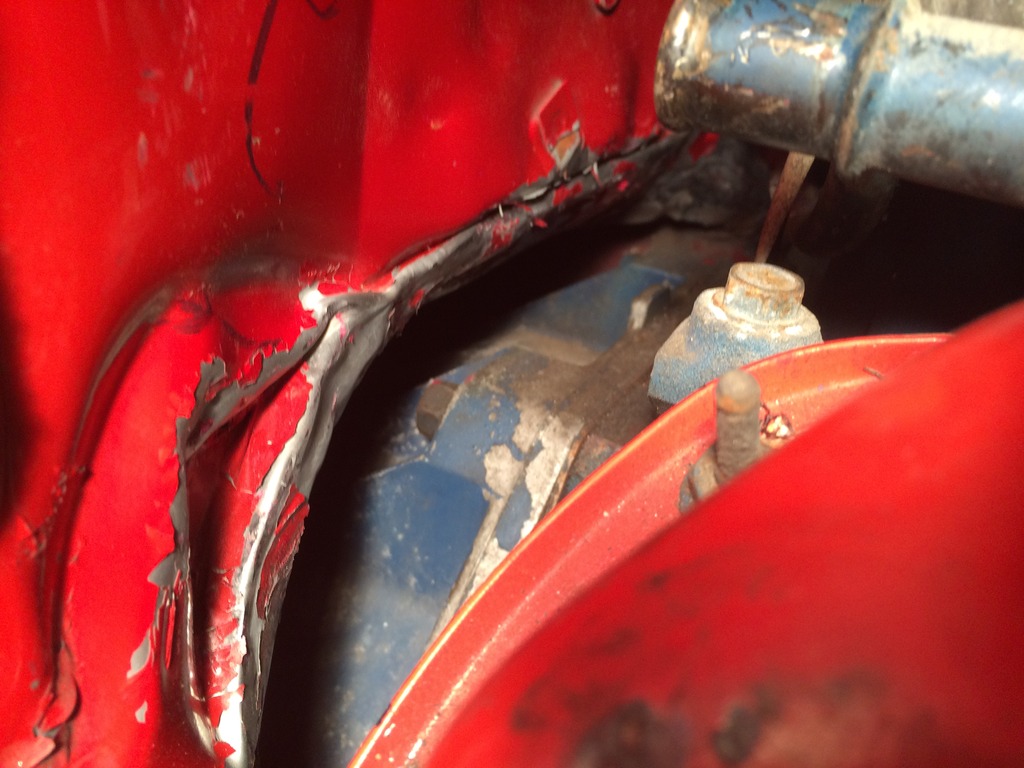
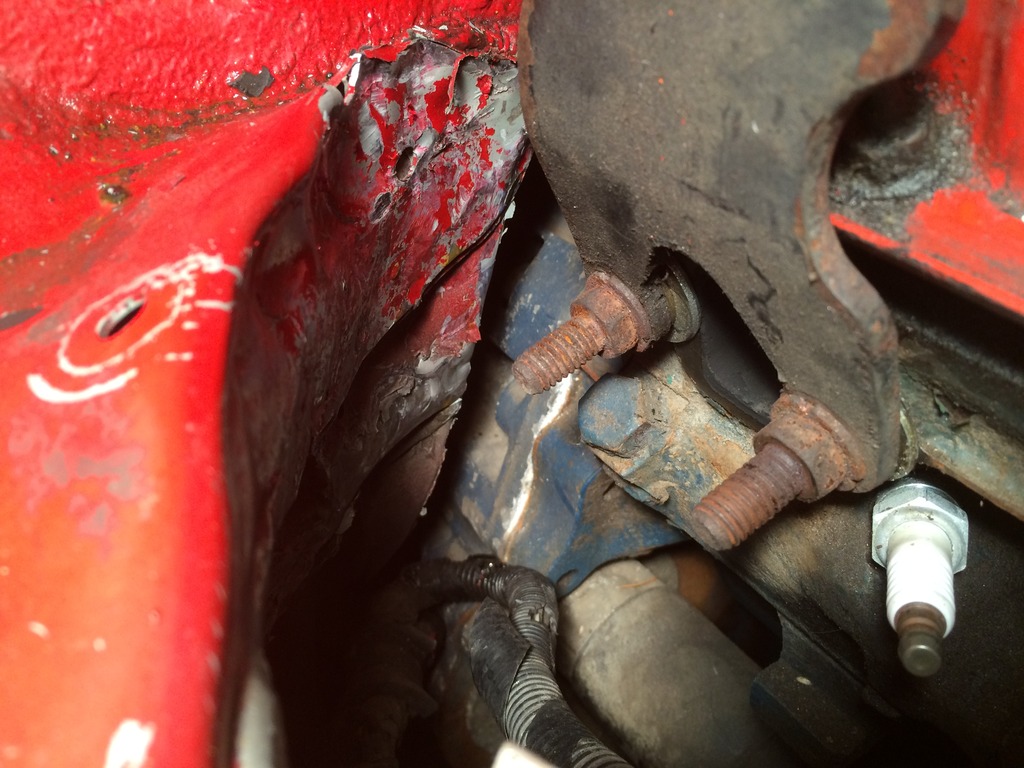
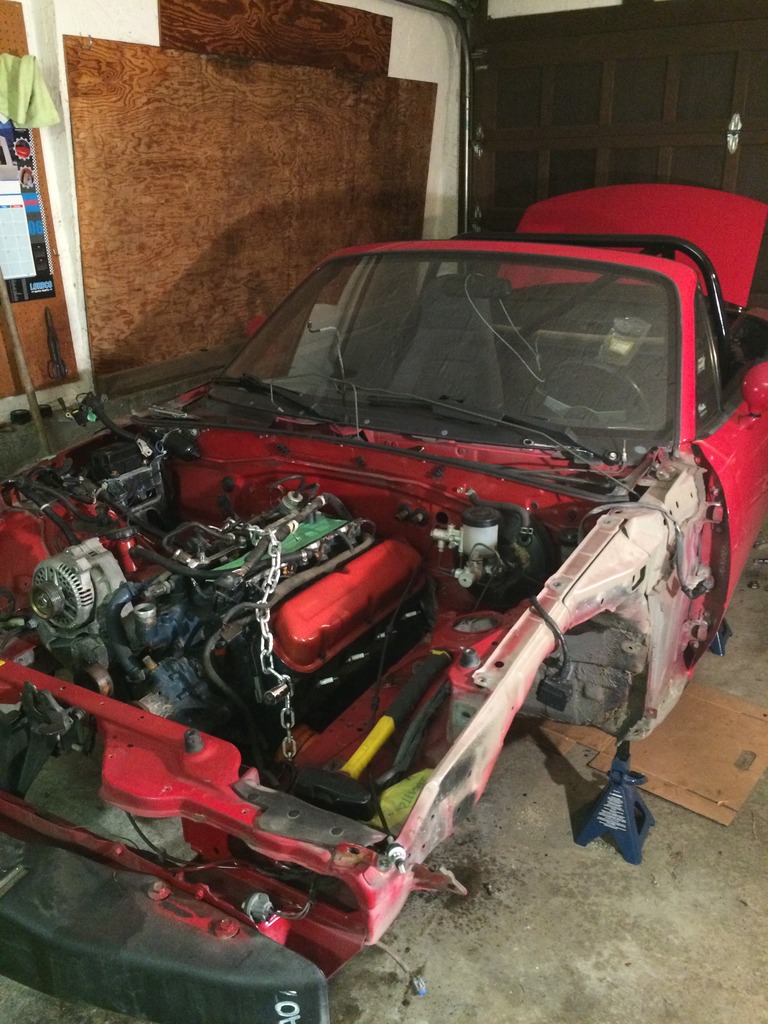
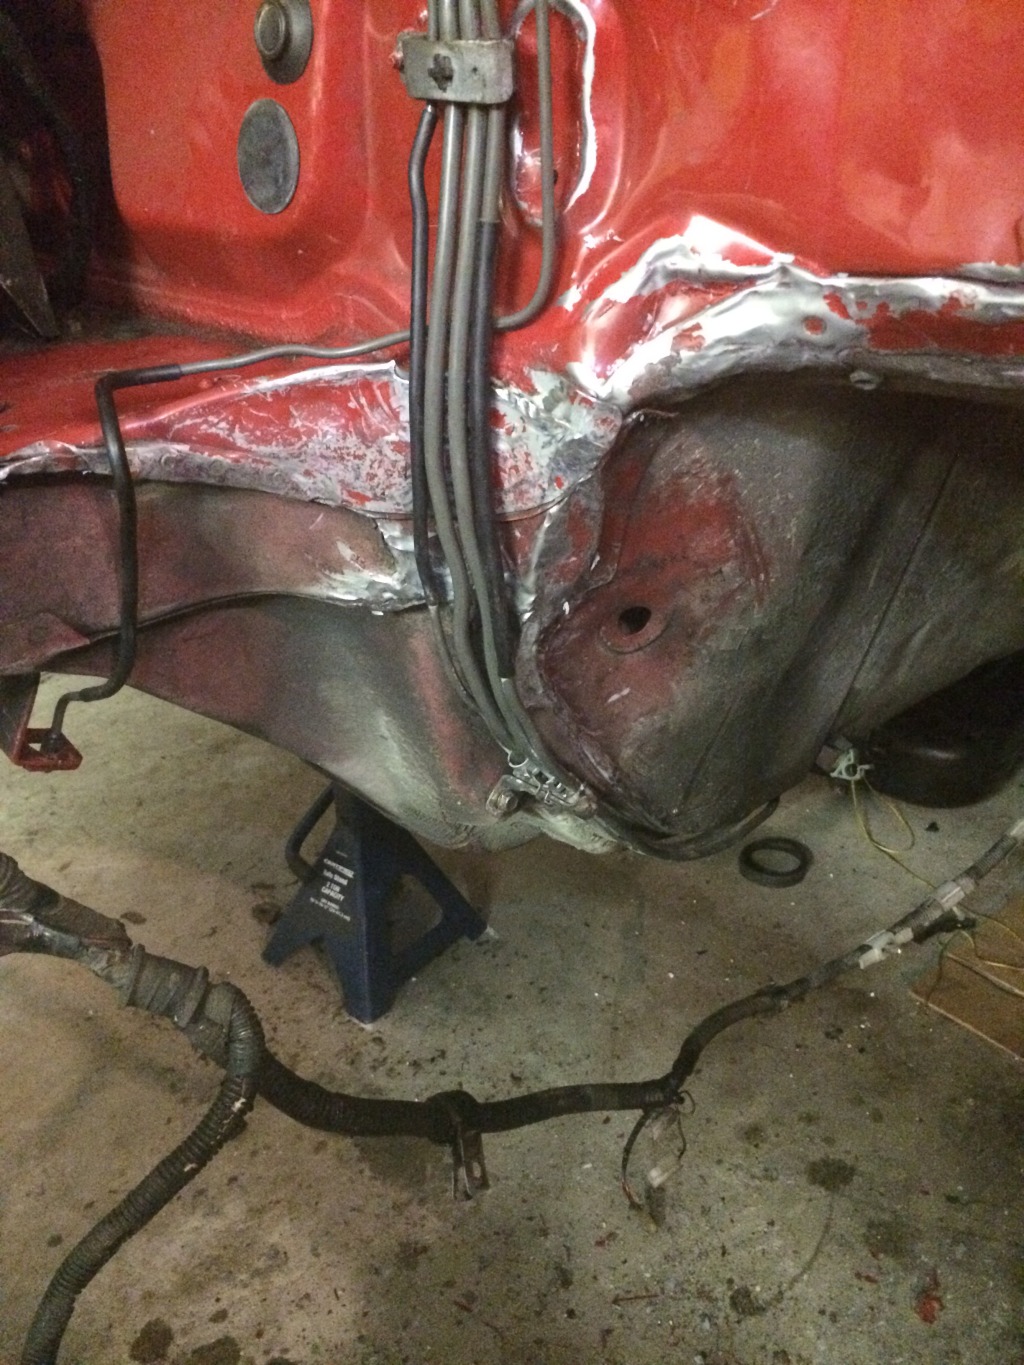
Next I pulled apart the front suspension and dropped the stock subframe. Moved a few brake and fuel lines out of the way before starting to enlarge the bay for the new engine. What I have decided to attempt here is instead of cutting out the corners and leaving them open (I don't have a welder in my garage to weld in any plates, rear subframe etc will be welded elsewhere) I'm going to try and hammer the back corners of the bay into shape. I like the idea of doing this because all the metal is still more or less in tact and may be a bit sturdier than cutting, at least without adding new welded plates. Here are a couple pictures of the initial shaping of the back corners.
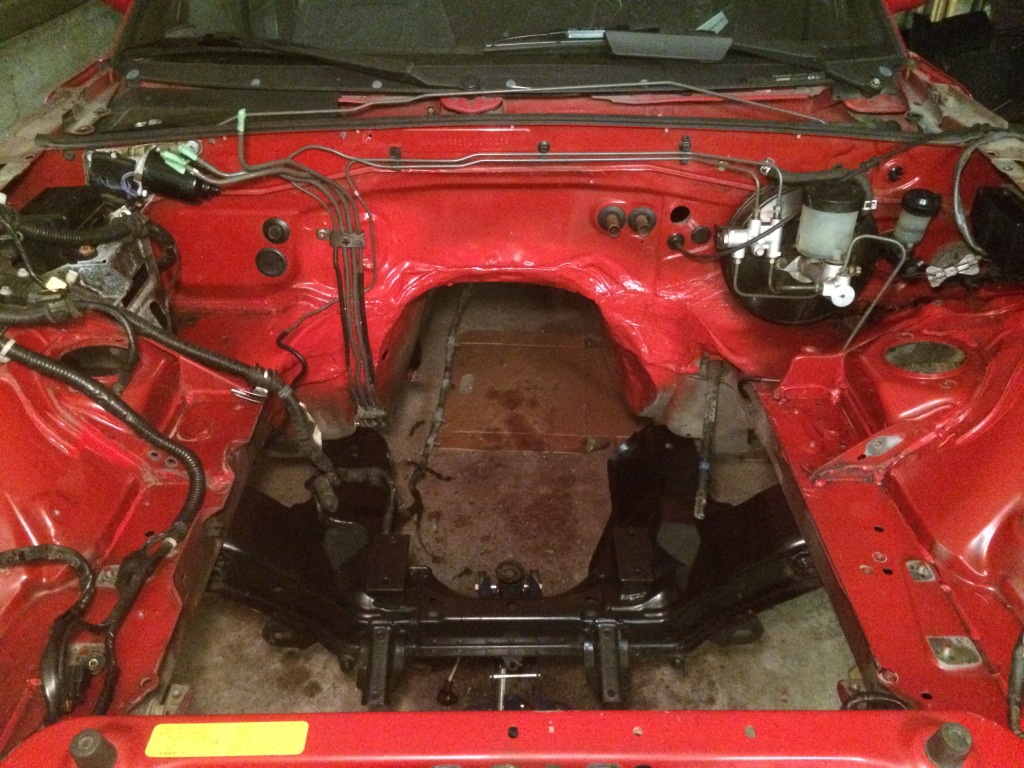
Following this initial clearancing I bolted on the martin subframe and tried to wiggle the engine in to see the problem areas. Quite a nice sight, even if its not fully in place.

It looks to me like I'm going to need to hammer the top of the tunnel a bit so I can slide the trans back just a bit farther so the oil pan can slide back enough to not be sitting on the subframe, right now the pan sits about 1" onto the subframe before the cutout on the pan. Both transmission tunnel sides look like they will need to expand about 3/4" to 1" on each side once the bell housing moves a bit farther back, I think its currently approx 2" forward from final resting position.

Next I pulled apart the front suspension and dropped the stock subframe. Moved a few brake and fuel lines out of the way before starting to enlarge the bay for the new engine. What I have decided to attempt here is instead of cutting out the corners and leaving them open (I don't have a welder in my garage to weld in any plates, rear subframe etc will be welded elsewhere) I'm going to try and hammer the back corners of the bay into shape. I like the idea of doing this because all the metal is still more or less in tact and may be a bit sturdier than cutting, at least without adding new welded plates. Here are a couple pictures of the initial shaping of the back corners.


Following this initial clearancing I bolted on the martin subframe and tried to wiggle the engine in to see the problem areas. Quite a nice sight, even if its not fully in place.

It looks to me like I'm going to need to hammer the top of the tunnel a bit so I can slide the trans back just a bit farther so the oil pan can slide back enough to not be sitting on the subframe, right now the pan sits about 1" onto the subframe before the cutout on the pan. Both transmission tunnel sides look like they will need to expand about 3/4" to 1" on each side once the bell housing moves a bit farther back, I think its currently approx 2" forward from final resting position.


V8 Miata Fanatic
Joined: Mar 2014
Posts: 636
Likes: 37
From: SW Ont.
You're really moving along.
Interesting idea bending the corners. You need evey milimeter of room you can get in that area. I guess if it doesn't work out you can still cut them and get someone to come over with a small flux core welder to button up the corners (or glue them like some folks do). Hopefully you'll be ok as is.
Keep up the great progress.
Thread Starter
V8 Miata Fan
Joined: Sep 2015
Posts: 25
Likes: 2
From: Victoria BC Canada
I do actually have a flux core welder but I really dislike using it in comparison to gas, I guess that's always an option though depending on how tight it gets in there. I'm thinking my main clearance issues will be around the perimeter of the transmission tunnel but hopefully its not too horrible..
V8 Miata Fanatic
Joined: Mar 2014
Posts: 636
Likes: 37
From: SW Ont.
You think you'll have to cut the tunnel, or will bashing be sufficient? Keep your exhaust routing in mind regarding where your clutch slave ends up. You'll want to be able to bleed and adjust it without removing exhaust.
Thread Starter
V8 Miata Fan
Joined: Sep 2015
Posts: 25
Likes: 2
From: Victoria BC Canada
Hoping that a lot of bashing will be good enough but I wont know for a bit. That's a good tip on the slave actually as I think it might be in a slightly lower position on the SN95 bell when compared to a fox, Thanks!!
Thread Starter
V8 Miata Fan
Joined: Sep 2015
Posts: 25
Likes: 2
From: Victoria BC Canada
Got another afternoon in on the car today, very happy with the outcome!
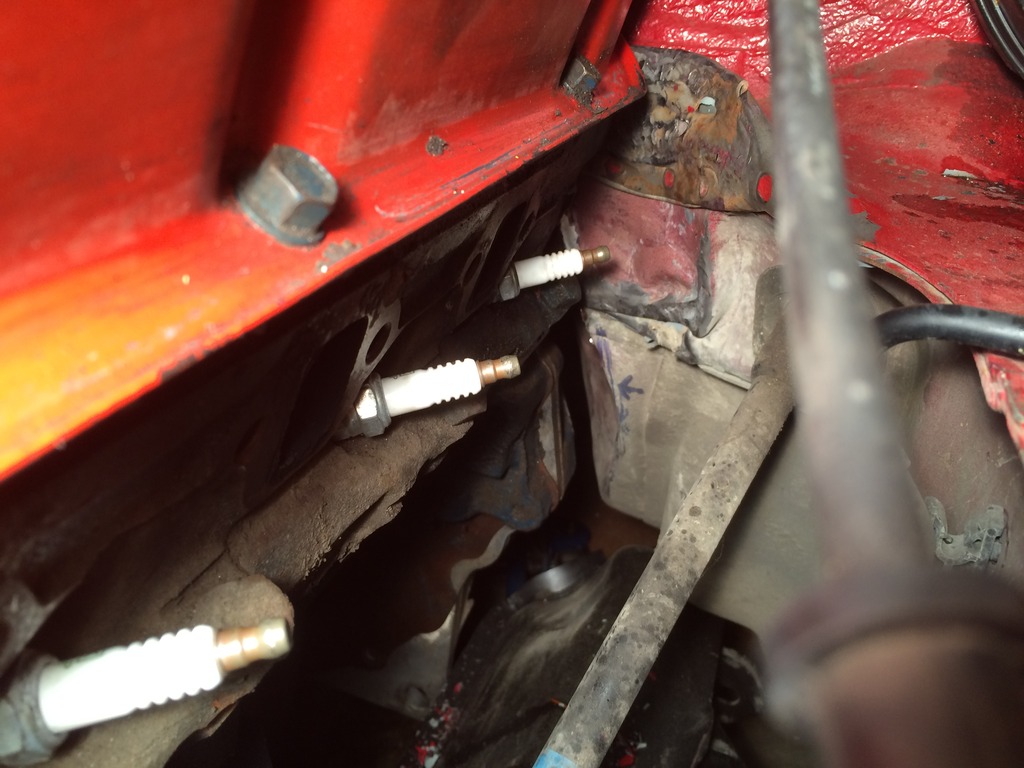
Pulled the engine back out and did some more work with the BFH, stuck the engine in and back out a couple more times marking areas to attack further with the hammer. First pic here is before I hammered the vertical face of the firewall back a bit.
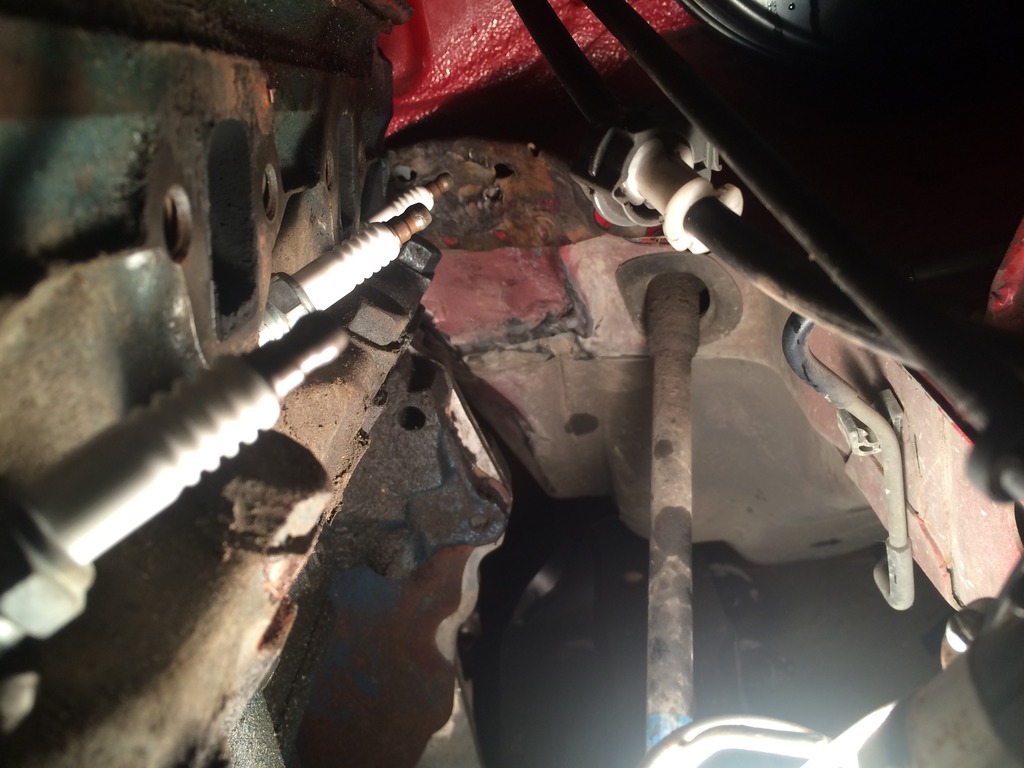
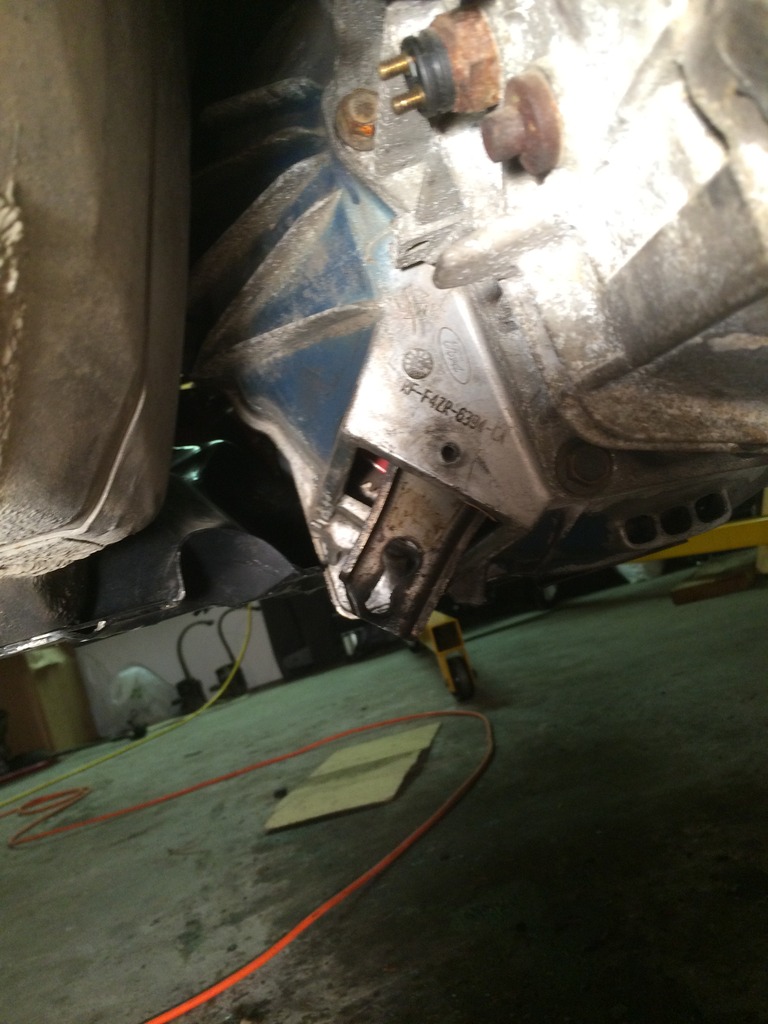
Realizing that wasnt enough, I pushed the vertical part of the firewall back a bit and then managed to wiggle the engine into place on its mounts. Right now the engine is at the most forward point on the slots, I'd like to get it at least a 1/2" farther back for weight / rad clearance. Only thing stopping the engine from going back right now is the driver side cyl head is hitting my hammered back engine bay corner. I'm going to hit that a bunch more tomorrow and possibly whip out the zip disc to chop it back a bit, pleanty of room on the passenger side as well as what appears to be enough room around the bell for it to move back a fair bit.

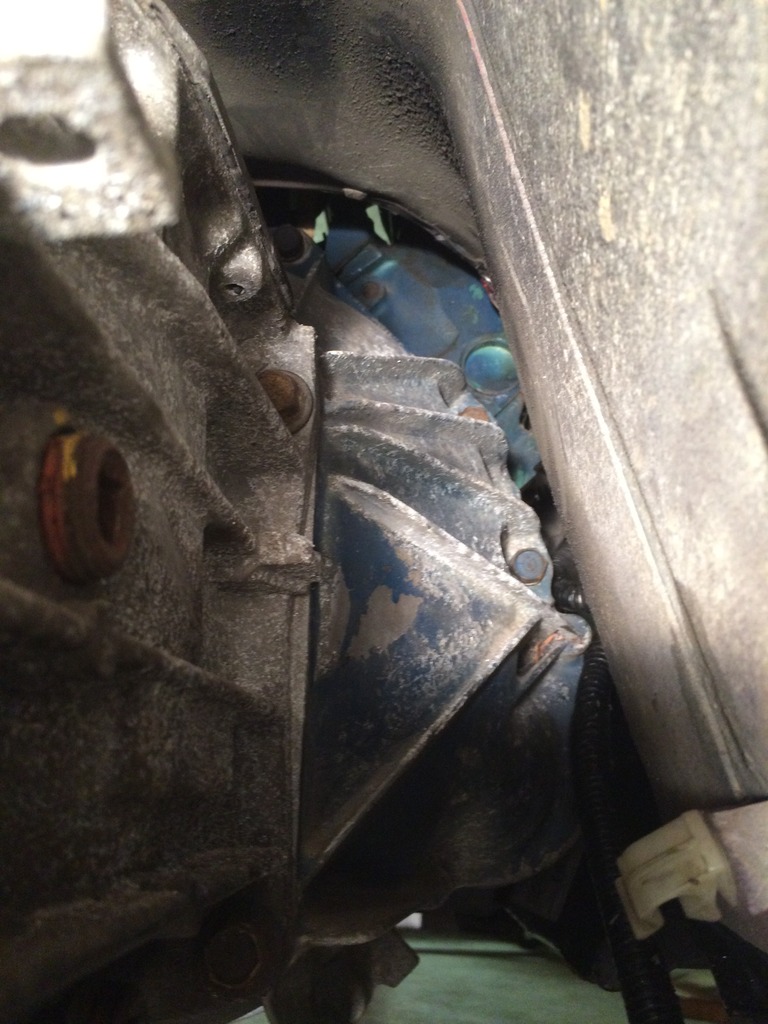
Here are some photos of clearance around the bell, and again this is the larger SN95 bell, actually in place with room to spare!!
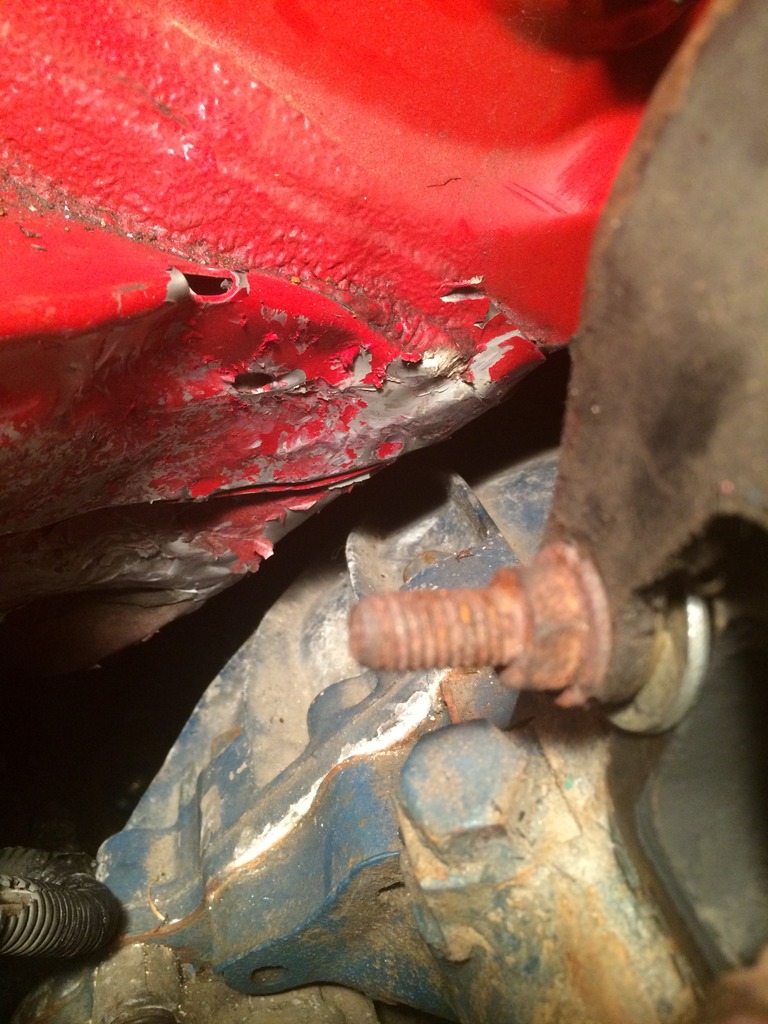
This piece of the bell is actually very close to touching the subframe and would probably vibrate against it when running, I'm just going to knick a small bit of it out for clearance.
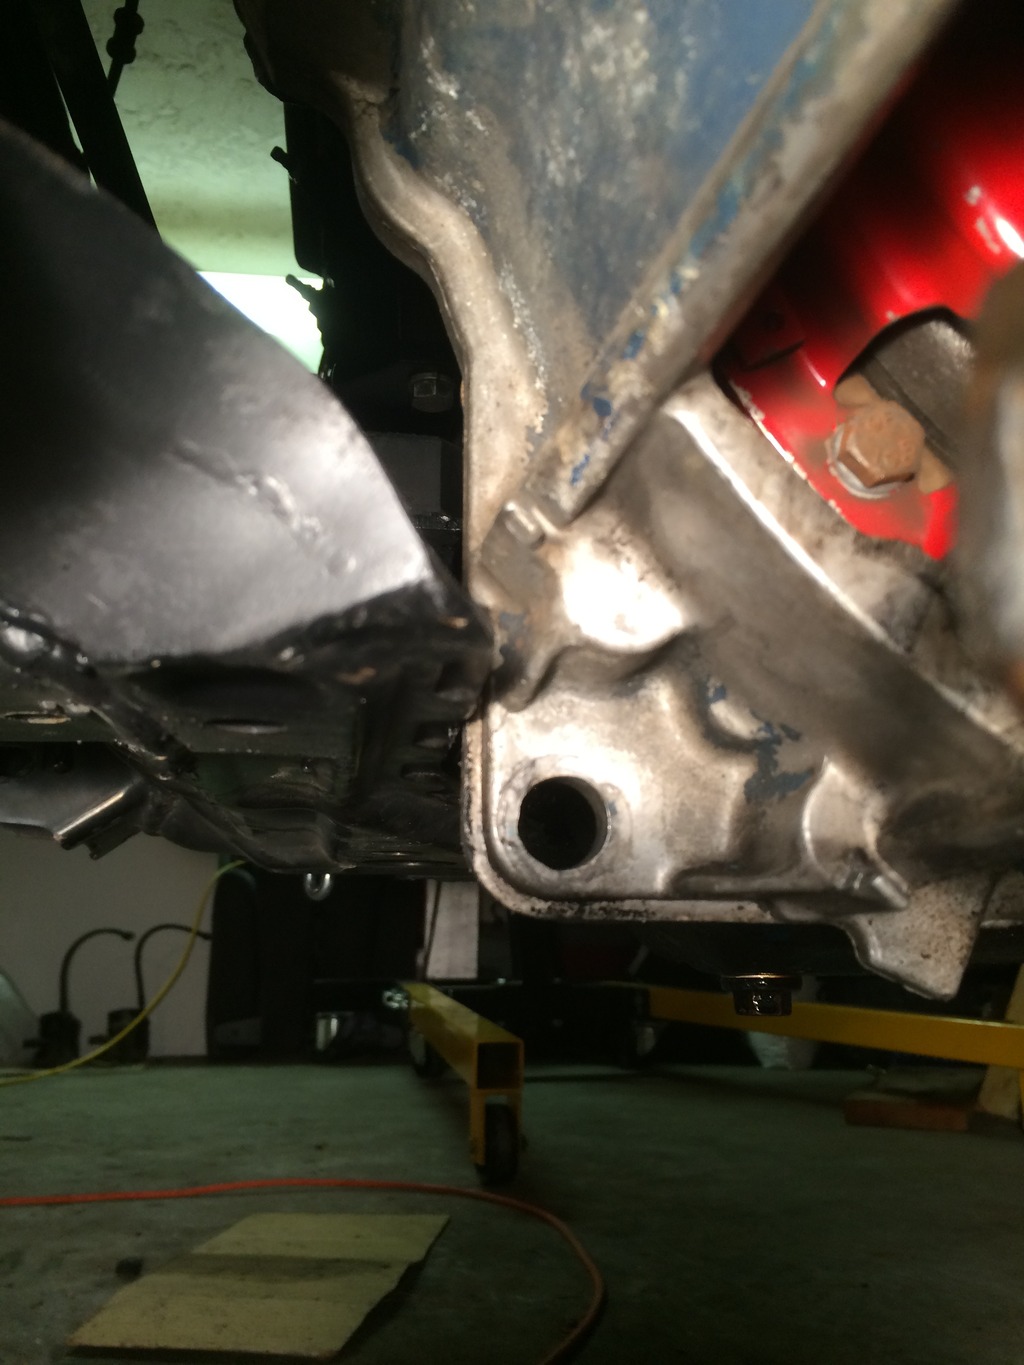
And the rest of the room around the larger bell
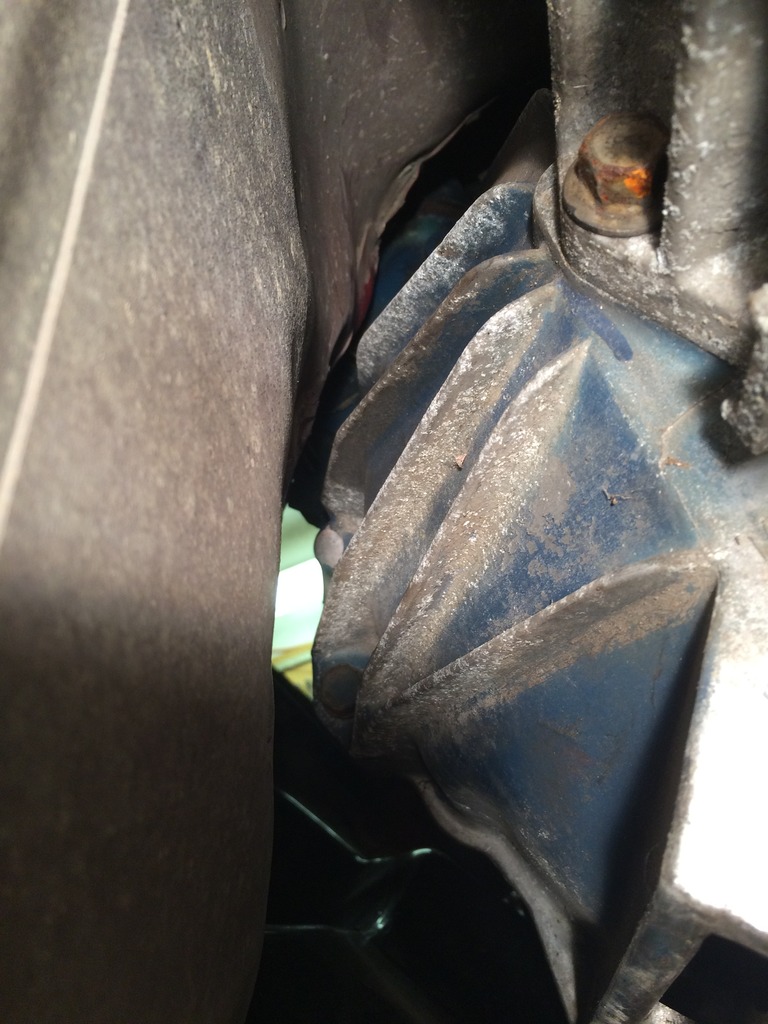
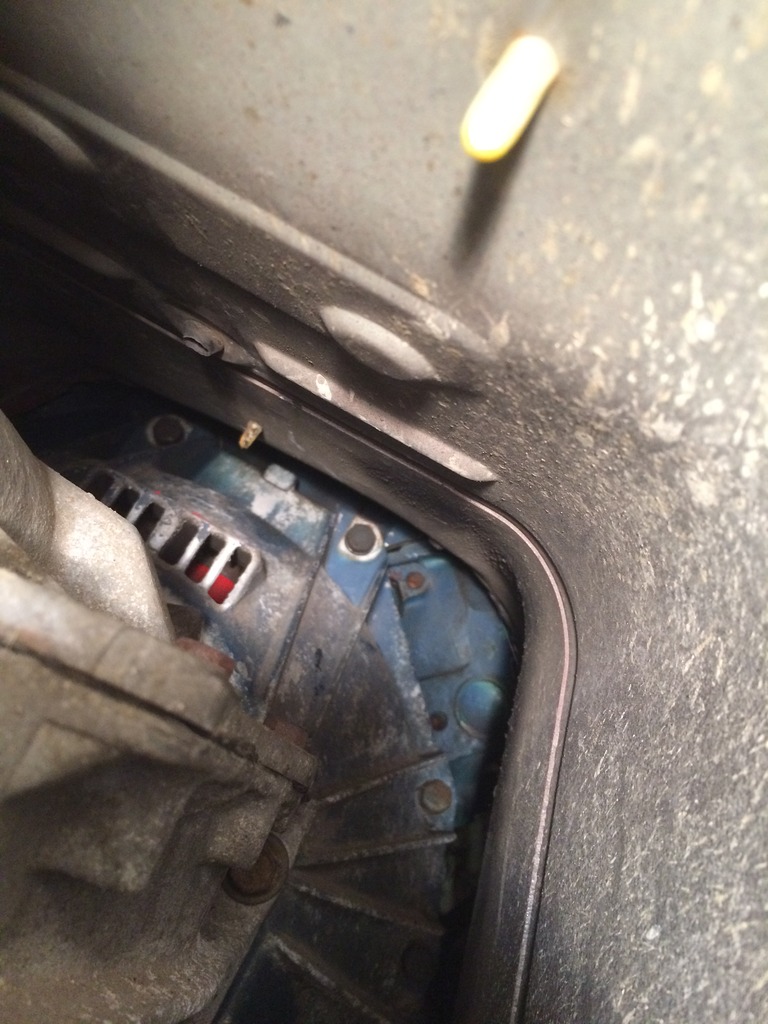
Look at it sitting in there so nicely after all that hammering
Pulled the engine back out and did some more work with the BFH, stuck the engine in and back out a couple more times marking areas to attack further with the hammer. First pic here is before I hammered the vertical face of the firewall back a bit.

Realizing that wasnt enough, I pushed the vertical part of the firewall back a bit and then managed to wiggle the engine into place on its mounts. Right now the engine is at the most forward point on the slots, I'd like to get it at least a 1/2" farther back for weight / rad clearance. Only thing stopping the engine from going back right now is the driver side cyl head is hitting my hammered back engine bay corner. I'm going to hit that a bunch more tomorrow and possibly whip out the zip disc to chop it back a bit, pleanty of room on the passenger side as well as what appears to be enough room around the bell for it to move back a fair bit.

Here are some photos of clearance around the bell, and again this is the larger SN95 bell, actually in place with room to spare!!


This piece of the bell is actually very close to touching the subframe and would probably vibrate against it when running, I'm just going to knick a small bit of it out for clearance.

And the rest of the room around the larger bell


Look at it sitting in there so nicely after all that hammering


V8 Miata Fan
Joined: Mar 2015
Posts: 98
Likes: 8
From: Sa, Tx
Another ME here. I too am using sn95 bell and tranny and have everything mocked into place. I think there is plenty of room and don't see any reason for a fox bell. The shifter is also almost in the perfect spot with this set up
Thread Starter
V8 Miata Fan
Joined: Sep 2015
Posts: 25
Likes: 2
From: Victoria BC Canada
Sorry for the lack of updates lately guys, I've been working on the car pretty much every day after work so not a lot of free time!
First thing I did was pull the steering rack apart and cut the seal off for manual conversion.
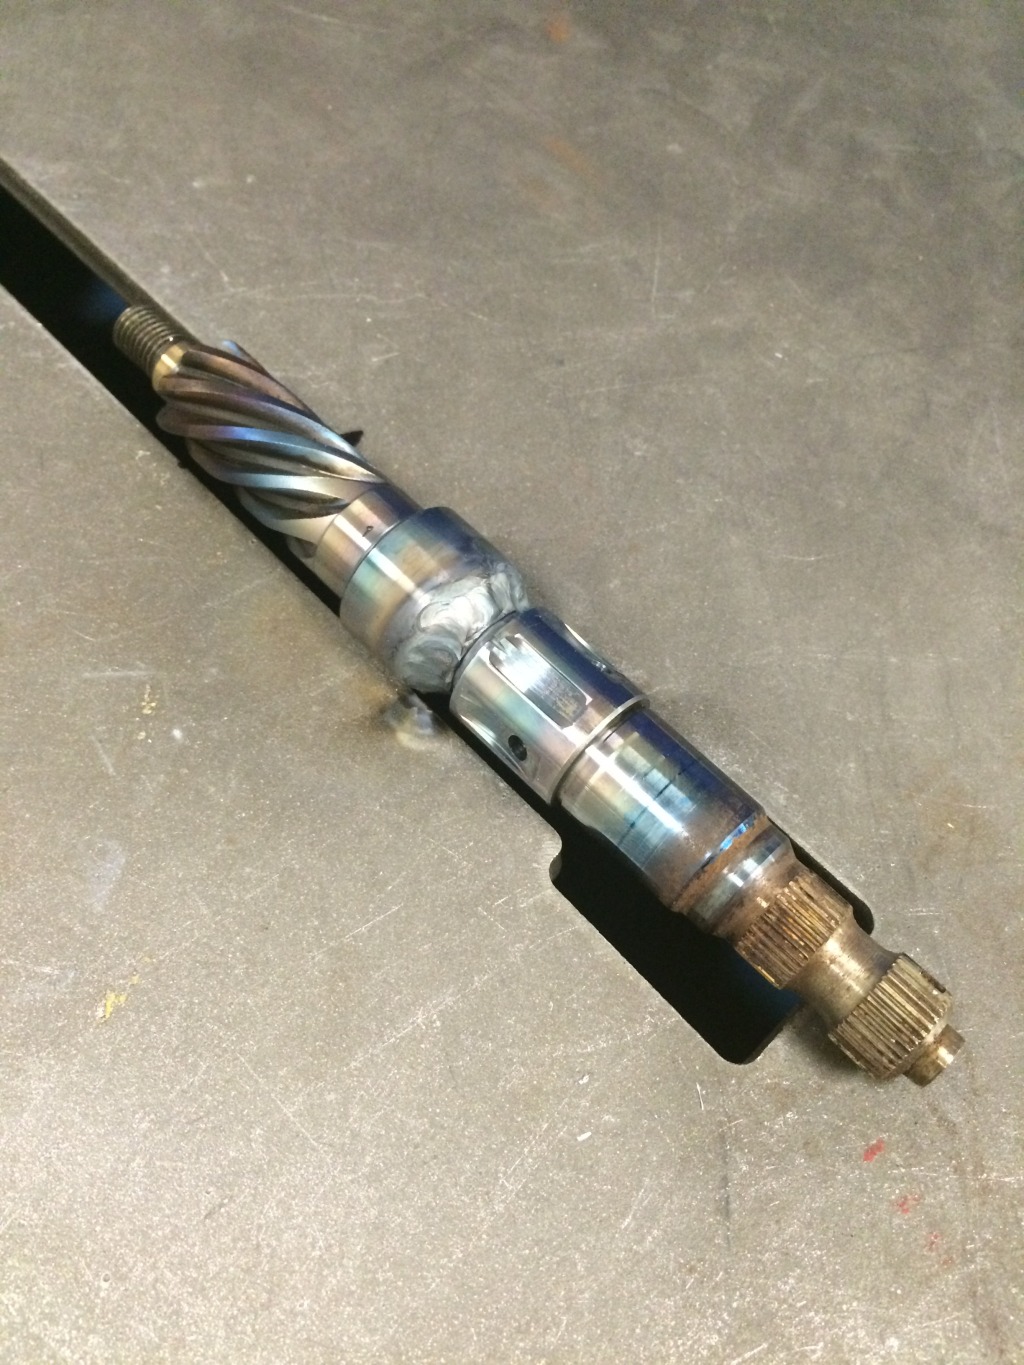
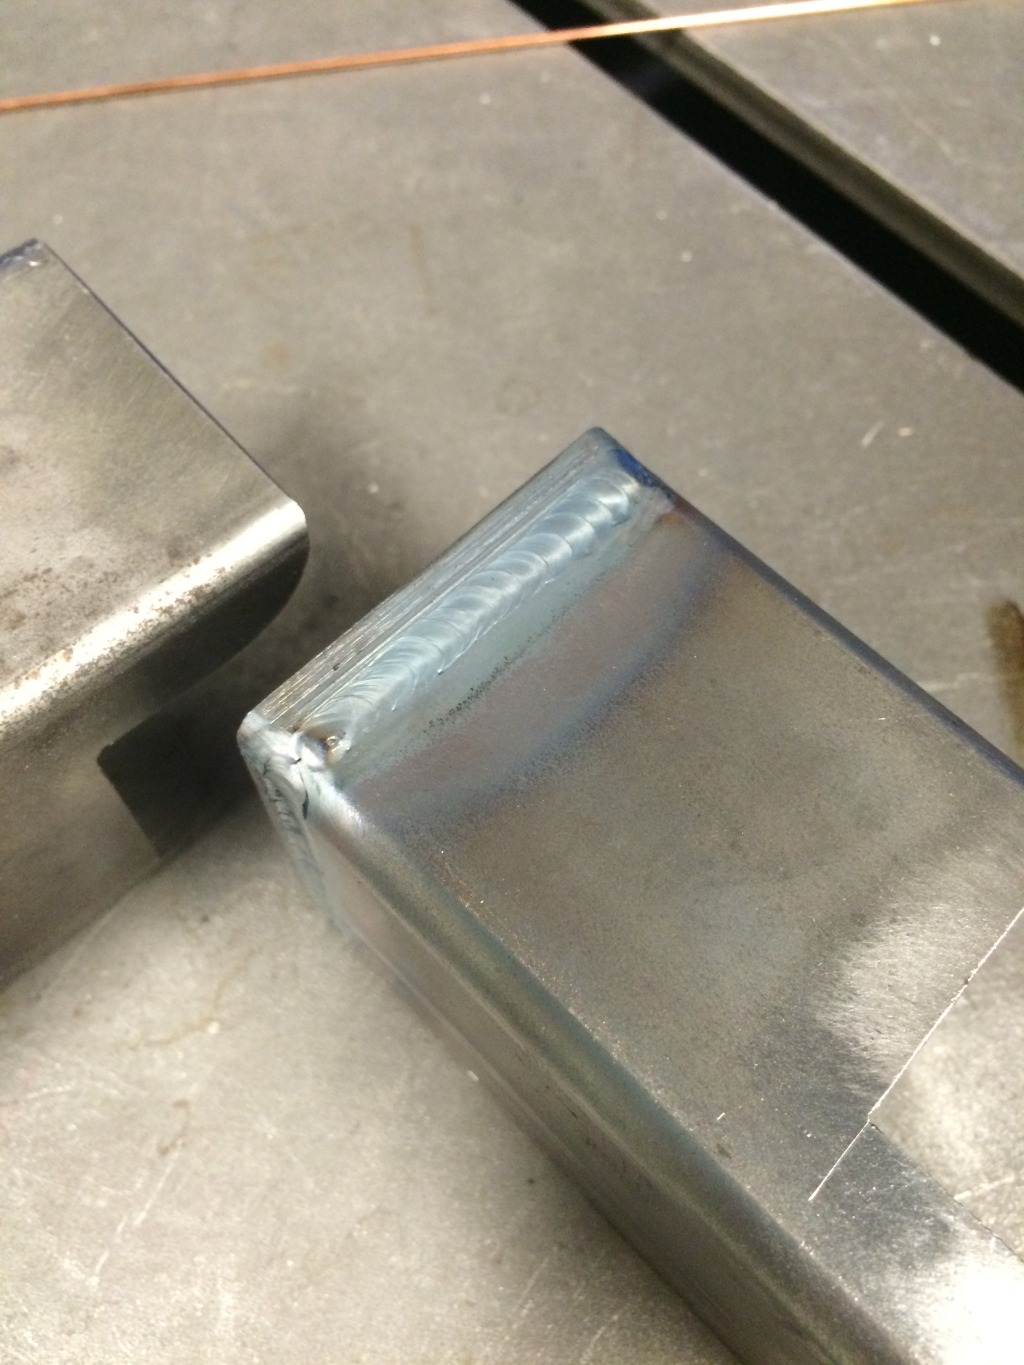
Next I decided it would be a good idea to TIG up the flex joint part to eliminate any excess play.
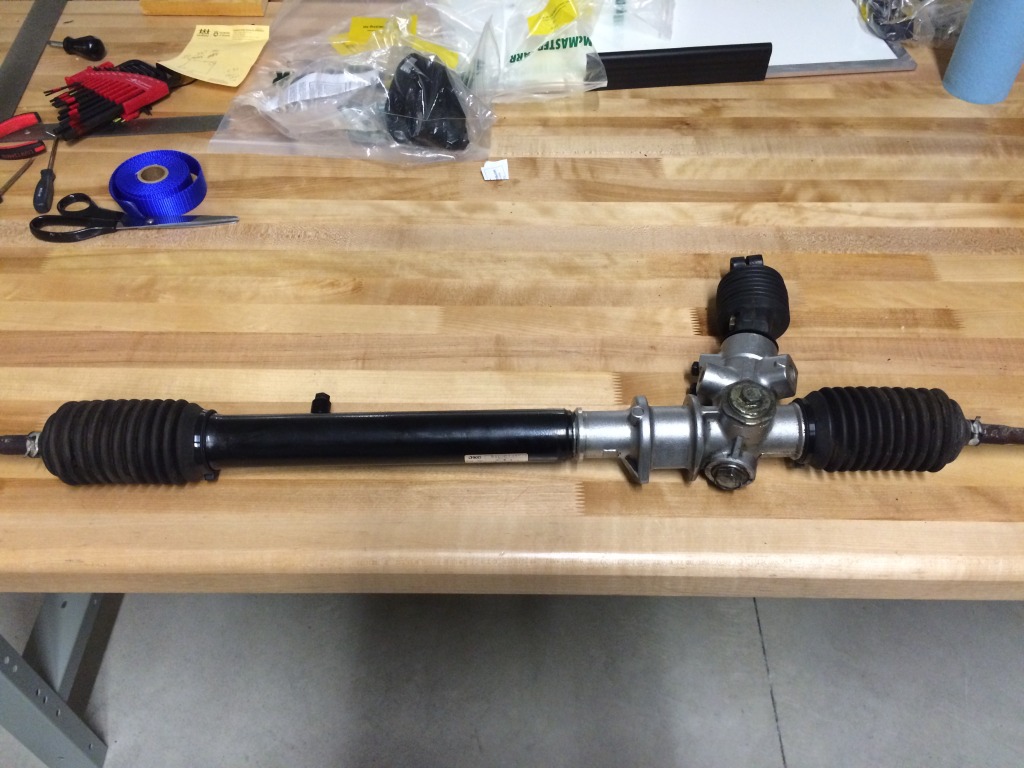
Then reassembled the rack with grease and sealed off all the old power steering fluid fittings.
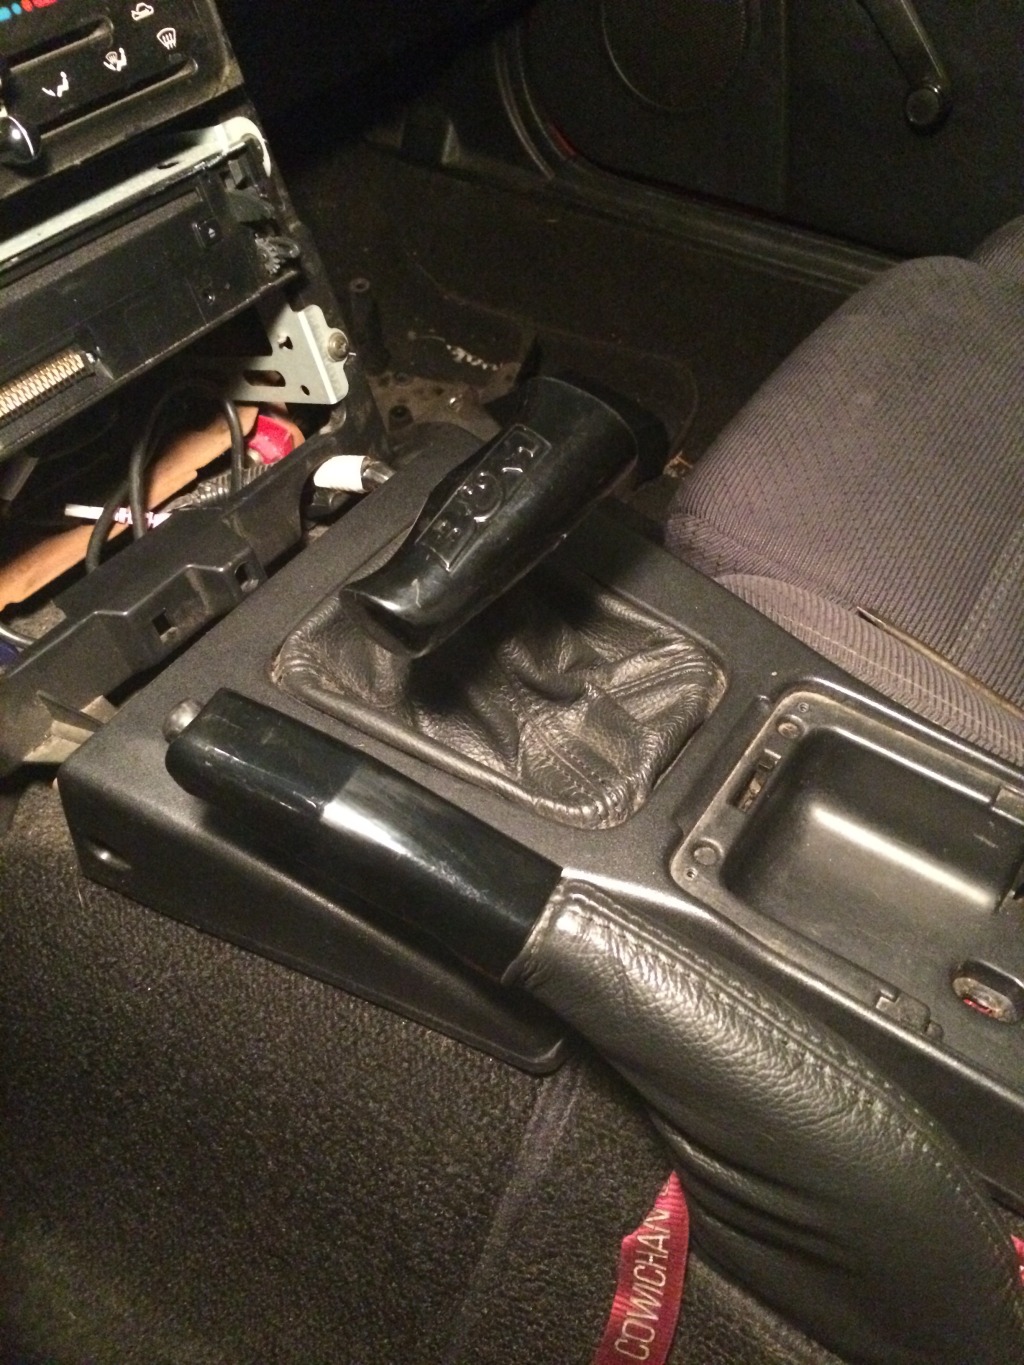
Before I pulled the engine and trans again I tossed the shifter together with the console and boot, it was perfect! I have a PRO 5.0 shifter and powerstick handle or something that came with the trans. The shifter is a two piece bolted together, I just flipped the side the upper half was attached to and it lined up very well.
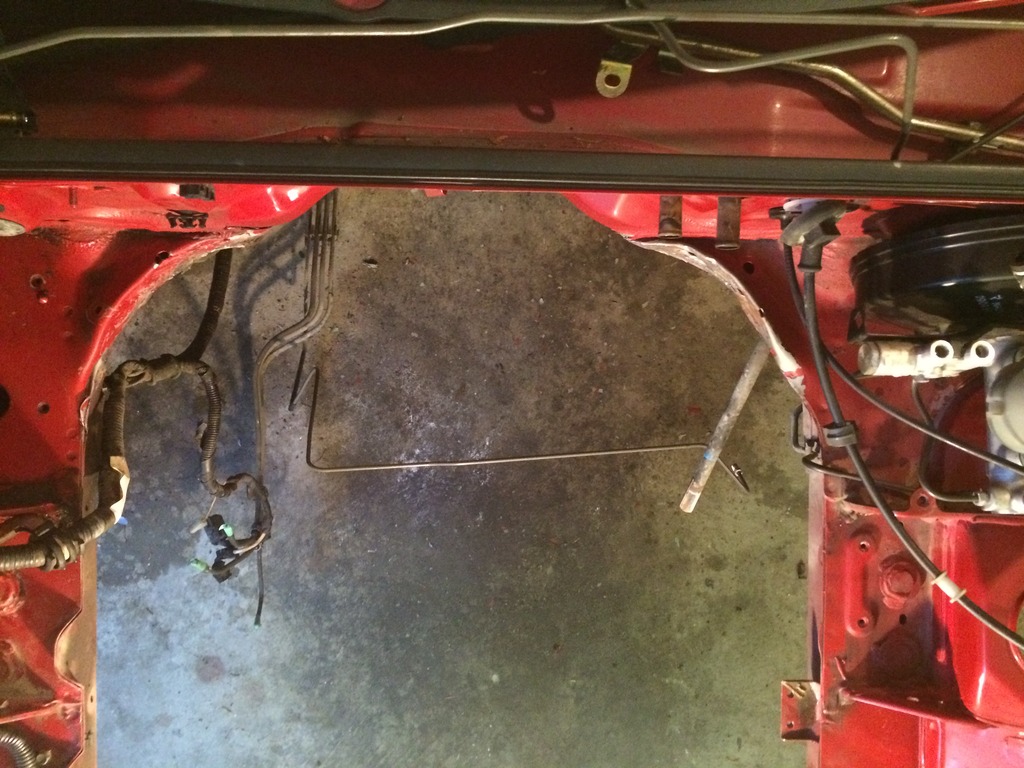
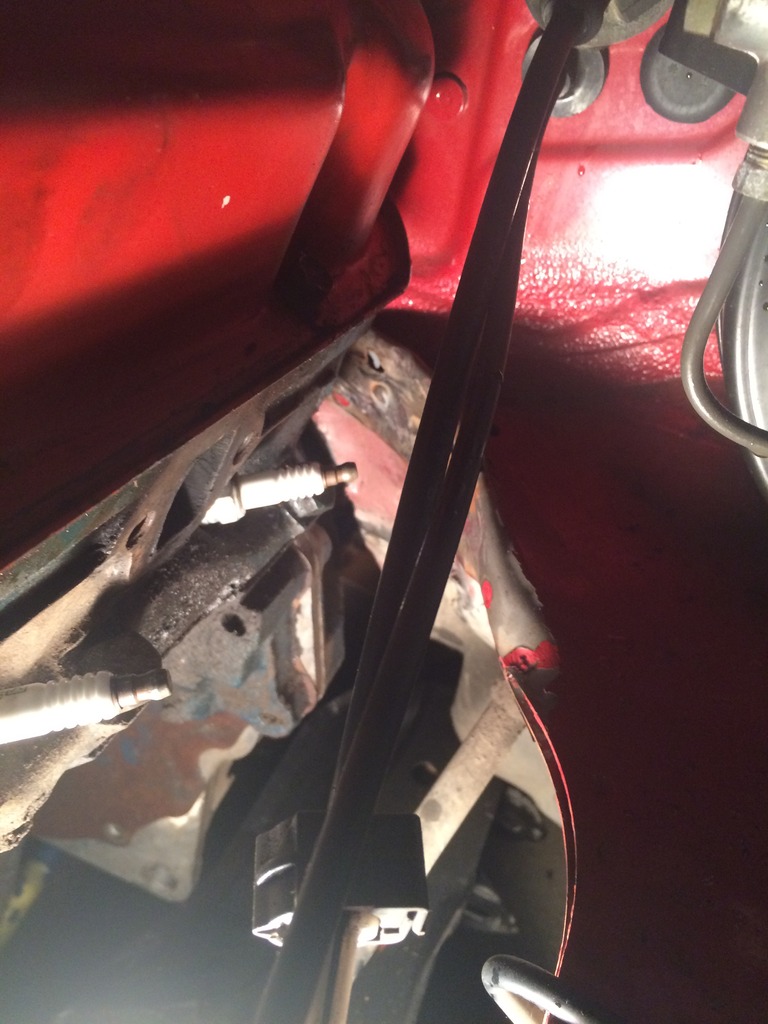
Did a little more bashing and then re-routed the lines up the firewall. Then repainted the rear of the engine bay.
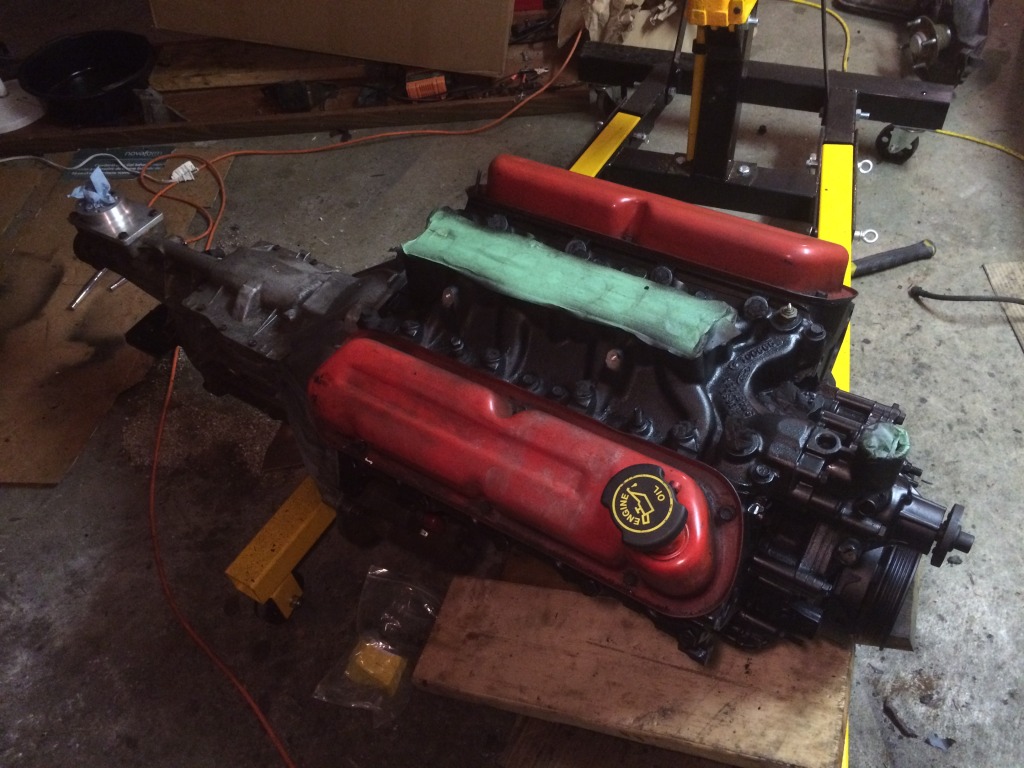
Repainted the engine while it was out, satin black. didnt do anything with the valve covers yet as they need to be repainted once I'm done pulling the engine in and out all the time.
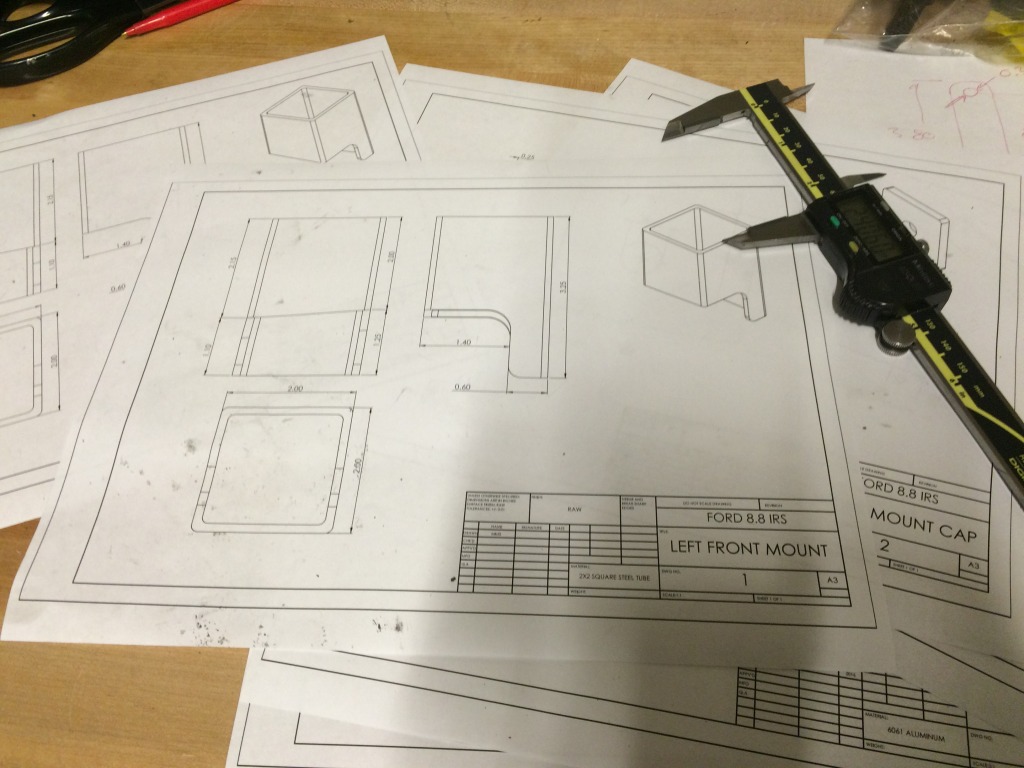
Next I started work on the rear diff. I found some rough dimensions for a design I've seen used here a bit and one which I like for the simplicity. I have re-drawn all the parts to mount the 8.8 diff which you can see me working off here.
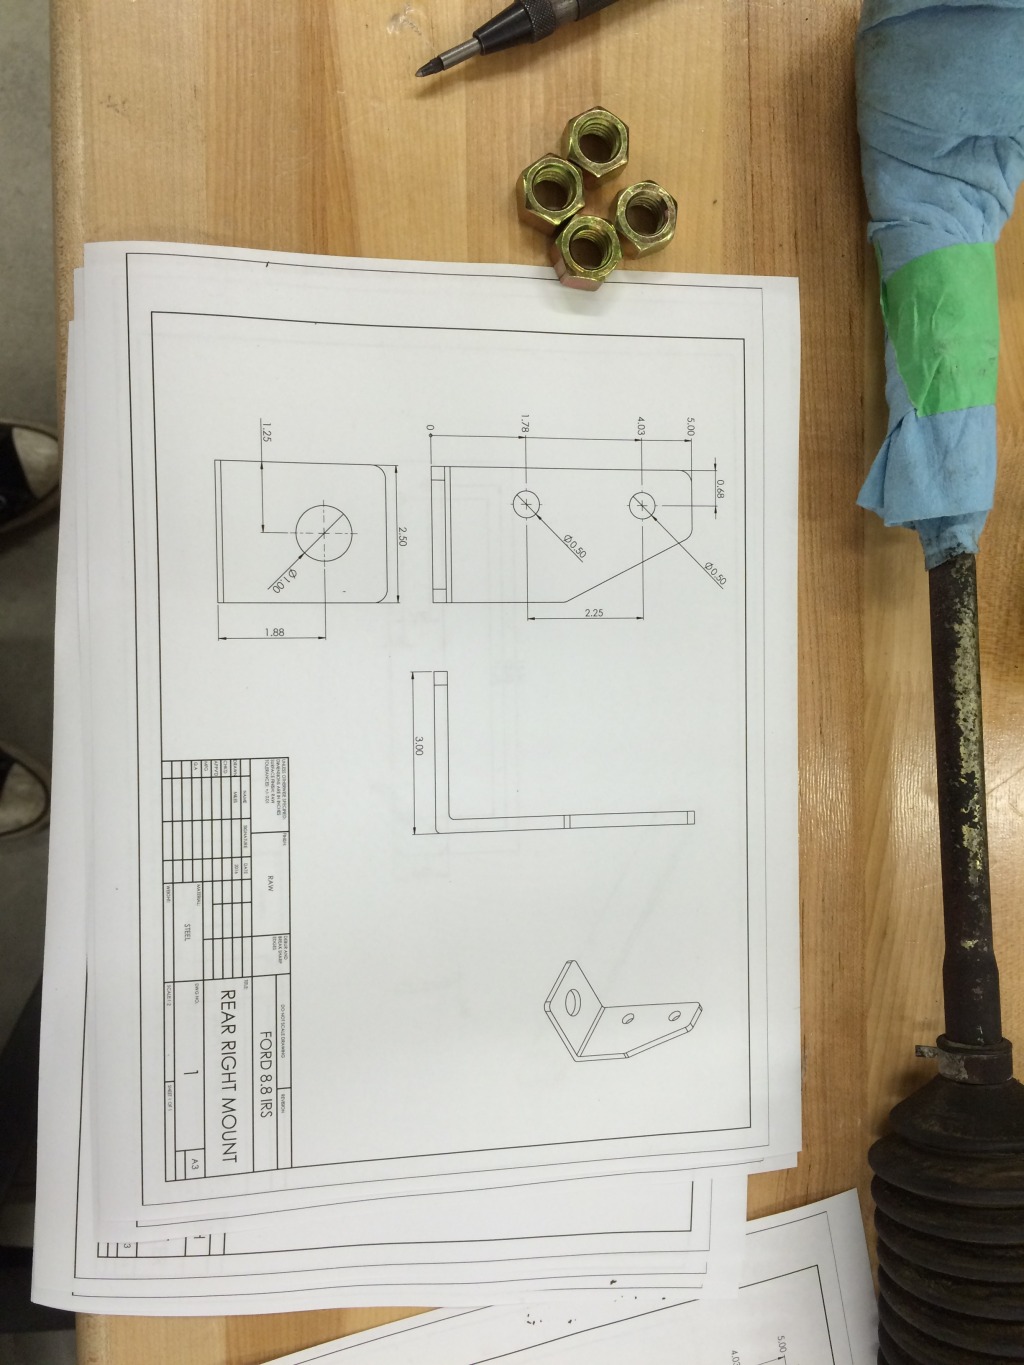
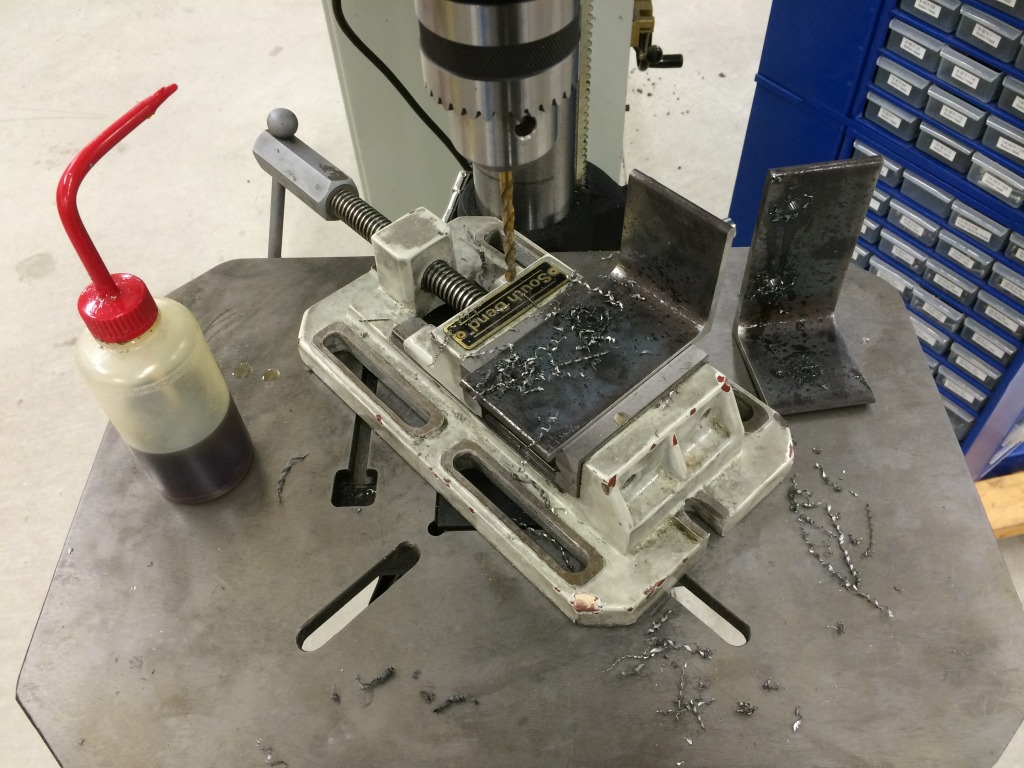
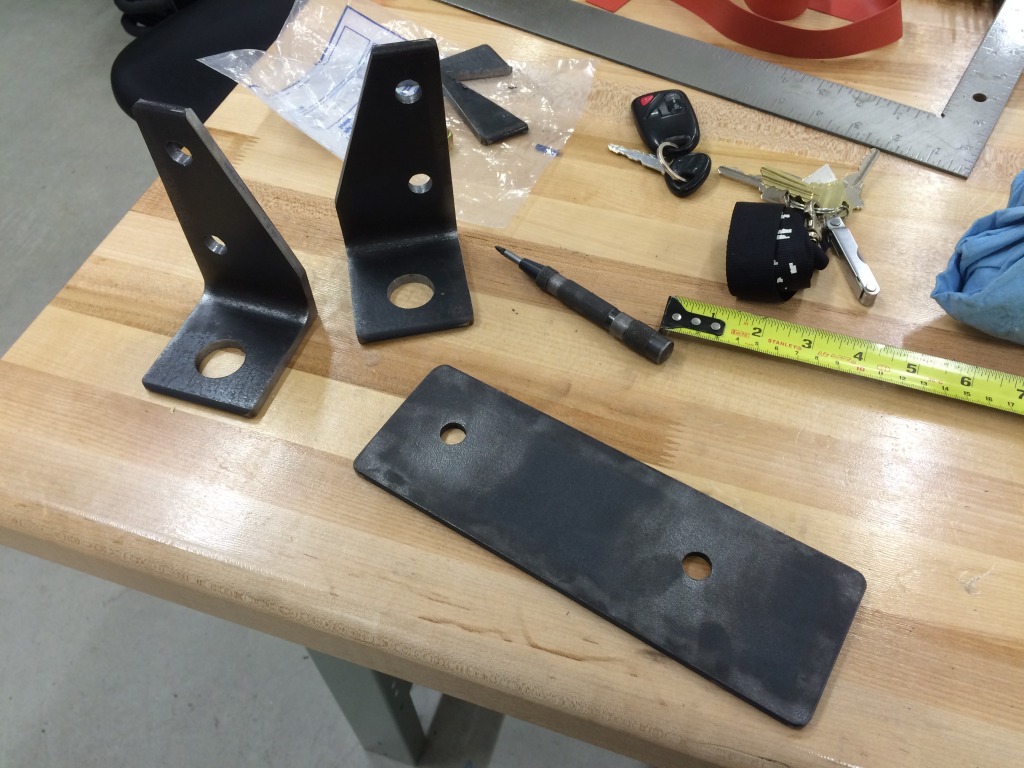
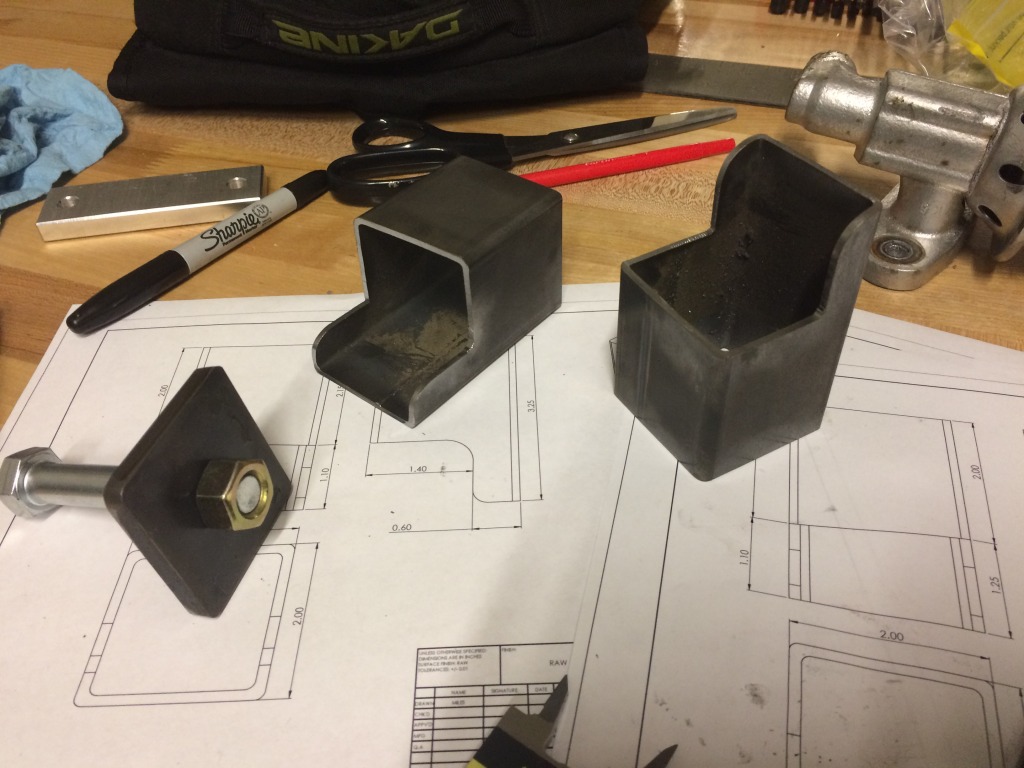
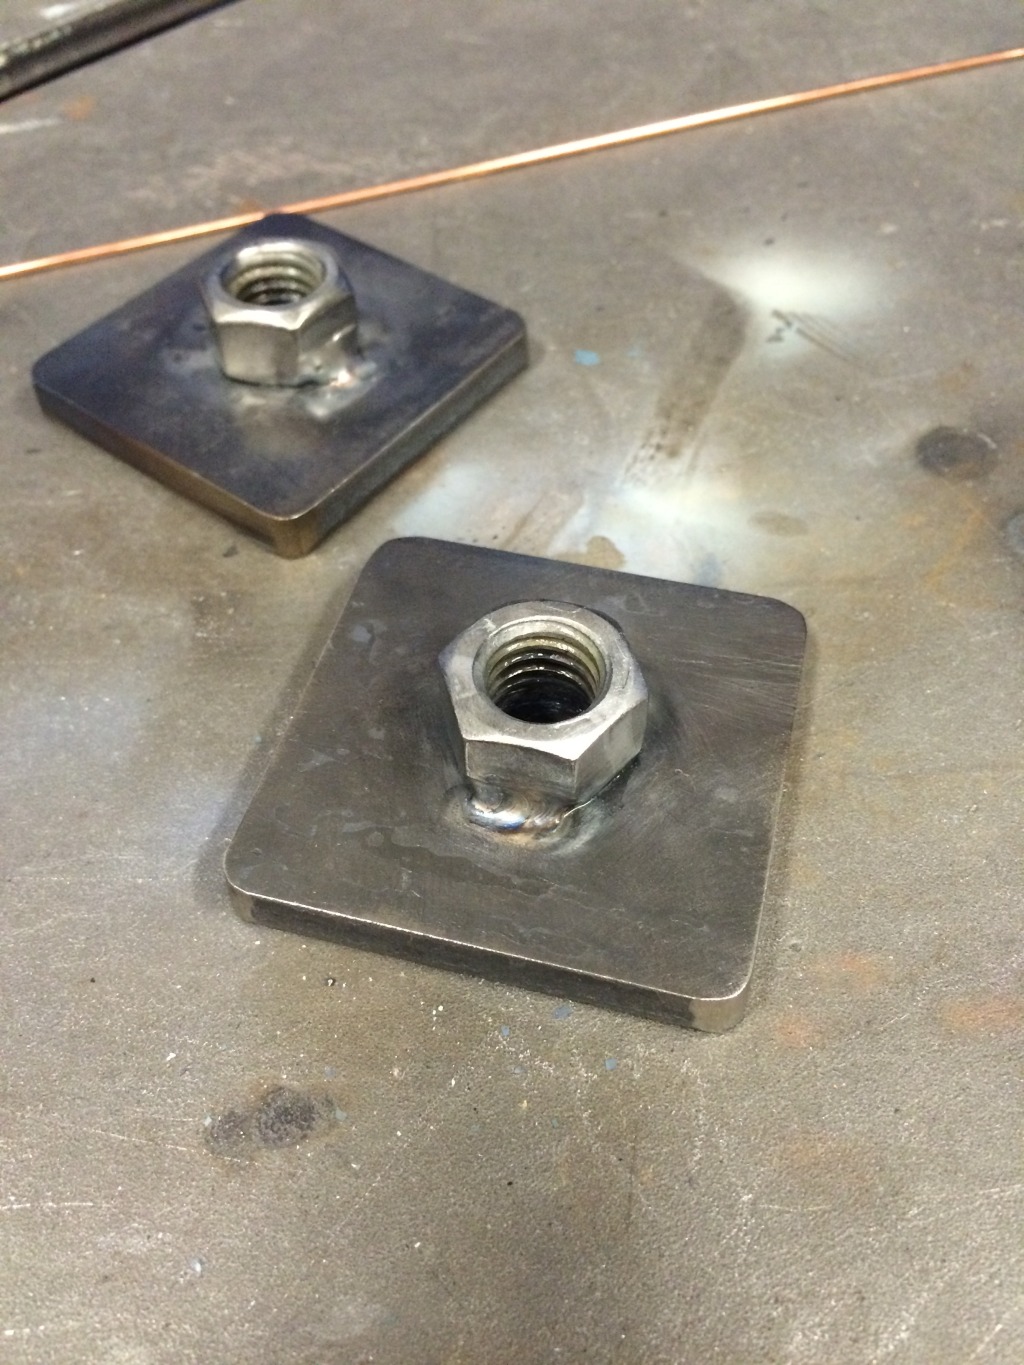
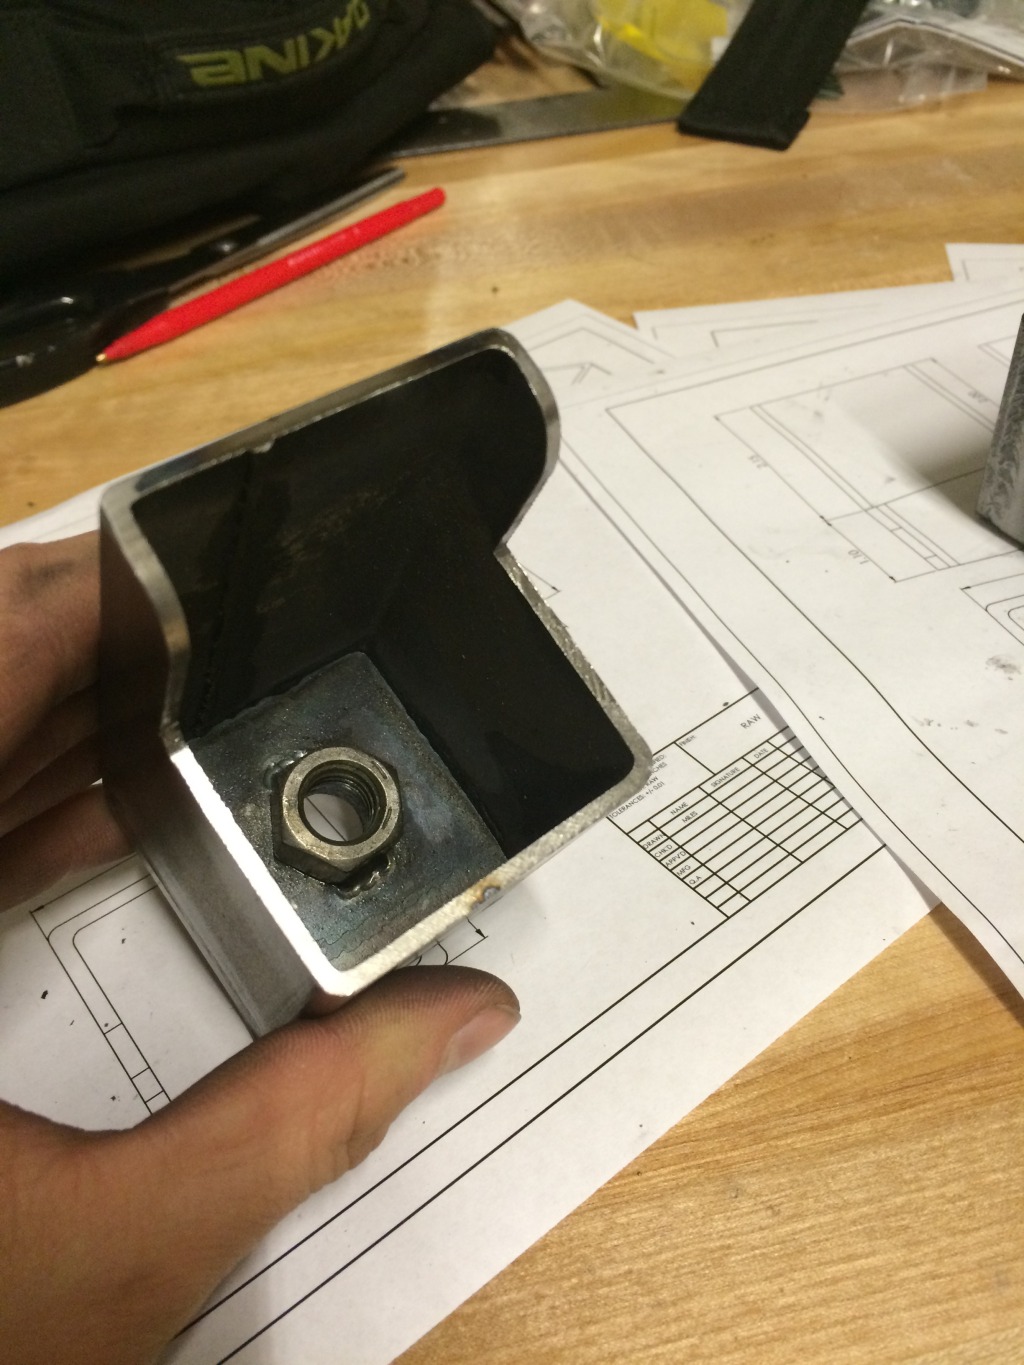
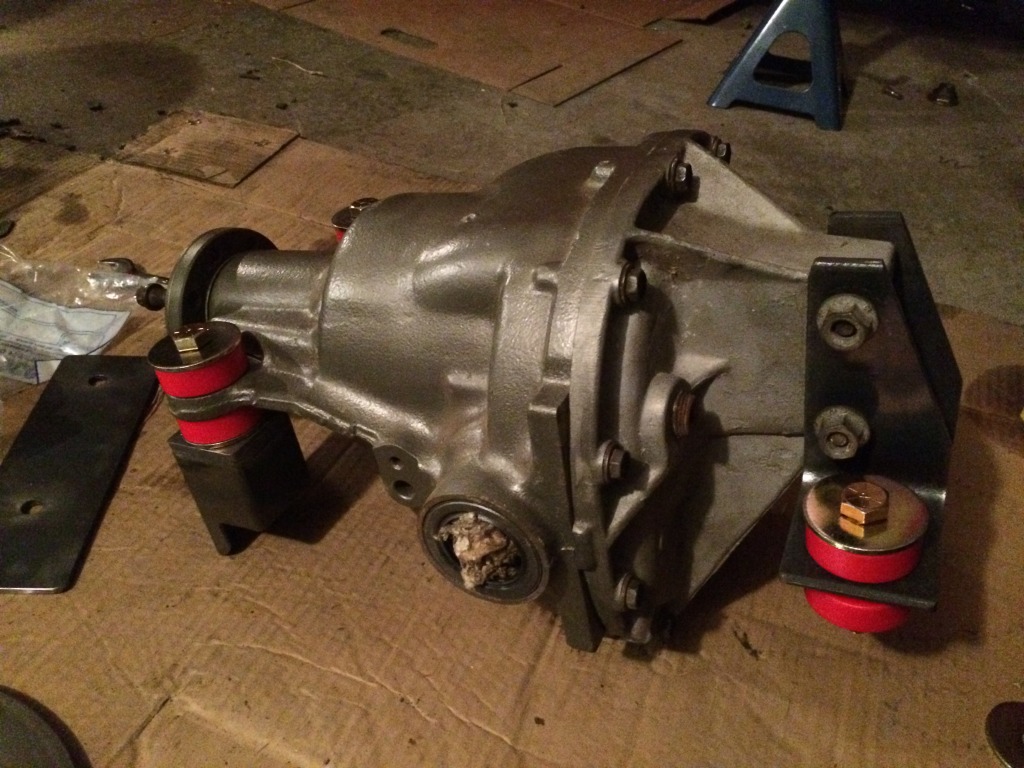
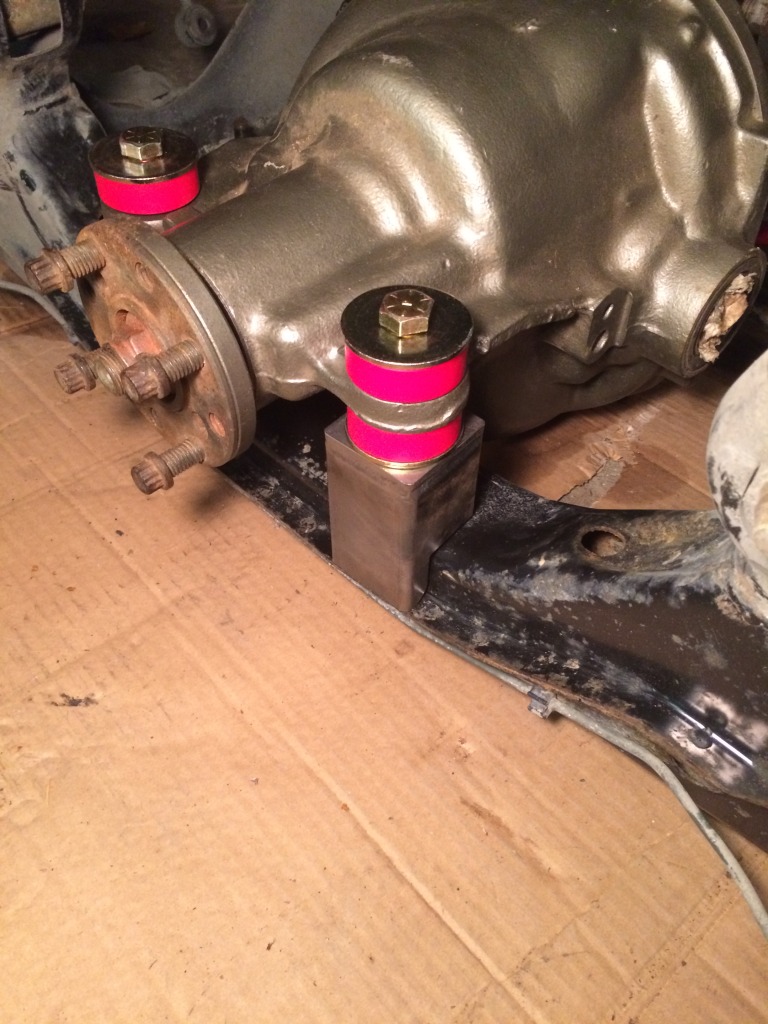
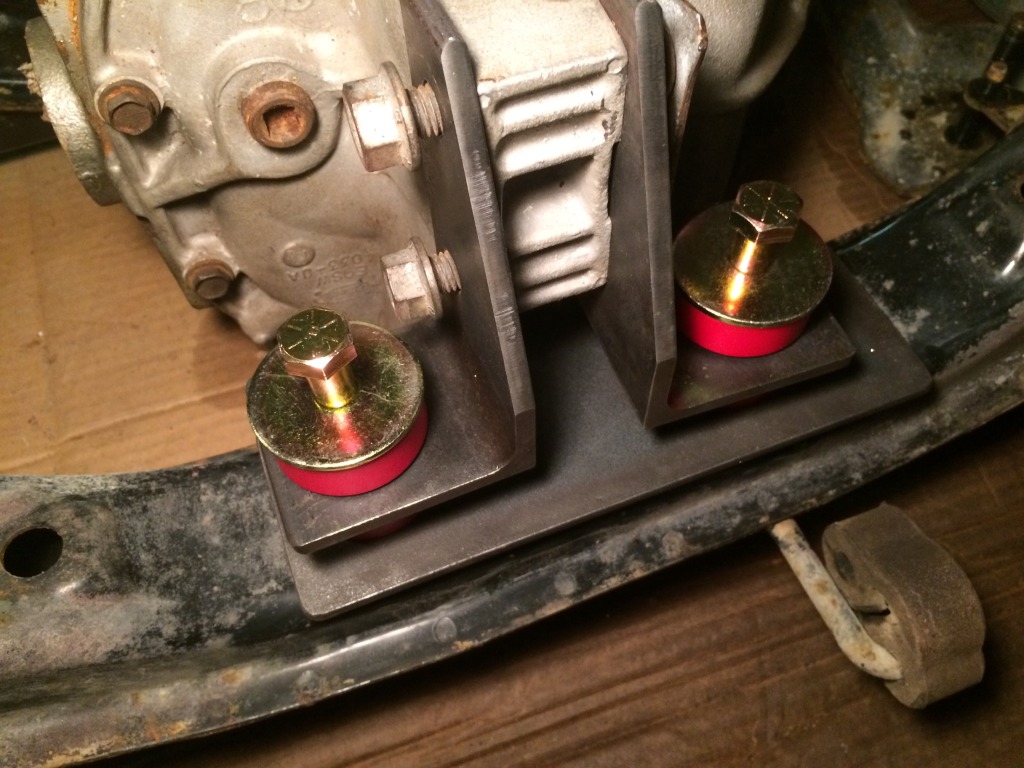
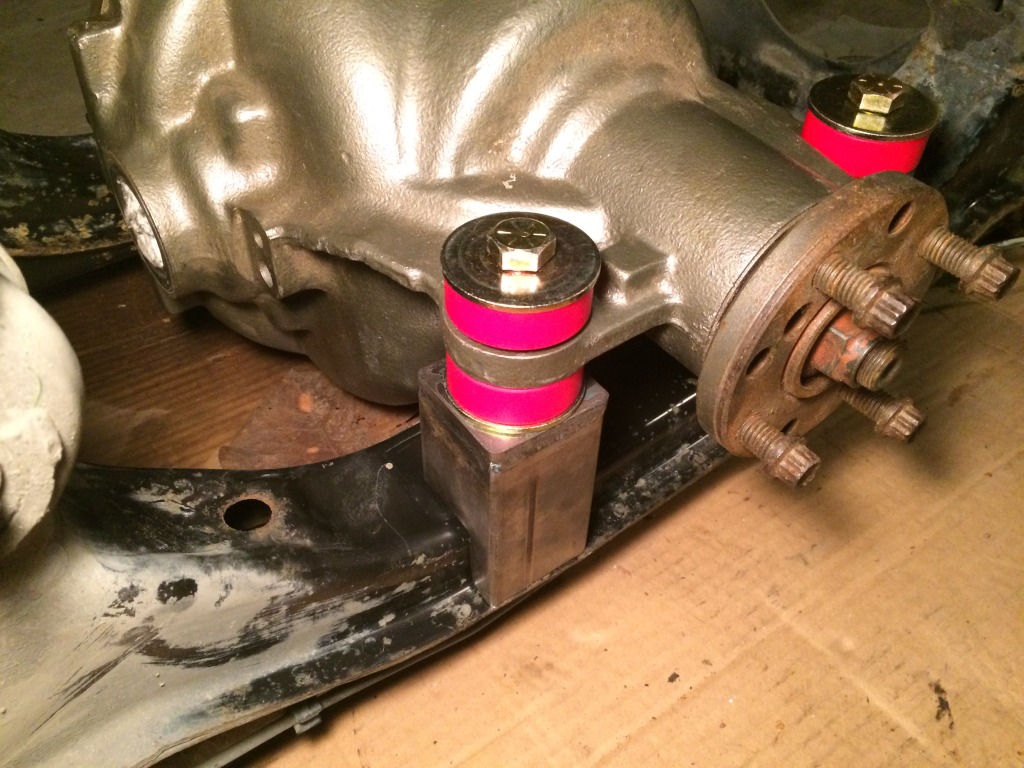
Making all the parts to mount the diff probably took me 4 hours and $15 in steel. Last night I bolted it to the diff to see how it fit, I am using the energy suspension 4.1126 poly bushings.
Tonight I pulled the subframe into a place where I could lay it down (garage is pretty crowded with parts these days). Looks like it will fit great! The parts dropped right into place.
And that's all for now guys, hopefully this weekend I'll get it welded up.
A question possibly for the moderators: after I can confirm the fitment of these diff mount parts, is there somewhere I could post the PDF drawing files of all the components? I think everyone should have access to these plans if they wish to use this design, I'm also working on a transmission brace which will have detailed plans as well.
First thing I did was pull the steering rack apart and cut the seal off for manual conversion.

Next I decided it would be a good idea to TIG up the flex joint part to eliminate any excess play.

Then reassembled the rack with grease and sealed off all the old power steering fluid fittings.

Before I pulled the engine and trans again I tossed the shifter together with the console and boot, it was perfect! I have a PRO 5.0 shifter and powerstick handle or something that came with the trans. The shifter is a two piece bolted together, I just flipped the side the upper half was attached to and it lined up very well.

Did a little more bashing and then re-routed the lines up the firewall. Then repainted the rear of the engine bay.


Repainted the engine while it was out, satin black. didnt do anything with the valve covers yet as they need to be repainted once I'm done pulling the engine in and out all the time.

Next I started work on the rear diff. I found some rough dimensions for a design I've seen used here a bit and one which I like for the simplicity. I have re-drawn all the parts to mount the 8.8 diff which you can see me working off here.


Making all the parts to mount the diff probably took me 4 hours and $15 in steel. Last night I bolted it to the diff to see how it fit, I am using the energy suspension 4.1126 poly bushings.

Tonight I pulled the subframe into a place where I could lay it down (garage is pretty crowded with parts these days). Looks like it will fit great! The parts dropped right into place.


And that's all for now guys, hopefully this weekend I'll get it welded up.
A question possibly for the moderators: after I can confirm the fitment of these diff mount parts, is there somewhere I could post the PDF drawing files of all the components? I think everyone should have access to these plans if they wish to use this design, I'm also working on a transmission brace which will have detailed plans as well.
V8 Miata Fanatic
Joined: Feb 2015
Posts: 559
Likes: 83
From: Marion Illinois
Nice drawings on the diff mount parts, but I do have one concern. I just finished up my diff mount and it looks like everything you used is thinner than mine, or Mike Moninger who originally made that design. For example, that square tubing you used looks like it is 1/8" wall thickness, with the amount of torque those mounts could have to stand up to, I'd be a little concerned that they might twist on you.

V8 Miata Participant
Joined: Feb 2010
Posts: 276
Likes: 13
From: Sarasota, FL
Miles, if the mods don't come up with something here, I'd be happy to include those pdf's on my blog, with appropriate credit.
I see you're in the mechanical engineering field, is there any way to do some sort of strength and materials analysis of this design? I put these things together based on intuition mostly and observation of what the factories do, but there isn't a lot of science to back them up.
Also, there are gussets that are not readily visible that run from side to side both on the front "crossmember" and the rear that I included but did not document well.
Very nice work and looking forward to seeing the finished product on the road.
Mike
Thread Starter
V8 Miata Fan
Joined: Sep 2015
Posts: 25
Likes: 2
From: Victoria BC Canada
stng_96, I had actually hoped to use 0.1875 wall tubing for those components originally but when I went to the local metal supermarkets thats just what I ended up with. I was thinking it would be fine considering most of the subframe is material of about that thickness, but then you got me thinking.
I've made some assumptions for a "worst case" scenario but if anyone sees any issues with them let me know. I assumed that in a few years my car might be putting out 400lbft of torque to the driveshaft, and that during a launch at peak torque the diff mounts will be subjected to the full 400lbft for a brief instant before the car begins rolling. Also ignored the fact the rear mounts will take load - for a worst case we can assume the rear mounts are taking zero of the resultant torque. Assumed any unusual force spikes would be damped out with the poly bushings. Diff mounts are approx 3.5" away from the input shaft centerline.
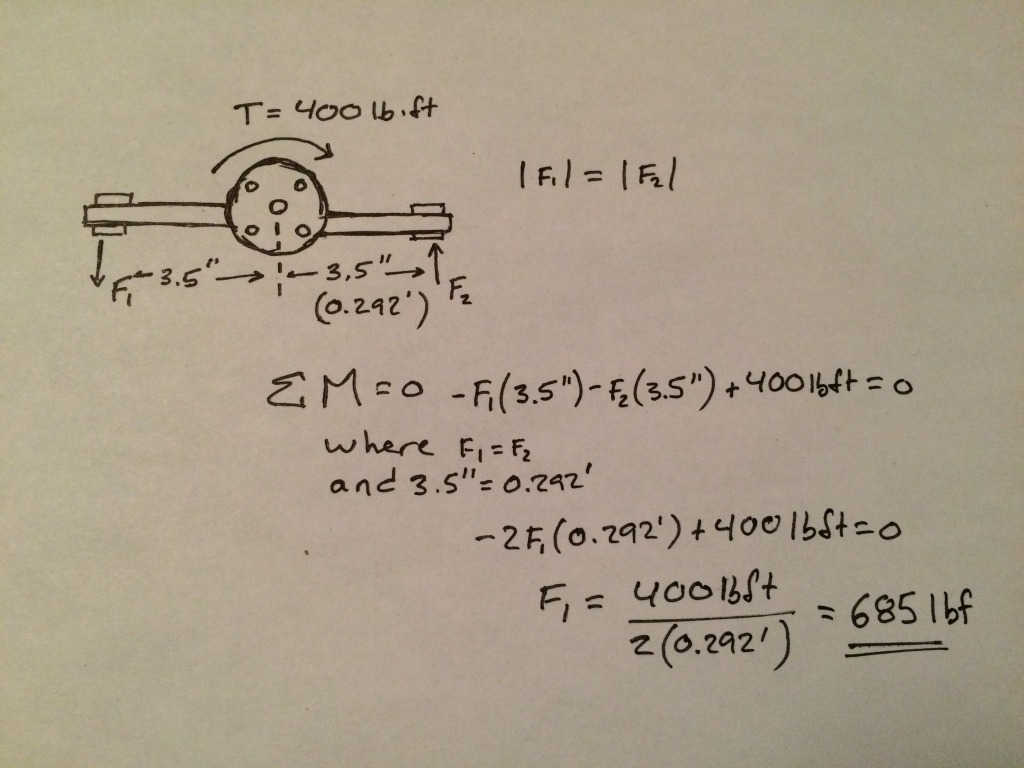
So peak force in each square mount is roughly 685 pounds of force at launch, this is ignoring diff and driveshaft weight but I think for the purposes of this analysis it can be negligible. Next I did an FEA analysis on the 0.125 wall plain steel mount.
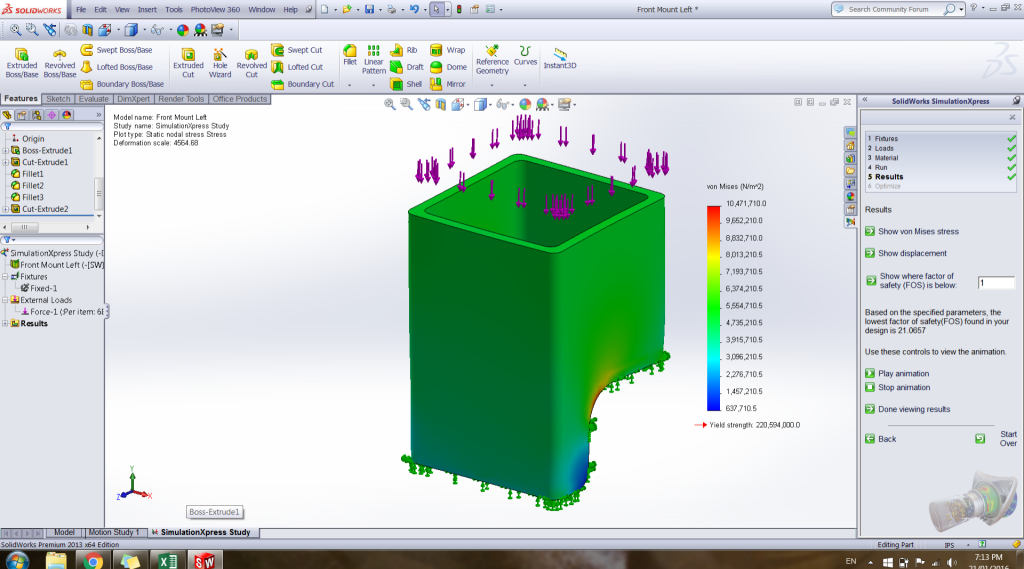
the 0.125 wall mount had a factor of safely of 21 before any yielding occurred. Next I analised the same mount but with a 0.1875 wall instead
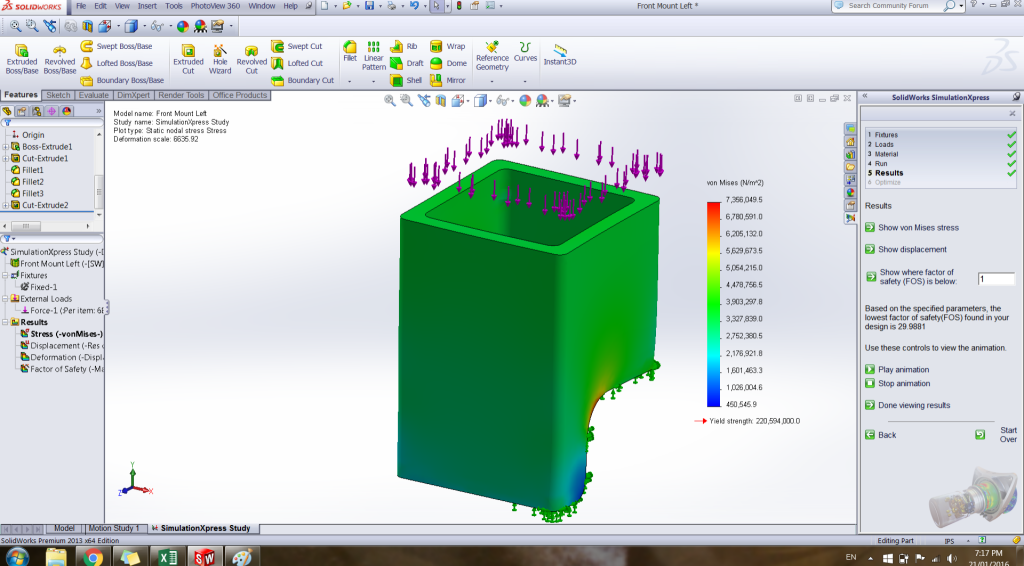
The 0.1875 wall mount had a factor of safely of 30, roughly a 30% increase over the 0.125 wall mount. Quite an increase but I feel comfortable with a factor of safety of 20 in that part, I think the welds will fail in tension on that mount before one buckles in compression. What do you guys think?
Mike, I had no idea you were the original creator of that mount, I apologize for not giving you credit earlier. I will talk to you shortly about getting your name on those drawings as well and then sending them over to you.
Sorry if there are some grammatical errors in this post or its lacking crucial info, its late, my session timed out and I lost everything, so I've re-written this thing twice!
V8 Miata Participant
Joined: Feb 2010
Posts: 276
Likes: 13
From: Sarasota, FL
That all looks reasonable, with the assumption that you're launching in high gear. You need to factor in the torque multiplication of the transmission, typically around 3:1 in first gear. But it's still a workable design. Especially since the rear mount plays an important part.
To give you some more food for thought, what about the additional load imparted by the transfer of torque thru the axle? At that point, the multiplication by the rear end ratio comes into play, so assuming another 3.5 or so, you could end up with .... um..., a pretty big number that the rear end housing has to deal with. If it could be effectively transmitted to the ground, you could do wheelies in your Miata.
As far as credit for the design, that was not the implication. I meant that I would credit YOU for the effort involved in creating the documentation. And now for the analysis. I have always admired the open source concept as applied to projects like putting V8s in Miatas and hopefully now others down the line will benefit from our contributions.
So, again, thanks.
Mike


