
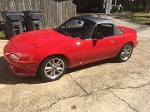
1991 Miata Monster 5.0 Build With SN95

Thread Starter
V8 Miata Participant
Joined: Nov 2014
Posts: 296
Likes: 12
From: Atlanta, Ga
I do not have the over heating one (we'll see though...), just the one in the build stage!
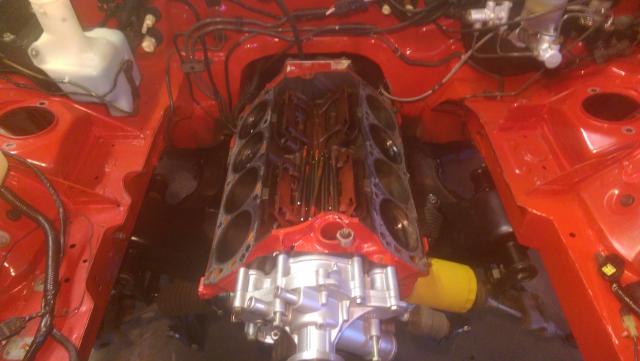
So I have the trans shimmed up 3/4 inch at the trans mount cross member and a slight tilt at the engine blocks using two washers in front an no washers in the back (other than the large "nut" spacers). The engine and trans are in and adjusted. I'm very happy with the overall alignment.
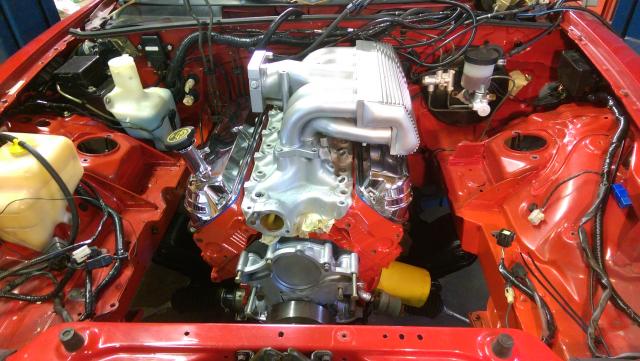
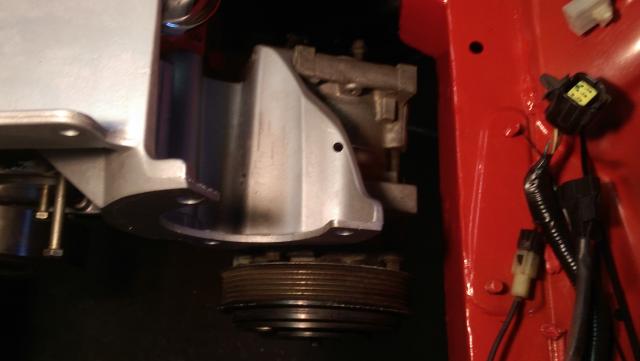
Here is the A/C compressor notch looking like is is adequate.
I was able to put the hood on and latch it in front. Here are pictures of the clearance under the hood.
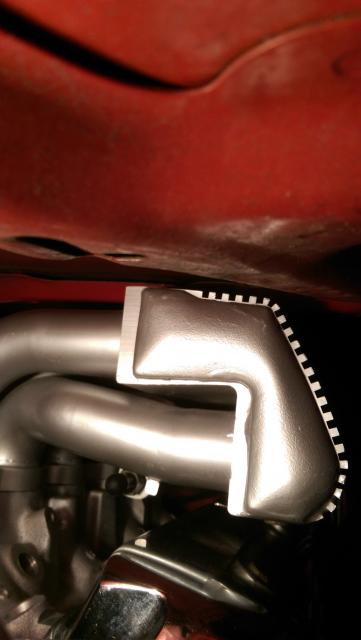
So the intake will rise a little with the various intake gaskets to be installed. The other item will be the throttle body that may get into the hood. Don't know yet but everything is looking good so far.
Now if I can only get the TBird axle to come out of the outer CV joint I'll be in good shape.
So I have the trans shimmed up 3/4 inch at the trans mount cross member and a slight tilt at the engine blocks using two washers in front an no washers in the back (other than the large "nut" spacers). The engine and trans are in and adjusted. I'm very happy with the overall alignment.

Here is the A/C compressor notch looking like is is adequate.

I was able to put the hood on and latch it in front. Here are pictures of the clearance under the hood.


So the intake will rise a little with the various intake gaskets to be installed. The other item will be the throttle body that may get into the hood. Don't know yet but everything is looking good so far.
Now if I can only get the TBird axle to come out of the outer CV joint I'll be in good shape.

Thread Starter
V8 Miata Participant
Joined: Nov 2014
Posts: 296
Likes: 12
From: Atlanta, Ga
I tried the old pipe trick to get that CV joint off the axle after reviewing Gabriel's video. These are "new" rebuilts from Cardone so I don't know if that has something to do with it but I pounded and pounded on both of them and no luck. Was getting worried about the possibility of having to go to an actual axle shop... Then I decided - after carefully watching Gabriel's video again - to just cut the axle off close to the CV joint and take it apart. I would never have done that without Gabriel's video! Spun the joint around and shoved the nub out. C clip still there with no evidence of budging at all.
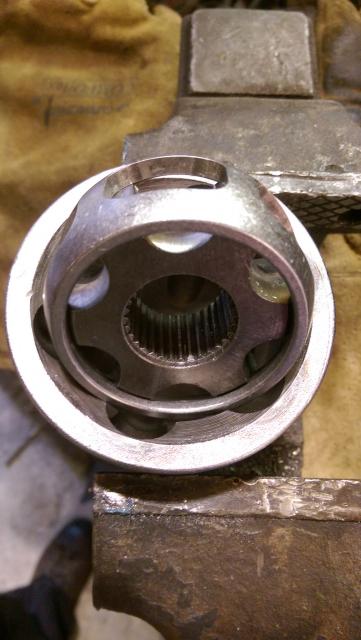
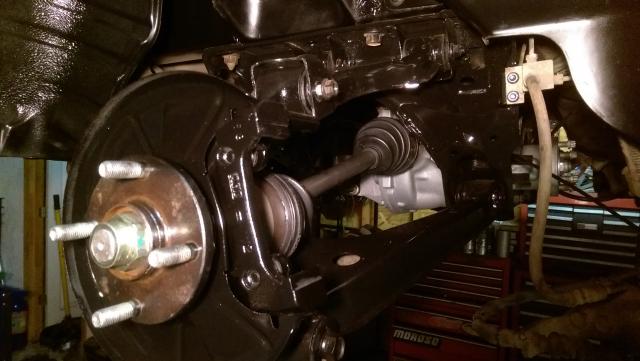
Cleaned it all up, did it again to the other axle, packed them with grease and installed in car. I also installed new hub bearings and new axle seals in the diff.
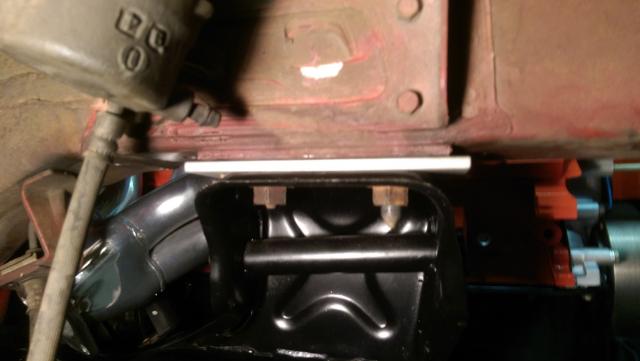
Here is a picture of the shim I used in the front K member. I'll probably have the lower intake milled down 1/4 inch just to be completely safe on hood clearance.


V8 Miata Fanatic
Joined: Aug 2014
Posts: 634
Likes: 15
From: Seven Hills, OH
Did you shim the K in the rear bolt holes as well, or just the studs as shown? How thick, 1/4"? Seems like a good idea to add clearance. Planning on milling my lower intake as well.
Jason
Jason
Thread Starter
V8 Miata Participant
Joined: Nov 2014
Posts: 296
Likes: 12
From: Atlanta, Ga
I did shim the back K member bolts as well using large flat washers (two each). Shim is 1/4 inch. Not much but a little helps!
Also note that I am having to shim up the rear trans mount. About 3/4 inch to level out the engine front to back. Shifter mount surface will be approximately 1 1/4 inch below tunnel sheet metal with shim.
Also note that I am having to shim up the rear trans mount. About 3/4 inch to level out the engine front to back. Shifter mount surface will be approximately 1 1/4 inch below tunnel sheet metal with shim.
V8 Miata Fanatic
Joined: Aug 2014
Posts: 634
Likes: 15
From: Seven Hills, OH
I did shim the back K member bolts as well using large flat washers (two each). Shim is 1/4 inch. Not much but a little helps!
Also note that I am having to shim up the rear trans mount. About 3/4 inch to level out the engine front to back. Shifter mount surface will be approximately 1 1/4 inch below tunnel sheet metal with shim.
Also note that I am having to shim up the rear trans mount. About 3/4 inch to level out the engine front to back. Shifter mount surface will be approximately 1 1/4 inch below tunnel sheet metal with shim.
Jason
Thread Starter
V8 Miata Participant
Joined: Nov 2014
Posts: 296
Likes: 12
From: Atlanta, Ga
Not too much work done today. Got the trans cross member holes drilled with bolts through the end plates. Sorted the alternator wire connectors along with the oil pressure and water temp sender connections. I'm using the original Miata oil and water temp senders.
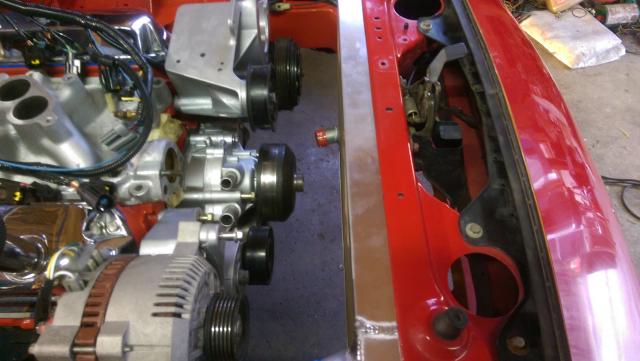
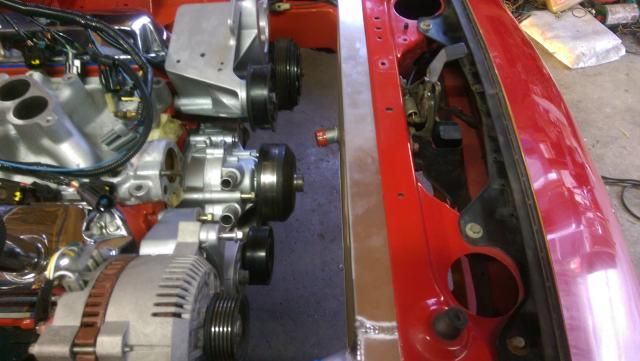
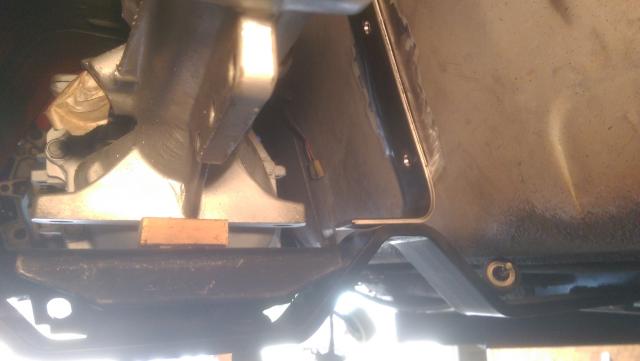
I figured out the radiator mount setup. Seems a little sketchy with no real positive cradles for it to be planted in so I will work a little more with the mounts to ensure it can not move. Here is a picture of the space between the radiator and the SN95 accessories. Almost 4 inches of space overall.
Have a great Christmas!
I figured out the radiator mount setup. Seems a little sketchy with no real positive cradles for it to be planted in so I will work a little more with the mounts to ensure it can not move. Here is a picture of the space between the radiator and the SN95 accessories. Almost 4 inches of space overall.

Have a great Christmas!
V8 Miata Fanatic
Joined: Aug 2014
Posts: 634
Likes: 15
From: Seven Hills, OH
Not too much work done today. Got the trans cross member holes drilled with bolts through the end plates. Sorted the alternator wire connectors along with the oil pressure and water temp sender connections. I'm using the original Miata oil and water temp senders.
I figured out the radiator mount setup. Seems a little sketchy with no real positive cradles for it to be planted in so I will work a little more with the mounts to ensure it can not move. Here is a picture of the space between the radiator and the SN95 accessories. Almost 4 inches of space overall.
Have a great Christmas!
Jason

Thread Starter
V8 Miata Participant
Joined: Nov 2014
Posts: 296
Likes: 12
From: Atlanta, Ga
For some reason I would rather not trim them if at all possible. But in the end if I have to I will do as little trimming of the hood "bracing" as needed.
I don't know how everyone else does it but I've been trying to keep a list going that helps me know where I am at with the build and what I have to do. Forgetting something is not an option. The list keeps growing as I determine additional things that need attention or addressing. Labor time is not completely accurate when you add in all the research time but a representation of the actual item's duration. I put a $25 / HR rate on it for labor. I work for cheap.
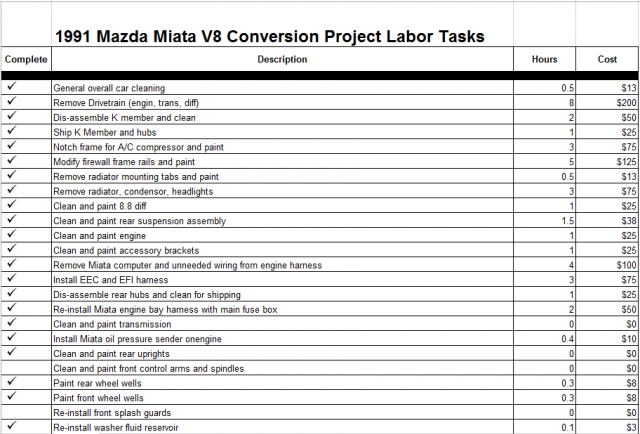
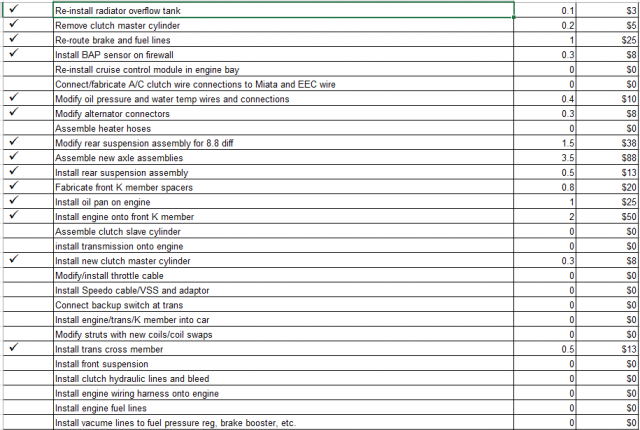
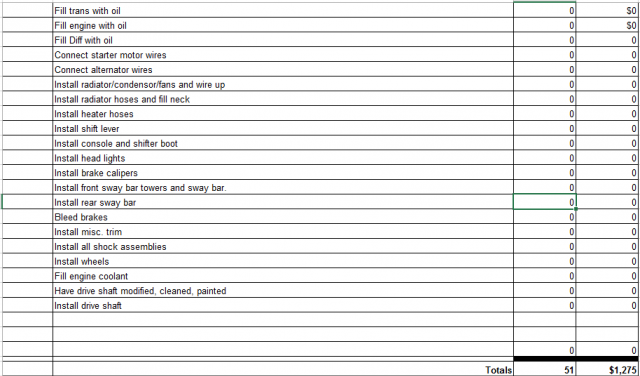
I don't know how everyone else does it but I've been trying to keep a list going that helps me know where I am at with the build and what I have to do. Forgetting something is not an option. The list keeps growing as I determine additional things that need attention or addressing. Labor time is not completely accurate when you add in all the research time but a representation of the actual item's duration. I put a $25 / HR rate on it for labor. I work for cheap.


Thread Starter
V8 Miata Participant
Joined: Nov 2014
Posts: 296
Likes: 12
From: Atlanta, Ga
Did several small things over the weekend (clutch master and slave cylinder setups, final routing of fuel lines, strut spring conversions and rear brake install among other things).
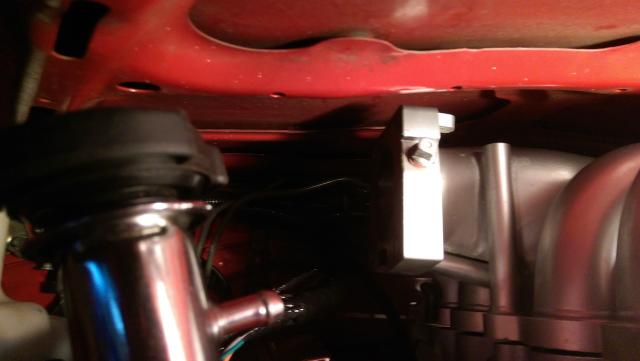
I've read so much that I'm not sure now where I saw this but a great idea. I noticed the trans mount had some bounce to it so I installed this bracket.
I wanted to be able to unbolt it if needed without taking the seat out. This allows me to do that.
I've read so much that I'm not sure now where I saw this but a great idea. I noticed the trans mount had some bounce to it so I installed this bracket.

I wanted to be able to unbolt it if needed without taking the seat out. This allows me to do that.

V8 Miata Zealot
Joined: Mar 2010
Posts: 1,220
Likes: 51
From: Canton, Georgia
Thread Starter
V8 Miata Participant
Joined: Nov 2014
Posts: 296
Likes: 12
From: Atlanta, Ga
This is how I stiffened my crossmember. https://www.v8miata.net/v8-miata-bui...es-1163/page4/

Jim Stainer
Joined: Jul 2011
Posts: 2,462
Likes: 62
From: Sunny SW Minnesota
+1 I ran a couple of bolts up through the floor like Tbone did too and that really firms things up. The floor is about 3 layers thick right there and really strong.
I love your time sheet! I sort of stopped keeping track at 300 hours or so...
I love your time sheet! I sort of stopped keeping track at 300 hours or so...
V8 Miata Zealot
Joined: Mar 2010
Posts: 1,220
Likes: 51
From: Canton, Georgia
Thread Starter
V8 Miata Participant
Joined: Nov 2014
Posts: 296
Likes: 12
From: Atlanta, Ga
So I ran over a couple of bumps in the road with this build...
GT40P heads DO NOT WORK. The passenger side is fine, no problems at all. The driver side (of which I did not have the header for a while to check with) is not. I had forgotten about this issue as I was wrapping the passenger side header and at some point I thought I had better check plug clearance on the driver side. Number 7 plug goes right into - and I mean right into - the header tube. This means serious crushing of the header tube or even cutting and welding in a modified piece, re-coat, etc. I'm still debating the plan. My son has a set of GT40 heads (huge combustion chambers however some machining has been done) to swap with so that may be it.
The other bump is that SN95 bell housing. That thing is huge and with the motor back as far as it is I would need to do some serious clearancing either on the tunnel or the bell housing - trimming tabs/runners, etc. I got a hold of a fox body bell and clutch fork and decided to use it instead. Lots of clearance. No problem. Now the trans itself has a longer input shaft to deal with. Either convert to the shorter one or as it turns out, modern driveline has a spacer just for this purpose. About the same cost going either way and I still like the idea of having the shifter closer to the Miata original location. Spacer it is.
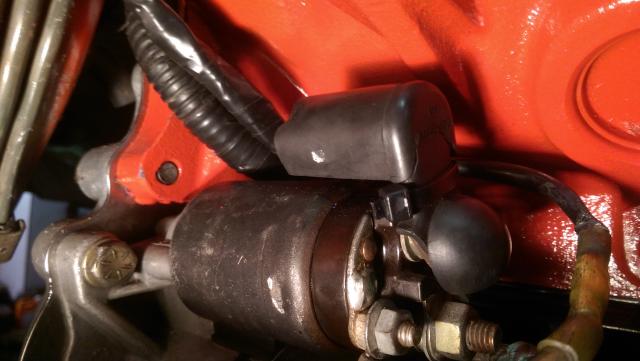
So the starter is in
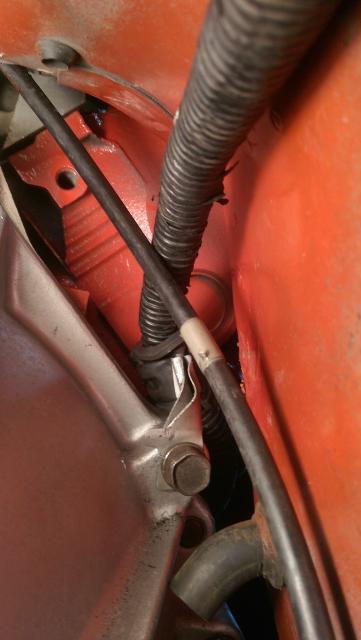
Here is where I used on of those Miata harness holders to keep the main harness from rubbing on things. I will probably move the main harness to the other side of the speedo cable and attach to the trans then move it over to the body further down the tunnel.
I got the clutch installed and bled the cylinders. Using a very slight preload on the throw out bearing/pressure plate.
Once the spacer arrives, I will cut the tunnel hole for the shifter and final bolt it all in place. Then get the drive shaft measured and built. While that is going on, I'll do something with those cylinder heads...
Happy New Year!
GT40P heads DO NOT WORK. The passenger side is fine, no problems at all. The driver side (of which I did not have the header for a while to check with) is not. I had forgotten about this issue as I was wrapping the passenger side header and at some point I thought I had better check plug clearance on the driver side. Number 7 plug goes right into - and I mean right into - the header tube. This means serious crushing of the header tube or even cutting and welding in a modified piece, re-coat, etc. I'm still debating the plan. My son has a set of GT40 heads (huge combustion chambers however some machining has been done) to swap with so that may be it.
The other bump is that SN95 bell housing. That thing is huge and with the motor back as far as it is I would need to do some serious clearancing either on the tunnel or the bell housing - trimming tabs/runners, etc. I got a hold of a fox body bell and clutch fork and decided to use it instead. Lots of clearance. No problem. Now the trans itself has a longer input shaft to deal with. Either convert to the shorter one or as it turns out, modern driveline has a spacer just for this purpose. About the same cost going either way and I still like the idea of having the shifter closer to the Miata original location. Spacer it is.
So the starter is in

Here is where I used on of those Miata harness holders to keep the main harness from rubbing on things. I will probably move the main harness to the other side of the speedo cable and attach to the trans then move it over to the body further down the tunnel.

I got the clutch installed and bled the cylinders. Using a very slight preload on the throw out bearing/pressure plate.


Once the spacer arrives, I will cut the tunnel hole for the shifter and final bolt it all in place. Then get the drive shaft measured and built. While that is going on, I'll do something with those cylinder heads...
Happy New Year!
Last edited by V8MiataMike; Jan 5, 2015 at 08:23 AM.
Thread Starter
V8 Miata Participant
Joined: Nov 2014
Posts: 296
Likes: 12
From: Atlanta, Ga
Two steps forward and one step back...
But the transmission spacer came in today so now the trans is all but permanently (we'll see!) installed!


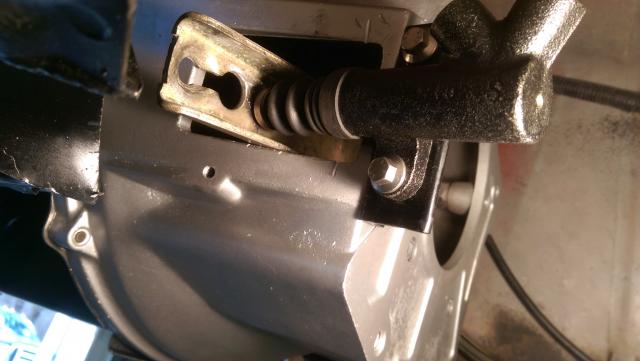
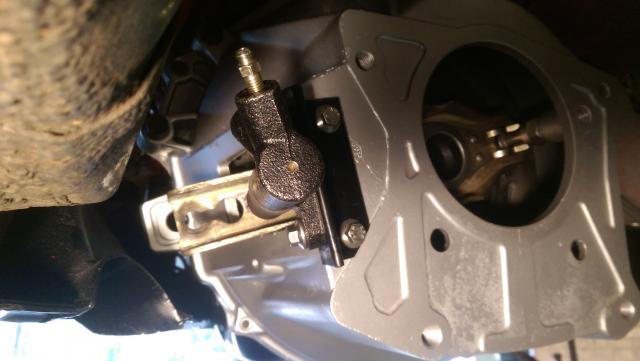
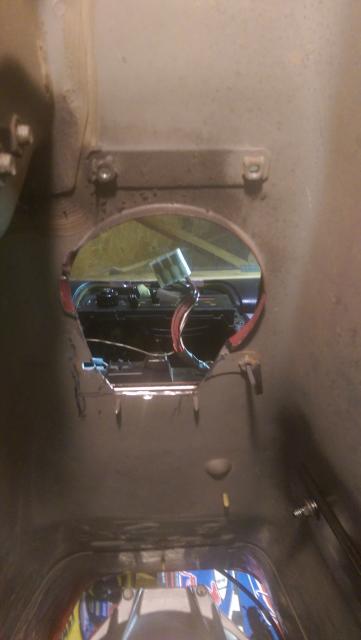
I cut the hole in the tunnel for the shifter from underneath. Very easy access. I'm using the Pro 5.0 shifter so that big round raised portion of the shifter sits just below the tunnel surface.
I'm using Martin's shift handle but it will need a little tweeking as it is sitting back further with the longer SN95 transmission setup.
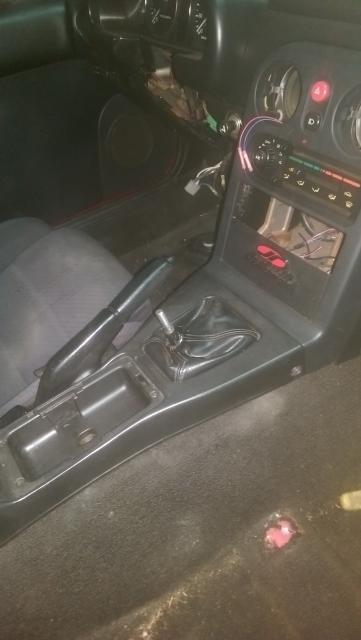
I can reach through the tunnel shifter hole and turn the yoke I have installed on the end of the trans. As far as clutch operation, I have just a slight bit of preload on the throw out bearing. When I push the clutch pedal to the floor with trans in first gear, I can freely turn the yoke. As I release/back off the pedal, the clutch engages nicely. My only concern is that it starts engaging very quickly coming off the floor. Overall very happy though as it operates very smoothly.

But the transmission spacer came in today so now the trans is all but permanently (we'll see!) installed!


I cut the hole in the tunnel for the shifter from underneath. Very easy access. I'm using the Pro 5.0 shifter so that big round raised portion of the shifter sits just below the tunnel surface.

I'm using Martin's shift handle but it will need a little tweeking as it is sitting back further with the longer SN95 transmission setup.

I can reach through the tunnel shifter hole and turn the yoke I have installed on the end of the trans. As far as clutch operation, I have just a slight bit of preload on the throw out bearing. When I push the clutch pedal to the floor with trans in first gear, I can freely turn the yoke. As I release/back off the pedal, the clutch engages nicely. My only concern is that it starts engaging very quickly coming off the floor. Overall very happy though as it operates very smoothly.
Last edited by V8MiataMike; Jul 11, 2015 at 05:05 PM.

V8 Miata Follower
Joined: Jun 2013
Posts: 115
Likes: 0
From: OH, the Arctic rain forest
When I push the clutch pedal to the floor with trans in first gear, I can freely turn the yoke. As I release/back off the pedal, the clutch engages nicely. My only concern is that it starts engaging very quickly coming off the floor. Overall very happy though as it operates very smoothly.
Am not sure which clutch master cylinder is used in a kit, but if it's an adjustable master, you should be able to dial in the engage/release points...or you coul make your own w/ some threaded rod, nuts & a forked end to attach to the pedal arm.
Jim Stainer
Joined: Jul 2011
Posts: 2,462
Likes: 62
From: Sunny SW Minnesota
Hang in there man builders fatigue is setting in! Can't tell you how many times I walked in from the garage discouraged and told my wife one step forward and 2 (or more) steps back. I'm quite sure I did enough of that to have built the car at least twice! Hang in there and just focus on one small piece at a time.
If you need a bit of perspective we got 6 inches of snow yesterday and tonight's low is forecast for -15 so there is no question you are lucky to be in the promised land and going to have a great day!
If you need a bit of perspective we got 6 inches of snow yesterday and tonight's low is forecast for -15 so there is no question you are lucky to be in the promised land and going to have a great day!


