
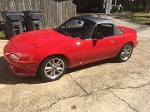
1991 Miata Monster 5.0 Build With SN95


Thread Starter
V8 Miata Participant
Joined: Nov 2014
Posts: 296
Likes: 12
From: Atlanta, Ga
Boner indeed! Fortunately, my son has done some horse trading with me and he has supplied all the drivetrain including the intake hardware. Cool for sure (and he says I can not sell it with the GT40 intake on it if I ever do sell it - and he gets to cruise it once and a while - no problem!).
So here is what happens when you have no parts to play with... It may never run again...
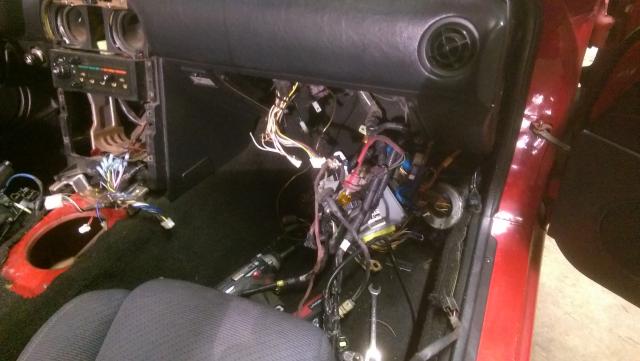
I'm taking out all or most of the non essential wiring including the "blinking light" air bag system. Gonna get a decent steering wheel in the near future.
I also forgot that the short term plan includes bigger brakes after getting it running reliably.

V8 Miata Fanatic
Joined: Aug 2014
Posts: 634
Likes: 16
From: Seven Hills, OH
Yeah, I've been hacking away at my harness as well. Just gonna re-run the few wires that need to tie in to the stang harness, easier than chasing the factory stuff (mine is a 96, so it's a little different than the Martin book anyway).
Jason
Jason
Thread Starter
V8 Miata Participant
Joined: Nov 2014
Posts: 296
Likes: 12
From: Atlanta, Ga
Spent some of today working on wiring. I have an after market EFI harness so it has relays for EEC power, O2 heater power, fuel pump power and one more that may be for things like the coil, etc. I think this makes things much easier. The harness was another horse trade item from my Son. All the Miata original engine controls are gone.
So inside I have the EEC installed (A9P) and the tach and MIL hooked up, Foot cover and carpet back in. A/C evaporator back in as well (what a PITA and those clamps...). only a few more wires in the engine bay and it is ready to go.
So inside I have the EEC installed (A9P) and the tach and MIL hooked up, Foot cover and carpet back in. A/C evaporator back in as well (what a PITA and those clamps...). only a few more wires in the engine bay and it is ready to go.
Thread Starter
V8 Miata Participant
Joined: Nov 2014
Posts: 296
Likes: 12
From: Atlanta, Ga
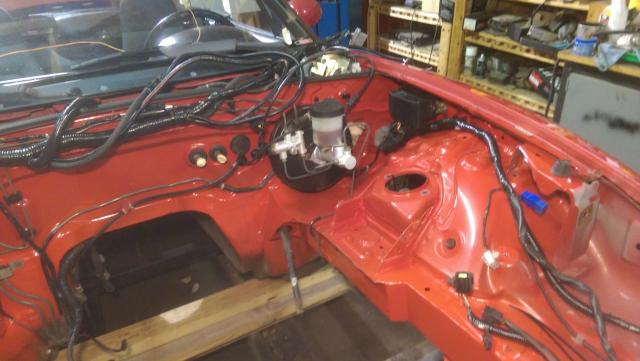
Only a couple of electrical items left to do now. Inside the car is again buttoned up except for the console and tombstone trim - waiting for the trans shifter alignment and any cutting that may be necessary for it. The EFI harness I'm using has the controlled relay for the fuel pump driver so I ran that lead (power to the fuel pump) to that circuit opening relay connector under the dash blue/red connection. I feel much more comfortable with the EEC running the fuel pump rather than jumpering it on all the time.
I stripped back the alternator leads and ran them up over the inner fender and will have it up front near the alternator. I ordered the 3G pigtail to integrate into the Miata wires.
EFI harness relay pack and fuses is behind the Miata main power box. The EFI harness also has an A/C on sense wire that I'll need to connect when the engine and A/C compressor is in.
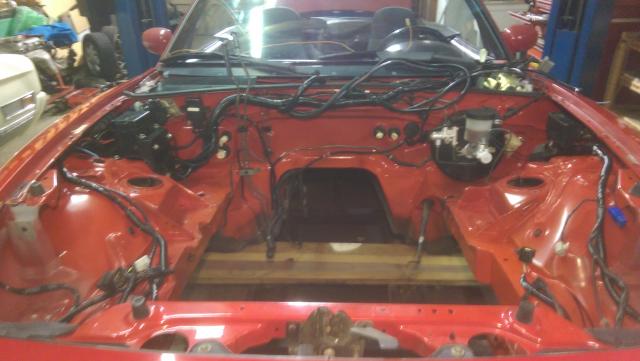
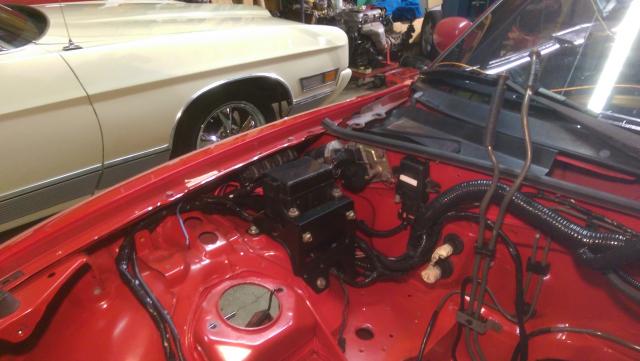
It's amazing how quickly the wiring can fill up space in the engine compartment.

V8 Miata Participant
Joined: Jan 2010
Posts: 290
Likes: 12
To clean up my wiring a bit, I also ran wires over the inner fender......and behind and under the headlights. The heavy alt. wires went down and along the engine block to the battery. They're run in a lenght of heater hose and wrapped in insulation to protect against chaffing and heat. A very few thousand miles and no issues yet.


 it's done!
V8 Miata Fanatic
Joined: Aug 2014
Posts: 634
Likes: 16
From: Seven Hills, OH
LOL Jim, same thought here.
Funny, I was going through the wiring diagrams yesterday, and am planning on the same thing with the fuel pump circuit. The EFI harness has the relay, why not use it.
Jason
Funny, I was going through the wiring diagrams yesterday, and am planning on the same thing with the fuel pump circuit. The EFI harness has the relay, why not use it.
Jason
Thread Starter
V8 Miata Participant
Joined: Nov 2014
Posts: 296
Likes: 12
From: Atlanta, Ga
Nice work on that very clean engine bay. I looked at running the harnesses up high on the fender wells like you did but waiting on putting the lights back in to ensure light movement operation.
I took the lights out because no matter how hard I tried not to, I kept leaning on them and bending the lids. Had to get them out before I destroyed them!
I took the lights out because no matter how hard I tried not to, I kept leaning on them and bending the lids. Had to get them out before I destroyed them!
Thread Starter
V8 Miata Participant
Joined: Nov 2014
Posts: 296
Likes: 12
From: Atlanta, Ga
It would probably be a good idea to include the inertia switch as you did. I'm gonna see if I can find one...
But for now, I have bigger problems. Parts have arrived! No excuses for not getting it done!
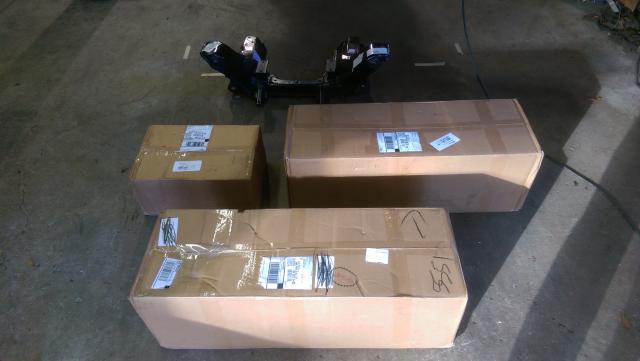
So I cleaned the remaining things that needed it and they are now ready for paint (suspension parts...).
But for now, I have bigger problems. Parts have arrived! No excuses for not getting it done!

So I cleaned the remaining things that needed it and they are now ready for paint (suspension parts...).

 4 months till mitty!

V8 Miata Zealot
Joined: Mar 2010
Posts: 1,220
Likes: 51
From: Canton, Georgia
Drill a hole on each side of the firewall while the engine is out. I wish I had. You can plug them off with some rubber plugs if you do not use them. You may need the holes later if you decide to run some gauges in the future.


Administrator
Joined: Nov 2009
Posts: 1,120
Likes: 38
From: Allentown, PA
Hi. I've been a little not here lately but wanted to comment on a couple parts of your posts. First, everything looks very awesome so far and you are definatly going at this the right way. I've always thought the best way to tackle one of these builds is to plan, plan, plan and then build fast. When you take too long it increases the chances you'll loose interest, parts or funding.
I'm not sure you'll be able to use the gt40p heads you have with Martin's headers, although I all honesty I can't conclusive say anyone has actually tried yet. The issue is the angle the plugs are set at. Martin's headers are designed around the traditional slanted plug style heads. The good news is the p heads are generally more sought after and may be very easy to trade for a set of gt40's on a mustang site. I may even be pulling mine off my car in favor of a set of AFRs over the winter and looking to find them a new home.
If you can ditch the smog pump the ac compressor is incredibly easy to mount in its place which saves you from having to cut into the engine bay sides. You should only need the smog pump if you state's emission inspections looks for the car to have all the donor engine's equipment. If it looks for the miata's equipment you don't need it as a Miata does not have one. If they do a sniff test you can get a modern catalytic converter to more than make up for the antiquated tech of the smog pump.
-Jason
Thread Starter
V8 Miata Participant
Joined: Nov 2014
Posts: 296
Likes: 12
From: Atlanta, Ga
Jason, thank you for the update! The car is a 1991 and here in Georgia, it will no longer need any emissions compliance as it will be 25 years old in 2016. I bought the car and used the emission certificate for the title transfer and it is good for one tag renewal (it will be used to renew in 2015) so that is it. No smog worries! No smog pump, no cats, no worries!
I already notched the frame for the A/C compressor to be on the driver side. Ready to go.
I specifically asked Martin about the GT40P heads and he said they work with the correct spark plug wire boot angle - 90 degrees. But I am "bracing" myself for a problem and will replace the heads with decent aluminum heads if needed. Go ahead, give me an excuse! (rationale for buying yet more things for the build... yikes...).
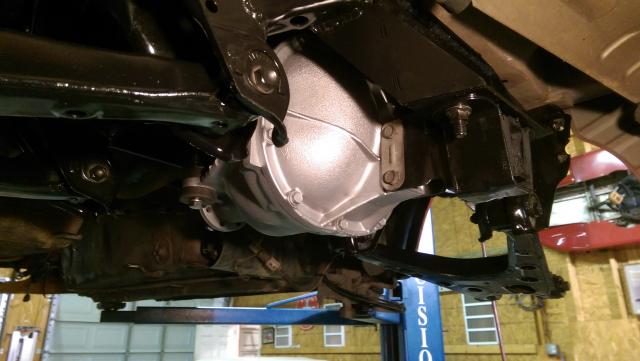
The rear suspension and diff are in the car. It feels good to be moving to the "build" direction rather than the dismantle direction.
I already notched the frame for the A/C compressor to be on the driver side. Ready to go.
I specifically asked Martin about the GT40P heads and he said they work with the correct spark plug wire boot angle - 90 degrees. But I am "bracing" myself for a problem and will replace the heads with decent aluminum heads if needed. Go ahead, give me an excuse! (rationale for buying yet more things for the build... yikes...).
The rear suspension and diff are in the car. It feels good to be moving to the "build" direction rather than the dismantle direction.

V8 Miata Fanatic
Joined: Aug 2014
Posts: 634
Likes: 16
From: Seven Hills, OH
Curious, which ECU pin did you use to trigger the Miata Fuel Pump relay. I see pin 19 is labeled as the monitoring wire, but it also looks to be the wire that goes to the fuel pump off of the Ford fuel pump relay. I see pin 22 which looks to the the trigger for the Ford Fuel Pump relay. I am thinking if I used that, I would have a MIL as the fuel pump would not be running through the ford relay.
Thoughts?
Thanks,
Jason
Thoughts?
Thanks,
Jason
Thread Starter
V8 Miata Participant
Joined: Nov 2014
Posts: 296
Likes: 12
From: Atlanta, Ga
Jason, I have a relay (not part of the original Miata circuitry) that is negative picked by pin 22 of the Ford EEC which is the control point of the EEC. +12V to the relay pick side is supplied by the output of the main EEC power relay. The high current +12V output side of the relay goes to both the fuel pump itself (through an inertia switch if you use one) and to pin 19 of the EEC with is merely feedback to the EEC that the pump is actually on. The high current +12V to this relay is a fused always hot from the battery. This relay is most likely part of the original Mustang wiring harness if you have one that is mass air related but you never know...
So it is an external relay (as Ford utilized it) not part of the original Miata circuitry that is providing an output to that plug under the driver side dash that is connected to that blue/red wire that goes right to the original Miata pump. This plug was connected to the Miata circuit opening relay (how the original Miata circuitry managed the fuel pump power).
So it is an external relay (as Ford utilized it) not part of the original Miata circuitry that is providing an output to that plug under the driver side dash that is connected to that blue/red wire that goes right to the original Miata pump. This plug was connected to the Miata circuit opening relay (how the original Miata circuitry managed the fuel pump power).
Thread Starter
V8 Miata Participant
Joined: Nov 2014
Posts: 296
Likes: 12
From: Atlanta, Ga
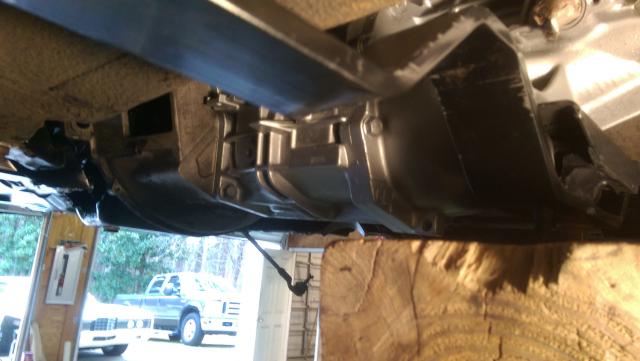
So I learned today the oil pan to cross member clearance is not the issue. It is the rack to oil pan that has everything to do with clearancing the engine to the cross member...
Here is what I had to do the the power rack unit.
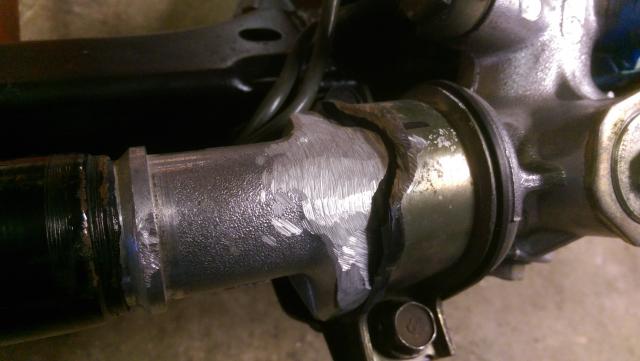
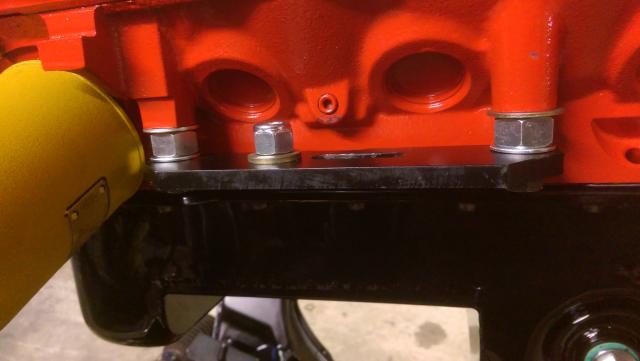
Here is where I landed with the block plate spacers.
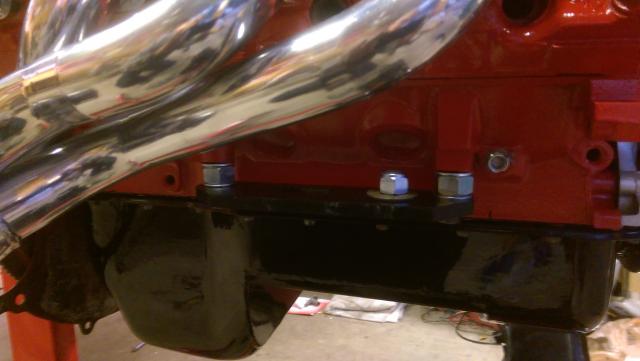
I plan to use spacers to bring the K member down at least a 1/4 inch from the car frame to help with hood clearance. But right now the rack is like somebody said. "two credit cards worth of space between the rack and oil pan"...
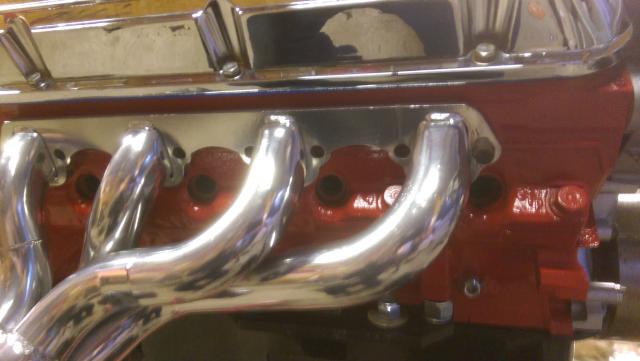
Another piece of good news and bad news. The passenger side header and GT40P spark plug angle issue is not an issue. Spark plugs and wires will work fine. The bad news piece is that I have two passenger side headers. Martin is getting me the driver side header ASAP.
Here is what I had to do the the power rack unit.

Here is where I landed with the block plate spacers.


I plan to use spacers to bring the K member down at least a 1/4 inch from the car frame to help with hood clearance. But right now the rack is like somebody said. "two credit cards worth of space between the rack and oil pan"...
Another piece of good news and bad news. The passenger side header and GT40P spark plug angle issue is not an issue. Spark plugs and wires will work fine. The bad news piece is that I have two passenger side headers. Martin is getting me the driver side header ASAP.

V8 Miata Fanatic
Joined: Aug 2014
Posts: 634
Likes: 16
From: Seven Hills, OH
Bummer on the headers. He actually emailed me yesterday to double check mine, as I just got my pair from him.
Thanks for the info on the wiring. That is how I thought it should run, and what the MAF wiring I have has build in. I'll bypass the Miata relay by tying pin 19 to the fuel pump power wire (blue/red).
Thanks!
Jason
Thanks for the info on the wiring. That is how I thought it should run, and what the MAF wiring I have has build in. I'll bypass the Miata relay by tying pin 19 to the fuel pump power wire (blue/red).
Thanks!
Jason

Thread Starter
V8 Miata Participant
Joined: Nov 2014
Posts: 296
Likes: 12
From: Atlanta, Ga
Administrator
Joined: Nov 2009
Posts: 1,120
Likes: 38
From: Allentown, PA
If you are using a 1995 computer and harness you should have something called a "Constant Control Relay Module" or CCRM with it. This contains four relays, one for the fuel pump, two for the fans and one for the AC WOT shut off. You should just be able to pull the leads from the module to power the fuel pump and fans.
-Jason
-Jason
Thread Starter
V8 Miata Participant
Joined: Nov 2014
Posts: 296
Likes: 12
From: Atlanta, Ga
So this is that part of the build where main assemblies will be going in and out a few times...
I don't have the driver side header yet but wanted to get started on overall engine/trans fitment. I lowered the car onto the engine with the K member on it (attached to engine stand) to see where things line up.
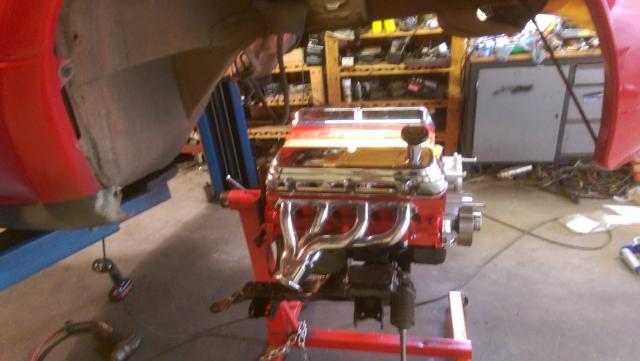

Used a Fox body bell (no clutch/pilot bearing so input shaft could go all the way into crank shaft) and set the trans member at the 3 1/2 mark from seam per Martin's manual. This gives me the approximate front to back alignment.
I learned with this setup that the engine has a tilt to it relative to the engine mount towers on the K member.
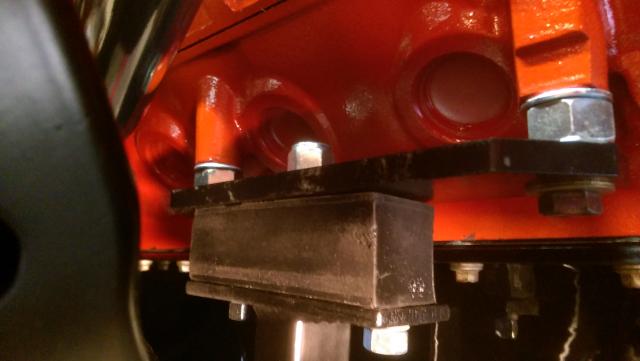
As you can see in the picture, the engine is compressing the rear of the motor mount and lifting in the front. I have the top nut a little loose. Does anyone know if this is typical? I guess I'm OK with making high/low spacers for the engine block mounts and this actually helps with steering rack clearance - I can shorten the spacers a bit with the engine tilted as it brings up the oil pan in the front area clearing the steering rack more. I have seen other posts where the washer stacks have more in front than in back so it may be a normal setup. Otherwise, the trans will have to be lifted much more than cross member and trans mount currently set it at.
I don't have the driver side header yet but wanted to get started on overall engine/trans fitment. I lowered the car onto the engine with the K member on it (attached to engine stand) to see where things line up.


Used a Fox body bell (no clutch/pilot bearing so input shaft could go all the way into crank shaft) and set the trans member at the 3 1/2 mark from seam per Martin's manual. This gives me the approximate front to back alignment.

I learned with this setup that the engine has a tilt to it relative to the engine mount towers on the K member.

As you can see in the picture, the engine is compressing the rear of the motor mount and lifting in the front. I have the top nut a little loose. Does anyone know if this is typical? I guess I'm OK with making high/low spacers for the engine block mounts and this actually helps with steering rack clearance - I can shorten the spacers a bit with the engine tilted as it brings up the oil pan in the front area clearing the steering rack more. I have seen other posts where the washer stacks have more in front than in back so it may be a normal setup. Otherwise, the trans will have to be lifted much more than cross member and trans mount currently set it at.
Last edited by V8MiataMike; Jul 11, 2015 at 02:16 PM.


