
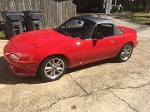
1991 Miata Monster 5.0 Build With SN95

Thread Starter
V8 Miata Participant
Joined: Nov 2014
Posts: 296
Likes: 12
From: Atlanta, Ga
Hang in there man builders fatigue is setting in! Can't tell you how many times I walked in from the garage discouraged and told my wife one step forward and 2 (or more) steps back. I'm quite sure I did enough of that to have built the car at least twice! Hang in there and just focus on one small piece at a time.
If you need a bit of perspective we got 6 inches of snow yesterday and tonight's low is forecast for -15 so there is no question you are lucky to be in the promised land and going to have a great day!
If you need a bit of perspective we got 6 inches of snow yesterday and tonight's low is forecast for -15 so there is no question you are lucky to be in the promised land and going to have a great day!
We will be in the 30's today so not much warmer down here for the next few days anyway. Snow! Hideous!
Thread Starter
V8 Miata Participant
Joined: Nov 2014
Posts: 296
Likes: 12
From: Atlanta, Ga
Today I hope to get the driver side header wrapped and ready for install. While that is drying (wet header wrap then wrap coating) I will install the GT40 cylinder heads. I can then do the final mock up of the lower/upper intake setup to see exactly where things line up under the hood.
Oh ya, just remembered that I have to buy spark plug wires, spark plugs, engine oil, diff oil and trac loc additive, radiator hoses, serpentine belt, clamps, engine ground strap, probably more bolts, washers, this, that, the other things! $$$!!!
Thread Starter
V8 Miata Participant
Joined: Nov 2014
Posts: 296
Likes: 12
From: Atlanta, Ga
Looking carefully under the dash, I see that the stock Miata push rod is adjustable so I can easily back off some of that "pre stroke" on the master and see what happens. But without extending the actual pedal travel I don't see any way to make a difference there.

Administrator
Joined: Nov 2009
Posts: 1,120
Likes: 38
From: Allentown, PA
Don't lose sight of the end game. Remember, as much fun as it is to build one of these cars driving it is 1000% better.
Clutch engagement:
Both Martin's push rod at the slave cylinder and the actual stock Miata clutch pedal have adjustments that can be fiddled with to change the point of engagement. You can also remove the switch at the top of the pedal's throw (no longer used) and the rubber stoppers at both ends if you need more movement. Also make sure the slave is in some way braced so that it does not flex and that the pushrods from it is not at an angle relative to the bore of the cylinder itself. You may have to drill a new hole in the fork about 1/4 inch inboard to make this happen. Missailgnment here will reduce the amount of throw available and prematurely wear out the slave cylinder.
Make sure you paint the headers after wrapping them to make them water proof. Doing so will keep the wrap from retaining moisture and rusting out the tubes. I used an entire spray can PER HEADER when I did mine. Wrap, allow to dry completely, spray and allow to dry, rub off the pilling that will occur from the paint, spray again, repeat until there is no pilling (about four applications). Mine have lived wrapped outdoors for three years through winters and rain without issues.
-Jason
Last edited by MRM331; Jan 7, 2015 at 07:23 AM. Reason: Added additional information as my coffee woke me up.

V8 Miata Follower
Joined: Jun 2013
Posts: 115
Likes: 0
From: OH, the Arctic rain forest
Even though the same amount of fluid is displaced relative to engage/disengage, by pulling the rod back further in the pre-load of the master, the engagement point of the clutch will be further off the floor.
Thread Starter
V8 Miata Participant
Joined: Nov 2014
Posts: 296
Likes: 12
From: Atlanta, Ga
I was able to get the cylinder heads installed (these torque to yield bolts are interesting - that last 1/4 turn seems like a lot!) along with the completion of header wrapping/coating. I did not see MRM331's advice in time on the amount of coating to do so we'll see how they do as is. Headers are installed along with the steering column. Car is back on the ground with wheels installed.
I used heat tape on the front brake lines and around the clutch hydraulic line in the header areas. If this tape really works, it is a nice item for sure!


As a "gauge", I put that plastic split loom around the brake and clutch lines and will watch for any evidence of melting from initial start of the engine and going forward.


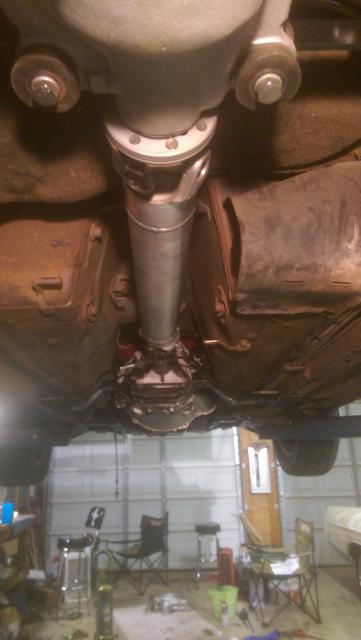
My goal now is to get the correct measurement for the drive shaft and get it to the drive shaft shop for shortening and balancing.
Last edited by V8MiataMike; Jul 11, 2015 at 05:07 PM.
Thread Starter
V8 Miata Participant
Joined: Nov 2014
Posts: 296
Likes: 12
From: Atlanta, Ga
Mike
Thread Starter
V8 Miata Participant
Joined: Nov 2014
Posts: 296
Likes: 12
From: Atlanta, Ga
I got the drive shaft back and made a slight adjustment. Turns out for an additional $30 I could get an aluminum drive shaft made from a used unit they already had at the shop. They kept my old steel one. New U joints and balanced as well.
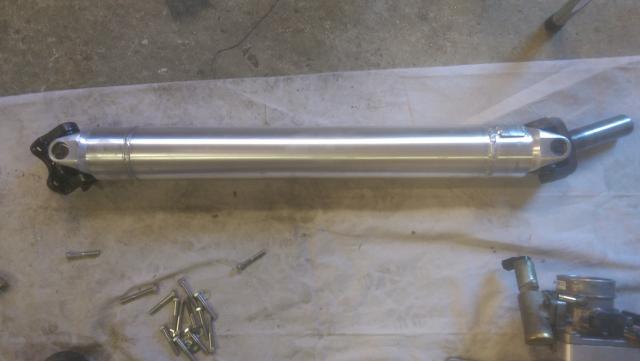
When I picked it up my first reaction was "uh oh, that is way too short - I must have measured wrong". But it went in perfectly.
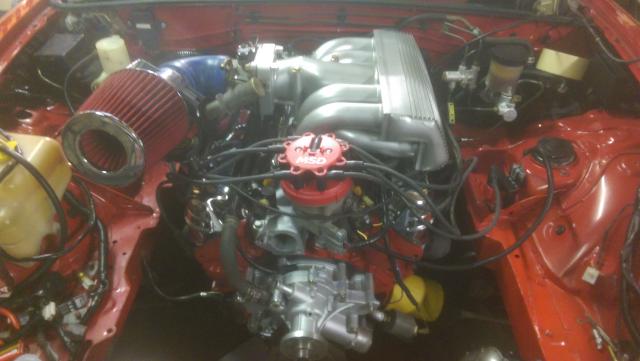
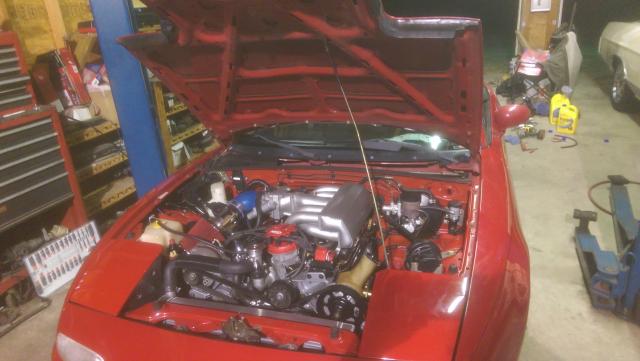
So while that was being made, I started working the top end of the motor. Installed the rocker arms on the heads, filled engine with oil and primed the oil pump till I saw some oil on the top of the rocker arms, then installed the lower intake.
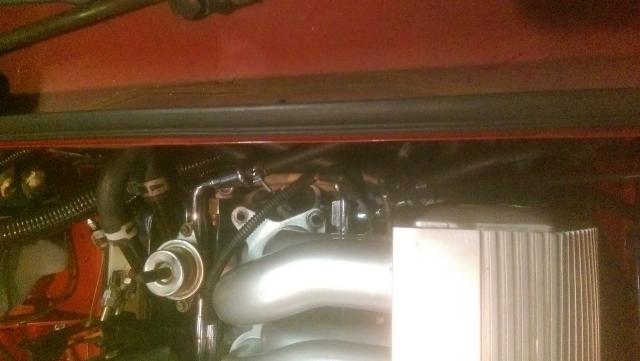
I then installed the injectors and fuel rail. I think this is an Explorer fuel rail which has the fuel connection in the back which is why I rand my Miata steel fuel lines on the back side firewall area.
Then on to the heater hoses. I found the hoses Martin recommends in his guide and they seemed to work fine.
Then on to engine wiring harness plugging up. Man, things are really busy back there at the firewall! But it all seems to work with nothing getting jammed or bound up.
At this point I wanted to pressurize the fuel system before bolting on the upper intake. So I began powering up the car. Unfortunately, I have a problem with my positive fuel pump wire from the EEC relay of which all that is now taped/wrapped/buried... went ahead and installed fuel pump jumper per Martin's guide and put high pressure hose end into bucket. Nice flow into bucket (and confirmed proper fuel feed line as well!). Plugged fuel lines into fuel rail and all pressured up with no leaks anywhere. Woo whoo!
I went ahead and turned the engine over with the key - starter motor to verify that works. Good to go. Oil PSI gauge came up on cranking so that works too.

When I picked it up my first reaction was "uh oh, that is way too short - I must have measured wrong". But it went in perfectly.

So while that was being made, I started working the top end of the motor. Installed the rocker arms on the heads, filled engine with oil and primed the oil pump till I saw some oil on the top of the rocker arms, then installed the lower intake.
I then installed the injectors and fuel rail. I think this is an Explorer fuel rail which has the fuel connection in the back which is why I rand my Miata steel fuel lines on the back side firewall area.
Then on to the heater hoses. I found the hoses Martin recommends in his guide and they seemed to work fine.
Then on to engine wiring harness plugging up. Man, things are really busy back there at the firewall! But it all seems to work with nothing getting jammed or bound up.

At this point I wanted to pressurize the fuel system before bolting on the upper intake. So I began powering up the car. Unfortunately, I have a problem with my positive fuel pump wire from the EEC relay of which all that is now taped/wrapped/buried... went ahead and installed fuel pump jumper per Martin's guide and put high pressure hose end into bucket. Nice flow into bucket (and confirmed proper fuel feed line as well!). Plugged fuel lines into fuel rail and all pressured up with no leaks anywhere. Woo whoo!
I went ahead and turned the engine over with the key - starter motor to verify that works. Good to go. Oil PSI gauge came up on cranking so that works too.
Last edited by V8MiataMike; Jul 11, 2015 at 05:09 PM.
Thread Starter
V8 Miata Participant
Joined: Nov 2014
Posts: 296
Likes: 12
From: Atlanta, Ga
Clutch engagement:
Both Martin's push rod at the slave cylinder and the actual stock Miata clutch pedal have adjustments that can be fiddled with to change the point of engagement. You can also remove the switch at the top of the pedal's throw (no longer used) and the rubber stoppers at both ends if you need more movement. Also make sure the slave is in some way braced so that it does not flex and that the pushrods from it is not at an angle relative to the bore of the cylinder itself. You may have to drill a new hole in the fork about 1/4 inch inboard to make this happen. Missailgnment here will reduce the amount of throw available and prematurely wear out the slave cylinder.
-Jason
Thread Starter
V8 Miata Participant
Joined: Nov 2014
Posts: 296
Likes: 12
From: Atlanta, Ga
I finally got out to the car late today and then literally spent all afternoon repairing a busted off bolt in the cylinder head for the valve cover. You know the drill. Go to put a part on on and sure enough, there is a bolt busted off in the hole. Used parts... oh well...
I should get a couple of hours on the car tomorrow I hope. I really want to start the engine and see if it will idle for a few seconds to verify engine wiring. We'll see...

V8 Miata Fanatic
Joined: Aug 2014
Posts: 634
Likes: 16
From: Seven Hills, OH
LOL, yeah, that's why this one is going to take me a while. When I built the turbo setup for this car, I spent a lot of time on it, and it got to my wife, so I'm trying to be more balances on this one. Plus a job change has limited my time as well.
Some day.
Can't wait to see yours complete, it's inspiration.
Jason
Some day.
Can't wait to see yours complete, it's inspiration.
Jason
Thread Starter
V8 Miata Participant
Joined: Nov 2014
Posts: 296
Likes: 12
From: Atlanta, Ga
Not much done visually but lots of little things completed.
I was able to start the engine and get the timing light on it and set. I made some short "dump" tubes for the headers. The intake tubing is not routed yet but just on there to start the engine.
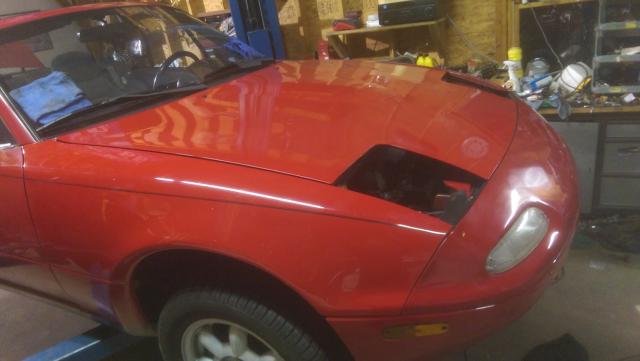
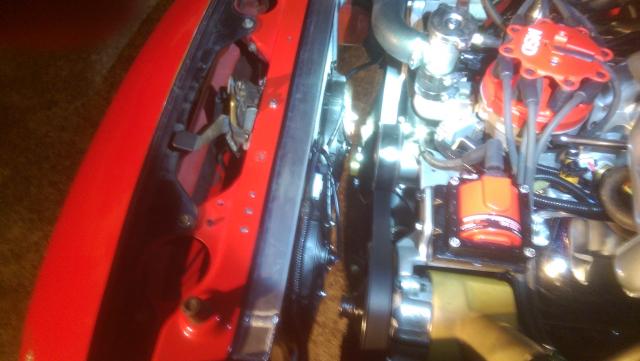
Completed another hood check. Everything fits with clearance, so for now, no trimming is required on braces.
Major items left are the condenser, radiator and throttle cable install.

I was able to start the engine and get the timing light on it and set. I made some short "dump" tubes for the headers. The intake tubing is not routed yet but just on there to start the engine.
Completed another hood check. Everything fits with clearance, so for now, no trimming is required on braces.

Major items left are the condenser, radiator and throttle cable install.
Thread Starter
V8 Miata Participant
Joined: Nov 2014
Posts: 296
Likes: 12
From: Atlanta, Ga
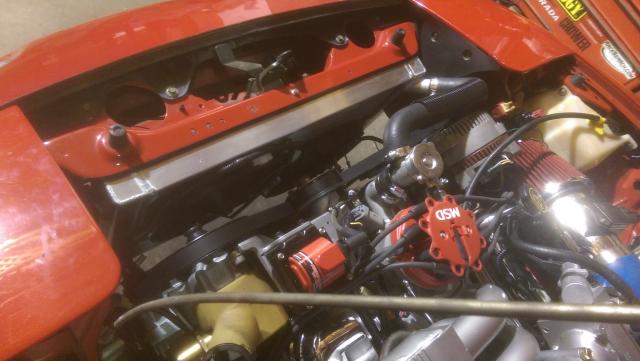
I think it is at that stage where visually there seems to be not much changing. I have managed to adapt the Miata power steering lines to the Ford pump, located the correct serpentine belt, and completed the accessory drive system. I do not have A/C lines in place yet but the A/C compressor pulley acts as an idler at this point until I get that system completed.
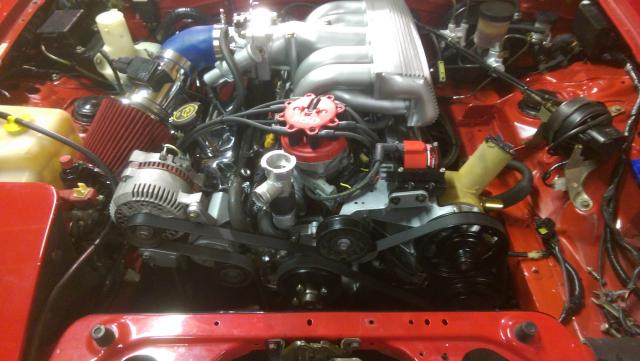
I managed to get the throttle cable fabbed up and working. It is an Explorer 65MM TB so I had to make a plate to bolt to the Explorer throttle pull plate.
Next up is the condenser / radiator assemblies. So far I have the condenser mounted up with the original modified Miata mounts and the two additional brackets that attach to the radiator mounts.
Thread Starter
V8 Miata Participant
Joined: Nov 2014
Posts: 296
Likes: 12
From: Atlanta, Ga
Wicked cool. I was able to drive it down the block and back tonight.
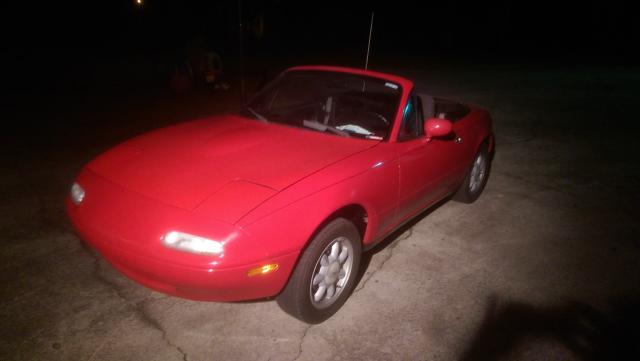
Clutch seems to be working just fine. Engage/disengage feels right.
Along the way over the last couple of days I had to fix a leaking power steering pump reservoir (O rings) and replace a leaking water pump (used stuff...). Once those items were taken care of, with the condenser and radiator now installed, I could take care of several small things (headlights, fuel evap line, hood, etc.)
So I got the nerve to press the gas a little in 2nd gear. Roasted the tires and got a little sideways! Sweet!
Next up - fabricate exhaust (yes, I drove it with open "dump tubes". A little loud!
Mike

Clutch seems to be working just fine. Engage/disengage feels right.
Along the way over the last couple of days I had to fix a leaking power steering pump reservoir (O rings) and replace a leaking water pump (used stuff...). Once those items were taken care of, with the condenser and radiator now installed, I could take care of several small things (headlights, fuel evap line, hood, etc.)


So I got the nerve to press the gas a little in 2nd gear. Roasted the tires and got a little sideways! Sweet!
Next up - fabricate exhaust (yes, I drove it with open "dump tubes". A little loud!
Mike


Thread Starter
V8 Miata Participant
Joined: Nov 2014
Posts: 296
Likes: 12
From: Atlanta, Ga
I had the lower intake milled down 3/16 of an inch for insurance. I also shortened the water neck where it goes into the intake neck. I just ground off the tube till I got to lip that retains the hose. This moved it down about 1/4 inch. The top radiator hose just touches the hood but I figure after some heat cycles it will sag enough to clear it altogether. No trimming at all of the hood at this time.


