
Exomotive Body Panels


Thread Starter
V8 Miata Enthusiast
Joined: Oct 2013
Posts: 421
Likes: 33
From: Colorado Springs, CO
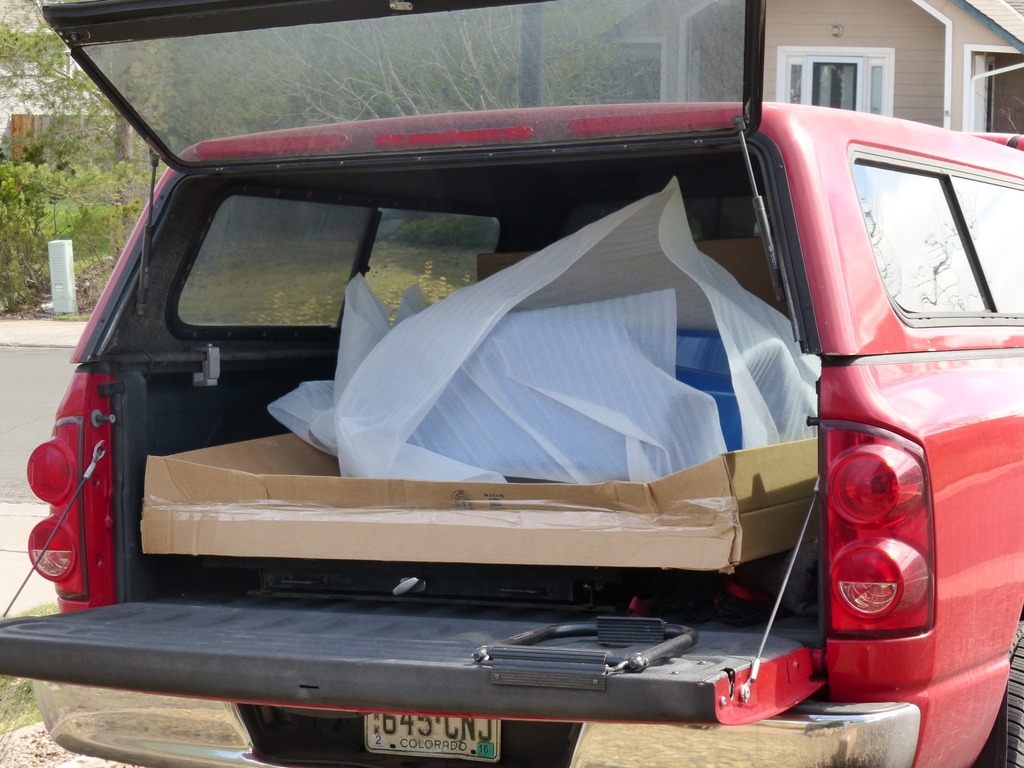
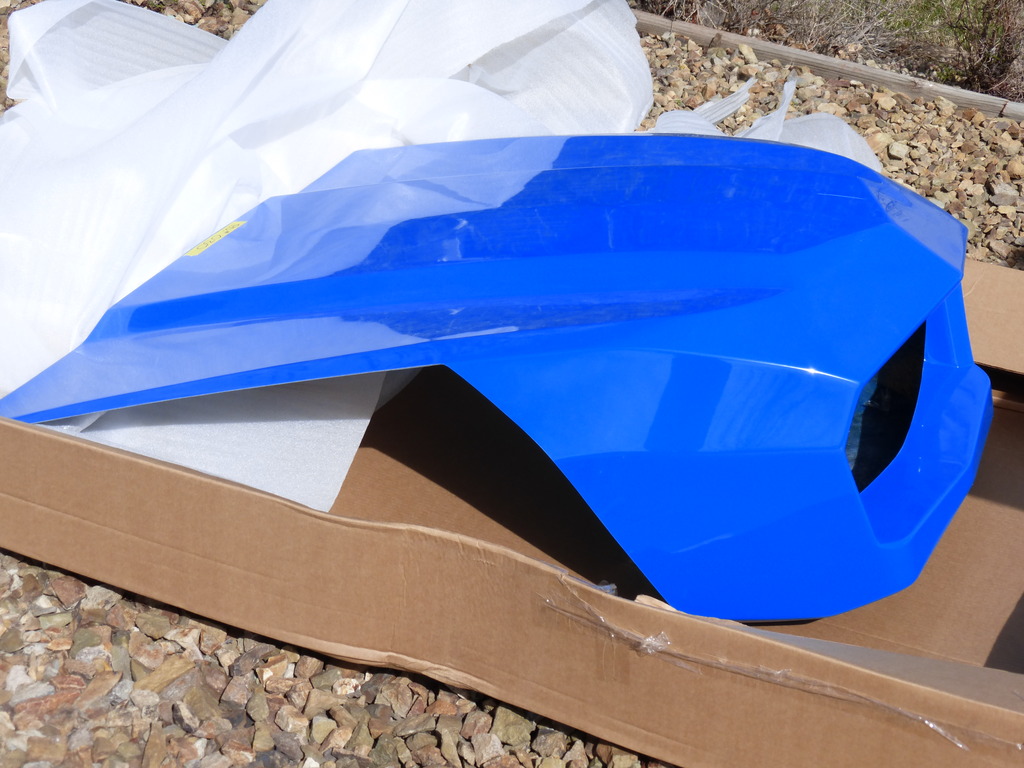
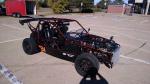
Body panels arrived this week. I went over to the freight yard and picked them on Monday.
Once removed from the palate, everything easily fit in the back of my short bed pick up. The cap is only cab height.
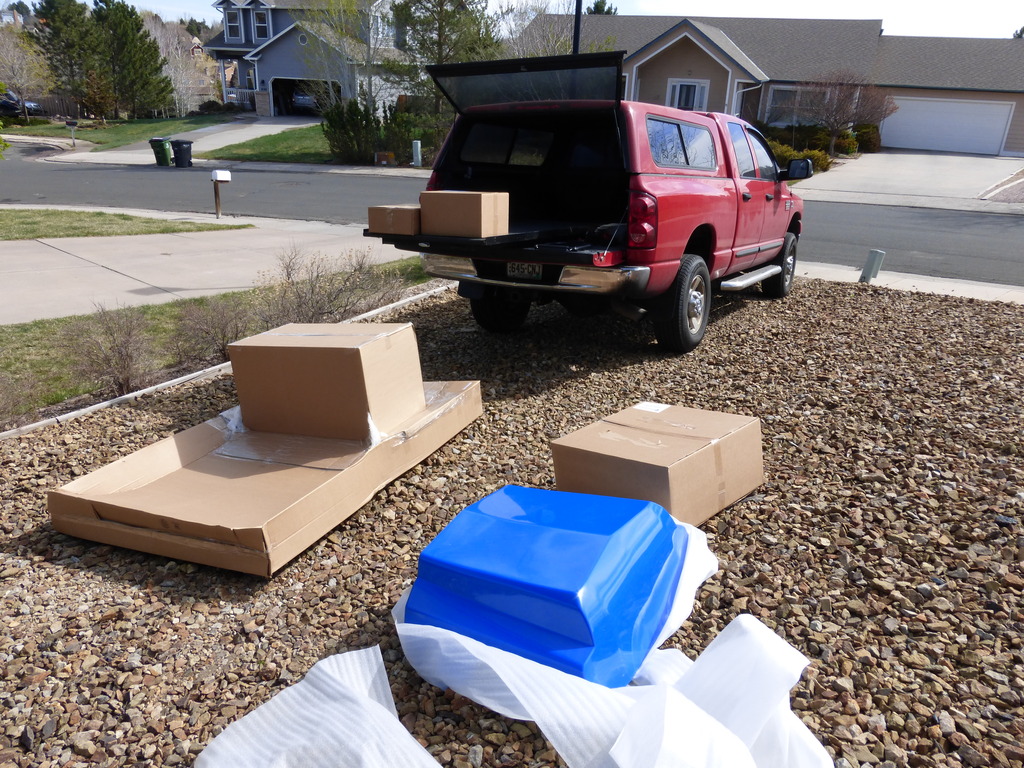
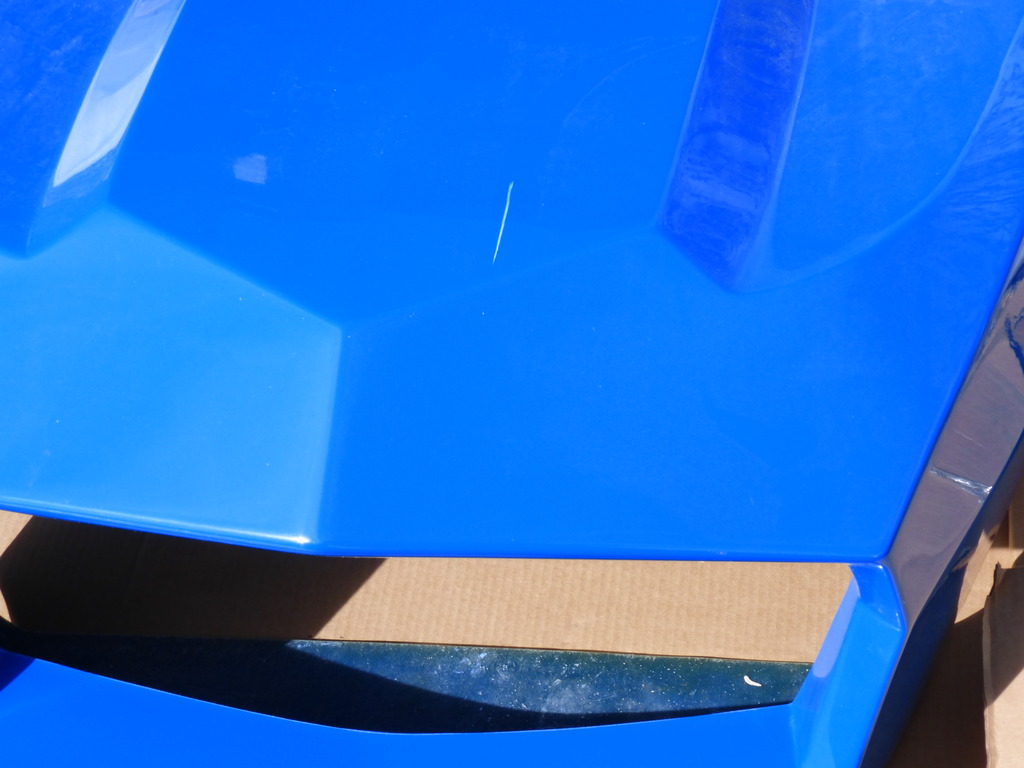
There were some very small scratches on the bottom of the nose and the bottom of the fuel tank cover. Not enough to matter, and not visible. But, there is a large scratch on the hood. Too big to buff out or repair. Would probably have to repaint everything. Since this is a track car, it's not a big deal to me. I'll cover it with a number or decal or something. It's bound to get more of them anyway.

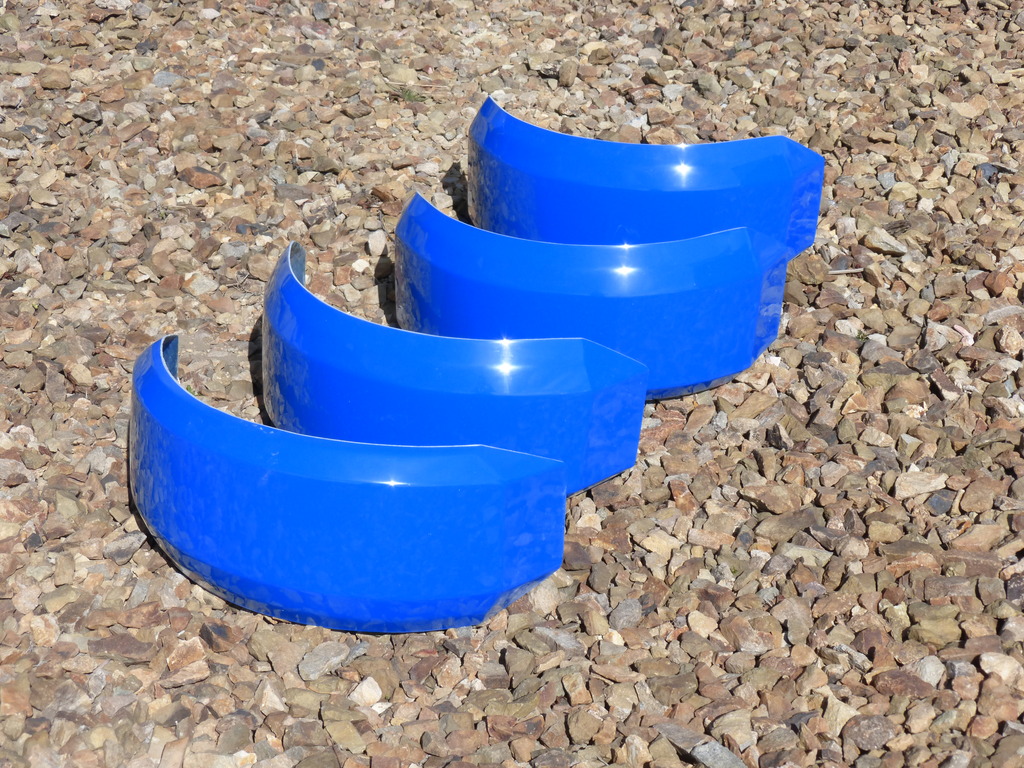
The fender look nice. But, the edges don't look all that good. For a show car you'de have to do something about that. It's doesn't matter to me, though. I probably won't even use them.
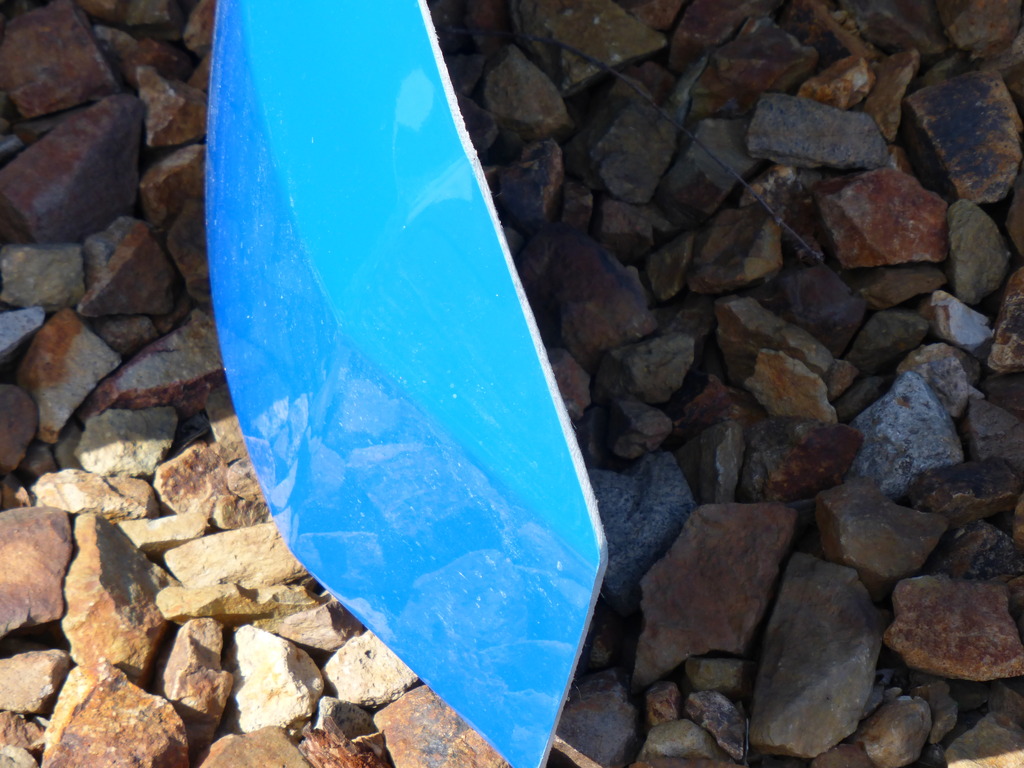
The gauge pod looks OK. We'll see how it fits with my AiM system.
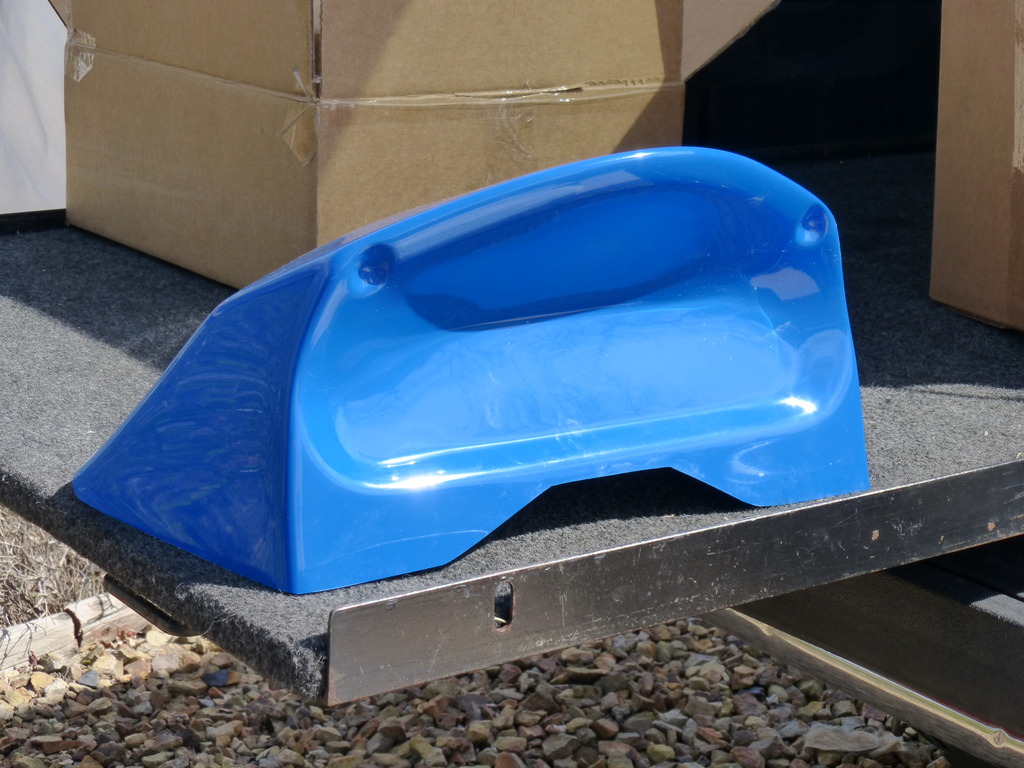
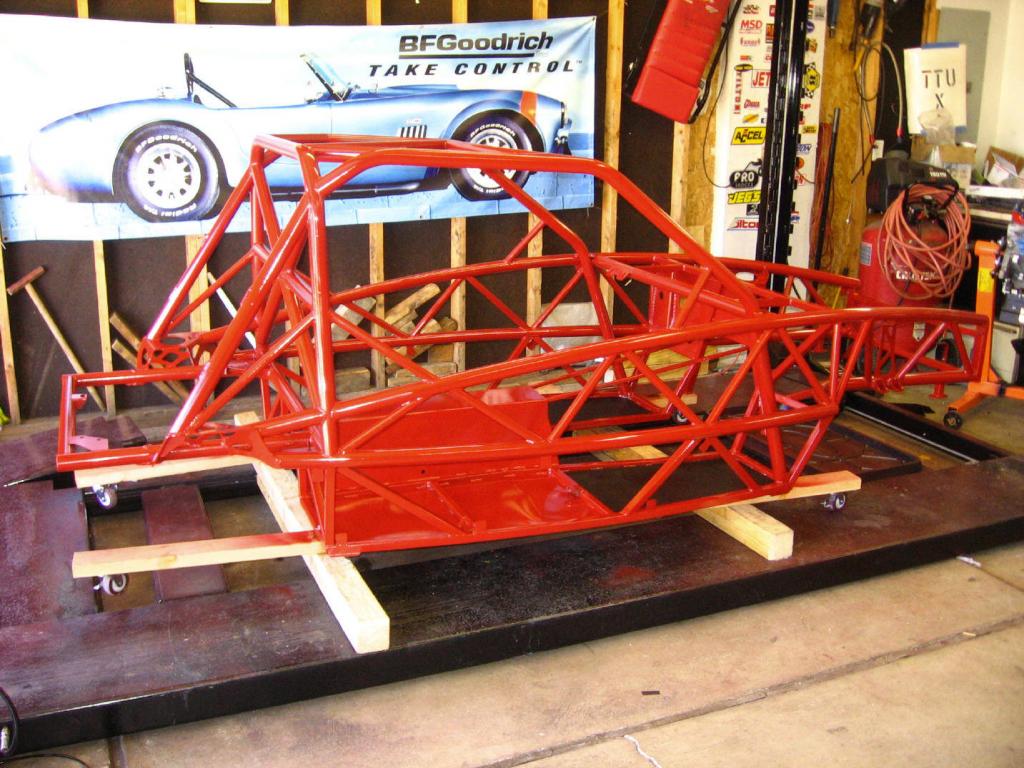
This color should look good with the red frame. I'd hate to have to repaint it.
Once removed from the palate, everything easily fit in the back of my short bed pick up. The cap is only cab height.


There were some very small scratches on the bottom of the nose and the bottom of the fuel tank cover. Not enough to matter, and not visible. But, there is a large scratch on the hood. Too big to buff out or repair. Would probably have to repaint everything. Since this is a track car, it's not a big deal to me. I'll cover it with a number or decal or something. It's bound to get more of them anyway.


The fender look nice. But, the edges don't look all that good. For a show car you'de have to do something about that. It's doesn't matter to me, though. I probably won't even use them.


The gauge pod looks OK. We'll see how it fits with my AiM system.

This color should look good with the red frame. I'd hate to have to repaint it.

Thread Starter
V8 Miata Enthusiast
Joined: Oct 2013
Posts: 421
Likes: 33
From: Colorado Springs, CO
Not getting much done lately. Been a pretty busy summer so far. And it doesn;t look like it will calm down until the end of Oct. Oh, fun before work! Anyway, been doing a bit of puttering here and there, so though I'd do an update.
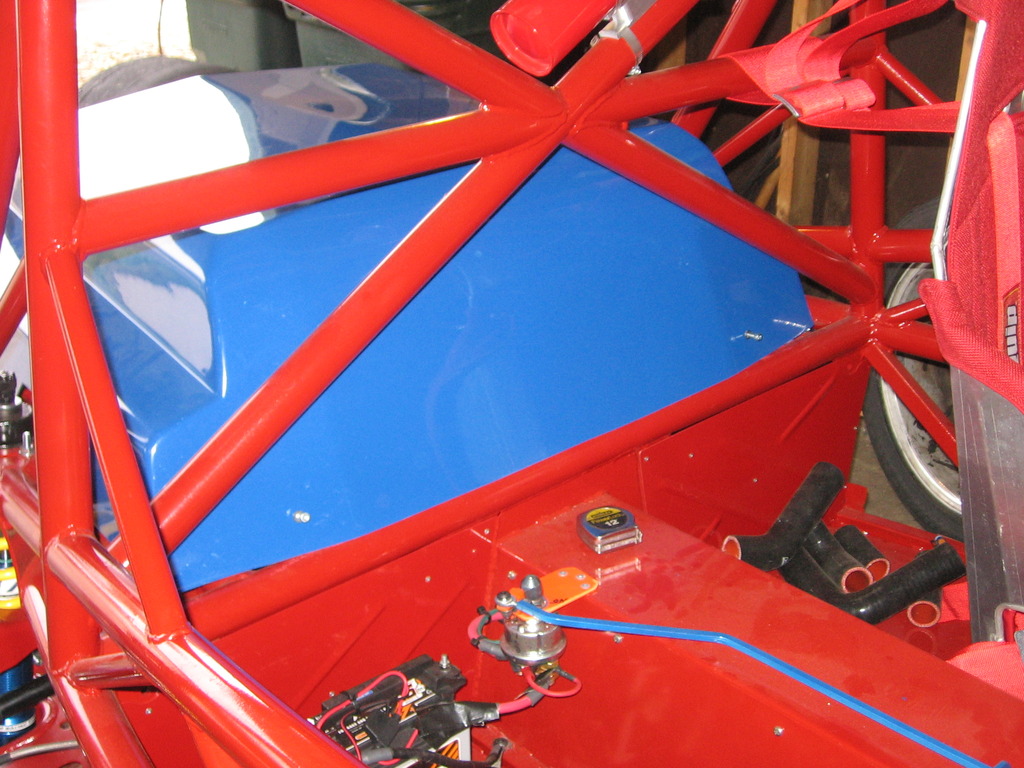
The first body panel to go on is the rear tank cover. Probably because it was the easiest, and the tank and fuel system were already installed and tested. But, this job is MUCH easier with the fuel tank removed.
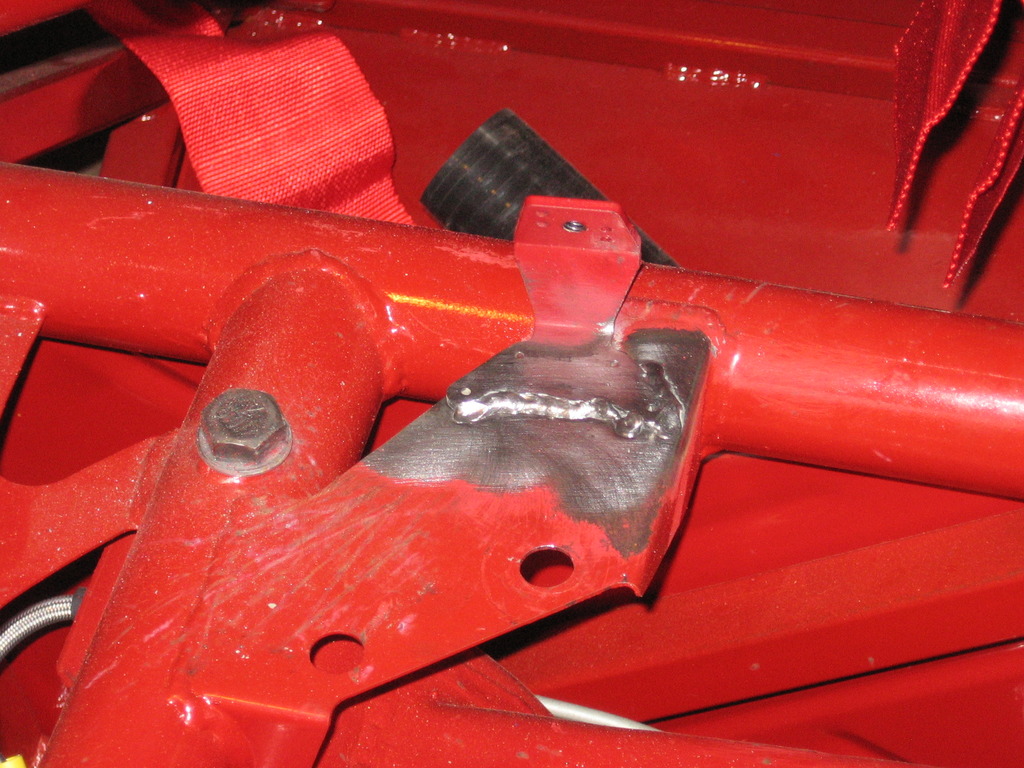
Following the directions on the web site, I positioned the front bracket where they're supposed to be, and welded them in place. You could easily bolt or pop rivit them in place. But, I have a welder.....
Quick note: Drill and tap the holes in the brackets for 1/4" bolts before you attach them to the frame. Much easier to do on the bench than on the frame. You could also use Riv-nuts, but I didn't really see an advantage to that. Same with 1/4 turn fasteners.

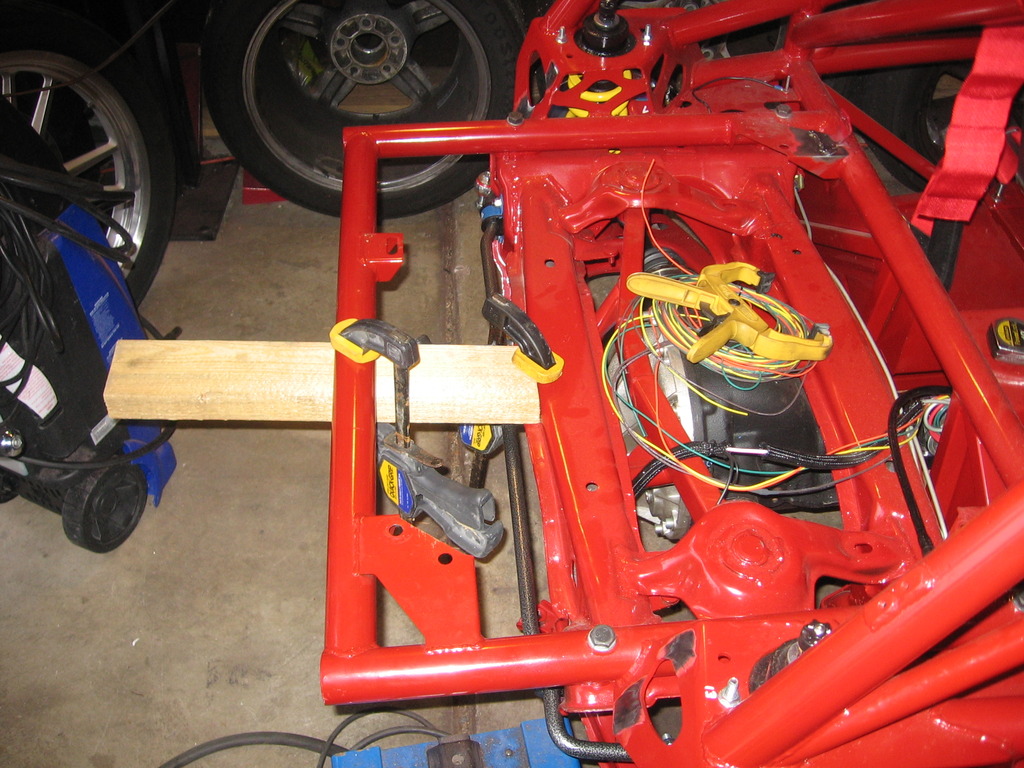
After that, set the cover in place, and see exactly where you want it. I wanted the bottom of the cover to be even with the bottom of the rear tube. So I clamped the board in place.

Once I had it where I wanted it, I welded the rear bracket into place. The duct tape keeps the heat off the body. And the painters tape makes it easy to remove the duct tape. Just spot weld in place, and remove the cover for final welding.


Once the brackets are in place, you need to drill holes in the cover to match the brackets. With the fuel tank removed, this is an easy job. With the cover sitting where you want it, you can easily reach up there and mark the holes from the inside. Perfect match every time.
The first body panel to go on is the rear tank cover. Probably because it was the easiest, and the tank and fuel system were already installed and tested. But, this job is MUCH easier with the fuel tank removed.
Following the directions on the web site, I positioned the front bracket where they're supposed to be, and welded them in place. You could easily bolt or pop rivit them in place. But, I have a welder.....
Quick note: Drill and tap the holes in the brackets for 1/4" bolts before you attach them to the frame. Much easier to do on the bench than on the frame. You could also use Riv-nuts, but I didn't really see an advantage to that. Same with 1/4 turn fasteners.

After that, set the cover in place, and see exactly where you want it. I wanted the bottom of the cover to be even with the bottom of the rear tube. So I clamped the board in place.

Once I had it where I wanted it, I welded the rear bracket into place. The duct tape keeps the heat off the body. And the painters tape makes it easy to remove the duct tape. Just spot weld in place, and remove the cover for final welding.


Once the brackets are in place, you need to drill holes in the cover to match the brackets. With the fuel tank removed, this is an easy job. With the cover sitting where you want it, you can easily reach up there and mark the holes from the inside. Perfect match every time.
Thread Starter
V8 Miata Enthusiast
Joined: Oct 2013
Posts: 421
Likes: 33
From: Colorado Springs, CO
Not getting much done lately. Been a pretty busy summer so far. And it doesn;t look like it will calm down until the end of Oct. Oh, fun before work! Anyway, been doing a bit of puttering here and there, so though I'd do an update.
The first body panel to go on is the rear tank cover. Probably because it was the easiest, and the tank and fuel system were already installed and tested. But, this job is MUCH easier with the fuel tank removed.
Following the directions on the web site, I positioned the front bracket where they're supposed to be, and welded them in place. You could easily bolt or pop rivit them in place. But, I have a welder.....
Quick note: Drill and tap the holes in the brackets for 1/4" bolts before you attach them to the frame. Much easier to do on the bench than on the frame. You could also use Riv-nuts, but I didn't really see an advantage to that. Same with 1/4 turn fasteners.
After that, set the cover in place, and see exactly where you want it. I wanted the bottom of the cover to be even with the bottom of the rear tube. So I clamped the board in place.
Once I had it where I wanted it, I welded the rear bracket into place. The duct tape keeps the heat off the body. And the painters tape makes it easy to remove the duct tape. Just spot weld in place, and remove the cover for final welding.

Once the brackets are in place, you need to drill holes in the cover to match the brackets. With the fuel tank removed, this is an easy job. With the cover sitting where you want it, you can easily reach up there and mark the holes from the inside. Perfect match every time.
The first body panel to go on is the rear tank cover. Probably because it was the easiest, and the tank and fuel system were already installed and tested. But, this job is MUCH easier with the fuel tank removed.
Following the directions on the web site, I positioned the front bracket where they're supposed to be, and welded them in place. You could easily bolt or pop rivit them in place. But, I have a welder.....
Quick note: Drill and tap the holes in the brackets for 1/4" bolts before you attach them to the frame. Much easier to do on the bench than on the frame. You could also use Riv-nuts, but I didn't really see an advantage to that. Same with 1/4 turn fasteners.

After that, set the cover in place, and see exactly where you want it. I wanted the bottom of the cover to be even with the bottom of the rear tube. So I clamped the board in place.
Once I had it where I wanted it, I welded the rear bracket into place. The duct tape keeps the heat off the body. And the painters tape makes it easy to remove the duct tape. Just spot weld in place, and remove the cover for final welding.
Once the brackets are in place, you need to drill holes in the cover to match the brackets. With the fuel tank removed, this is an easy job. With the cover sitting where you want it, you can easily reach up there and mark the holes from the inside. Perfect match every time.


Last edited by .boB; Jul 30, 2015 at 11:15 PM.
Thread Starter
V8 Miata Enthusiast
Joined: Oct 2013
Posts: 421
Likes: 33
From: Colorado Springs, CO
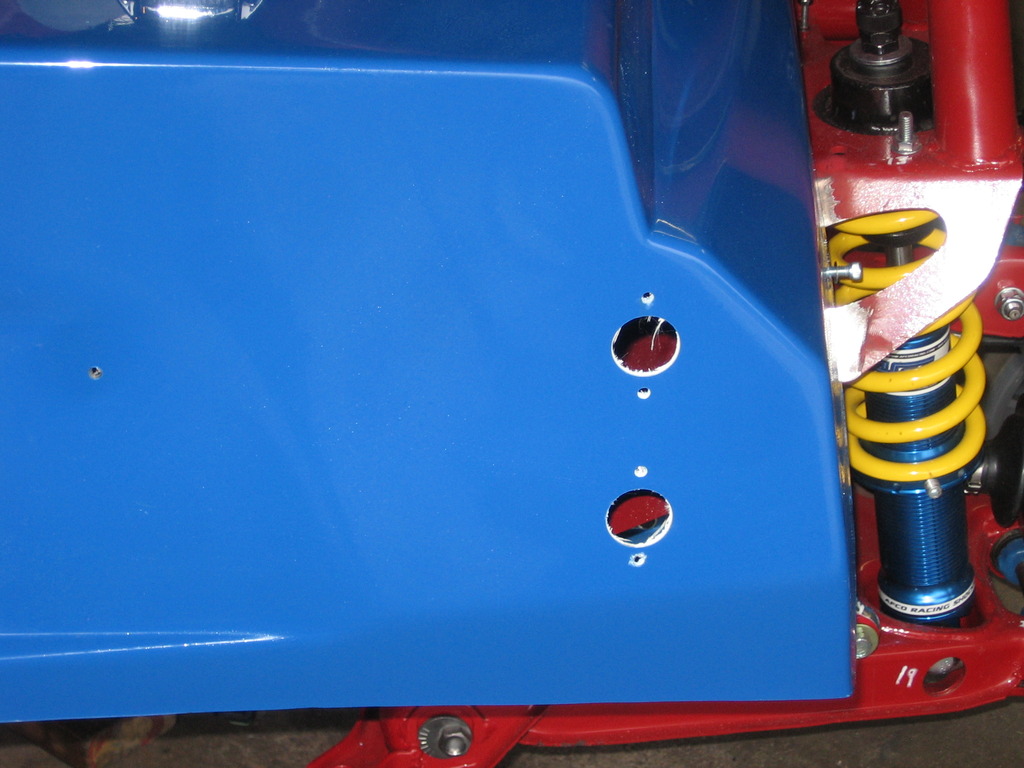
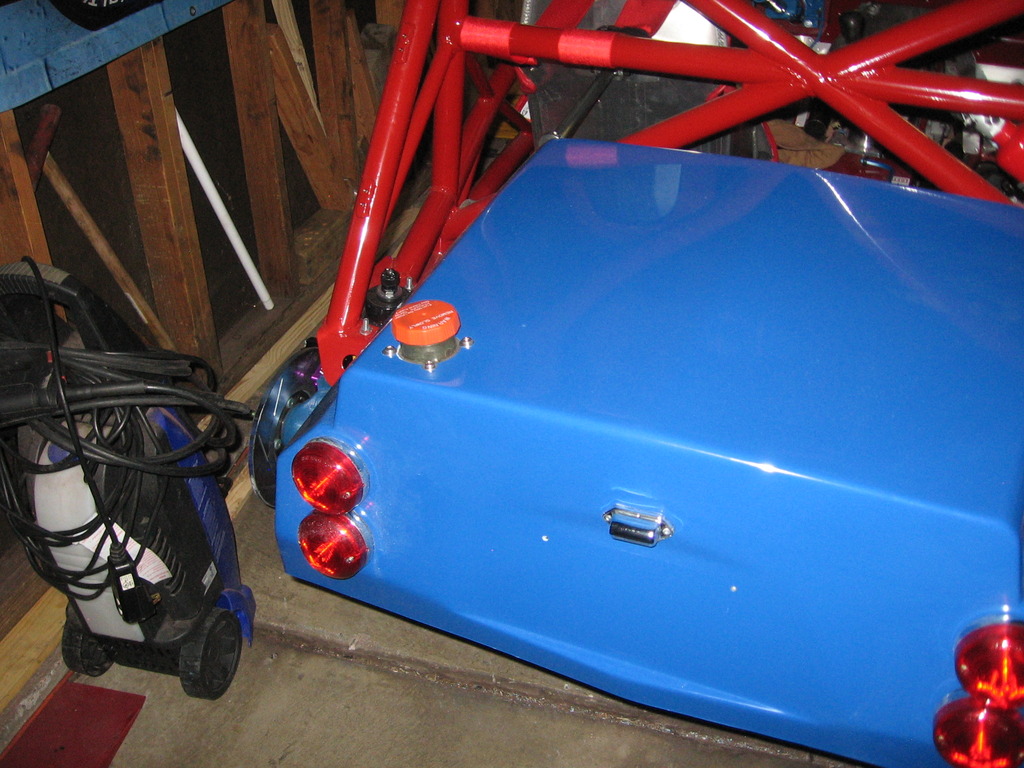
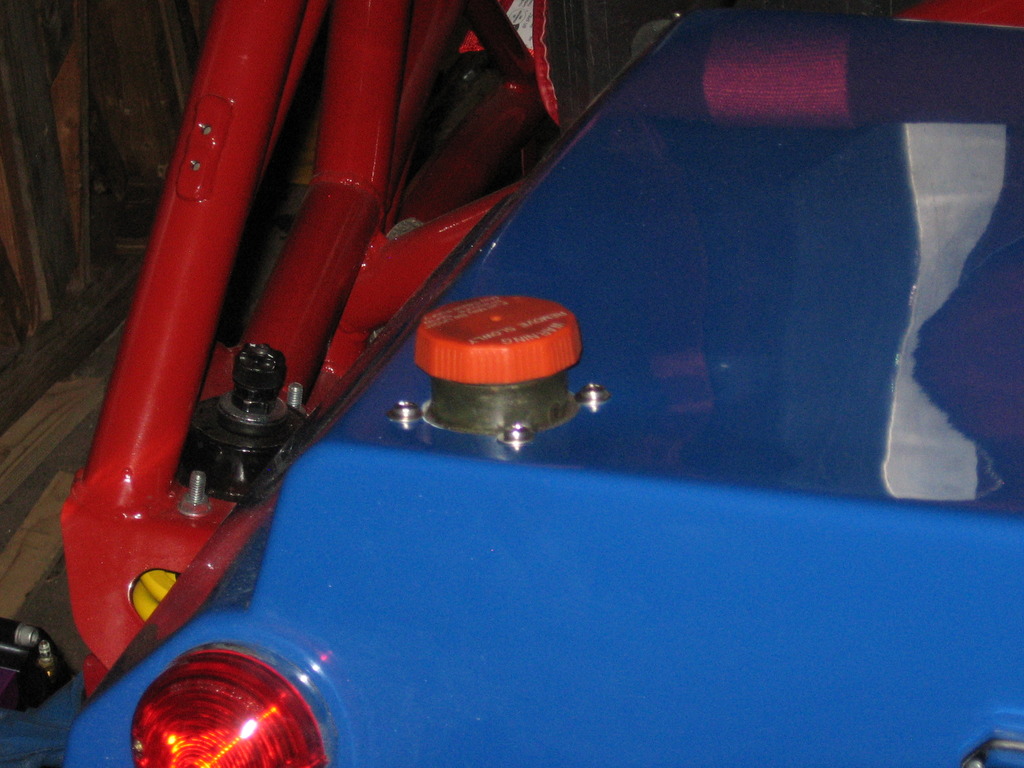
Once the cover was fitted to the frame, I needed to fit the lights in place. You could do that first. But the cover has to come off and on a bunch of times, so it's easier to do it last.
I made apattern for the where I wanted the lights to go. With small holes for the center punch to make the drill marks. For the other side, simply flip the pattern around 180*.
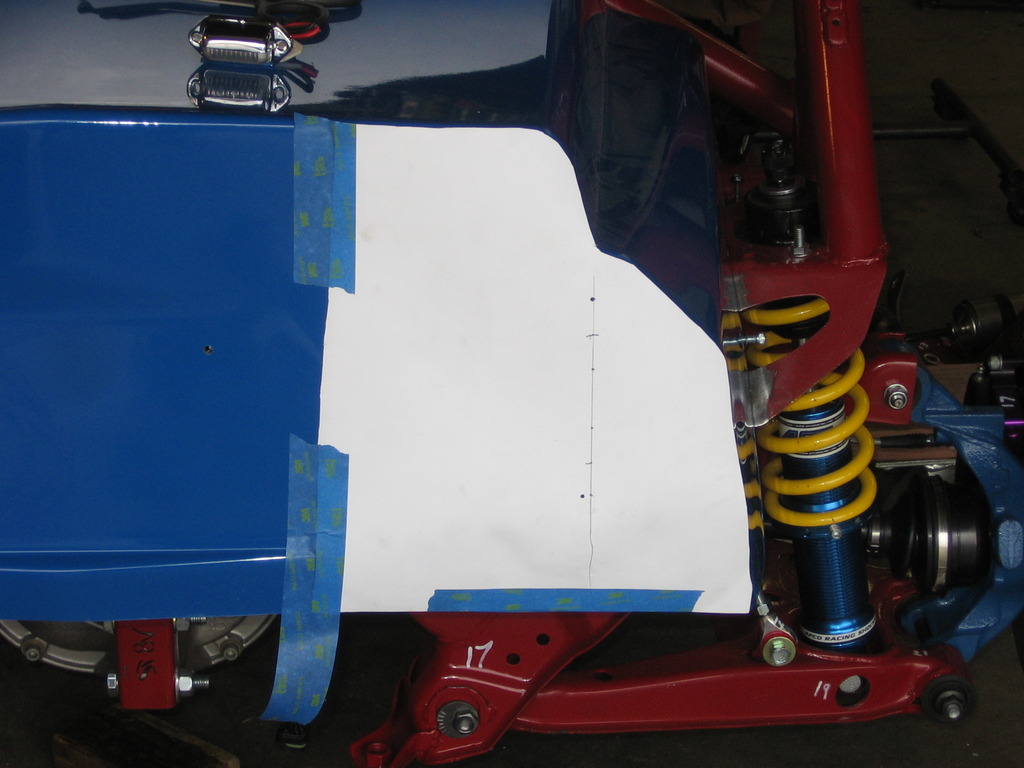
Then drill the holes and mount the lights.
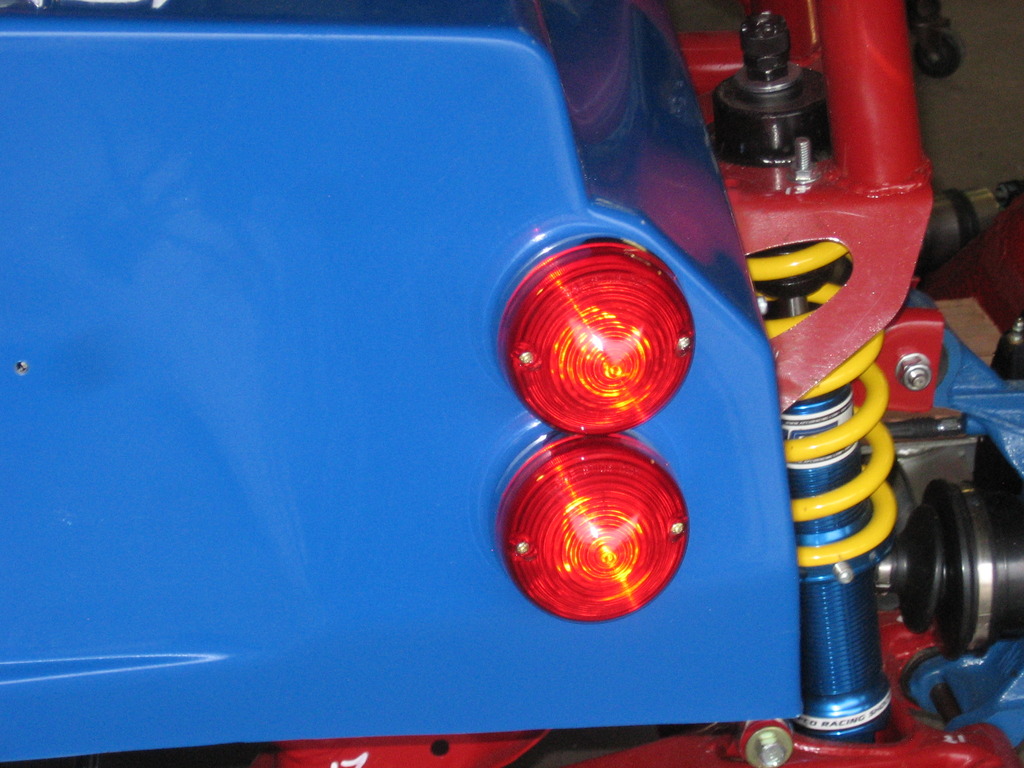
The license plate lamp is simply bolted to the back, through two small holes I also drilled holes for the license plate. The fiberglass is thick enough that I could simply ran a tap right through the glass, and bolt the plate directly to that. Not fancy, but light weight and effective.
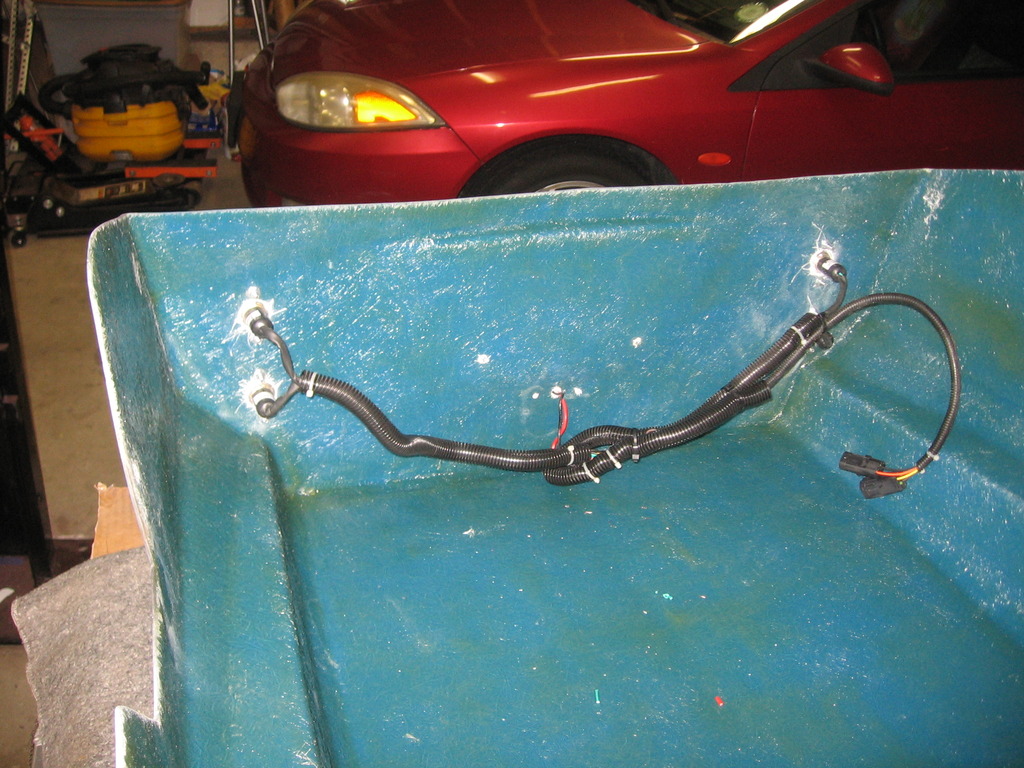
The wiring is pretty simple. I did use Weatherpack connectors, for when I want to remove the rear cover.
And the (nearly) finished product.
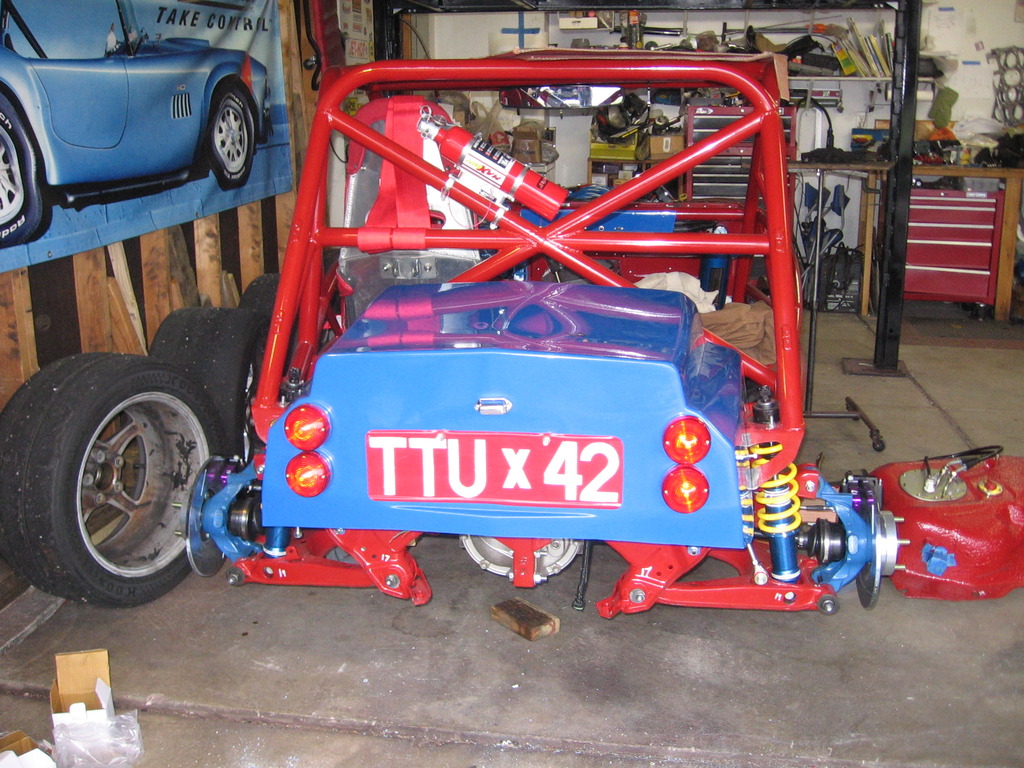
In case you don;t recognize them, the tail and license plate lights are from a '65 Shelby Cobra. I'm considering adding the quick jacks.
I made apattern for the where I wanted the lights to go. With small holes for the center punch to make the drill marks. For the other side, simply flip the pattern around 180*.

Then drill the holes and mount the lights.


The license plate lamp is simply bolted to the back, through two small holes I also drilled holes for the license plate. The fiberglass is thick enough that I could simply ran a tap right through the glass, and bolt the plate directly to that. Not fancy, but light weight and effective.
The wiring is pretty simple. I did use Weatherpack connectors, for when I want to remove the rear cover.

And the (nearly) finished product.

In case you don;t recognize them, the tail and license plate lights are from a '65 Shelby Cobra. I'm considering adding the quick jacks.
Thread Starter
V8 Miata Enthusiast
Joined: Oct 2013
Posts: 421
Likes: 33
From: Colorado Springs, CO
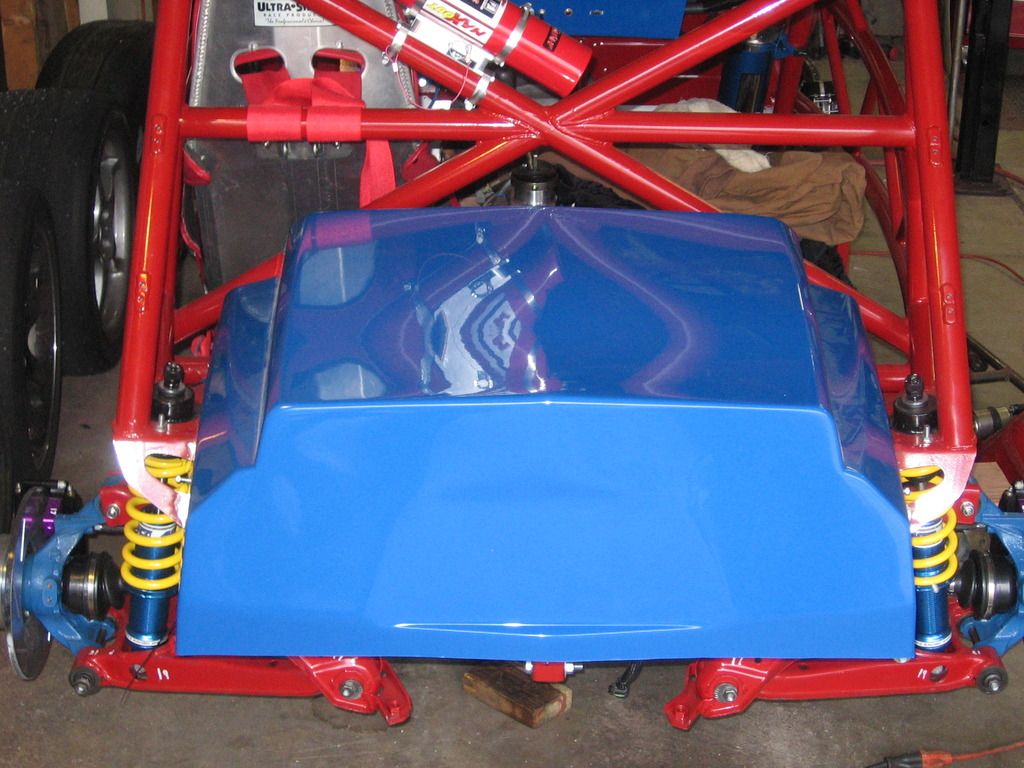
The final task was to connect the fuel filler neck. Not exactly an easy task, either. There didn't seem to be a simple off the shelf answer, either. I didn't take many pictures of this part, though. I guess I should remove the cover and take some.
I started out with this, a stock Miata filler neck and cap.
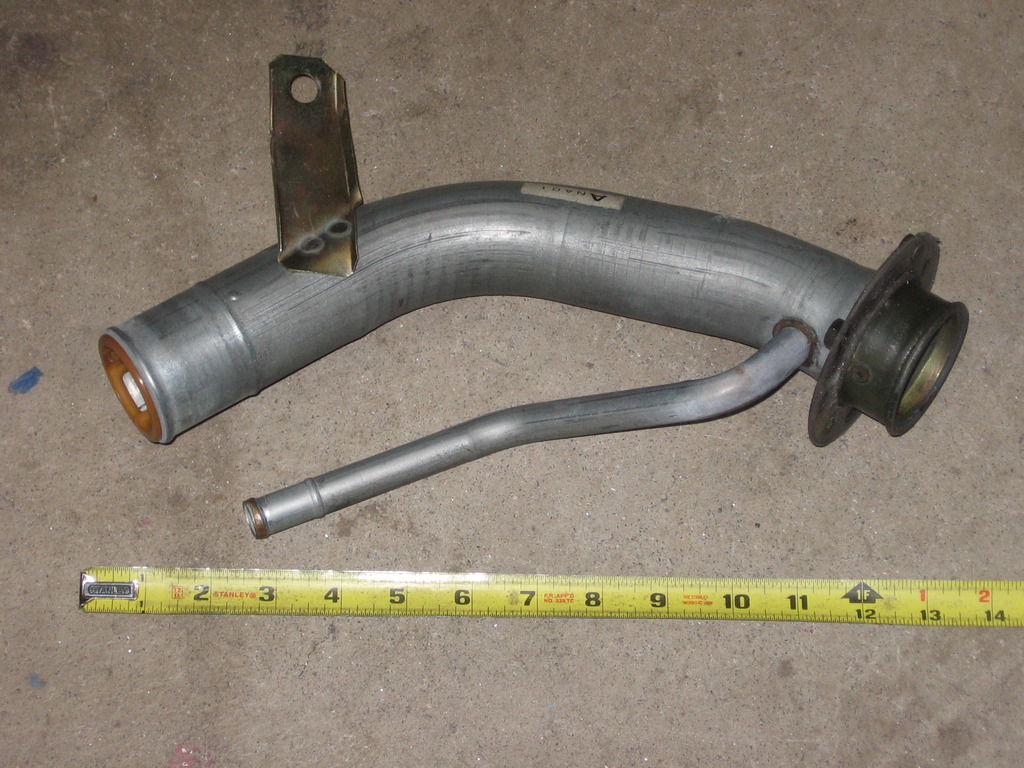
Inside of that is a plastic ball check valve. I would like to have retained that, but it just didn't fit.
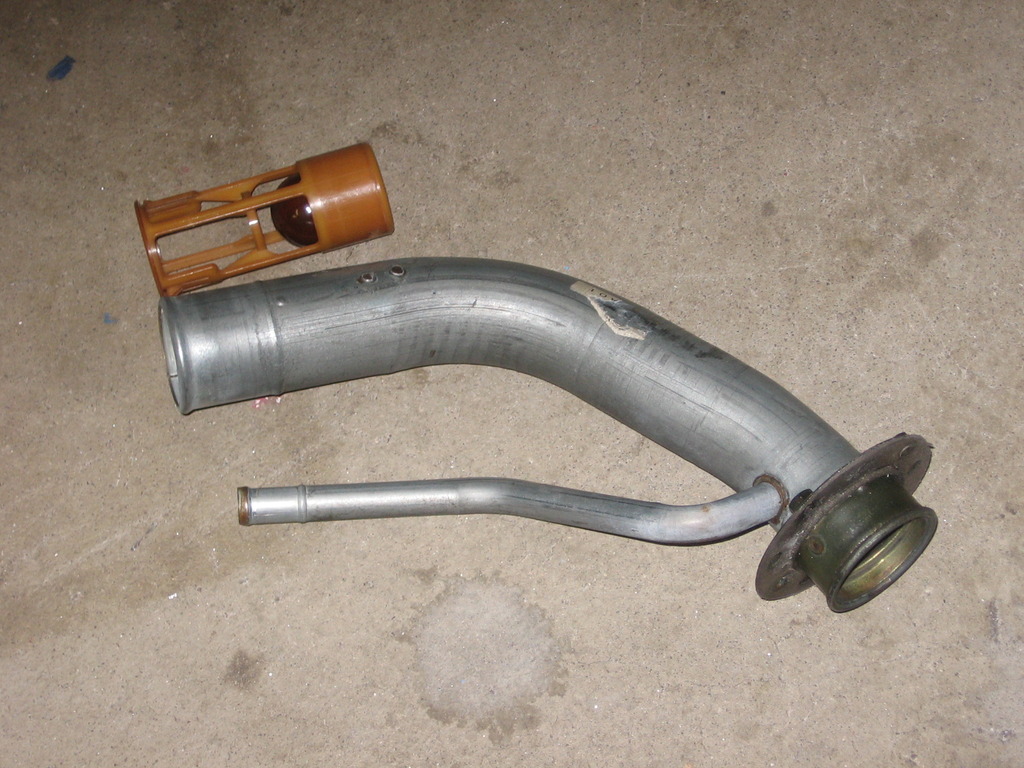
I had to do some cutting and welding on the metal tube. And then some cutting on the stock rubber hoses - both filler and vent. But I finally got them where I wanted them. I drilled abig hole in the cover where I thought the cap would come out. And then used another CAD drawing (cardboard aided design) for the 4 smaller holes. Probably could have gotten away with two mounting holes.
Done! This is a track car, so function and light weight are the key. I still may add a LeMans type flip up cover, just to keep the Cobra flavor alive.
I started out with this, a stock Miata filler neck and cap.

Inside of that is a plastic ball check valve. I would like to have retained that, but it just didn't fit.

I had to do some cutting and welding on the metal tube. And then some cutting on the stock rubber hoses - both filler and vent. But I finally got them where I wanted them. I drilled abig hole in the cover where I thought the cap would come out. And then used another CAD drawing (cardboard aided design) for the 4 smaller holes. Probably could have gotten away with two mounting holes.


Done! This is a track car, so function and light weight are the key. I still may add a LeMans type flip up cover, just to keep the Cobra flavor alive.


Thread Starter
V8 Miata Enthusiast
Joined: Oct 2013
Posts: 421
Likes: 33
From: Colorado Springs, CO
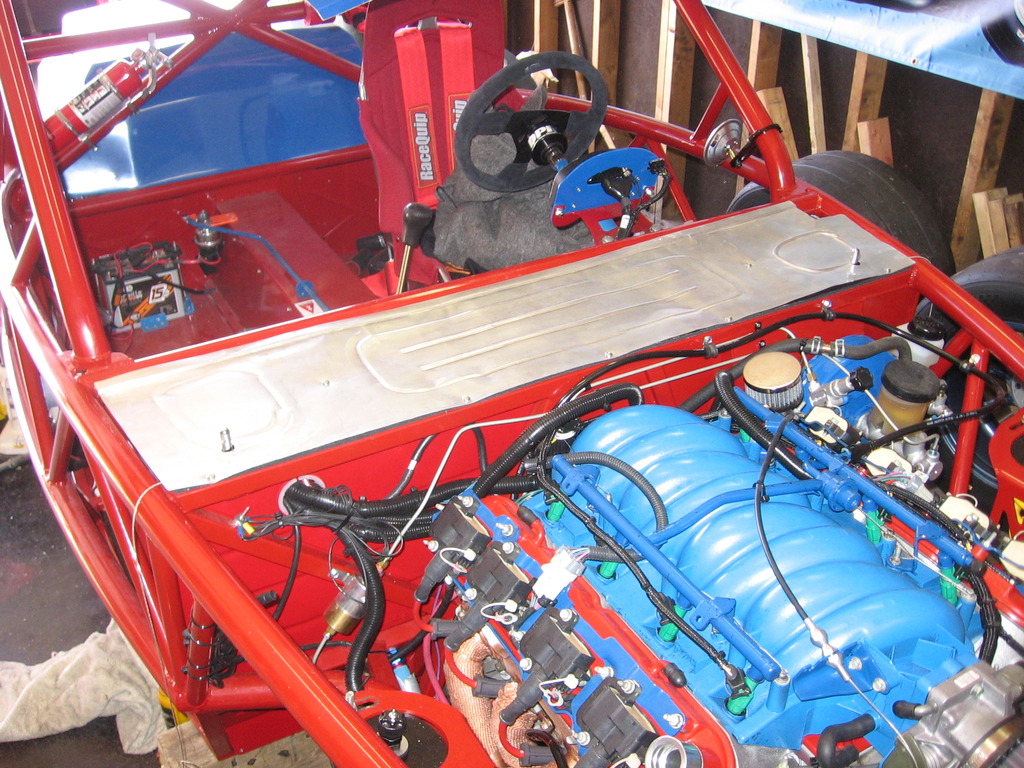
Haven't done much in a while. I'v been pretty busy on other projects here and there. Lately, I'v been working on the front body work. This job was a PITA because things didn't seem to want to fit very well. Getting them all line up correctly requires a lot of time, and a lot of patience
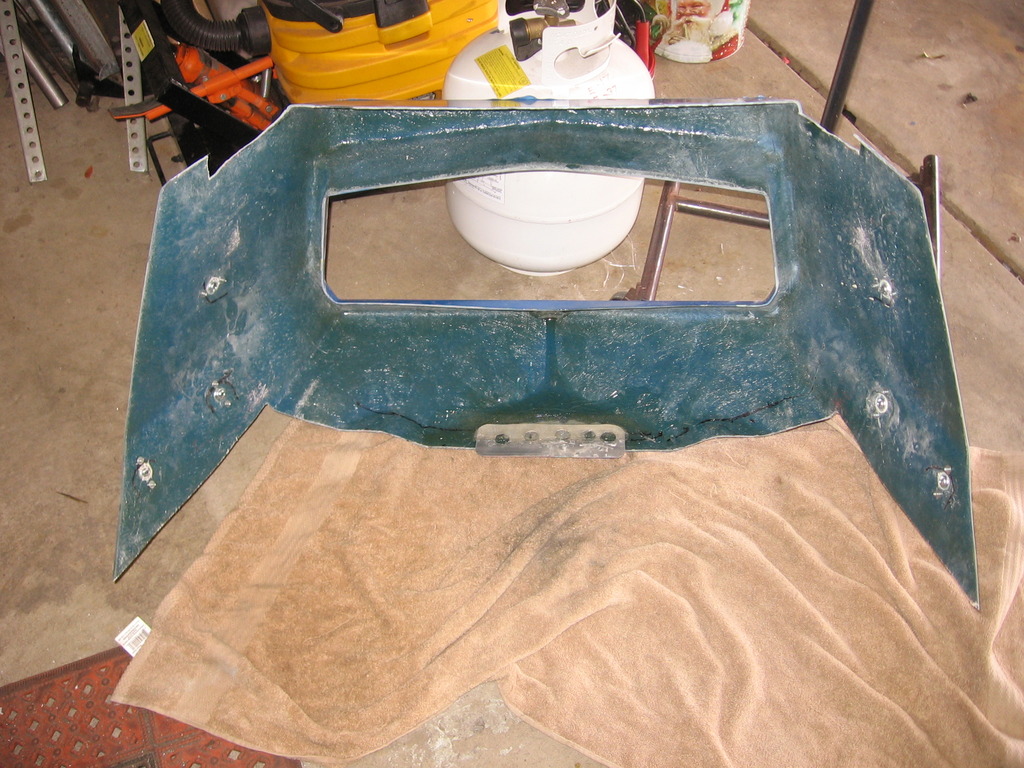
Obviously, we start here. With a single piece hood and nose cone.
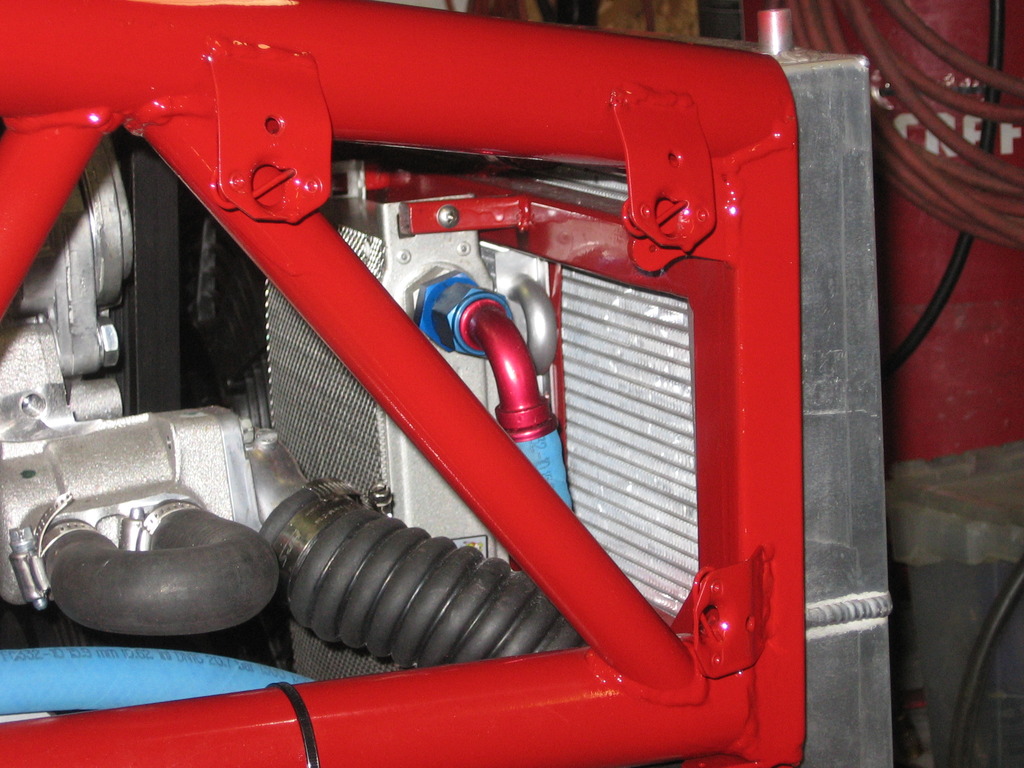
I didn't want that to be one single piece, because it would be too difficult to handle between races. So I did some very careful measuring to decide where I wanted to cut it. I ended up cutting just above the radiator. So that should give me easy access to pretty much everything.

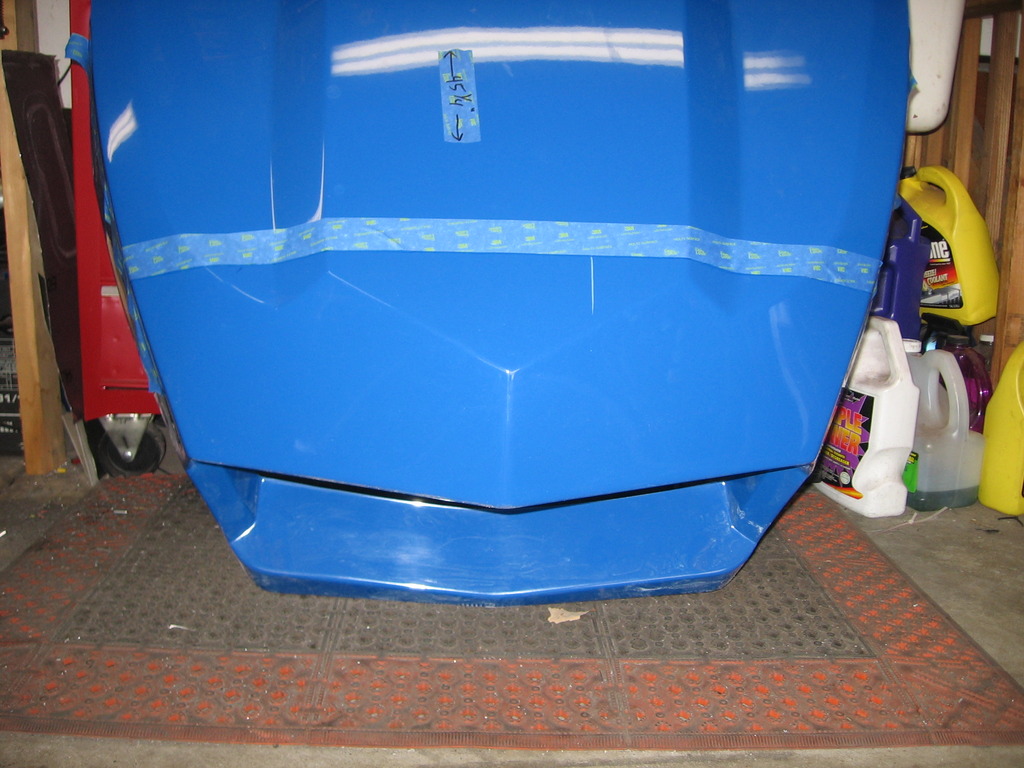
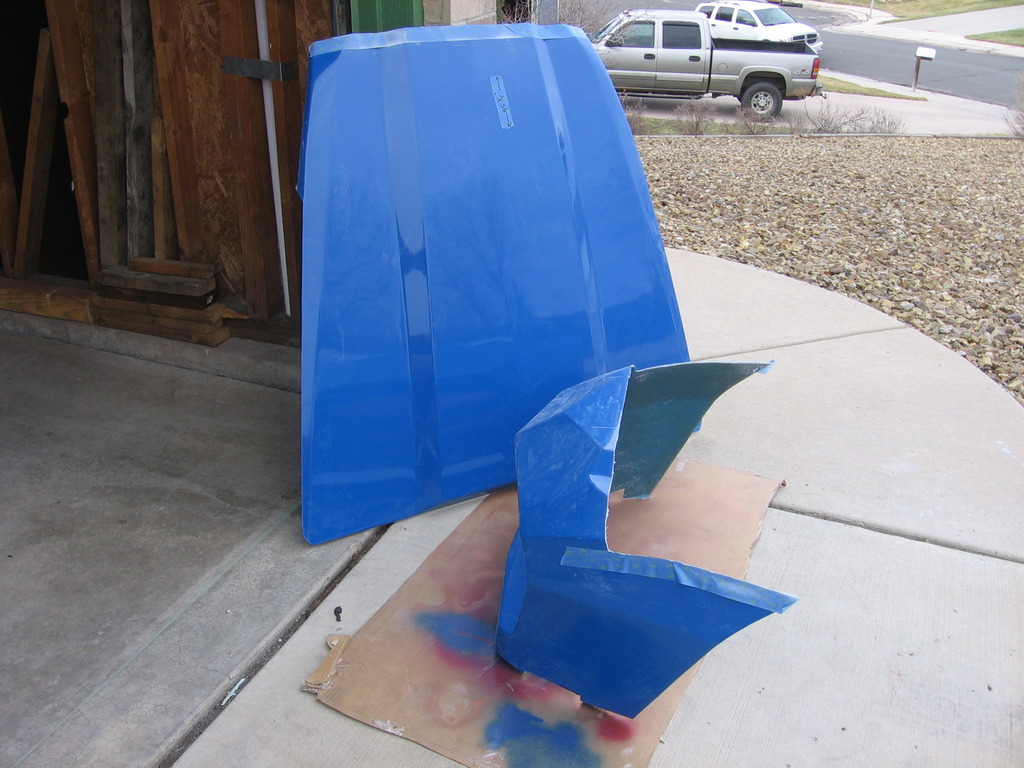
The painters tape provide a nice straight edge across the body lines. I cut the sides below the body line for a reason. A single flat sheet of 'glass is not very stiff. It would flop up and down and eventually crack. By leaving that curved edge, the front of the hood is stiffer.
Obviously, we start here. With a single piece hood and nose cone.
I didn't want that to be one single piece, because it would be too difficult to handle between races. So I did some very careful measuring to decide where I wanted to cut it. I ended up cutting just above the radiator. So that should give me easy access to pretty much everything.


The painters tape provide a nice straight edge across the body lines. I cut the sides below the body line for a reason. A single flat sheet of 'glass is not very stiff. It would flop up and down and eventually crack. By leaving that curved edge, the front of the hood is stiffer.
Last edited by .boB; Dec 8, 2015 at 09:44 PM.
Thread Starter
V8 Miata Enthusiast
Joined: Oct 2013
Posts: 421
Likes: 33
From: Colorado Springs, CO
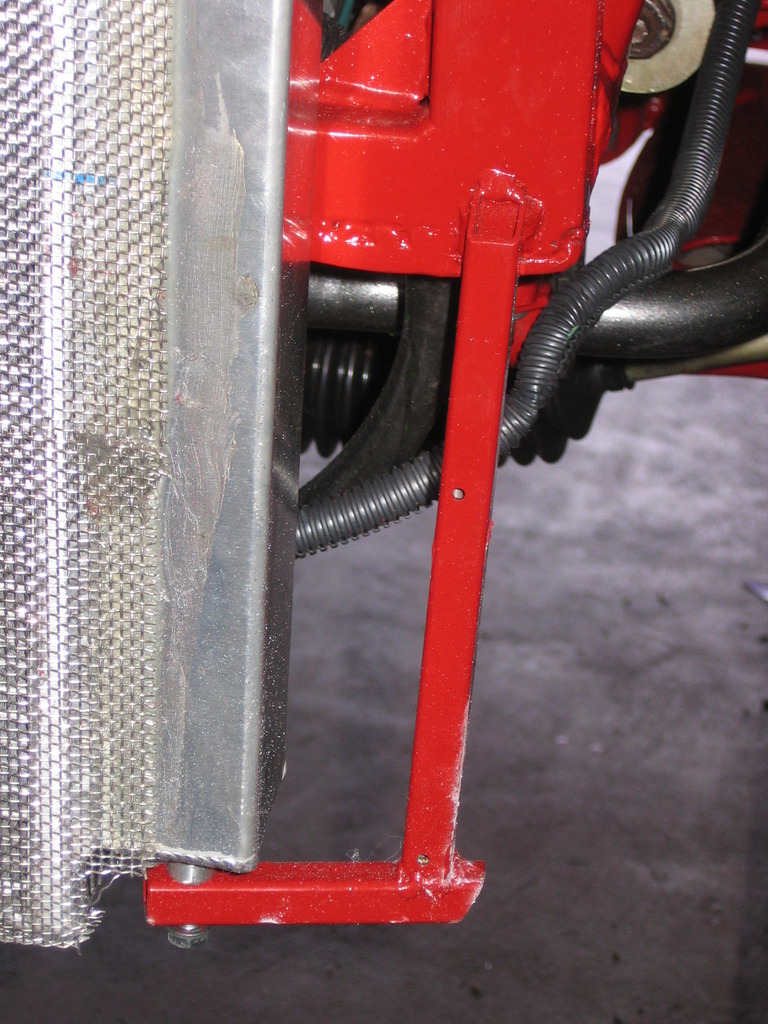
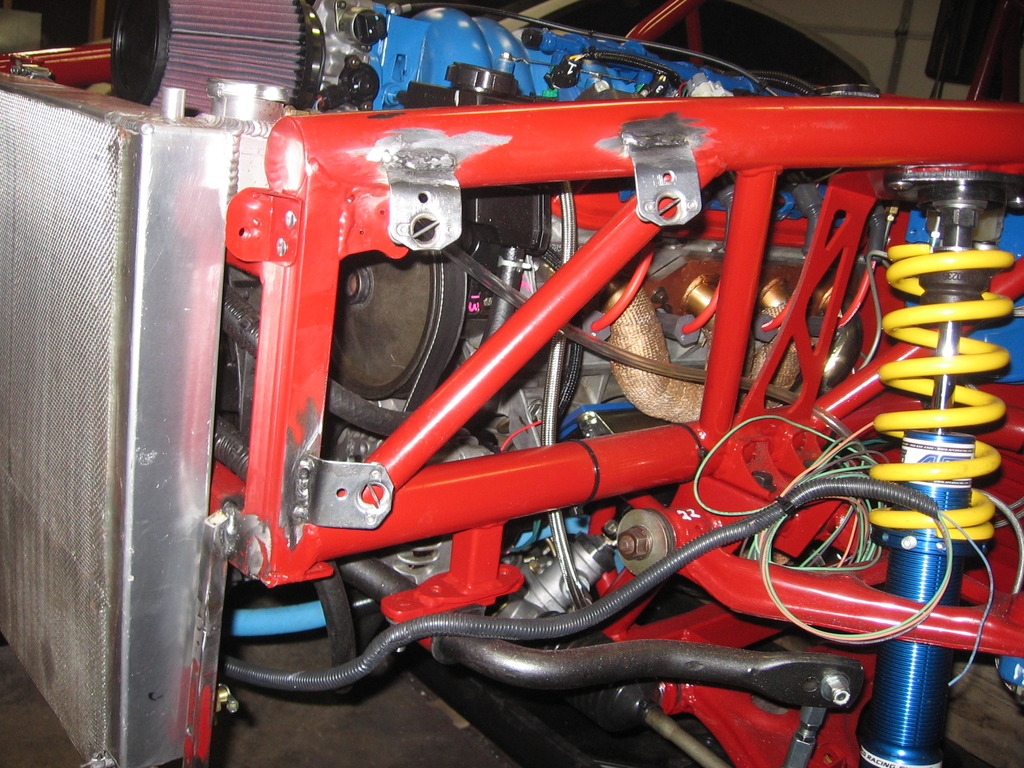
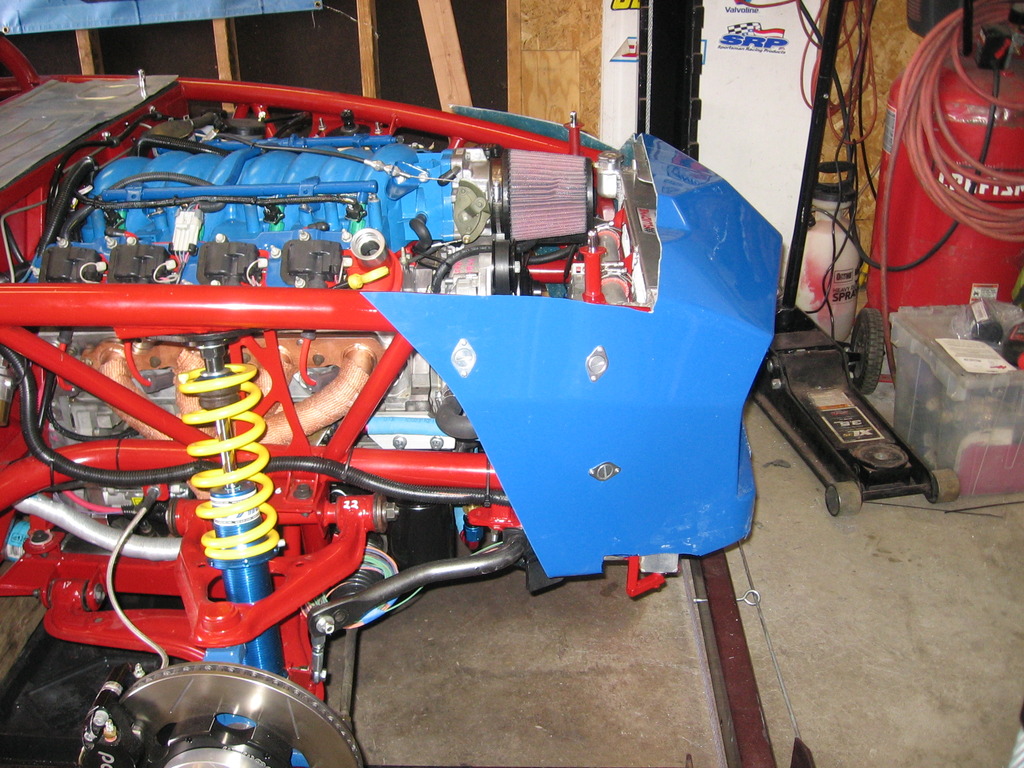
Trying to get the pieces to fit was not easy. I think their molds need a little bit of work. Not much, just a little bit. One of the problems was that I had put the radiator mounts too far outboard. So I had to cut them off and remake them. The other issue was that I had place the coolant overflow tank next to the radiator, and this didn't fit, either. I'll have to fab up a new mount for the a different tank. Next week end.
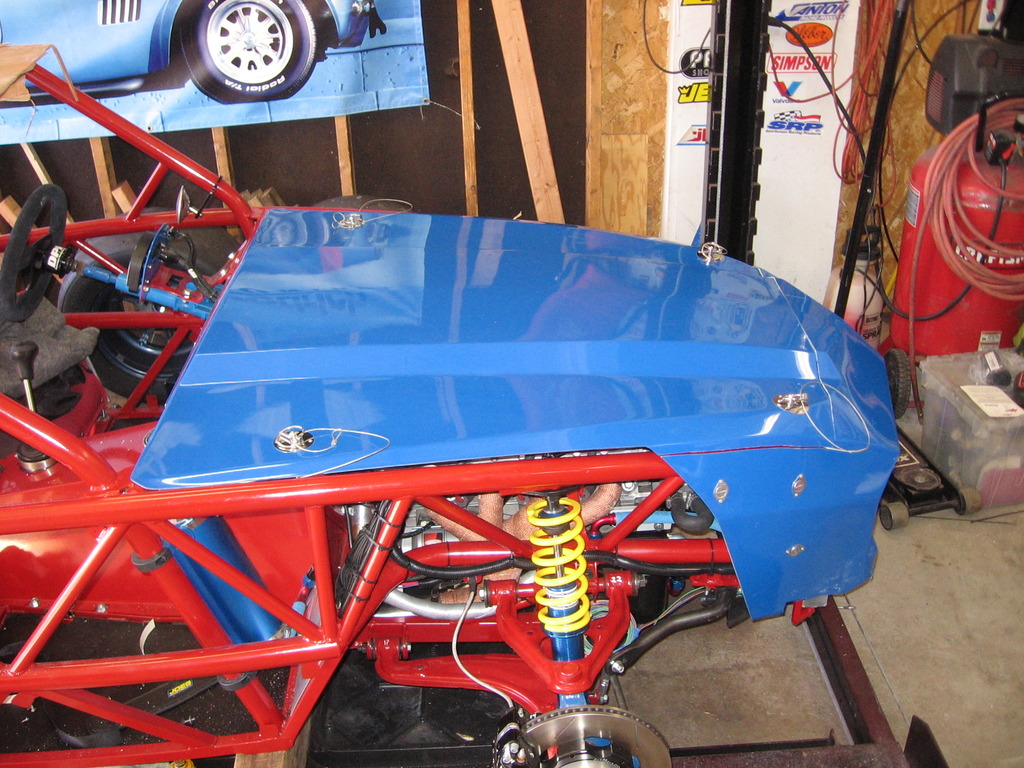
The hod I mounted with standard deck pins. Not very pretty, I admit. But they're simple, light weight, and inexpensive. They don't require any tools to use, either. On the track, you sometimes need to open the hood quickly, and you don't want to be fumbling around with tools.
The rear pins were easy, since the bracket was already there. I had to fab the front brackets. Simple to do. But getting the placed just right is time consuming. I also made some spacers for the hood to sit on.

The nut is welded to the bottom of the bracket. That makes adjustments really easy. For final assembly, I used a second jamb nut and red lock-tite.


The hod I mounted with standard deck pins. Not very pretty, I admit. But they're simple, light weight, and inexpensive. They don't require any tools to use, either. On the track, you sometimes need to open the hood quickly, and you don't want to be fumbling around with tools.
The rear pins were easy, since the bracket was already there. I had to fab the front brackets. Simple to do. But getting the placed just right is time consuming. I also made some spacers for the hood to sit on.


The nut is welded to the bottom of the bracket. That makes adjustments really easy. For final assembly, I used a second jamb nut and red lock-tite.
Last edited by .boB; Dec 8, 2015 at 09:46 PM.
Thread Starter
V8 Miata Enthusiast
Joined: Oct 2013
Posts: 421
Likes: 33
From: Colorado Springs, CO
The nose cone is a bit more difficult. There's nothing to locate it on the frame. And there are no mounts anywhere. Once the hood was in place where I wanted it, I duct taped the nose to that, and then started making mounts.
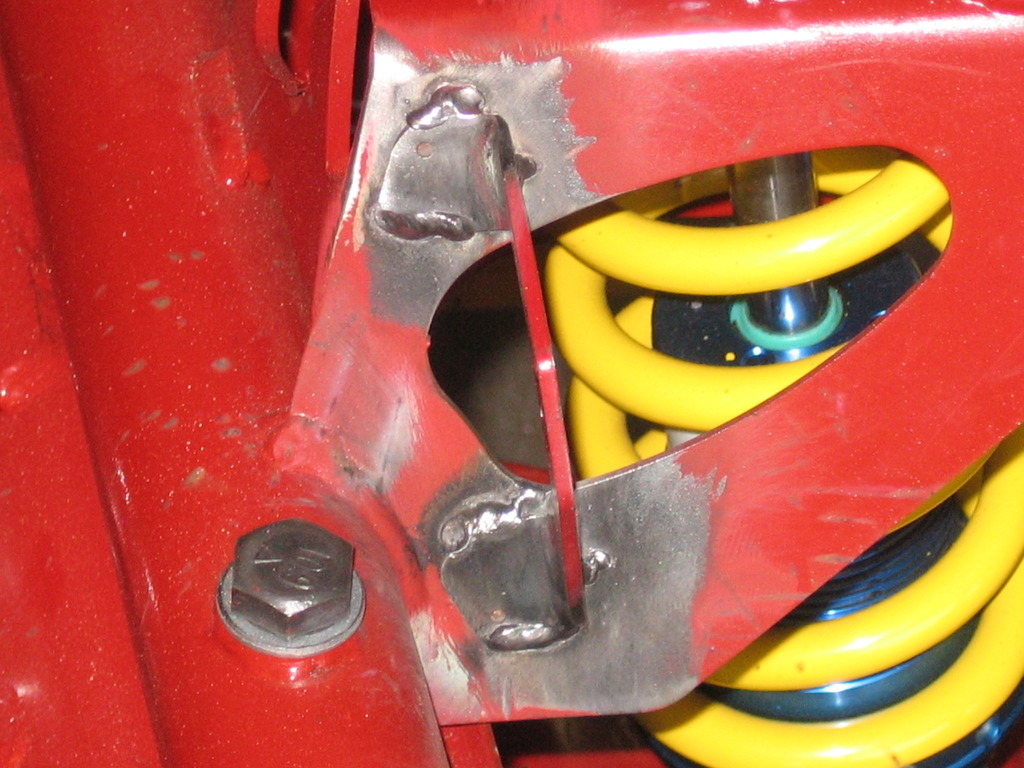
It would not be very common to need to remove the nose cone. But when you do, it needs to be in a hurry. So I attached that with 1/4 turn Dzues fasteners. Lots of very careful measurements and adjustment. Tack weld the tabs in place so you can adjust a bit for final welding.
A multi bit drill bit makes drilling holes in fiberglass really easy. Even bevels them real nice, too.
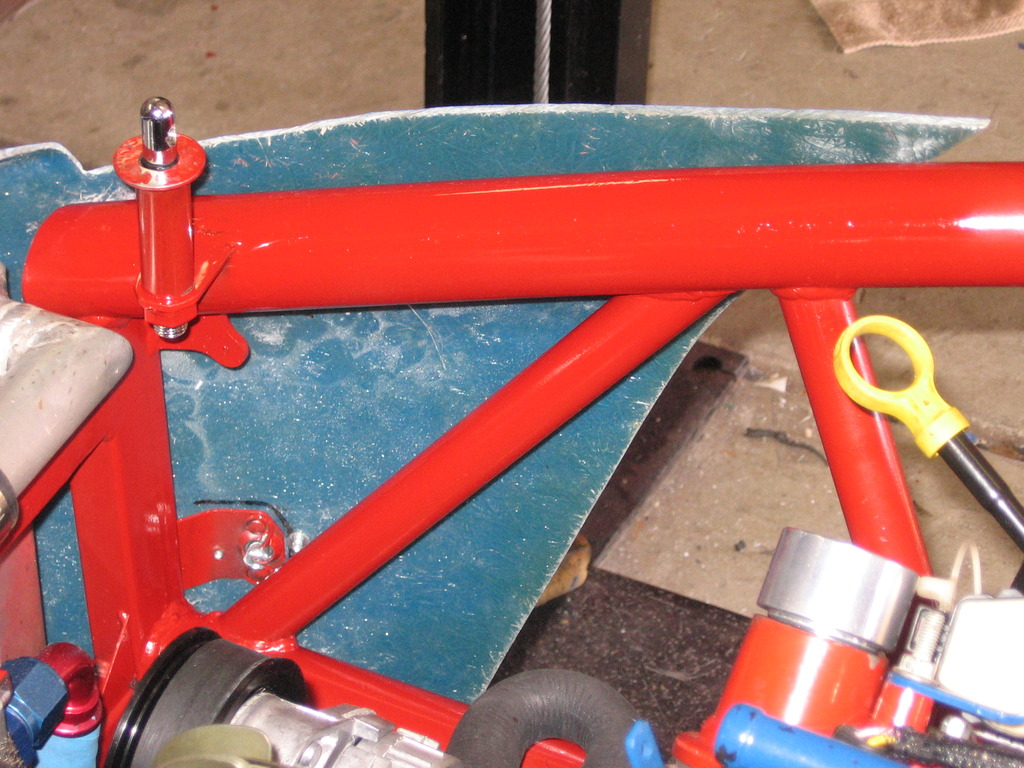
I'v never installeed Dzues fastners before, so there was a short learning curve. I did a lot reading before starting, too. One trick I discovered by accident, that I had not see anywhere.
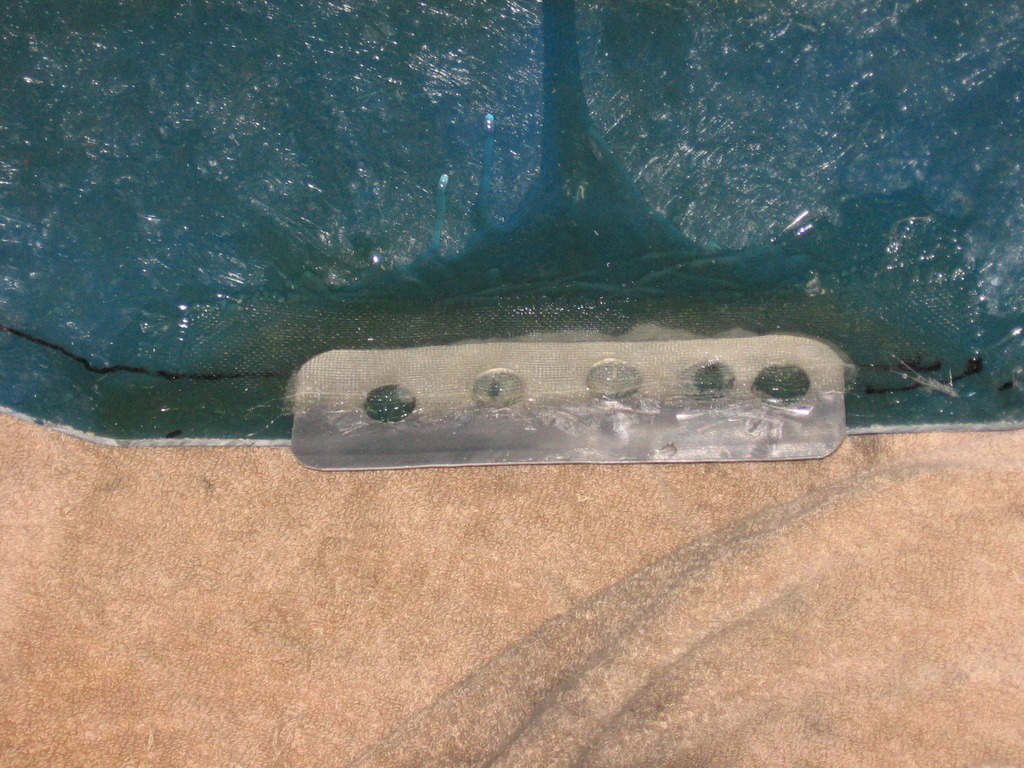
The outside oval bracket/fastener is one piece. And it's held on to the panel with pop rivits. The pop rivits extend behind the panel for a short way. In my mind, that created a clearance issue. So I turned the brackets so they're parallel with the inside brackets. Look at the inside and outside picture, and you'll see what I mean. The top two are vertical, and the bottom one is horizontal.
With this installation, one of the rivits clears the end of the tab, so no problem there. The other one is about in the middle of the metal tab. So I drilled a 3/16" hole there; you can see that in the top picture of the unpainted tabs. Now the end of the pop rivit extends through the bracket, instead of contacting it. As I took the nose off and on a couple of times, I found an extra benefit. The rivit back goes in to the hole like a locating stud, making it extremely easy to line up the Dzeus stud with the spring catch. Mounting the nose is a simple 60 second one man operation.
It would not be very common to need to remove the nose cone. But when you do, it needs to be in a hurry. So I attached that with 1/4 turn Dzues fasteners. Lots of very careful measurements and adjustment. Tack weld the tabs in place so you can adjust a bit for final welding.
A multi bit drill bit makes drilling holes in fiberglass really easy. Even bevels them real nice, too.


I'v never installeed Dzues fastners before, so there was a short learning curve. I did a lot reading before starting, too. One trick I discovered by accident, that I had not see anywhere.
The outside oval bracket/fastener is one piece. And it's held on to the panel with pop rivits. The pop rivits extend behind the panel for a short way. In my mind, that created a clearance issue. So I turned the brackets so they're parallel with the inside brackets. Look at the inside and outside picture, and you'll see what I mean. The top two are vertical, and the bottom one is horizontal.
With this installation, one of the rivits clears the end of the tab, so no problem there. The other one is about in the middle of the metal tab. So I drilled a 3/16" hole there; you can see that in the top picture of the unpainted tabs. Now the end of the pop rivit extends through the bracket, instead of contacting it. As I took the nose off and on a couple of times, I found an extra benefit. The rivit back goes in to the hole like a locating stud, making it extremely easy to line up the Dzeus stud with the spring catch. Mounting the nose is a simple 60 second one man operation.
Last edited by .boB; Dec 8, 2015 at 09:56 PM.
Thread Starter
V8 Miata Enthusiast
Joined: Oct 2013
Posts: 421
Likes: 33
From: Colorado Springs, CO
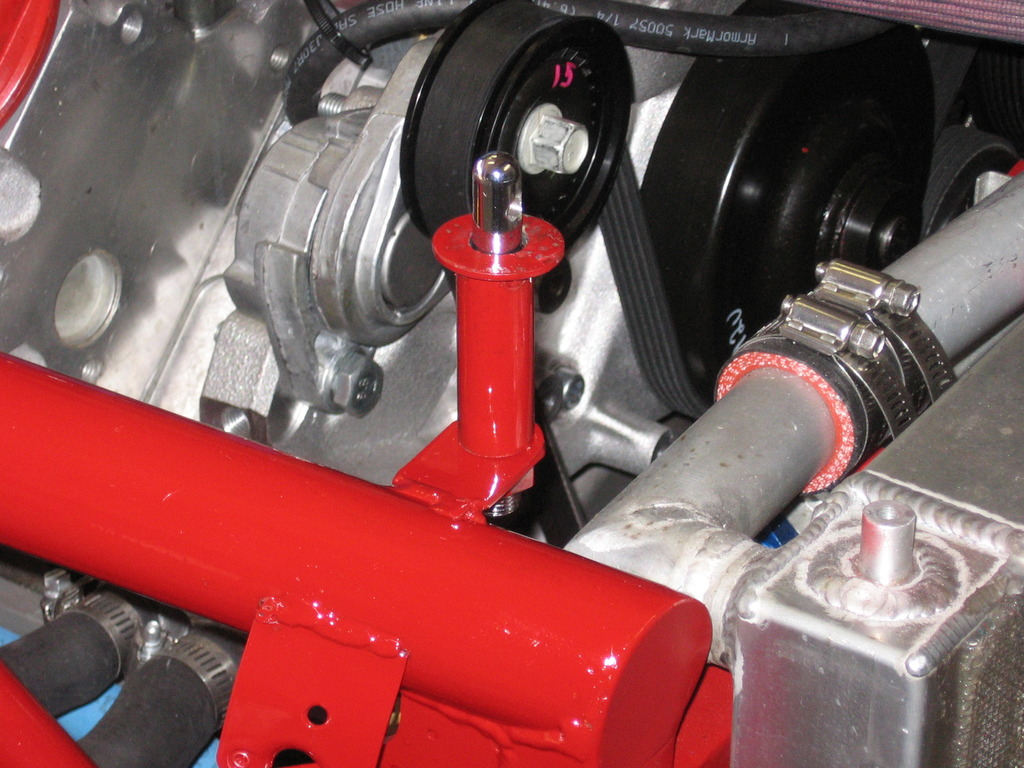
Once I had it all mounted in place, I noticed a small problem. The hood sags in the middle. Looks ugly, not very aerodynamic, and would probably flutter at speed.
I cut out this small piece of .066 aluminum. The holes are there to help it adhere better. and I glassed it to the underside of the nose piece.

Now the front of the hood has something to rest on, and keep the surfaces even. If I start getting lift out of it, I'll glass in a slot on the bottom of the hood for that tab to fit in to.
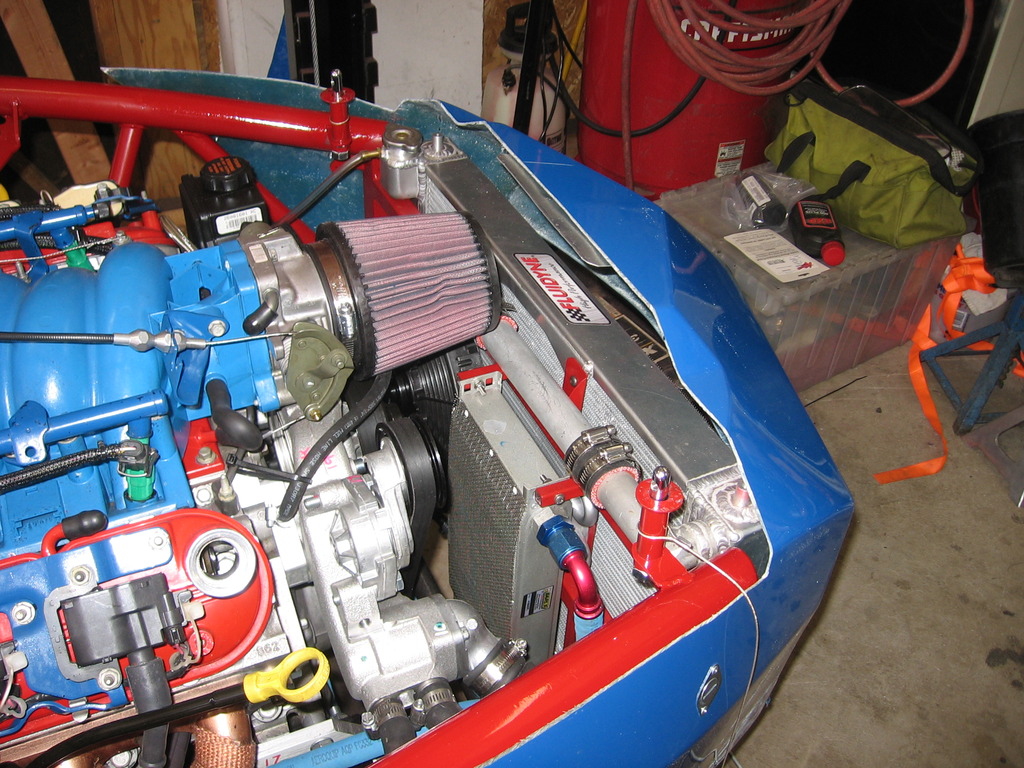
Still not sure what I'm going to do about the air cleaner. It fits where it is. But there's no room for a MAF sensor. Running it 90* interfered with the hood. I'll work on that.
I cut out this small piece of .066 aluminum. The holes are there to help it adhere better. and I glassed it to the underside of the nose piece.


Now the front of the hood has something to rest on, and keep the surfaces even. If I start getting lift out of it, I'll glass in a slot on the bottom of the hood for that tab to fit in to.
Still not sure what I'm going to do about the air cleaner. It fits where it is. But there's no room for a MAF sensor. Running it 90* interfered with the hood. I'll work on that.
Thread Starter
V8 Miata Enthusiast
Joined: Oct 2013
Posts: 421
Likes: 33
From: Colorado Springs, CO
And here's the finished product. It works, it's simple, and it looks OK. Not great, but OK.

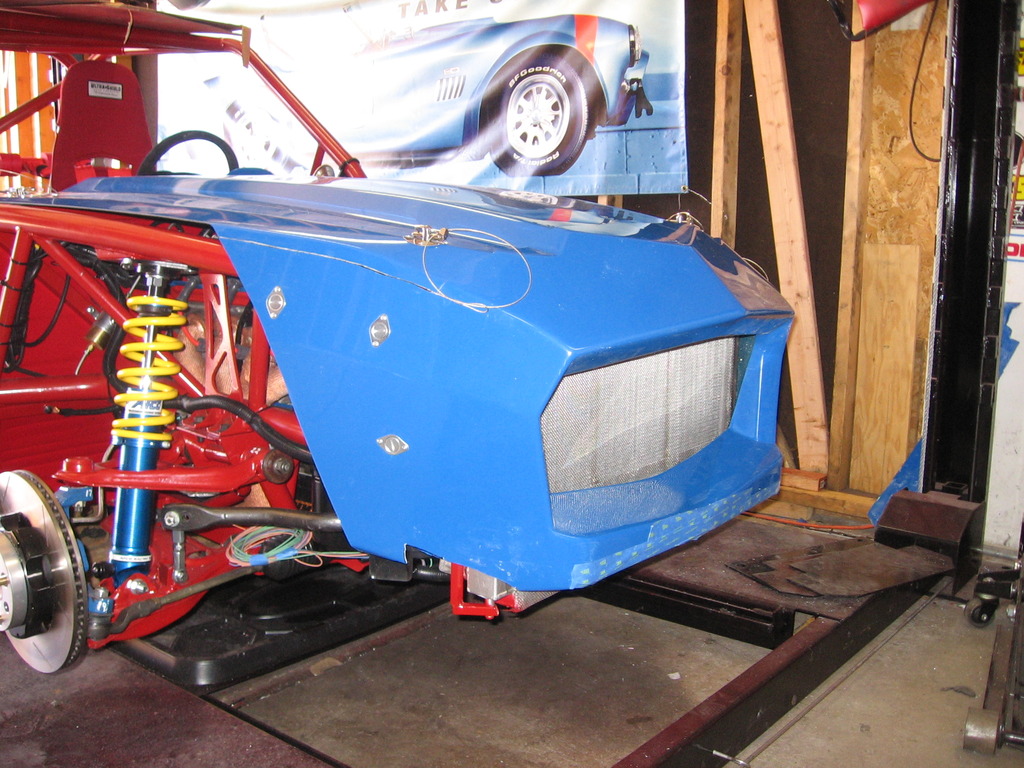
I still need to mount the front wing arms. Not sure how that's going to fit. Again, another custom job where I'll have to fab stuff. Not a big deal, I can do that if I have to. I'm sure the nose will have to be trimmed a bit here and there for that, too.
I'll put the numbers and sticker on the front needed for my class. And I have some LS1 emblems for the hood somewhere, too. I'll take the nose off and then coat the whole thing with 3M paint protector.
I'm also thinking of venting the hood so it doesn't get any lift. Not sure it really needs that, though. We'll see.
V8 Miata Fan
Joined: Nov 2015
Posts: 35
Likes: 1
From: Richmond Hill, GA
Good on you making the hood fit, I gave up and made a nosecone out of it. Another benefit on the rearward mounting position is extra clearance that I don't have around the front top of the intake. Interested to see how you approach the front wing. Haven't tackled that yet, since I know the supplied mounts wont work with my front of the tube radiator
Thread Starter
V8 Miata Enthusiast
Joined: Oct 2013
Posts: 421
Likes: 33
From: Colorado Springs, CO
Thanx. Although not very talented, I am sometimes sorta clever. 
It does clear the top of the air filter, although just barely. as you can see, about 3-4" of the V8R radiator hangs out the bottom. I need to work on a better air filter, though.
Not sure what I'll do about the front wing. Obviously, it can be done. But not as the front wing mounts were designed. Some good clues can be found by looking at the photos of the XXXocet. I was fortunate enough to be visiting FM while they were building that car, and I took a bunch of pics. I'll use the standard Exocet front mounts to some extent. But I'll end modifying them quite a bit. I guess. Something I might get time to work on this week end.
Thread Starter
V8 Miata Enthusiast
Joined: Oct 2013
Posts: 421
Likes: 33
From: Colorado Springs, CO
Building this car is a lot more involved than I thought it was going to be. My original intention of this thread - and others like it - was to document the differences from dropping a V8 into a Miata. I wanted this information to be easily found and referenced for the next guy. But keeping these threads updated and organized isn't working out all that well.
So, I built a web site. Racing the Exocet
This site only documents those steps, problems, and solutions specific to the Exocet. I'm sure some of it will apply to a Miata. But since I've never owned one, I can't say. I'll still read this site nearly every day, like I have been. And I still think this is the best site not only for V8 Miata's, but Miata performance in general.
No, this is not a commercial web site. It's for information only. I'm not selling anything, promoting anything, or asking for anything. Peruse the site at your leisure. Or not.

Thread
Thread Starter
Forum
Replies
Last Post
Currently Active Users Viewing This Thread: 1 (0 members and 1 guests)


