A "Fabricators" Build Thread
 01-24-2017, 07:25 AM
#101
V8 Miata Follower
Thread Starter

Just a quick sound clip to post for you guys as promised! I dont think you will be able to distinguish much without decent headphones.
Obviously the sound is very skewed since the exhaust is pointed into the back of the garage. Also, no intake makes a TON of noise, which you can hear. But hopefully she'll be outside someday soon to get some better clips!!

Obviously the sound is very skewed since the exhaust is pointed into the back of the garage. Also, no intake makes a TON of noise, which you can hear. But hopefully she'll be outside someday soon to get some better clips!!
Last edited by wcw5023; 03-13-2017 at 09:11 AM.

The following users liked this post:
SupaDupaSteve (01-24-2017)
01-25-2017, 07:09 AM
#104
V8 Miata Follower
Thread Starter
REAL TALK. Im at the stage where I really really want to start taking shortcuts just to be done. But I'm resisting! Im working on silly things like repainting brake calipers and such. Thanks for the compliment! Cant wait to hear it outside.
Haha, priorities, you have them! To be honest with you, im not sure yet. Picked up the dropout for a bargain, now im just browsing craigslist for a project. I have a few things I would LIKE to put it in, but honestly it will probably be whatever falls into my lap haha.
Haha, priorities, you have them! To be honest with you, im not sure yet. Picked up the dropout for a bargain, now im just browsing craigslist for a project. I have a few things I would LIKE to put it in, but honestly it will probably be whatever falls into my lap haha.
01-25-2017, 07:28 PM
#105
V8 Miata Prot�g�


REAL TALK. Im at the stage where I really really want to start taking shortcuts just to be done. But I'm resisting! Im working on silly things like repainting brake calipers and such. Thanks for the compliment! Cant wait to hear it outside.
Haha, priorities, you have them! To be honest with you, im not sure yet. Picked up the dropout for a bargain, now im just browsing craigslist for a project. I have a few things I would LIKE to put it in, but honestly it will probably be whatever falls into my lap haha.
Haha, priorities, you have them! To be honest with you, im not sure yet. Picked up the dropout for a bargain, now im just browsing craigslist for a project. I have a few things I would LIKE to put it in, but honestly it will probably be whatever falls into my lap haha.
I'm at the point where I'm tired of waiting for perfection and next level stuff. I'm still putting together a quality car and won't skimp on parts that will be inaccessible later. But simple bolt on parts are not high on my priories right now. I reallllly want to have my car ready for miatapalooza.
02-02-2017, 07:40 AM
#106
V8 Miata Follower
Thread Starter
Alright guys. Until the "first drive" update, im afraid my updates are going to be quite lack-luster as I continue to just tuck things away and try and make everything look pretty. Which is really all ive been up to lately.
Ive been refinishing my brake carriers/calipers here and there, was tired of the old dirty faded red, and decided to bake on some gloss black caliper paint. Not quite finished yet so no pictures so far.
Although I did install a wilwood prop valve.
Next I finished up my fan wiring, as that was the only thing keeping me from taping up the engine bay wiring harness. It was actually quite simple, and for those of you using a dual fan setup this will work exactly the same; because I wired mine for two speeds. What I did was:
- Allow the stock miata wiring/relay to handle low speed fan or fan1
- Connect Blk/Grn that fed into the Miata ECU to the Dr Grn "Low Speed Cooling Fan Relay Control"
- Connect the OE miata fan wires ( yellow and black ) to the low speed or fan 1
- Add new relay to handle high speed fan or fan 2
- Using a SPST 30A or higher relay as well as a connector pigtail
- Supply power and ground to the Relay. I used the alternator lug (+) and a chassis ground(-) just above the driver side swaybar mount.
- Fish the signal wire for the relay, back up the main miata wiring harness back into the cabin, or to wherever you ECU is located.
- Connect this signal wire to the DK BLU "High Speed Cooling Fan Relay Control"
Thats it, super simple. Heres a test! :

Woohoo!! Everything in the engine bay is offically done, completed, wrapped up, secured and tucked away! Thats a good feeling!
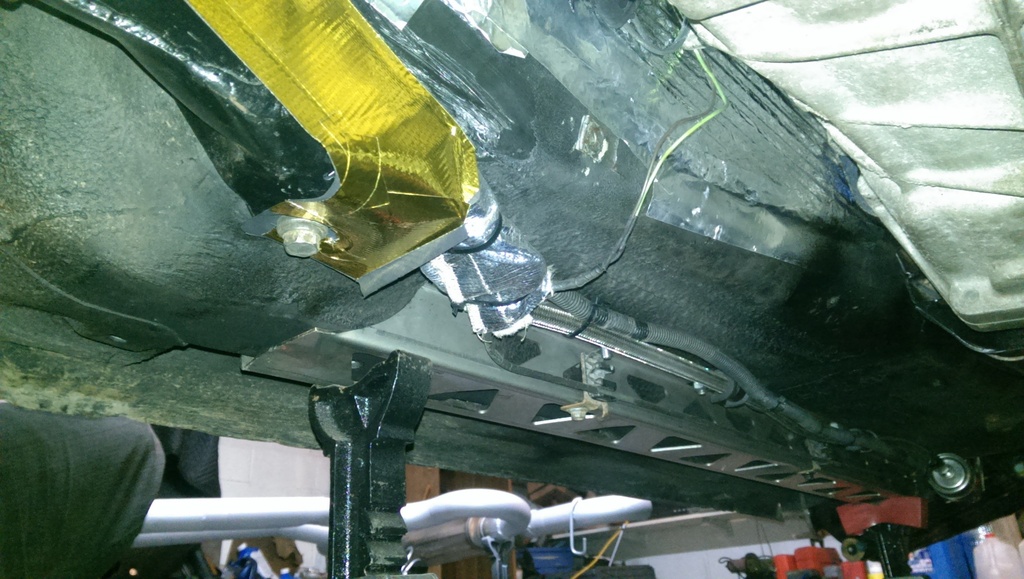
Warning, really poor pictures incoming! I wrapped the starter, wiring going up to the fuse box, fuel line, and made heat shields for the engine mounts.
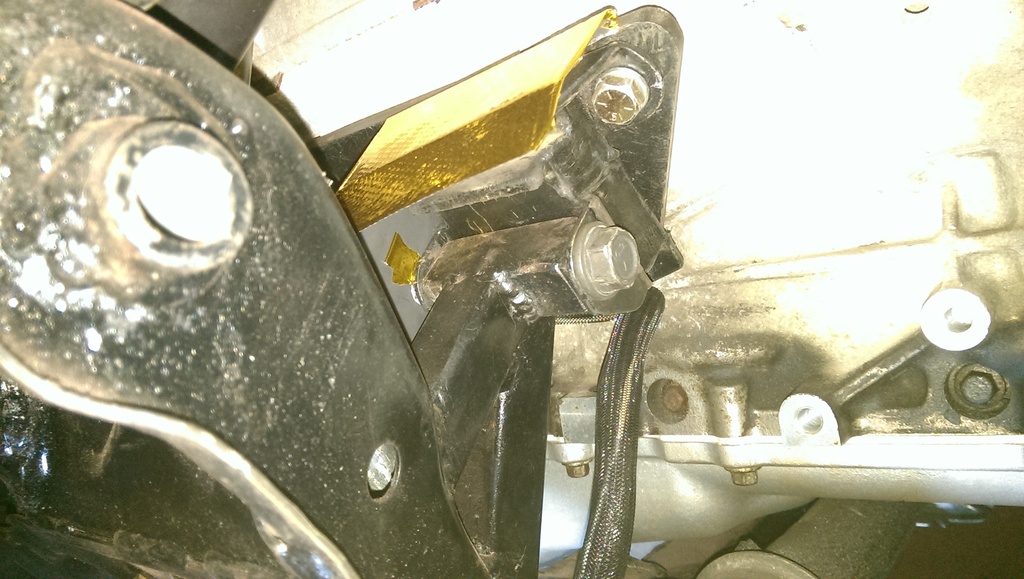

I am going to make an additional sheet metal heat shield to better protect everything underneath the car as well, just as an added layer or protection, not that I dont have faith in the capabilities of the DEI sleeve.
Ive been refinishing my brake carriers/calipers here and there, was tired of the old dirty faded red, and decided to bake on some gloss black caliper paint. Not quite finished yet so no pictures so far.
Although I did install a wilwood prop valve.

Next I finished up my fan wiring, as that was the only thing keeping me from taping up the engine bay wiring harness. It was actually quite simple, and for those of you using a dual fan setup this will work exactly the same; because I wired mine for two speeds. What I did was:
- Allow the stock miata wiring/relay to handle low speed fan or fan1
- Connect Blk/Grn that fed into the Miata ECU to the Dr Grn "Low Speed Cooling Fan Relay Control"
- Connect the OE miata fan wires ( yellow and black ) to the low speed or fan 1
- Add new relay to handle high speed fan or fan 2
- Using a SPST 30A or higher relay as well as a connector pigtail
- Supply power and ground to the Relay. I used the alternator lug (+) and a chassis ground(-) just above the driver side swaybar mount.
- Fish the signal wire for the relay, back up the main miata wiring harness back into the cabin, or to wherever you ECU is located.
- Connect this signal wire to the DK BLU "High Speed Cooling Fan Relay Control"
Thats it, super simple. Heres a test! :

Woohoo!! Everything in the engine bay is offically done, completed, wrapped up, secured and tucked away! Thats a good feeling!


Warning, really poor pictures incoming! I wrapped the starter, wiring going up to the fuse box, fuel line, and made heat shields for the engine mounts.


I am going to make an additional sheet metal heat shield to better protect everything underneath the car as well, just as an added layer or protection, not that I dont have faith in the capabilities of the DEI sleeve.
02-07-2017, 03:12 PM
#107
V8 Miata Follower
Thread Starter
Here have some photo updates!
Just cookin some calipers:

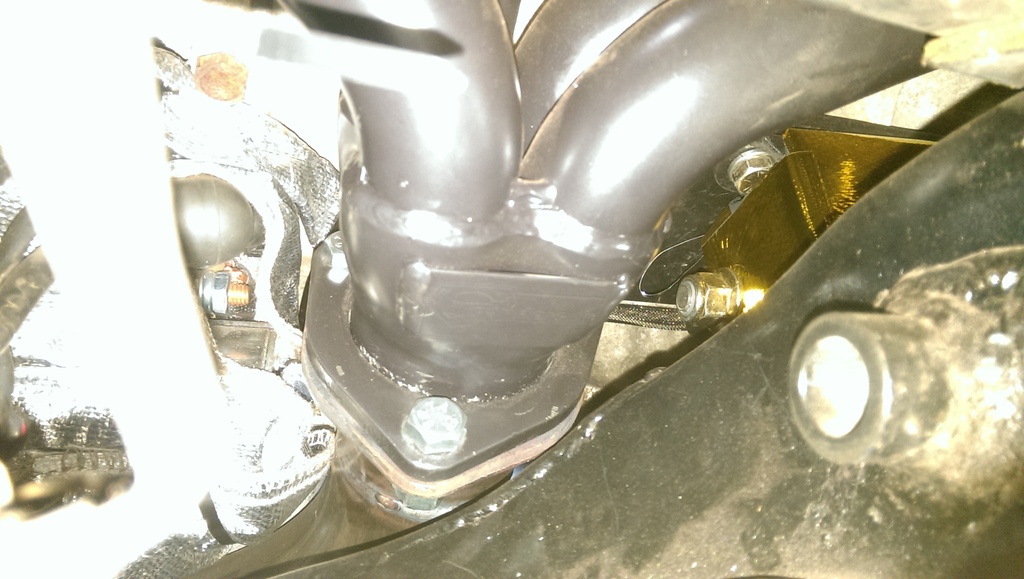
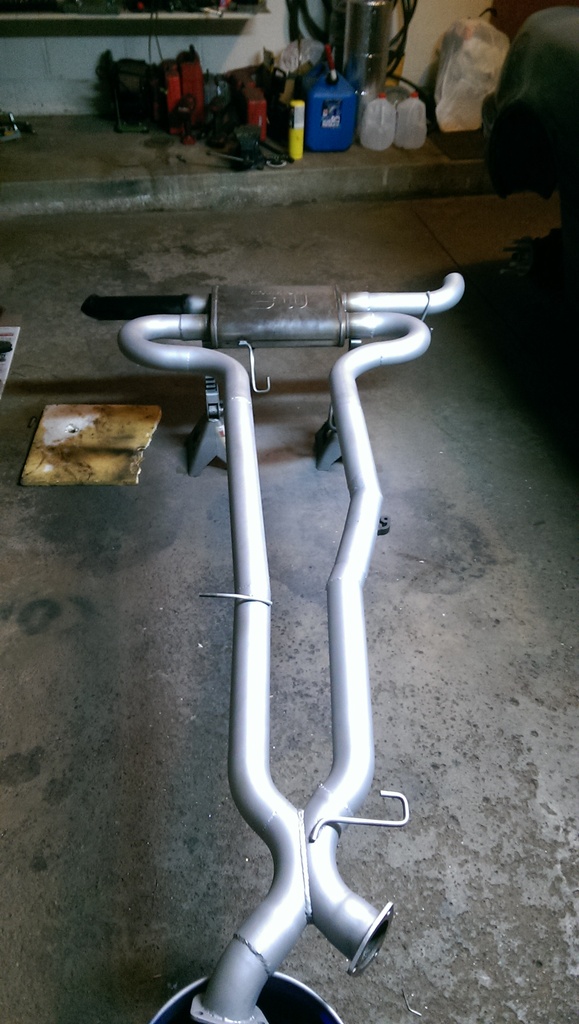
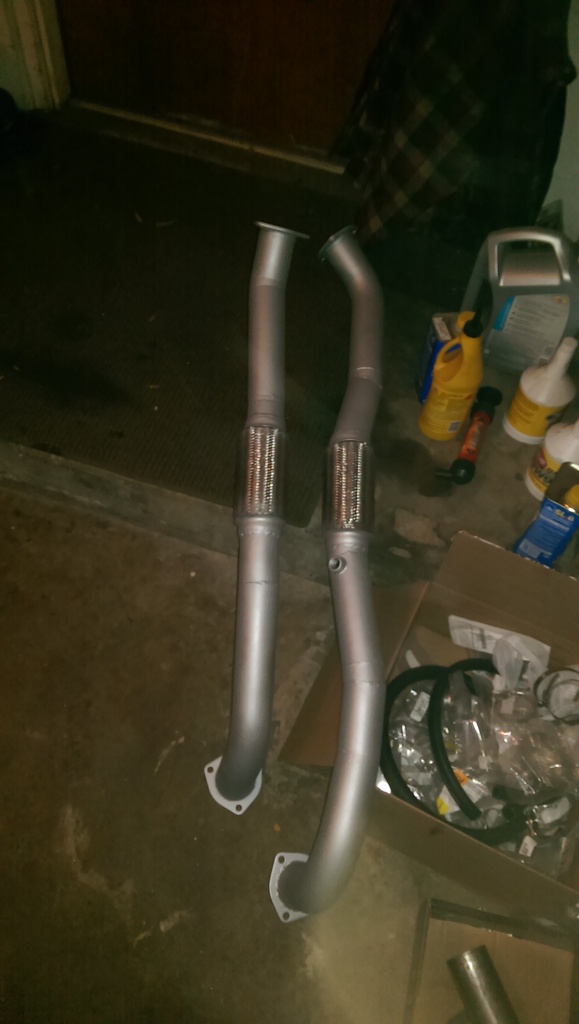
"Ceramic" painted the exhaust after finishing up welding some hangers and 02 bungs
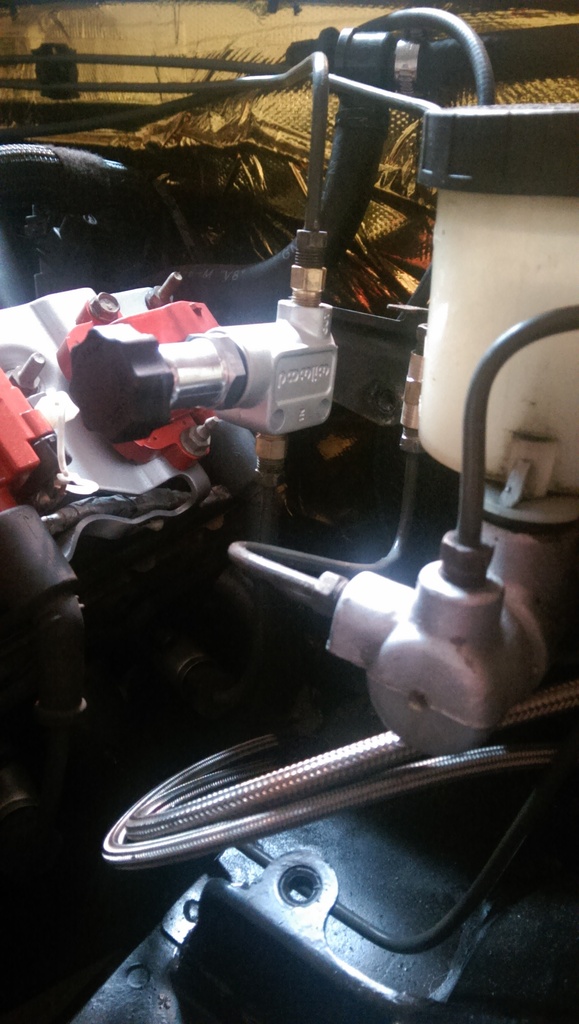
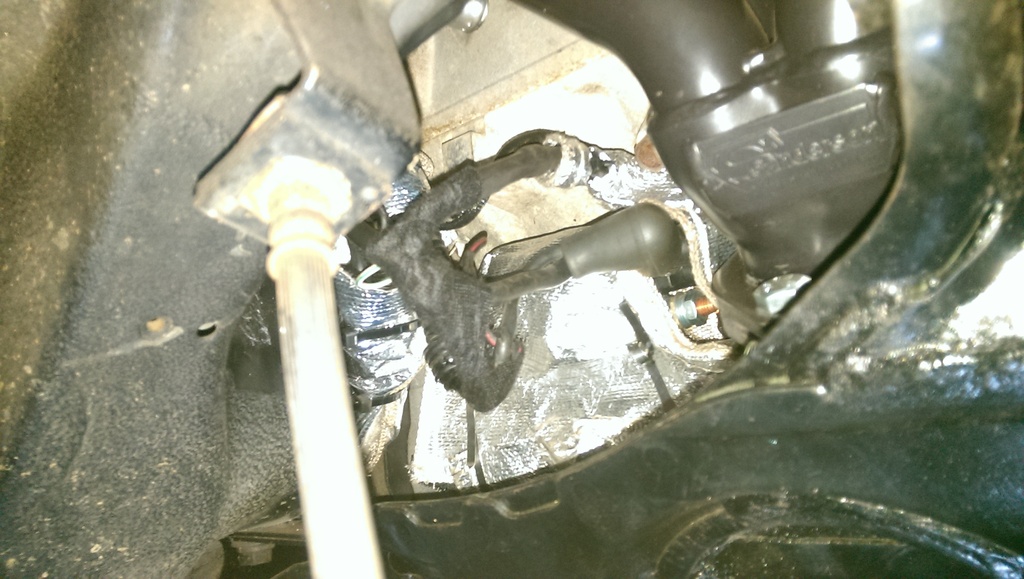
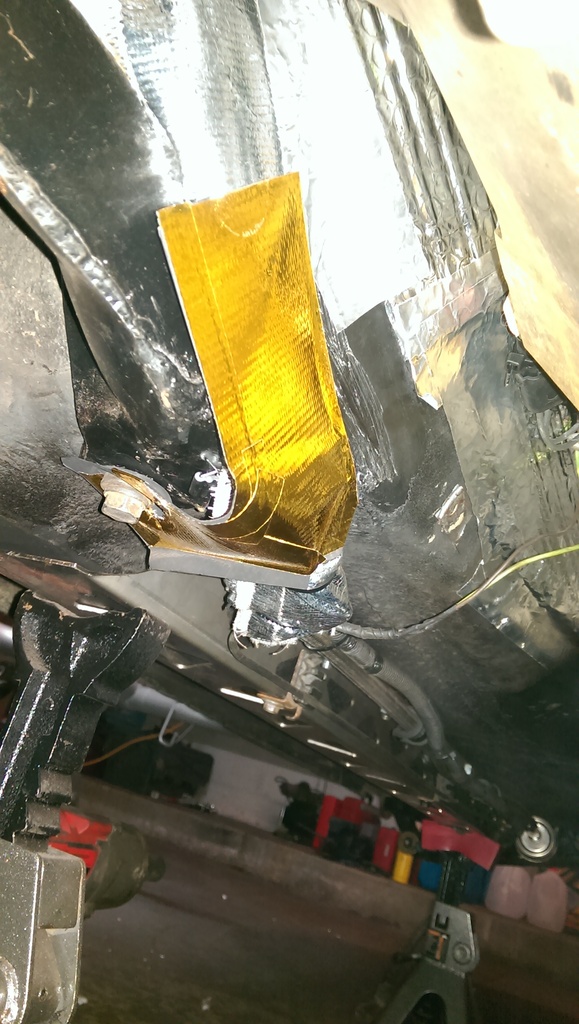
And made a heatshield to protect the wires/fuel lines where they got close
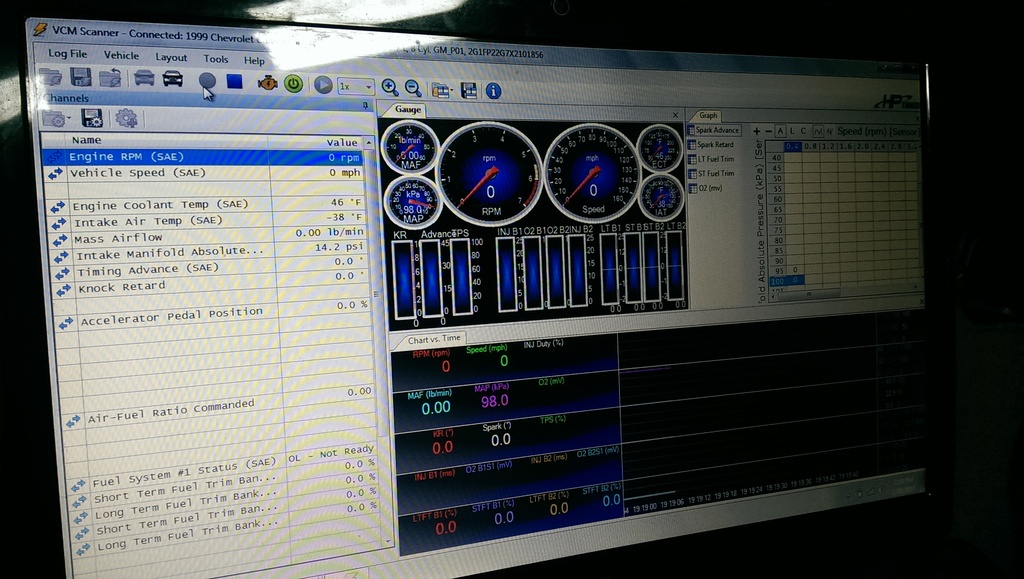
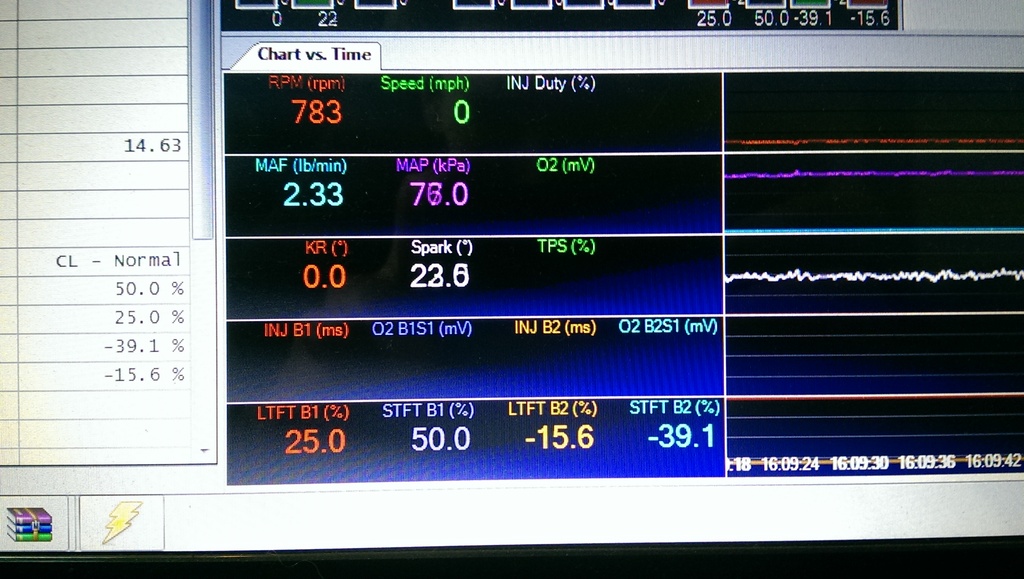
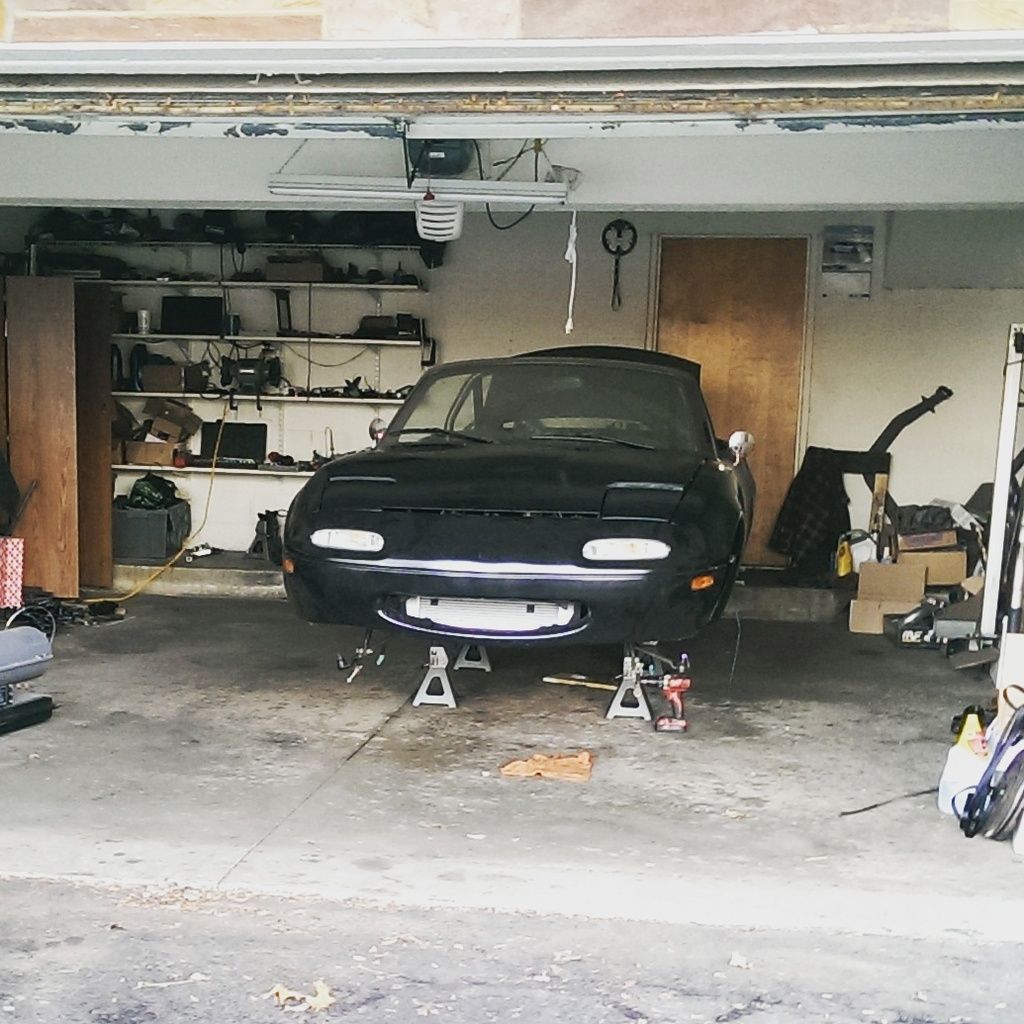
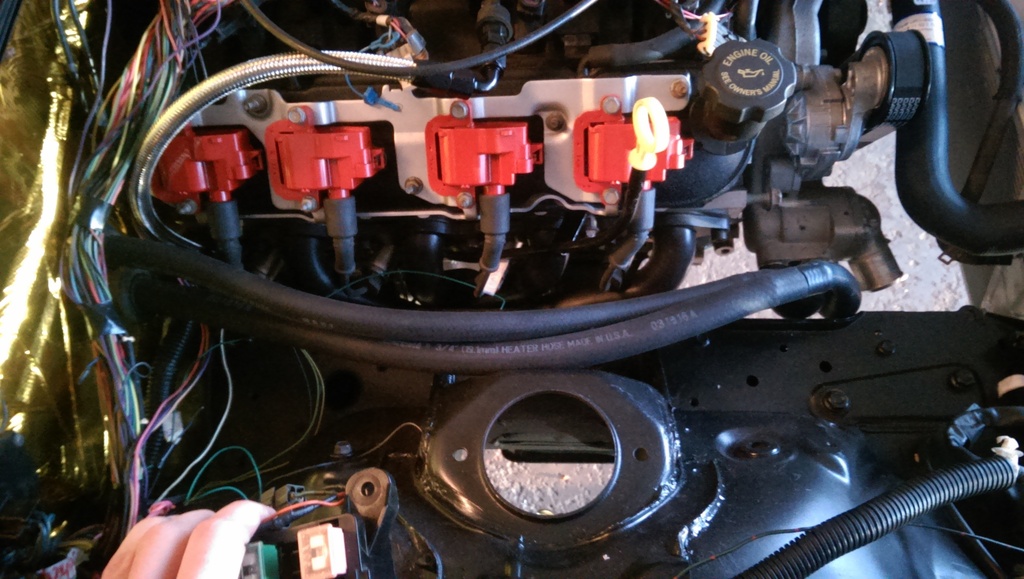
Fired her back up with 02 sensors in, all the way up to operating temperature to bleed the cooling system as well as bake the paint on the exhaust.... Ive already solved this issue, but Ill see if anyone wants to take a guess as to what I did wrong here??
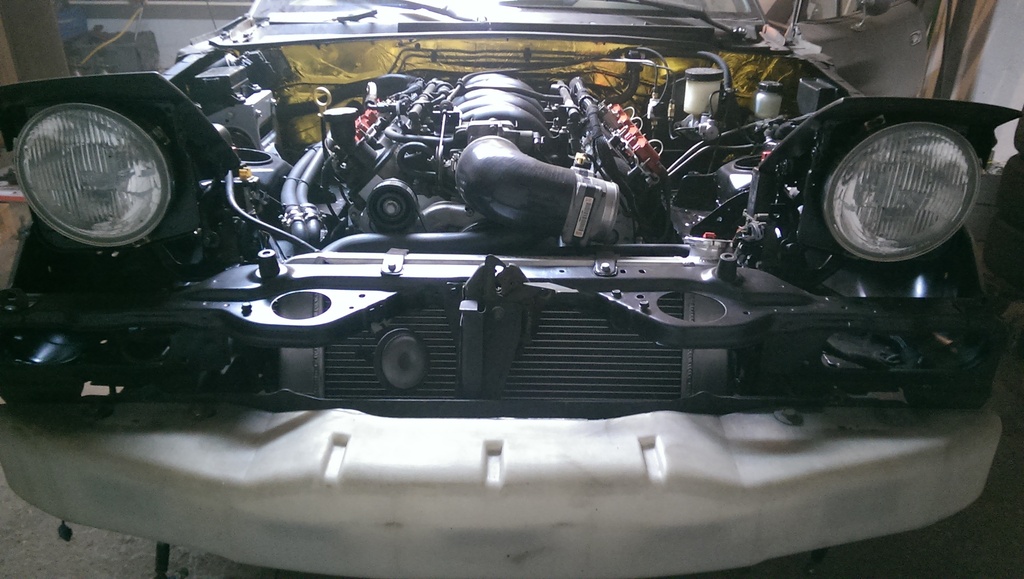
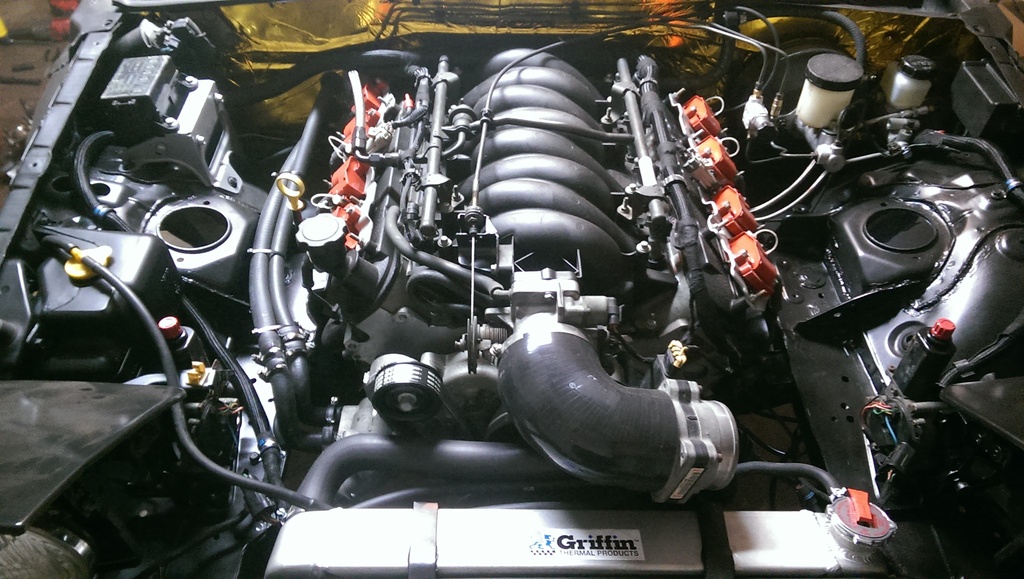
Lookin like a car again!!
Just cookin some calipers:

"Ceramic" painted the exhaust after finishing up welding some hangers and 02 bungs


And made a heatshield to protect the wires/fuel lines where they got close


Fired her back up with 02 sensors in, all the way up to operating temperature to bleed the cooling system as well as bake the paint on the exhaust.... Ive already solved this issue, but Ill see if anyone wants to take a guess as to what I did wrong here??

Lookin like a car again!!
 02-08-2017, 11:25 AM
#109
V8 Miata Follower
Thread Starter
As yes I cooked them with dust seals. They are brake calipers afterall, those seals are designed to handle some pretty hot temps, they had no issues at 400� in the oven for a little while. Although I do have a new set of caliper rebuild seals on the way anyways.
02-08-2017, 11:26 AM
#110
V8 Miata Follower
Thread Starter
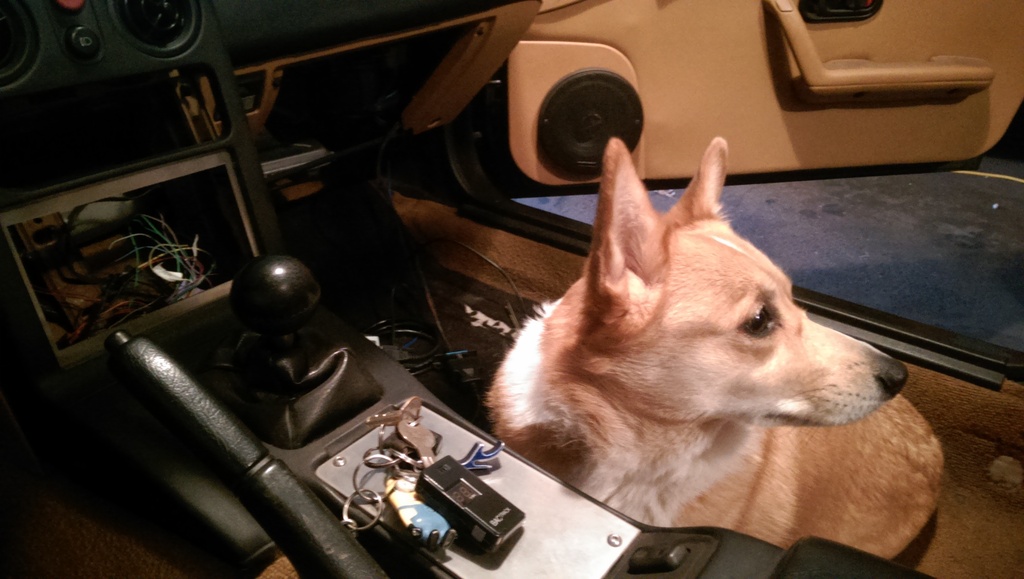
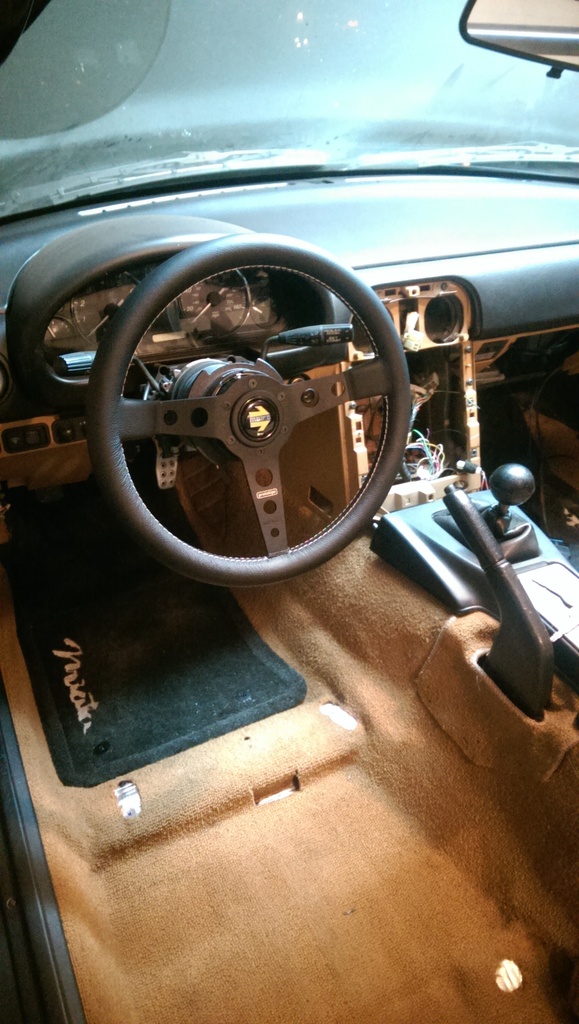
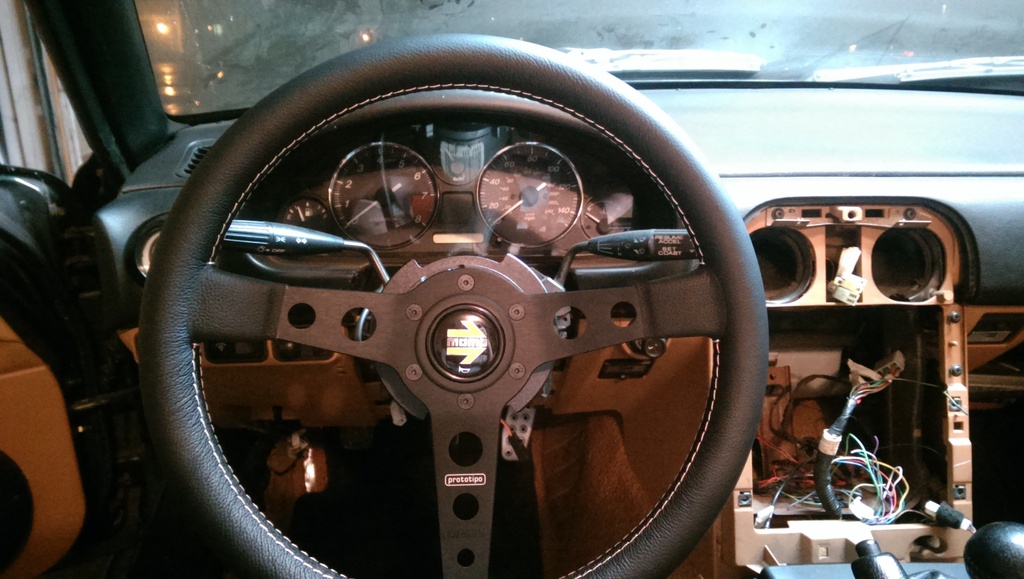
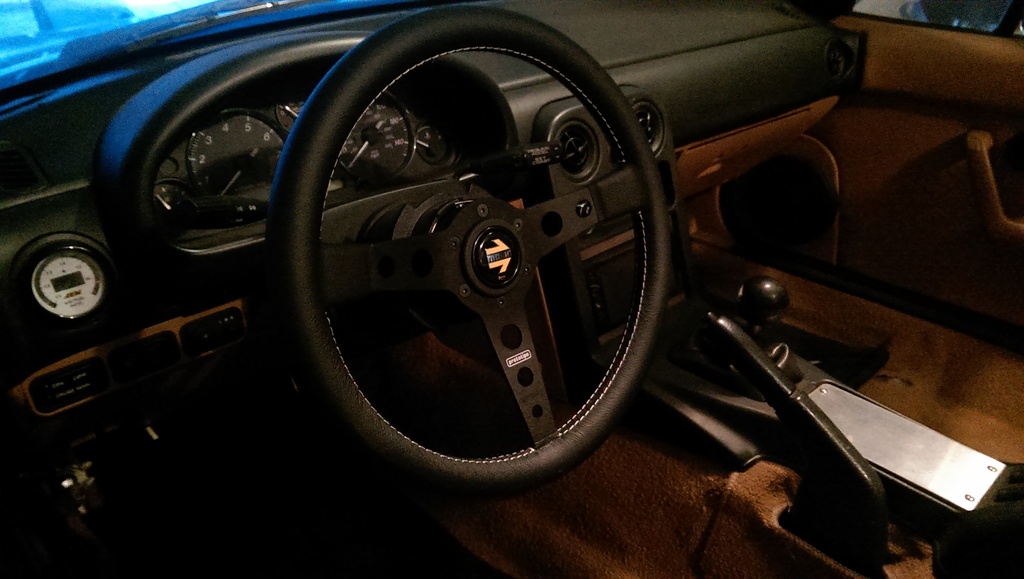
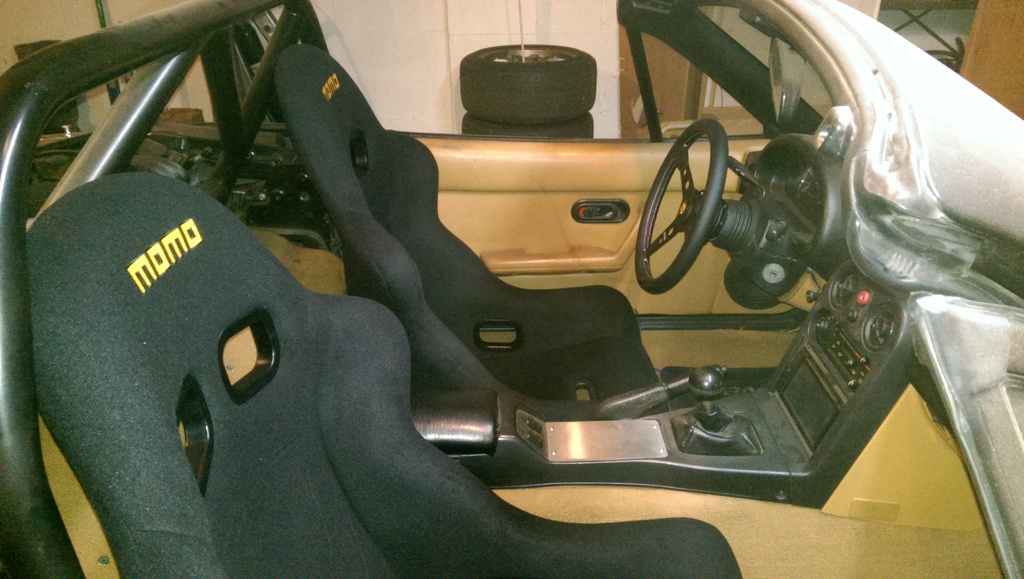
Another tiny update. Me and doge hung out in the garage last night to enjoy the "warm" weather. Got the rest of my dash put together and installed my Momo hub, NRG QR and new wheel =D


 02-08-2017, 11:43 AM
#111
V8 Miata Enthusiast

Not sure why the signals dont show up in that display. But I assure you they are both reading . Try again.
As yes I cooked them with dust seals. They are brake calipers afterall, those seals are designed to handle some pretty hot temps, they had no issues at 400� in the oven for a little while. Although I do have a new set of caliper rebuild seals on the way anyways.
As yes I cooked them with dust seals. They are brake calipers afterall, those seals are designed to handle some pretty hot temps, they had no issues at 400� in the oven for a little while. Although I do have a new set of caliper rebuild seals on the way anyways.
02-17-2017, 10:27 AM
#112
V8 Miata Follower
Thread Starter
Not much left to do before the first drive! Just waiting for some nice weather!
Tied up a few more things over the last week. Bled the brakes, made my intake and started making brackets for my new seats which I am in love with. Way more comfy than my old Sprint V's =D
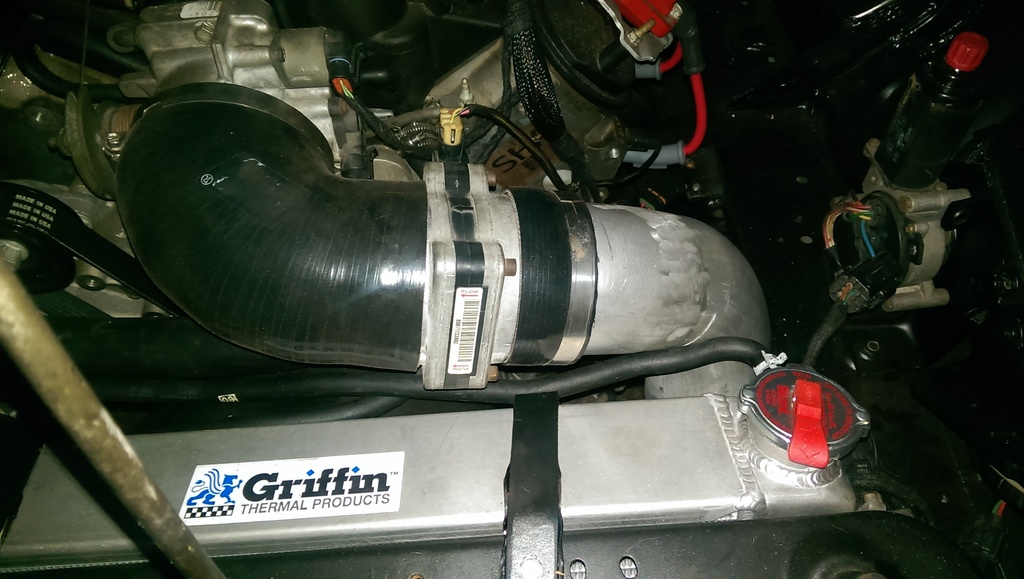
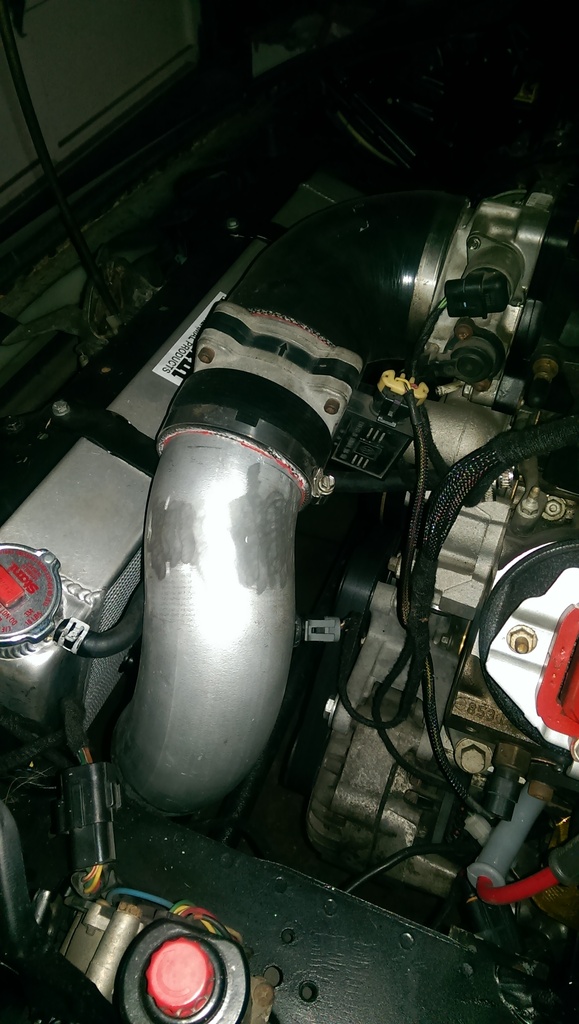
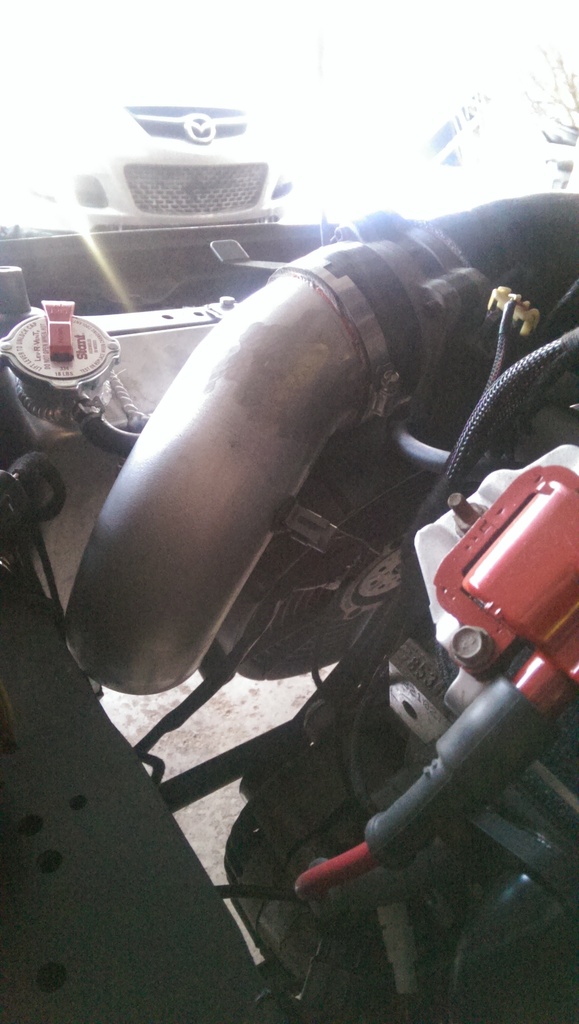

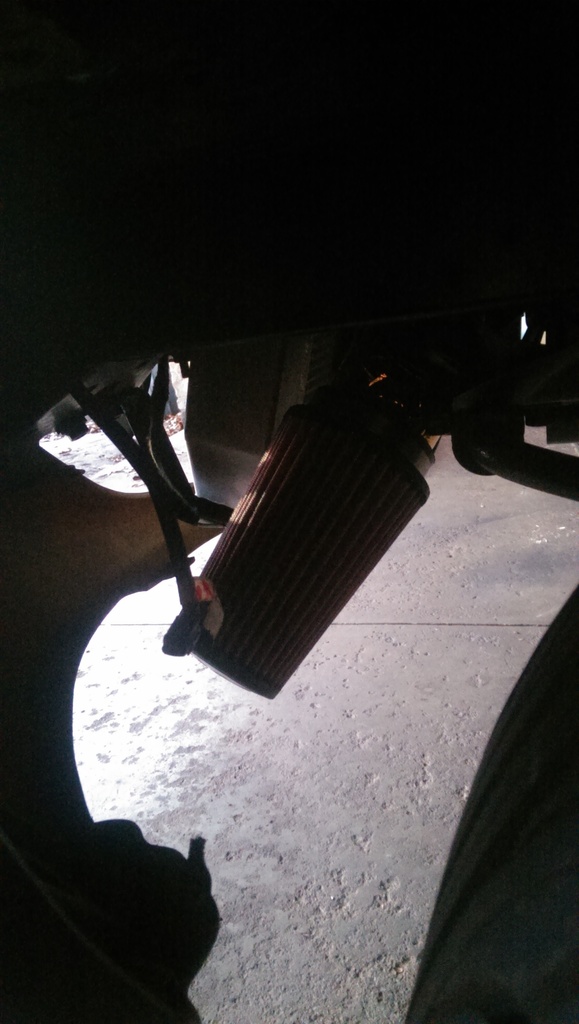
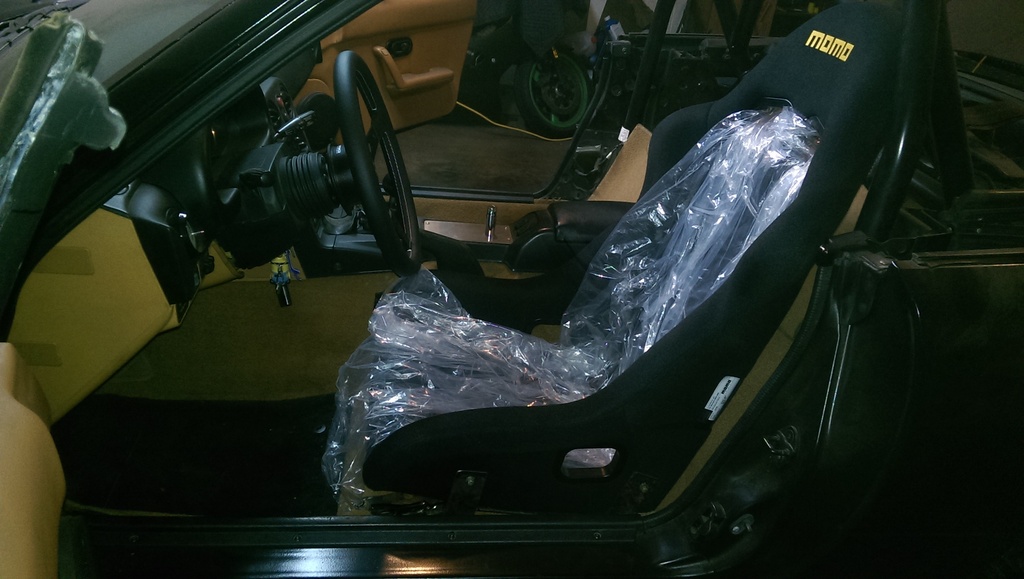
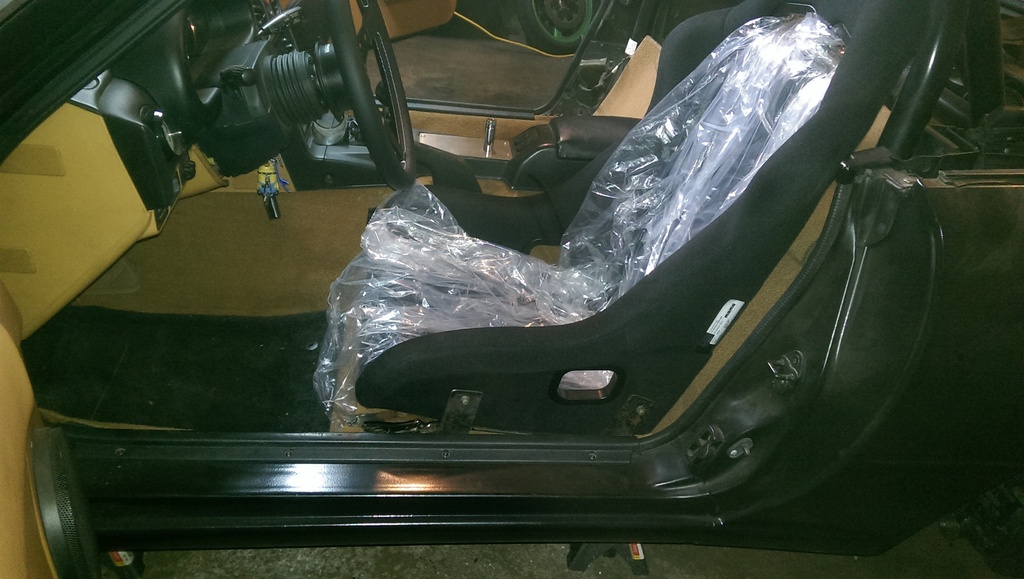
Tied up a few more things over the last week. Bled the brakes, made my intake and started making brackets for my new seats which I am in love with. Way more comfy than my old Sprint V's =D


 02-20-2017, 08:12 AM
#114
V8 Miata Follower
Thread Starter
 02-20-2017, 08:50 AM
#115
V8 Miata Enthusiast
The steering wheel and seats are a nice match. I'm pretty sure I'll tire of the airbag wheel I have now, and move to a 3 spoke wheel as I've done with other cars. The seat looks comfy for a fixed back. Again, something I will need to address.
Where did you pick them up?
Where did you pick them up?
03-07-2017, 11:56 AM
#116
V8 Miata Follower
Thread Starter
Long overdue for an update!
Ive spend the last couple weeks just fiddling around with different things, improving fitment here and there etc.
Having gone over, and fabricated every component I could of this car. Something just felt wrong about having someone finish the "final" step and align it.
Ive come this far, with my own two hands, I can do this part dammit!
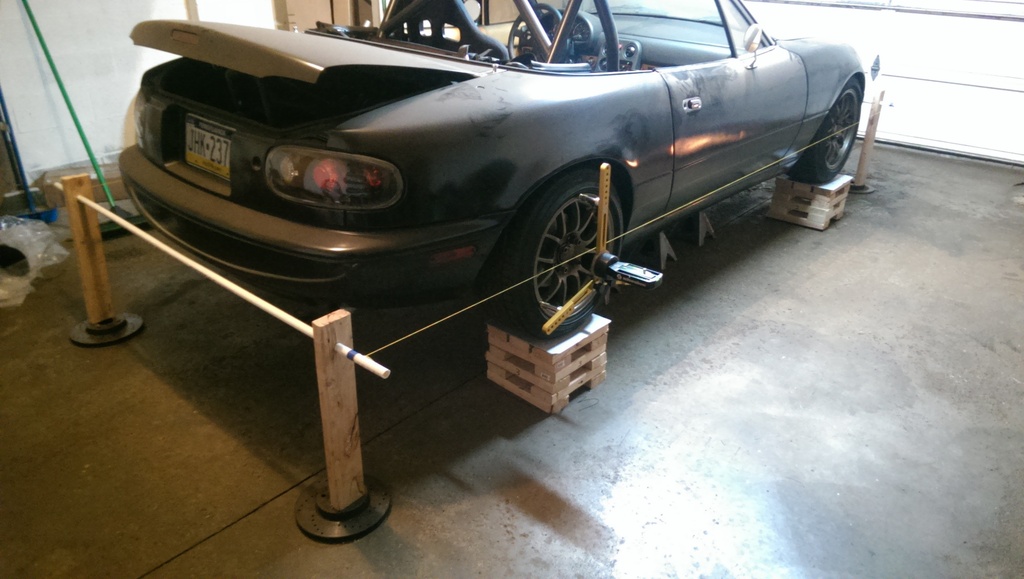
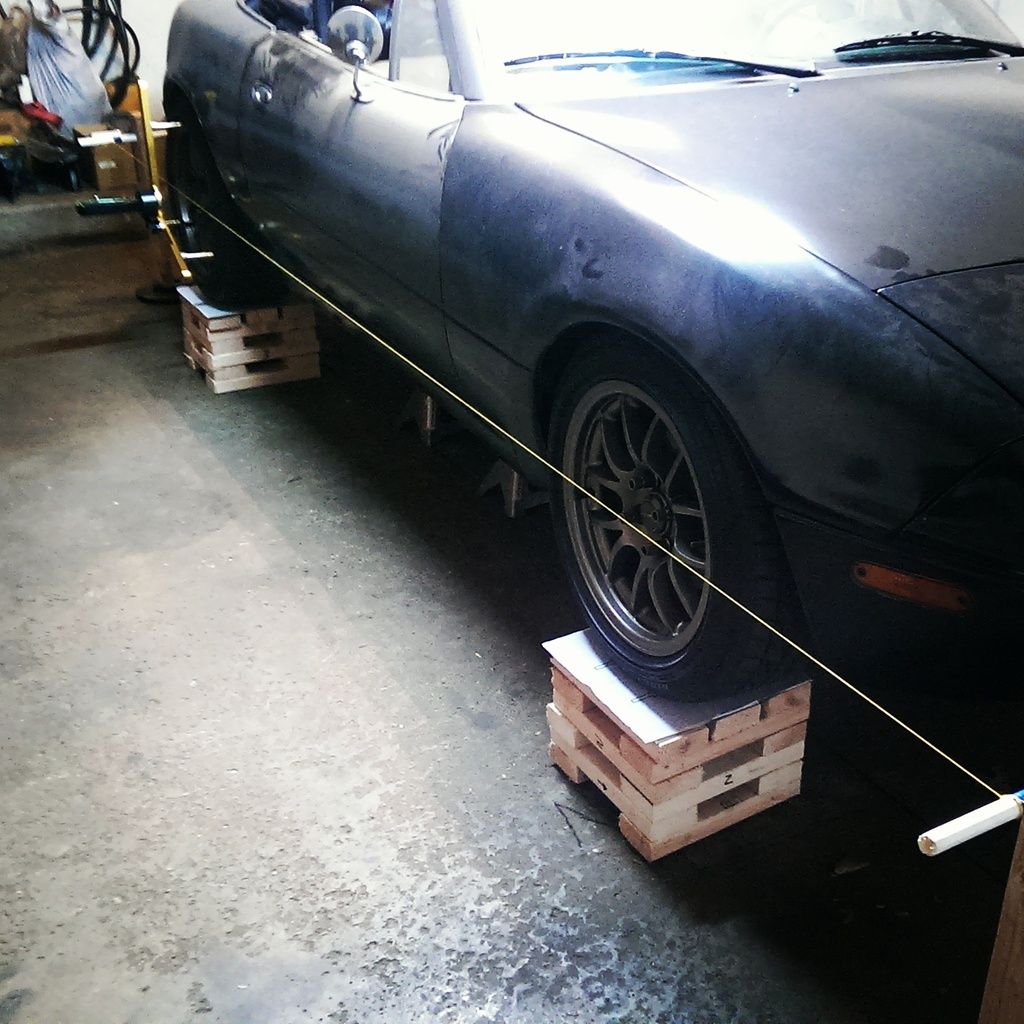
So, behold, DIY alignment:
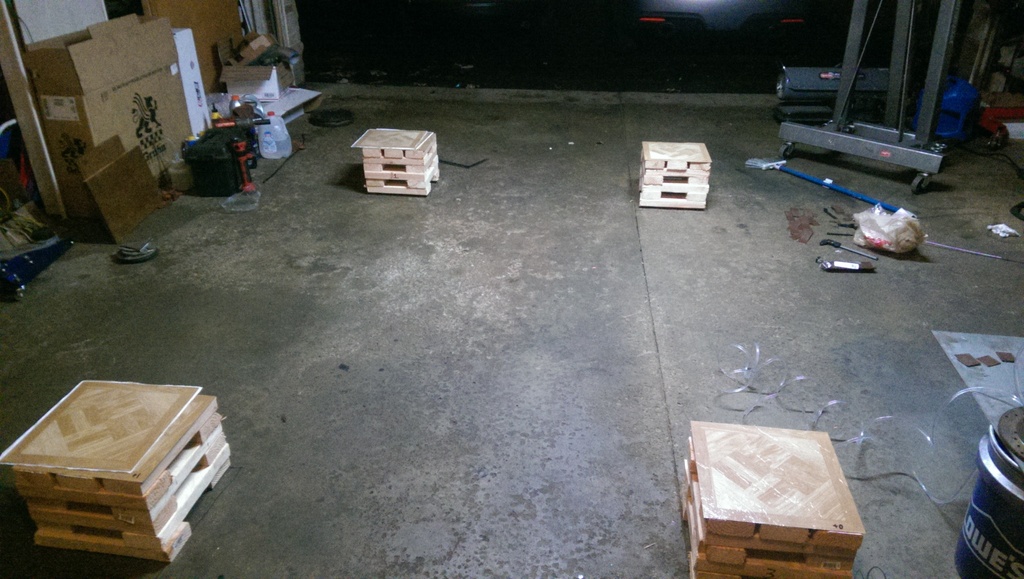
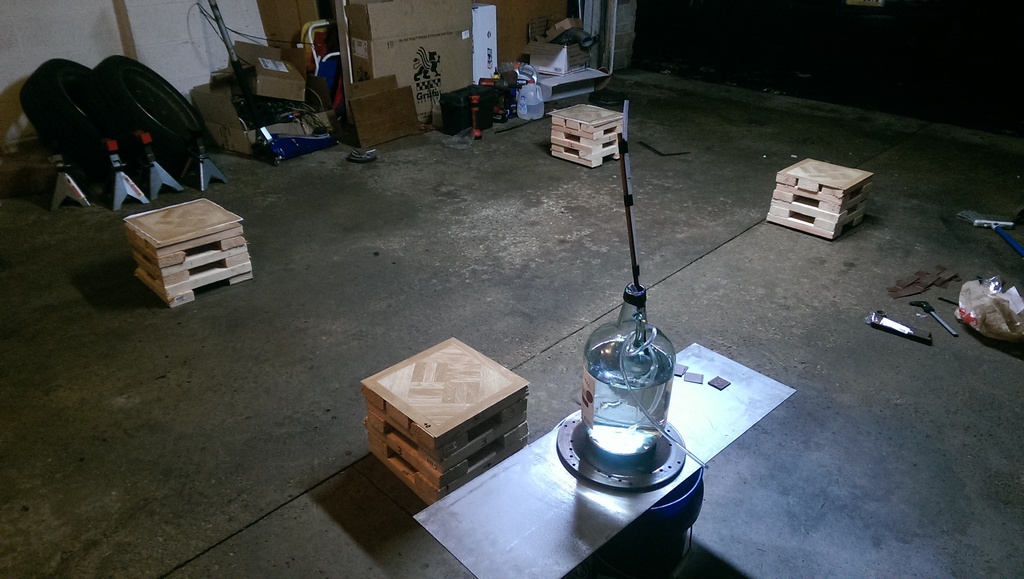
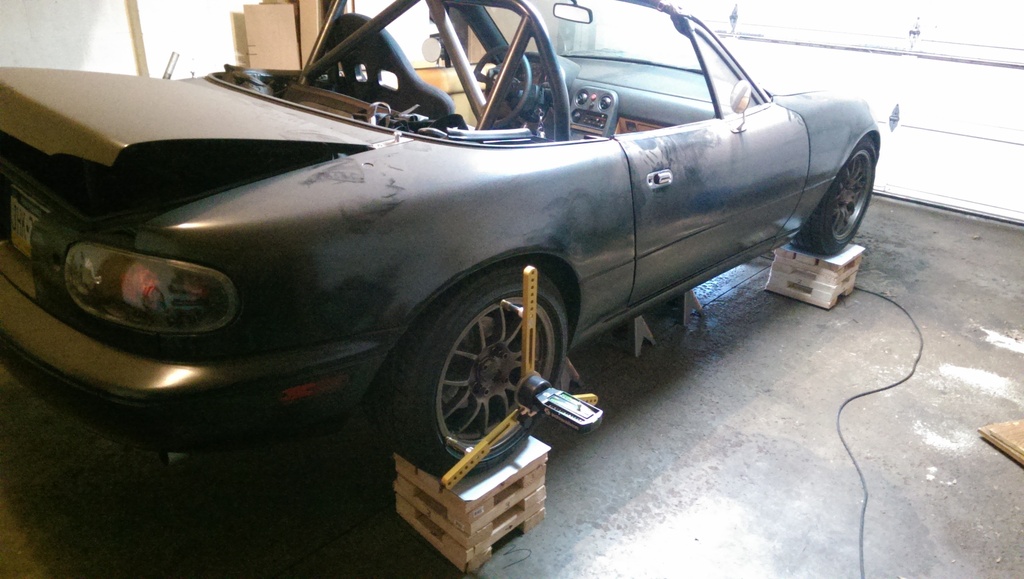
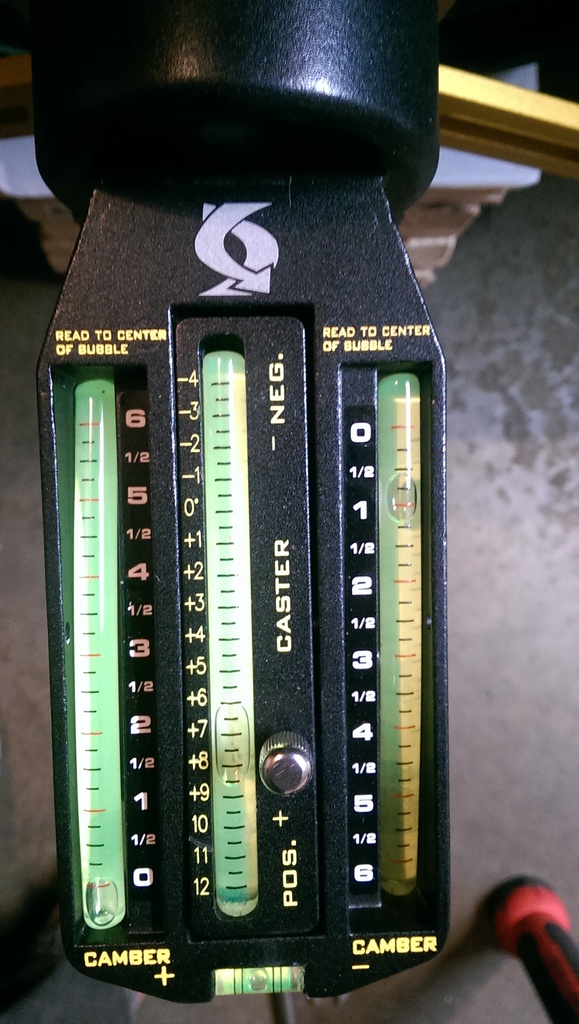
Once this was done... what was to stop me from a little spin around the block? Well..... nothing?
So off I went! And do my amazement, it went off without a hitch! It seems, I am capable of building a running driving LS swapped miata, and aligning it with no immediate issues. How bow dah?
Still plenty to tie up, I will have videos for you soon.
Ive spend the last couple weeks just fiddling around with different things, improving fitment here and there etc.
Having gone over, and fabricated every component I could of this car. Something just felt wrong about having someone finish the "final" step and align it.
Ive come this far, with my own two hands, I can do this part dammit!
So, behold, DIY alignment:


Once this was done... what was to stop me from a little spin around the block? Well..... nothing?
So off I went! And do my amazement, it went off without a hitch! It seems, I am capable of building a running driving LS swapped miata, and aligning it with no immediate issues. How bow dah?
Still plenty to tie up, I will have videos for you soon.
The following 2 users liked this post by wcw5023:
SupaDupaSteve (03-07-2017),
ToySnakePMC (03-09-2017)
03-07-2017, 05:20 PM
#117
V8 Miata Prot�g�
On the fuel trim thing, did you have different /larger injectors on the one bank? I'm glad you were able to drive your car! I'm getting close too. Waiting on a driveshaft, and some coolant parts
03-08-2017, 06:36 AM
#118
V8 Miata Enthusiast
Nice work on the alignment. After some suspension work when I bought my car, the shop that aligned bitched and moaned about how difficult it was - too many moving parts I guess and I had made no effort to get it close beforehand. Another shop turned me away because the car was too low... lol.
I don't have a flat or very solid garage floor so a good DIY alignment is pretty much out for me. I have a Smart Camber gauge but the issue with using those is you need to have a level surface and verify your ride height is even from one side to the other before you trust any of the readings.
In for burnout videos.
03-08-2017, 09:36 AM
#119
V8 Miata Follower
Thread Starter
Easy fix anyways, just switch the connectors

Ill be anxiously waiting for your videos

Nice work on the alignment. After some suspension work when I bought my car, the shop that aligned bitched and moaned about how difficult it was - too many moving parts I guess and I had made no effort to get it close beforehand. Another shop turned me away because the car was too low... lol.
I don't have a flat or very solid garage floor so a good DIY alignment is pretty much out for me. I have a Smart Camber gauge but the issue with using those is you need to have a level surface and verify your ride height is even from one side to the other before you trust any of the readings.
In for burnout videos.
I don't have a flat or very solid garage floor so a good DIY alignment is pretty much out for me. I have a Smart Camber gauge but the issue with using those is you need to have a level surface and verify your ride height is even from one side to the other before you trust any of the readings.
In for burnout videos.
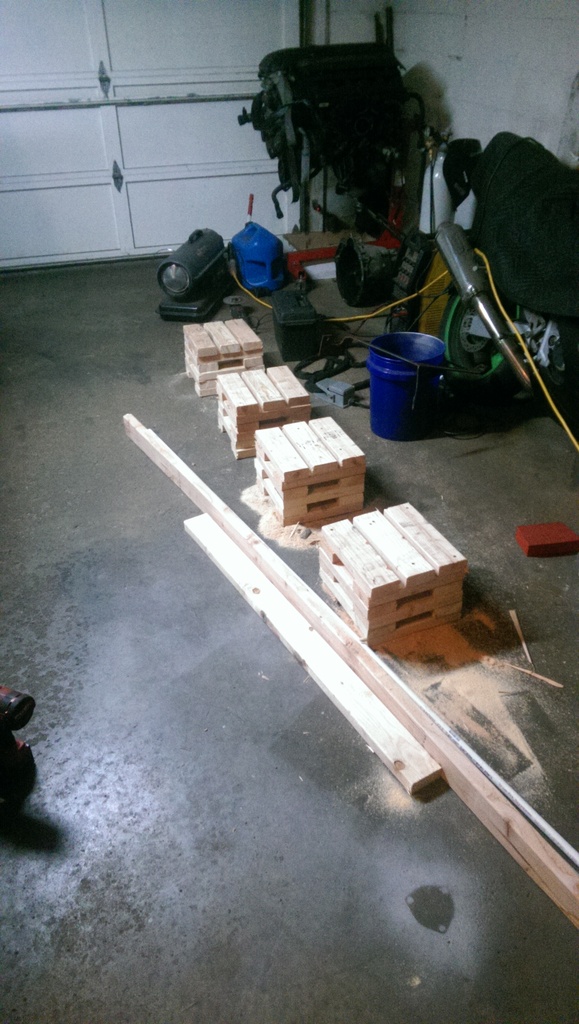
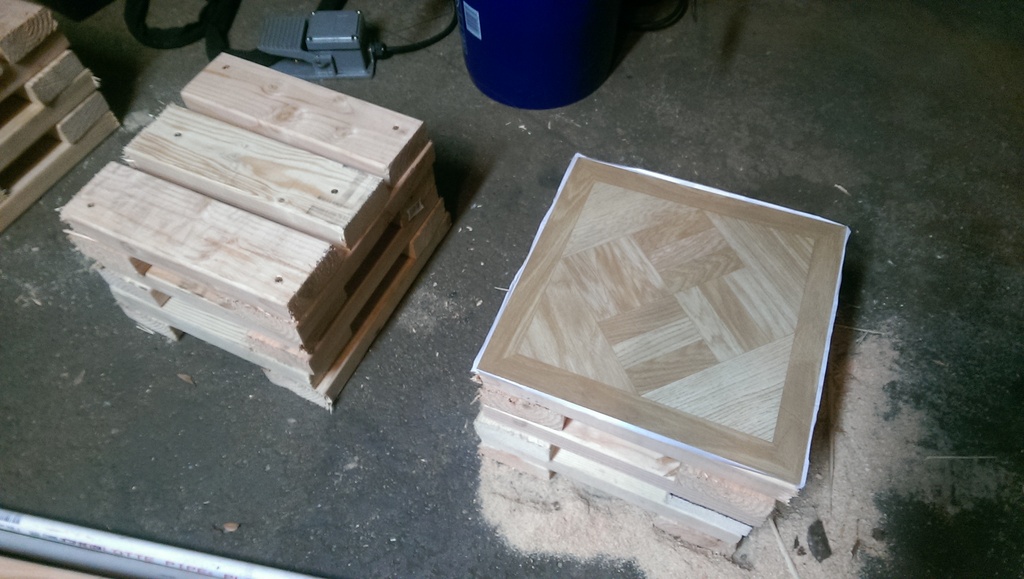
Dont let the uneven floor discourage you! It can be leveled out with tiles like I did! The task seemed a little daunting at first. But it was a great learning experience and Im glad I did it.... And to be honest, Im looking forward to being able to play with my specs on a whim.
My garage floor dropped about 1/2" along the wheel base of the car!
 04-11-2017, 01:55 PM
#121
V8 Miata Enthusiast

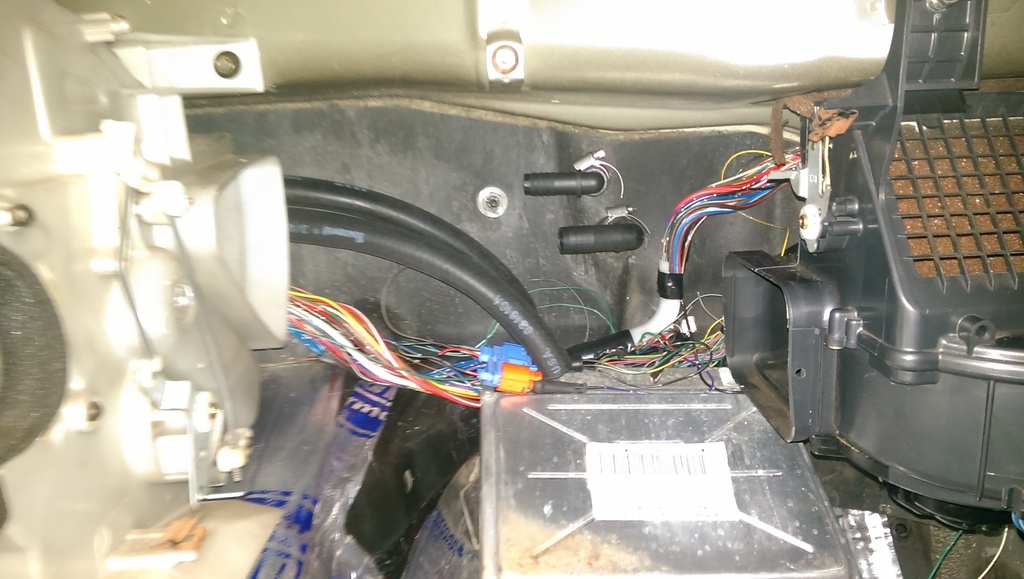
Where did you find those plastic 90 deg. elbows? I can't seem to figure out an exact description to find them. Also, what size firewall grommets did you use? I am wondering if the elbow requires a different size than the existing ones?
Good news is, all of the above IS now done. So lets take a look.
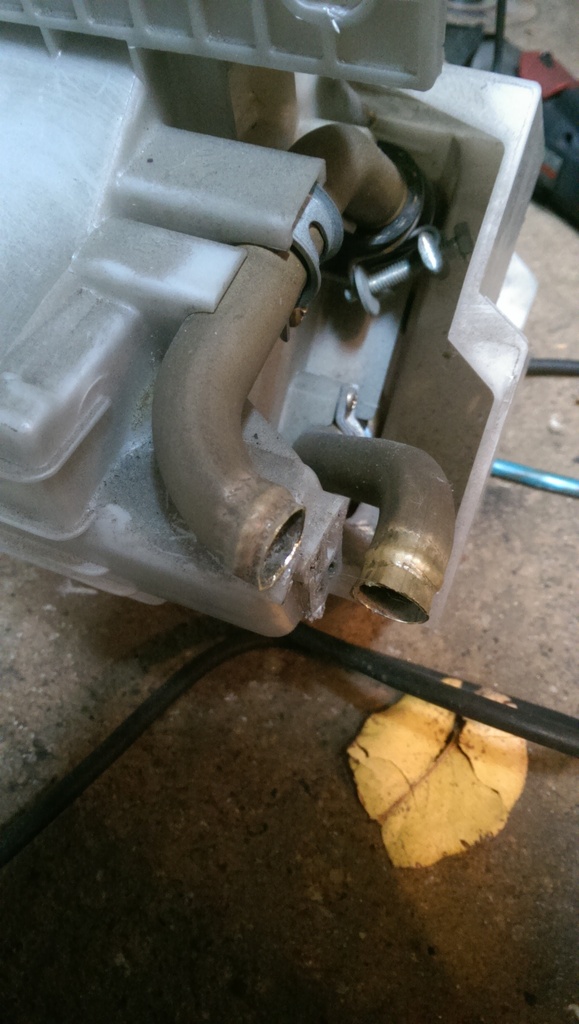
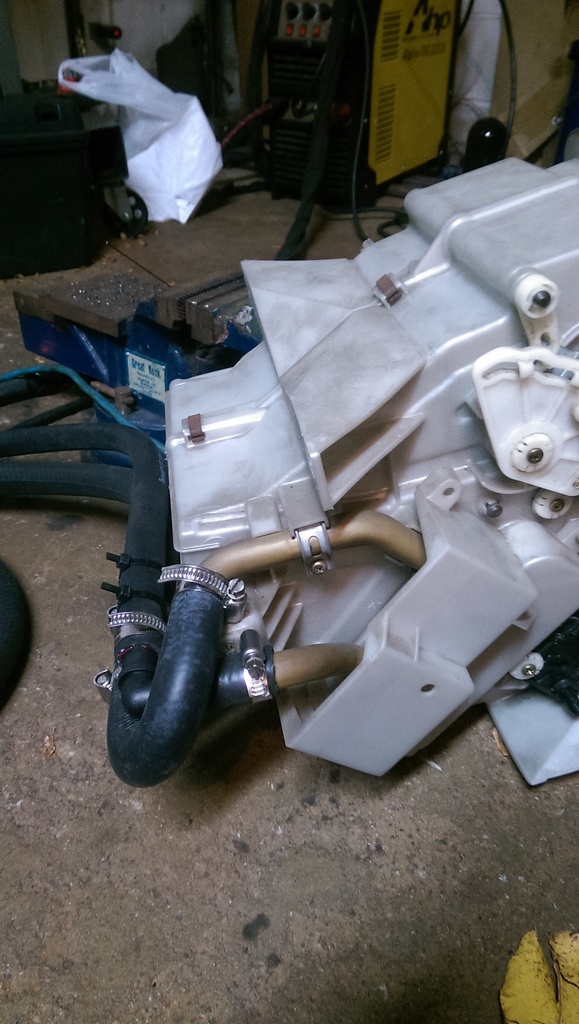
I lopped off the heater core lines like so:
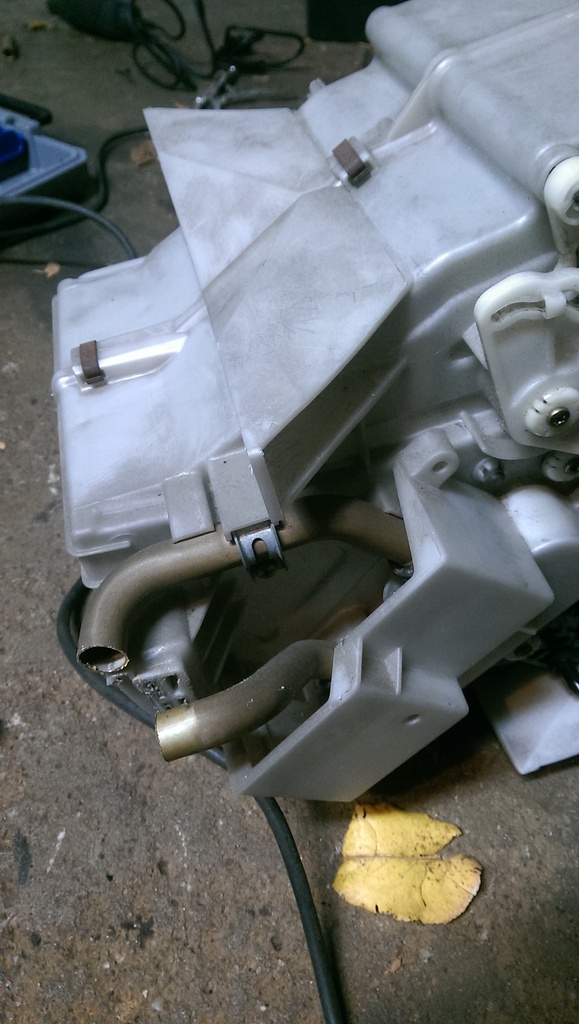
Notice I also cut off the lower retaining tab. This was necessary to get my hose on the line. Im not too worried about losing the support, as the lines will be tight against the padding on the firewall, and I will zip tie them together.
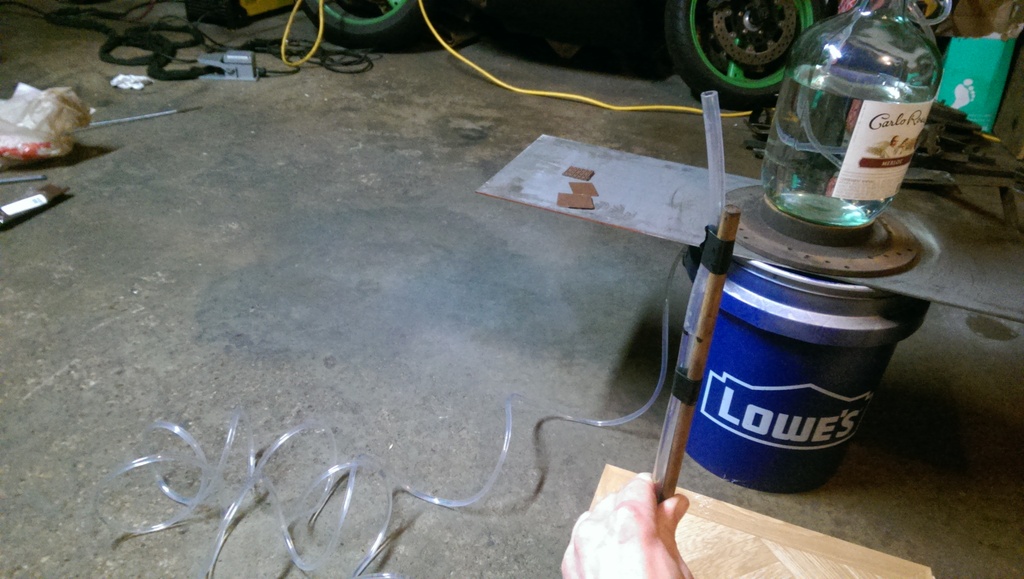
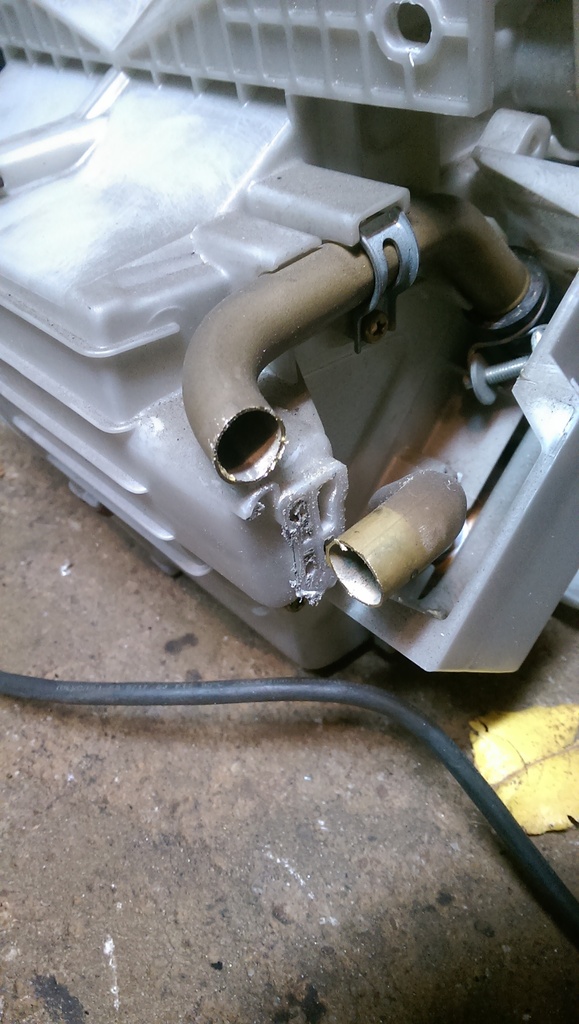
Now, because I really really really, dont want to get this car all back together and have coolant **** all over my leg the first time it gets up to temperature, I wanted to flare the ends of the brass tubing. Because Im cheap, and this is a "fabricators" build thread after all. I broke out the welder and made this simple little tool.
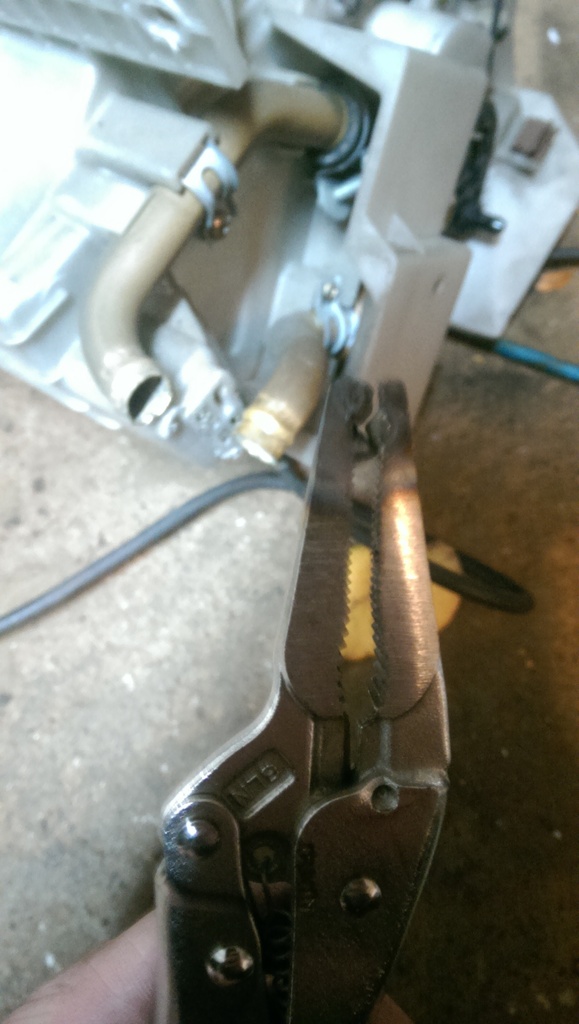
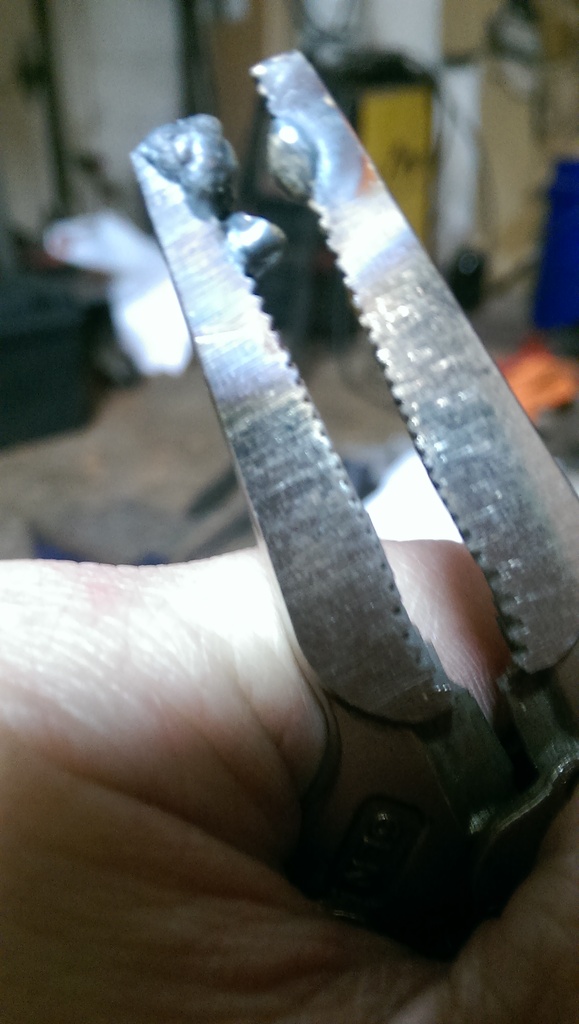
Its not pretty, but itll do the job. Could I have made it nicer? Sure, but for how often Ill use this thing (probably never again) I didnt care. So lets see how it did
Hey not bad right?!
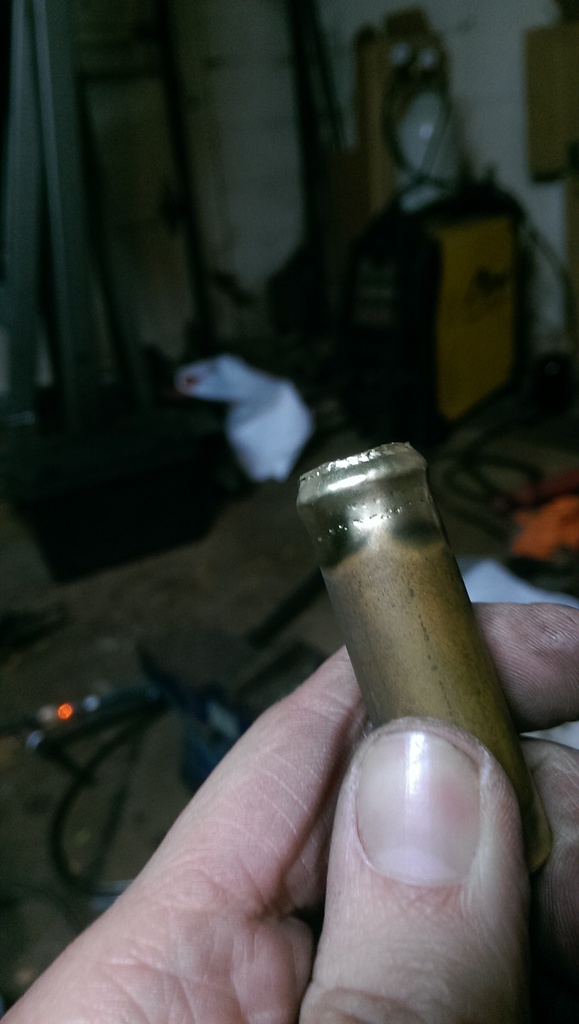
Thatll work!
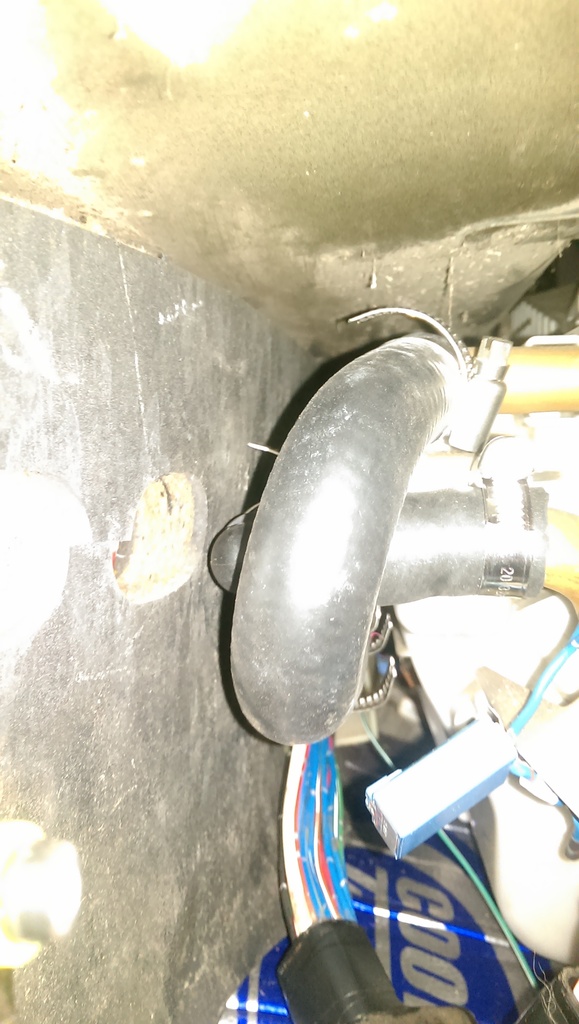
Now Ill just let the rest of the pics do the talking.
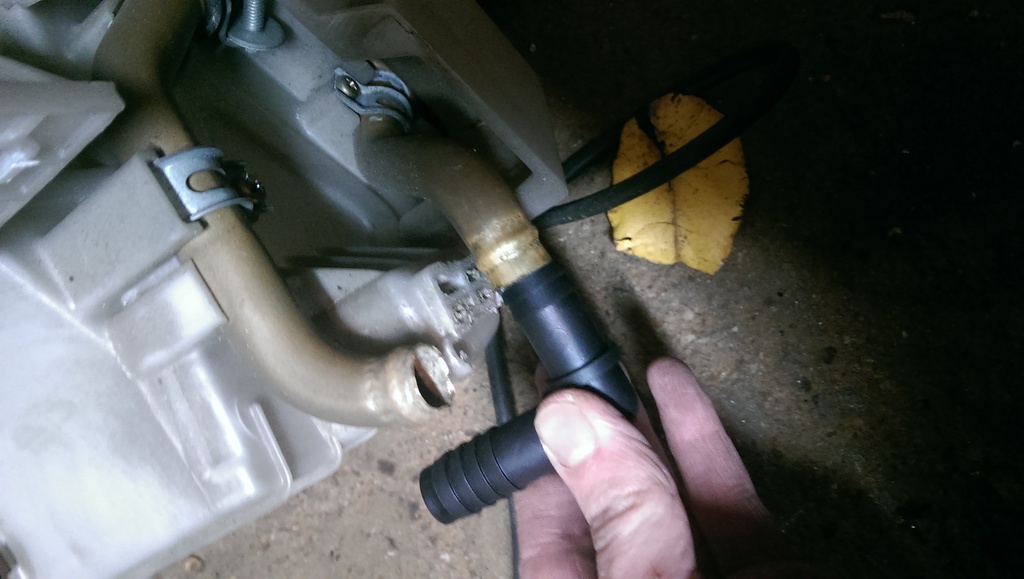
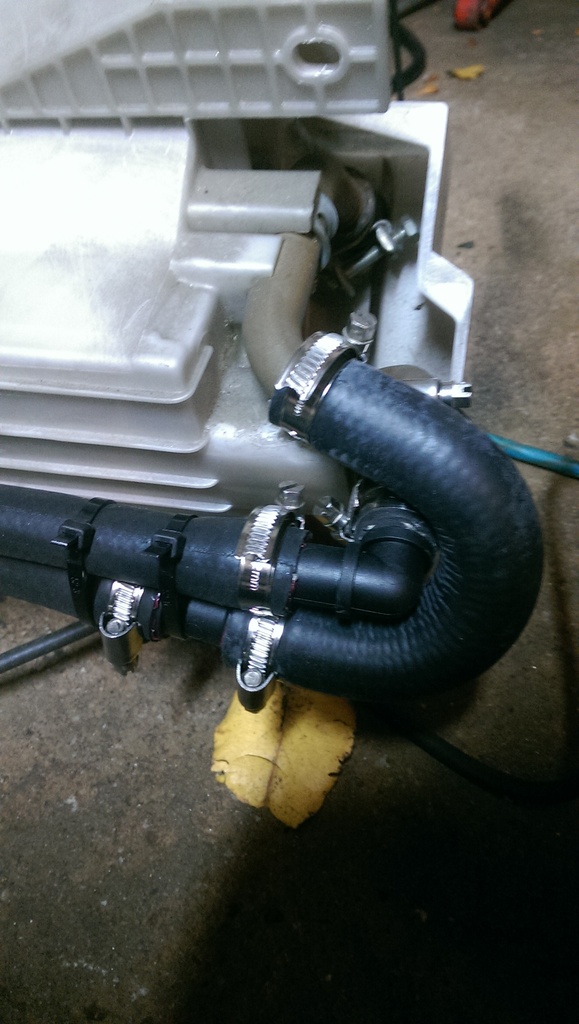
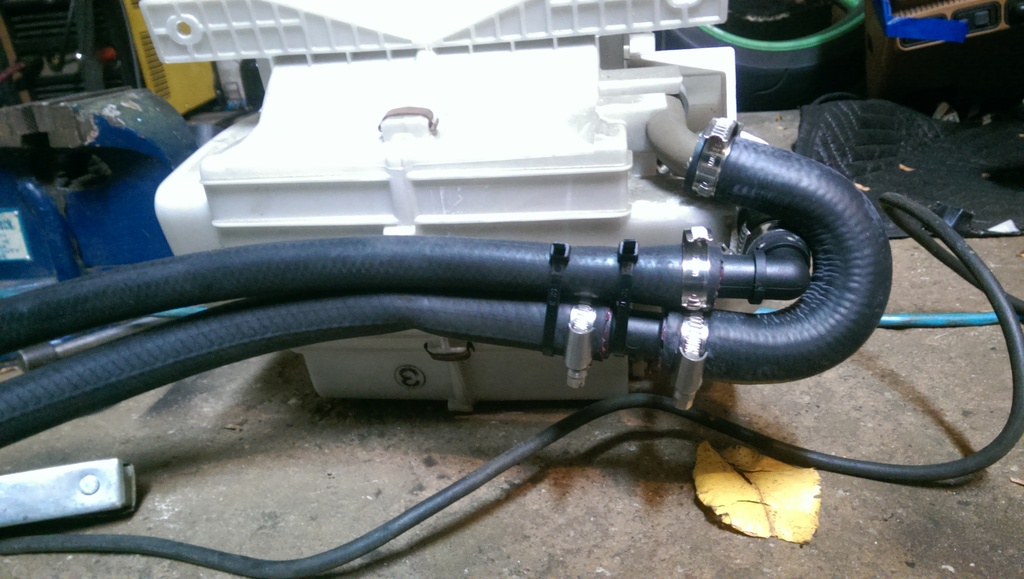
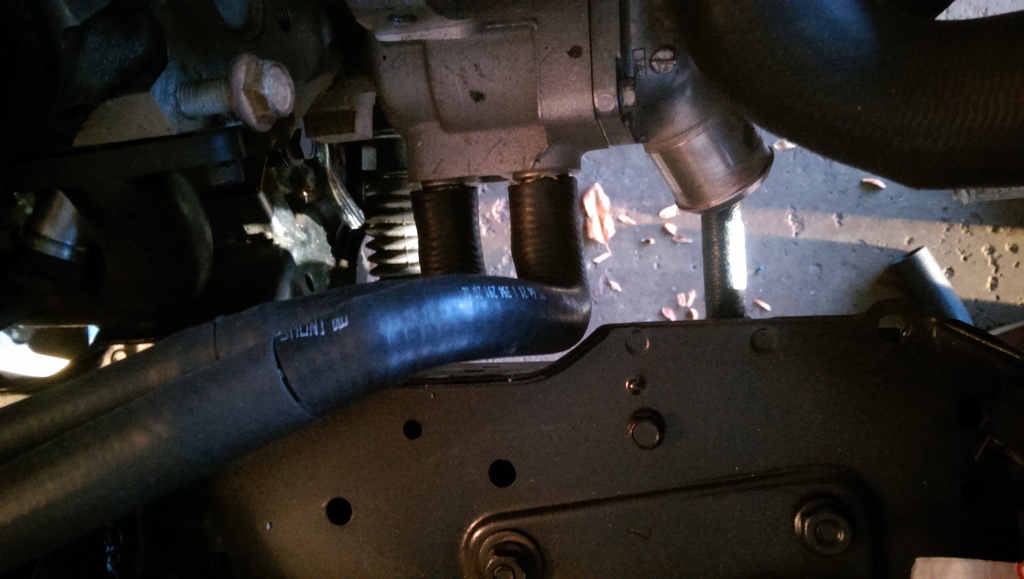
Notice I didnt connect the lines at the firewall. Thats because Ill need to pull the heater core out again to put the carpet in.
What do I need to do before I put the carpet it? Well..... nothing I dont think? Please chime in if you can think of anything important to do while I still have this mostly disassembled!
As for whats left before first start? Well, heres everything I can think of
- Motor Oil
- Trans Fluid
- Prime Oil Pump with Plug behind Alt
- Make Ground Strap (BlockChassis)
To be honest, I think thats it. Once the first start is successful, obviously there is plently left still to do, but we can go over that when we get to that point. Let me know what you guys think!
I lopped off the heater core lines like so:


Notice I also cut off the lower retaining tab. This was necessary to get my hose on the line. Im not too worried about losing the support, as the lines will be tight against the padding on the firewall, and I will zip tie them together.
Now, because I really really really, dont want to get this car all back together and have coolant **** all over my leg the first time it gets up to temperature, I wanted to flare the ends of the brass tubing. Because Im cheap, and this is a "fabricators" build thread after all. I broke out the welder and made this simple little tool.


Its not pretty, but itll do the job. Could I have made it nicer? Sure, but for how often Ill use this thing (probably never again) I didnt care. So lets see how it did

Hey not bad right?!

Thatll work!
Now Ill just let the rest of the pics do the talking.


Notice I didnt connect the lines at the firewall. Thats because Ill need to pull the heater core out again to put the carpet in.
What do I need to do before I put the carpet it? Well..... nothing I dont think? Please chime in if you can think of anything important to do while I still have this mostly disassembled!
As for whats left before first start? Well, heres everything I can think of
- Motor Oil
- Trans Fluid
- Prime Oil Pump with Plug behind Alt
- Make Ground Strap (BlockChassis)
To be honest, I think thats it. Once the first start is successful, obviously there is plently left still to do, but we can go over that when we get to that point. Let me know what you guys think!
04-11-2017, 02:04 PM
#122
V8 Miata Follower
Thread Starter
5/8" Hose - Dorman 47062
3/4" Hose - Dorman 47063
I reused the factory gromments for the A/C lines. One was a perfect fit, but IIRC the smaller of the two needed some trimming of the ID to fit 5/8" Hose.
Thanks for asking!
 04-11-2017, 02:55 PM
#125
V8 Miata Enthusiast
I actually prefer the copper fittings on the Yellow Submarine thread but have run up against a little snag. Being an NB, the connections to the Heater core are Aluminum rather than copper. I don't know of a way to connect the Aluminum directly to the copper without a rubber hose. Since I will need to run a rubber hose anyway, I don't see any gain of a small piece over just running the rubber hose the whole way as it was done in this thread.
If anybody knows of a reasonable and reliable way to connect the aluminum to the copper
I would love to hear about it.
I guess the other option for me might be to locate some NA copper connections, presuming they are interchangeable with the NB heater core. I bought a replacement heater core and it appears to be aluminum.
What I absolutely do NOT want is something that will start leaking a short time after completing my installation but I do want to switch the firewall connections over to the passenger side for a cleaner look.


