
A "Fabricators" Build Thread


V8 Miata Zealot
Joined: Mar 2010
Posts: 1,220
Likes: 51
From: Canton, Georgia
A few years back I bought one of these: Bottom-line pricing on UView 550000 at ToolTopia.com to fill the coolant on Mr. Miyagi. I wish I had owned one sooner. Money well spent!

Thread Starter
V8 Miata Follower
Joined: Jun 2016
Posts: 138
Likes: 12
From: Akron OH
Havent completed the top yet. Finished up the drivers side last night, but am trying to decide about the top. If I leave the rad mounted perfectly vertical in its current location, It runs into the hood latch. So I can either tilt the top towards the engine to clear, modify my hood latch, or run Aero Catch latches (would rather not). So im not sure what Ill do yet.
A few years back I bought one of these: Bottom-line pricing on UView 550000 at ToolTopia.com to fill the coolant on Mr. Miyagi. I wish I had owned one sooner. Money well spent!

V8 Miata Follower
Joined: Jun 2013
Posts: 154
Likes: 8
From: Central FL
do you think this one will fit ?
its another 2 inch wider
https://www.summitracing.com/parts/g...-xls/overview/
its another 2 inch wider
https://www.summitracing.com/parts/g...-xls/overview/

V8 Miata Prot�g�

Joined: Nov 2014
Posts: 485
Likes: 37
From: South FL
The airlift coolant fill is a very nice tool that works well but doesn't alleviate the need to have the fill at the highest point in the system. There's a couple companies that make small expansion tanks that can be bolted to the cylinder head or elsewhere that look nice
V8 Miata Zealot
Joined: Mar 2010
Posts: 1,220
Likes: 51
From: Canton, Georgia
The airlift coolant fill is a very nice tool that works well but doesn't alleviate the need to have the fill at the highest point in the system. There's a couple companies that make small expansion tanks that can be bolted to the cylinder head or elsewhere that look nice
Thread Starter
V8 Miata Follower
Joined: Jun 2016
Posts: 138
Likes: 12
From: Akron OH
do you think this one will fit ?
its another 2 inch wider
https://www.summitracing.com/parts/g...-xls/overview/
its another 2 inch wider
https://www.summitracing.com/parts/g...-xls/overview/
Thread Starter
V8 Miata Follower
Joined: Jun 2016
Posts: 138
Likes: 12
From: Akron OH
Weekend update.
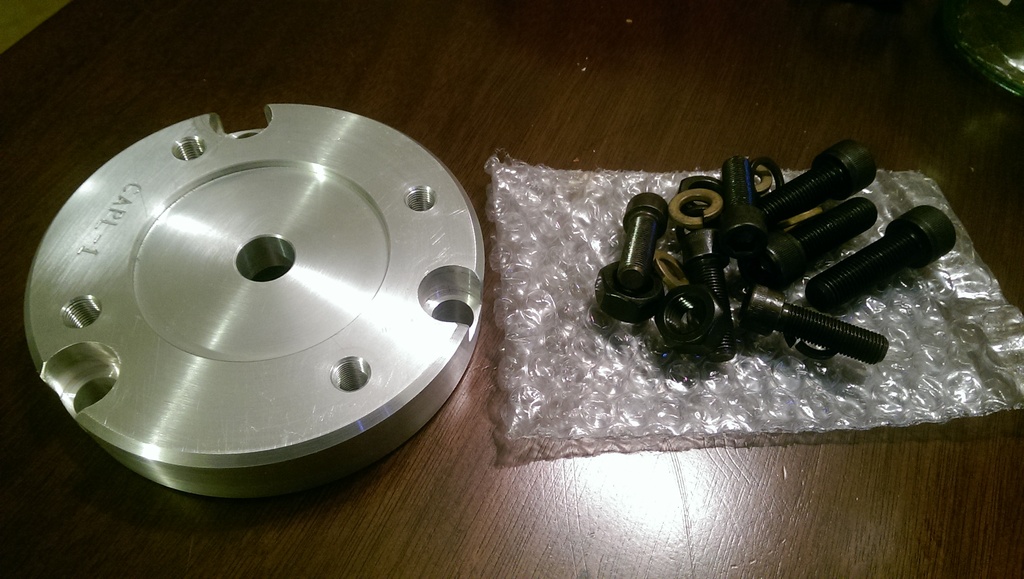
Not too much exciting. Sadly the adapter plate arrived Friday, however it appears DSS provided the wrong plate, as you can see (or not) the bolt circle that mounts to the diff is pretty far off. I dont know where the confusion came from here, as when I place my initial order, I clearly stated that I was using basically a standard V8R Getrag setup, simply with custom mounts everywhere. So, for this part in particular, I needed the exact same adapter plate as everyone else. Anyhow, theyve been relatively helpful throughout the process , I need to measure the bolt circle when I get home.
Anyhow, Saturday morning I decided that I didnt like Rev1 of the rad mounts, So I opted to lift it up a good amount, and tilt the top.
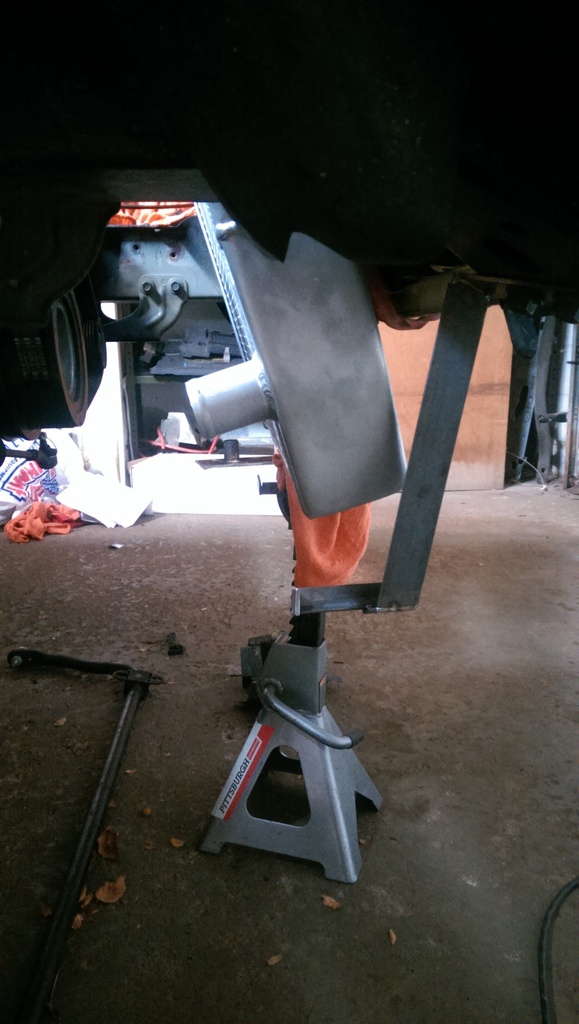
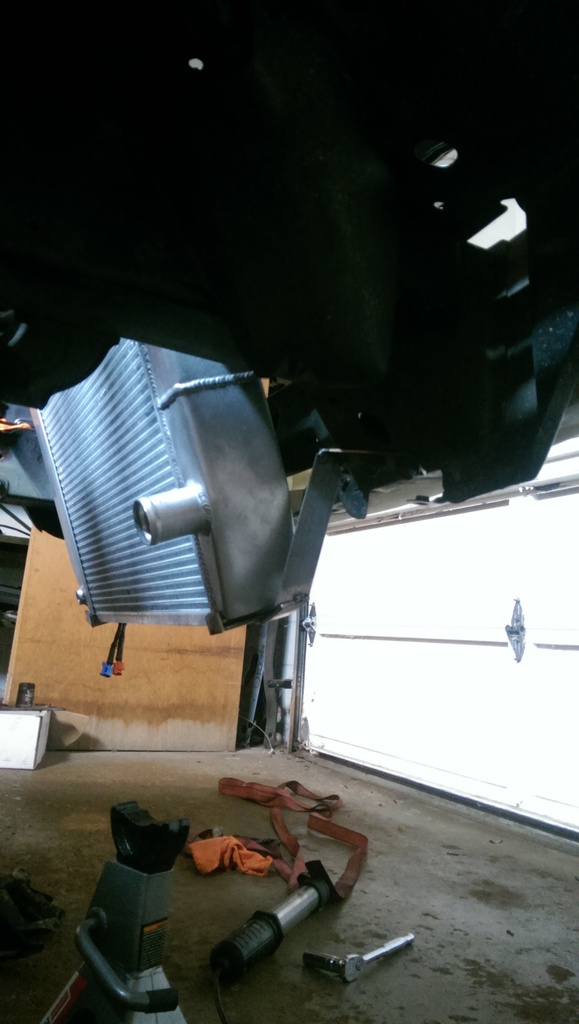
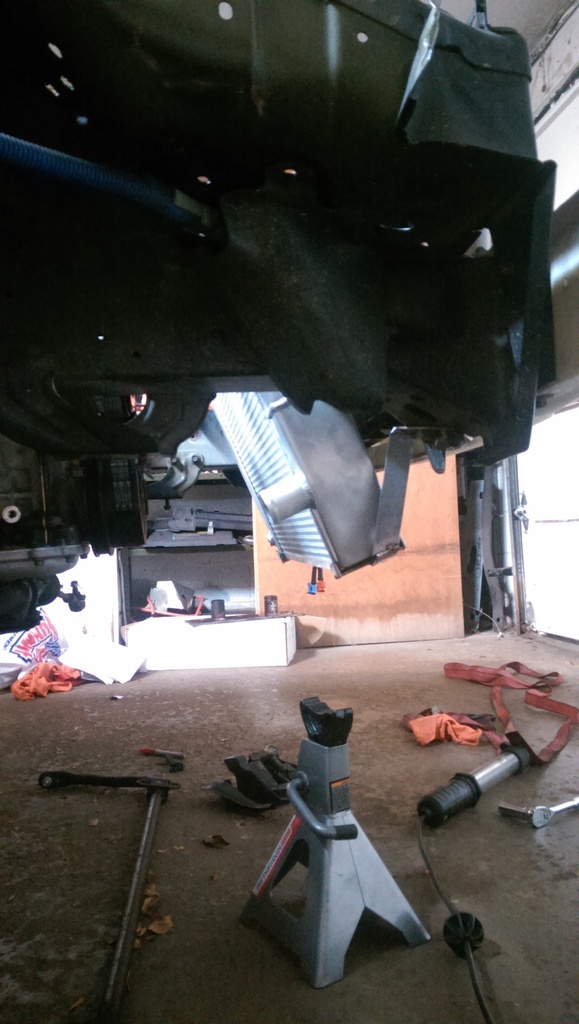
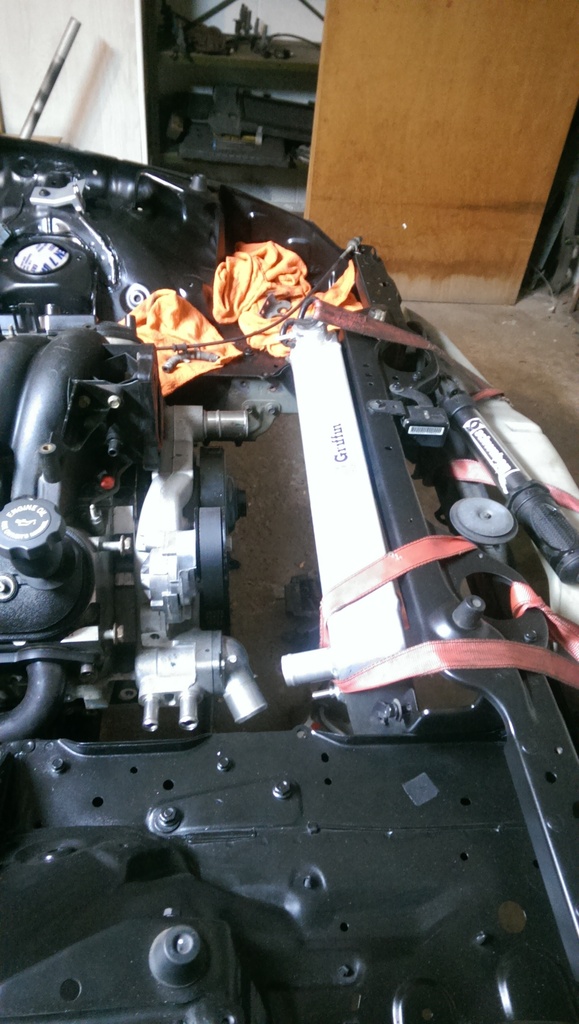
I know it wont be ideal for airflow, but now the cap is the highest point again, I still have adequate clearance for a large fan, sway bars, and rad hoses. And some left-over for ducting in the future.
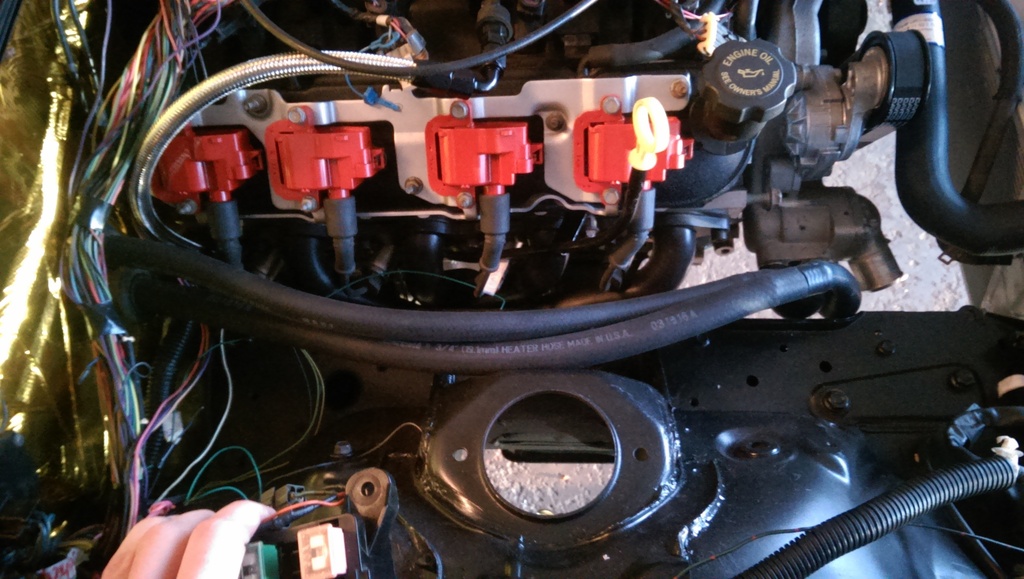
Next I got to work finally installing my LS6 PCV system. I didnt take pictures, but this requires trimming an area in the valley of early LS1 blocks (98-00?) . Then to clear the LS6 intake the crossover tubes need to be massaged. I spent a good two hours with the map gas trying to get the fit perfect. A lot of extra bends need added to go around the vent tube, and all the little dimples in the cover.
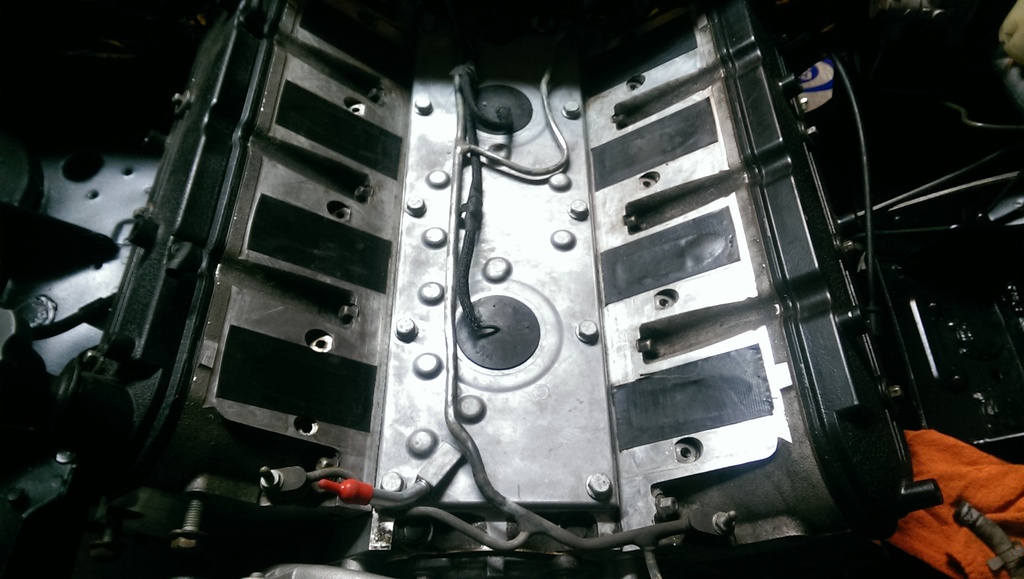
I ended up tweaking some more from here so that the tube basically lays flat on the valley cover . There really is very little clearance between them and the bottom of the Ls6 intake.
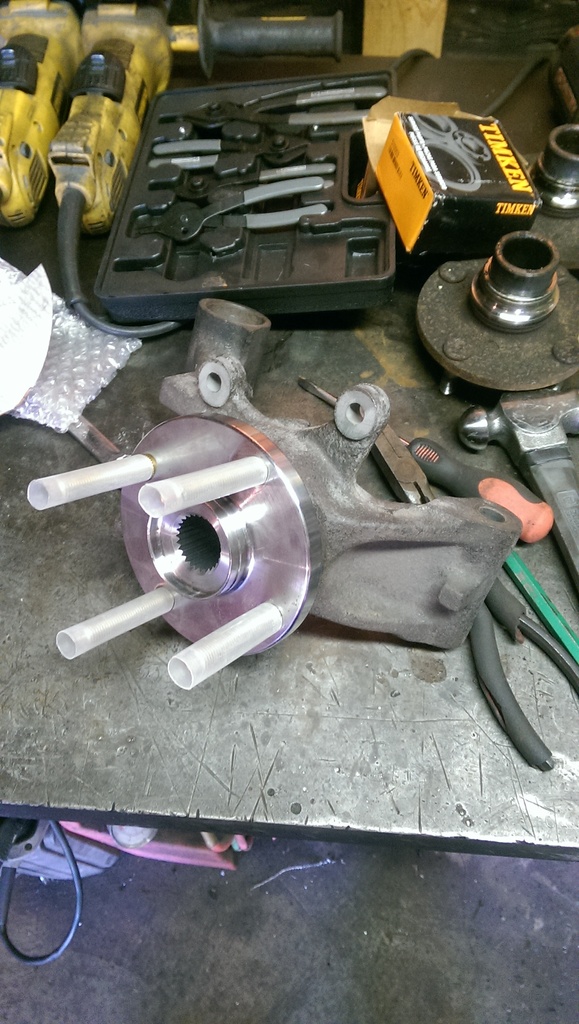
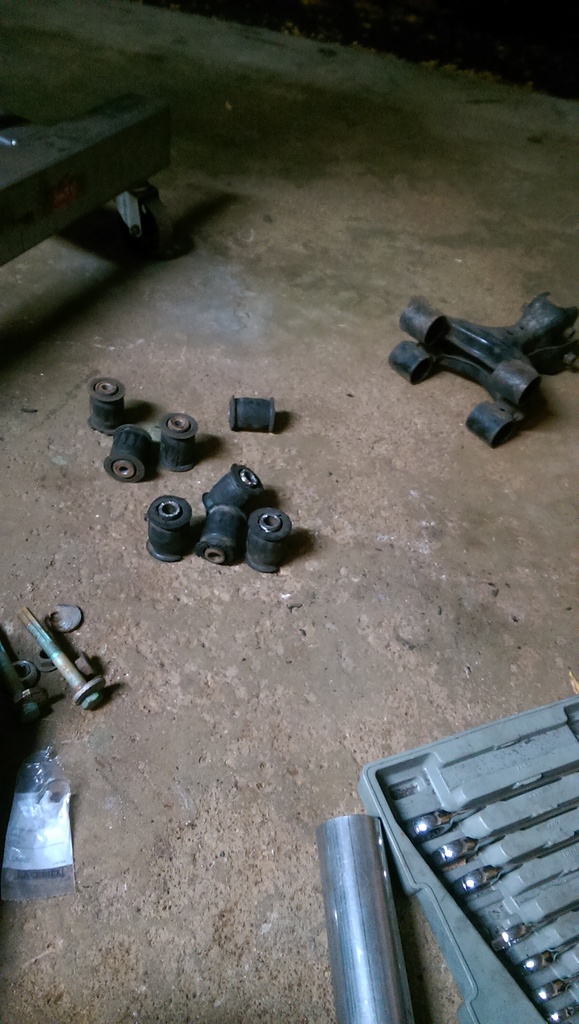
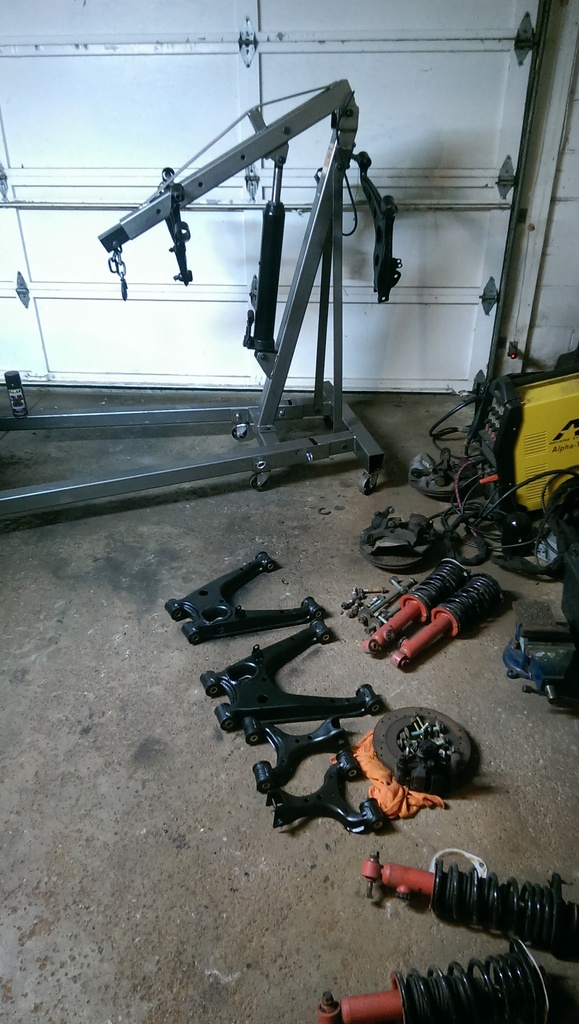
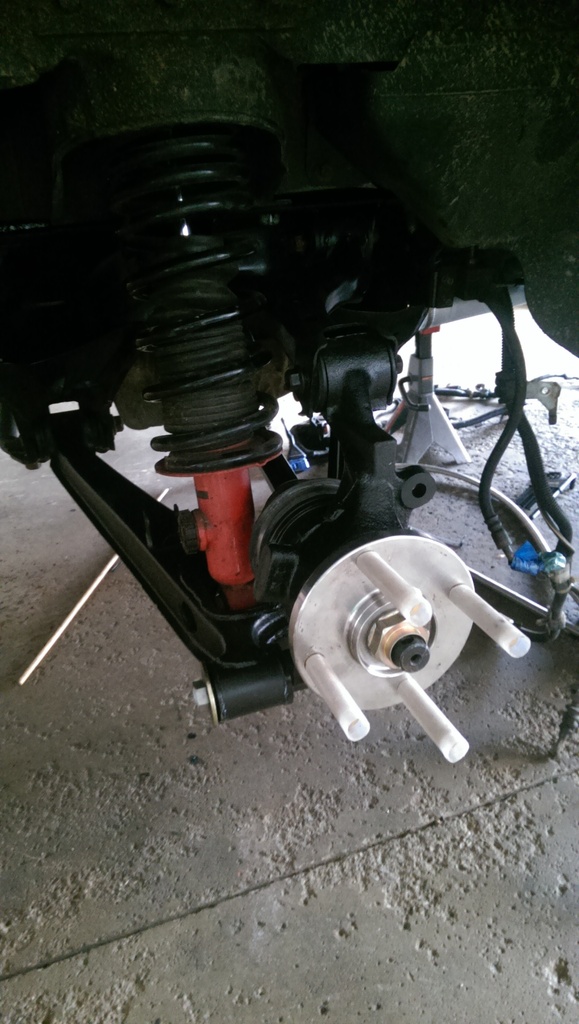
Next I installed new wheel bearings, and hubs into the rear knuckles. Bent both rear lower control arm bolts. That sucked. Those are expensive bastards at ~$17 a piece!!
No better time than now to hit em with a little paint
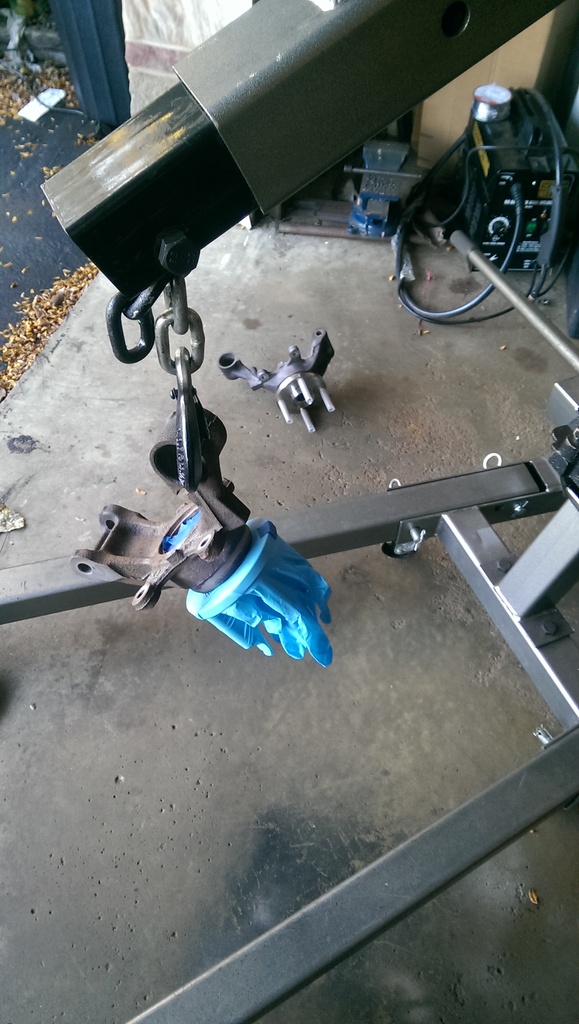
I wasnt going to do poly bushings at this time. But since I started to melt the lower rears when trying to get the knuckle off, I kind of have to . So the ole allthread and washer technique.

So thats about it for now. Going to paint some more bits today, and get all the poly back in.
Oh and take some measurements for the DSS after work today. =/
Not too much exciting. Sadly the adapter plate arrived Friday, however it appears DSS provided the wrong plate, as you can see (or not) the bolt circle that mounts to the diff is pretty far off. I dont know where the confusion came from here, as when I place my initial order, I clearly stated that I was using basically a standard V8R Getrag setup, simply with custom mounts everywhere. So, for this part in particular, I needed the exact same adapter plate as everyone else. Anyhow, theyve been relatively helpful throughout the process , I need to measure the bolt circle when I get home.

Anyhow, Saturday morning I decided that I didnt like Rev1 of the rad mounts, So I opted to lift it up a good amount, and tilt the top.


I know it wont be ideal for airflow, but now the cap is the highest point again, I still have adequate clearance for a large fan, sway bars, and rad hoses. And some left-over for ducting in the future.
Next I got to work finally installing my LS6 PCV system. I didnt take pictures, but this requires trimming an area in the valley of early LS1 blocks (98-00?) . Then to clear the LS6 intake the crossover tubes need to be massaged. I spent a good two hours with the map gas trying to get the fit perfect. A lot of extra bends need added to go around the vent tube, and all the little dimples in the cover.

I ended up tweaking some more from here so that the tube basically lays flat on the valley cover . There really is very little clearance between them and the bottom of the Ls6 intake.
Next I installed new wheel bearings, and hubs into the rear knuckles. Bent both rear lower control arm bolts. That sucked. Those are expensive bastards at ~$17 a piece!!


No better time than now to hit em with a little paint

I wasnt going to do poly bushings at this time. But since I started to melt the lower rears when trying to get the knuckle off, I kind of have to . So the ole allthread and washer technique.


So thats about it for now. Going to paint some more bits today, and get all the poly back in.
Oh and take some measurements for the DSS after work today. =/
Thread Starter
V8 Miata Follower
Joined: Jun 2016
Posts: 138
Likes: 12
From: Akron OH
Well, I think I see the end! I have the rest of the week off from work, and my goal is to get this thing started in that time.
But first, Ill fill you in on the little stuff Ive done since last time.
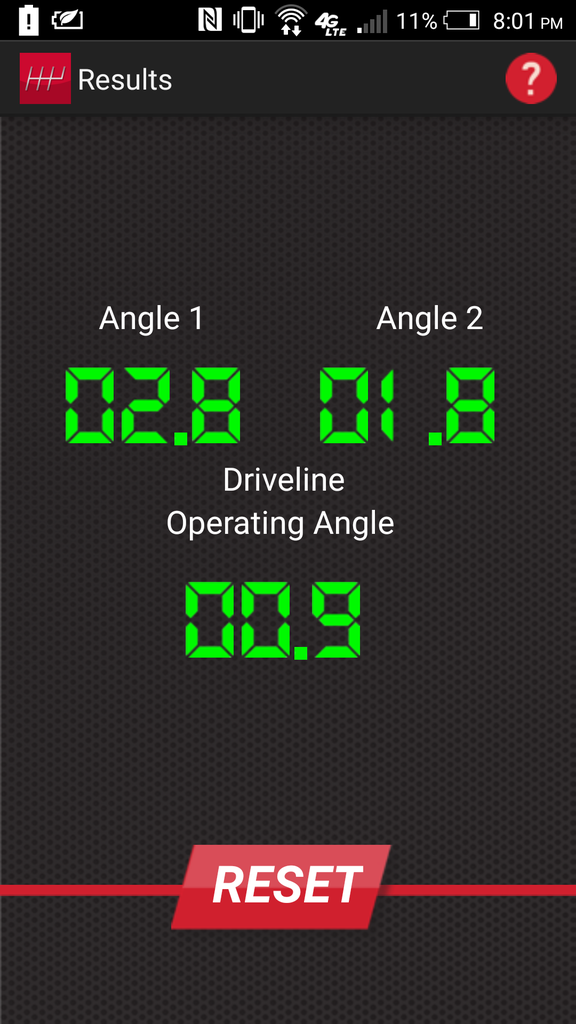
Got the correct adapter from DSS, Woo! Looks good, and the angles look great!
My paint booth! finished up painting all the control arms, and pressing in the new poly bushings.
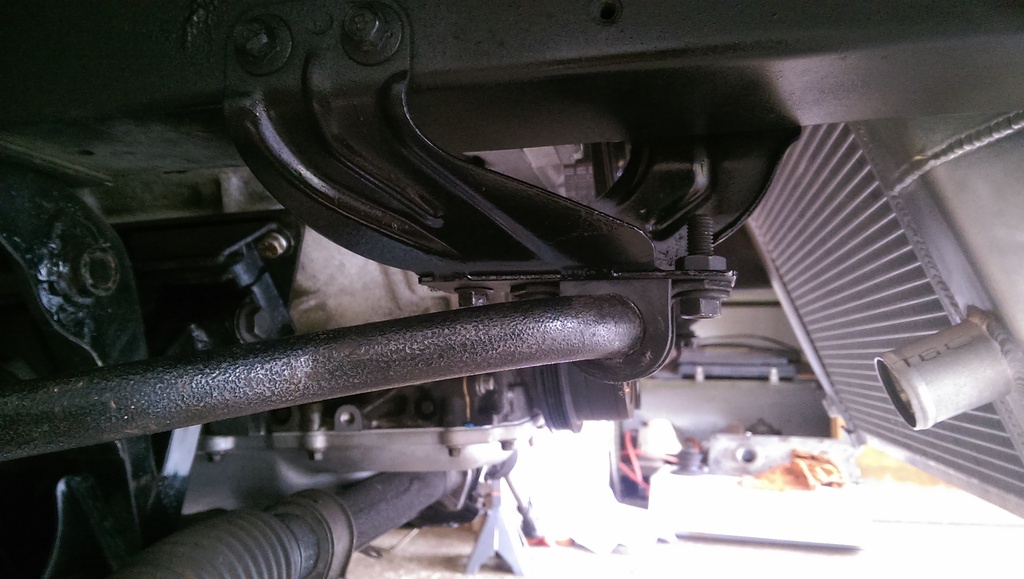
So I made a little sway bar adapter. I was thinking I could get away with just bolting it in, but I changed my mind, Ill end of welding it to the existing mount for some extra stiffness, Ill just have to pay extra attention to the heat im putting into it, I dont want to embrittle the already "prone-to-cracking" factory mount.
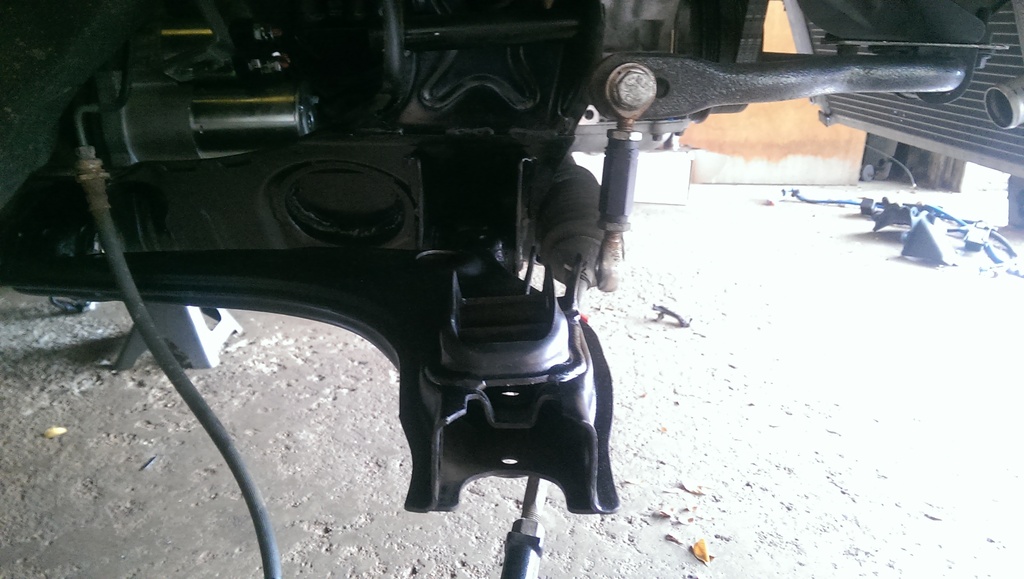
I have the end link placed on where I plan to put it, by using a long Grade 12.9 bolt, with a sleeve that goes in between the factory brackets. Yes, it will be in single shear, But I am confident it will hold up fine.
Heres what it would look like otherwise. Not ideal as far as geometry goes, and im pretty sure the heim would bind up at full compression.
Some new wheel bearing seals!
So thats all the pictures I have at the moment. I finished thinning out the LS harness yesterday, and am ready to lay it in the car. Still lots of work to do on the miata harness. But thats what I plan on doing this week!
Stay tuned.
But first, Ill fill you in on the little stuff Ive done since last time.
Got the correct adapter from DSS, Woo! Looks good, and the angles look great!


My paint booth! finished up painting all the control arms, and pressing in the new poly bushings.

So I made a little sway bar adapter. I was thinking I could get away with just bolting it in, but I changed my mind, Ill end of welding it to the existing mount for some extra stiffness, Ill just have to pay extra attention to the heat im putting into it, I dont want to embrittle the already "prone-to-cracking" factory mount.

I have the end link placed on where I plan to put it, by using a long Grade 12.9 bolt, with a sleeve that goes in between the factory brackets. Yes, it will be in single shear, But I am confident it will hold up fine.

Heres what it would look like otherwise. Not ideal as far as geometry goes, and im pretty sure the heim would bind up at full compression.

Some new wheel bearing seals!


So thats all the pictures I have at the moment. I finished thinning out the LS harness yesterday, and am ready to lay it in the car. Still lots of work to do on the miata harness. But thats what I plan on doing this week!
Stay tuned.

V8 Miata Prot�g�
Joined: May 2016
Posts: 452
Likes: 25
From: Ambler, PA
Looking good!
I'm thinking about what I need to do with my harnesses, but trying at the same time to not think about it. lol.
I'd be interested in hearing a summary of what you did with the GM harness, other than removing wires for unneeded o2 sensors or other functions, anything special?. did you need to buy any pigtails for various connectors?
Any particular resource you're using? I've been over some of the posts on this forum, the lt1swap.com page (doing my PCM as we speak) and Nathan's LS1 miata page, but I have not dived in too deep on any of them.
Thread Starter
V8 Miata Follower
Joined: Jun 2016
Posts: 138
Likes: 12
From: Akron OH
Looking good!
I'm thinking about what I need to do with my harnesses, but trying at the same time to not think about it. lol.
I'd be interested in hearing a summary of what you did with the GM harness, other than removing wires for unneeded o2 sensors or other functions, anything special?. did you need to buy any pigtails for various connectors?
Any particular resource you're using? I've been over some of the posts on this forum, the lt1swap.com page (doing my PCM as we speak) and Nathan's LS1 miata page, but I have not dived in too deep on any of them.
I'm thinking about what I need to do with my harnesses, but trying at the same time to not think about it. lol.
I'd be interested in hearing a summary of what you did with the GM harness, other than removing wires for unneeded o2 sensors or other functions, anything special?. did you need to buy any pigtails for various connectors?
Any particular resource you're using? I've been over some of the posts on this forum, the lt1swap.com page (doing my PCM as we speak) and Nathan's LS1 miata page, but I have not dived in too deep on any of them.
So far, all I've done is:
GM harness :
Trace and remove all ancillaries I am not useing. EGR, VATS, CAGS, AC etc.
Other than that, I just wanted to have the whole loom lose so I can do whatever I need to do in the car much easier. I left the oil pressure sensor wiring in case I can use it for the Mazda sensor
Mazda harness:
Follow everything connected to the PCM connectors minus coolant oil pressure and fan control and ditch it. I also am pulling all the airbag stuff out of the harness.
Beyond all that, I'm gonna figure out the rest when I lay it in the car. Honestly I've found plenty of resources for the GM harness, which ironically seems like the harness that needs the least amount of work. Meanwhile , I've found limited info on what people have done with the Mazda harness. But I'll figure it out.
Thread Starter
V8 Miata Follower
Joined: Jun 2016
Posts: 138
Likes: 12
From: Akron OH
Well I feel like Ive got a lot done this week ( as I should ). Havent cranked it over yet like I had hoped I was going to. But I think I am just a few wires away from doing that , well plus fluids.
I picked up this awesome wheel, but then almost immediately decided that I shouldnt have gotten the suede. I know ill be super upset when it starts to look like crap in 500 miles, but man does it feel nice!! So i think Ill be reselling it and picking up something else.
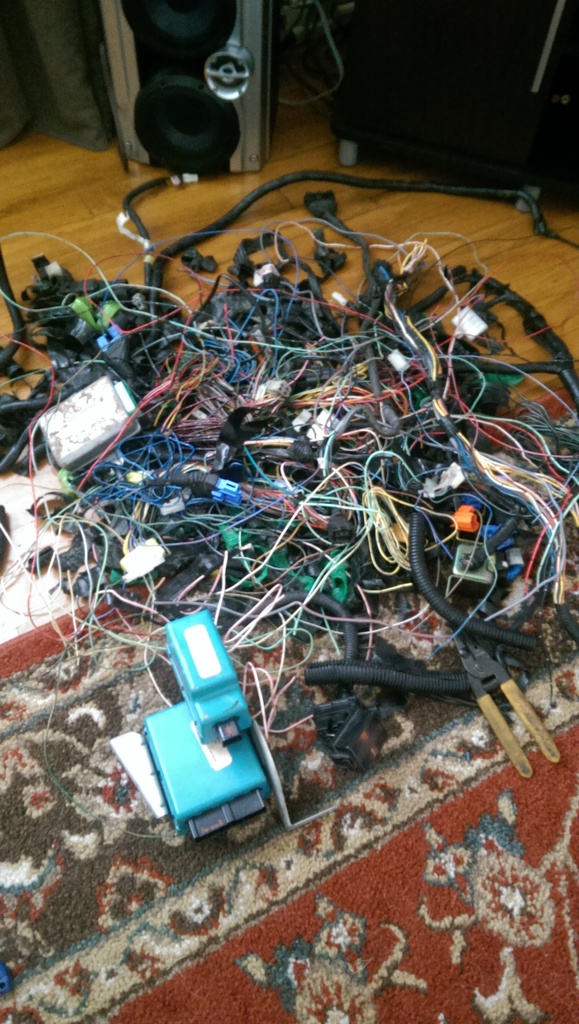
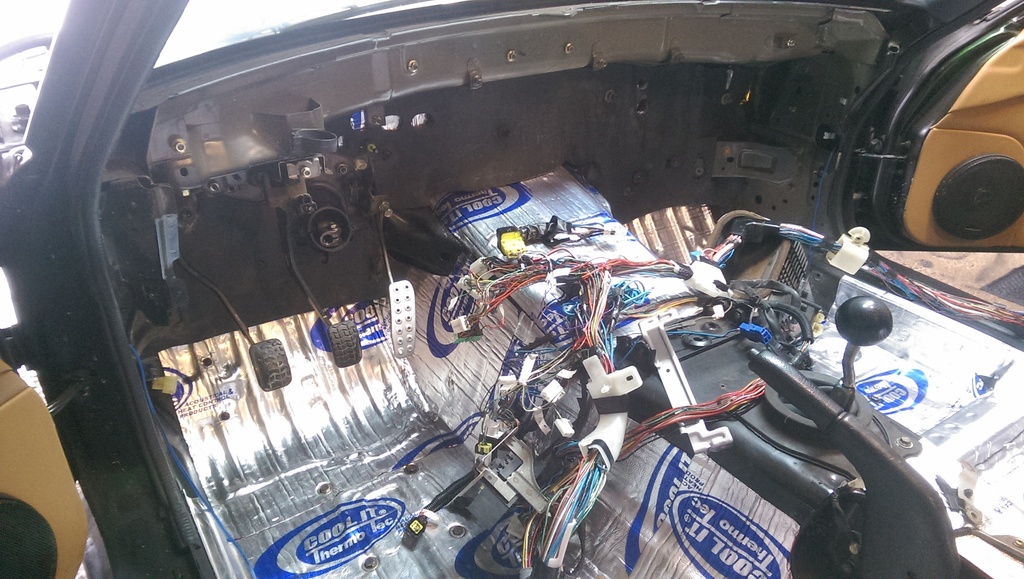
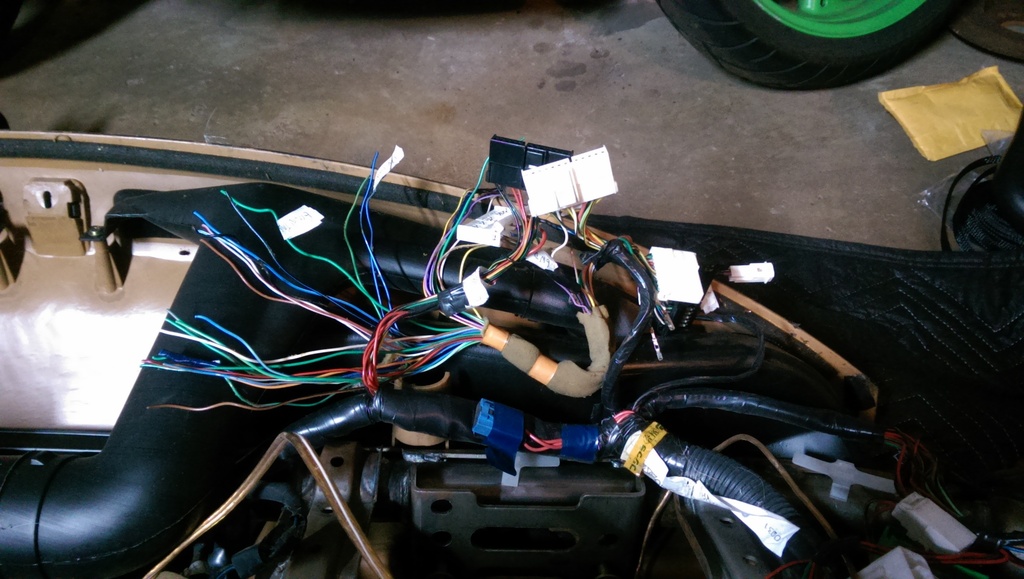
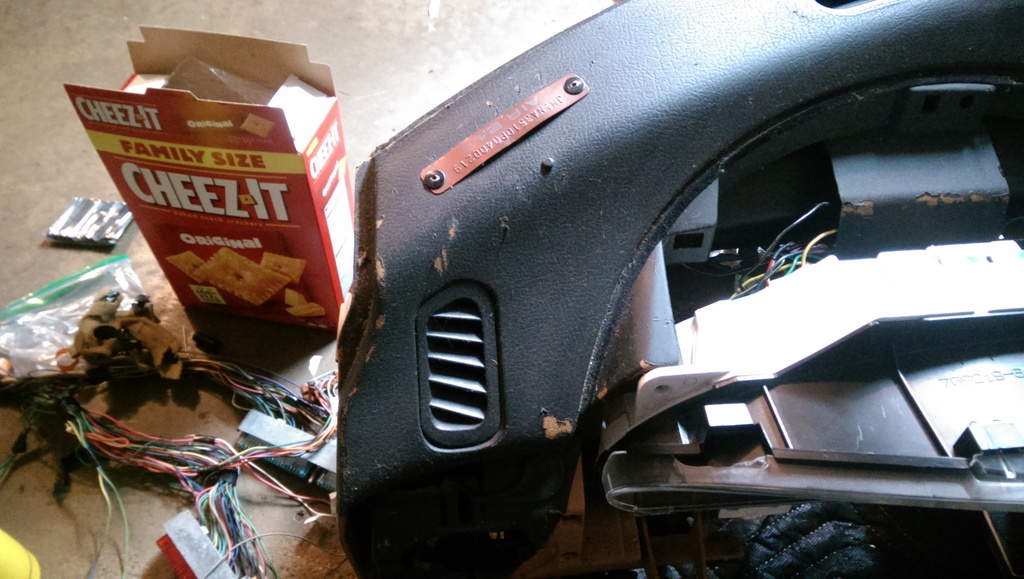
So Ill start at the beginning. After deciding I wanted to ditch all the Airbag stuff as well, I went back to work on the Mazda harness and ditched a ton more wires.
Doge tried to help, but I was getting nervous about the whole colorblind thing, so I had to keep a close eye on her!
So many wires removed! Sure hope this car still functions haha
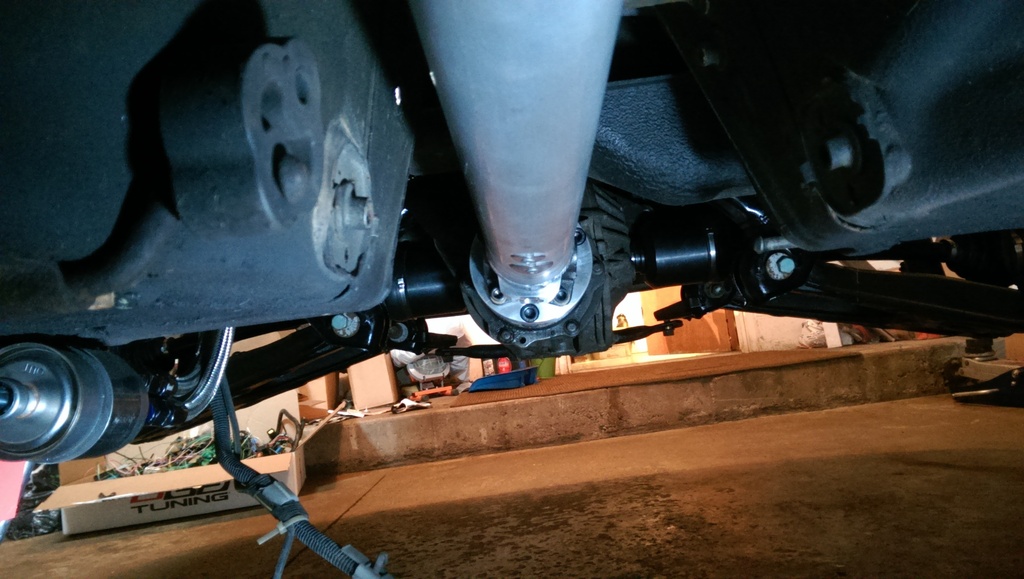
Rear end has been fully assembled on both sides. Everything is there to put the power to the ground, this i getting exciting!
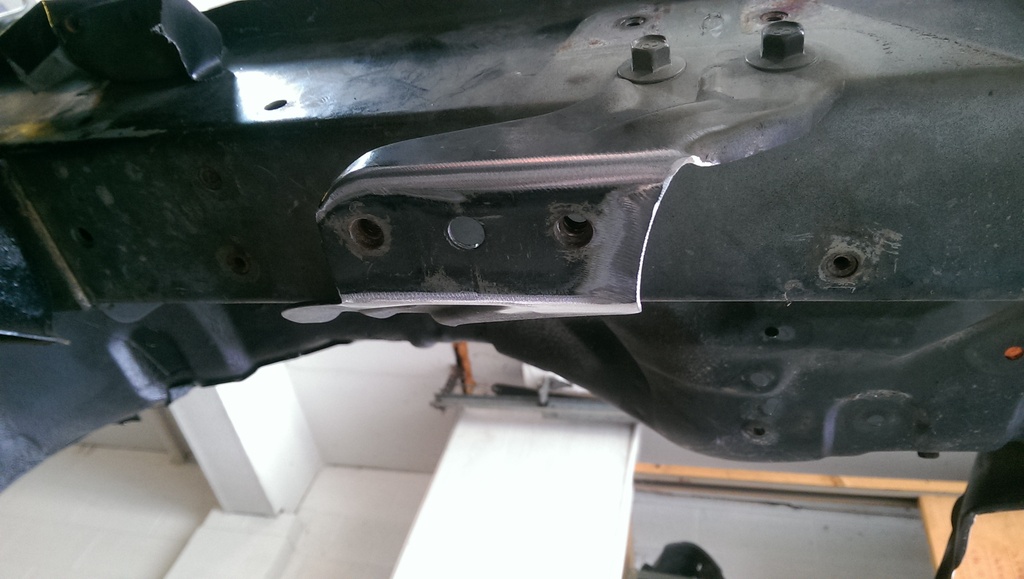
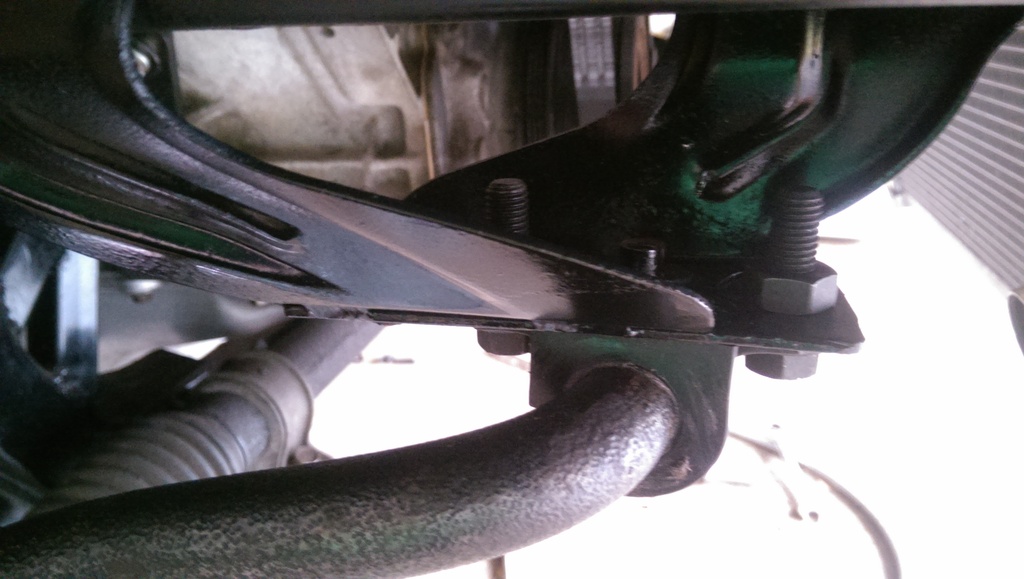
Welded on my sway bar adapter brackets. I only did some stitch welding in areas that needed it rather than fully welding to lessen HAZ of the bracket. Welding out of position is fun, and really helps me get better at TIGing.
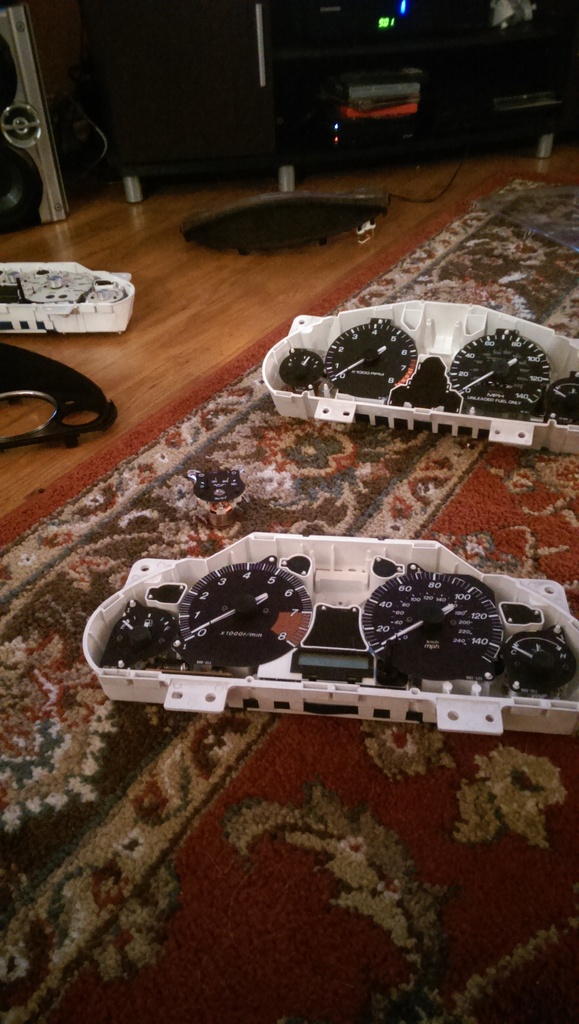
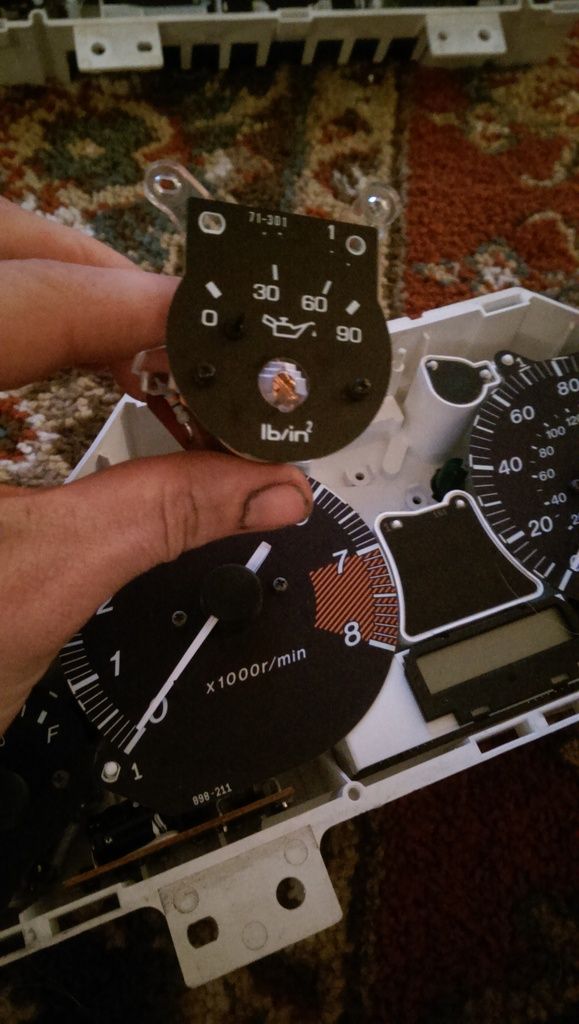
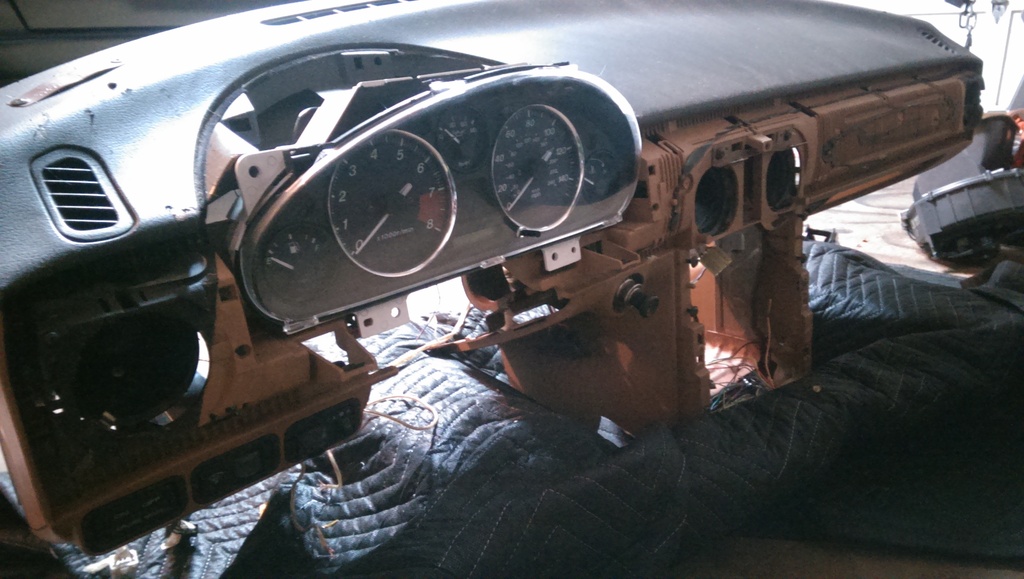
Got to work transfering my "real" NA OPG to the NB cluster
Back to the garage; painted and swaybar installed
Surprise!!!!! Steering shaft clears no problem !!
Well...... here we go, time to dig in.
HAd to get cozy with the back of the dash to rewire the cluster connectors, my method here was to simply pull one wire at a time from the NA connectors, and transfer it to the correct pin on the NB pigtail. After all was done, just pull out the remaining wires.
Sweet!
Sadly when I pulled my dash out of storage, I found that it had accumulated a few scratches, and is now showing the tan underneath....That blows, but oh well not a huge deal. I picked up a can of SEM vinyl/plastic satin black paint which Ive used in the past with great success. I will show you the final product later.
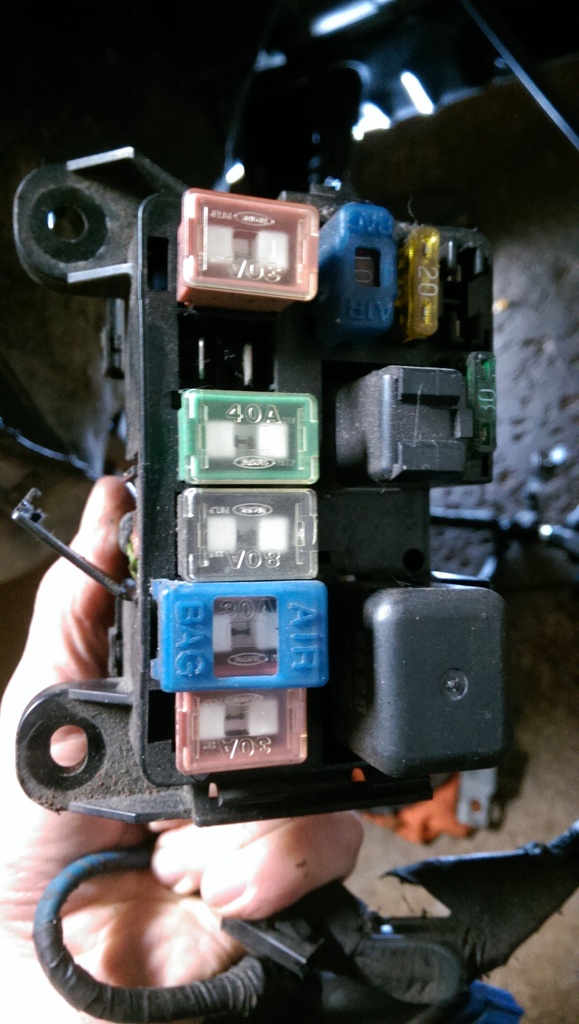
Next, I came to the sad realization, that there was one more thing I shouldve installed before putting the engine in for the last time..... The main Mazda fuse box..... DOH. So what I did was, just take a lot of pictures of where the wires go inside the box, depin everything, pull the wires through, then reattach. Surprisingly, wasnt too bad, other than learning how to depin a fuse block.
So thats where Im at pretty much. I also have the LS harness in the car, and when I get a little further with that. I will update hopefully later today/tomorrow.
I picked up this awesome wheel, but then almost immediately decided that I shouldnt have gotten the suede. I know ill be super upset when it starts to look like crap in 500 miles, but man does it feel nice!! So i think Ill be reselling it and picking up something else.

So Ill start at the beginning. After deciding I wanted to ditch all the Airbag stuff as well, I went back to work on the Mazda harness and ditched a ton more wires.
Doge tried to help, but I was getting nervous about the whole colorblind thing, so I had to keep a close eye on her!

So many wires removed! Sure hope this car still functions haha

Rear end has been fully assembled on both sides. Everything is there to put the power to the ground, this i getting exciting!


Welded on my sway bar adapter brackets. I only did some stitch welding in areas that needed it rather than fully welding to lessen HAZ of the bracket. Welding out of position is fun, and really helps me get better at TIGing.


Got to work transfering my "real" NA OPG to the NB cluster


Back to the garage; painted and swaybar installed


Surprise!!!!! Steering shaft clears no problem !!


Well...... here we go, time to dig in.

HAd to get cozy with the back of the dash to rewire the cluster connectors, my method here was to simply pull one wire at a time from the NA connectors, and transfer it to the correct pin on the NB pigtail. After all was done, just pull out the remaining wires.

Sweet!

Sadly when I pulled my dash out of storage, I found that it had accumulated a few scratches, and is now showing the tan underneath....That blows, but oh well not a huge deal. I picked up a can of SEM vinyl/plastic satin black paint which Ive used in the past with great success. I will show you the final product later.


Next, I came to the sad realization, that there was one more thing I shouldve installed before putting the engine in for the last time..... The main Mazda fuse box..... DOH. So what I did was, just take a lot of pictures of where the wires go inside the box, depin everything, pull the wires through, then reattach. Surprisingly, wasnt too bad, other than learning how to depin a fuse block.


So thats where Im at pretty much. I also have the LS harness in the car, and when I get a little further with that. I will update hopefully later today/tomorrow.
Last edited by wcw5023; Nov 7, 2016 at 08:19 AM.

Thread Starter
V8 Miata Follower
Joined: Jun 2016
Posts: 138
Likes: 12
From: Akron OH
Also, are all the pictures appearing for you in the last post??
Thread Starter
V8 Miata Follower
Joined: Jun 2016
Posts: 138
Likes: 12
From: Akron OH
V8 Miata Prot�g�
Joined: May 2016
Posts: 452
Likes: 25
From: Ambler, PA
Nice progress
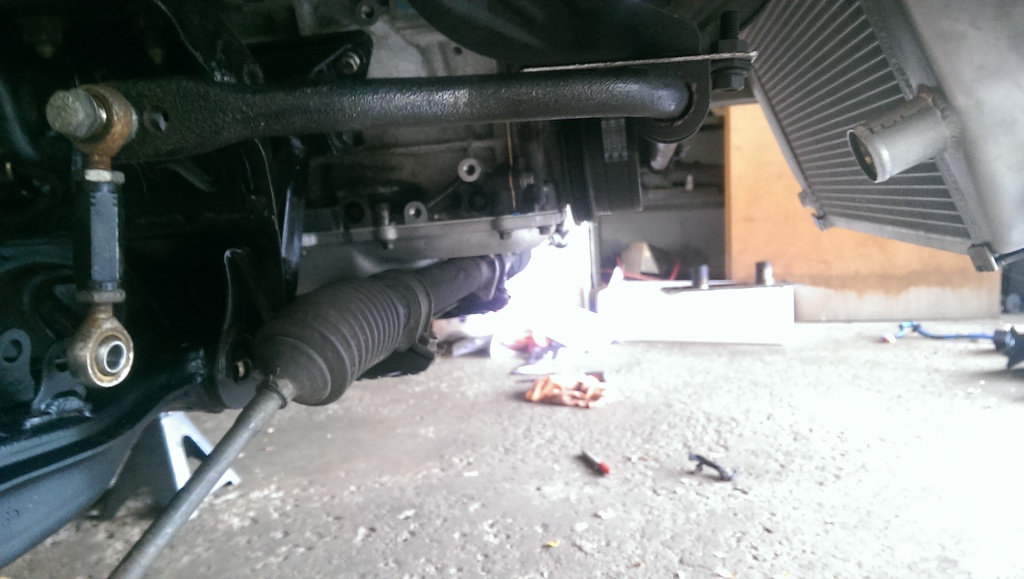
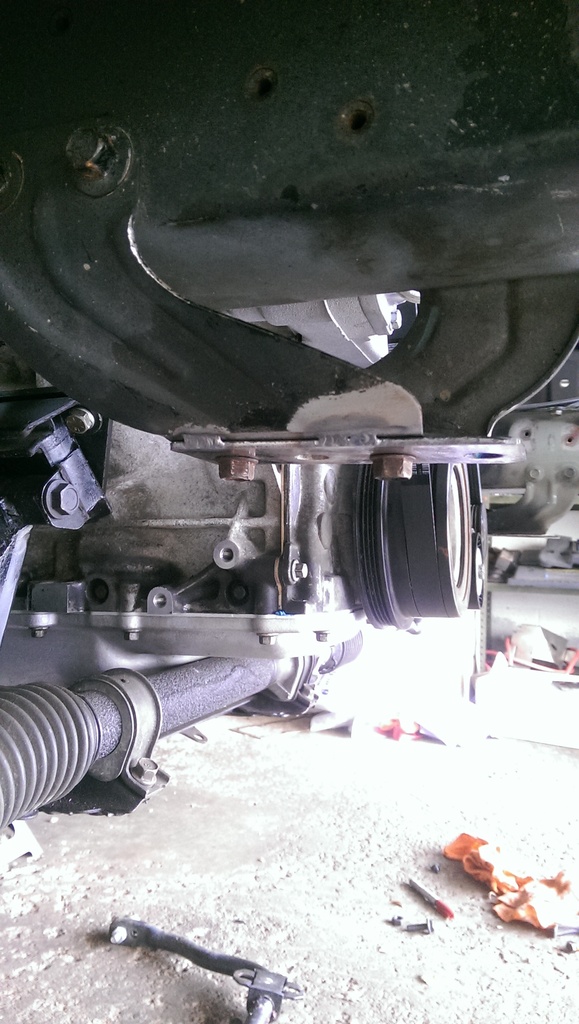
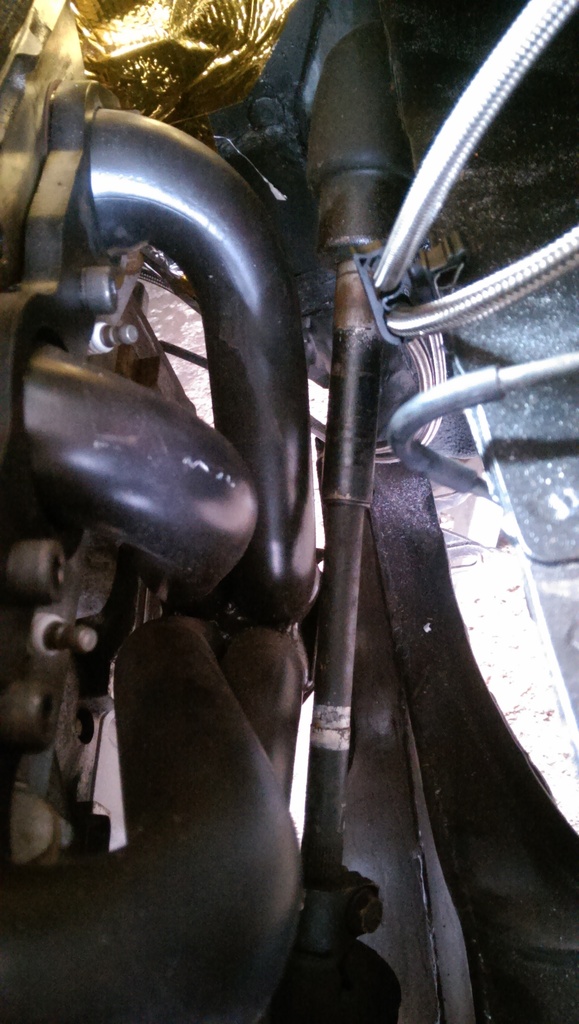
Is that Fuel filter/reg in its final location? Looks to be mounted on the floorpan? I can see some clearance issues with that, not to mention all the dirt and road grime it might see.
Btw, I did a VDO Oil pressure sender/gauge mod earlier this year and published it online: [NB] VDO Oil pressure w/ warning light, and Water Temp gauge install - MX-5 Miata Forum
Thread Starter
V8 Miata Follower
Joined: Jun 2016
Posts: 138
Likes: 12
From: Akron OH
Nice progress
Is that Fuel filter/reg in its final location? Looks to be mounted on the floorpan? I can see some clearance issues with that, not to mention all the dirt and road grime it might see.
Btw, I did a VDO Oil pressure sender/gauge mod earlier this year and published it online: [NB] VDO Oil pressure w/ warning light, and Water Temp gauge install - MX-5 Miata Forum
It does sit above the frame rail so no danger there; and I am not really concerned with dirt/grime, as this cars days or traversing bad weather and off-roading are hopefully over! haha

Thread Starter
V8 Miata Follower
Joined: Jun 2016
Posts: 138
Likes: 12
From: Akron OH
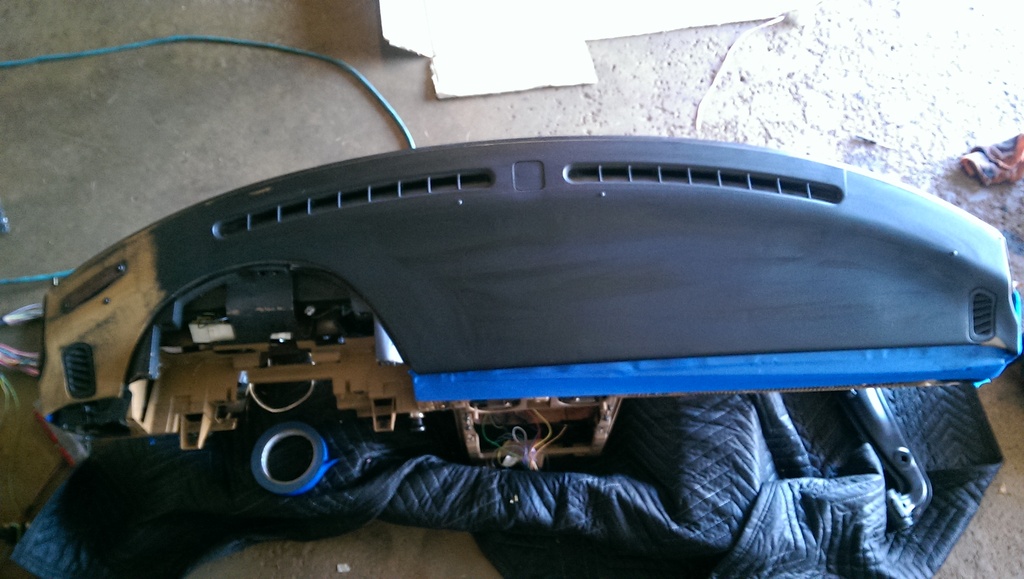
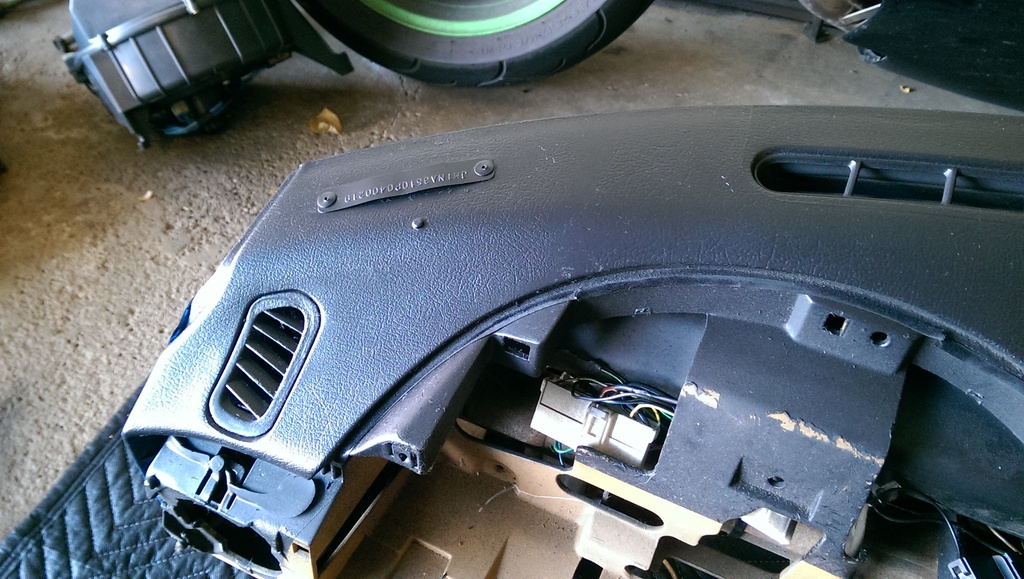
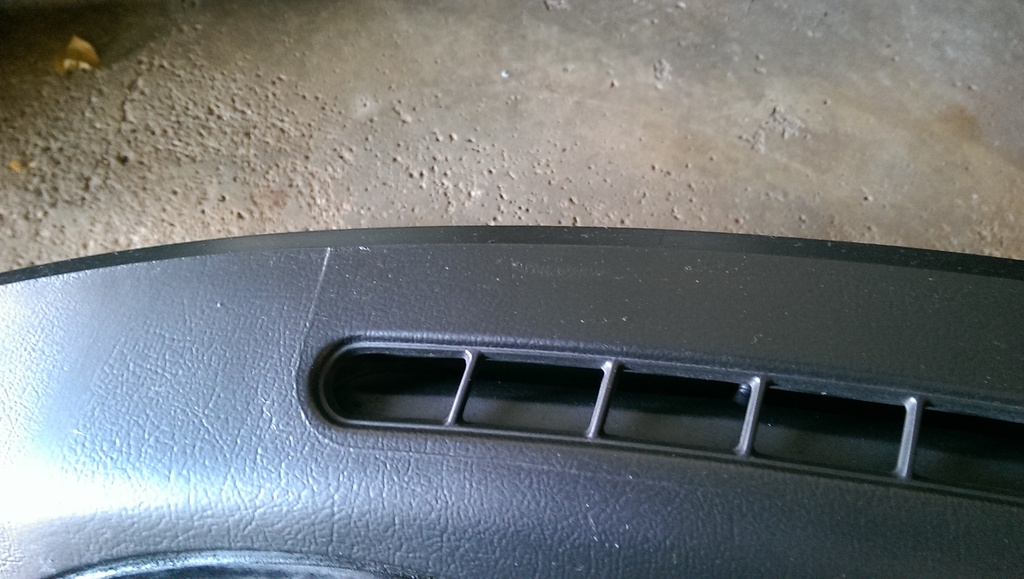
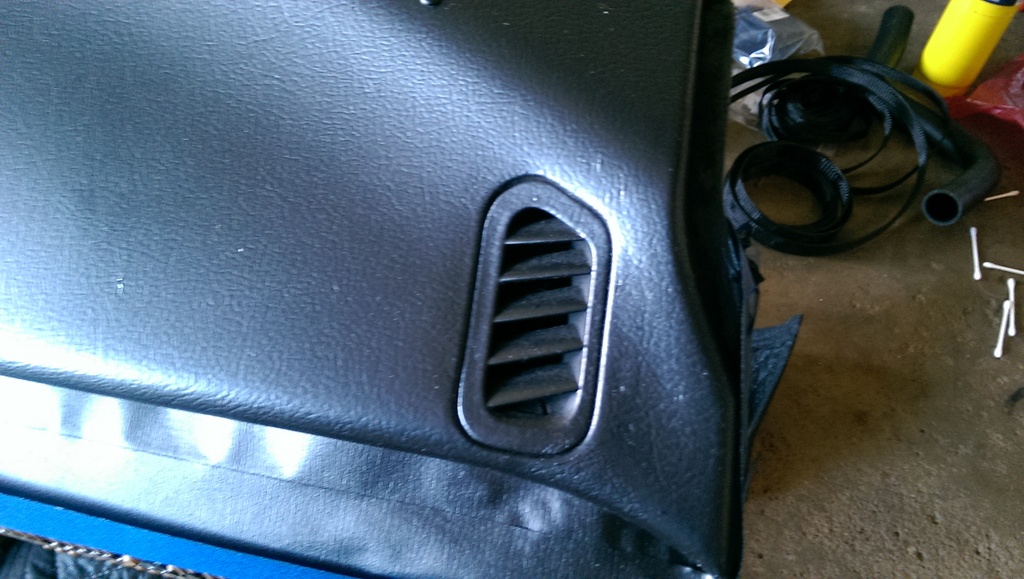
Just another little update from yesterday.
Here is the finished dash pad. Not perfect but good enough for me!
More progress on the wiring. They say that the factory miata starter power wire will bolt right up.... and maybe it will at a funky angle. So in order to get it to fit right, I trimmed it where you see if have scribed
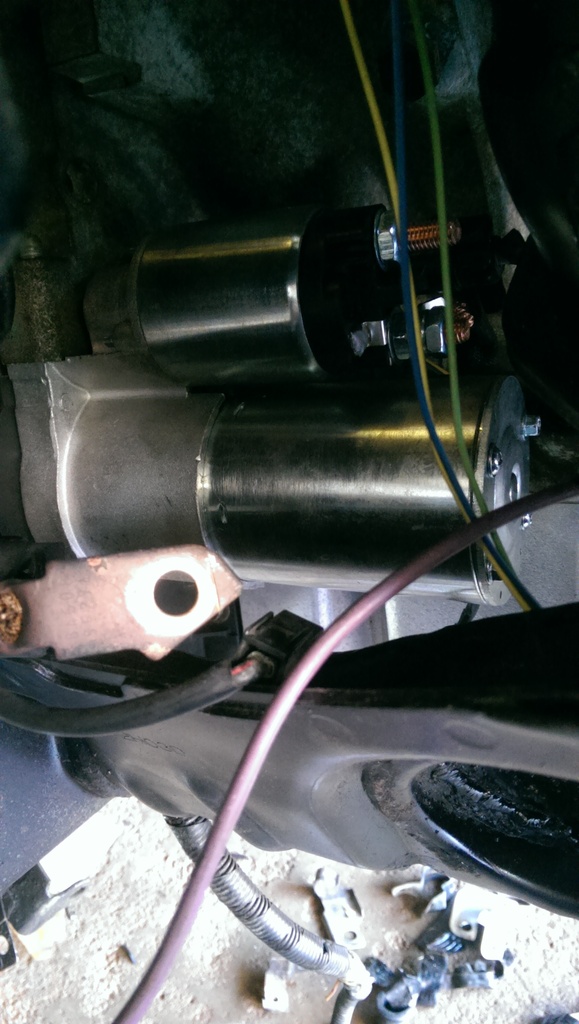
Now something interesting I noticed. Some instructions ive seen pertaining to starter wiring mention just attaching the factory ring terminal from an f-body harness. Well I swapped my f-body starter for a corvette version, which uses a plug rather than a post. It just so happens, that the other end of the fbody purple wire ( opposite of the ring terminal ) is that same plug! so instead of attaching the ring terminal. I attached the plug end
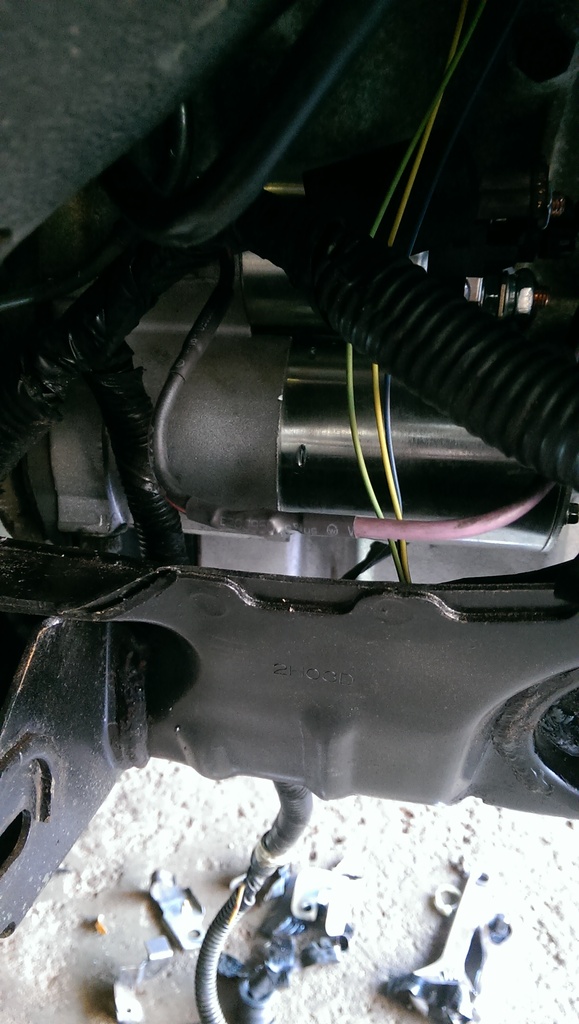
This is the starter I used:
https://www.amazon.com/gp/product/B0...?ie=UTF8&psc=1
See the pictures for the connection I am referring to.
Hey look the reverse lights work!
Here is the finished dash pad. Not perfect but good enough for me!


More progress on the wiring. They say that the factory miata starter power wire will bolt right up.... and maybe it will at a funky angle. So in order to get it to fit right, I trimmed it where you see if have scribed

Now something interesting I noticed. Some instructions ive seen pertaining to starter wiring mention just attaching the factory ring terminal from an f-body harness. Well I swapped my f-body starter for a corvette version, which uses a plug rather than a post. It just so happens, that the other end of the fbody purple wire ( opposite of the ring terminal ) is that same plug! so instead of attaching the ring terminal. I attached the plug end

This is the starter I used:
https://www.amazon.com/gp/product/B0...?ie=UTF8&psc=1
See the pictures for the connection I am referring to.
Hey look the reverse lights work!

V8 Miata Prot�g�
Joined: May 2016
Posts: 452
Likes: 25
From: Ambler, PA
Any updates?
On the fuel filter I think I was more concerned about something catching it under the car and damaging it... maybe b/c these cars are so low I feel like you're always about to bottom out. Maybe it's b/c I live in the Philadelphia area where roads are just deplorable.
I think I have the same starter but I have it mounted and can't see the connections right now b/c of the heat shield I have around it, but thanks for the tip.
Thread Starter
V8 Miata Follower
Joined: Jun 2016
Posts: 138
Likes: 12
From: Akron OH
Any updates?
On the fuel filter I think I was more concerned about something catching it under the car and damaging it... maybe b/c these cars are so low I feel like you're always about to bottom out. Maybe it's b/c I live in the Philadelphia area where roads are just deplorable.
I think I have the same starter but I have it mounted and can't see the connections right now b/c of the heat shield I have around it, but thanks for the tip.
On the fuel filter I think I was more concerned about something catching it under the car and damaging it... maybe b/c these cars are so low I feel like you're always about to bottom out. Maybe it's b/c I live in the Philadelphia area where roads are just deplorable.
I think I have the same starter but I have it mounted and can't see the connections right now b/c of the heat shield I have around it, but thanks for the tip.
I also need to put my heatshield on the starter. Just been putting it off because its such a cramped area!
As far as updates, I dont have much. Its been a busy couple weeks with the holidays , I was back in your neck of the woods for the better part of a week.
Had the womans b-day the weekend before that, so we were out of town again.
Then in my free time, I had been taking care of some basic maintenance on the other cars as well =/
Truth be told, Ive slowed down a lot, because having the opportunity to drive the car 1 or 2 times before its consistently cold/salty. Just isnt worth rushing through this part of the build.
That being said. Ive still tied up a lot of little bits here and there. Ill get together an update at some point this morning, so stay tuned =)
Thread Starter
V8 Miata Follower
Joined: Jun 2016
Posts: 138
Likes: 12
From: Akron OH
Okay, update time. As I mentioned above, not a whole lot of progress has been made since my last update unfortunately. But progress is progress none-the-less!!
My phone has also been on the fritz lately, and im overdue for a replacement. By the time I get home from work during the week its basically dead.
One thing I made that I have zero pictures of at the moment, is my ECU holder. Ill try and remember to snag some pics the next time I have it out, but notice its location in the pics to come.
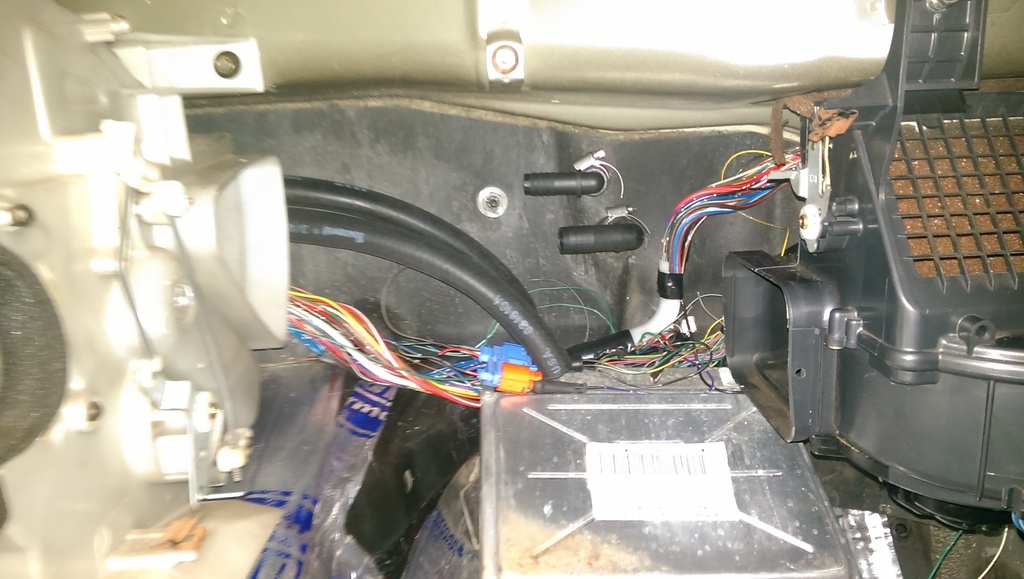
So one thing Ive been postponing my "first start" for, has been putting the dash back in so I can use my OPG on the cluster to ensure I have primed the system before I let it catch. However in order to put the dash back in, I needed to tie up some loose ends like:
-ECU Mounting
-Finish Wire Routing
-Ensure ALL Grounds Are Connected
-Heater Core Lines
Now that last one was the big one for me. One of those things that I had just been putting off, because its fiddly and just not fun in my opinion. But In order to move forward I needed to get it done.
Good news is, all of the above IS now done. So lets take a look.
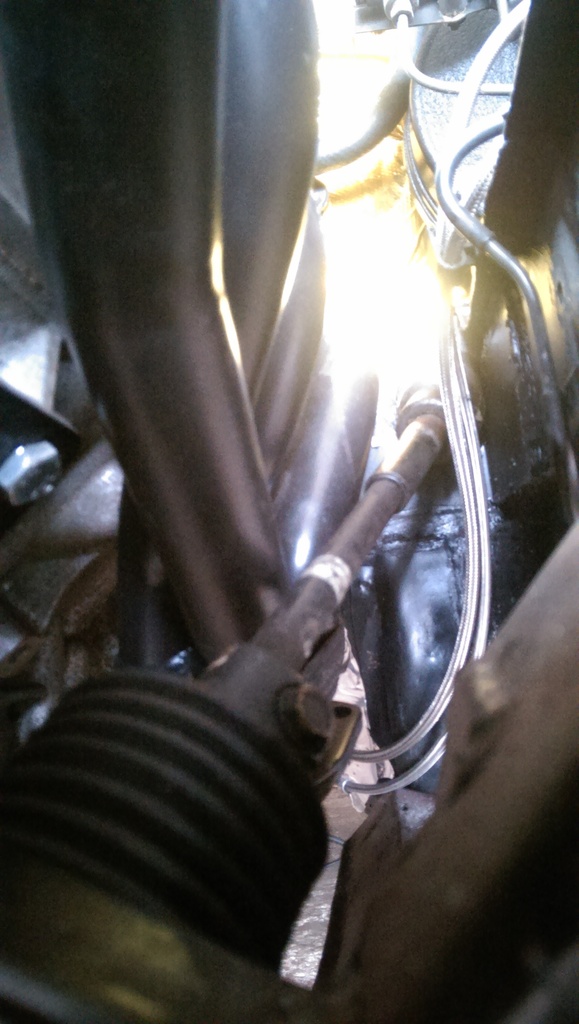
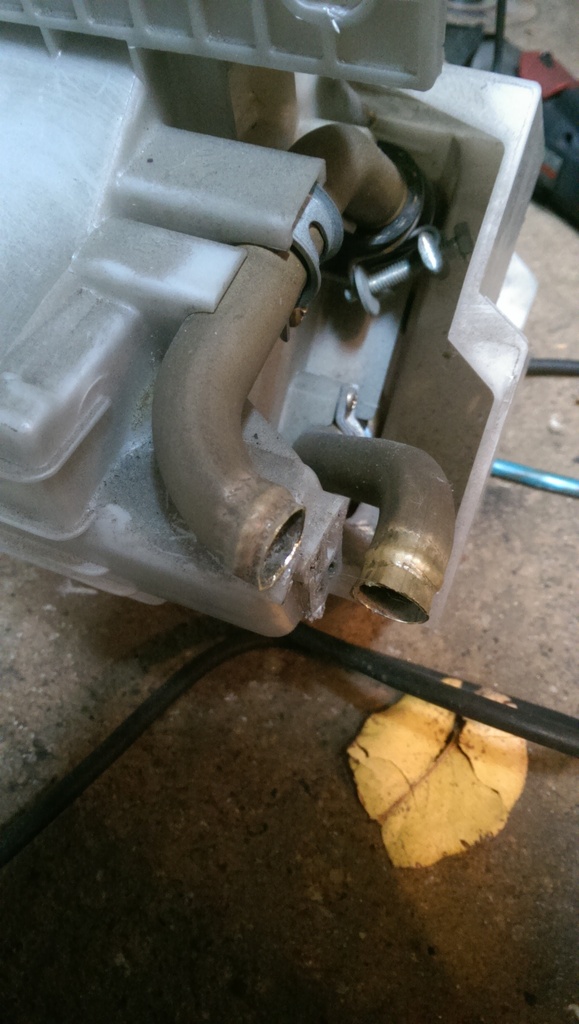
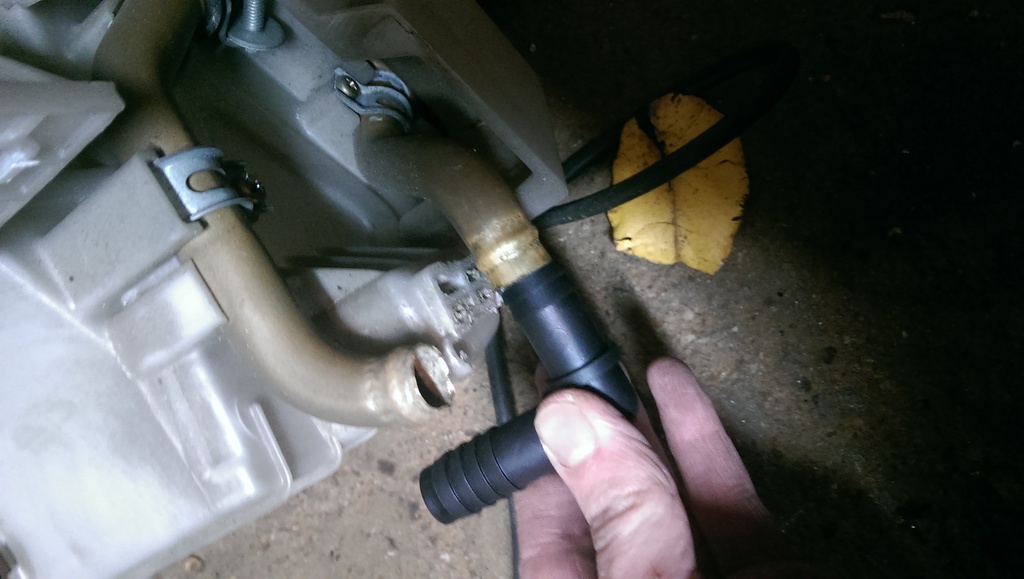
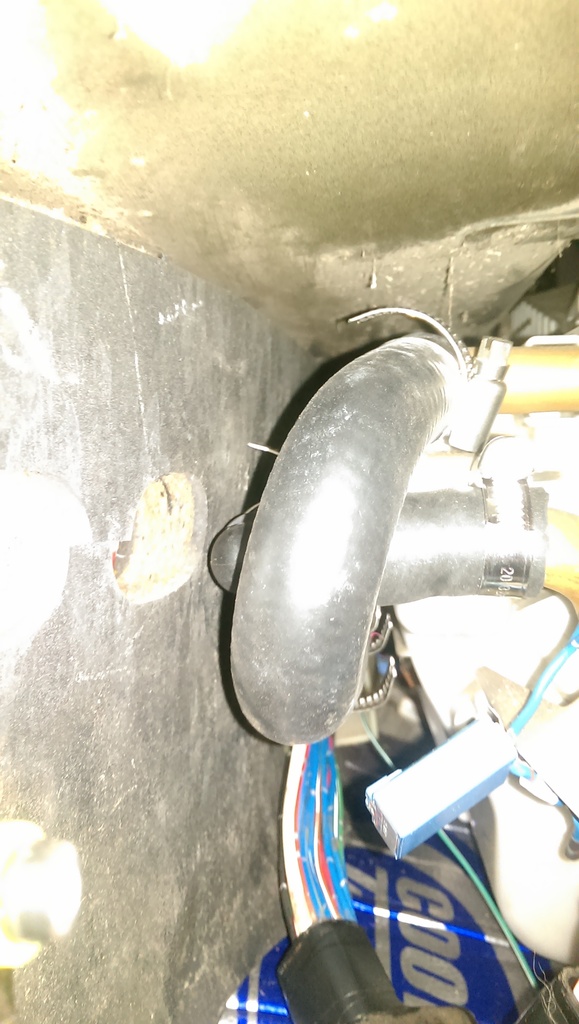
I lopped off the heater core lines like so:
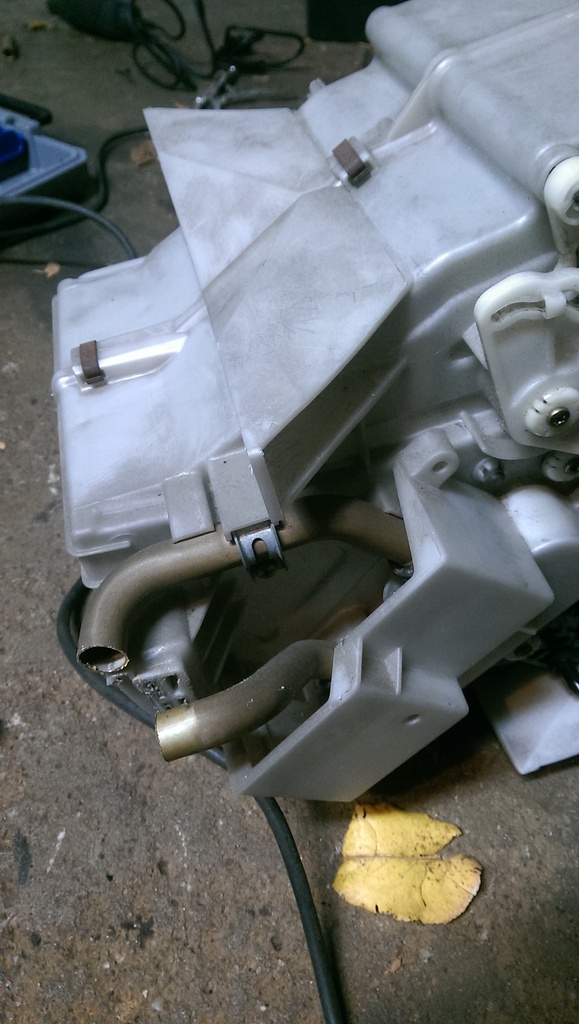
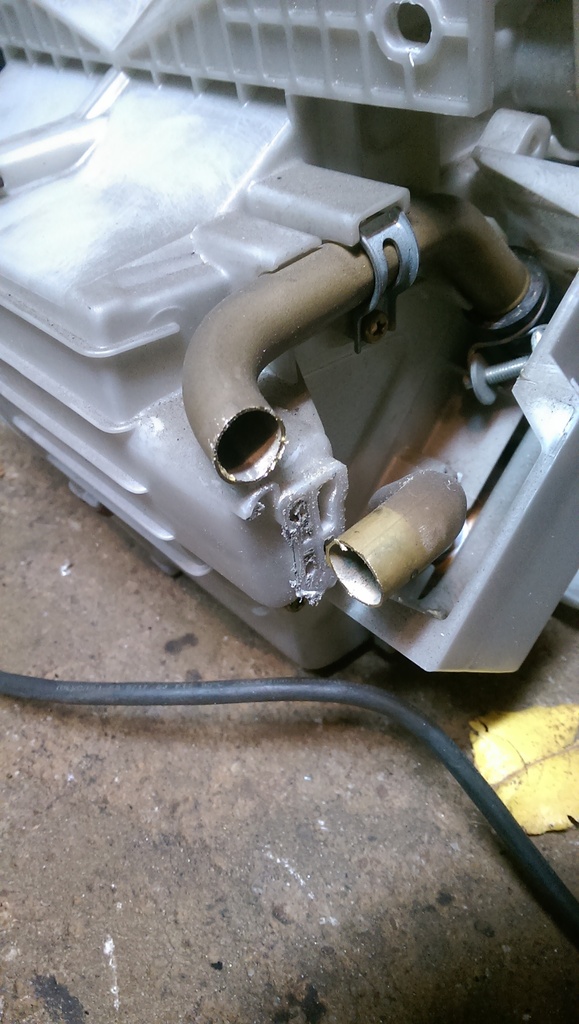
Notice I also cut off the lower retaining tab. This was necessary to get my hose on the line. Im not too worried about losing the support, as the lines will be tight against the padding on the firewall, and I will zip tie them together.
Now, because I really really really, dont want to get this car all back together and have coolant **** all over my leg the first time it gets up to temperature, I wanted to flare the ends of the brass tubing. Because Im cheap, and this is a "fabricators" build thread after all. I broke out the welder and made this simple little tool.
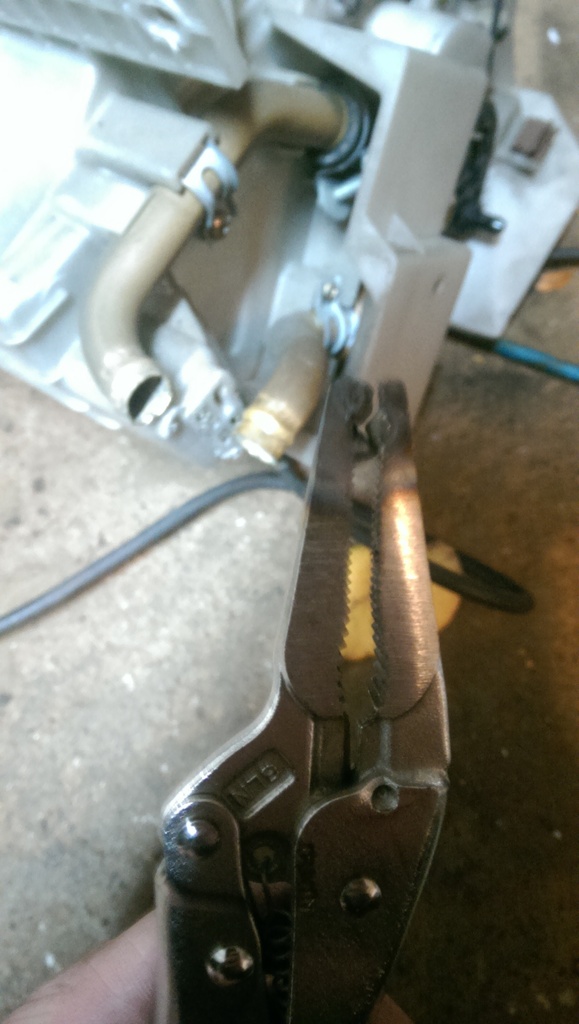
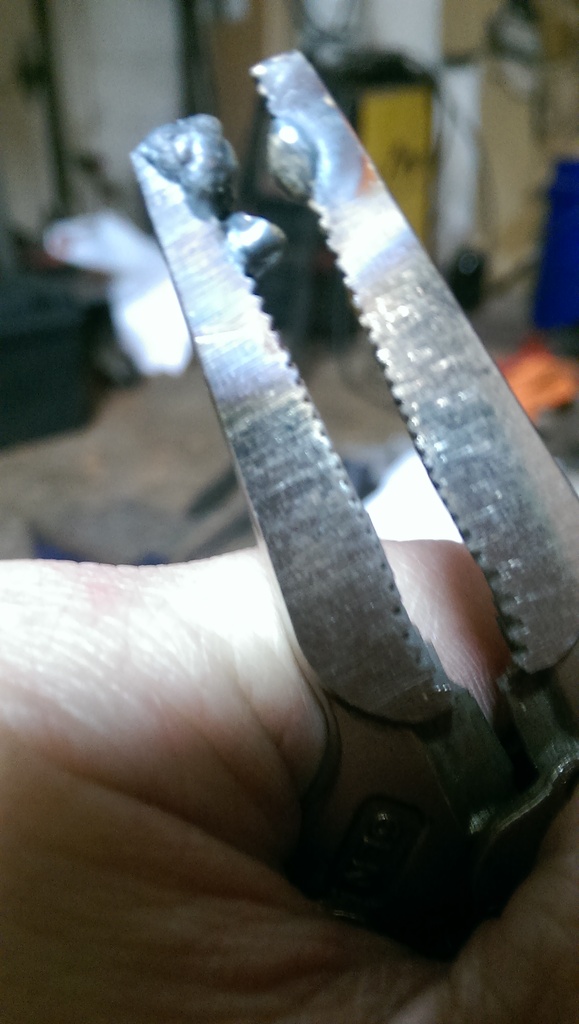
Its not pretty, but itll do the job. Could I have made it nicer? Sure, but for how often Ill use this thing (probably never again) I didnt care. So lets see how it did
Hey not bad right?!
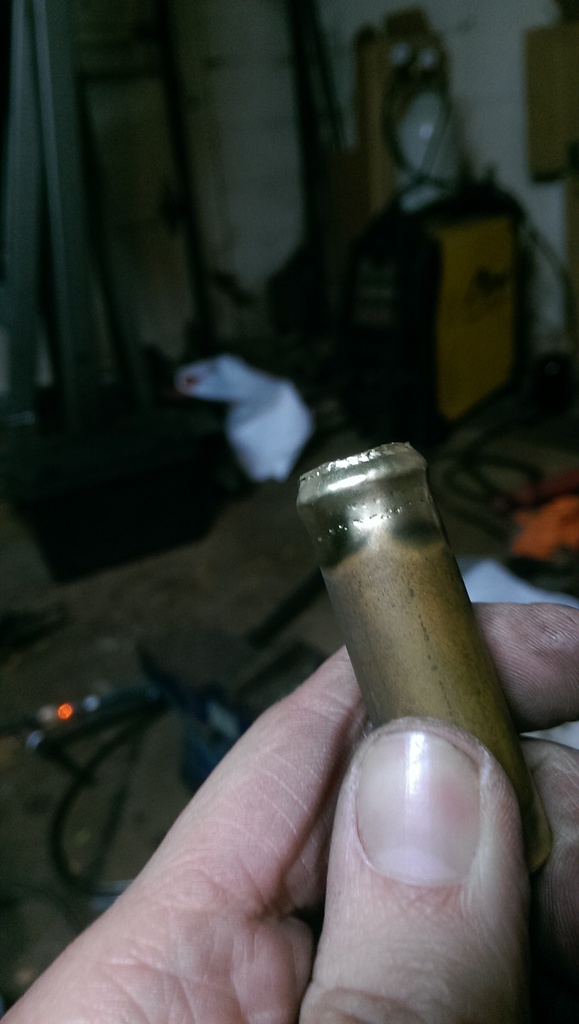
Thatll work!
Now Ill just let the rest of the pics do the talking.
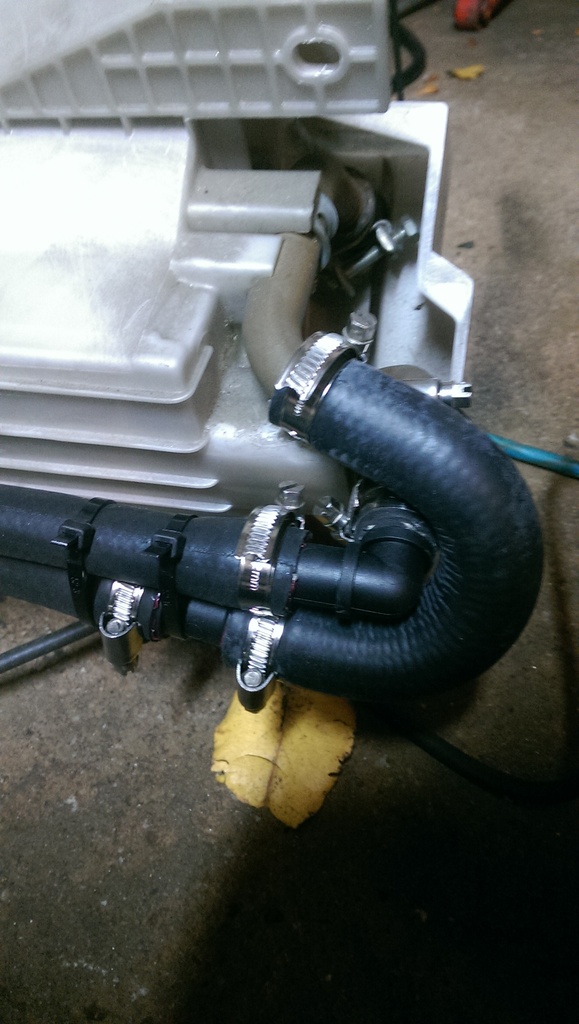
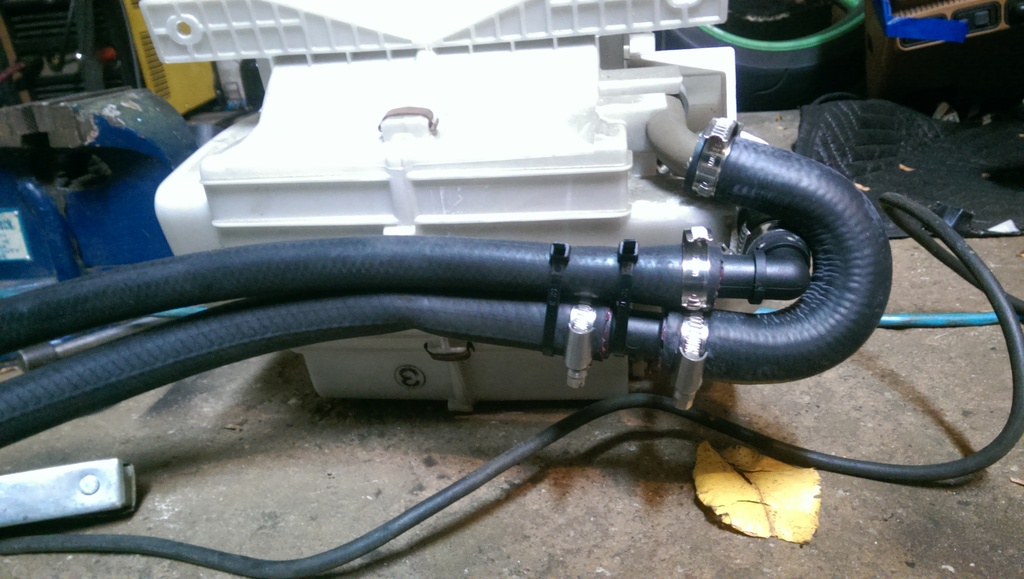
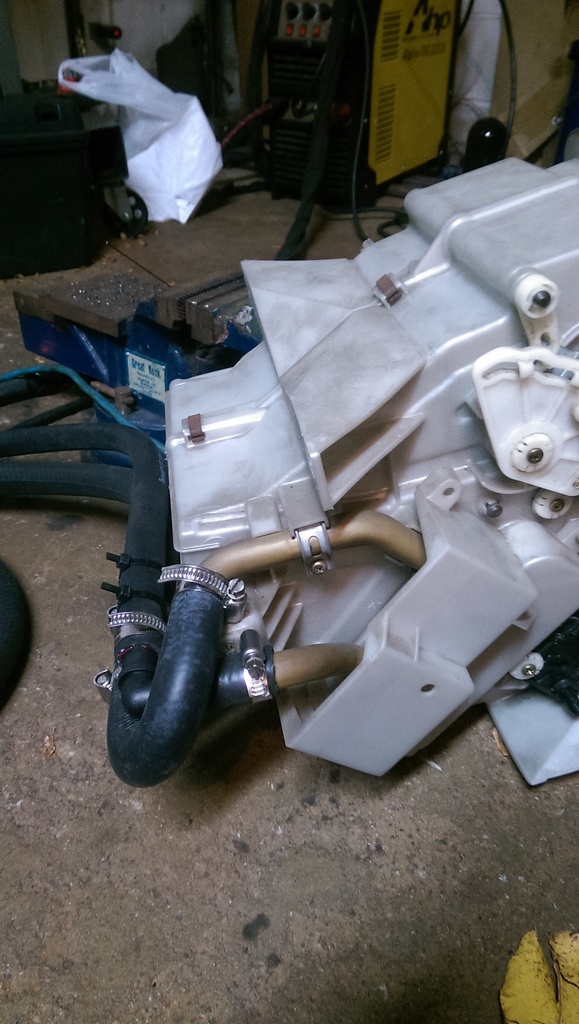
Notice I didnt connect the lines at the firewall. Thats because Ill need to pull the heater core out again to put the carpet in.
What do I need to do before I put the carpet it? Well..... nothing I dont think? Please chime in if you can think of anything important to do while I still have this mostly disassembled!
As for whats left before first start? Well, heres everything I can think of
- Motor Oil
- Trans Fluid
- Prime Oil Pump with Plug behind Alt
- Make Ground Strap (BlockChassis)
To be honest, I think thats it. Once the first start is successful, obviously there is plently left still to do, but we can go over that when we get to that point. Let me know what you guys think!
My phone has also been on the fritz lately, and im overdue for a replacement. By the time I get home from work during the week its basically dead.
One thing I made that I have zero pictures of at the moment, is my ECU holder. Ill try and remember to snag some pics the next time I have it out, but notice its location in the pics to come.
So one thing Ive been postponing my "first start" for, has been putting the dash back in so I can use my OPG on the cluster to ensure I have primed the system before I let it catch. However in order to put the dash back in, I needed to tie up some loose ends like:
-ECU Mounting
-Finish Wire Routing
-Ensure ALL Grounds Are Connected
-Heater Core Lines
Now that last one was the big one for me. One of those things that I had just been putting off, because its fiddly and just not fun in my opinion. But In order to move forward I needed to get it done.
Good news is, all of the above IS now done. So lets take a look.
I lopped off the heater core lines like so:


Notice I also cut off the lower retaining tab. This was necessary to get my hose on the line. Im not too worried about losing the support, as the lines will be tight against the padding on the firewall, and I will zip tie them together.
Now, because I really really really, dont want to get this car all back together and have coolant **** all over my leg the first time it gets up to temperature, I wanted to flare the ends of the brass tubing. Because Im cheap, and this is a "fabricators" build thread after all. I broke out the welder and made this simple little tool.


Its not pretty, but itll do the job. Could I have made it nicer? Sure, but for how often Ill use this thing (probably never again) I didnt care. So lets see how it did

Hey not bad right?!

Thatll work!
Now Ill just let the rest of the pics do the talking.


Notice I didnt connect the lines at the firewall. Thats because Ill need to pull the heater core out again to put the carpet in.
What do I need to do before I put the carpet it? Well..... nothing I dont think? Please chime in if you can think of anything important to do while I still have this mostly disassembled!
As for whats left before first start? Well, heres everything I can think of
- Motor Oil
- Trans Fluid
- Prime Oil Pump with Plug behind Alt
- Make Ground Strap (BlockChassis)
To be honest, I think thats it. Once the first start is successful, obviously there is plently left still to do, but we can go over that when we get to that point. Let me know what you guys think!
V8 Miata Prot�g�
Joined: May 2016
Posts: 452
Likes: 25
From: Ambler, PA
Nice. I'm holding off on purchasing any hoses for the rad or heater core until I have the rad mounted and welded in.
Do you have any part numbers for the hoses you used, especially the ones that come off the water pump to the heater core as that's a tight fit. Do you know if they also are the right size (inside diameter and bend size) for the heater core in/out?
edit: I believe you could also fire it up w/out any coolant just to see if it fire's and idles ok, no CELs, etc.
Thanks
Thread Starter
V8 Miata Follower
Joined: Jun 2016
Posts: 138
Likes: 12
From: Akron OH
Nice. I'm holding off on purchasing any hoses for the rad or heater core until I have the rad mounted and welded in.
Do you have any part numbers for the hoses you used, especially the ones that come off the water pump to the heater core as that's a tight fit. Do you know if they also are the right size (inside diameter and bend size) for the heater core in/out?
edit: I believe you could also fire it up w/out any coolant just to see if it fire's and idles ok, no CELs, etc.
Thanks
Do you have any part numbers for the hoses you used, especially the ones that come off the water pump to the heater core as that's a tight fit. Do you know if they also are the right size (inside diameter and bend size) for the heater core in/out?
edit: I believe you could also fire it up w/out any coolant just to see if it fire's and idles ok, no CELs, etc.
Thanks
As far as hoses. I will attach them below. The hoses off the waterpump only maintain size, so the larger maintains 3/4" and the smaller maintains 5/8". This was intentional, because I wanted the hoses to fit the grommets in the firewall well. The "U" shaped hose off the actual heater core transitions from 5/8" to 3/4" .
URO 64211394292
REIN 64211394291
V8 Miata Prot�g�
Joined: May 2016
Posts: 452
Likes: 25
From: Ambler, PA
ha, those are actually E36 BMW parts, and I think I did the same ones on my M3 when I did a cooling system refresh. They were a b_tch to get to.
Re: startup - Flyin Miata instructions would say to be aware of "magic smoke" during the battery hookup or ignition on, in case you have anything miswired.
Re: startup - Flyin Miata instructions would say to be aware of "magic smoke" during the battery hookup or ignition on, in case you have anything miswired.
Thread Starter
V8 Miata Follower
Joined: Jun 2016
Posts: 138
Likes: 12
From: Akron OH
So PJ made me realize I left out a pretty significant step in my progress in the last update.
I have officially powered up the harness, no magic smoke and the ECU reads!!!
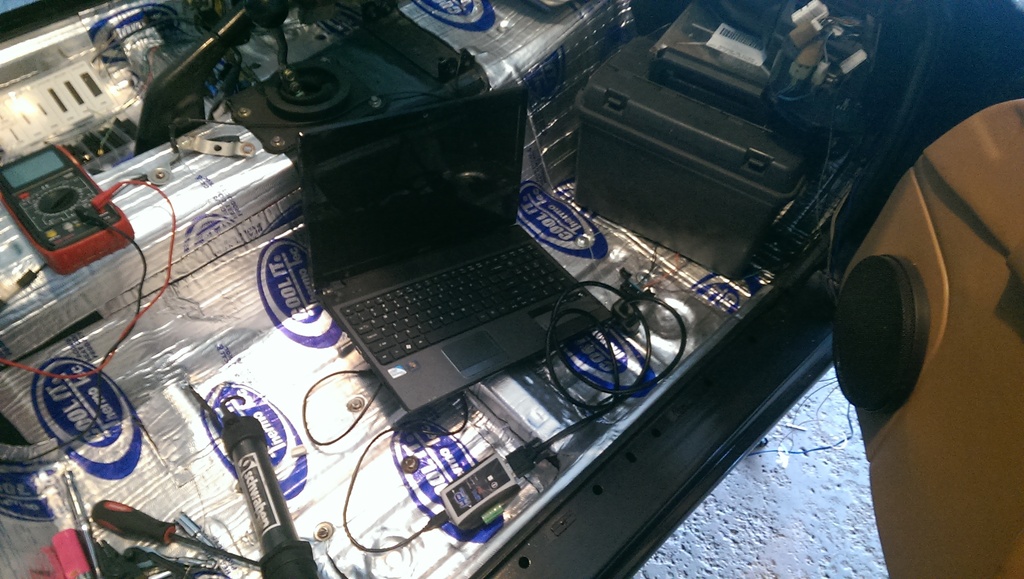
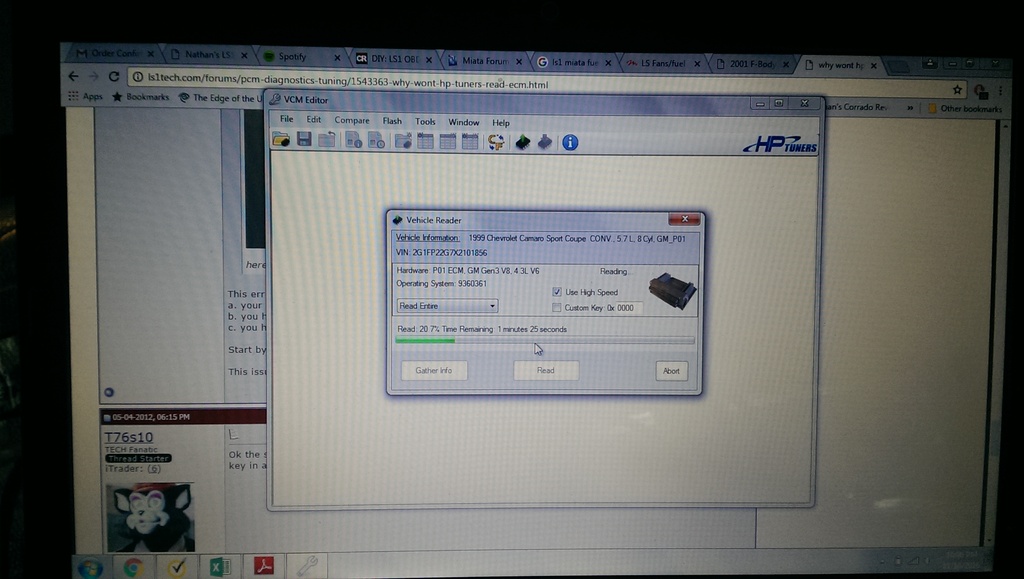
Woo hoo! So I loaded up HPTuners and disabled all the bits I wont be using
- Rear O2's
-AIR
-EGR
-VATS
-CAGS
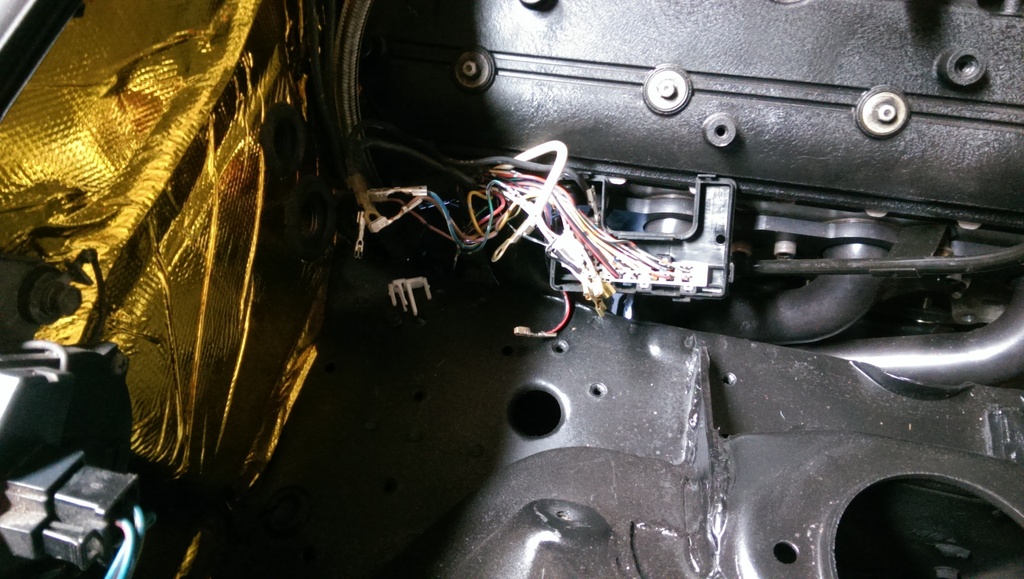
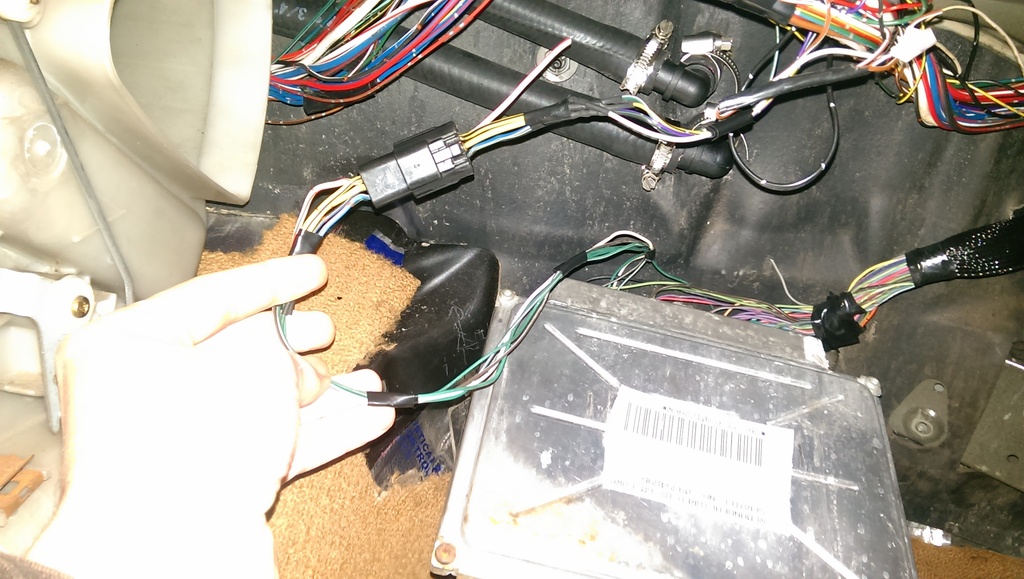
That all seemed to go well. So I started to tidy up the wiring harness, recycling OE Mazda connectors from my harness and things I removed. The two main connectors I created were power supplies to the orange and pink wires of the LS Harness, which plug in underneath my fuse block shown here.
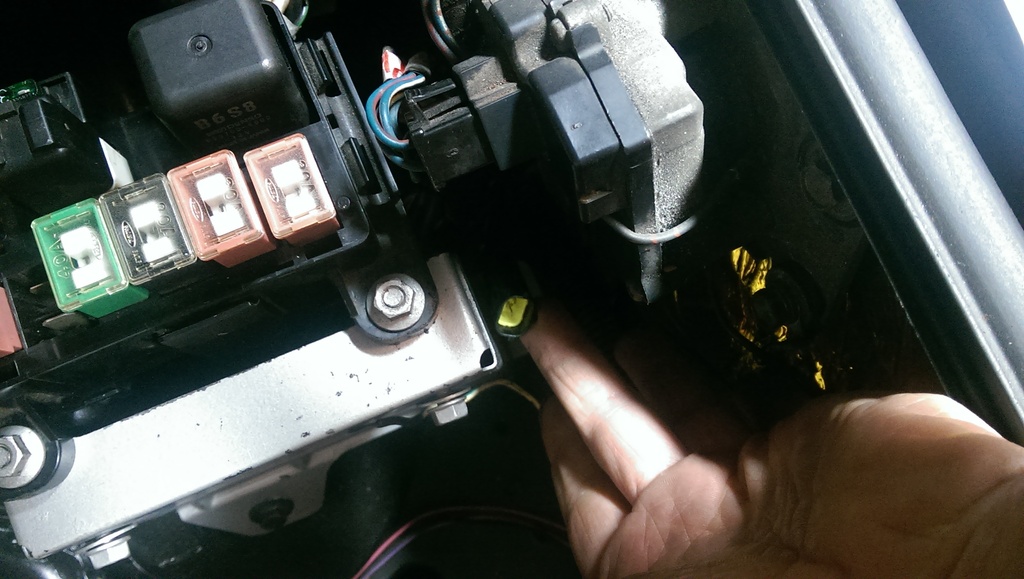
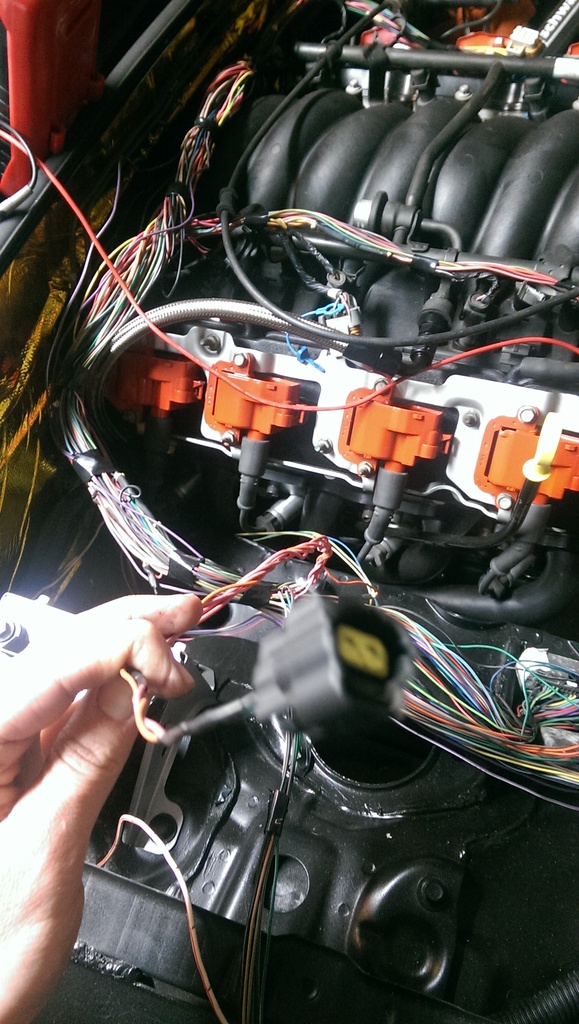
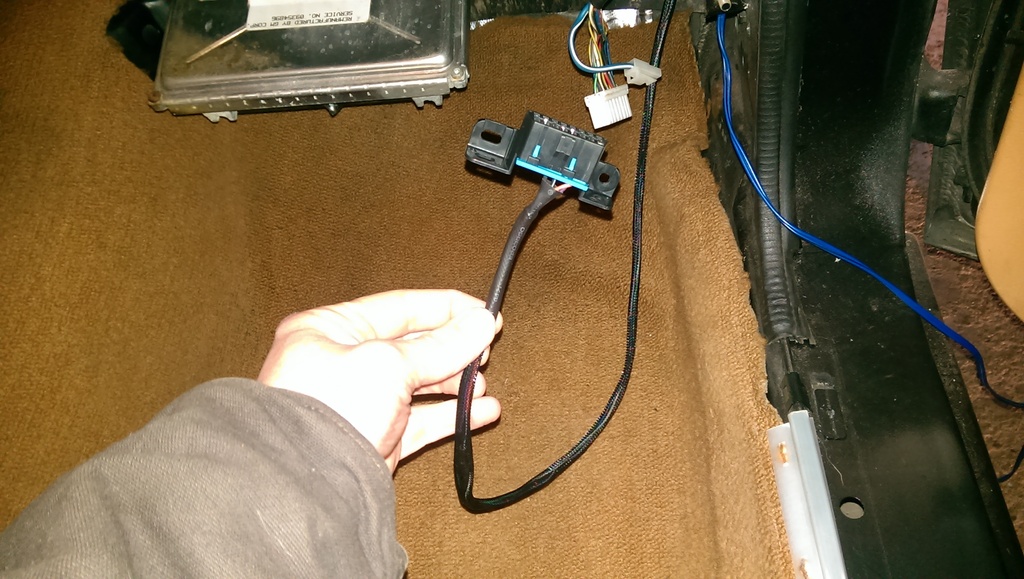
Then I made another connector at the LS ECU for the wires that run into the Miata harness at the interior ( oil pressure, tach, speedo, fuel relay trigger, fan relay trigger)
And Also cleaned up the OBD2 port that I added. I will probably just leave it in the glovebox
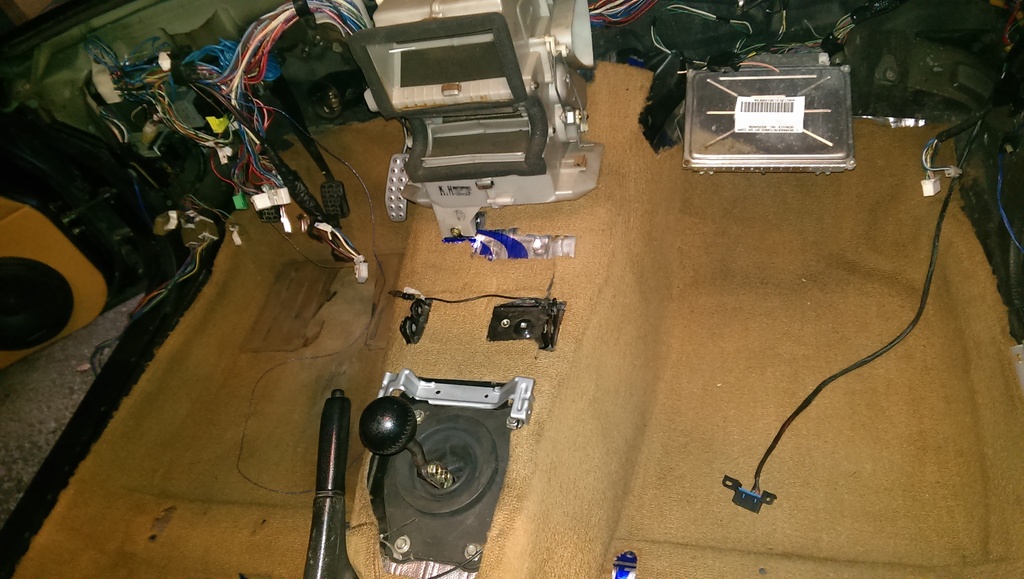
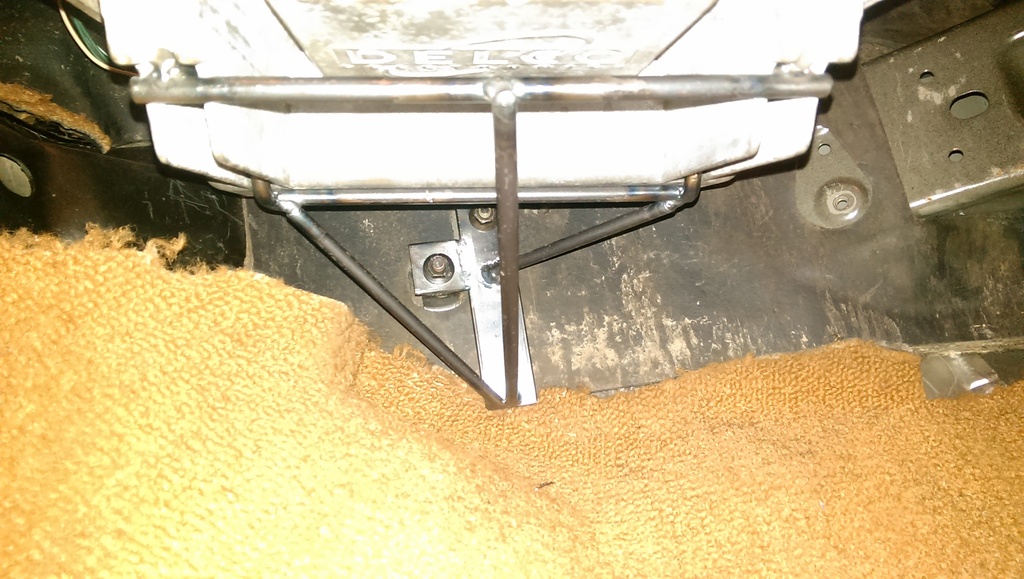
Oh and since I forgot to take pictures earlier of my ECU bracket, here it is. Not too exciting, but it holds it well.
So Carpet is in obviously, and I tightened up all the heater lines, So I Think Im good to drop the dash back in. =D
I have officially powered up the harness, no magic smoke and the ECU reads!!!


Woo hoo! So I loaded up HPTuners and disabled all the bits I wont be using
- Rear O2's
-AIR
-EGR
-VATS
-CAGS
That all seemed to go well. So I started to tidy up the wiring harness, recycling OE Mazda connectors from my harness and things I removed. The two main connectors I created were power supplies to the orange and pink wires of the LS Harness, which plug in underneath my fuse block shown here.


Then I made another connector at the LS ECU for the wires that run into the Miata harness at the interior ( oil pressure, tach, speedo, fuel relay trigger, fan relay trigger)

And Also cleaned up the OBD2 port that I added. I will probably just leave it in the glovebox


Oh and since I forgot to take pictures earlier of my ECU bracket, here it is. Not too exciting, but it holds it well.

So Carpet is in obviously, and I tightened up all the heater lines, So I Think Im good to drop the dash back in. =D


