Tear down and redo
 04-25-2013, 01:33 PM
#1
V8 Miata Enthusiast
Thread Starter

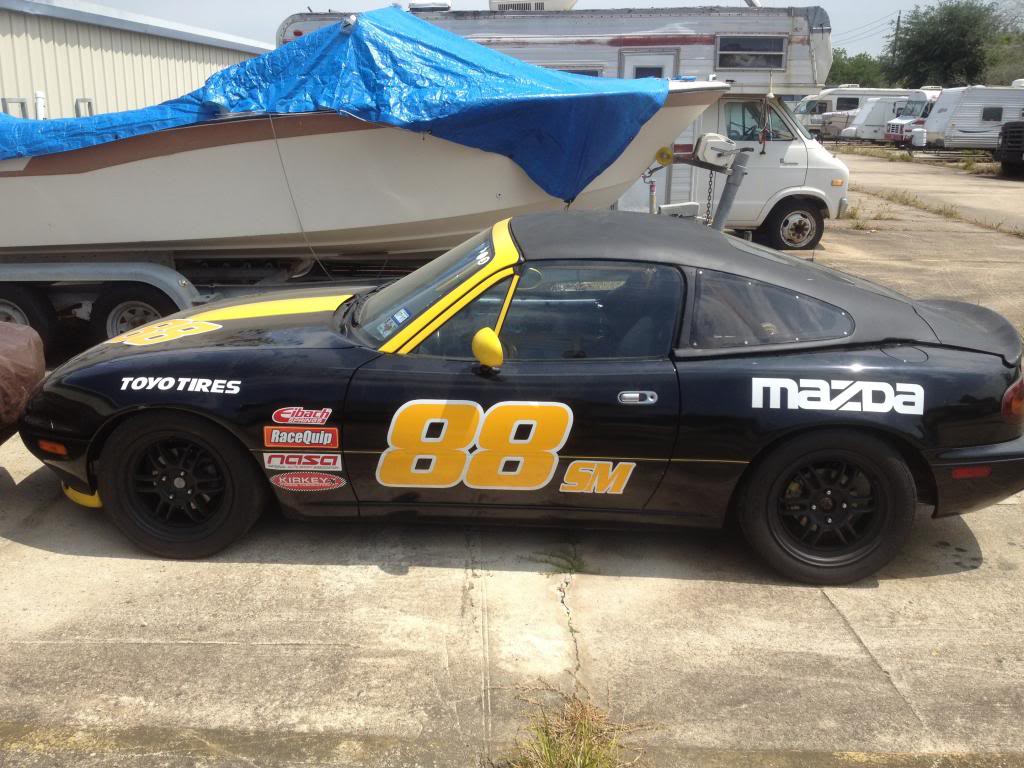
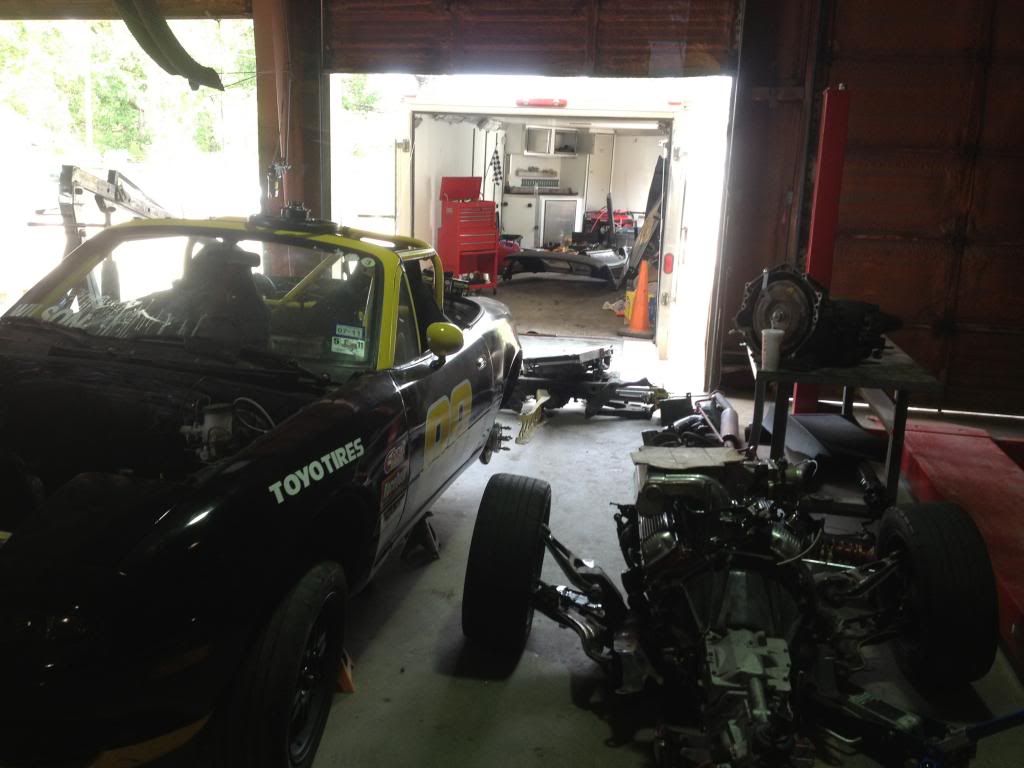
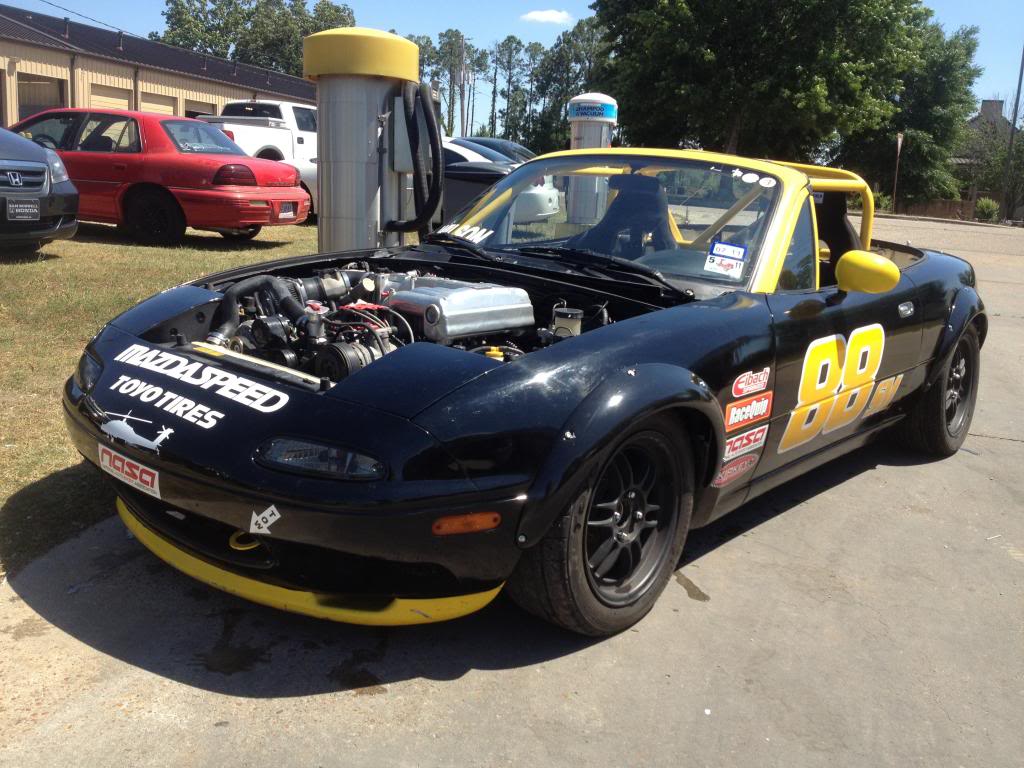
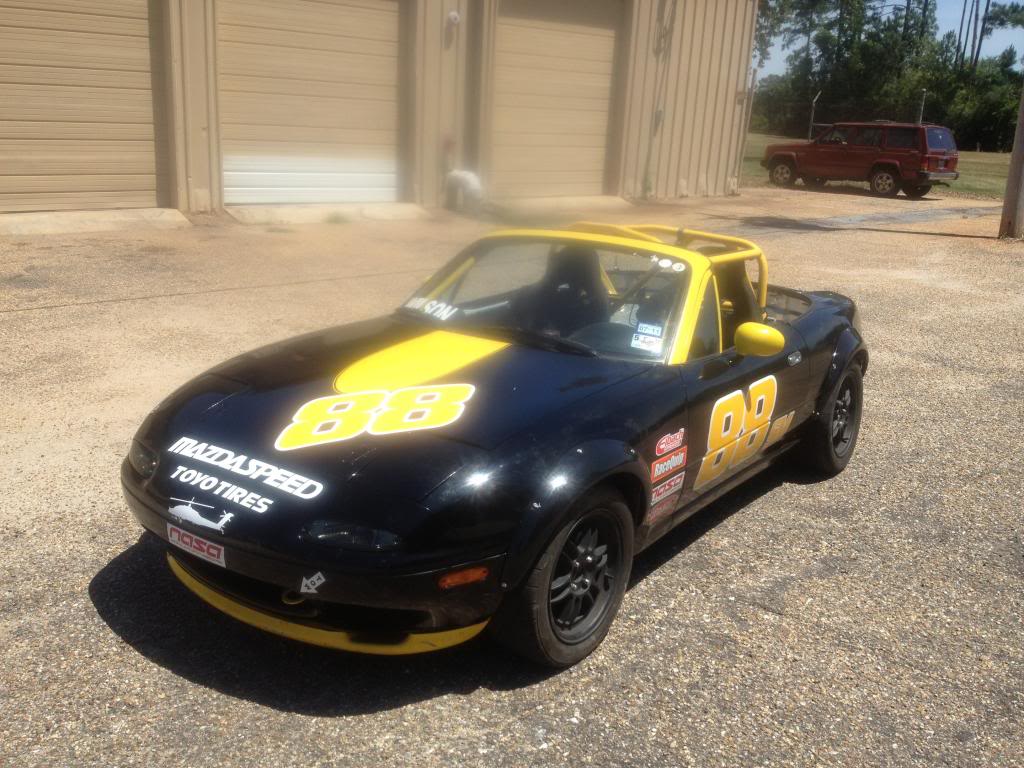
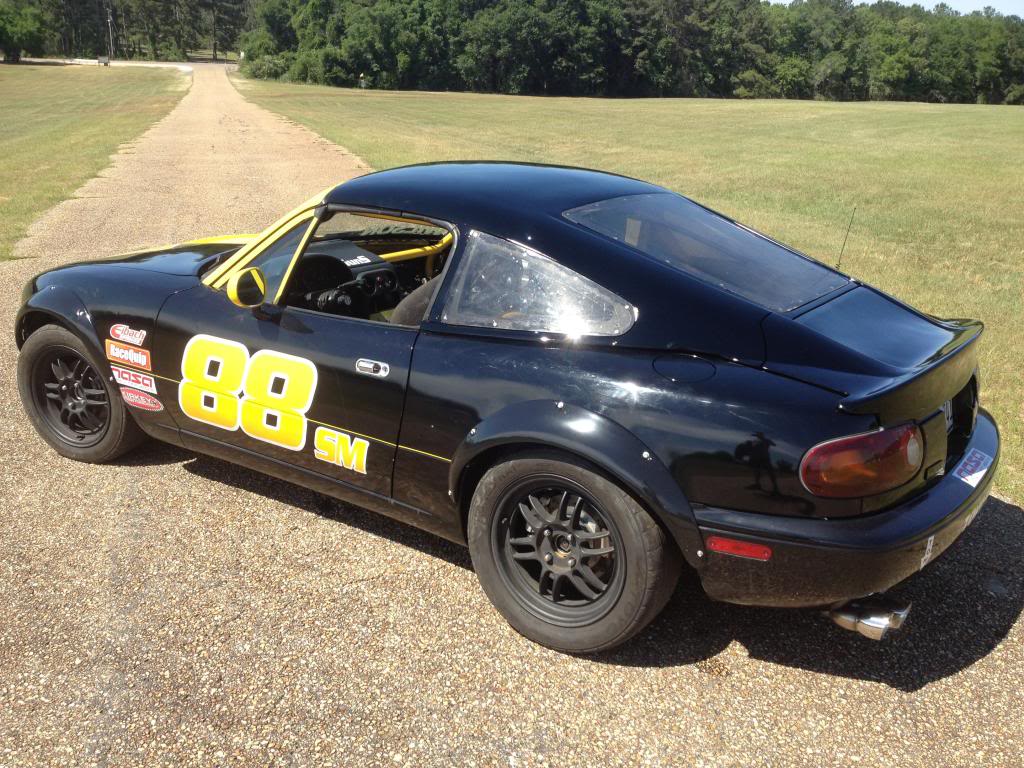
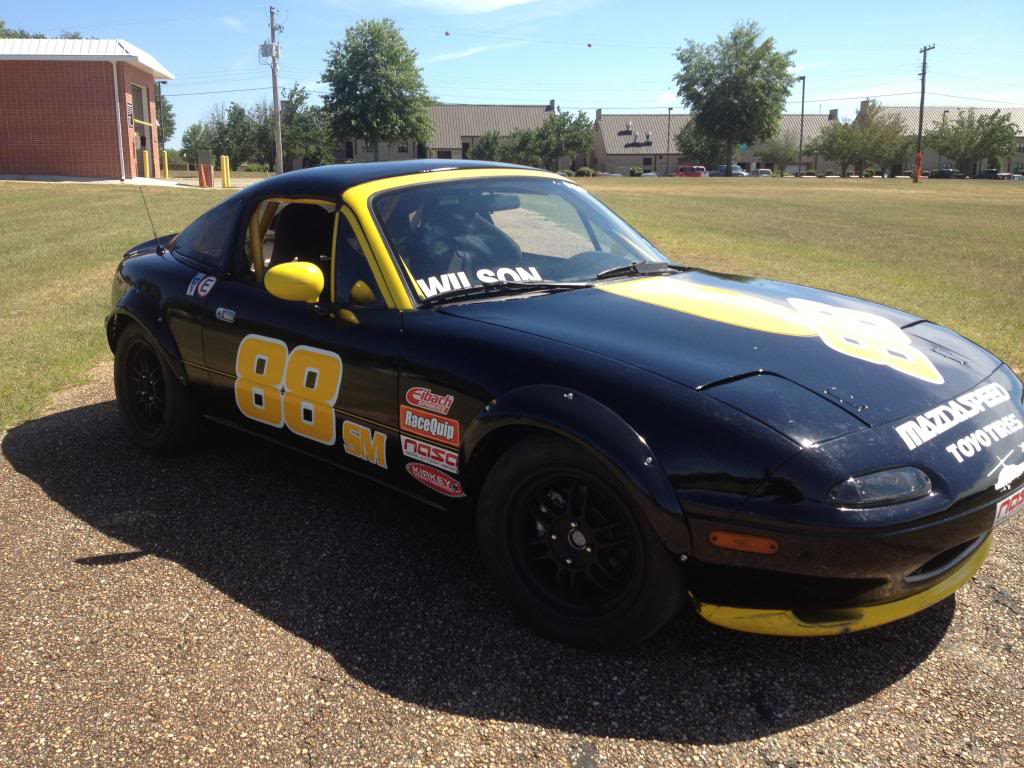
So after a year of accumulating parts and building my monster, I decided to switch gears. I took the monster for a few victory laps and decided I wanted to track the car. Sitting right next to it was my SPEC Miata that I really don't track as much as I would like anymore. Then it hits me. Transplant the monster into my SPEC car with full cage, fire suppression, and suspension. This way, when I do have time to track a car, it will be the V8.
So starts the tear down. I am headed to Alabama for some military flight training for 2 months in May. My plan is to tear the monster apart and throw all those parts and the SPEC car in my trailer and haul it down with me. In the next 6 weekends or so, I should have swap complete.
As an added bonus, I picked up a used fastback here in Houston. Its the version 1 with a useable trunk lid. Pictures and updates to follow.

 04-30-2013, 11:01 AM
#3
V8 Miata Enthusiast
Thread Starter
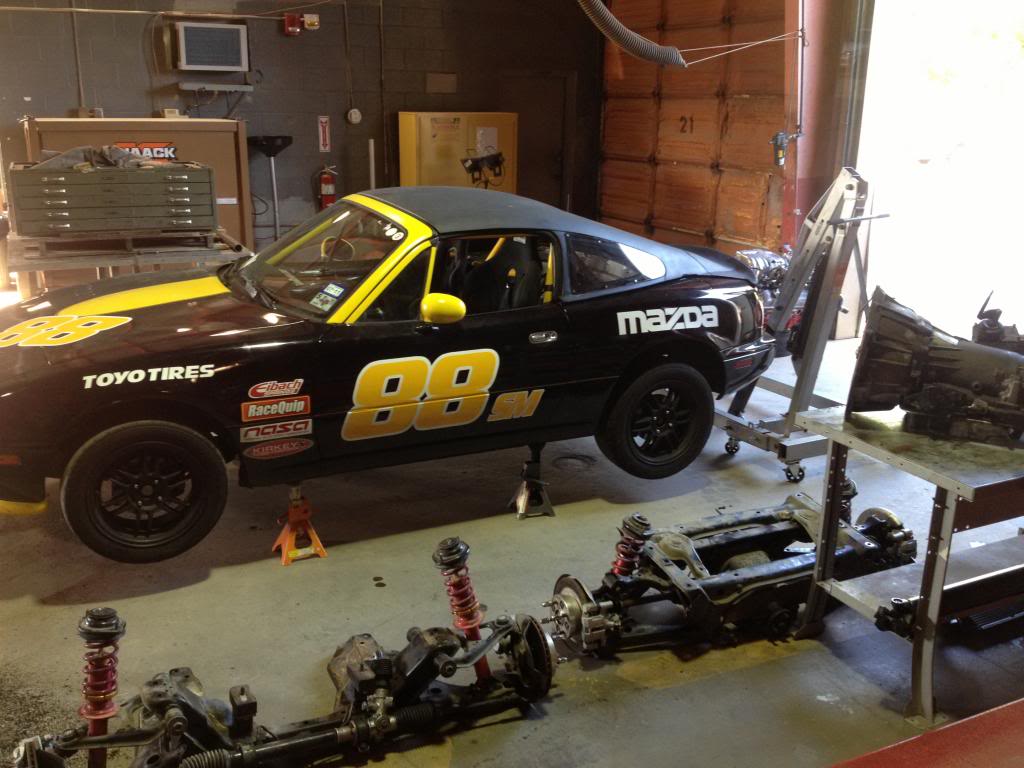
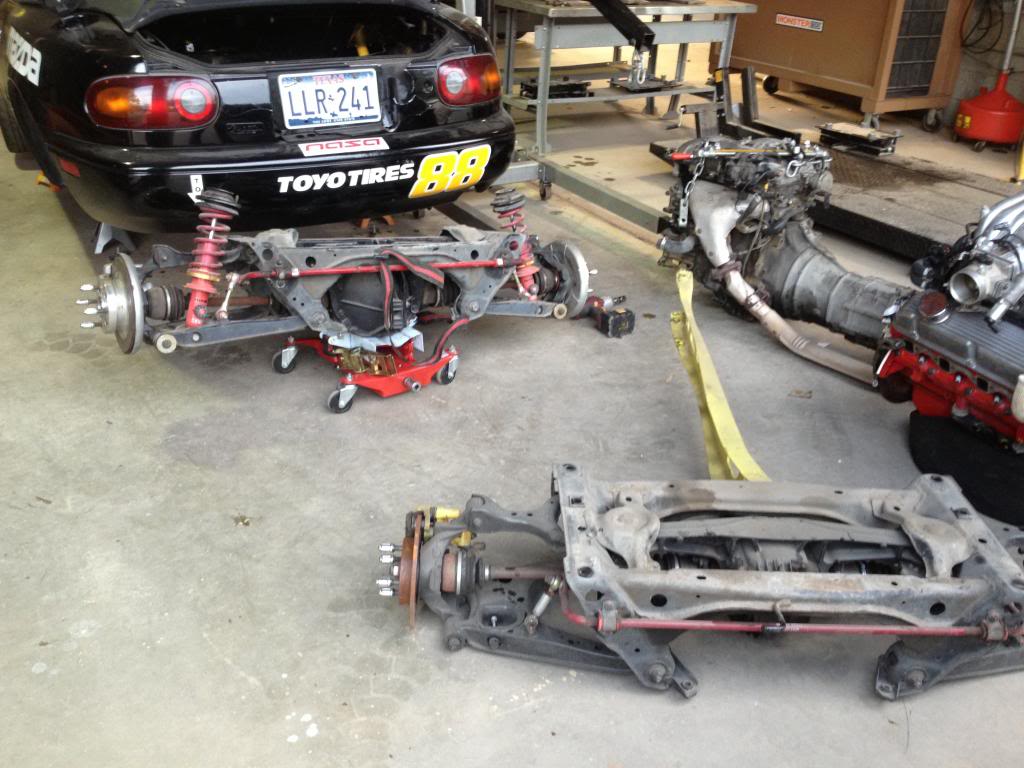
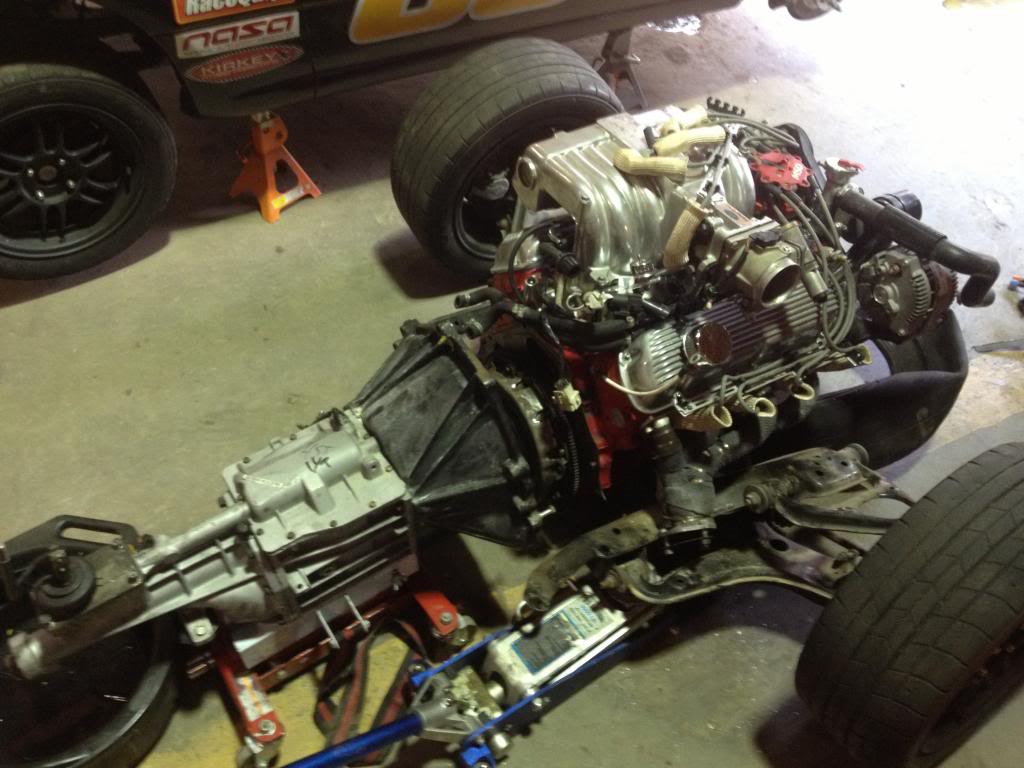
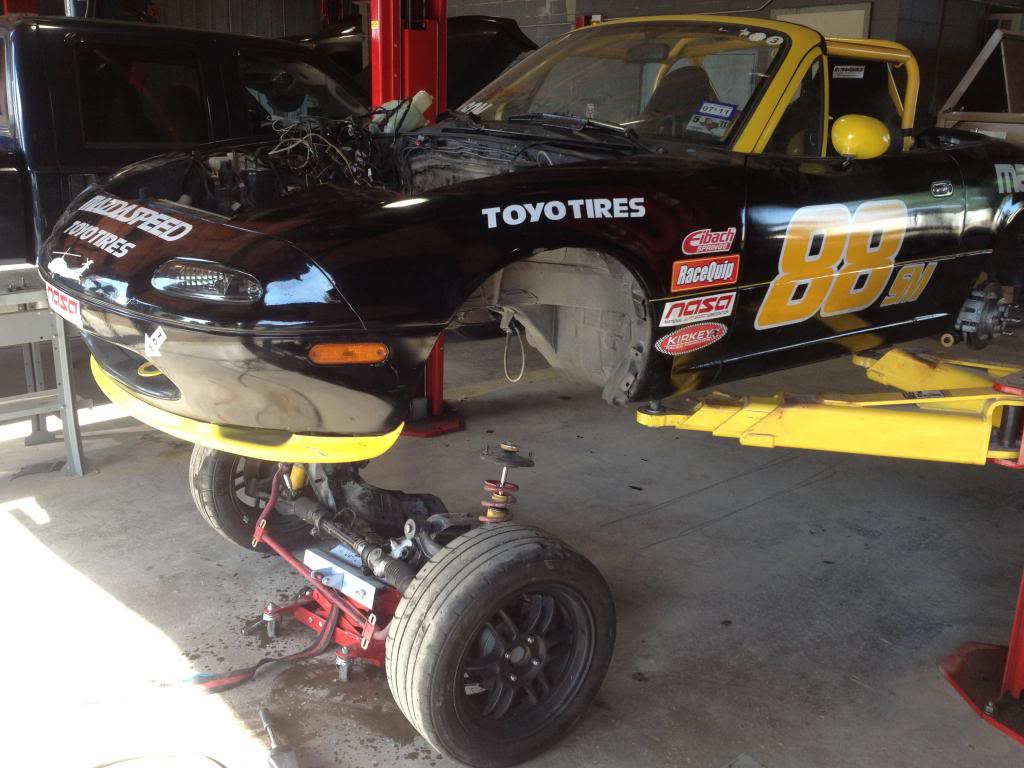
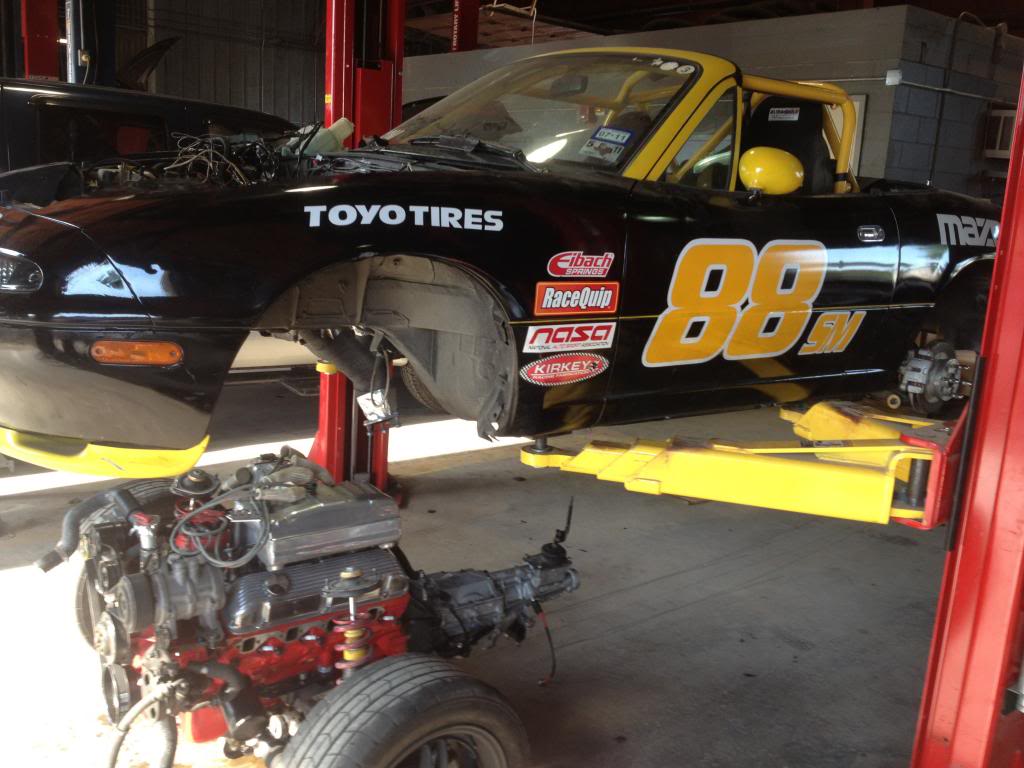
Leaving out of town next Monday, May 6th. Need to get this joker all taken apart. Had time this morning to start the tear down. It is amazing how much faster it comes apart. In 3 hours, this is where I was:
Rear End and Transmission out
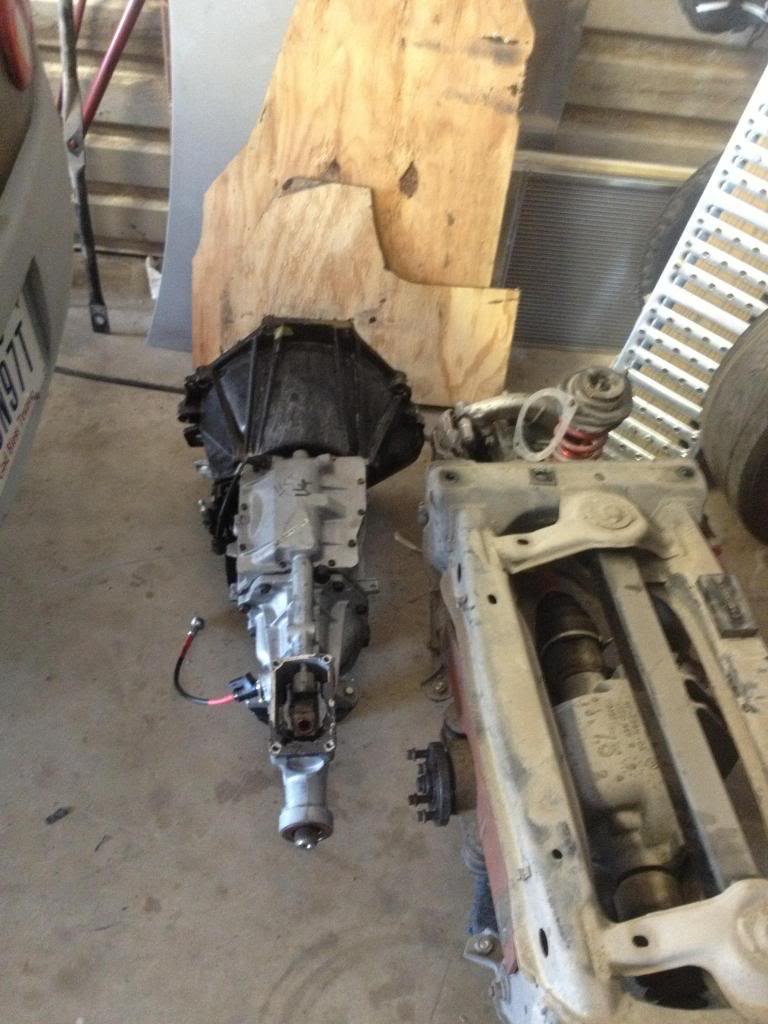
Engine out
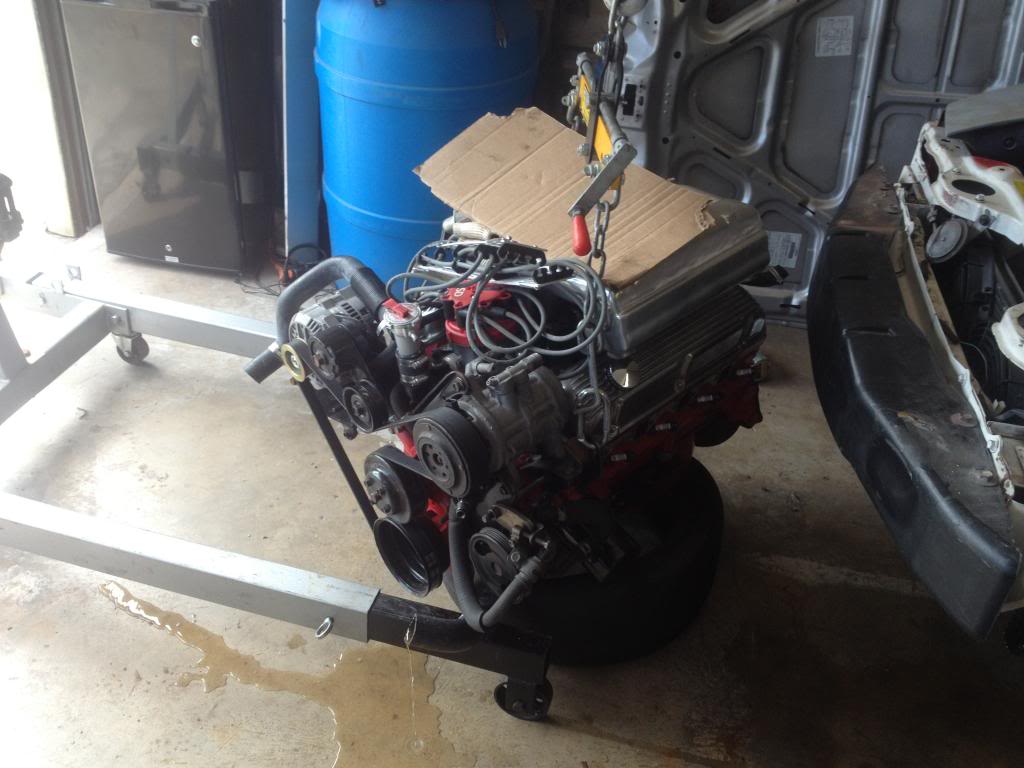
Next step will be front K Member and wiring harness. That should be it. Get it loaded into trailer with my SPEC miata and off I go........
Rear End and Transmission out
Engine out
Next step will be front K Member and wiring harness. That should be it. Get it loaded into trailer with my SPEC miata and off I go........
 05-07-2013, 07:21 PM
#6
V8 Miata Fanatic


Awesome. Nothing like somebody dedicated enough to his hobby that he'd pack it up and take it 2 or 3 states away with him! Should be a fun track toy.
05-08-2013, 07:38 AM
#7
V8 Miata Enthusiast
Thread Starter
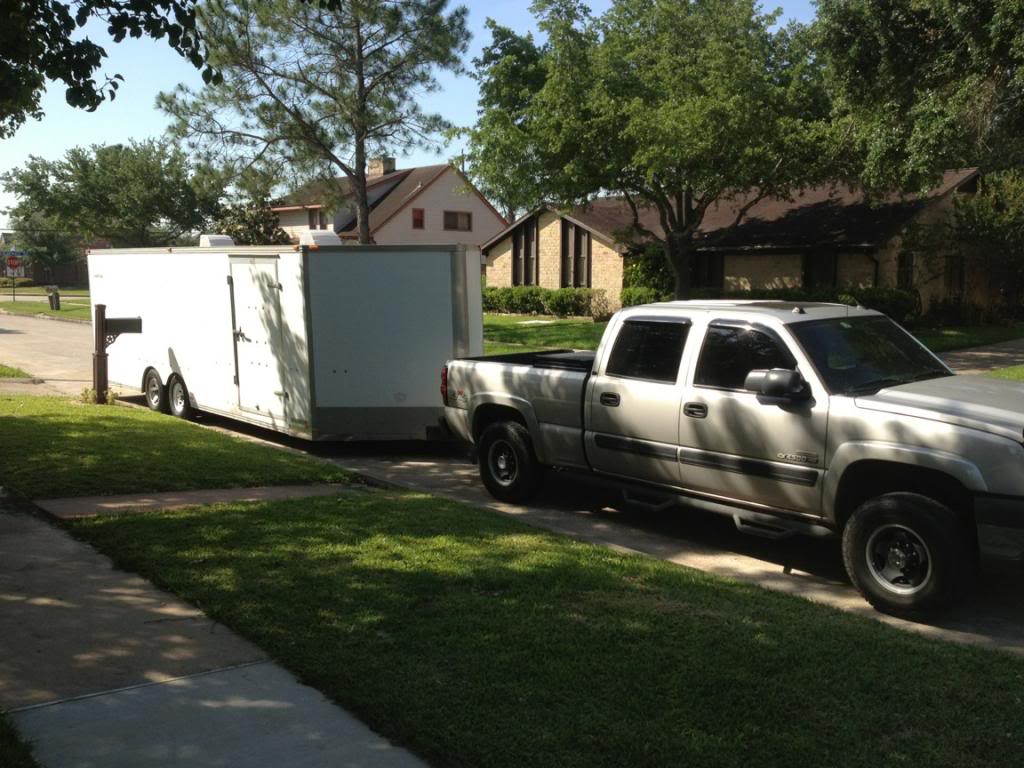
It's very frustrating! Had to load up everything I THOUGHT I would need. I know I left something out, but I did the best I could. I don't know how many times small parts floating around my shop allowed me to fabricate something for my projects. A small bolt, fastener, bracket, or hose. These are the things that can halt a project for an entire day while you figure it out. My trailer was about 10000 pounds.
I may have scored here at Fort Rucker, Al. On most military bases they have a self service shop with lifts and such. I am looking today at a bay they said I could use for the next 2 months. That will mean no working in my trailer. Ill post pics when it's unloaded.
I may have scored here at Fort Rucker, Al. On most military bases they have a self service shop with lifts and such. I am looking today at a bay they said I could use for the next 2 months. That will mean no working in my trailer. Ill post pics when it's unloaded.
Last edited by Gunpilot; 05-08-2013 at 07:43 AM.
 05-09-2013, 11:28 AM
#10
Administrator

I don't see a picture of the harness, I hope it made it into the trailer!
Rawn, this is going to rock. A customer of mine locally has a Ford track Miata we put a 331 into. My car with full interior, AC and everything is fun on the track, his with a gutted chassis is insane.
Good luck with it,
-Jason
Rawn, this is going to rock. A customer of mine locally has a Ford track Miata we put a 331 into. My car with full interior, AC and everything is fun on the track, his with a gutted chassis is insane.
Good luck with it,
-Jason
05-10-2013, 07:56 PM
#11
V8 Miata Enthusiast
Thread Starter
Jason- harness was last thing to come out. I wanted to make sure it came out clean.
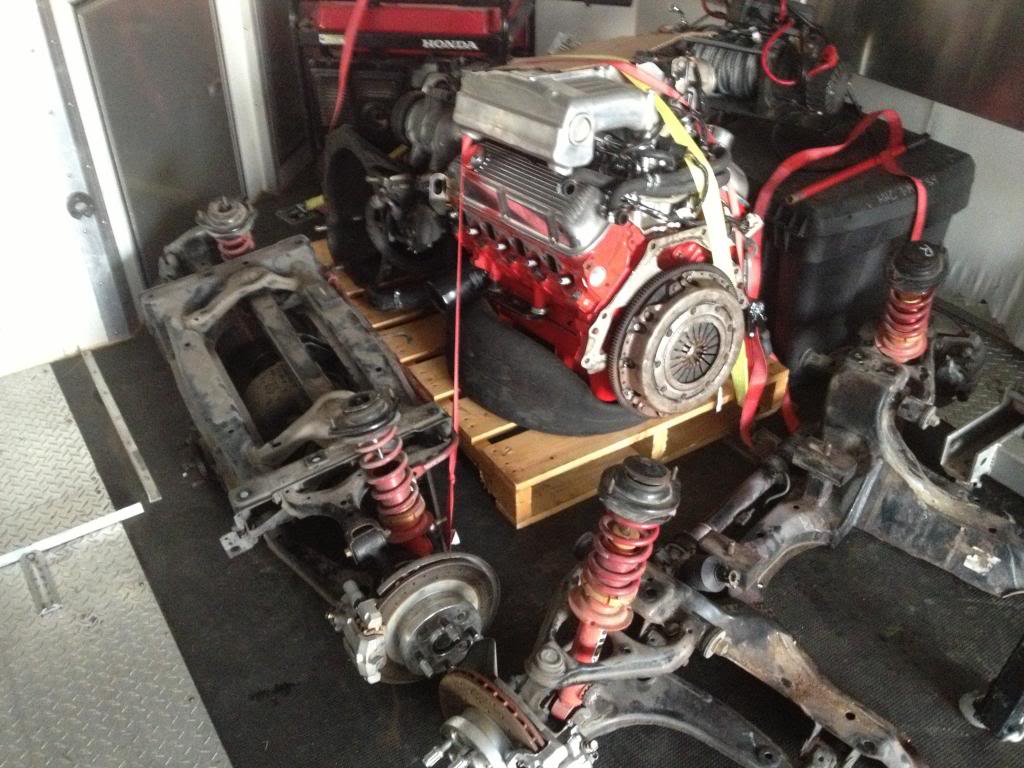
Had my first real time after training to get started. In 3 hours I removed engine, tranny, and rear end.
Bye bye 4 banger
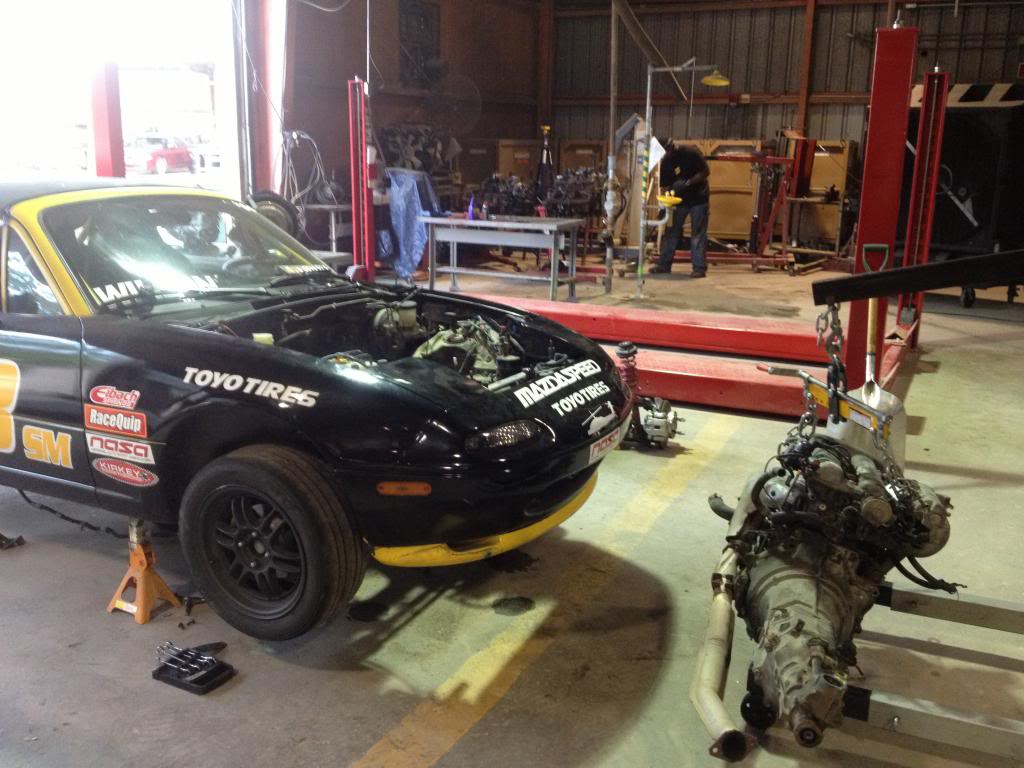
Bye bye Torsen
Removing all the items in big chunks and having done this recently helps out a lot. I will be doing this all weekend with the goal of having full drive train in by Sunday.
I still have to make engine bay mods and I think I may add AC back in the mix. Gonna take all day Sat to complete the clean up and install motor on Sunday. I'm gonna try using a lift and install body over the motor and tranny. It looks easier and fun.
Had my first real time after training to get started. In 3 hours I removed engine, tranny, and rear end.
Bye bye 4 banger
Bye bye Torsen
Removing all the items in big chunks and having done this recently helps out a lot. I will be doing this all weekend with the goal of having full drive train in by Sunday.
I still have to make engine bay mods and I think I may add AC back in the mix. Gonna take all day Sat to complete the clean up and install motor on Sunday. I'm gonna try using a lift and install body over the motor and tranny. It looks easier and fun.
Last edited by Gunpilot; 05-10-2013 at 08:00 PM.
05-11-2013, 05:46 PM
#12
V8 Miata Enthusiast
Thread Starter
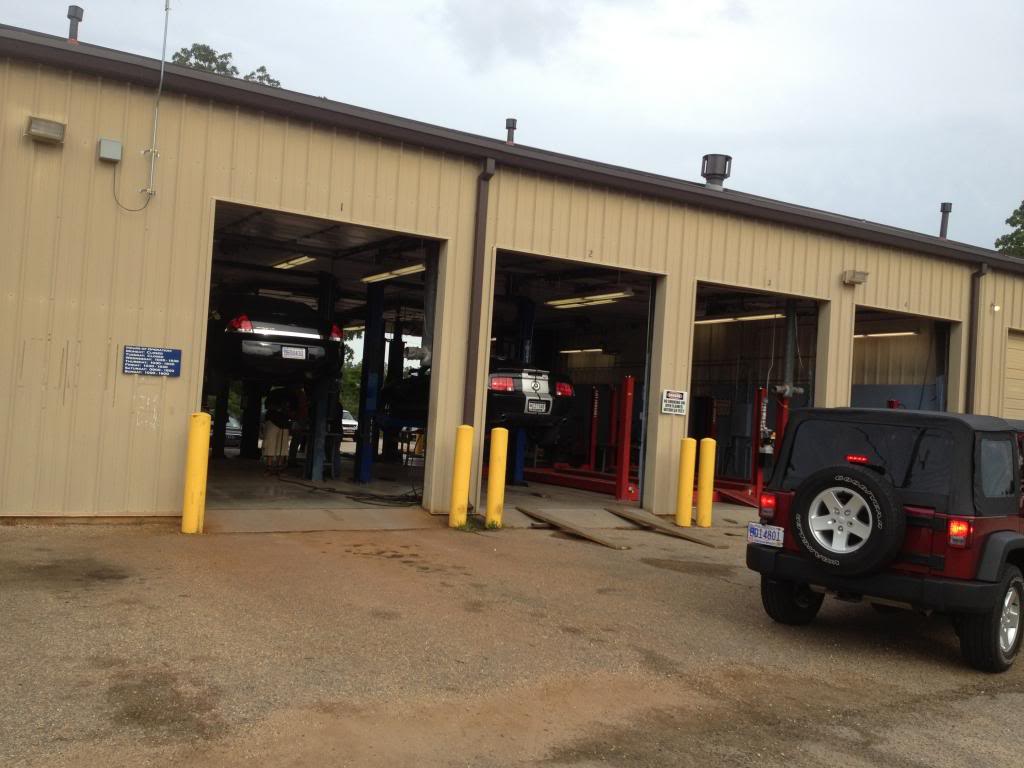
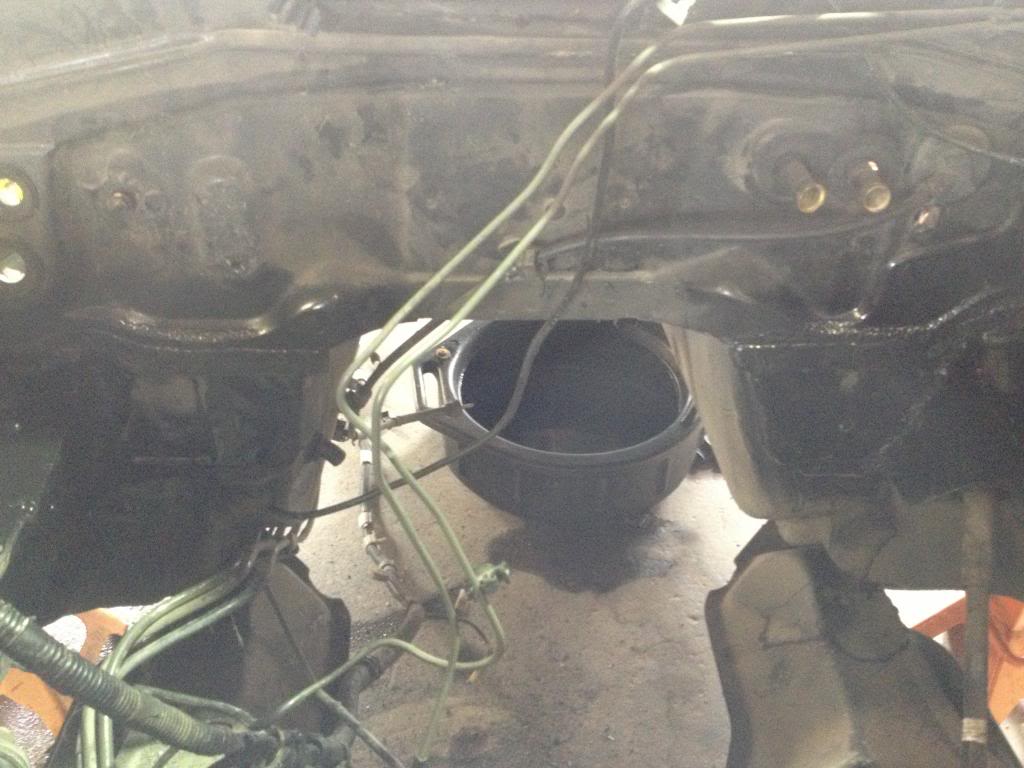
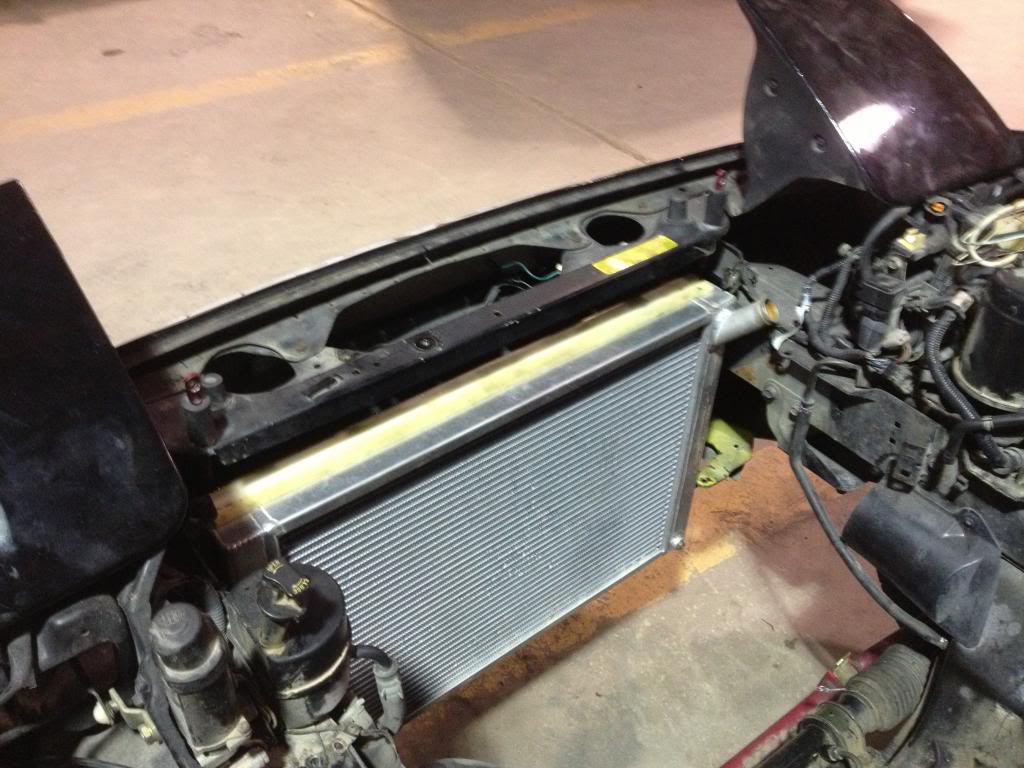
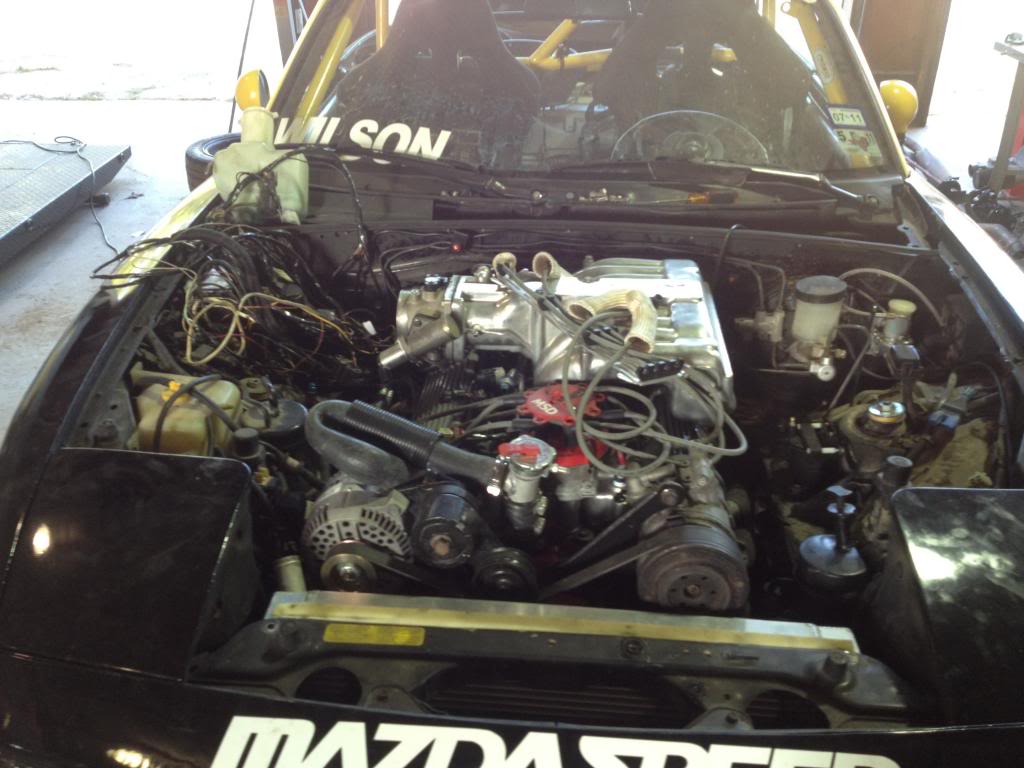
Put in a good 6 hours today. Got the dash pulled off, wire harness installed, fuel and brake lines re routed, and condenser and radiator wedged in the nose. Also got the body modifications done in the engine bay.
This is the shop we get to use
Bay modifications
This is the shop we get to use
Bay modifications
Last edited by Gunpilot; 05-11-2013 at 05:53 PM.
05-12-2013, 01:14 PM
#13
V8 Miata Enthusiast
Thread Starter
Figured while engine was out I would inspect intake to see which oil baffle was on there. Sure enough, it was the smaller one. The large one is no longer available, so I used a template I found online and cut it out of aluminum.
A chisel and some pop rivets...
Bada-Bing

A chisel and some pop rivets...
Bada-Bing
05-12-2013, 06:28 PM
#14
V8 Miata Enthusiast
Thread Starter
Backed my trailer up to the shop to get more working space.
Engine and tranny ready to be bolted up and rolled under the car.
Unfortunately the shop on post is closed until Wed. Gonna have to wait anxiously till then.
Engine and tranny ready to be bolted up and rolled under the car.
Unfortunately the shop on post is closed until Wed. Gonna have to wait anxiously till then.
Last edited by Gunpilot; 05-12-2013 at 06:31 PM.
05-15-2013, 08:11 PM
#15
V8 Miata Enthusiast
Thread Starter
Shop is open today and I got the engine in. In the hurry to leave( I was working till last second before closing) I forgot to take a final pic.
Old front member out:
New one going in:
Old front member out:
New one going in:
05-16-2013, 08:00 PM
#16
V8 Miata Enthusiast
Thread Starter
Engine installed. Having issues with transmission alignment. Driveshaft was contacting the ebrake channel under the car. I cut some out to make clearance, but it is still too close for me. I made a post under general talk to see if anyone has suggestions.
05-18-2013, 05:24 PM
#17
V8 Miata Enthusiast
Thread Starter
TIME!
Got her running today.
Here is a shot of the pipes out the back:

And running:
http://s447.photobucket.com/user/gun...eff5f.mp4.html
Got her running today.
Here is a shot of the pipes out the back:
And running:
http://s447.photobucket.com/user/gun...eff5f.mp4.html
Last edited by Gunpilot; 05-18-2013 at 05:28 PM.
05-23-2013, 05:25 PM
#18
V8 Miata Enthusiast
Thread Starter
Maiden voyage. I left my hood in Texas, so I will have to paint that and put it on when I return. The AK flares look great! Now I need to find some good wide rims to put some meat on. Car sits VERY low right now. Im gonna adjust the spring pearch. The exhaust was dragging on every small change in driving surface.
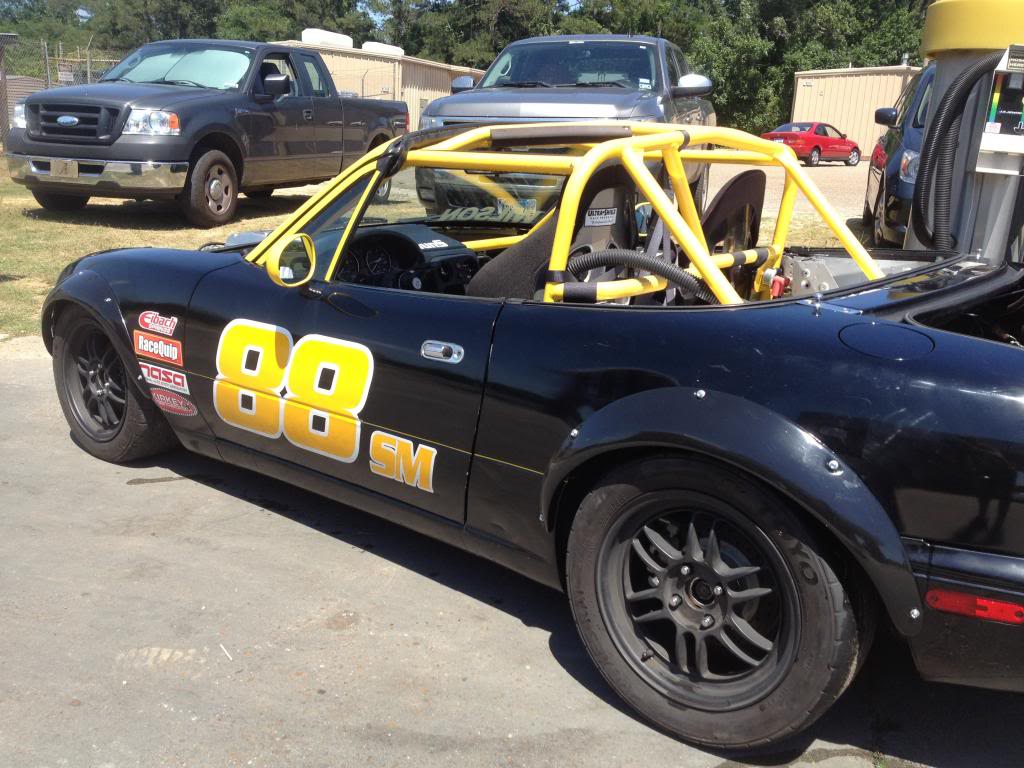
I really like the look of the roll cage, so I decided to do a half dash. Eventually I will clean it up and make a cockpit style side to surround me (like the new Corvette Stingray).
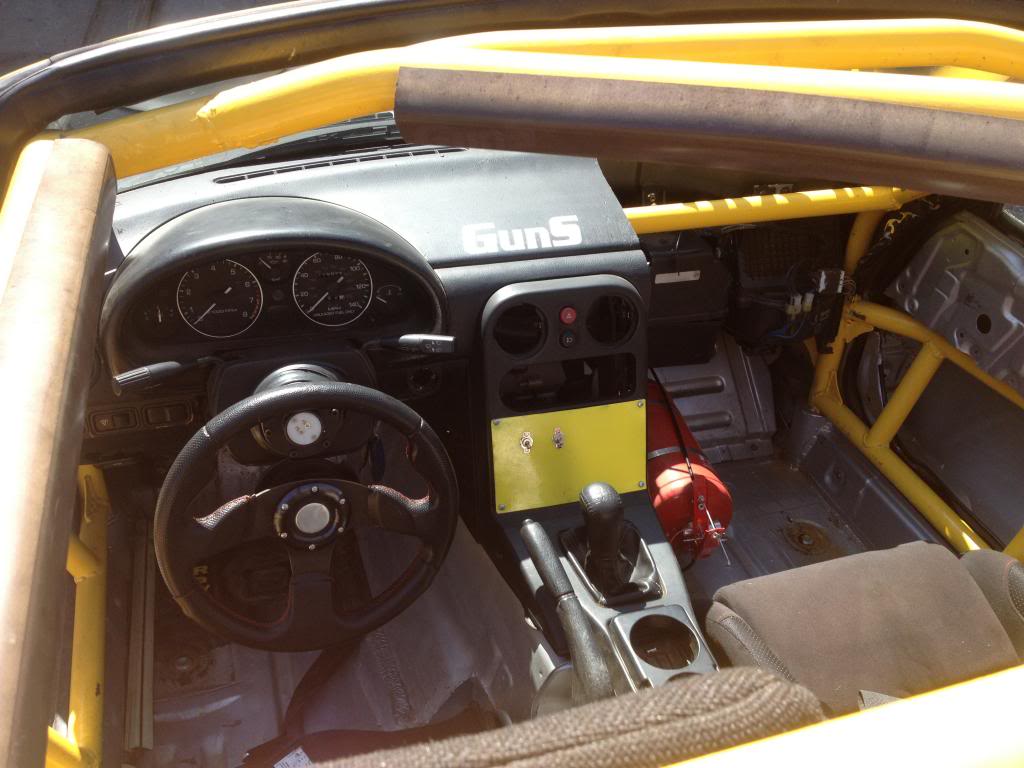
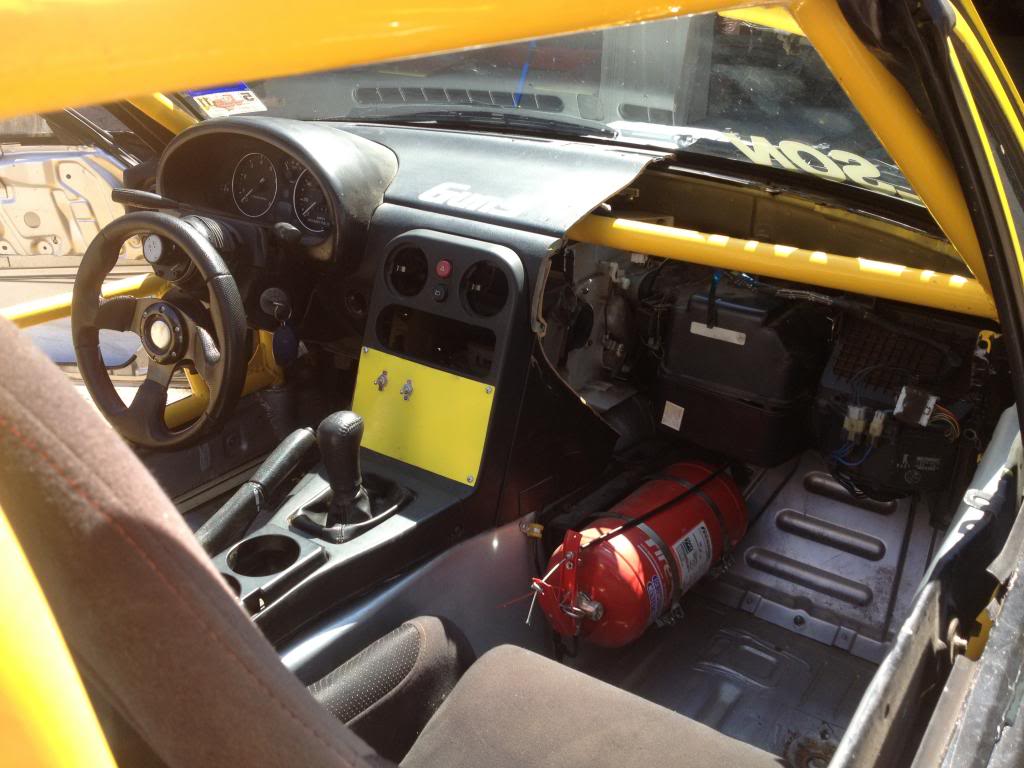
I really like the look of the roll cage, so I decided to do a half dash. Eventually I will clean it up and make a cockpit style side to surround me (like the new Corvette Stingray).
05-24-2013, 02:31 PM
#20
V8 Miata Enthusiast
Thread Starter
Really crazy. It's strange how their are 2 pieces of metal on the rear.
I followed this guide
http://site.autokonexion.com/site/66...LATIO.php#2918
I followed this guide
http://site.autokonexion.com/site/66...LATIO.php#2918
 05-26-2013, 07:54 AM
#23
V8 Miata Fanatic
Fastback hardtop is so unique - Your car will be a scary sight for a lot of folks when it creeps into their rearview mirror! And after it passes, they probably won't know what it was with the swoopy looks and loud V8 racket!
06-16-2013, 07:08 AM
#24
V8 Miata Enthusiast
Thread Starter
Well............
Had the car alignment and corner balancing done, tuned it on a dyno, and started to drive it around.
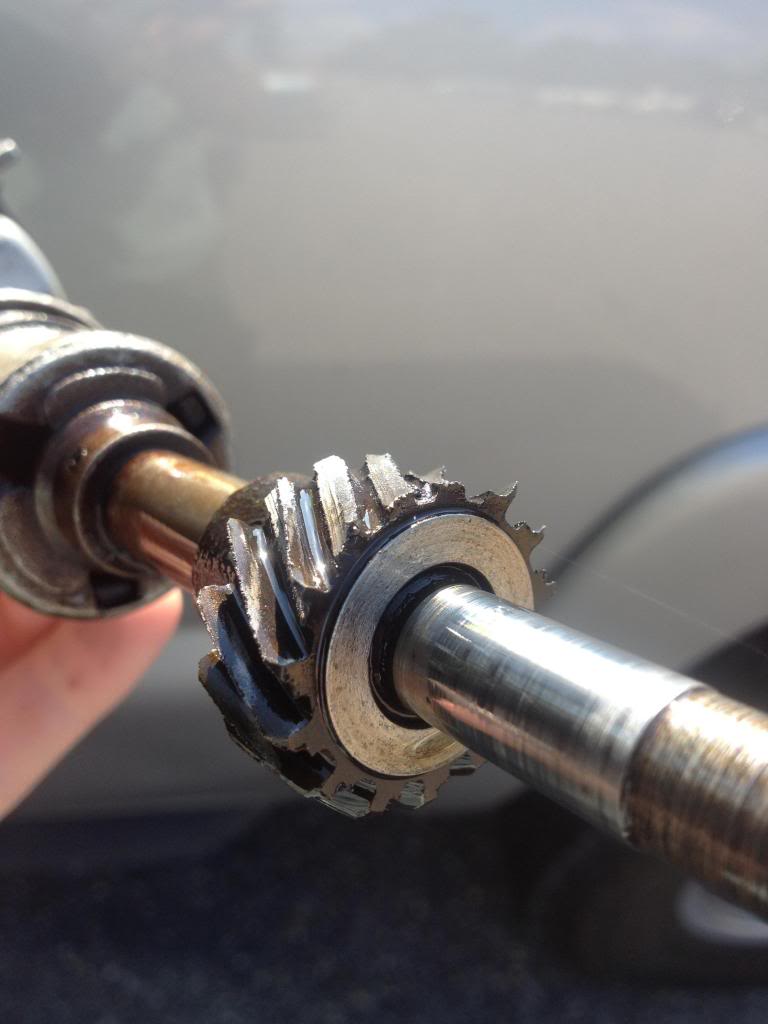
I got maybe 10 miles down the road and it just quit on me. Crank, but no start. After some head scratching and troubleshooting I found the bad news.
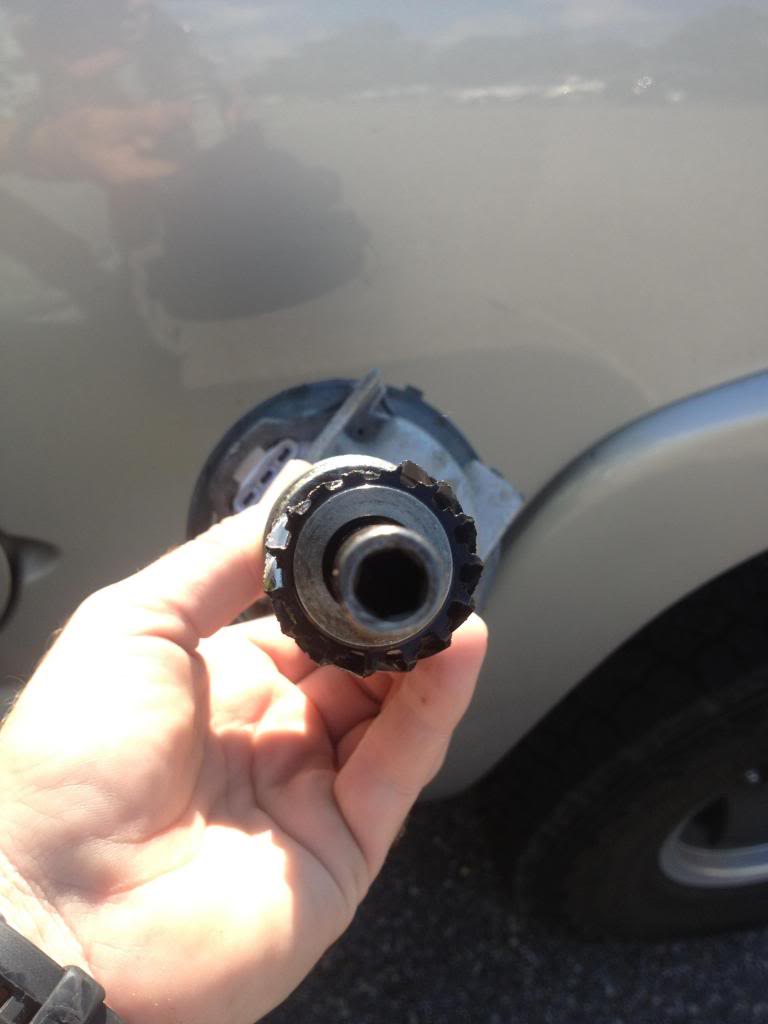
I was using the wrong gear on my distributor. With my E303 cam I should have used a steel gear, but I has a stock Mustang cast iron geat on it. The cam tore it apart. There is not much left on it. Now the issue is all that metal is in the motor! I have not had the time (or courage) to look down the distributor hole at the cam gear yet. Im hoping it is okay.
Assuming all is good with the cam, here is my plan today:
- Flush motor with 10 quarts of oil. Pour it down both valve covers and in distributor hole.
- Slightly lift car in the air and support engine with hoist.
- Drop front K member to get at oil pan.
- Drop oil pan to clean and replace oil pimp
- Reassemble and install new distributor with steel gear
- Add magnets to oil pan
- Run car and hope for the best
- Change oil and filter very frequently first couple times.
SOB!
Had the car alignment and corner balancing done, tuned it on a dyno, and started to drive it around.
I got maybe 10 miles down the road and it just quit on me. Crank, but no start. After some head scratching and troubleshooting I found the bad news.
I was using the wrong gear on my distributor. With my E303 cam I should have used a steel gear, but I has a stock Mustang cast iron geat on it. The cam tore it apart. There is not much left on it. Now the issue is all that metal is in the motor! I have not had the time (or courage) to look down the distributor hole at the cam gear yet. Im hoping it is okay.
Assuming all is good with the cam, here is my plan today:
- Flush motor with 10 quarts of oil. Pour it down both valve covers and in distributor hole.
- Slightly lift car in the air and support engine with hoist.
- Drop front K member to get at oil pan.
- Drop oil pan to clean and replace oil pimp
- Reassemble and install new distributor with steel gear
- Add magnets to oil pan
- Run car and hope for the best
- Change oil and filter very frequently first couple times.
SOB!
Last edited by Gunpilot; 06-16-2013 at 07:16 AM.
06-16-2013, 08:51 AM
#25
BUMMER! I like your plan, hopefully the filter caught a lot of the junk on first pass. One thing I'd do is full the motor with diesel (actually a light oil). Let is set for a bit, about two beers, pull plug and drain. I might do that a couple times, if you have access to some free Jet A, that's what I'd use.
After that little excersise I'd do a normal fill with the cheapest engine oil around with good new filter and crank the engine over several times in an effort to flush the load bearing surfaces of the cranks/rods. Drain oil, fill with the good stuff and drive.
Changing oil pump is not a bad move either.
Good luck!


