New project: 1996 Miata with Ford 5.0
 01-08-2015, 08:36 AM
#76
V8 Miata Fanatic

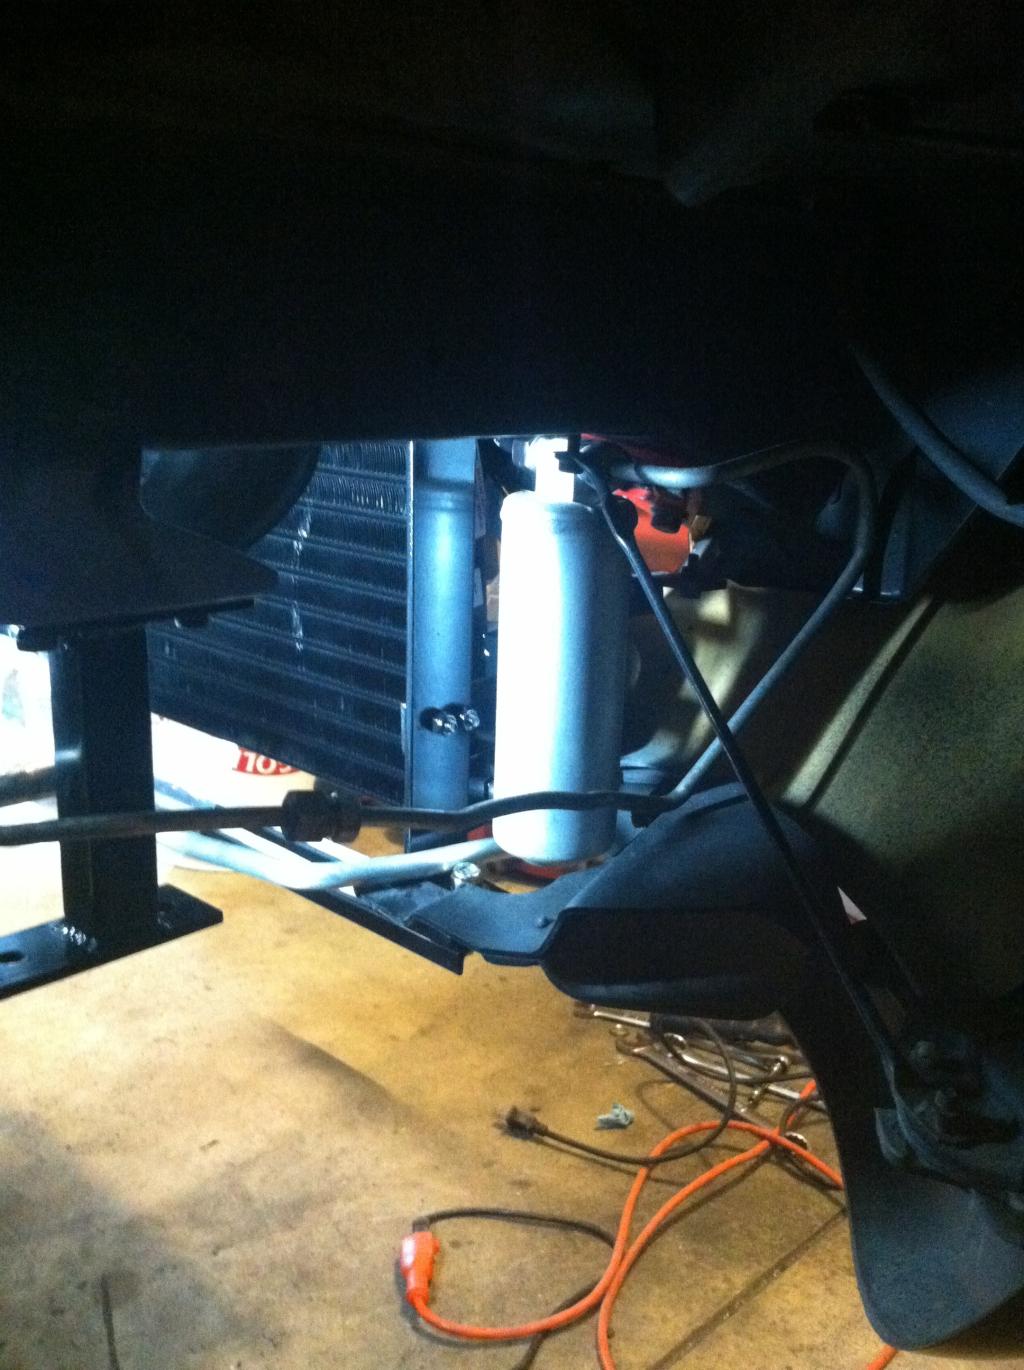
I'm test fitting rad and fans at this point. Did you trim the rearward lip off the plastic air guide? It didn't say anything in the manual about this but it seems like it must be neccessary for the rad to tuck in a little more at the bottom.
I used a cutoff wheel to trim it and the upper rad support lip.
I used a cutoff wheel to trim it and the upper rad support lip.

 01-09-2015, 07:30 PM
#78
V8 Miata Fanatic
Just a quick note about the fans if you and Mike are using Martin's. I noticed the curved blade direction was set up as a pusher on mine, so I went to reverse them....well, they're not reversible. I'm not sure if they'll be efficient enough as the curve of the blade is incorrect to use as a puller. Bummer. I may have to talk to Martin about this as he was aware that I planned to use pullers.
Brad
01-09-2015, 08:43 PM
#79
Administrator

Jason,
Just a quick note about the fans if you and Mike are using Martin's. I noticed the curved blade direction was set up as a pusher on mine, so I went to reverse them....well, they're not reversible. I'm not sure if they'll be efficient enough as the curve of the blade is incorrect to use as a puller. Bummer. I may have to talk to Martin about this as he was aware that I planned to use pullers.
Brad
When I went to flip them around I found the motors were shot which prompted me to get a whole new set from Martin. My old ones are still lying in my basement. Do you want them? I believe the motors can be replaced or you could just use the blades and scrap the rest.
-Jason
01-09-2015, 08:49 PM
#80
V8 Miata Fanatic
Actually I may be wrong (again). From what I can gather these may actually be pullers. The S blade orientation is counter intuitive.
They are definitely not reversible though. Thanks for the offer.
They are definitely not reversible though. Thanks for the offer.
01-10-2015, 06:42 AM
#81
V8 Miata Fanatic
Thread Starter

Based on the conversation I had with him before I ordered the fans, the new ones are pullers (smaller than the old tripacs, and more powerful). I see that there is a nut for removing the blade, but have not tried taking it off. I did run a jumper wire to one on my car to see how well it worked, and it moved a lot of air. I was comparing it to my Extreme Black Magic fan on my Mustang.
Jason
Jason
01-11-2015, 04:26 PM
#82
V8 Miata Fanatic
Thread Starter
Not too much to update.
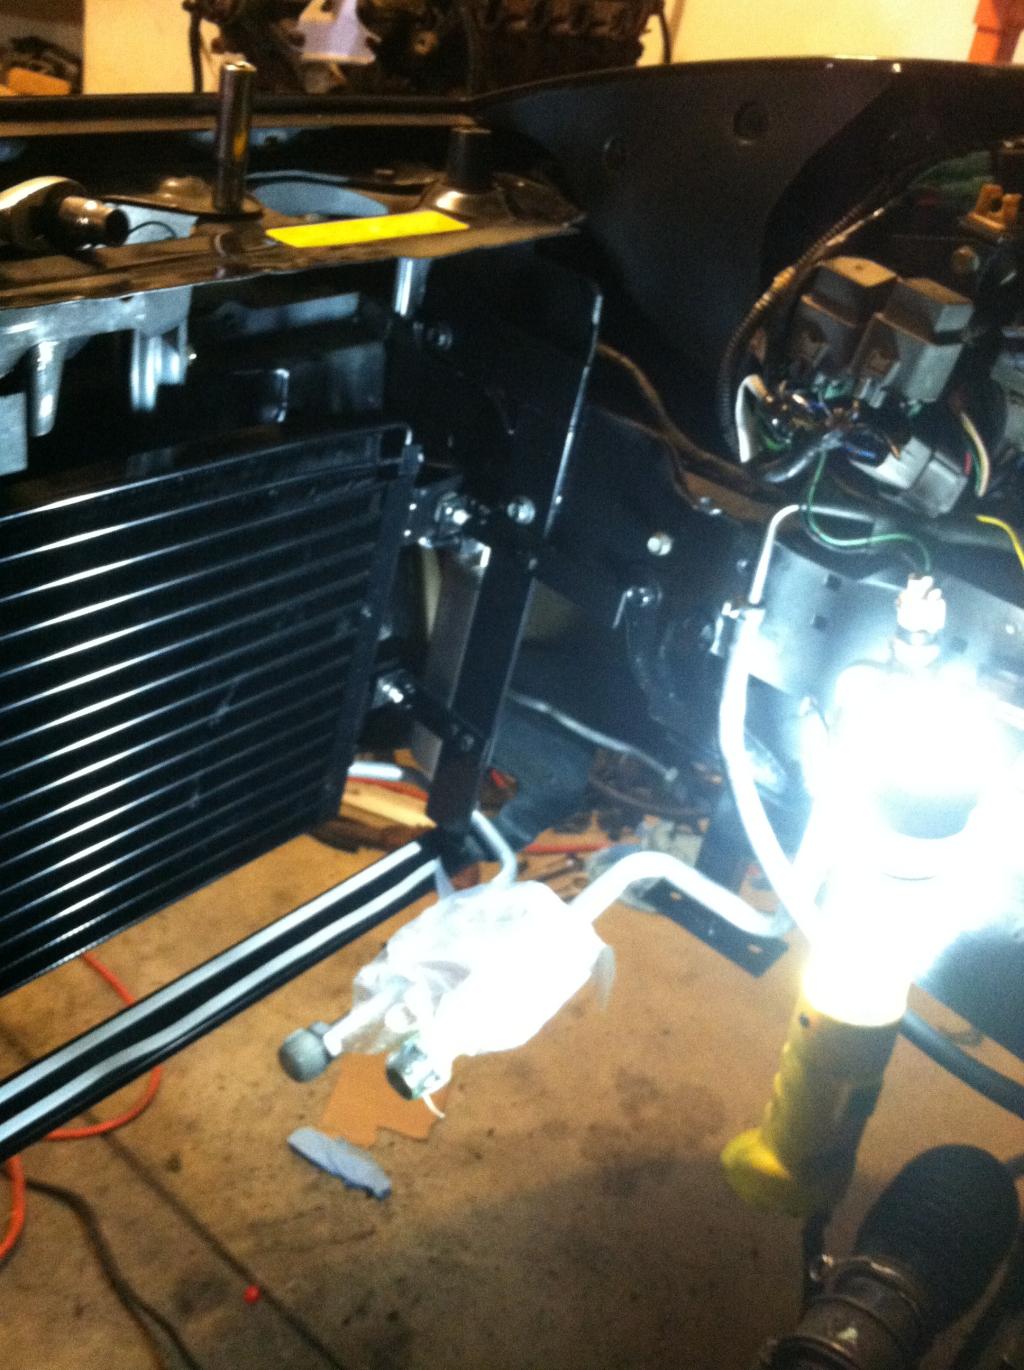
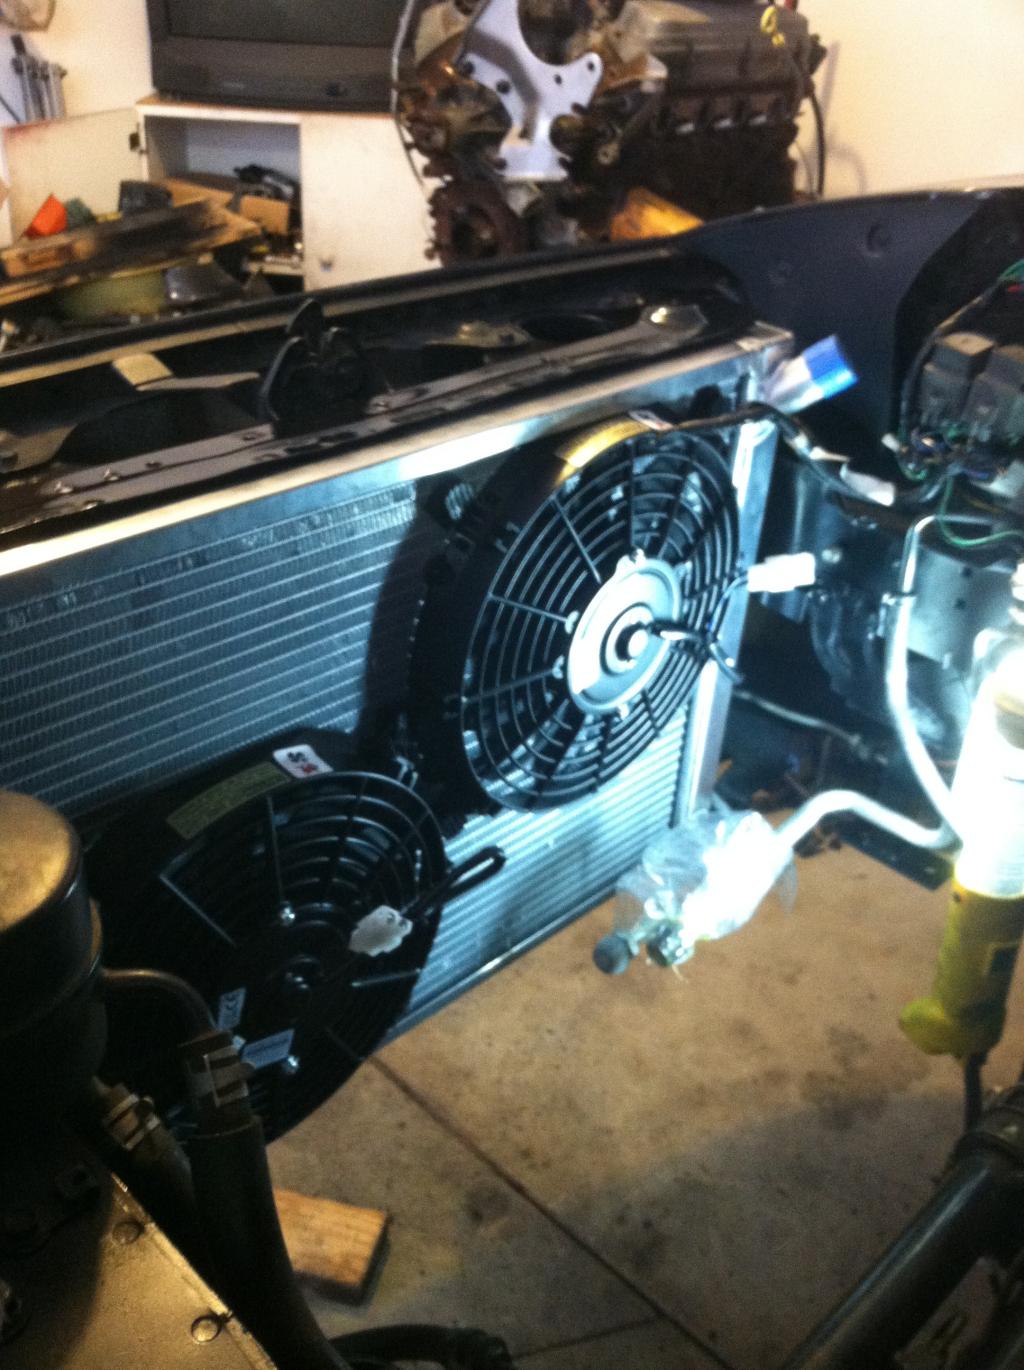
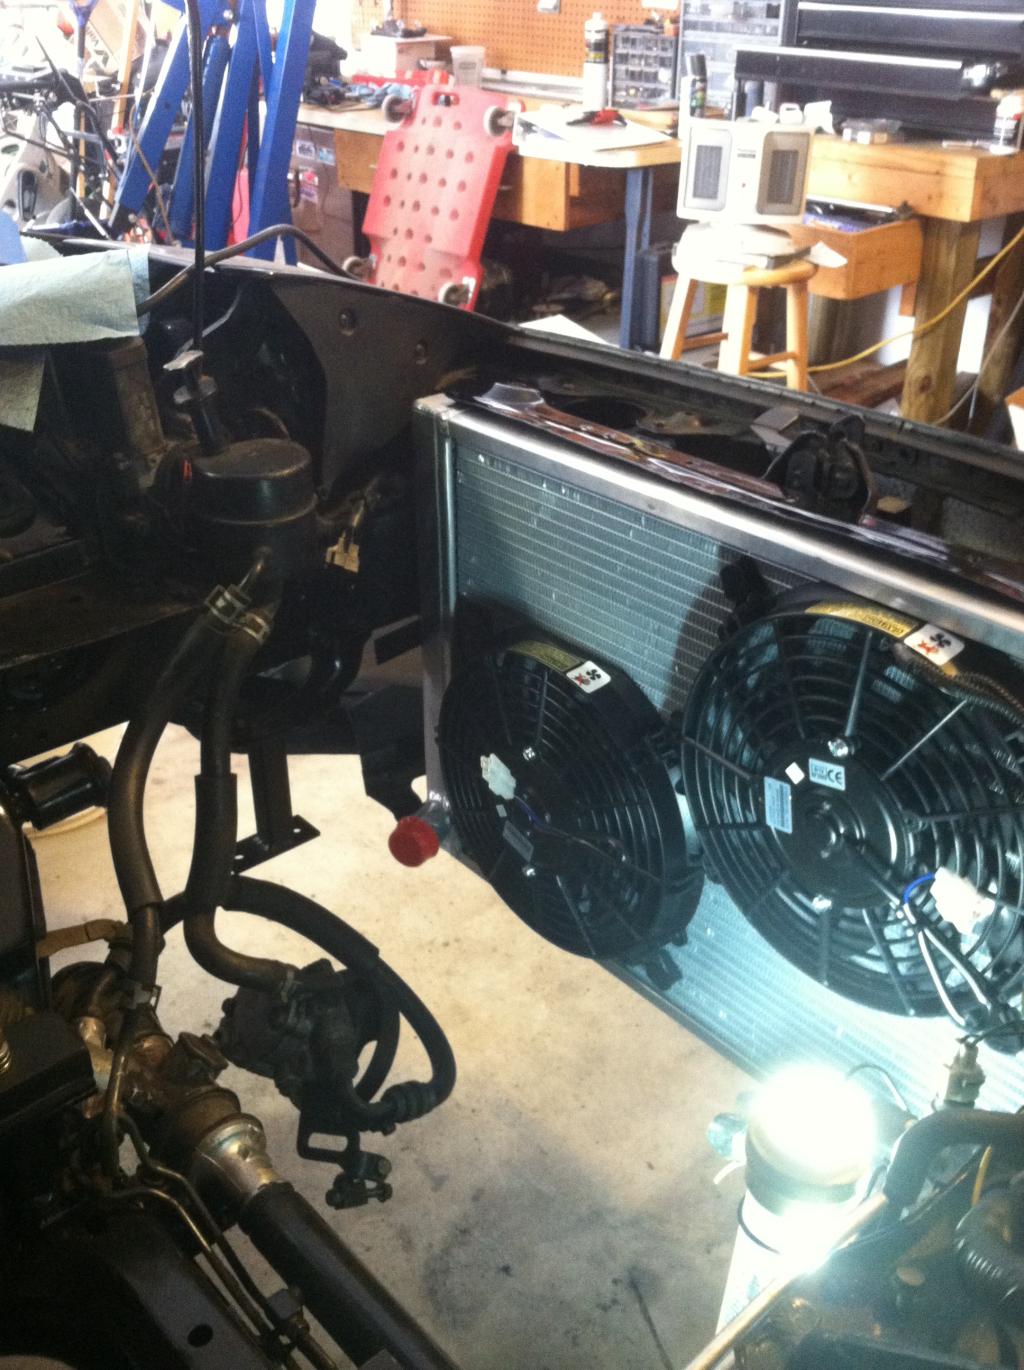
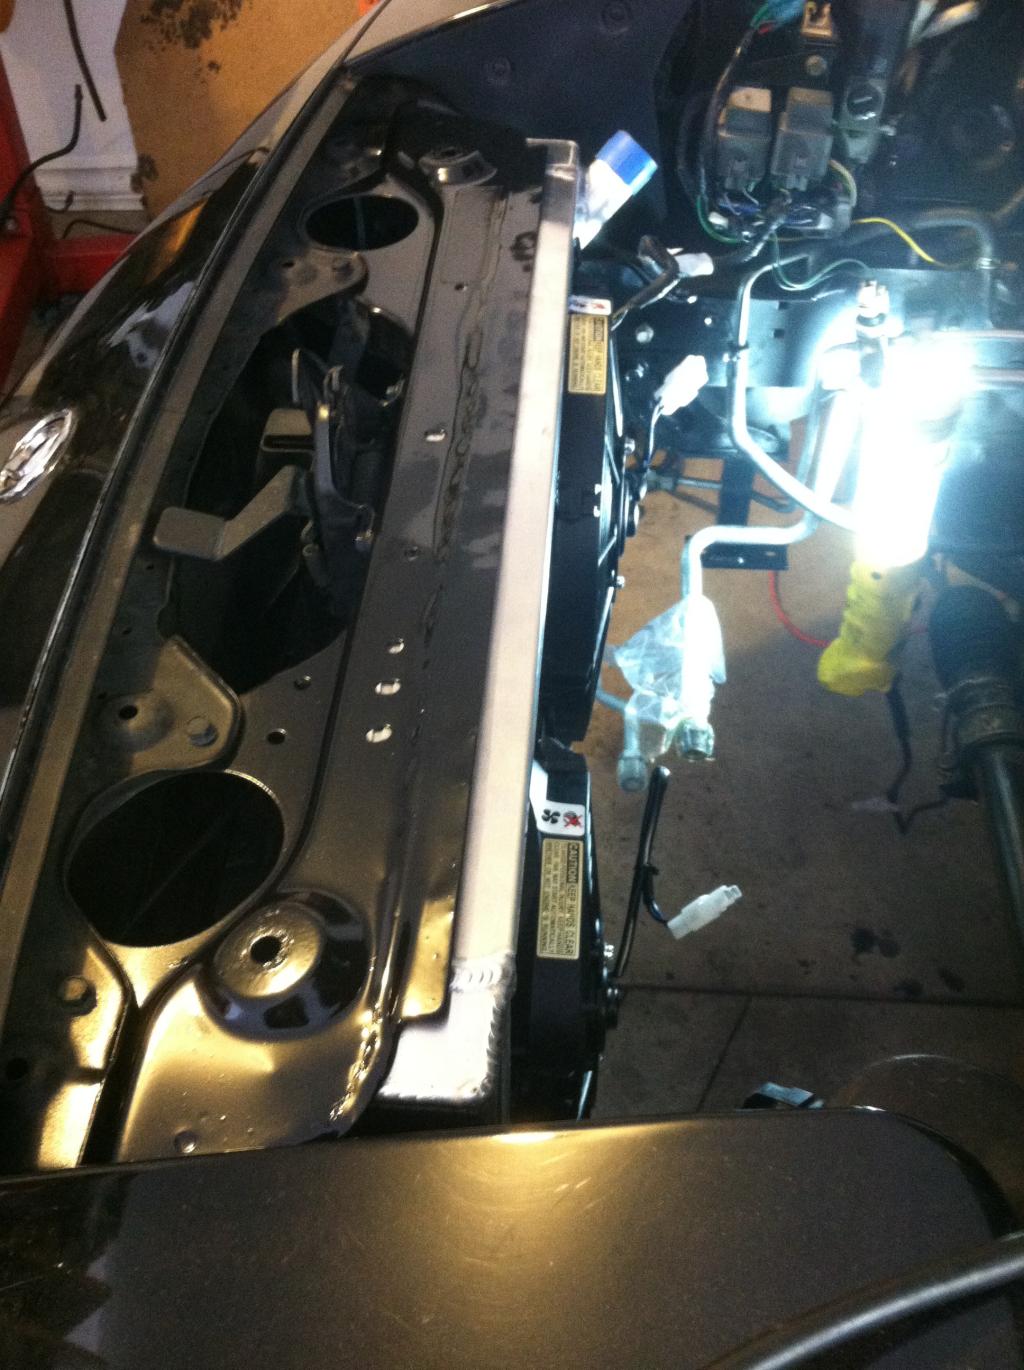
Flipped the radiator right side up and notched the top rail to clear the hood latch nuts. It's as far forward as it will go. Started the condensor mount fabrication, bent the drier line to relocate it, and tabbed one of the 4 mounts.
That's it. Not too exciting.
Jason
Flipped the radiator right side up and notched the top rail to clear the hood latch nuts. It's as far forward as it will go. Started the condensor mount fabrication, bent the drier line to relocate it, and tabbed one of the 4 mounts.
That's it. Not too exciting.
Jason
01-18-2015, 04:39 PM
#83
V8 Miata Fanatic
Thread Starter
Well, 4 condenser mounts have been fabbed up. Ordered new condenser and drier from rockauto. Time to start fabbing up the drier location.
Jason
Jason
01-24-2015, 06:11 AM
#84
V8 Miata Fanatic
Thread Starter
Got the condenser and dryer from rockauto yesterday. Good news is that the condenser is a little different than my stock one. It came with a removable clamp/bracket for mounting the dryer. I'll put that to use in the final mounting location. Also has better access to the top line that goes to the dryer. Hoping to have both installed this weekend in their final locations.
Slowly, but surely.
Jason
Slowly, but surely.
Jason
01-24-2015, 08:53 AM
#85
V8 Miata Participant
I considered getting a new condenser too but the one I have looked OK. I wound up cutting off the drier bracket so I can use it to mount. I have the short tube connected to the condenser and bent so that it will hook up to the drier next to the radiator bracket.
So depending on the humidity level in your area, opening up the drier will cause it to start absorbing moisture and eventually become useless/saturated. I see several listed on EBAY with no plugs. Hmmm.
Did the Rock Auto drier have plugs in it?
Getting the condenser and radiator mounted was a big step. You'll be happy when it is complete!
01-24-2015, 09:05 AM
#86
V8 Miata Fanatic
Thread Starter
Yes, new dryer has plugs. I'll keep using the old one for mock up and fab, and install the new one once ready to seal the system.
I wasn't going to get new condensor, but all the messing with lines put a few kinks in that I didn't like, plus they felt a little weak (messed with it a little too much).
Jason
I wasn't going to get new condensor, but all the messing with lines put a few kinks in that I didn't like, plus they felt a little weak (messed with it a little too much).
Jason
01-31-2015, 01:45 PM
#87
V8 Miata Fanatic
Thread Starter
Quick update. Got the mounts finished for the condenser, and mounted the new one. Also plumbed together the lines (orig. dryer in place, will put in new one when ready to charge system). Still need to fab a mount for the dryer as well.

01-31-2015, 06:23 PM
#88
V8 Miata Participant
Nice!
I just learned today (maybe saw something on this earlier but chose to ignore - wrongly I might add) but in order to have the A/C work, you need to connect the light green with black stripe wire (comes off the A/C thermo switch under the dash board by the left side of the glove box area) that used to be connected to the Miata ECU at pin 1Q to the blue with black stripe wire that used to be connected to the Miata ECU at pin 1J. At least on my 91 that is. It appears that the ECU wanted to turn the A/C off if it needed to even though the A/C switch was on - a pass through so to speak.
So now I have to go back into my wire loom and find those two somewhere where they used to connect up to the old Miata ECU. I stripped all that stuff out so I may need to run a new wire... Poop...
02-01-2015, 06:54 AM
#89
V8 Miata Fanatic
Thread Starter
Fun. Yeah, I have wiring diagrams for both the Miata and the Mustang, have to go through them both to make sure everything will be in order. If you go on the MMR website where you order their AC lines, there is a note about the wiring. I have a 96 donor, so I have to double check things.
Jason
Jason
 02-21-2015, 06:20 AM
#91
V8 Miata Fanatic
Thread Starter
Man, this cold weather needs to go. Killing my productivity. Next step is tearing in to the donor engine, just been too cold to be motivated.
02-21-2015, 09:27 AM
#92
V8 Miata Fanatic
I know. It's been high's of around -20 here and my little electric heater couldn't keep up. I had to buy an ice hut heater. I'm going though a 20lb propane tank every week and a half. Takes about an hr to heat the garage warm enough to work. Winter sucks.
Oh ya, I bet those little tabs on the air dam duct are getting in your way. I didn't want to cut mine off in case I could figure some way to attach them later. In the meantime I took some heat and bent them up out of the way. They're easy enough to bend back if needed.
Oh ya, I bet those little tabs on the air dam duct are getting in your way. I didn't want to cut mine off in case I could figure some way to attach them later. In the meantime I took some heat and bent them up out of the way. They're easy enough to bend back if needed.
03-08-2015, 07:31 AM
#94
V8 Miata Fanatic
Thread Starter
Finally a warm up this weekend. Got out yesterday, and started tearing down the donor engine. Going to inspect everything and replace bottom end components as necessary, as well as clean-up and paint. Have trick flow heads and stg 2 cam, explorer intake, and some other go fast goodies to install. Then it will be time to try to drop it in.
03-22-2015, 06:30 AM
#95
V8 Miata Fanatic
Thread Starter
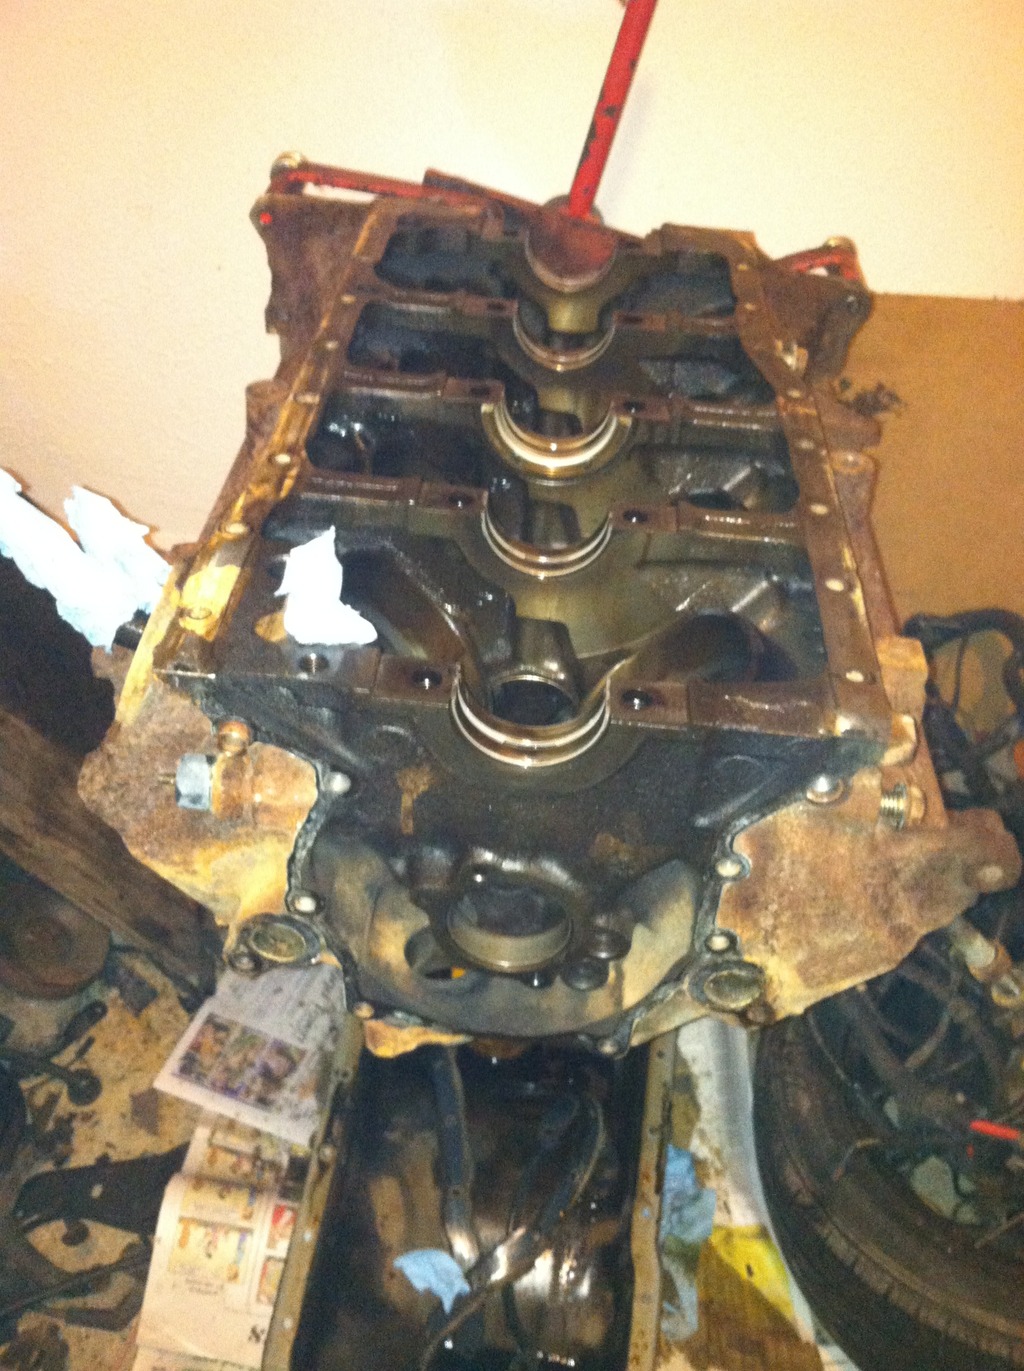
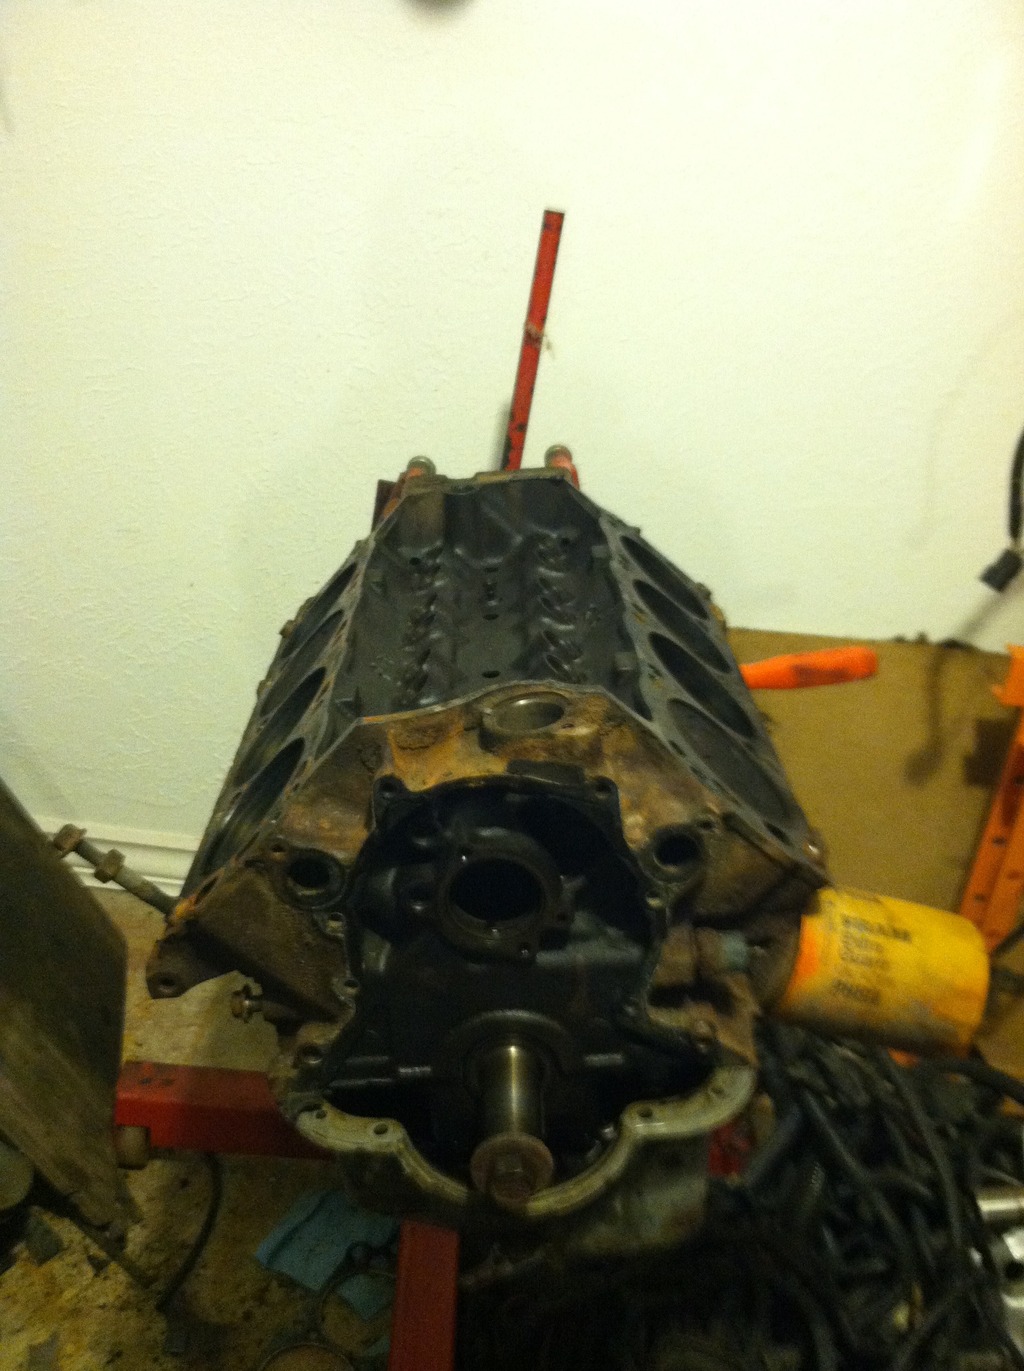
OK, got out yesterday and have the engine tear down almost complete. So far everything looks really good, so I am thinking I may be able to get away with just cleaning it up and putting it back together (with new heads/cam/intake of course).
More to come.
More to come.
 03-23-2015, 08:54 AM
#98
Jim Stainer

You can pick up a good enough cylinder hone for 25 bucks or rent one. The NAPA here lets you use their hone, ring compressor and valve spring compressor for nothing when you buy the rings, bearings and gasket kit from them. There is probably parts stores around you that would have one you could use cheap or for nothing too.
I don't say much but am really enjoying your build. Thanks for the great thread!!
I don't say much but am really enjoying your build. Thanks for the great thread!!
03-28-2015, 01:57 PM
#100
V8 Miata Fanatic
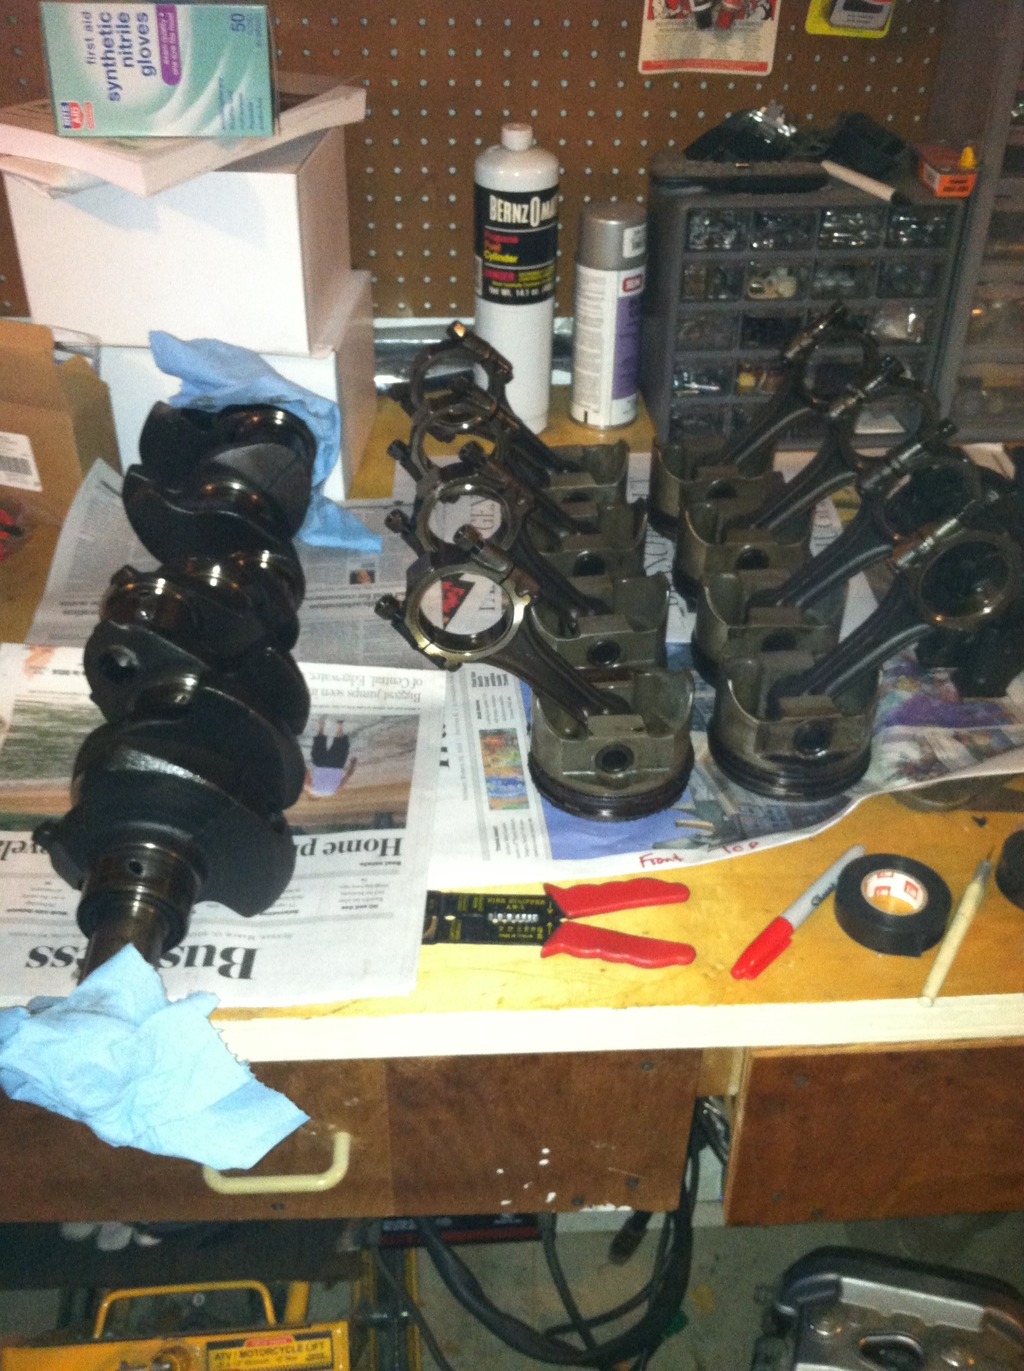
Thread Starter
Teardown of the engine is now complete. Bores look good, but I will hone/re-ring. Rod and main bearings show some copper, but there are no grooves in the crank. Cam bearings look good as well. I'll replace them all to be safe while I have it apart. Also have Melling oil pump that's going in with the TF stg 2 cam and Ford racing timing chain. TF heads, Scorpion rockers, new water pump, black ford racing valve covers, and explorer intake with 70mm tb and spacer will finish it off. New 24 LB injectors and matching BBK MAF will measure the fuel for the A9P ECU.