
New project: 1996 Miata with Ford 5.0


Administrator
Joined: Nov 2009
Posts: 1,120
Likes: 38
From: Allentown, PA
I was able to locate my radiator completely under the header and push my engine back as far as possible to gain enough room to just fit Martin's fans as pullers with a shroud. I called tri-pac (maker of the fans) and was told they were actually designed to be pullers and will be more efficient that way as long as you flip the fan blades over. To do this I had to delete the hood latch and front air bag sensor.
By the way, the clearance is so tight I actually had to swap one of the screws on the fan motors with a pan head screw to gain an extra 1/8 inch or so at the crank pulley.
-Jason
By the way, the clearance is so tight I actually had to swap one of the screws on the fan motors with a pan head screw to gain an extra 1/8 inch or so at the crank pulley.
-Jason

Thread Starter
V8 Miata Fanatic
Joined: Aug 2014
Posts: 634
Likes: 16
From: Seven Hills, OH
I have a set of fans I got from Martin that are not tripac, they are from a new vendor. Supposed to pull a ton and are smaller. I'm keeping a/c, so have to be able to mount condenser and radiator.
I'll probably remove the stock diagnostic and Maf wiring, I had been concentrating on pass side.
Jason
I'll probably remove the stock diagnostic and Maf wiring, I had been concentrating on pass side.
Jason
Thread Starter
V8 Miata Fanatic
Joined: Aug 2014
Posts: 634
Likes: 16
From: Seven Hills, OH
Got the wiper pump rewired and started integrating in the 5.0 harness under the dash. Need to figure out how to mount the ECU, as mind is a 96, I don't have the "footrest" on the floor. Once I get the evaporator box and blower box reinstalled I'll see what my options are.
Jason
Jason
Thread Starter
V8 Miata Fanatic
Joined: Aug 2014
Posts: 634
Likes: 16
From: Seven Hills, OH
Quick update. Got the EFI harness completely tied in under the dash, and have reinstalled the HVAC boxes. I am using the Ford harness to control the fuel pump. Need to find a mount for the ECU.
Jason
Jason
Thread Starter
V8 Miata Fanatic
Joined: Aug 2014
Posts: 634
Likes: 16
From: Seven Hills, OH
Got the coil mounted (used the mounting bracket from my Lincoln donor, looks more secure than the kit mounting method). Also spliced in the wires for the gauges and removed some wiring on the drivers side. Found a 90-93 ECU cover on ebay, so purchased it, as my 96 has the studs/mounting locations that are needed, so this will make my ECU mounting much easier.
Now am on to the radiator/condenser/fan mount setup. I plan on integrating more substantial mounting for the radiator and condenser, and a shroud for the dual puller fan setup I am running.
Jason
Now am on to the radiator/condenser/fan mount setup. I plan on integrating more substantial mounting for the radiator and condenser, and a shroud for the dual puller fan setup I am running.
Jason
V8 Miata Participant
Joined: Nov 2014
Posts: 296
Likes: 12
From: Atlanta, Ga
Mike
Thread Starter
V8 Miata Fanatic
Joined: Aug 2014
Posts: 634
Likes: 16
From: Seven Hills, OH
Have you checked the condenser's drier location yet? I will be using the condenser bolt on method using brackets on the radiator hanger bars. but there seems to be no room at all for the drier. Martin's guide does not address the drier location unless if mounted directly to the radiator it is no longer an issue but I don't see how...
Mike
Mike
Jason

V8 Miata Zealot
Joined: Mar 2010
Posts: 1,220
Likes: 51
From: Canton, Georgia
I modified the dryer mounting bracket & have it mounted to the bolt used to hold the right lower radiator crossmember. I was able to use the original a/c lines from the evaporator to the condenser. The lines at the dryer had to be bent some, but nothing drastic, to get everything to line up. Both the suction & discharge lines ended up with the "unions" located in the factory position (running parallel with the sway bar). I was able to cut the ends off of the union end of the Mazda compressor hoses & the compressor end of the Mustang hose. Using some old coolant heater hose, I was able to mock up the hoses so I could get the desired length & routing figured out. Then I had a/c hose crimped in its place.

Thread Starter
V8 Miata Fanatic
Joined: Aug 2014
Posts: 634
Likes: 16
From: Seven Hills, OH
Have you checked the condenser's drier location yet? I will be using the condenser bolt on method using brackets on the radiator hanger bars. but there seems to be no room at all for the drier. Martin's guide does not address the drier location unless if mounted directly to the radiator it is no longer an issue but I don't see how...
Mike
Mike
Jason
Thread Starter
V8 Miata Fanatic
Joined: Aug 2014
Posts: 634
Likes: 16
From: Seven Hills, OH
Not too much to update, I've had some work to do on my other car, so the Miata has been overlooked.
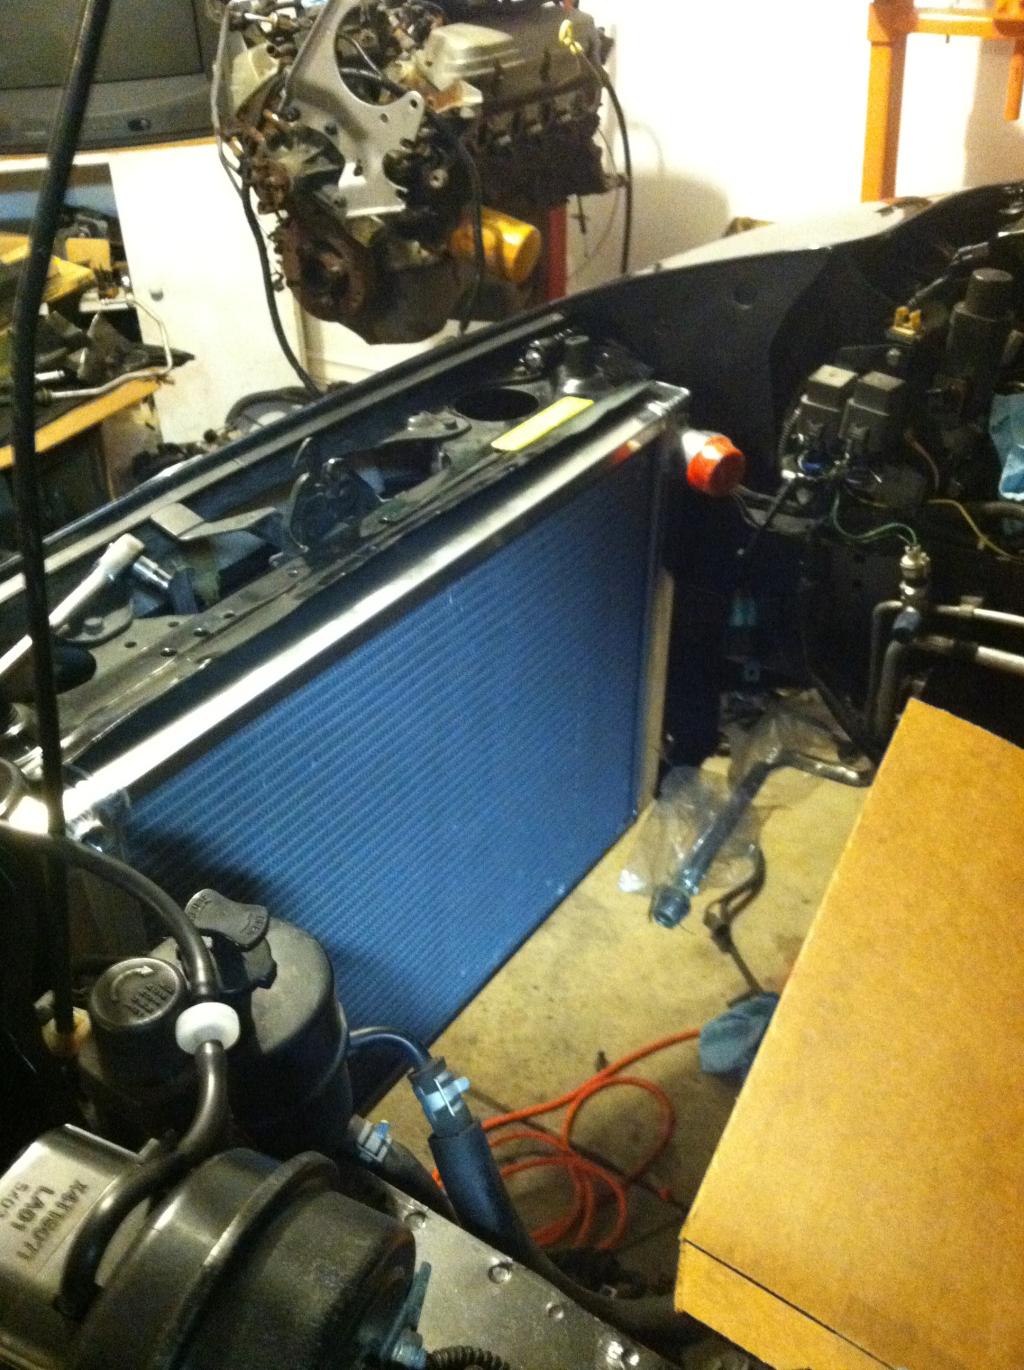
I did get the radiator in today. It's as far forward as it will go, as the top is up against the hood latch nuts (I cut the bolts down to gain space). Here's a pic, next task is mounting the condenser/drier.
Jason
I did get the radiator in today. It's as far forward as it will go, as the top is up against the hood latch nuts (I cut the bolts down to gain space). Here's a pic, next task is mounting the condenser/drier.
Jason

Thread Starter
V8 Miata Fanatic
Joined: Aug 2014
Posts: 634
Likes: 16
From: Seven Hills, OH
V8 Miata Participant
Joined: Nov 2014
Posts: 296
Likes: 12
From: Atlanta, Ga
I shaved down the hood latch mount bolts too then carefully notched the radiator so the remains of the mount nuts/bolts could go into the radiator and the radiator could rest up against the length of that upper flange. The actual tubes of the radiator are no where near the area that i notched. Seems to work OK.
Keep up the great work!
Keep up the great work!

V8 Miata Fanatic
Joined: Mar 2014
Posts: 636
Likes: 37
From: SW Ont.
Not too much to update, I've had some work to do on my other car, so the Miata has been overlooked.
I did get the radiator in today. It's as far forward as it will go, as the top is up against the hood latch nuts (I cut the bolts down to gain space). Here's a pic, next task is mounting the condenser/drier.

Jason
I did get the radiator in today. It's as far forward as it will go, as the top is up against the hood latch nuts (I cut the bolts down to gain space). Here's a pic, next task is mounting the condenser/drier.
Jason
V8 Miata Participant
Joined: Nov 2014
Posts: 296
Likes: 12
From: Atlanta, Ga
I did not notice it in the pic at first but now it is bugging me too. I have that drain hole down on the bottom right. I'll have to go back and look at hose diameters, etc. Seems like that drain hole should be on the bottom. Hmmm...
Thread Starter
V8 Miata Fanatic
Joined: Aug 2014
Posts: 634
Likes: 16
From: Seven Hills, OH
Checked with Martin. That bung is not part of his design, not sure why they included it. The smaller diameter neck goes pass side top. Have to check when I get home.
Jason
Jason
Administrator
Joined: Nov 2009
Posts: 1,120
Likes: 38
From: Allentown, PA
Did you get your lines?
Thanks for your business BTW. Your AC order gave me the last bit of funds needed to upgrade my cylinder heads.

-Jason


