Build thread for my 4th V8 Conversion

 06-06-2010, 09:33 PM
#26
Administrator
Thread Starter

I should have an update here soon. I've got the engine and trans in and just need to upload the pictures and write up the cardomain pages.
-Jason
 06-07-2010, 12:36 PM
#27
Administrator
Thread Starter
I've updated the cardomain page with May 29th's progress. Most of the day was dedicated to final engine assembly and painting. The whole page can be found here:
http://www.cardomain.com/ride/3855160/11
Some highlights:
Bottom End:

GT-40 Heads:

Oil Pump Mods:

Engine Painting:

Finished Product:

The engine is actually in at this point, I'll update with those pics when I get the opportunity.
-Jason
http://www.cardomain.com/ride/3855160/11
Some highlights:
Bottom End:
GT-40 Heads:
Oil Pump Mods:
Engine Painting:
Finished Product:
The engine is actually in at this point, I'll update with those pics when I get the opportunity.
-Jason
06-09-2010, 02:12 PM
#28
Administrator
Thread Starter
Updates:
May 31st, 2010:
Cardomain Page can be found here: http://www.cardomain.com/ride/3855160/12
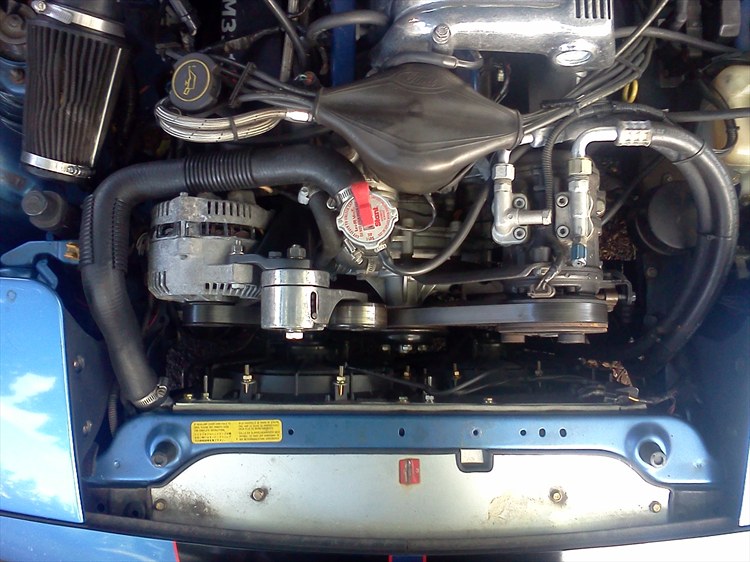
Engine Accessory Mock-Up:

Oil Pressure and Water Temp Sender Mods:

Last Moments as a 4-banger:

Engine In:


More soon...
-Jason
May 31st, 2010:
Cardomain Page can be found here: http://www.cardomain.com/ride/3855160/12
Engine Accessory Mock-Up:
Oil Pressure and Water Temp Sender Mods:
Last Moments as a 4-banger:
Engine In:
More soon...
-Jason
06-21-2010, 02:06 PM
#29
Administrator
Thread Starter
Update:
I�ve updated my Cardomain page with the progress I made on June 6th (Build Day 11). I have put in two more days since then and will post those days as I get them up on Cardomain. As of now I�m estimating I have about 2 more good days to go on the car before it can go to the exhaust shop.
June 6th:
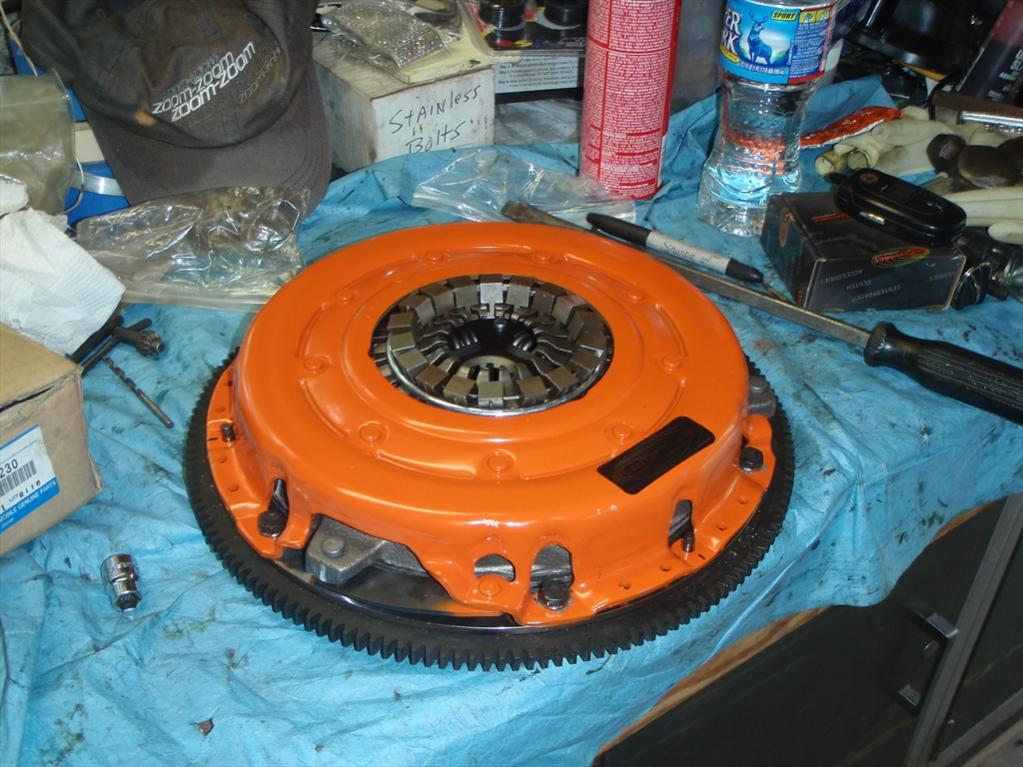
Flywheel, Clutch, Bell Housing and Transmission:

Driveshaft:

Completed Driveline:

Shifter:

Starter:

Old vs. New Clutch Slave Bracing:


Oil Diverter:

More can be found here:
http://www.cardomain.com/ride/3855160/13
-Jason
I�ve updated my Cardomain page with the progress I made on June 6th (Build Day 11). I have put in two more days since then and will post those days as I get them up on Cardomain. As of now I�m estimating I have about 2 more good days to go on the car before it can go to the exhaust shop.
June 6th:
Flywheel, Clutch, Bell Housing and Transmission:
Driveshaft:
Completed Driveline:
Shifter:
Starter:
Old vs. New Clutch Slave Bracing:
Oil Diverter:
More can be found here:
http://www.cardomain.com/ride/3855160/13
-Jason
06-22-2010, 10:17 AM
#30
Administrator
Thread Starter
Another Update:
I was just able to Update my Cardomain with the progress I made on Sunday, June 13th (build day 12).
Below are some highlights, a whole lot more can be seen at:
http://www.cardomain.com/ride/3855160/14
Thermoswitch installation:

Explorer Throttle Modifications:

Headers and Dipstick:

Power Steering Pump:

Accessory and Intake Mock-up on car:

-Jason
I was just able to Update my Cardomain with the progress I made on Sunday, June 13th (build day 12).
Below are some highlights, a whole lot more can be seen at:
http://www.cardomain.com/ride/3855160/14
Thermoswitch installation:
Explorer Throttle Modifications:
Headers and Dipstick:
Power Steering Pump:
Accessory and Intake Mock-up on car:
-Jason
06-22-2010, 02:20 PM
#31
Administrator
Thread Starter
Update: Saturday June 19th, 2010
Now I�m updated to where the car currently sits. The most recent Cardomain page covers:
Valve Cover Gaskets:

Radiator install:

Custom Heater Hoses:

Fuel Rails:

Rear hubs and Axles:

The car now:

I think at this point I�m only two good build days away from getting it out the door. Unfortunatly, those two days may not come until next week. If I can put in full days Monday and Tuesday of next week it MAY be able to go to the exhaust shop on Wednesday and MAY get back to me by the weekend after next for shake-down. That would give me about 2 weeks before track day to take care of any thing that may pop up.
Wish me luck, it�s going to be a close one�
-Jason
Now I�m updated to where the car currently sits. The most recent Cardomain page covers:
Valve Cover Gaskets:
Radiator install:
Custom Heater Hoses:
Fuel Rails:
Rear hubs and Axles:
The car now:
I think at this point I�m only two good build days away from getting it out the door. Unfortunatly, those two days may not come until next week. If I can put in full days Monday and Tuesday of next week it MAY be able to go to the exhaust shop on Wednesday and MAY get back to me by the weekend after next for shake-down. That would give me about 2 weeks before track day to take care of any thing that may pop up.
Wish me luck, it�s going to be a close one�
-Jason

 06-23-2010, 10:48 AM
#33
Administrator
Thread Starter
Thanks, I wish I had more time the last two months to work on it. If I had had every Sat. and Sun. to work on it since the start of May (as I originally planned) I'd probally be driving it by now...
Damn "life" getting in the way of the really important things...
-Jason
Damn "life" getting in the way of the really important things...
-Jason
08-07-2010, 02:50 PM
#34
Administrator
Thread Starter
So, the car is done and has been tracked. Rather than bore everyone with more build pictures here's some of it's track experience:


About to pass a green group Corvette:


Me showing the car off to Wilford Brimley:

A nice Artistic Shot:

The car did very well at the track. Once I was sure the bugs were worked out, I felt much more comfortable pushing the car than I did last year�s car. The couple of areas of improvement I added to this one as a result of last year�s track day seemed to pay off:
1. Brakes:
Last year I upgraded the 1990 brakes to 1994 sized all around and used Axxis Ultimate pads on all 4 corners. I kept the stock rubber lines.
This year I upgraded the front brakes to Wilwood Calipers over larger 1991 VW Corrado rotors with Wilwood BP-10 �Smart� pads. On the rear I stuck with the stock 1994 rotors and calipers with Axxis Ultimates. I upgraded all the lines to -3AN braided stainless. Once I got used to it, the braking was pronominal. Last year I had to be sure to not overpower the brakes, this year I couldn�t over heat them if i tried. The hotter they got the better they gripped. The only time I got a little worried was braking repeatedly from over 120 into turn 1. A few times the rear seemed a little unstable. I�ve been told that it could have been because i was running essentially a :�street� pad on the rear and an aggressive track pad on the front. Next track day I�m going to upgrade the rears to some type of Hawk pad.
I did manage to pretty much use up an entire set of BP-10 front pads over the two days. Fortunately they are under $50 a set so if I need to replace them every time I go out it�s doable. The ABS was not hooked up for the event.
2. Clutch:
This year I upgraded from a traditional organic clutch to a Kevlar clutch. It, like the brakes, just continued to get better the more I beat on it.
3. Shifter:
Last year I used a stock Mustang shifter and conventional ATF, this year I went with a Chinese knock-off of a �Pro 5.0� shifter that I picked up fro $35 on eBay. I also filled the trans with Royal Purple�s version of ATF. The shifting was �almost� Miata like.
4. Oil Cooler:
Last years car did not have an oil cooler. The oil (10w30 Conventional Valvoline) looked pretty smoked after just a half day of track. This year I added a cooler with a thermostatically-controlled valve and almost 10� of -8AN line. Even after almost 4 times the track time as last year the oil still looks clear.
5. Suspension:
This is not really an area of improvement but more an area of relief. I the past I�ve gone with a custom-valved set of Bilstien coilovers from FCM for about $2000. This car had a pretty good setup (Koni Yellows, Ground Control perches, 500 pound fronts/250 pound rears) that seemed to work great with the 1.8. I was skeptical about how it would work with the V8 in place. To my surprise, the car actually felt a little more stable than last year with much less movement. The only thing I �may� do to the suspension is upgrade the rears from 250 to maybe 325�s. The springs are a bit short (I�m riding very close to the top of the sleeves) and on the highway the rear seems to get a a little �bouncy� at times. There�s a chance this could help my 120mph+ braking issue as well.
Issues:
The car only showed a few small issues other than the braking one I listed above. They are:
1. Oil Leak
The front crank seal, which was new, seems to have not sealed very well. It�s allowing oil to seep out which then becomes a �spray� when I take the engine over 5500 or so rpm�s. This oil spray then drifts back to the headers and begins to create a sort of scary white �mist� in the cabin and a trail of smoke behind. Hopefully this is a pretty cheap fix, I�ve got a few more seals lying around. The worst part was that it kept me from taking the car to 6500 rpm�s which meant I had to shift to 5th gear on the bowl and keep the speed under 110 or so. This was no problem while playing with the Miata�s in the green group but later on Tuesday I could only �keep up� with the Corvettes. If I had that extra 1000 rpm�s available to me I�m pretty sure I could have passed more than just 2.
2. Starter heat Soak:
For some reason if I let the car idle in place for more than 10 minutes or so or run it really hard the starter will heat soak and not allow me to restart the car for another 30minutes to an hour and a half. I have a starter wrap on order from Summit. It should be here tomorrow.
3. Overheating:
While the temps are fine on the track or if I�m moving, the car can�t seem to keep up if it sits still or crawls in traffic for more than 30 minutes. While this is no issue for a track car it�s pretty big one for a street car. Right now the system is running a mix of 33 percent antifreeze and 66 percent �mostly� distilled water. I ordered some water wetter from Summit and will try it with only distilled water and see if that works. If it does, I�ll just go with a 50/50 mix of traditional antifreeze/water for the winter when I really don�t drive it much anyhow.
4. CV Boot Clamps:
I used the �toolless� type of boot clamps to secure my CV boots. I now have a nice splattering of axle grease all over the back of the car which may of also had something to do with the smoke issue. I�m going to go to Napa and get OEM-style clamps. If my Dad does not actually have the tool to install them I�ll just spring for the extra $30 and pick it up as well.
Other than that the car did wonderfully. Ironically, even thought the car was much better sorted and did much better than last year�s car, I didn�t �feel� as if I was going as fast as last year. I�m thinking this may be a combination of the track seats and harnesses, the better braking and even the hardtop making the car feel more comfortable at speed than last year where I was holding on for dear life, hopping the brakes would last the whole session and feeling the wind buffeting my helmet.
About to pass a green group Corvette:
Me showing the car off to Wilford Brimley:
A nice Artistic Shot:
The car did very well at the track. Once I was sure the bugs were worked out, I felt much more comfortable pushing the car than I did last year�s car. The couple of areas of improvement I added to this one as a result of last year�s track day seemed to pay off:
1. Brakes:
Last year I upgraded the 1990 brakes to 1994 sized all around and used Axxis Ultimate pads on all 4 corners. I kept the stock rubber lines.
This year I upgraded the front brakes to Wilwood Calipers over larger 1991 VW Corrado rotors with Wilwood BP-10 �Smart� pads. On the rear I stuck with the stock 1994 rotors and calipers with Axxis Ultimates. I upgraded all the lines to -3AN braided stainless. Once I got used to it, the braking was pronominal. Last year I had to be sure to not overpower the brakes, this year I couldn�t over heat them if i tried. The hotter they got the better they gripped. The only time I got a little worried was braking repeatedly from over 120 into turn 1. A few times the rear seemed a little unstable. I�ve been told that it could have been because i was running essentially a :�street� pad on the rear and an aggressive track pad on the front. Next track day I�m going to upgrade the rears to some type of Hawk pad.
I did manage to pretty much use up an entire set of BP-10 front pads over the two days. Fortunately they are under $50 a set so if I need to replace them every time I go out it�s doable. The ABS was not hooked up for the event.
2. Clutch:
This year I upgraded from a traditional organic clutch to a Kevlar clutch. It, like the brakes, just continued to get better the more I beat on it.
3. Shifter:
Last year I used a stock Mustang shifter and conventional ATF, this year I went with a Chinese knock-off of a �Pro 5.0� shifter that I picked up fro $35 on eBay. I also filled the trans with Royal Purple�s version of ATF. The shifting was �almost� Miata like.
4. Oil Cooler:
Last years car did not have an oil cooler. The oil (10w30 Conventional Valvoline) looked pretty smoked after just a half day of track. This year I added a cooler with a thermostatically-controlled valve and almost 10� of -8AN line. Even after almost 4 times the track time as last year the oil still looks clear.
5. Suspension:
This is not really an area of improvement but more an area of relief. I the past I�ve gone with a custom-valved set of Bilstien coilovers from FCM for about $2000. This car had a pretty good setup (Koni Yellows, Ground Control perches, 500 pound fronts/250 pound rears) that seemed to work great with the 1.8. I was skeptical about how it would work with the V8 in place. To my surprise, the car actually felt a little more stable than last year with much less movement. The only thing I �may� do to the suspension is upgrade the rears from 250 to maybe 325�s. The springs are a bit short (I�m riding very close to the top of the sleeves) and on the highway the rear seems to get a a little �bouncy� at times. There�s a chance this could help my 120mph+ braking issue as well.
Issues:
The car only showed a few small issues other than the braking one I listed above. They are:
1. Oil Leak
The front crank seal, which was new, seems to have not sealed very well. It�s allowing oil to seep out which then becomes a �spray� when I take the engine over 5500 or so rpm�s. This oil spray then drifts back to the headers and begins to create a sort of scary white �mist� in the cabin and a trail of smoke behind. Hopefully this is a pretty cheap fix, I�ve got a few more seals lying around. The worst part was that it kept me from taking the car to 6500 rpm�s which meant I had to shift to 5th gear on the bowl and keep the speed under 110 or so. This was no problem while playing with the Miata�s in the green group but later on Tuesday I could only �keep up� with the Corvettes. If I had that extra 1000 rpm�s available to me I�m pretty sure I could have passed more than just 2.
2. Starter heat Soak:
For some reason if I let the car idle in place for more than 10 minutes or so or run it really hard the starter will heat soak and not allow me to restart the car for another 30minutes to an hour and a half. I have a starter wrap on order from Summit. It should be here tomorrow.
3. Overheating:
While the temps are fine on the track or if I�m moving, the car can�t seem to keep up if it sits still or crawls in traffic for more than 30 minutes. While this is no issue for a track car it�s pretty big one for a street car. Right now the system is running a mix of 33 percent antifreeze and 66 percent �mostly� distilled water. I ordered some water wetter from Summit and will try it with only distilled water and see if that works. If it does, I�ll just go with a 50/50 mix of traditional antifreeze/water for the winter when I really don�t drive it much anyhow.
4. CV Boot Clamps:
I used the �toolless� type of boot clamps to secure my CV boots. I now have a nice splattering of axle grease all over the back of the car which may of also had something to do with the smoke issue. I�m going to go to Napa and get OEM-style clamps. If my Dad does not actually have the tool to install them I�ll just spring for the extra $30 and pick it up as well.
Other than that the car did wonderfully. Ironically, even thought the car was much better sorted and did much better than last year�s car, I didn�t �feel� as if I was going as fast as last year. I�m thinking this may be a combination of the track seats and harnesses, the better braking and even the hardtop making the car feel more comfortable at speed than last year where I was holding on for dear life, hopping the brakes would last the whole session and feeling the wind buffeting my helmet.
08-07-2010, 02:50 PM
#35
Administrator
Thread Starter
Since that point I've addressed the problems above as well as a few others. I think its just about to where i would say it's "sorted":
Clutch:
The clutch bolts actually loosened at some point and were allowing the clutch to separate from the flywheel. This is why i had a slight vibration as well as why I kept having to readjust the clutch's preload. Fortunately, I was able to get at the 6 clutch bolts through the opening for the fork and adverted having to take down the whole drive line. After being re-tightened the clutch works fine.
Why it happened: The billet flywheel I used came drilled with standard thread bolts as opposed the metrics that would normally be found on a '90's Ford. The manufacturer included a set of hardened ARP standard bolts with the flywheel. The ARP bolts, being much higher strength than the standard Ford bolts, have a much higher torque rating than the stock ones. I torqued the bolts to standard Ford specs the first time which allowed them to loosen pretty quickly (within the first 100 or so miles). This time they have all been torqued to about 40 Foot Pounds, which is pretty high for clutch bolts. I'm going to monitor them and probably retorque them before any track events.
Hot No-start:
This was not actually due to starter heat-soak but due to heat-soak of the wire that triggered the starter solenoid. Unlike a firewall-mounted solenoid or any other relay the starter solenoid needs enough power to slide the starter gear onto the flywheel and then make contact with the 12 volt feed to turn the starter. I checked the voltage on that line while it was hot and it was getting only 7 volts. I let it cool and it increased to 9 volts which is just enough to start the car. To solve the problem I rerouted that wire to a relay mounted out of the heat and then used a direct 12 volt source with a new 30 amp fuseable link to power the solenoid. I ran a new length of heavy-gauge wire down the back of the engine and around and under the starter to keep it away from the header and then wrapped the starter in heat shielding. So far the car has started every time no matter how hot it is.
Oil leak/smoke in cabin:
The front crank seal must have gotten misaligned when I changed the cam timing from retarded to advanced during the build. It had folded over when I reinstalled the harmonic balance and pretty much ate itself up. This created an oil spray which coated every portion of the exhaust that ran from side to side under the car (pretzel bends, H pipe) and burned. Fixing this seal completely solved the problem.
Smoke Trail:
While we thought the "smoke trail" was from the rear brake pads I also saw pretty hard evidence that the differential was leaking on the exhaust pipes. The differential looked pretty good when I picked it so I didn't reseal it. Lesson learned. The one inner boot was was also leaking CV grease which was melting on the exhaust as well. On that same side the outer boot also leaked which threw grease all over the inside of the left rear wheel. This may have been smoking as well.
Changes since track day:
-As noted above, the front seal has been repaired and the starter rewired. Also, the efficiency of the cooling fans has been increased through better sealing of the AC condenser to the radiator eliminating overheating while sitting in traffic. I drained the cooling system and replaced it with nothing but a bottle of water wetter and distilled water. As the weather gets cooler I'll introduce antifreeze into the system and see if it still does not overheat.
-The front pads have been changed from Wilwood BP-10 "Smart" pads to Hawk HPs pads. The BP-10's were awesome at the track but not so great on the street. I also managed to use up about 3/4 of the lining during the track days. I'll pick up another set next time I track but the HPS's feel great for now on the street. The rotors look fine.
-The exhaust tips have finally been installed.
-The rocker arms I used were the "the best I had" during assembly an were actually pretty worn. I replaced them with a set of almost new rockers my father located which significantly quieted the engine down.
-I attempted to charge the AC using the Autozone kit with limited success. It looks like the used compressor I installed may be bad or my ghetto-charging of the system blew it. I ordered another compressor from Advance for $170 shipped.
Still To Do:
-I need to address all the problems at the rear of the car. While none of the leaking boot and differential problems pose any real concern on the street, I'm not taking it near the track until they are fixed. In the near future I'll be dropping the entire rear out of the car at which point I will:
1. Install a new gasket on the back of the differential and fill with new fluid.
2. Replace the axle seals just in case they are bad.
3. Cut away a little of the hanger assembly to make room of the driver's side ABS sensor.
4. Fix the defective axle boots and fill with new CV grease.
5. Paint the exhaust since it will have to come down anyhow.
6. Replace the bolts holding the nose of the differential to the torque mount with studs to make reassembly easier.
7. Replace all exhaust gaskets (header and collector) with Percy's "Seal for Life" aluminum. I'm tired of hearing header noise.
8. After allowing them to heat cycle, I'm going to safety wire the header bolts aircraft-style.
At some other point I'm going to install the new compressor and get the AC professionally charged.
As of now, the car is ready to be used as a daily. When the above is done (sounds worse than it really is) the car will be ready to hit the track again.
-Jason
 01-12-2012, 03:53 PM
#37
V8 Miata Fan

Join Date: Jul 2011
Location: LA, Westside
Posts: 37
Likes: 0
Received 0 Likes
on
0 Posts
A little off the thread. My recently purchased conversion is running 255x40x17 Yokohama Ad08s. Handles very well with all of the suspension mods but the speedo is way off. Any suggestions. Tranny is a T5.
01-12-2012, 05:06 PM
#38
V8 Miata Zealot

The "red" gear was recommended by Monster Miata, but was still off. I think I am using the "pink" gear now. Maybe this will help you: http://www.latemodelrestoration.com/...lication-Guide
12-21-2012, 09:57 AM
#39
Administrator
Thread Starter
There's been so many upgrades since I last posted to this thread that I really need to update it.
Here's a few pics of the car currently:
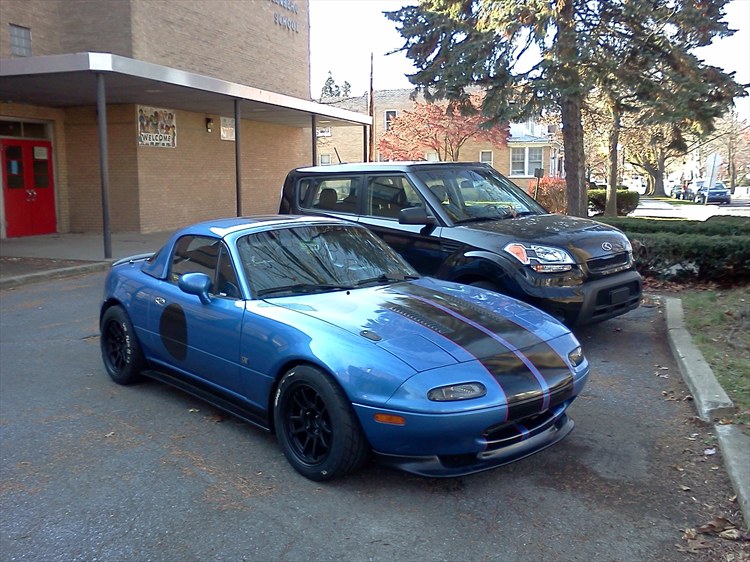
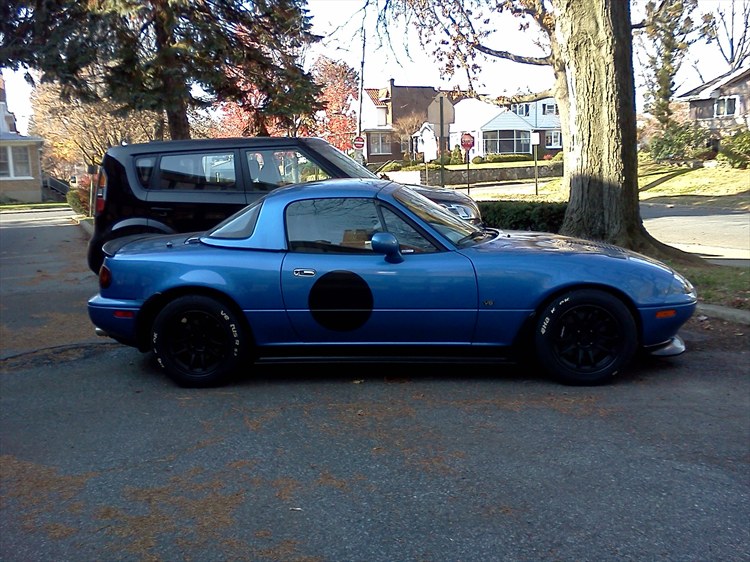
Here’s a quick rundown on the upgrades the last few years:
Exterior:
-Planet Miata side skirts-seemed to help at the track over 130mph
-Reinstalled the R-package rear air dam, replaced the front one.
-Redid my stripes, added a red pinstripe down each side.
-Added "meatballs" so that my painter's tape numbers show up better on the Laguna paint.
-Purchased some TRM C1's for use as track wheels. Eventually I switched them for my street wheels.
-Added hood vents to help keep the car planted at speed and vent radiator heat.
Engine/drive line:
-Switched from the 1991 A9L to a PNP Megasquirt 2 from DIYAutotune.
-Added an Innovate Wideband
-Upgraded the injectors from 19 pounders from a 1996 Explorer to 31.8 pounders from a 2011 Mustang GT.
-Added an adjustable BBK fuel regulator and gauge.
-Deleted the ERG, barometric pressure sensor, mass air sensor, canister purge system
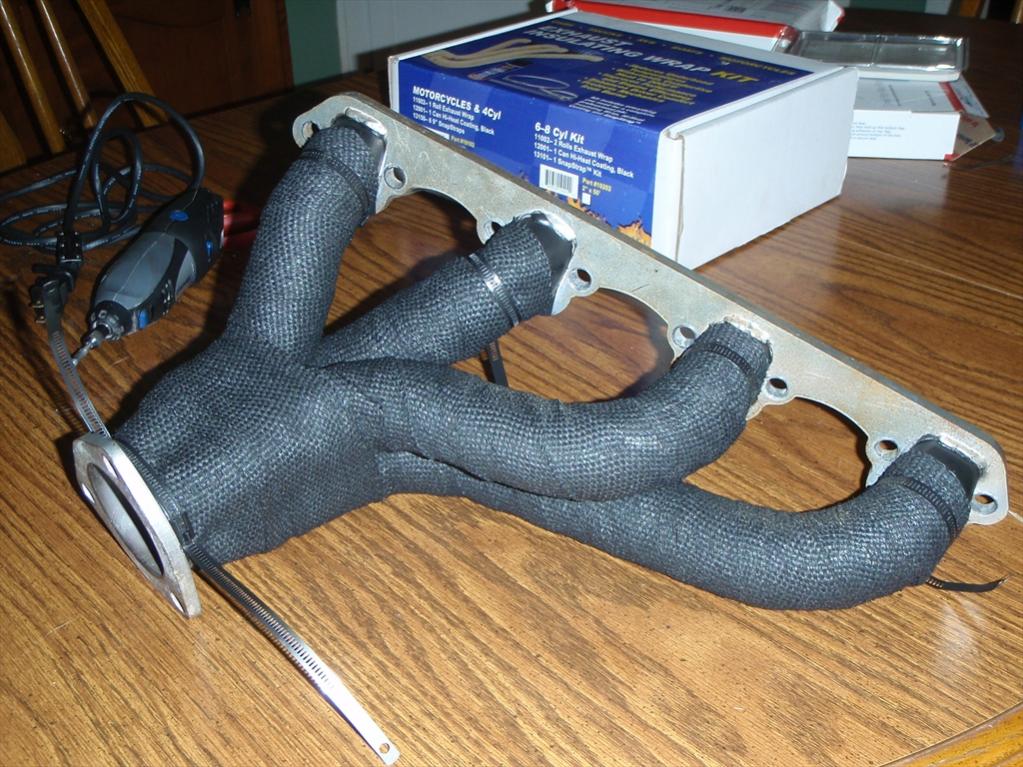
-Wrapped the headers
-pulled the ebay clutch for a Centerforce II
-Braced my trans crossmember to reduce drive line slop
-Rerouted my fuel lines and heat shielded them differently to help with fuel heat soak.
-Moved my Monster Miata kit fans behind the radiator and constructed a shroud.
-Changed the coolant over to Evans waterless
Interior:
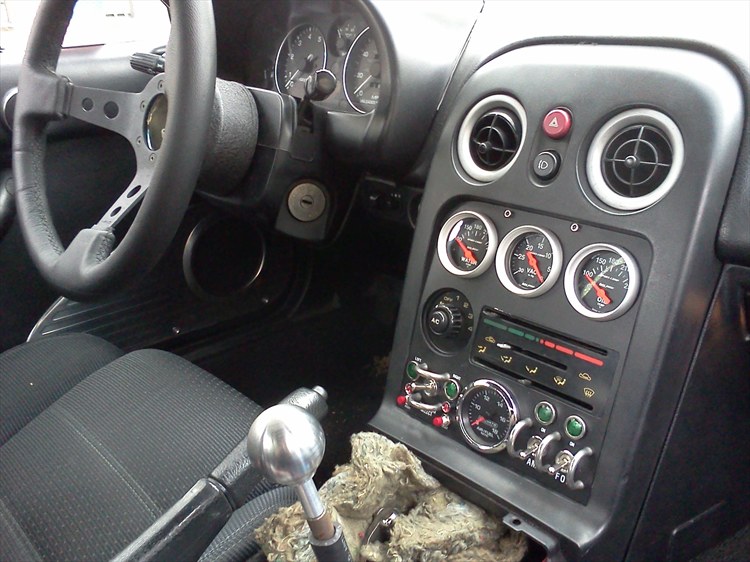
-Added an oil temp, water temp, vacuum (Autometer sport-comp) and O2 gauge (innovate G3) to the center stack.
-Moved my HVAC controls down one slot so the gauges would be more visible
-deleted the stock temp gauge
-Removed the radio and replaced it with an amp I plug into my phone
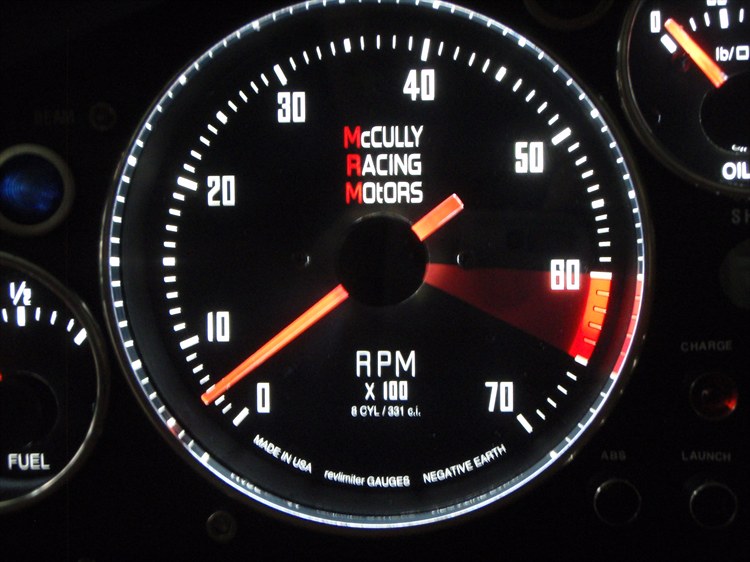
-Rescaled my tach to accurately read the rev range of a 331. it now only goes to 7000.
-Changed the gauge faces out with custom ones from RevLimiter.net
-made a custom gauge surround that looks like a KG-works one
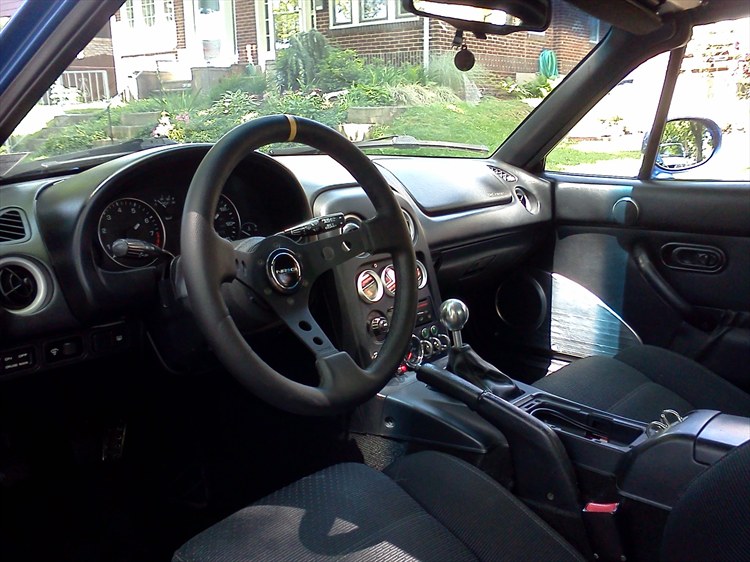
-Added a NRG deep-dish wheel with a short spacer.
-Added DIYRoadster doorbars
-Added a 2" shifter extension
-Swapped out the power window controls and replaced with toggle switches.
-Removed the hazard lights, pop-up controls and repalced them with toggles. I can now get the "sleepy" light look if I want.
There's been more, I'll add some more pics later.
-Jason
Here's a few pics of the car currently:
Here’s a quick rundown on the upgrades the last few years:
Exterior:
-Planet Miata side skirts-seemed to help at the track over 130mph
-Reinstalled the R-package rear air dam, replaced the front one.
-Redid my stripes, added a red pinstripe down each side.
-Added "meatballs" so that my painter's tape numbers show up better on the Laguna paint.
-Purchased some TRM C1's for use as track wheels. Eventually I switched them for my street wheels.
-Added hood vents to help keep the car planted at speed and vent radiator heat.
Engine/drive line:
-Switched from the 1991 A9L to a PNP Megasquirt 2 from DIYAutotune.
-Added an Innovate Wideband
-Upgraded the injectors from 19 pounders from a 1996 Explorer to 31.8 pounders from a 2011 Mustang GT.
-Added an adjustable BBK fuel regulator and gauge.
-Deleted the ERG, barometric pressure sensor, mass air sensor, canister purge system
-Wrapped the headers
-pulled the ebay clutch for a Centerforce II
-Braced my trans crossmember to reduce drive line slop
-Rerouted my fuel lines and heat shielded them differently to help with fuel heat soak.
-Moved my Monster Miata kit fans behind the radiator and constructed a shroud.
-Changed the coolant over to Evans waterless
Interior:
-Added an oil temp, water temp, vacuum (Autometer sport-comp) and O2 gauge (innovate G3) to the center stack.
-Moved my HVAC controls down one slot so the gauges would be more visible
-deleted the stock temp gauge
-Removed the radio and replaced it with an amp I plug into my phone
-Rescaled my tach to accurately read the rev range of a 331. it now only goes to 7000.
-Changed the gauge faces out with custom ones from RevLimiter.net
-made a custom gauge surround that looks like a KG-works one
-Added a NRG deep-dish wheel with a short spacer.
-Added DIYRoadster doorbars
-Added a 2" shifter extension
-Swapped out the power window controls and replaced with toggle switches.
-Removed the hazard lights, pop-up controls and repalced them with toggles. I can now get the "sleepy" light look if I want.
There's been more, I'll add some more pics later.
-Jason
12-21-2012, 01:13 PM
#40
Administrator
Thread Starter
Relocated fans:
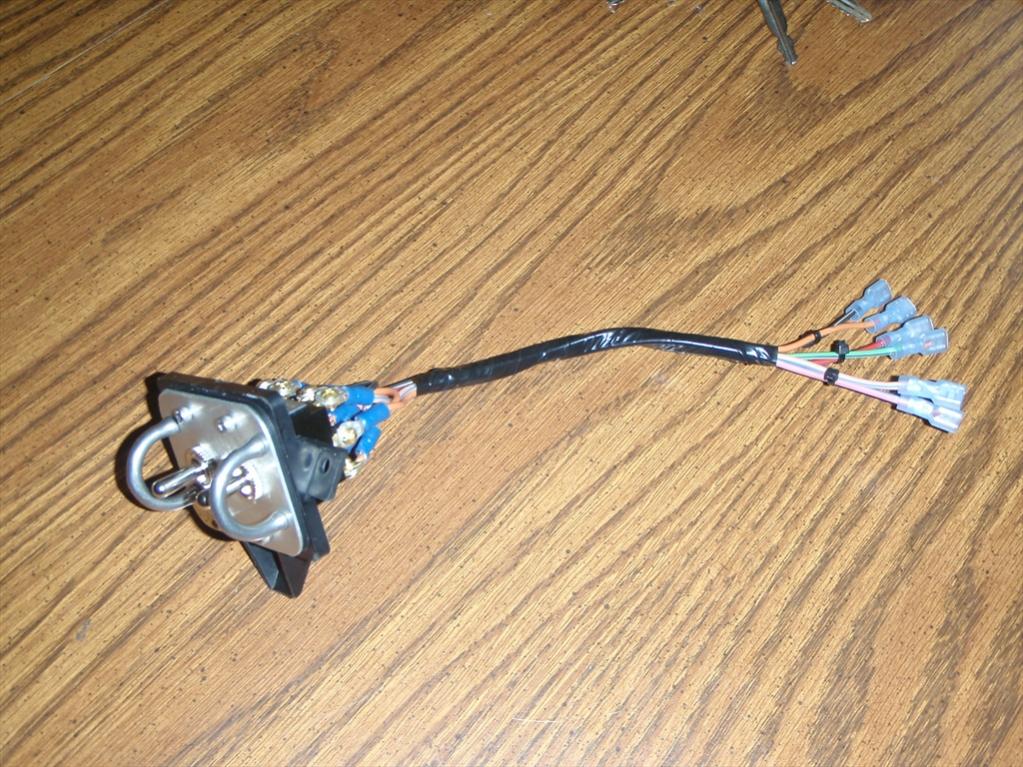
Guage Cluster with LED lighting:
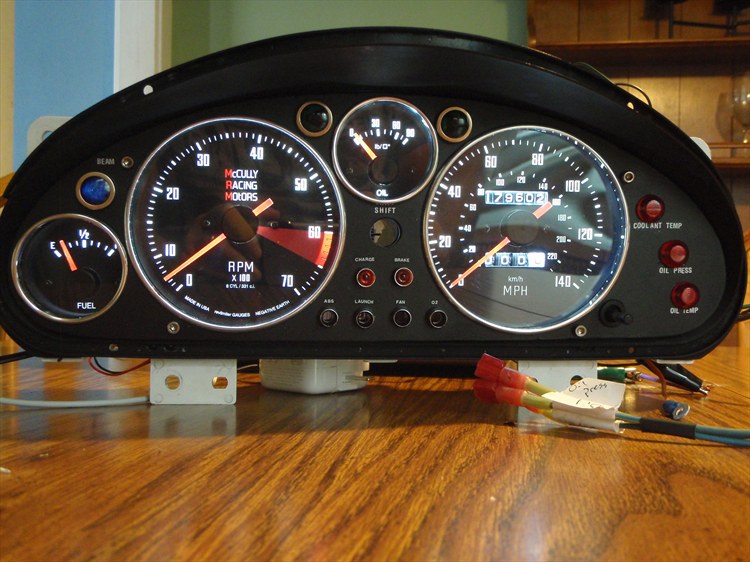
Close-up of new Tach face:
Interior with new center stack with new wheel:
During installation:
Since the two pictures above were taken I've taken the 3-inch hub out and replaced it with a NRG short hub. The speedometer surround is also not in place yet.
Once the winter is over an we again have light I'll take some more shots.
-Jason
Guage Cluster with LED lighting:
Close-up of new Tach face:
Interior with new center stack with new wheel:
During installation:
Since the two pictures above were taken I've taken the 3-inch hub out and replaced it with a NRG short hub. The speedometer surround is also not in place yet.
Once the winter is over an we again have light I'll take some more shots.
-Jason
 01-03-2013, 09:02 AM
#42
V8 Miata Zealot
Did you ever get your "hot fuel" issue sorted out? A cleaning of the screen in my fuel cap, & unsticking the valve in the tank has eliminated all of the pressure build-up in the tank of mine. Great build thread by the way. How do you like the Center Force clutch? I was thinking of getting one for my Cobra.
01-03-2013, 09:59 AM
#43
Administrator
Thread Starter
Did you ever get your "hot fuel" issue sorted out? A cleaning of the screen in my fuel cap, & unsticking the valve in the tank has eliminated all of the pressure build-up in the tank of mine. Great build thread by the way. How do you like the Center Force clutch? I was thinking of getting one for my Cobra.
The centerforce clutch is great. I can't say that the centrifugal weights actually do anything but they haven't stuck or rattled like some on the internet said they would. The effort required to modulate it is much less than the King Cobra or even O'AutoAdvancePepZonapaBoyz Mustang clutches I've experienced. I've been very impressed with it.
I'll get some pics of that transbrace mod up in a bit.
-Jason
01-03-2013, 10:26 AM
#44
Administrator
Thread Starter
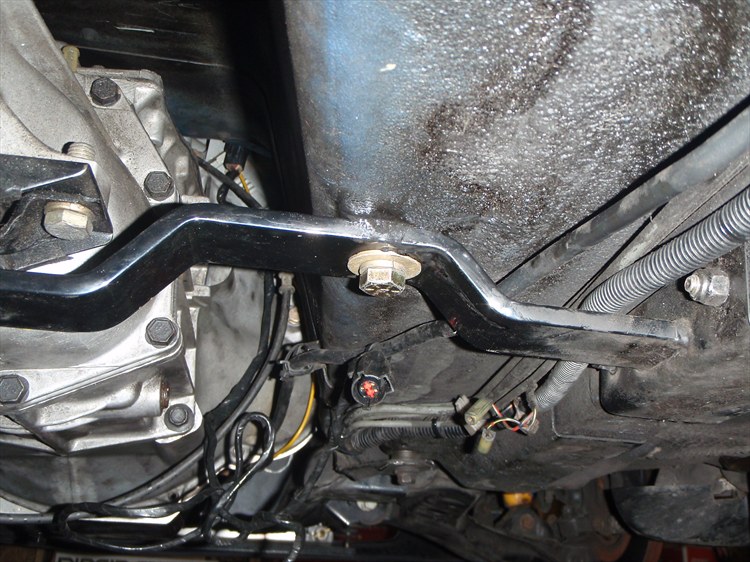
Here we are, the "official" MRM Monster Miata Transmission crossmember mod:
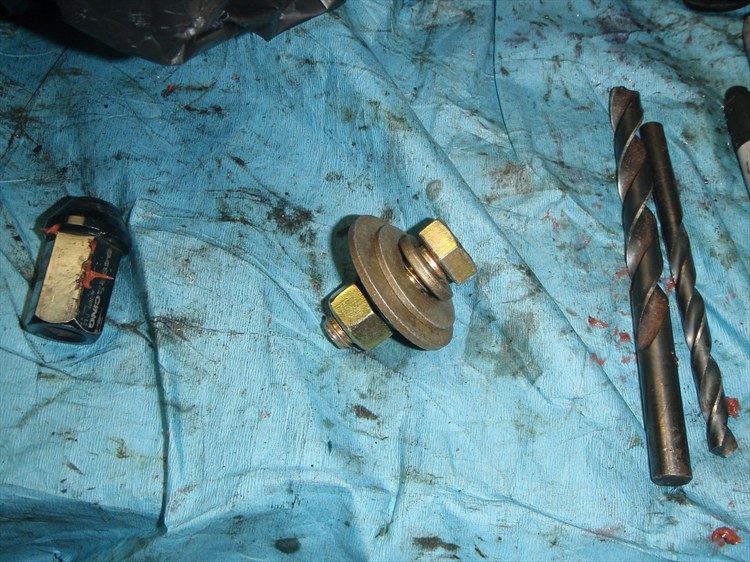
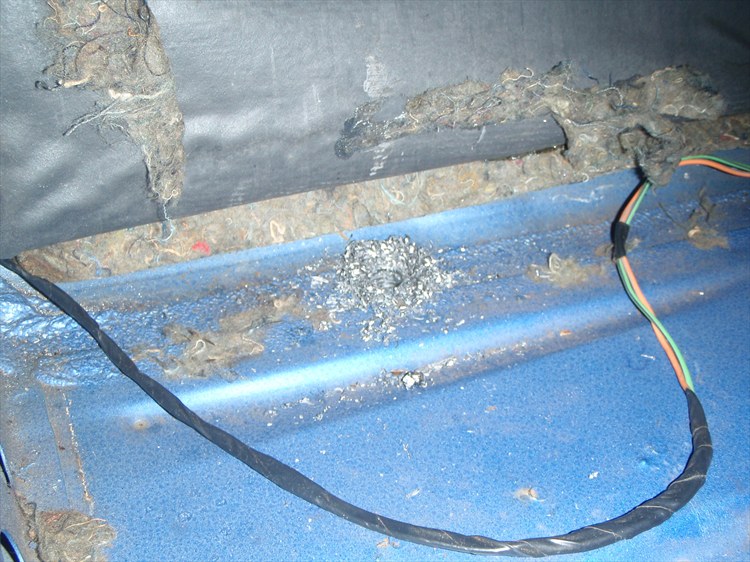
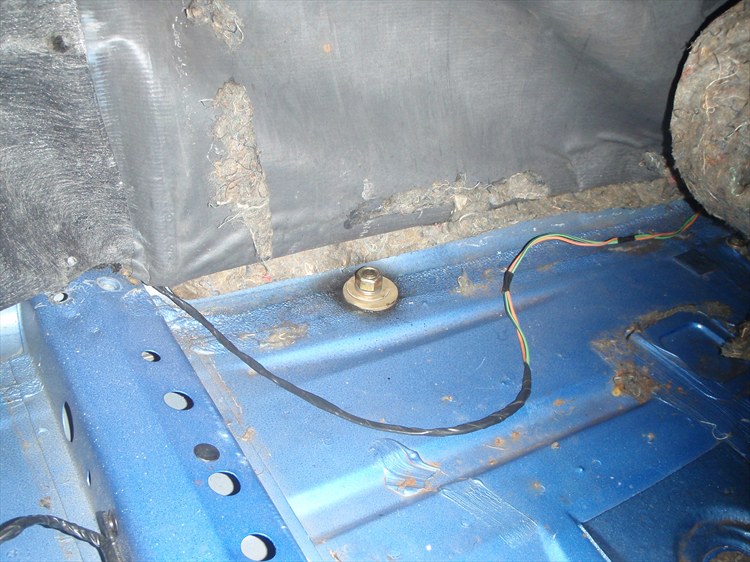
I did this because i noticed that while under the car with everything bolted in and tight I could still push the tail of the trans up and down a bit under a quarter inch. The Monster Miata crossmember is very strong but due to being constructed of just steel stock can, at times, become a leaf spring of sorts. The goal was to eliminate the up and down movement.
Although I was originally going to construct a much more elaborate brace for the other side (the other side does not make direct contact with the floor like the passenger side does), I am so satisfied with the results of just bracing this side that I doubt I'll ever try to tackle it. My car is running at a bit over 11:1 and really was not comfortable to slug around under 2500 rpm's. With this mod I can cruse through town at 1000 rpm's without any slop what so ever.
I have to give credit for the inspiration behind this mod to the builder of the Monster 427 track Miata Martin had for sale a few years ago. A customer of ours had purchased it (with a very used pullout Mustang 302 in it at that point) and brought it to us to "upgrade" it with a new MRM331R engine. The original builder of the car had built his own transmission crossmember which incorporated a bolt on each side similar to what I did.
All in all this has been the best $3.00 or so I have ever spent upgrading the car. I highly recommend doing it if you experience the shifter moving while at a low rpm. The best part of it is you can literally drive to Ace hardware, pick up the parts you need, drive home, drill a hole and bolt it up in an afternoon or less.
-Jason
01-03-2013, 04:42 PM
#45
V8 Miata Zealot
I will have to try this. Thanks for the info. I think I will weld a nut to a steel plate that will be fastened to the floor pan so the interior does not have to be removed if I need to remove the crossmember. Hey, this is something else that you can offer!
01-06-2013, 05:11 PM
#46
V8 Miata Enthusiast

Jason, thanks for all the help. My frame rails are a bit widened where the crossmember mounts. How did you get yours to go over the frame rails? I have been weighing options of using a c clamp to squish rails together or heat and bend the kit brace to open it up.
What are your thoughts?
What are your thoughts?
01-06-2013, 10:03 PM
#47
Administrator
Thread Starter
I had a few that seemed a bit too short as well. Try banging the outside edge over a bit so you can just get the crossmember over them and then push them up each end with a floor jack. If you do what I did above and also make a brace for the other side you should be fine.
-Jason
-Jason
05-09-2013, 11:32 AM
#48
Administrator
Thread Starter
Coming up in the next few weeks:
VMaxxx track pack suspension
Upgraded puller fan assembly
Exhaust dumps
Cool tow hooks
Power window upgrades
-Jason
VMaxxx track pack suspension
Upgraded puller fan assembly
Exhaust dumps
Cool tow hooks
Power window upgrades
-Jason
07-04-2013, 08:56 PM
#49
Administrator
Thread Starter
I just painted my track wheels and tires!

Write up here:
http://mccullyracingmotors.weebly.com/blog.html
-Jason
Write up here:
http://mccullyracingmotors.weebly.com/blog.html
-Jason


