93 Carbed 302 T5 DIY no JB Weld or Duct Tape


 08-28-2014, 08:38 PM
#77
V8 Miata Follower
Thread Starter

Thank you MLKNR.
Got all the under hood welding and painting done so both subframes are complete. May add some additional bracing later but want to move on to the next part of the project.
I have to buy and fit the clutch slave unit then I can drop then engine back in. Planning to use the Bendix 12172 clutch slave. Hoping it won't be a bear, had enough of the bears.
WANNA BE STARTIN' SOMETHIN' (this weekend)
09-01-2014, 08:33 PM
#78
V8 Miata Follower
Thread Starter
Plans changed over the weekend. I did get the engine back in (last time out, I hope) and the newly modified header fits like a dream.
I deviated from the plan due to getting a spectacular deal on a real roll bar, aftermarket struts/springs, and an aftermarket antisway bar. Had to cut the bottom bolt off one of the front struts (no fun at all) but I got the newish ones installed in the front. I know I'm a little out of order but it all has to be done and I only have 51 days left.
Got lots of painting to do too:
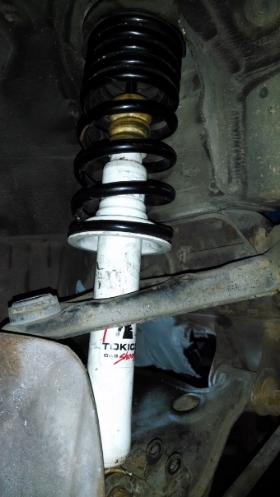
Last edited by Jack Sprat; 09-01-2014 at 08:43 PM.
 Great score on the parts well done!!
09-07-2014, 08:15 PM
Great score on the parts well done!!
09-07-2014, 08:15 PM
#80
V8 Miata Follower
Thread Starter
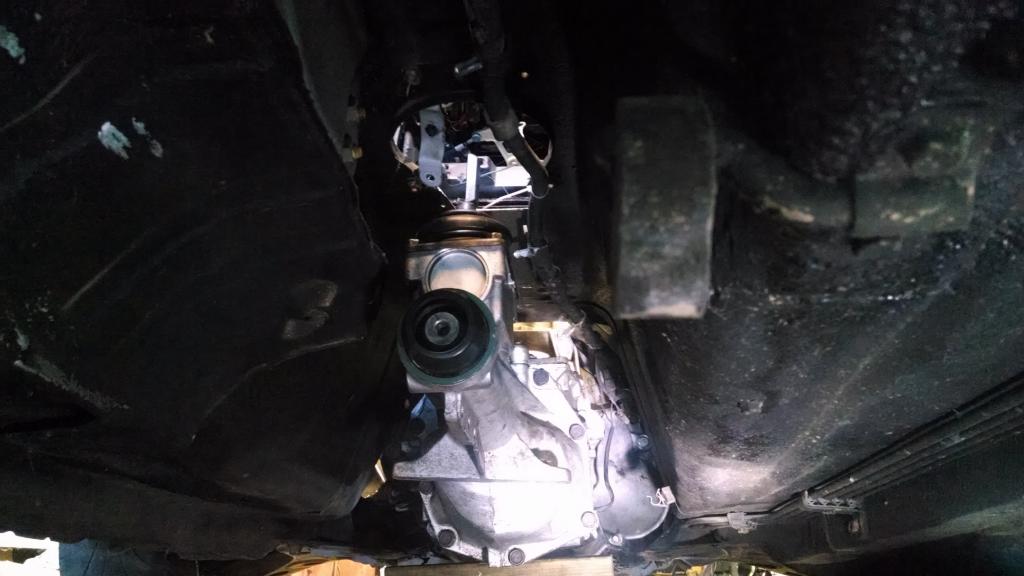
My son and I worked our butts off and made a ton of progress this weekend. Shocks/springs installed on all 4, trans disassembled and reassembled to correct a shift fork issue, trans installed (no crossmember yet), tires purchased and mounted, clutch slave fitted to bellhousing, rollbar & sidebars installed, carpet removed, etc etc.
09-07-2014, 08:30 PM
#81
V8 Miata Follower
Thread Starter
My son and I worked our butts off and made some really good progress over the weekend:
Shocks / Springs installed on all 4 corners
Transmission disassembled & reassembled to correct a shift fork issue
Installed Transmission using brute force method (no crossmember yet)
Drilled bellhousing to fit S10 slave cylinder (need hydraulic line)
Installed Rollbar & Sidebars
Removed carpet and seats, reinstalled seats
Mounted Tires
exhausted
[IMG] [/IMG]
Shocks / Springs installed on all 4 corners
Transmission disassembled & reassembled to correct a shift fork issue
Installed Transmission using brute force method (no crossmember yet)
Drilled bellhousing to fit S10 slave cylinder (need hydraulic line)
Installed Rollbar & Sidebars
Removed carpet and seats, reinstalled seats
Mounted Tires
exhausted
[IMG]
Last edited by Jack Sprat; 09-07-2014 at 08:33 PM.
 09-08-2014, 09:58 PM
#83
V8 Miata Follower
Thread Starter
I need some help:
I am using the s10 slave cylinder but don't know if there is a hydraulic (brake) hose that will work with it and connect to the master cylinder. I haven't seen anything on that connection. I know the S10 fitting is a m12x1 but that is as far I have gotten.
Thanks in advance, you guys are great!
I am using the s10 slave cylinder but don't know if there is a hydraulic (brake) hose that will work with it and connect to the master cylinder. I haven't seen anything on that connection. I know the S10 fitting is a m12x1 but that is as far I have gotten.
Thanks in advance, you guys are great!
09-13-2014, 08:13 PM
#85
V8 Miata Follower
Thread Starter
A call to Martin confirmed that I am overthinking things. I am moving forward and will debug if necessary. In that vein, I made a strong but super simple transmission crossmember today. Good but not awesome. Awesome will come with crossmember 2.0 which will incorporate chassis stiffening.
Tomorrow, I should have the structural stuff done, engine and trans bolted in, and will start working on the final assembly. Wahoo! I have been super cheap with everything so it looks like I'll have enough money for nitrous to help get my quarter mile times down. 125 shot should put a little spring in her step.
Just Do It, Moving Forward...whatever. Progress, no matter how small will get you there. I'm sticking with that because sometimes that progress is just cleaning or painting something when you don't have the energy to tackle the big stuff.
Last edited by Jack Sprat; 09-13-2014 at 08:15 PM.

 09-14-2014, 06:54 AM
#87
V8 Miata Fanatic

Looks like this is coming along great. I admire that you are doing a lot of the fab on your own. I thought about it, but just don't have the time/patience. I plan on making "adjustments" to the kit build to make things how I want them, but wanted the proven base to build off of.
Keep the info coming, this is great!
Jason
Keep the info coming, this is great!
Jason
Last edited by jrmotorsports55; 09-14-2014 at 06:59 AM.
09-14-2014, 04:28 PM
#88
V8 Miata Follower
Thread Starter
Today was a milestone in the project. All the major fabrication is done. I have a few bits here and there to do but nothing major. Since, I'm planning on having a driveshaft shop shorten the driveshaft, I'm not counting that. Also, I'm running very late on the project so I'm not doing the exhaust right now - going to be running the Challenge with open headers.
My transmission crossmember design is super simple and very strong. It's a piece of angle iron with additional 1/2" tall rib welded to provide additional stiffness. Between the motor and transmission mount everything is in rock solid. Life is good!
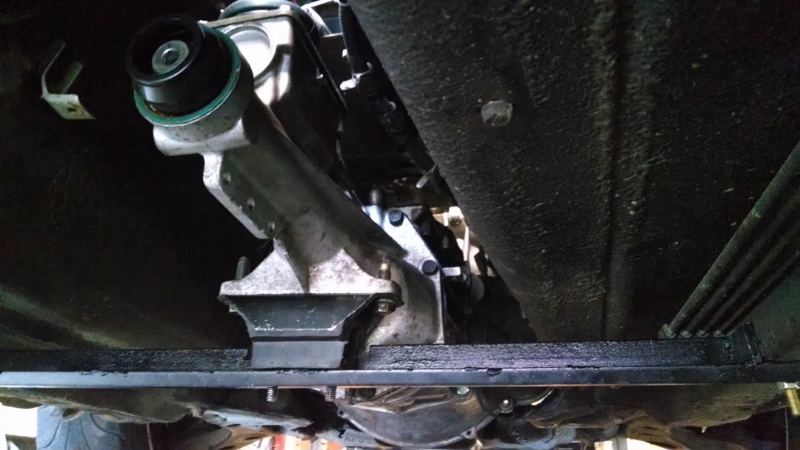
My transmission crossmember design is super simple and very strong. It's a piece of angle iron with additional 1/2" tall rib welded to provide additional stiffness. Between the motor and transmission mount everything is in rock solid. Life is good!
09-15-2014, 09:46 PM
#89
V8 Miata Follower
Thread Starter
Thanks for your comments, jrmotorsports55 and Gator Bait.
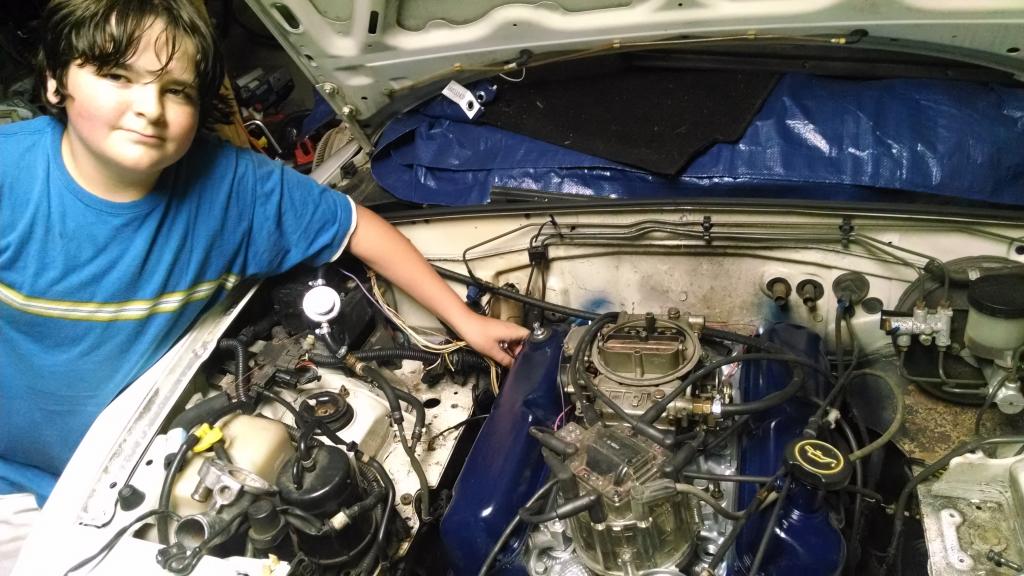
I got a little tired of fabricating stuff so I decided to spiffy up the engine a little. In my normally backwards ways, I painted the engine AFTER it was in the engine bay and plan to paint the engine bay while the engine is in. Form follows Function, right? When I paint the engine bay I will do a more proper job and be careful to avoid overspray.
I decided to use an old can of Dark Ford Blue and I love the color. I like the contrast with the intake so I'm going to paint the headers silver, while they are out - lol.
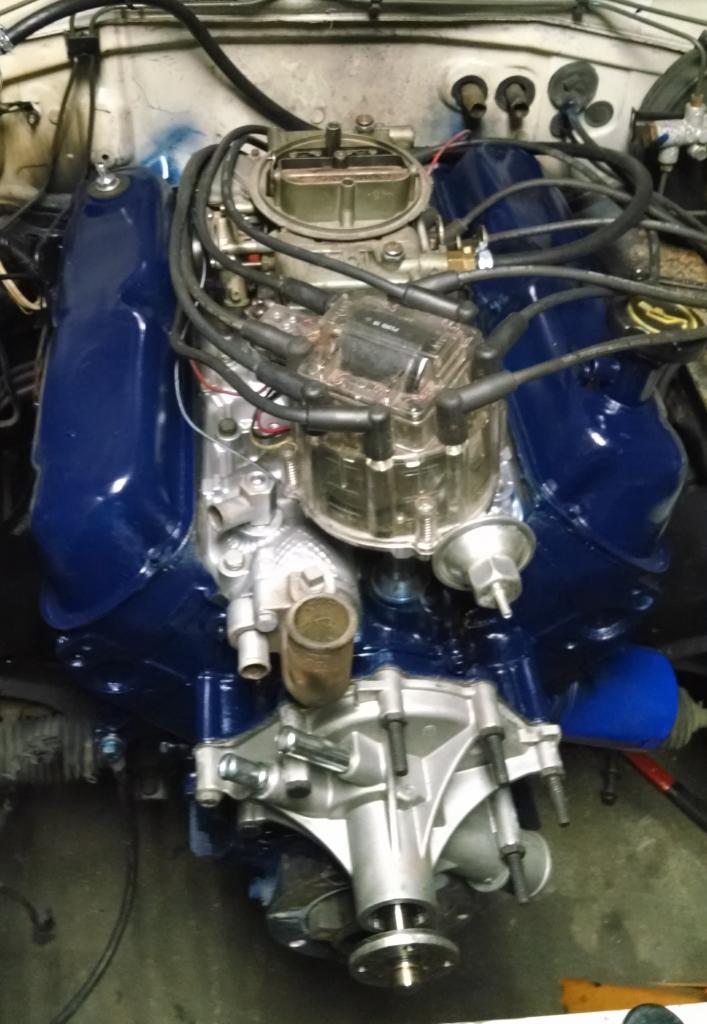
Last edited by Jack Sprat; 09-15-2014 at 09:53 PM.
09-15-2014, 09:52 PM
#91
Jim Stainer

Just had to laugh because that is exactly the way I would have done it too. Well that and I love that color of blue too! I never understood why Ford broke the mold on the 225 hp cars with a gold engine. Talk about a brain fart!
So is that a GM hei on that bad boy?
So is that a GM hei on that bad boy?
09-15-2014, 10:21 PM
#92
V8 Miata Follower
Thread Starter
The Ford/GM hei disty is a hybrid design that has been selling on Ebay for quite some time. This one was on my old fox Mustang that I used to race. I like the design (except size) since it has plenty of coil output and is a one wire connection. Too bad it is too tall.

Hope to start the car tomorrow.
09-17-2014, 10:31 PM
#93
V8 Miata Follower
Thread Starter
Having some health issues so I didn't get to start the car. Making tiny bits of progress myself but the guy in the picture has been big help. I really enjoy the time that we spend together on this project.
09-21-2014, 08:45 PM
#94
V8 Miata Follower
Thread Starter
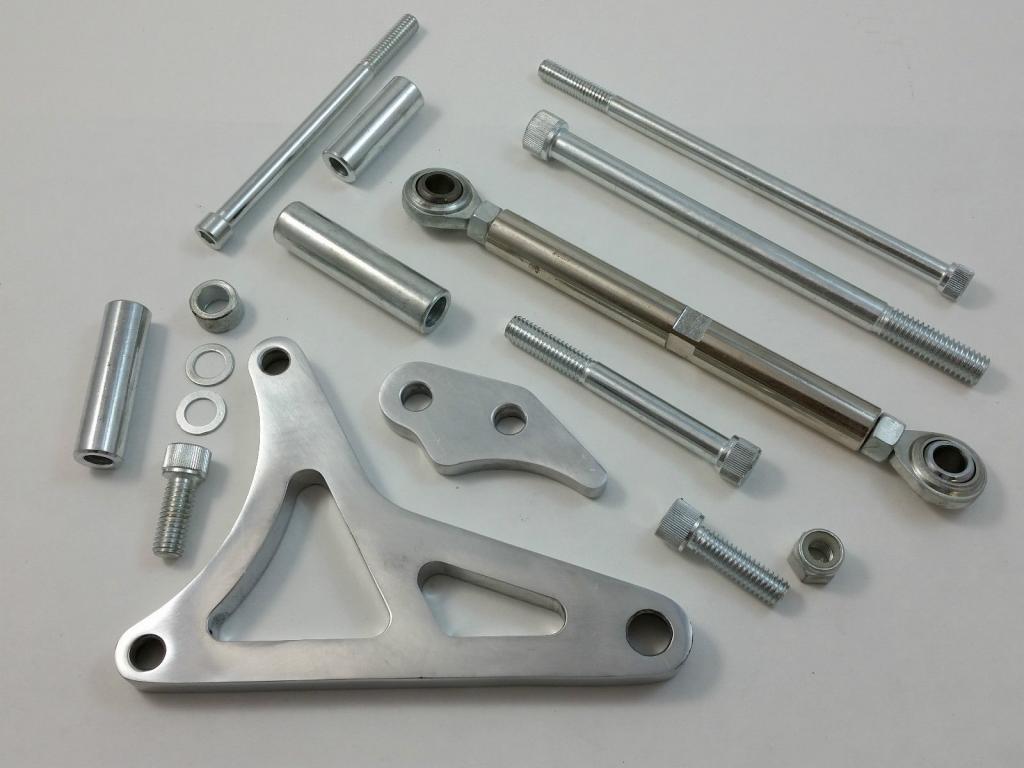
This weekend was a total mixed bag. I spent several hours in the junk yard looking for accessory drive brackets that I could make work with no PS and no AC. I ended up settling for an F150 setup, only to have to take it back - good think LQK has a 30 day warranty.
I ended up ordering a kit from ebay for $40 which has the brackets, bolts, and tension adjuster. I really like the concept since this should be super light compared to most of the brackets I would have used otherwise. The only problem with the kit is that I will have to buy a new water pump so I can reverse the direction of the water pump since I will be changing the belt routing. Here is a picture of the kit:
I ended up ordering a kit from ebay for $40 which has the brackets, bolts, and tension adjuster. I really like the concept since this should be super light compared to most of the brackets I would have used otherwise. The only problem with the kit is that I will have to buy a new water pump so I can reverse the direction of the water pump since I will be changing the belt routing. Here is a picture of the kit:
09-21-2014, 08:51 PM
#95
V8 Miata Follower
Thread Starter
It appears as though ebay is getting to be like Craigs List. The carb that I bought was supposed to have a "sticking" issue which I figured would be a bent lever/arm. After several failed attempts at starting, I took the carb apart to see what is wrong. Since it was flooding badly, I checked the jets but found none. Yup, No Jets.
So I found some old jets, installed and carefully reassembled. True to Holley's nature it leaks but I was able to make the following video (click on link, hit back to return):
enginestarting_zpsb127db4c.mp4
Only ran it a few seconds but at least I didn't hear any abnormal noises and it seemed to be running well despite the carb. Progress, none the less!
I think I will yank it and put an old Ford Autolite carb on it - they are super reliable and don't leak.
Last edited by Jack Sprat; 09-21-2014 at 08:56 PM.
09-26-2014, 09:27 PM
#96
V8 Miata Follower
Thread Starter
I received in the accessory drive kit from ebay. I was surprised at how nice the polished billet aluminum brace was and that it had all the hardware. One of the spacers was too long but given what I have already fabbed, this won't be a problem.
From what I have read, the kit will require me to switch over to an opposite flowing water pump like is in a 91 Crown Vic. I have also read that the V ribs won't be a problem on the flat pulley - which would normally contact the back side of the belt. Unless it blows up in my face, I am very happy with the configuration. It is super light and no extra anything to weigh down the front of the car.
I picked up some alt connectors/wiring last weekend and lucked up that it happened to fit the alternator that I had laying around. I also lucked up that the alternator fit the brackets AND that the pullies that I scavenged will line up with everything.
I may have used up all my luck, hope not.
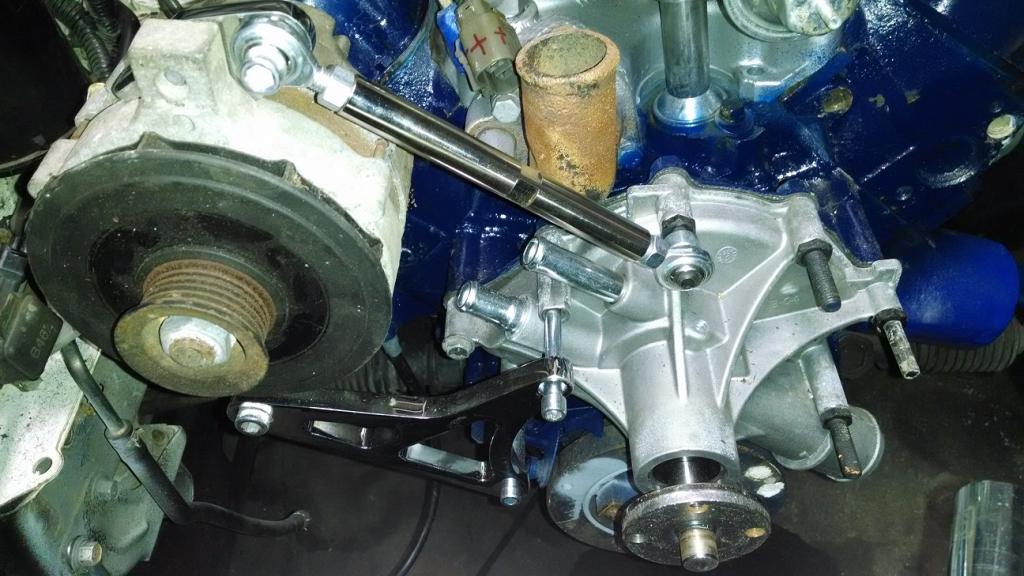
Last edited by Jack Sprat; 09-26-2014 at 09:30 PM.
09-26-2014, 09:38 PM
#97
V8 Miata Follower
Thread Starter
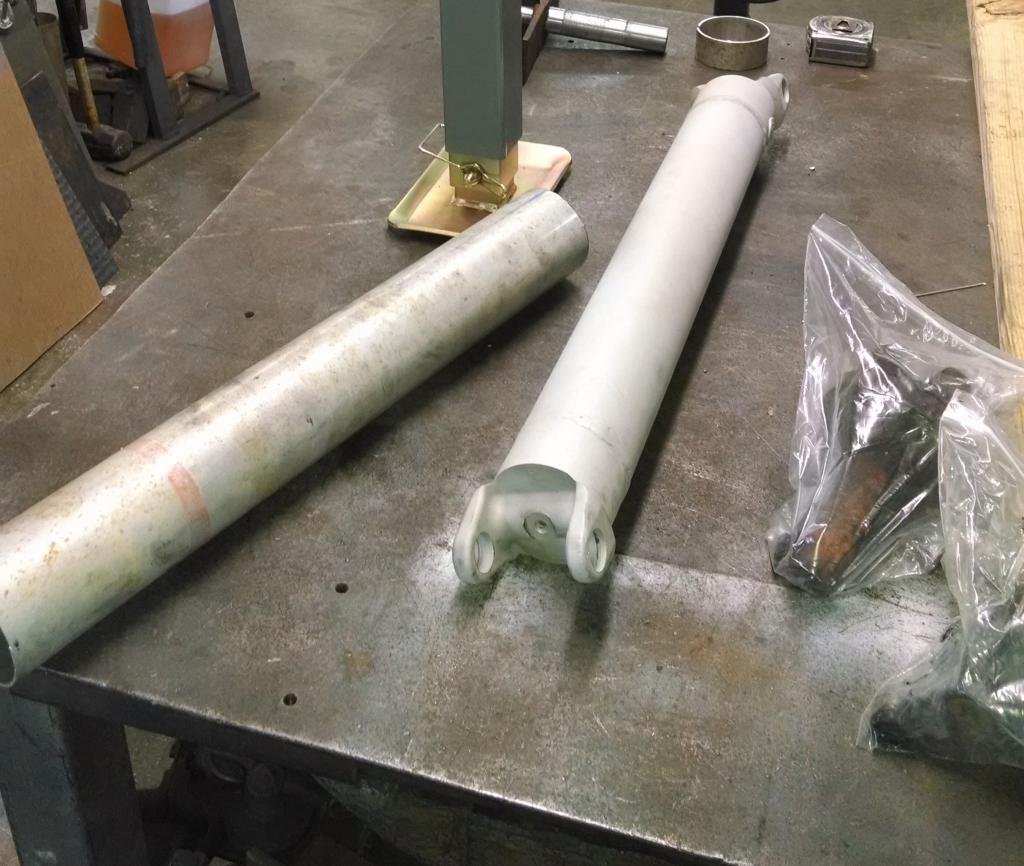
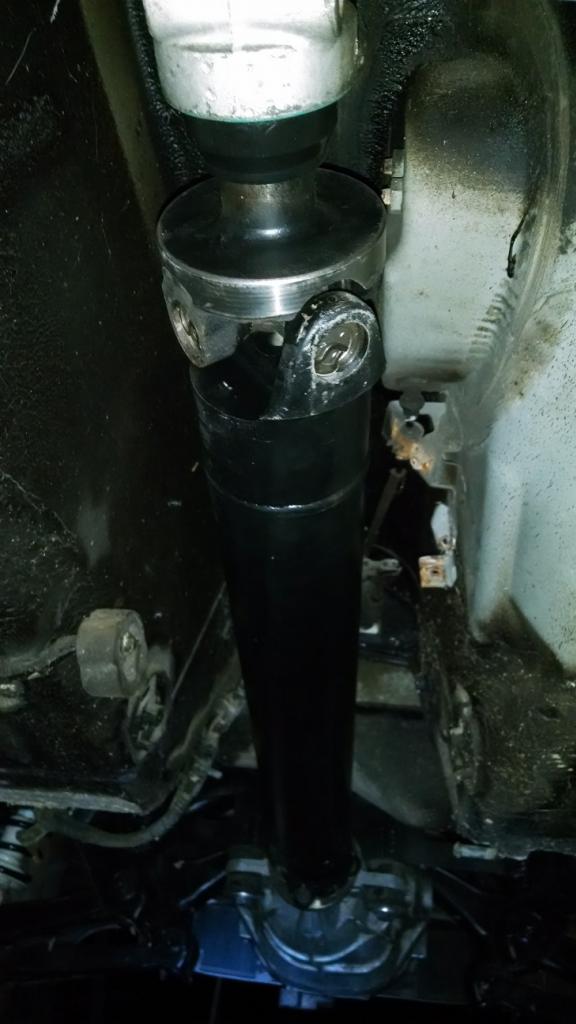
My Challenge budget prevents me from buying a ready-made drive shaft. I called on a favor from a friend who cut down and welded an aluminum drive shaft for me. The funny thing is that he cut out more than was left of the original shaft. It is so short that it doesn't even look right. Hope it fits when I try it out tomorrow.
The drive shaft is from an Aerostar and I'll have to use the 1310/1330 adapter U joints to adapt the Mustang ends onto the drive shaft. No biggie since they are cheap too.
The drive shaft is from an Aerostar and I'll have to use the 1310/1330 adapter U joints to adapt the Mustang ends onto the drive shaft. No biggie since they are cheap too.
Last edited by Jack Sprat; 09-26-2014 at 09:43 PM.
09-27-2014, 09:21 PM
#98
V8 Miata Follower
Thread Starter
Mixed bag of progress/regress.
The reverse rotation water pump didn't work with my timing cover. I have a choice, add a dummy pulley and fab a bracket OR pull a timing cover from a Crown Vic. I really want the weight savings so might have to do the latter.
Got the u joints installed, painted and installed the drive shaft. Last of the drive train components is in the bag. Drive shaft is so short that it looks more like a pto shaft than a drive shaft:
For those who want to buy a drive shaft, I found these links on a board somewhere:
Southwestspeed
http://www.southwestspeed.com/?sec=view_part&id=9803
Speedwaymotors
http://www.speedwaymotors.com/Steel-...afts,2187.html
Last edited by Jack Sprat; 09-27-2014 at 09:25 PM.
09-28-2014, 07:30 PM
#99
V8 Miata Noob

Join Date: Sep 2014
Posts: 15
Likes: 0
Received 0 Likes
on
0 Posts
I don't know if everyone else did this but I just had to see if it would fit in the car. It fits!!! I am just about as amazed as if I had just seen bigfoot!
The engine has been sitting about in the garage for quite some time. I am going to spiffy it up and make it look nice as time allows.
The engine has been sitting about in the garage for quite some time. I am going to spiffy it up and make it look nice as time allows.
This is the sort of build I want to do so keep on with it....
09-28-2014, 09:55 PM
#100
V8 Miata Follower
Thread Starter
Car looks like crap due to peeling clearcoat but it looks awesome to me with the hood down:
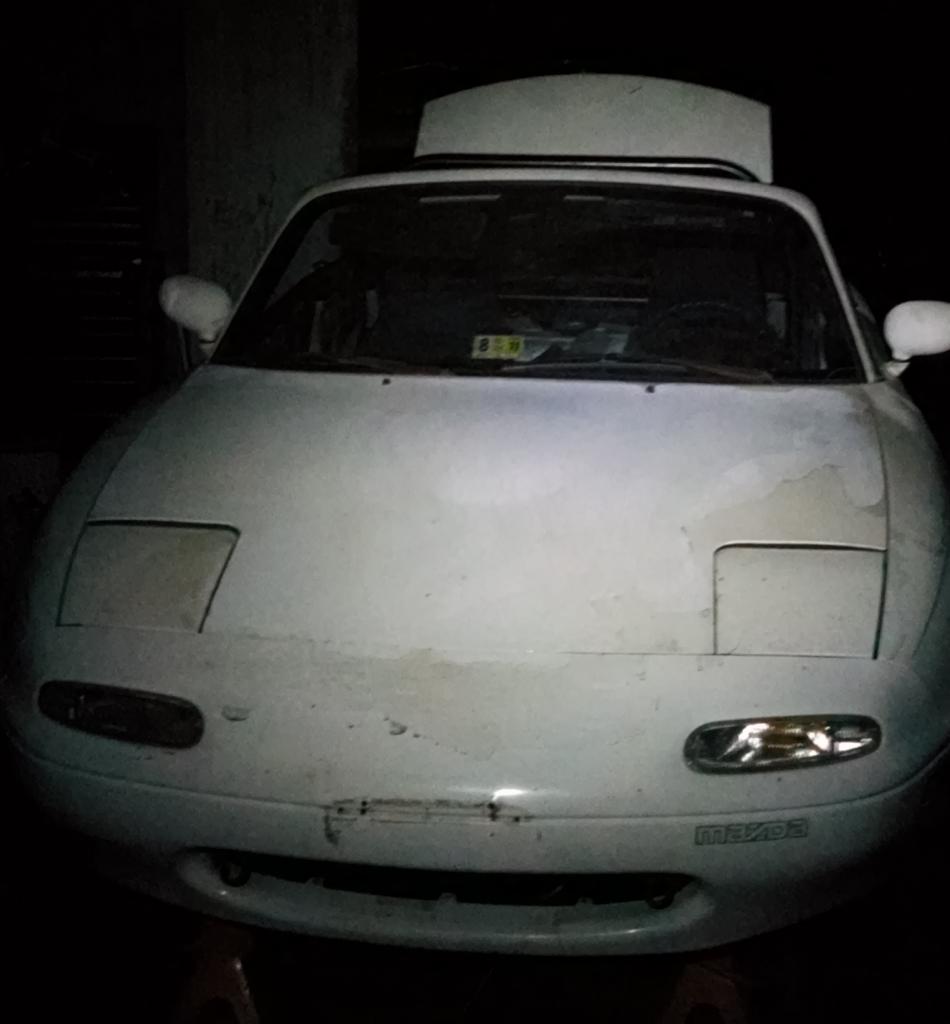
Didn't get as much as I wanted done but the drivetrain is completely installed and appears to turn freely with no abnormal noises.

Need to update my signature.


