V8R sloooww build - 94 Miata - North Carolina

 08-12-2015, 10:06 PM
#226
V8 Miata Fanatic

Thread Starter

Brief update: Shandelle at V8Roadsters confirmed this fool (my word, not his!) left off necessary large washers on my tubular lower rear control arms. New parts are on a big brown truck coming to NC via I-95 Northbound. Hope to install this Friday night. Keep you updated.
 11-30-2015, 06:07 PM
#227
V8 Miata Fanatic
Thread Starter
LOL, here's a brief note after 3.5 month absence of build-thread updates! Not that I don't love and visit V8M.net just about every day, but I had lost the cable for downloading pics from an older digital camera into this laptop. So, found a cable that fits, and here we are tonite...
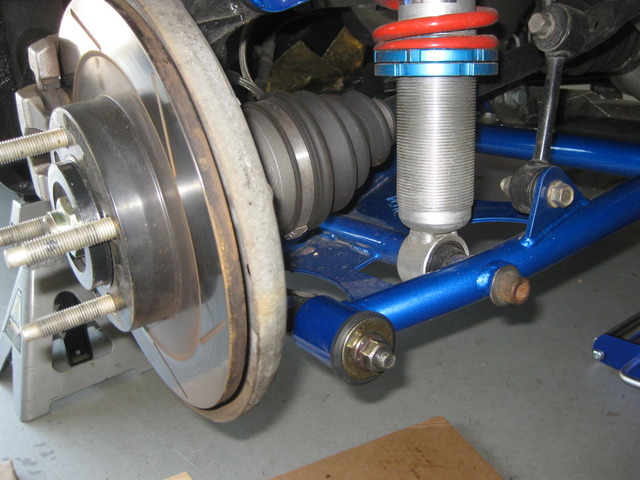
Quick show-n-tell on my missing washers for rear lower control arms: Got the L & R ones both installed in 30-45 minutes way back when...
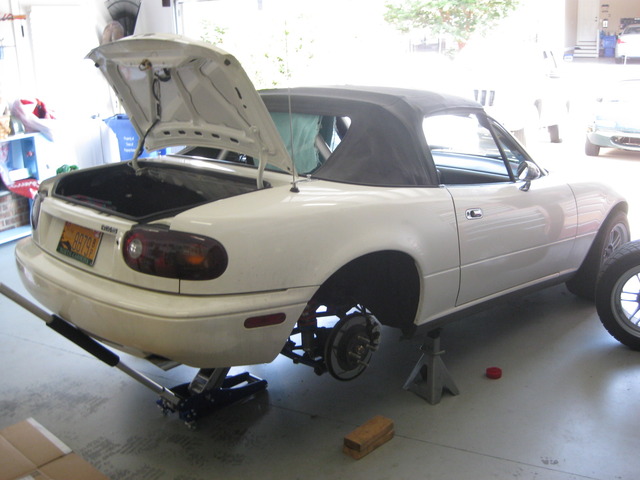
Jacked her @ss up
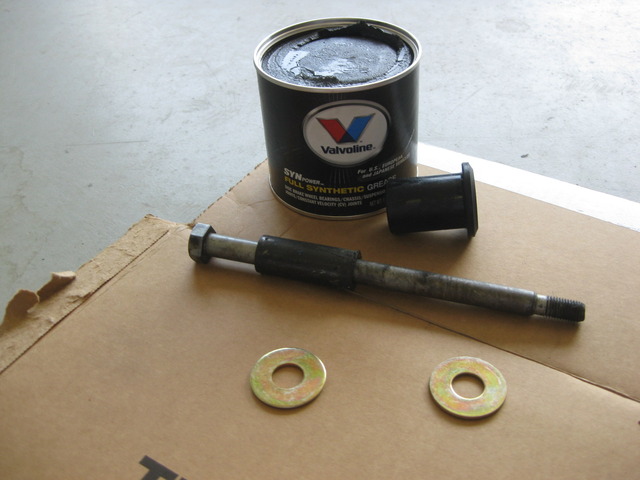
Here are some of the components. Steel bushing/insert, a rubber bushing, long Mazda bolt, and synthetic grease
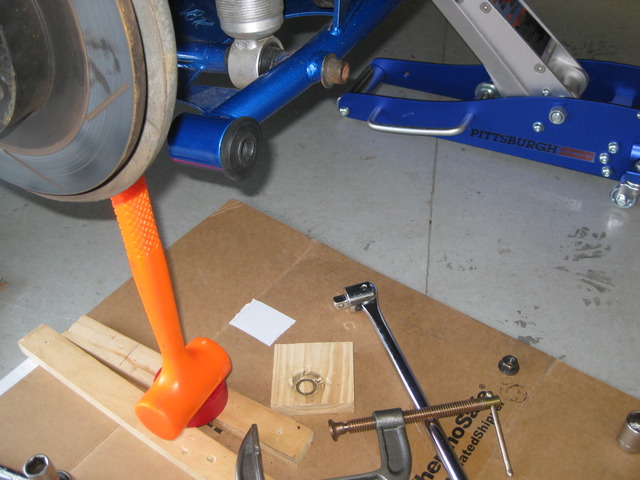
Since the
Good Lord didn�t equip me with a third arm & hand, I invented a way to hold the hub up and away from the work zone. Took large C clamp and pushed the two, new rubber bushings and steel inserts into the V8R tubular A-arms.
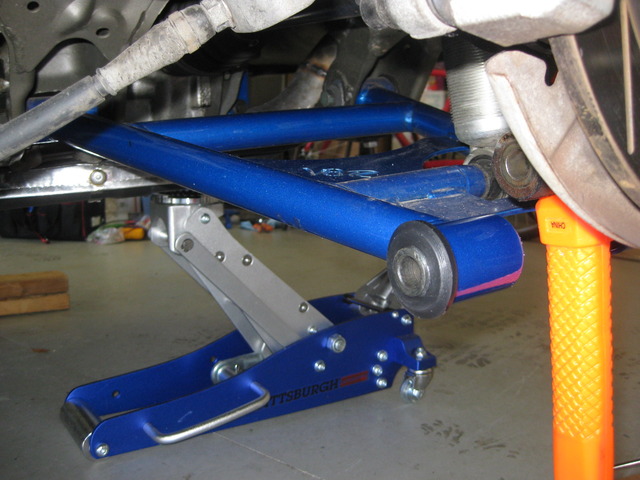
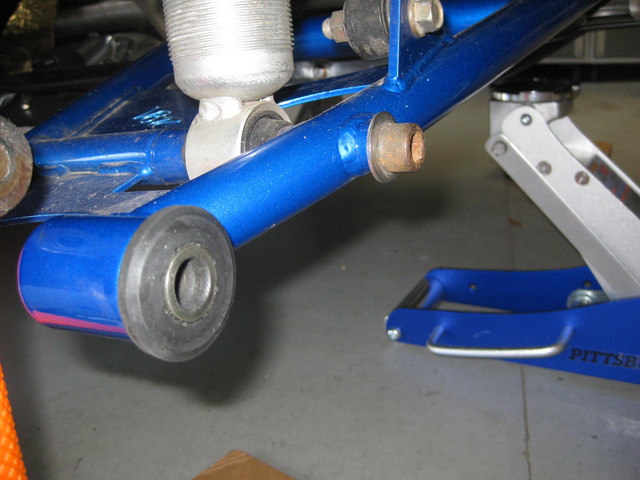
Lined up the hub and lower A-arm, put bolt in with new washers (that this fool never originally installed) and torqued everything down with weight applied to suspension so things can get back to normal.
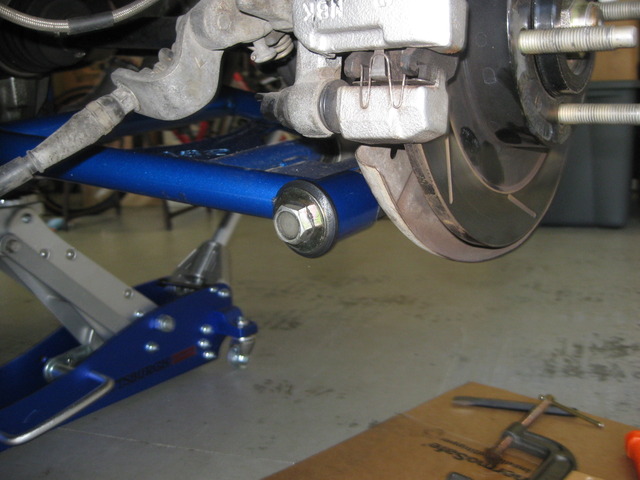
She drives like a champ once again. Have had a blast putting a few miles back on the car this Fall. Believe she�s up to 3,200 miles or so.
Only small concerns are little oil seepage � probably at side or rear of oil pan . Nothing major � just a wet spot or 2 under the car when pulled out of the garage. AND, my poor execution (or something!!) when prepping and painting the engine bay. The paint continues to act like a magnet for attracting dust and dirt � almost like masking tape! I may remove as much as possible under the hood and have professional painter prep and paint the bay with the motor and radiator covered up. Who knows. Most folks wouldn�t notice at a glance, but it bothers me!
Quick show-n-tell on my missing washers for rear lower control arms: Got the L & R ones both installed in 30-45 minutes way back when...
Jacked her @ss up
Here are some of the components. Steel bushing/insert, a rubber bushing, long Mazda bolt, and synthetic grease
Since the
Good Lord didn�t equip me with a third arm & hand, I invented a way to hold the hub up and away from the work zone. Took large C clamp and pushed the two, new rubber bushings and steel inserts into the V8R tubular A-arms.
Lined up the hub and lower A-arm, put bolt in with new washers (that this fool never originally installed) and torqued everything down with weight applied to suspension so things can get back to normal.
She drives like a champ once again. Have had a blast putting a few miles back on the car this Fall. Believe she�s up to 3,200 miles or so.
Only small concerns are little oil seepage � probably at side or rear of oil pan . Nothing major � just a wet spot or 2 under the car when pulled out of the garage. AND, my poor execution (or something!!) when prepping and painting the engine bay. The paint continues to act like a magnet for attracting dust and dirt � almost like masking tape! I may remove as much as possible under the hood and have professional painter prep and paint the bay with the motor and radiator covered up. Who knows. Most folks wouldn�t notice at a glance, but it bothers me!
11-30-2015, 06:13 PM
#228
V8 Miata Fanatic
Thread Starter
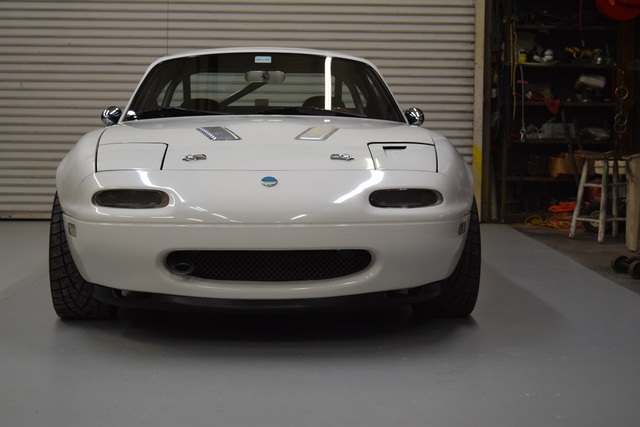
Next up on the list that day was to toss on my new mud guards from Rok Blokz. Rokblokz Rally Mud Flaps for the 1990-1997 Mazda Miata FREE SHIPPING - rally mud flaps I ordered the shorter set of mud flaps that didn’t hang down too low. I’m guessing the true rally enthusiast may want the longer ones to hang lower for extreme gravel and mud protection. I don’t find those aesthetically pleasing to my eye, so these shorter ones would fit the bill and are supposed to utilize factory mounting points for no drilling (and no rubbing on my painted fenders and bumpers like the Mazda OEM-style mud guards would eventually do…).
Here they are minus the nice package of hardware. Don’t believe any instructions were provided, but it was simple to figure out and utilize the nice stainless steel hardware, spacers, and few small brackets. They are heavy duty and fairly thick with smooth surface facing the tires and textured surface facing the rear… Do like.
IMG 1924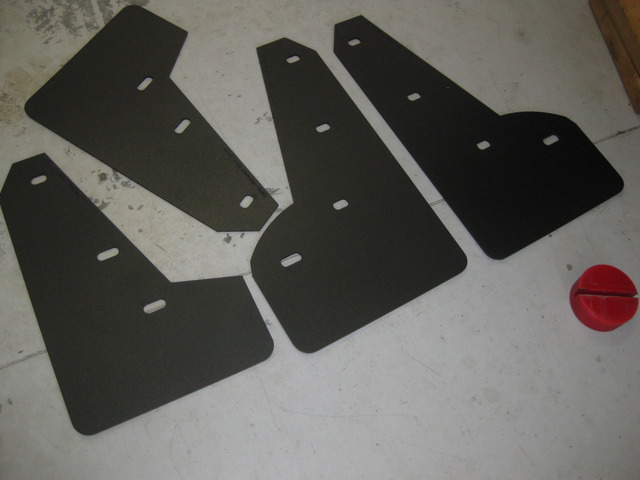
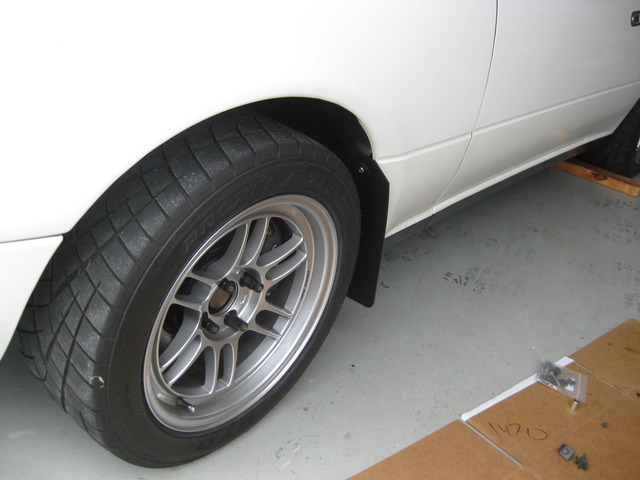
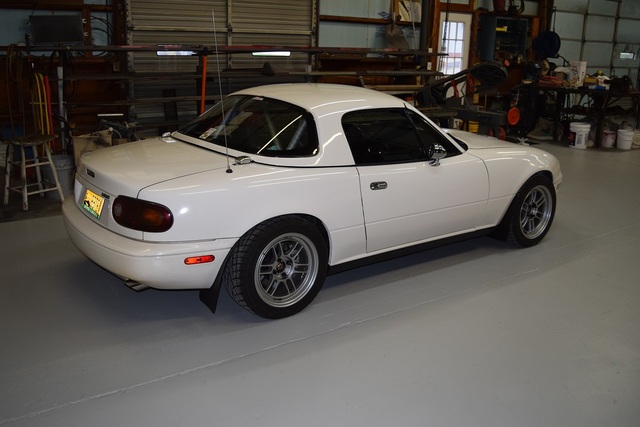
Rears installed:
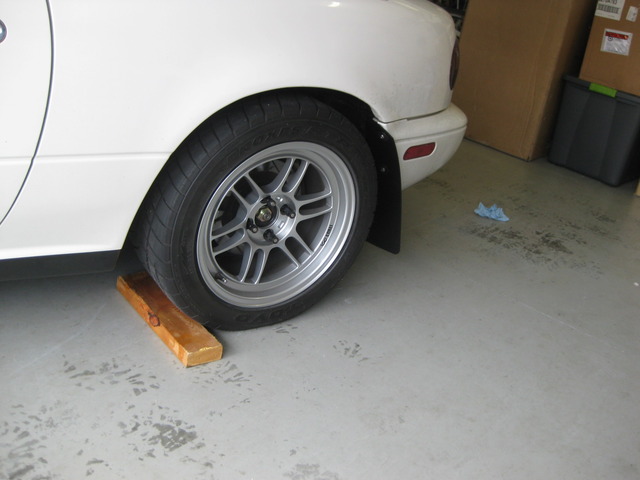
Notice how dirty it gets on rear bumper and lower 1/4 panel... These mud guards should keep the @ss end a bit cleaner, I hope...

Fronts installed:
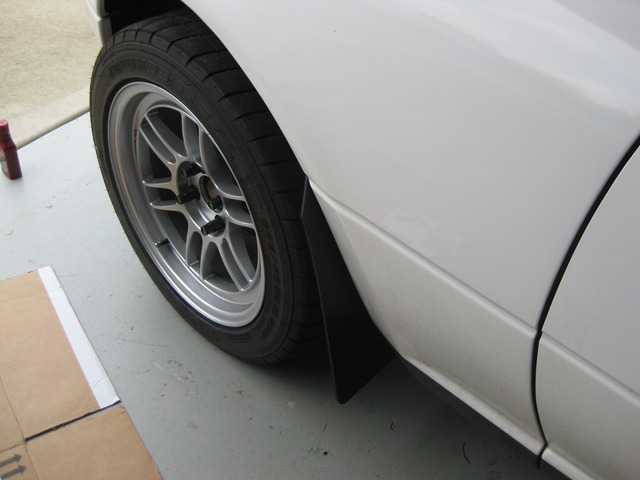
Here they are minus the nice package of hardware. Don’t believe any instructions were provided, but it was simple to figure out and utilize the nice stainless steel hardware, spacers, and few small brackets. They are heavy duty and fairly thick with smooth surface facing the tires and textured surface facing the rear… Do like.
IMG 1924
Rears installed:
Notice how dirty it gets on rear bumper and lower 1/4 panel... These mud guards should keep the @ss end a bit cleaner, I hope...
Fronts installed:

 12-02-2015, 12:09 AM
#230
V8 Miata Fanatic
Thread Starter
12-23-2015, 01:45 PM
#231
V8 Miata Noob

nice looking miata , who makes control arm for miatas? been looking for a while and apparently im looking in wrong place. do you have fronts as well and do they allow for more camber as well thanks in advance
12-24-2015, 09:05 PM
#232
V8 Miata Fanatic
Thread Starter
You can find them here --- NA/B 90-2005 - Suspension and Drive Train - Tubular Control Arms - V8 Roadsters
They look pretty good, give me a tad more space between rear half shafts and shock absorbers. Extra camber is there if you need it. Cheers.
They look pretty good, give me a tad more space between rear half shafts and shock absorbers. Extra camber is there if you need it. Cheers.
12-27-2015, 12:11 AM
#233
V8 Miata Fanatic
Thread Starter
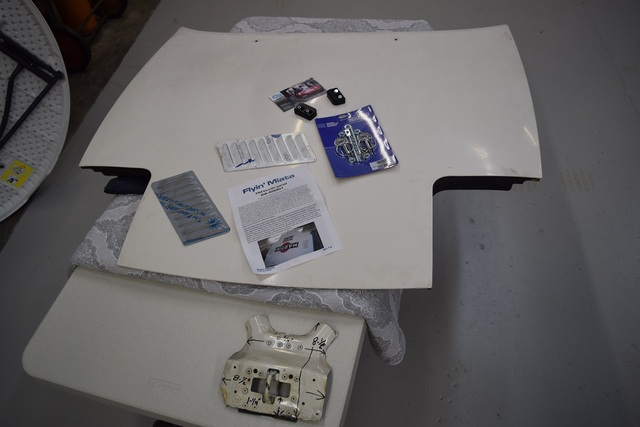
Christmas 2015 has come and gone & I have a few free hours to spend in the shop tonite! The timing is right as I have a new, small project to start on for the Roadster. I did one quick interweb Christmas purchase at Flyin� Miata on a set of aluminum hood vents and the GarageStar hard plastic door blocks.
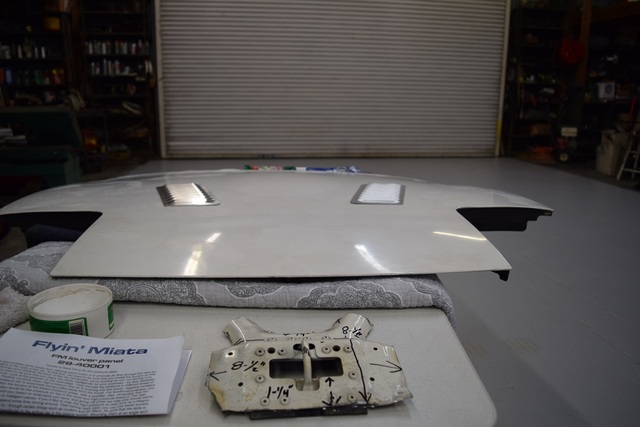
So tonite, I take the extra white hood that I purchased about 8 months ago out of storage and proceed to lay out my plan for installing the hood vents in the area with the lowest pressures (according to FM and other hood vent providers.) This extra hood isn�t perfect � far from it � but it gives me the opportunity to see if I like the results without having to cut up the hood on my car. I only will have one shot at cutting up MY hood, and I want to make it RIGHT when that time comes � if I do decide to modify it one day.
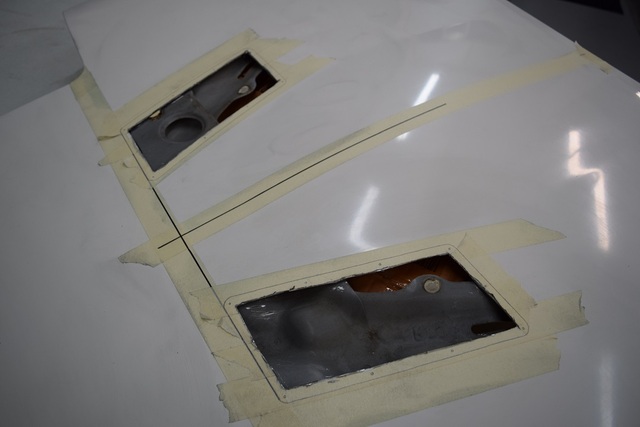
Step One is to remove the existing hood latch assembly for the existing Z06 intake. With the fading hope that I can build another V8Miata one day in the future, I saved the previous cut-out latch as my template. That proved to be a winner and saved me considerable time with this task. The Harbor Frt cut-off tool did a pretty nice job on this old Japanese aluminum sheetmetal� Pulled out the latch and filed down all the trimmed edges.
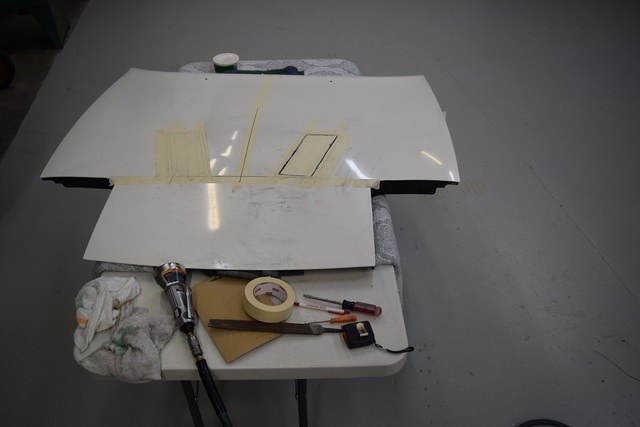
Step Two is laying out the hood vents. Simply used the masking tape to find the horizontal and vertical lines, �split� the hood down the middle, and confirmed my most preferred location for the aluminum vents.
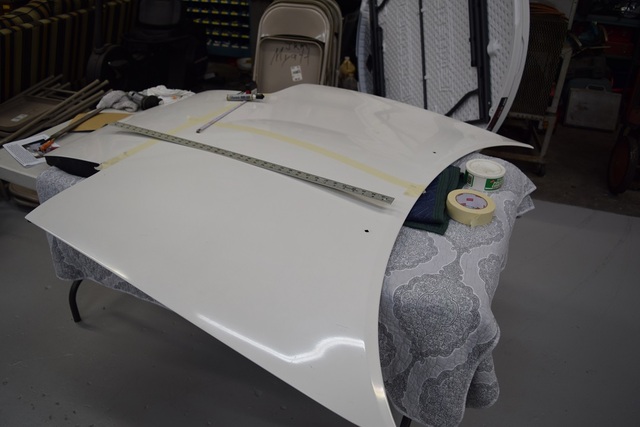
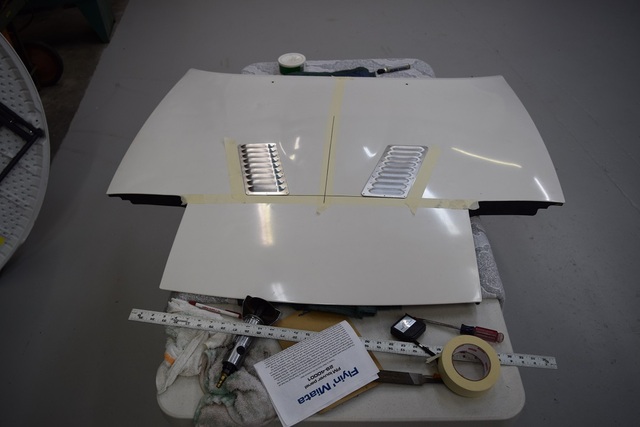
With the vents in place, I traced their shapes onto the masking tape, and decided on how much inner �lip� I needed for riveting these on later.
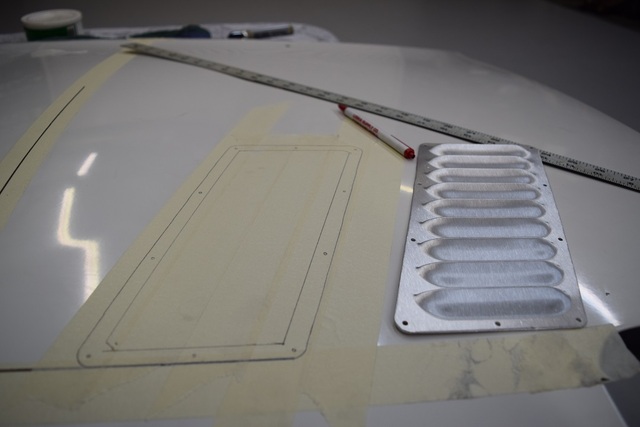
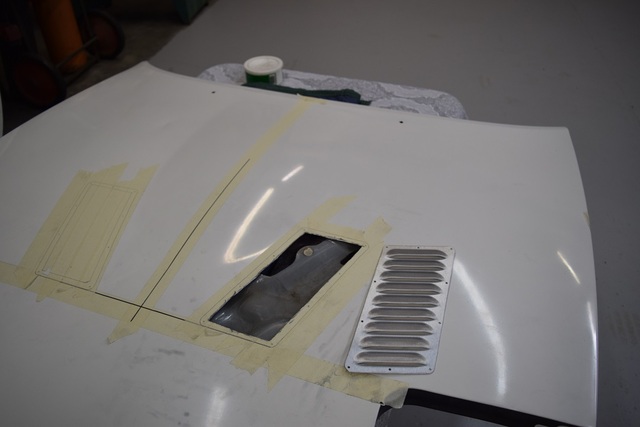
Step Three is using the HF cut-off tool and slicing out the two rectangle shapes to only reveal how much of the under-hood structure I�ll need to remove or drill holes into for improved air-flow.
Tomorrow, I hope to locate my hole saws, rivet gun/ tool, alum rivets, and finish up this quick project! Keep you posted!!
 12-27-2015, 07:51 AM
#234
V8 Miata Noob
thanks for info on control arms after i reread i realized i should have reread! if that makes sense lol . love the hood vents they will get rid of some of that hot air under there and maybe help keep front end planted at max velocity as well
 12-28-2015, 08:39 PM
#236
V8 Miata Fanatic
Thread Starter
Thanks Franko and BeGood for the comments. The small cut-off disc on the Harbor Freight tool didn't seem to gum up at all. It tore through the alum easily and coated the immediate area in aluminum "dust" and small shavings. Just love that HF tool !!!
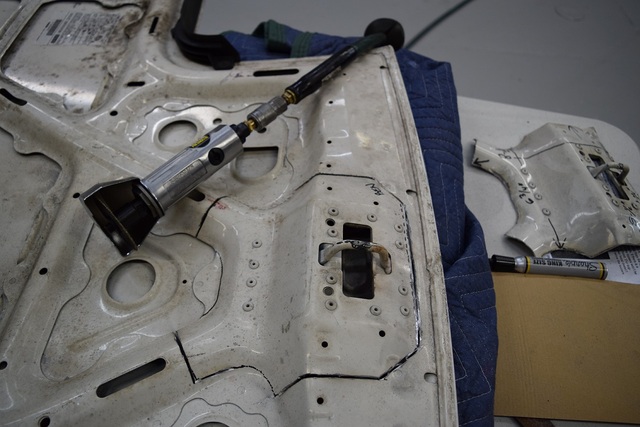
In-progress update: Spent some time Sunday afternoon on cutting out - swiss cheesing - the under hood structure. Went to a local Ace Hardware store that afternoon for two things: small aluminum rivets with 1/8" diameter and 1/8" grip and an approx. 1" hole saw. I left the hardware store with the rivets and a small 4-1/2" bench vise for my dad's new work bench at their new house. (Remembered the small hole saw after I got back to the shop... I'm old enough now that I should write down everything before making a parts run, or risk coming home with the wrong stuff or forgetting to purchase what I thought I needed.)
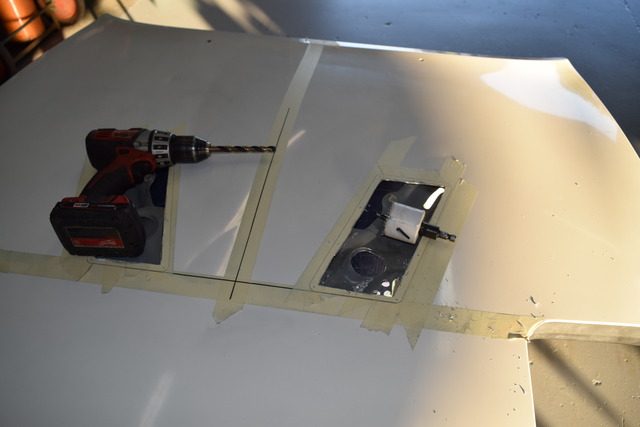
So, with only a 2" hole saw and an assortment of drill bits (selected the largest 1/2" one) - I went ahead and drilled out the under bracing as needed.
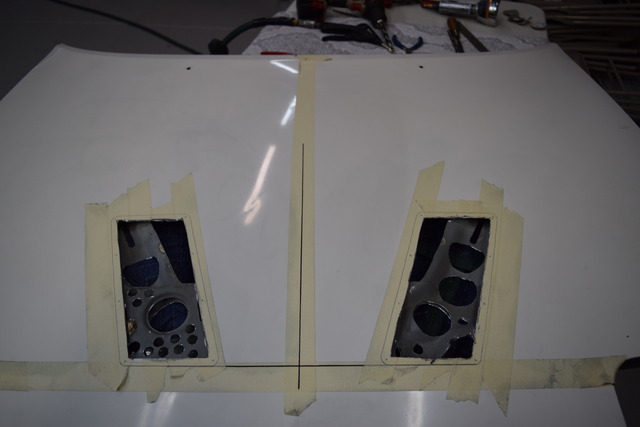
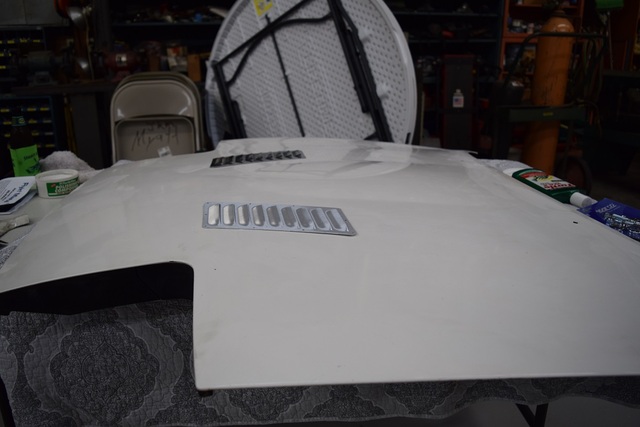
Somewhat random pattern was decided on, holes were cut, edges were smoothed out with several files, and I'm ready for riveting on the louvered panels. I'll wait until I can get my dad to drop by so we can hang the hood on the car and drill out for the two Sparco hood latches.

Not sure if you can see it real well in the photos, but I thought it was somewhat interesting (and a bit disappointing) that the two aluminum louvered panels from Flyin' Miata were different in appearance and feel. The driver-side panel is rougher finish while the passenger side panel is very smooth and shiny. Since this is the "rough hood", I'm going au-natural and leave them as is for now. I may decide to paint them either satin black or silver. That's for later on, I guess.
In-progress update: Spent some time Sunday afternoon on cutting out - swiss cheesing - the under hood structure. Went to a local Ace Hardware store that afternoon for two things: small aluminum rivets with 1/8" diameter and 1/8" grip and an approx. 1" hole saw. I left the hardware store with the rivets and a small 4-1/2" bench vise for my dad's new work bench at their new house. (Remembered the small hole saw after I got back to the shop... I'm old enough now that I should write down everything before making a parts run, or risk coming home with the wrong stuff or forgetting to purchase what I thought I needed.)
So, with only a 2" hole saw and an assortment of drill bits (selected the largest 1/2" one) - I went ahead and drilled out the under bracing as needed.
Somewhat random pattern was decided on, holes were cut, edges were smoothed out with several files, and I'm ready for riveting on the louvered panels. I'll wait until I can get my dad to drop by so we can hang the hood on the car and drill out for the two Sparco hood latches.
Not sure if you can see it real well in the photos, but I thought it was somewhat interesting (and a bit disappointing) that the two aluminum louvered panels from Flyin' Miata were different in appearance and feel. The driver-side panel is rougher finish while the passenger side panel is very smooth and shiny. Since this is the "rough hood", I'm going au-natural and leave them as is for now. I may decide to paint them either satin black or silver. That's for later on, I guess.
12-31-2015, 12:40 PM
#237
V8 Miata Fanatic
Thread Starter
I should really be more careful with how I manage my spare time off of work this afternoon.., but I found myself checking out FM's V8 conversion items for sale and stumbled upon the AC kit that ties in the CTS-V compressor to everything else Miata - plumbing that is.
https://www.flyinmiata.com/v8-complete-ac-kit.html
After a few clicks, I should have one of these on the way. This will give me the next few months to plumb and wire up the system on my car. I just never have wanted to tackle this endevor, but I know I'll like it this summer! I'll do a step-by-step in the thread later on.
Happy New Year.
12-31-2015, 01:04 PM
#238
V8 Miata Fanatic

I should really be more careful with how I manage my spare time off of work this afternoon.., but I found myself checking out FM's V8 conversion items for sale and stumbled upon the AC kit that ties in the CTS-V compressor to everything else Miata - plumbing that is.
https://www.flyinmiata.com/v8-complete-ac-kit.html
After a few clicks, I should have one of these on the way. This will give me the next few months to plumb and wire up the system on my car. I just never have wanted to tackle this endevor, but I know I'll like it this summer! I'll do a step-by-step in the thread later on.
Happy New Year.
https://www.flyinmiata.com/v8-complete-ac-kit.html
After a few clicks, I should have one of these on the way. This will give me the next few months to plumb and wire up the system on my car. I just never have wanted to tackle this endevor, but I know I'll like it this summer! I'll do a step-by-step in the thread later on.
Happy New Year.
12-31-2015, 01:47 PM
#239
V8 Miata Fanatic
Thread Starter
Yeah, but you have skills! I happened to have some PayPal credit from recent used car part sales on eBay from earlier in the month and just had to spend it!
12-31-2015, 02:04 PM
#240
V8 Miata Fanatic
 01-01-2016, 11:01 PM
#241
V8 Miata Fanatic
Thread Starter
Good fun this afternoon in the shop with my Dad. He’s 81 but sure doesn’t seem like it most days, thankfully. I needed his help with swapping out hoods and polishing up this “salvage” second hood that has now been cut and sliced up to some degree.
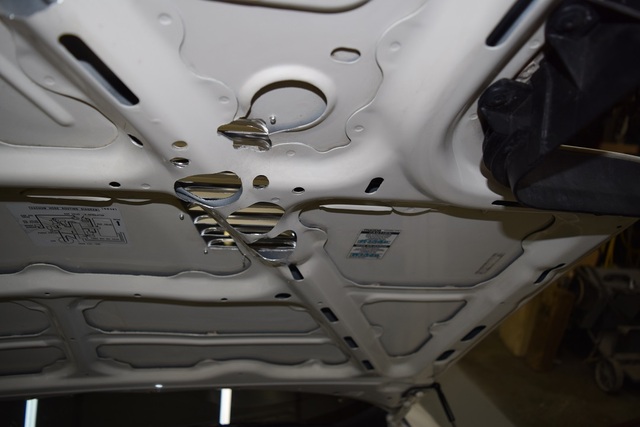
First order of business was drilling out the 1/8” holes for the rivets and popping them into place.
Here’s the back of vent view…
We next set the hood in roughly the right spot and drilled out the �” holes for the two hood pins. Once those were drilled, we had to take a round file and elongate the two holes from front to back so the pins would glide through the hood when lowered and raised.
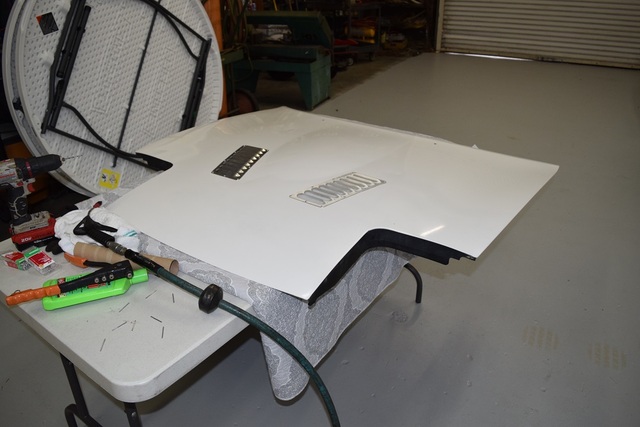
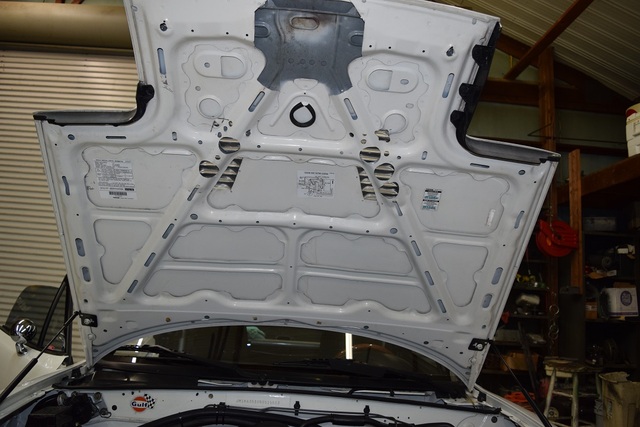
Now have some breathing room… Plenty of hood understructure is left in place – yet there’s enough openings to allow heat and air to flow out of this thing when shut.
Aligned and riveted on the SPARCO hood pin pieces (for lack of a true technical name, I guess). The only issue I have with this used hood, and it's not a biggie.., but the LH front corner of the hood - just behind the driver-side headlight - sits just a tad high when shut. So I have this slightly larger gap there that I don't think I had with my original hood. I pulled down and did my best to tweak it and minimize the problem. I'll correct it sometime soon.
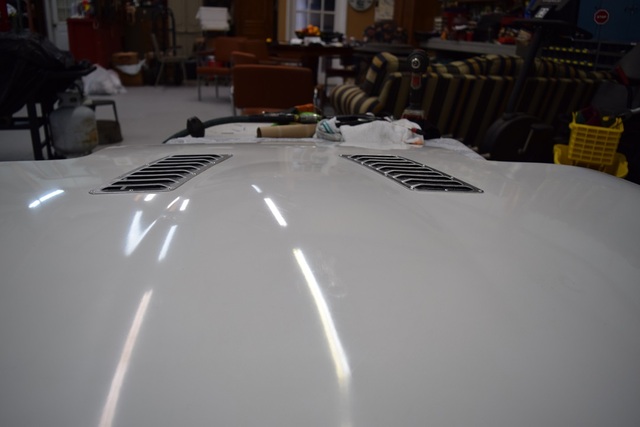
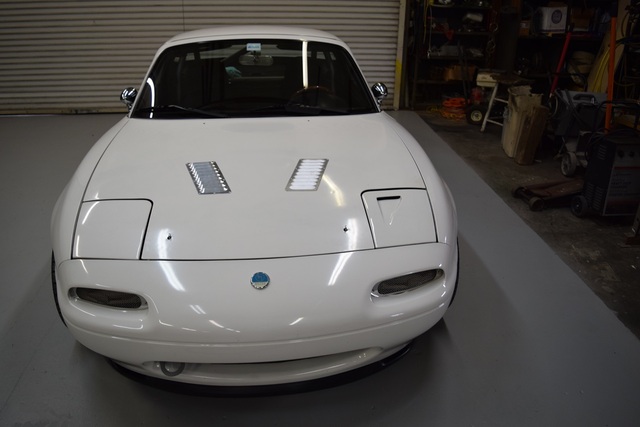
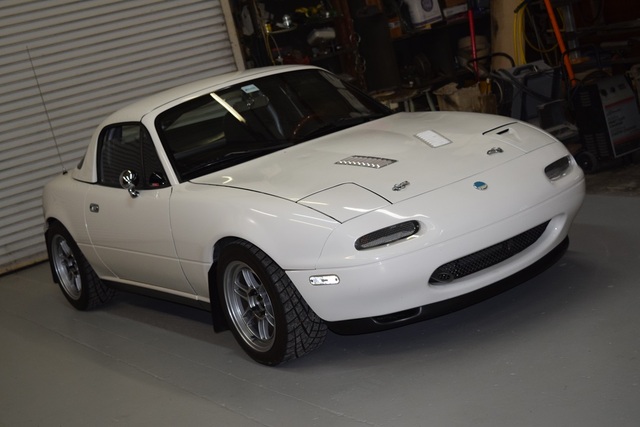
And now for some obligatory photos of this nasty little thing as I try out the new camera. I’m certainly no photographer, but I look forward to learning how to improve my game and snap better pics at car shows/ events/ races, etc.
First order of business was drilling out the 1/8” holes for the rivets and popping them into place.
Here’s the back of vent view…
We next set the hood in roughly the right spot and drilled out the �” holes for the two hood pins. Once those were drilled, we had to take a round file and elongate the two holes from front to back so the pins would glide through the hood when lowered and raised.
Now have some breathing room… Plenty of hood understructure is left in place – yet there’s enough openings to allow heat and air to flow out of this thing when shut.
Aligned and riveted on the SPARCO hood pin pieces (for lack of a true technical name, I guess). The only issue I have with this used hood, and it's not a biggie.., but the LH front corner of the hood - just behind the driver-side headlight - sits just a tad high when shut. So I have this slightly larger gap there that I don't think I had with my original hood. I pulled down and did my best to tweak it and minimize the problem. I'll correct it sometime soon.
And now for some obligatory photos of this nasty little thing as I try out the new camera. I’m certainly no photographer, but I look forward to learning how to improve my game and snap better pics at car shows/ events/ races, etc.
Last edited by ToySnakePMC; 01-01-2016 at 11:20 PM.
The following users liked this post:
Underdog (01-03-2016)
01-01-2016, 11:04 PM
#242
V8 Miata Fanatic
Thread Starter
And this short Christmas break project is now completed. I had an hour or so late this afternoon in 50F temperature to drive the car and exercise it a bit. Obviously, it wasn't warm by any means today and the temp gauge just hovered in that 183-186F range... No changes operationally, but I do like feeling the hot air trickling out when parked now with the hood down.
My goodness this thing is a wicked little brute! Too bad I had to run back home and put it away for the next several days/ weeks/ or whatever... Driving it is ALMOST as fun as building it.
My goodness this thing is a wicked little brute! Too bad I had to run back home and put it away for the next several days/ weeks/ or whatever... Driving it is ALMOST as fun as building it.
01-03-2016, 12:40 PM
#243
V8 Miata Noob

Join Date: Dec 2015
Location: oklahoma
Posts: 4
Likes: 0
Received 0 Likes
on
0 Posts
Love all the wounderfull work and info!!! When you removed the PCM what did you do with the AC wiring from it? Do you know if the Brown #10 pin in the gm PCM needs power to it? Thanks cant wait to start driving my 96!!!
01-03-2016, 01:02 PM
#244
V8 Miata Noob
Almost as much fun? wow i would have thought it would be twice the fun driving
that little rocketship! how does it handle? do you have any plans to autocross it later in the season? you have done a fantastic job on this build! I have a 97 if you need another project lol thanks for sharing this with us and happy new year!
that little rocketship! how does it handle? do you have any plans to autocross it later in the season? you have done a fantastic job on this build! I have a 97 if you need another project lol thanks for sharing this with us and happy new year!
01-08-2016, 04:48 PM
#245
V8 Miata Fanatic
Thread Starter
Almost as much fun? wow i would have thought it would be twice the fun driving
that little rocketship! how does it handle? do you have any plans to autocross it later in the season? you have done a fantastic job on this build! I have a 97 if you need another project lol thanks for sharing this with us and happy new year!
that little rocketship! how does it handle? do you have any plans to autocross it later in the season? you have done a fantastic job on this build! I have a 97 if you need another project lol thanks for sharing this with us and happy new year!
The following users liked this post:
charchri4 (01-19-2016)
01-19-2016, 01:17 PM
#247
V8 Miata Noob

Great thread. I am currently beginning my journey to an LS Miata. I am over on the coast in NC and wondered if one of these days I might get the opportunity to come check yours out and pick your brain? Lots of fantastic information.
01-23-2016, 07:54 AM
#248
V8 Miata Fanatic
Thread Starter
Hello JR !! I'd be more than happy to have you drop by, discuss all things V8Miata-related and go for a drive - with some decent weather  . Anything I can do to help, just drop me a PM and we can talk on the phone.
I grew up in Kinston - many years ago... Where abouts are you from?
. Anything I can do to help, just drop me a PM and we can talk on the phone.I grew up in Kinston - many years ago... Where abouts are you from?
01-23-2016, 08:42 AM
#249
V8 Miata Noob
Born on Camp Lejeune, raised outside the back gate, grew up and joined the USMC myself and now live over in Newport (between havelock and morehead city).
My husband and I do quite a bit of mechanic work, and he is finishing up his newest version of his LS RX7 FD. Last weekend I drove my turbo Miata one last time before stripping her this week in preparation for her new heart. She went from running/driving happy car to completely naked engine bay and interior in a week. Most of it I think we have figured out, the electrical is my scary point and I've told my husband that I would like to do the majority of the work on this one...so it's truly my build, we shall see how far I get haha (I am, however, intelligent enough to know when I need help...only the best craftsmanship will be used for this endeavor.)
I've been floating around on the forum for a while, but just signed up so I could actually ask questions and such. I appreciate your assistance and can't wait to get some better weather. Stay safe in this nasty weather...we are expected to have all the rain we got yesterday freeze over tonight.
01-23-2016, 09:48 AM
#250
V8 Miata Fanatic
Thread Starter
Very good! That's quite an interesting story & introductory post, you got there! You should copy and paste that into a new member thread or the start of your build thread - for sure!!
Love the FD/LS, that's pretty wicked, I would guess. Sounds like you 2 have skills and won't have any trouble building YOUR toy your way. Start the build thread and take lots of pics.
Know Newport and JaxVegas fairly well. My parents lived on Hwy 24 close to Cape Carteret. Nice area.
Love the FD/LS, that's pretty wicked, I would guess. Sounds like you 2 have skills and won't have any trouble building YOUR toy your way. Start the build thread and take lots of pics.
Know Newport and JaxVegas fairly well. My parents lived on Hwy 24 close to Cape Carteret. Nice area.


