pj_mcgarvey's - LS1/T56 NB build thread

 05-07-2017, 09:38 AM
#176
V8 Miata Enthusiast
Thread Starter

The other major development is with the clutch. With all the work I did to reinstall the rear oil seal, oil pan, etc, I got the bellhousing back on and decided to do what I did not do before - check the clutch throwout bearing clearance with the clutch. So I have a fresh T56, new GM throwout bearing, new T56 bellhousing, new Monster clutch/flywheel. Monster says you should not have issues with clearance on their setup... so guess what? I do. quite a bit.
Tick Performance gives a good overview of what I'm talking about here in the description of their shim kit: Tick Performance Slave Cylinder Shim Kit (3 Pack) - Tick Performance, Inc.
The shim kit is intended to make up for too much distance between your throwout bearing and clutch fingers. I had negative clearance, my TO bearing was too close. So the TO bearing was contacting the clutch fingers all the time, and actually pushing in the fingers a bit, may 0.2". The clutch actuation felt fine to me during my test drives, but I was not getting full power I thought. What I think now is that the clutch may have been slipping or not grabbing as much, which was more pronounced under power. The clutch PP, disc and flywheel looked fine when I pulled them. Maybe b/c I didn't drive it that much or push it. Hopefully I didn't create more problems, but we'll see. I don't think this caused any problems with the rear oil seal either.
So shims won't help my issue, but a different TO bearing will, basically a shorter one. Possibly a different clutch would as well or bellhousing (if that exists), but in the spirit of project cars everywhere, the only solution is to throw more parts/money at it.
My options are a:
McLeod adjustable TO bearing
https://www.summitracing.com/parts/mcl-1364/reviews
Or a Tilton adjustable TO bearing:
http://tiltonracing.com/product/6000...ease-bearings/
Going to make some phone calls Monday to find out more info. The McLeod unit seems to have some reliability problems that I'd rather not deal with obviously. Tilton is a great name in racing, but there is less info out there on them. Prices are similar. The braided lines on both are way too short, so I'm not sure if my existing hydraulic lines will work.
Still scratching my head how all the right parts are in place, but that I'm so far out of spec on the clearance...
In other news, I think my exhaust is mostly done. I rerouted it a bit, added resonators and moved the hangers in the rear, and put in some new rubber isolators, as I was using the old ones from the Miata. I redid one of the pipes off the header tube so I need to reweld the o2 sensor bung which I was able cut off and reuse, just need to get the position of it right before I weld it in.
Last edited by pj_mcgarvey; 05-12-2017 at 09:17 AM.
 05-12-2017, 09:28 AM
#177
V8 Miata Enthusiast
Thread Starter
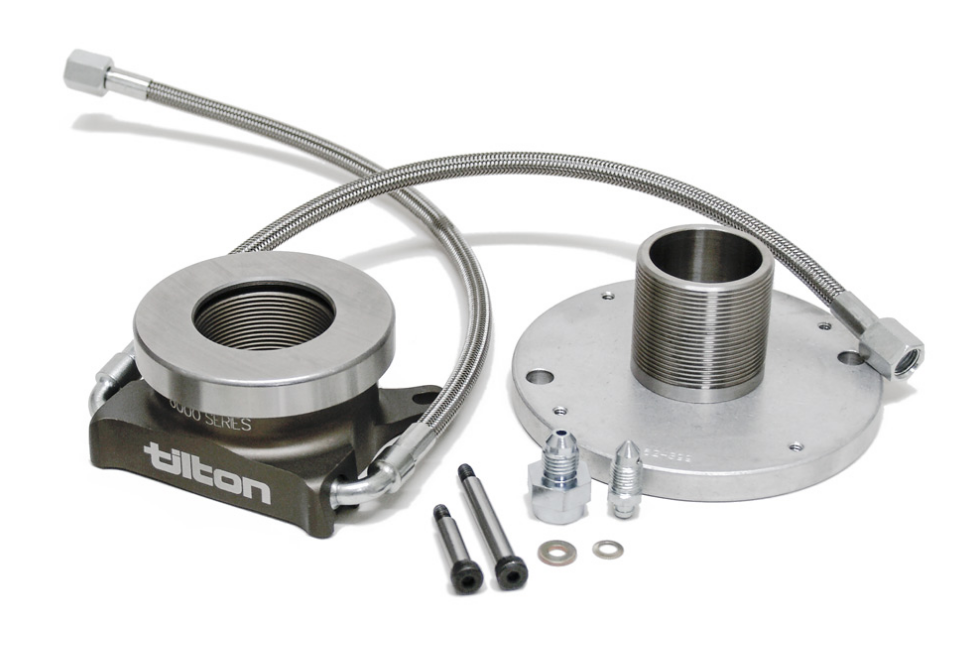
Went with the Tilton TO bearing, seemed like a very high quality piece, with lots of good documentation.
6000-Series Hydraulic Release Bearings - Tilton Engineering
http://tiltonracing.com/wp-content/u...ies-HRB-V2.pdf
http://tiltonracing.com/wp-content/u...294_NC_web.pdf
Purchased from Summit Racing, as well as these adapters so I could use my existing clutch lines. The Tilton lines are only 12" long to get you out of the bellhousing. https://www.summitracing.com/parts/EAR-501902ERL
Install was pretty easy, bolted it up with original bolts to 71 in. lbs. The slave cylinder mounts on a threaded adjustable base. So you can turn the cylinder to adjust the bearing up or down and get the clearance just right. Tilton calls for 0.125" or 1/8".
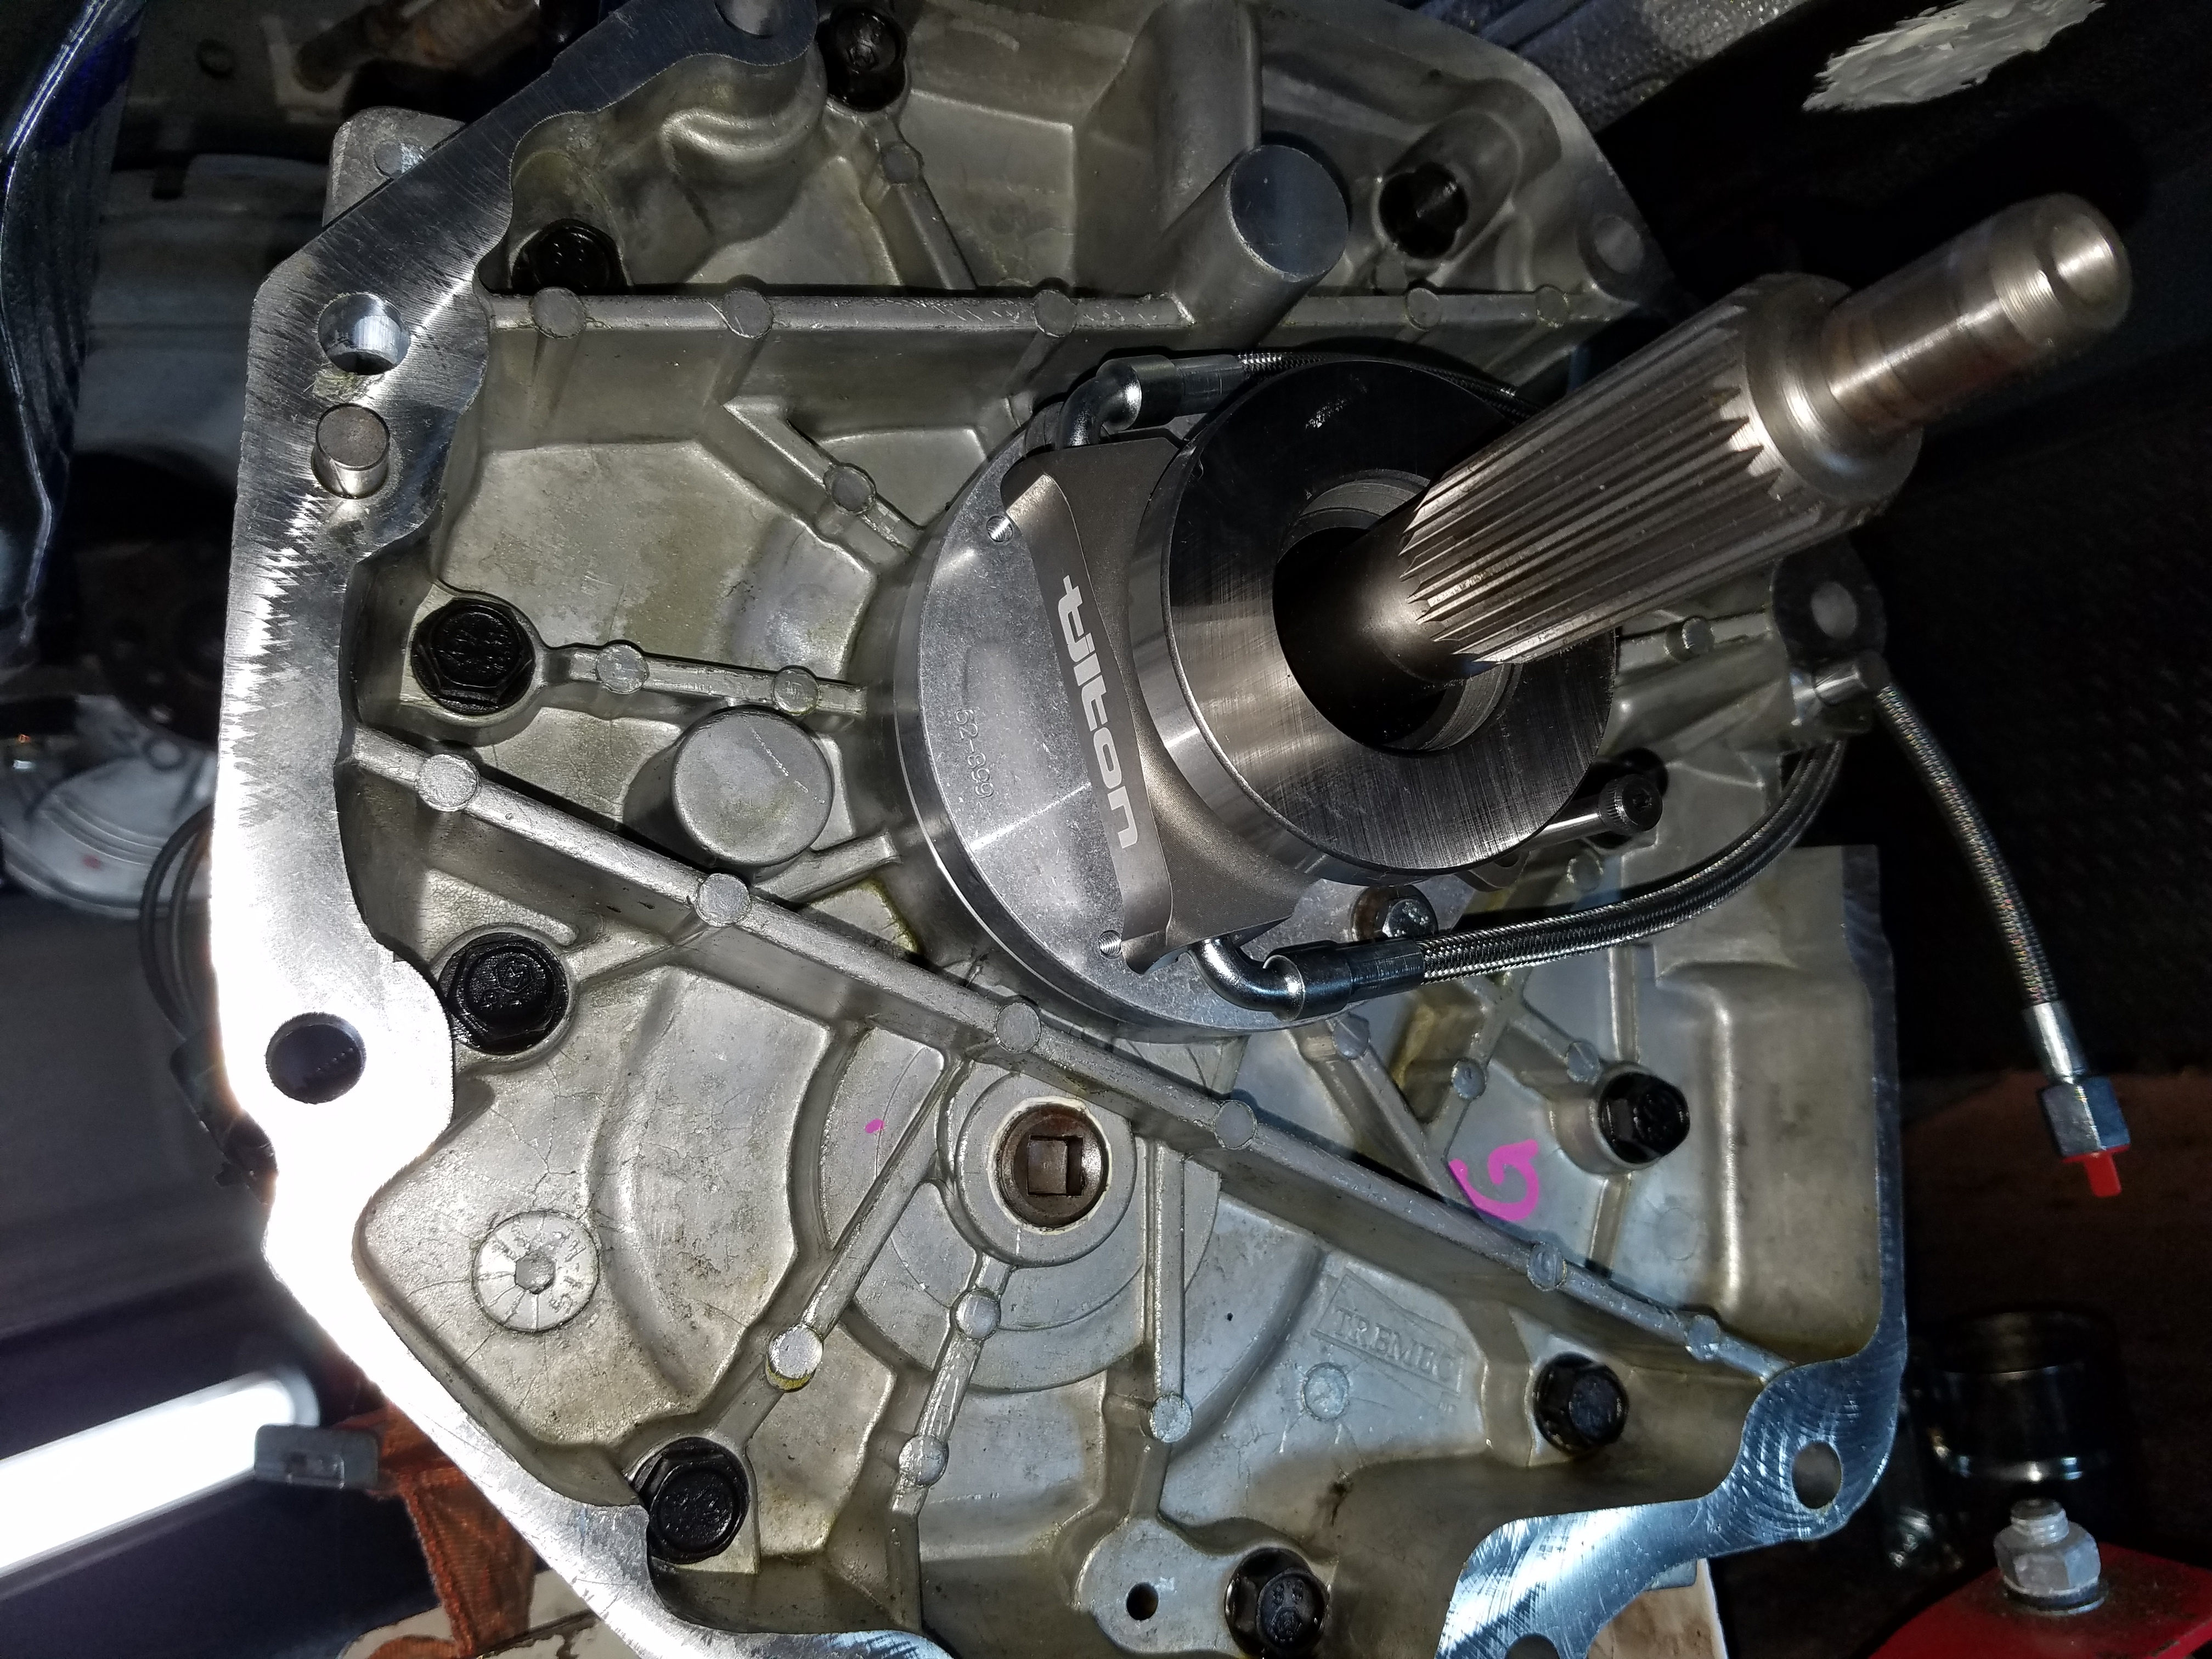
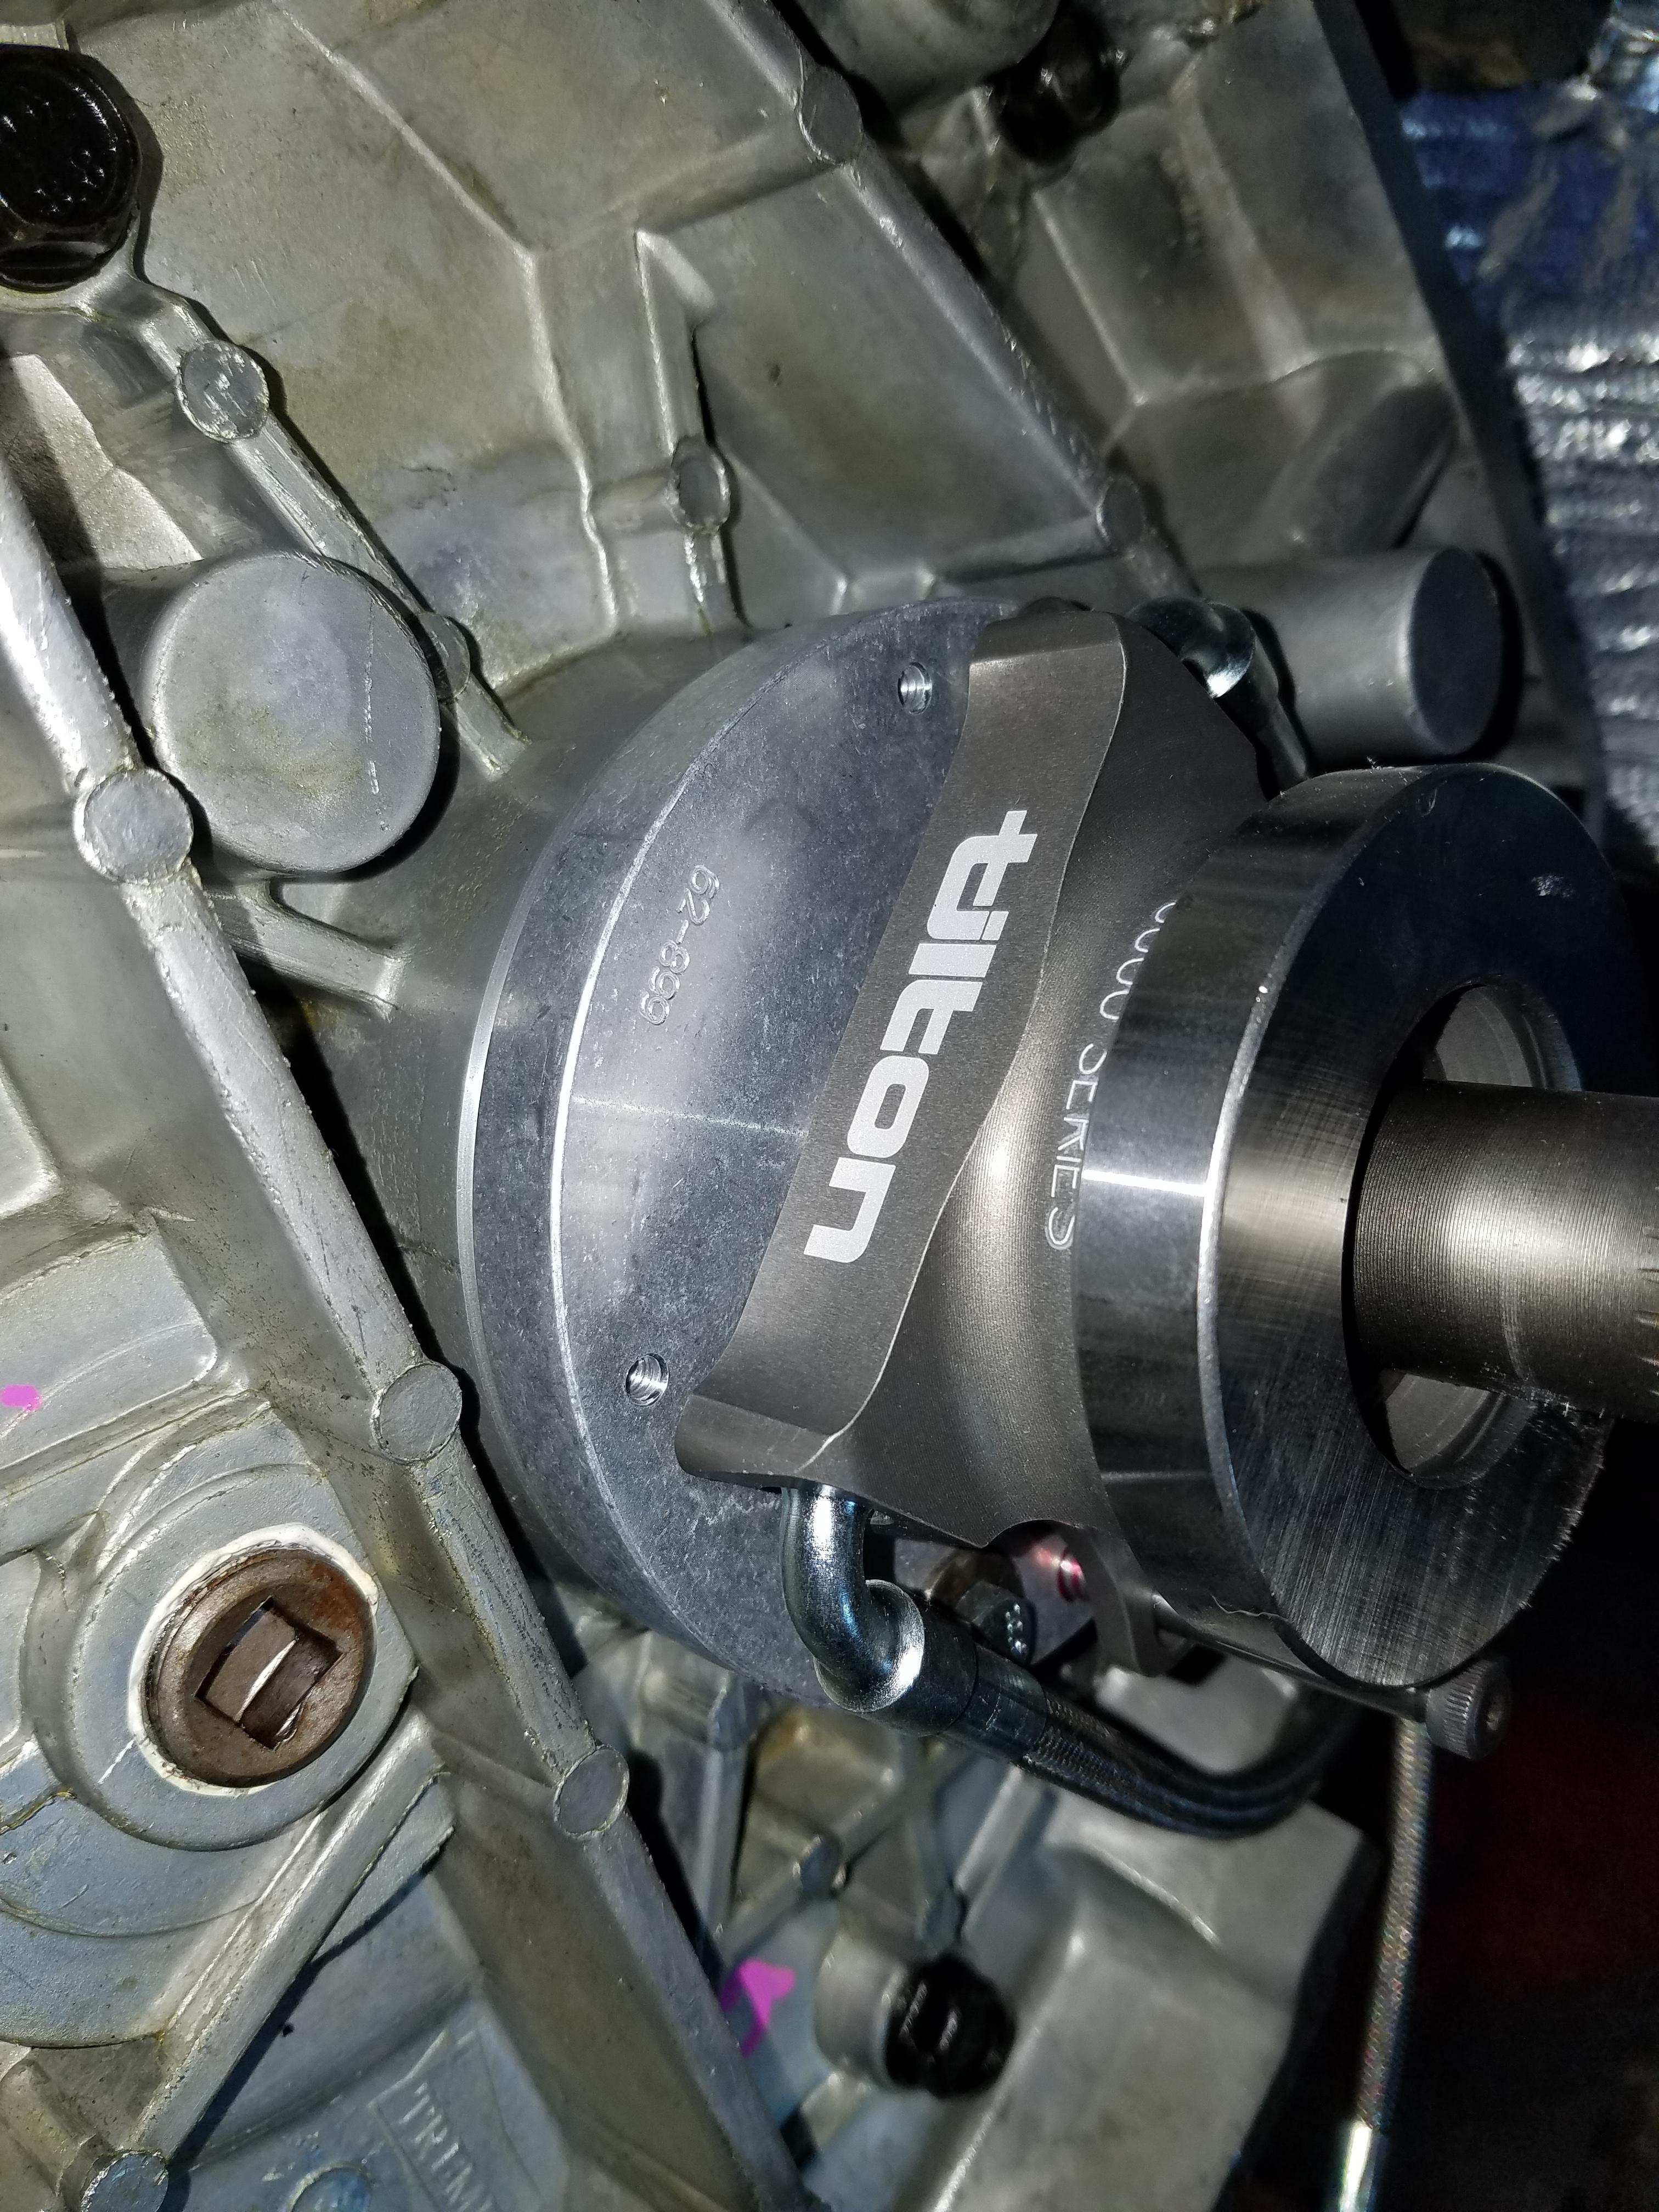
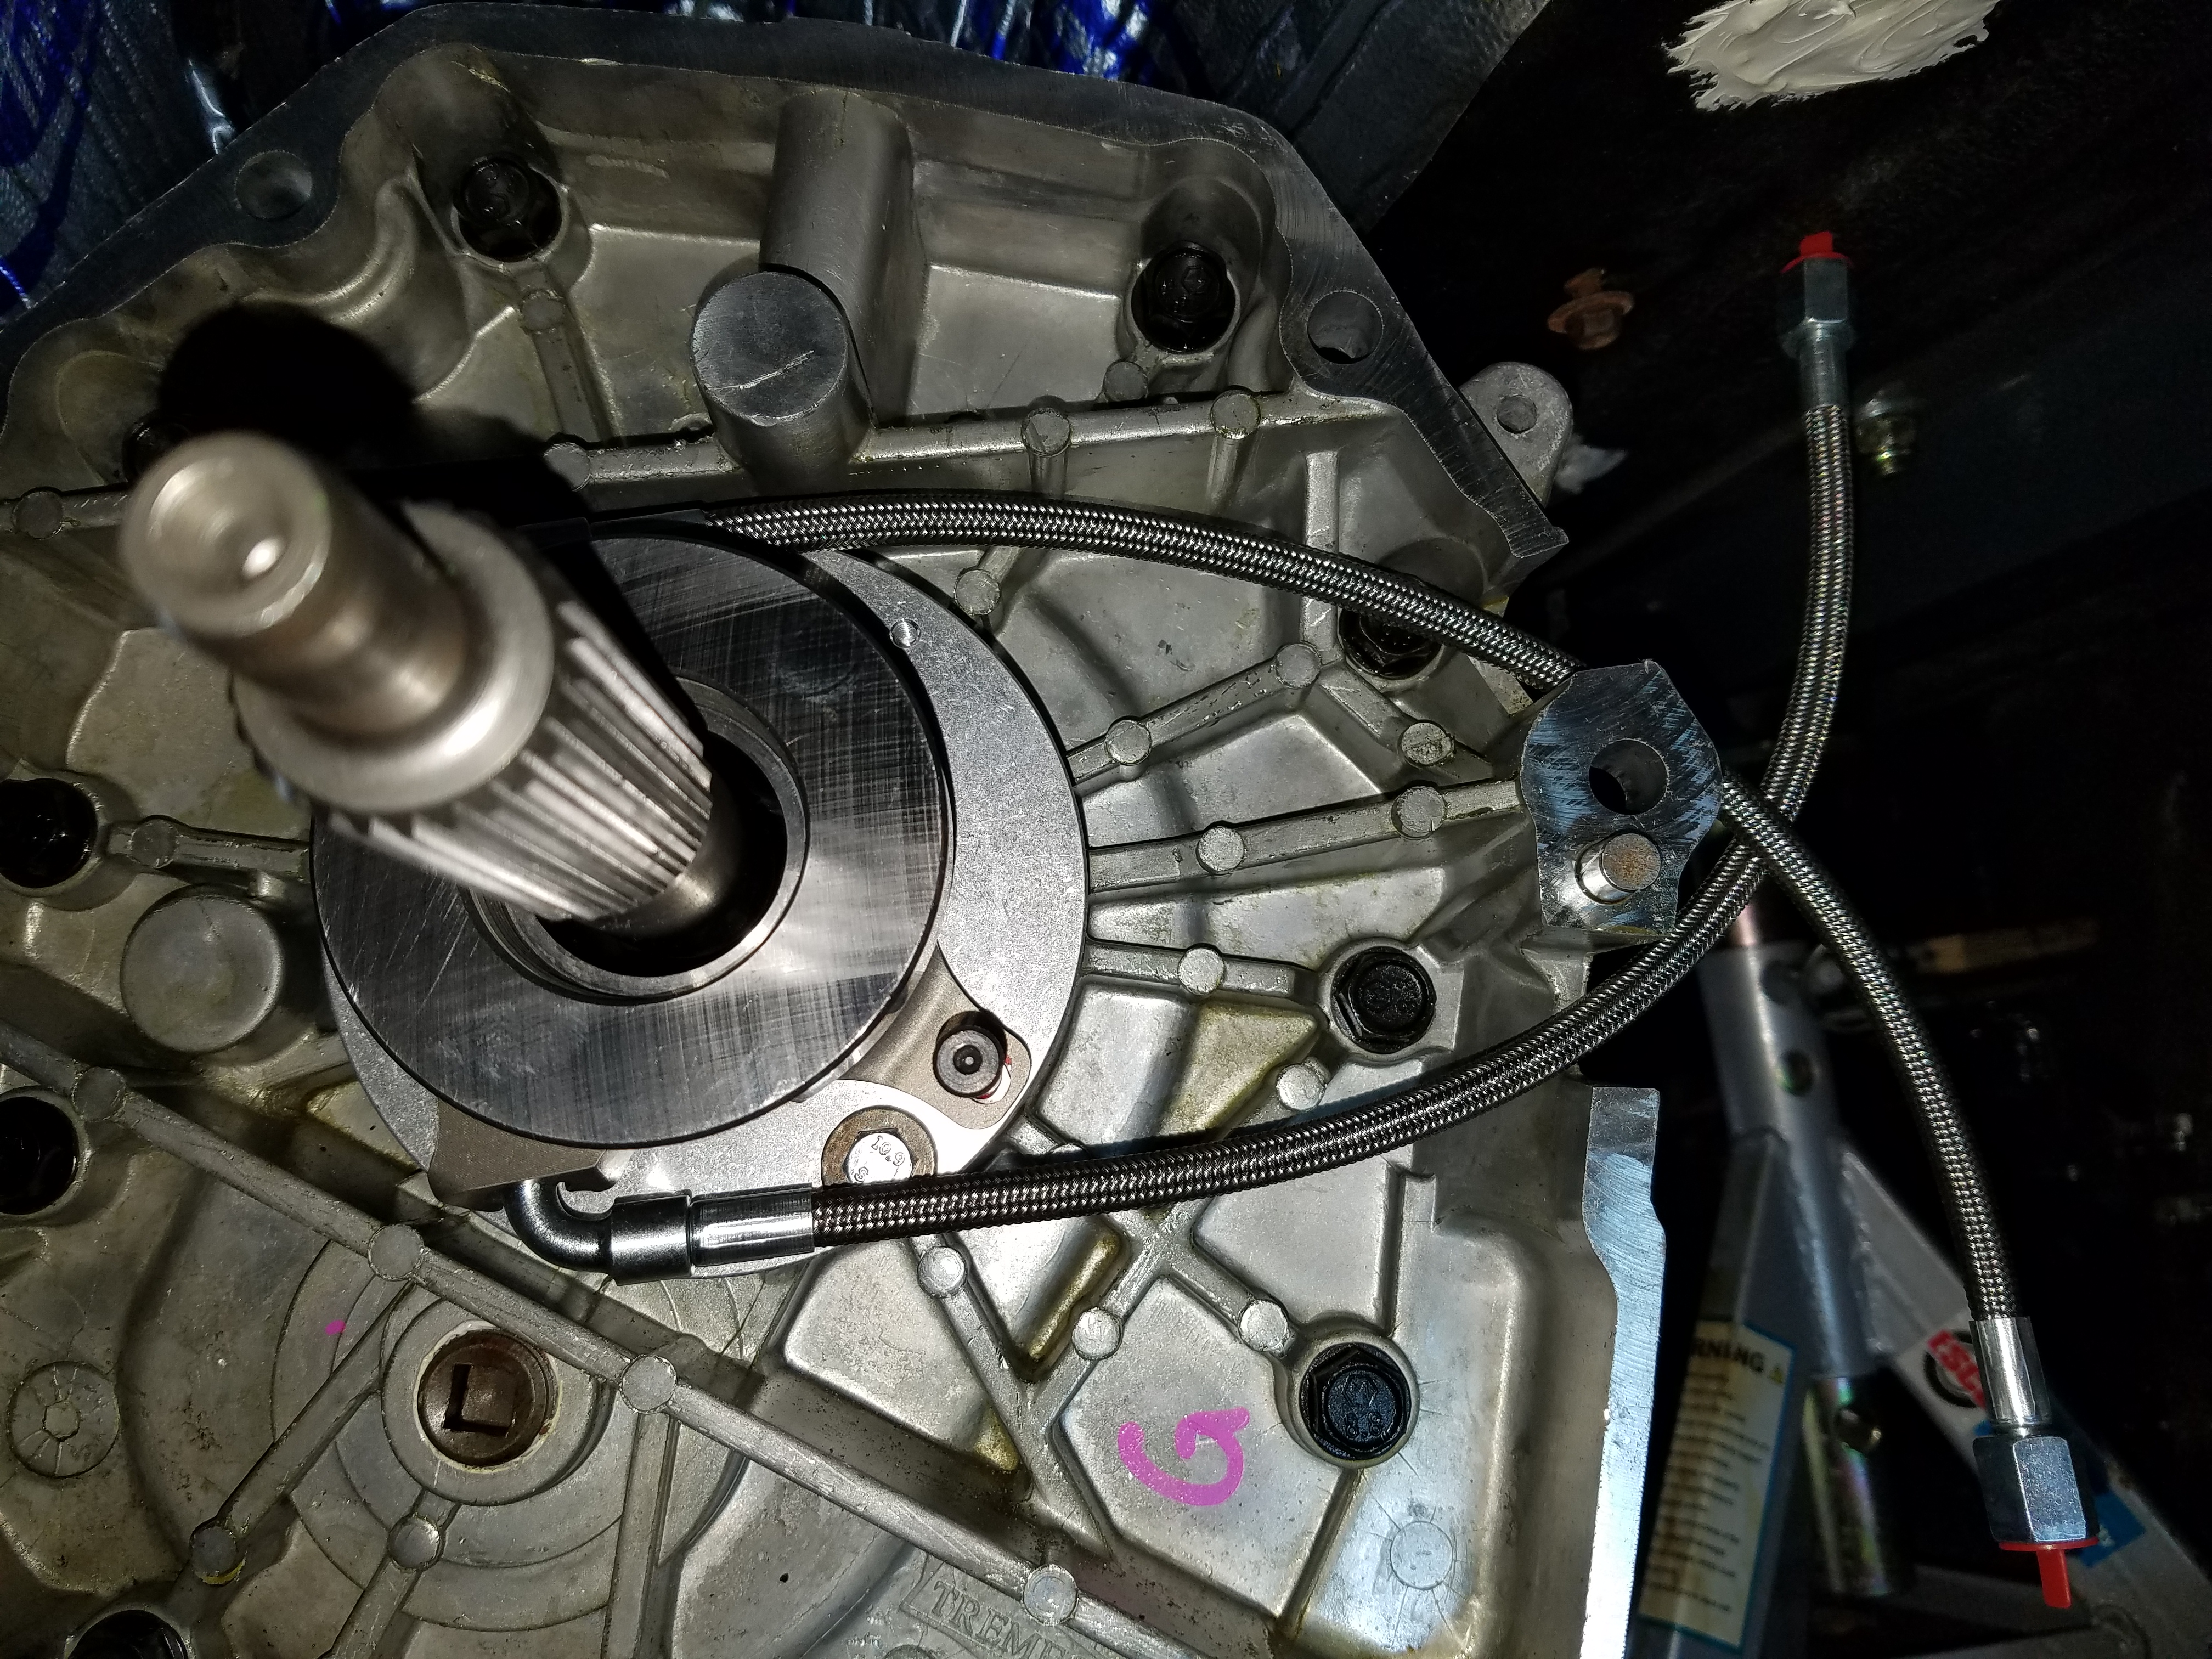
Check, and recheck your measurements for the clearance and then bolt the trans up.
Quick pic of the ridiculously long socket adapters I had to use reach one of the trans bolts on top of the trans with my torque wrench.
FYI - if you use this TO bearing it requires a clutch stop so you don't actuate it beyond what the clutch needs to disengage. So I need to do some creative work underneath the dash that doesn't require welding. So more to come on this step.
6000-Series Hydraulic Release Bearings - Tilton Engineering
http://tiltonracing.com/wp-content/u...ies-HRB-V2.pdf
http://tiltonracing.com/wp-content/u...294_NC_web.pdf
Purchased from Summit Racing, as well as these adapters so I could use my existing clutch lines. The Tilton lines are only 12" long to get you out of the bellhousing. https://www.summitracing.com/parts/EAR-501902ERL
Install was pretty easy, bolted it up with original bolts to 71 in. lbs. The slave cylinder mounts on a threaded adjustable base. So you can turn the cylinder to adjust the bearing up or down and get the clearance just right. Tilton calls for 0.125" or 1/8".
Check, and recheck your measurements for the clearance and then bolt the trans up.
Quick pic of the ridiculously long socket adapters I had to use reach one of the trans bolts on top of the trans with my torque wrench.
FYI - if you use this TO bearing it requires a clutch stop so you don't actuate it beyond what the clutch needs to disengage. So I need to do some creative work underneath the dash that doesn't require welding. So more to come on this step.

 05-17-2017, 09:10 AM
#179
V8 Miata Enthusiast
Thread Starter
With the new TO bearing installed and bled, I'm not getting full disengagement of the clutch. With the clutch pedal all the way down, I can't turn the drive wheels with 1st gear engaged. So NOW I think I'm not getting enough travel with the TO bearing b/c the Clutch master cylinder is undersized. 
Not sure why I chose the 3/4" Wilwood Clutch MC, but the 7/8" seems to be the correct size to get more fluid flow from the MC to the TO bearing. Some searching of the forums, everyone seems to be using this as well... *sigh*.
So I ordered one from Summit, which should arrive by the weekend. https://www.summitracing.com/parts/wil-260-3376
With the resonators installed however, the engine is much quieter, and I can tell just by idling it in my garage, there is WAY less drone. Got something right
Last edited by pj_mcgarvey; 05-25-2017 at 10:29 AM.
 05-22-2017, 12:41 PM
#181
V8 Miata Enthusiast
Thread Starter
I Installed the 7/8" Wilwood clutch master and was easily able to get the range of movement on my slave cylinder to disengage the clutch. Install was straight forward as this was basically swapping in the same part.
One note I'll make is that when I first installed the original MC I thought I had just forgotten to install or had lost the locknut on the Wilwood pushrod. Since it would be a pain to remove it and get the nut on there, so I could thread a locknut back on - I had just decided to forget about it.
When I got the new MC, there was no locknut installed on the pushrod, or included. I did some research and found the pushrod is a 5/16-24 thread pitch so I picked up a nut from my hardware store for $0.11. I sent an email to Wilwood thinking they should be including this in their kits.
After re-bleeding the MC and testing out the pedal, the effort was noticeably higher, but not bad. The clutch disengaged was about 3" from the firewall. Before with the 3/4" MC I had been pressing the pedal to the firewall and still had no disengagement. So it's interesting that only a 1/8" larger bore Master cylinder had made that much of a difference!
Anyway, since the Tilton slave cylinder requires a pedal stop to prevent over stroking it, I wondered whether a long threaded rod through the firewall would work. Then I could easily thread it to get just the right adjustment. After some measurements it looked like a hole would pass right into the wheel well but not interfere with wheel, fender liners, etc. Brilliant! I drilled a small pilot hole to confirm, then a larger hole for a 1/2" threaded piece of rod I had around.
Welded on a small bit to make contact with the back of the pedal and started to make my adjustment.
wheel well side, sprayed with undercoating after final adjustment.
Installed in place. On both sides of the firewall I used progressively larger washers under the nut to help with supporting the long threaded rod. I had to cut and reweld the stop so it was offset from the threaded rod a bit as the pedal does have some side to side wobble that I didn't account for. I could have also cut a bit less out of the carpeting... Just clears my new floormats.
Now the pedal makes a small tap as the metal contacts it, so might put some thin rubber over the stop to make it a bit softer.
Test drive was successful, the exhaust is quieter with the resonators though still getting some drone at certain RPMs, so a quieter muffler I think will be in my future.
Still not feeling like I'm getting the power I hoped for. Clutch engagement at takeoff and each gear is very smooth (love this T56) so I hope it's grabbing OK now. Need to mess with the VSS signal switcher box so I can see how fast I'm going now. Will try some hard launches and pulls when it's not a nice Sunday in the suburbs and everyone is out gardening and wondering why that Miata is making Corvette sounds...
Also got my hood dampers today which I will be installing. Got tired of the hood prop not fitting around all of the new underhood stuff.
Last edited by pj_mcgarvey; 06-06-2017 at 03:51 PM.
06-03-2017, 01:59 PM
#182
V8 Miata Enthusiast
Thread Starter
Couple quick updates, I installed the RSpeed hood lifts, which have been a nice upgrade to tidy up the engine bay. Install was a breeze.
https://www.rspeed.net/RSpeed_Mazda_...p/nab-5011.htm
The instructions that Flyin Miata has are better than the ones that came with them:
https://www.flyinmiata.com/support/i...d_lift_kit.pdf
I replaced my Flowmaster 40 mufflers with Magnaflow Performance Mufflers. These sound GREAT. I'd say there are a better look, better sound, and are much quieter with less drone than the Flowmasters.
https://www.summitracing.com/parts/MPE-11236
I highly recommend these. My Flowmasters are for sale if anyone is interested.
08-09-2017, 08:42 PM
#183
V8 Miata Enthusiast
Thread Starter
Been out of the game for a couple months, but summer has kept me busy. The car is still not where I want it to be, as the power output is not there. So I'm going to take the car to a reputable tuner in the area to see if they can help. I will be updating with more experiences around that.
Some small updates:
For awhile, unbeknownst (big word) to me, my alternator was not charging my battery. I was driving the car very little, and when the battery would be weak I assumed it was because it sat for a few weeks. Once I figured out that I had it wired wrong, the fix was relatively simple. Basically the alternator "trigger" wire needed a 5v signal to tell it to charge. I updated my wiring posts with the information here:
https://www.v8miata.net/general-moto...ge7/#post23046
I went with the Singular Motorsports hood vents. Singular Motorsports Hood Louvers: NB Miata | Singular Motorsports
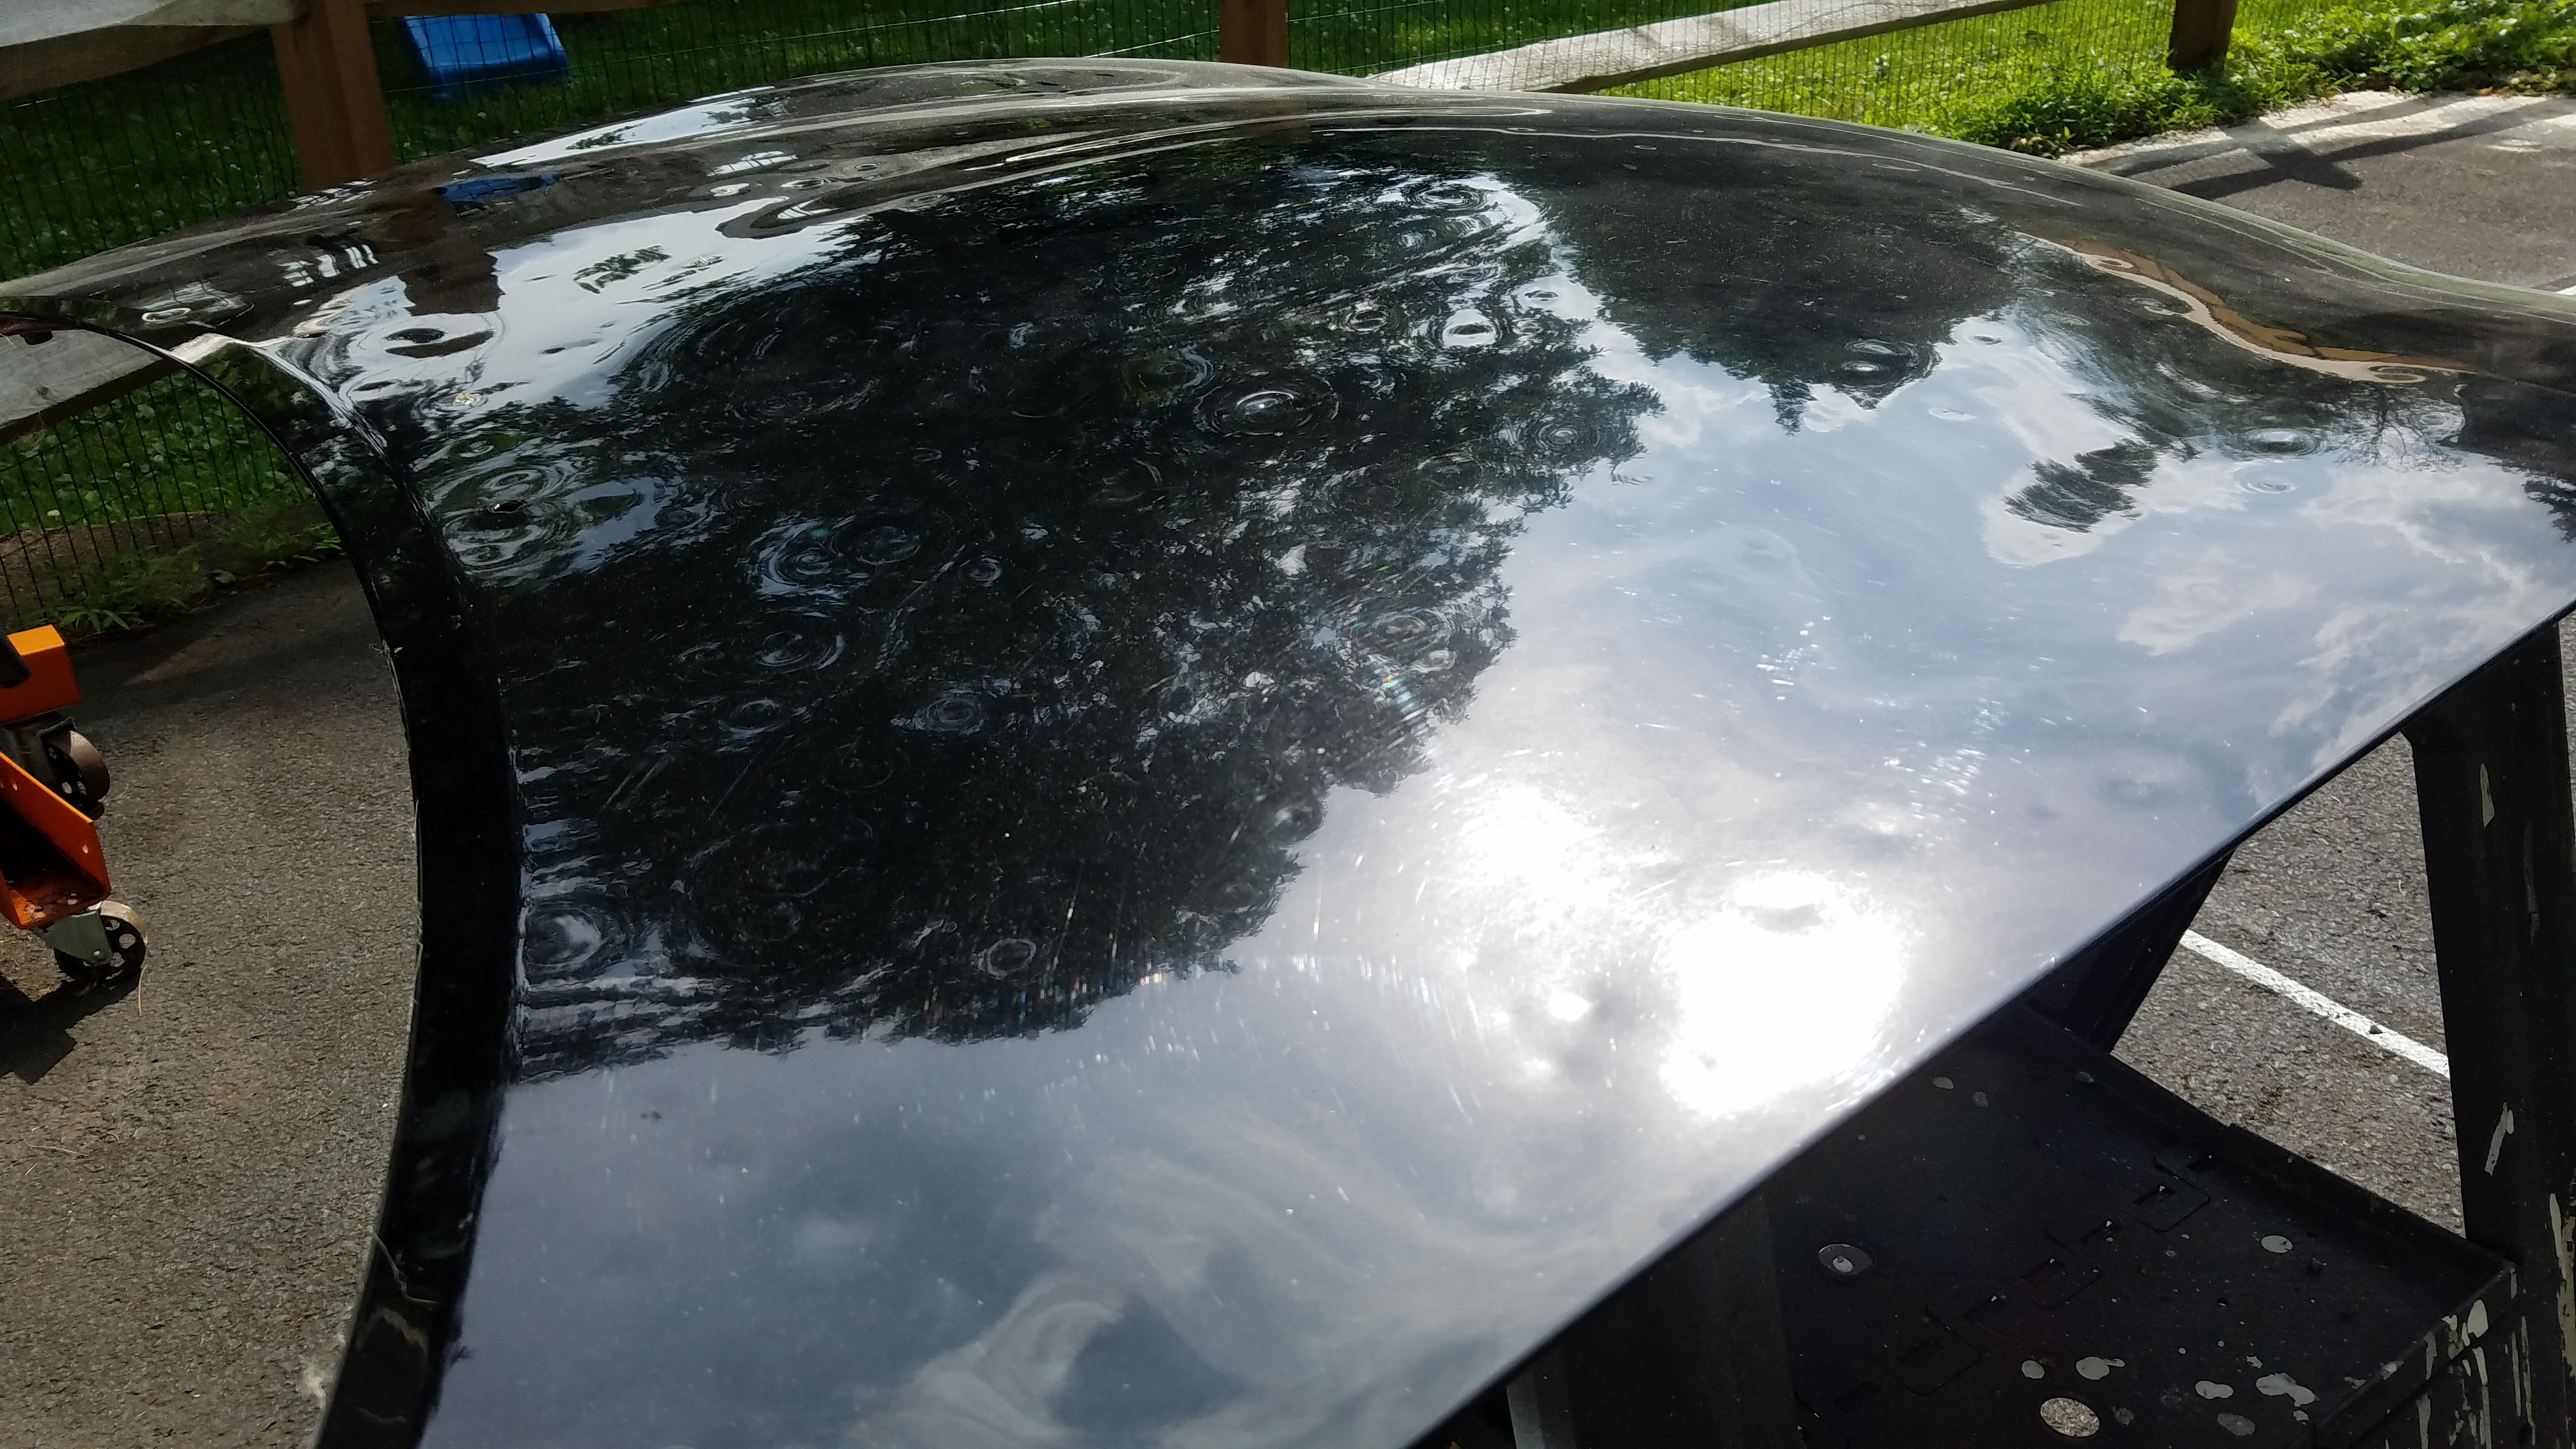
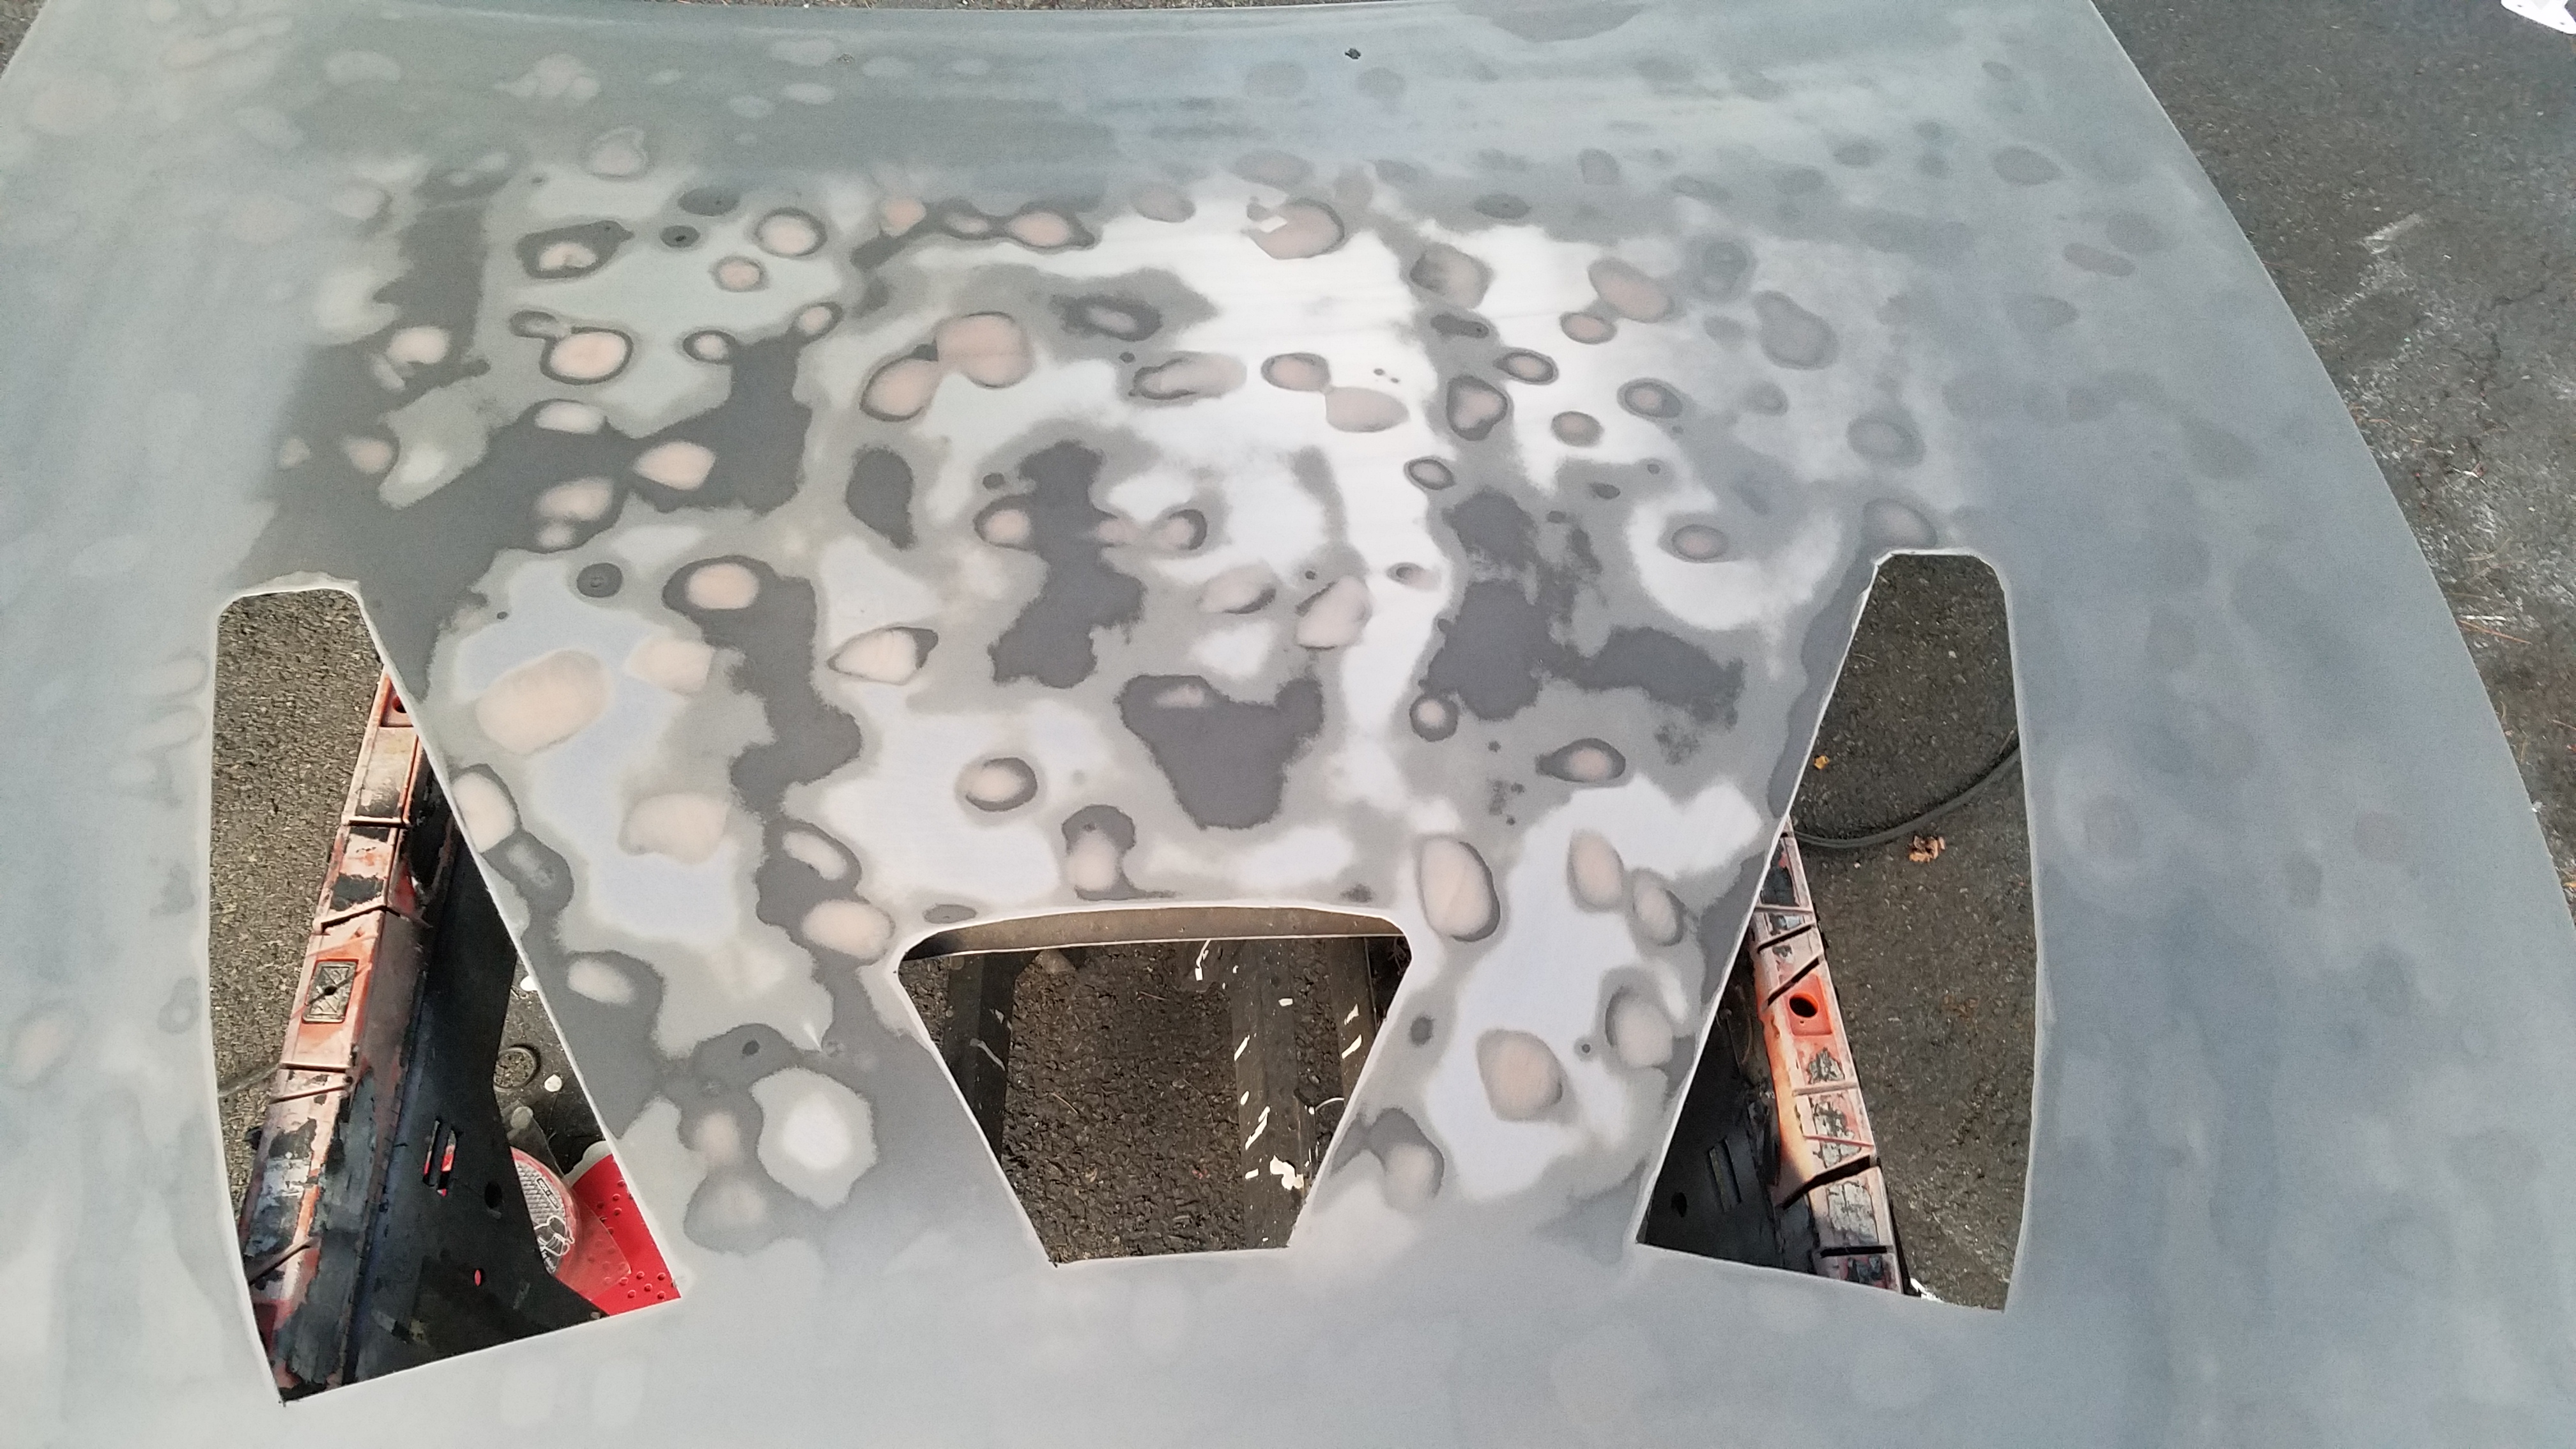
I had an old hood from the previous owner that had alot of hail damage. I decided this would go under the knife for some hood vent surgery and some DIY bodywork to fix the dents and then a flat black finish for that rat rod look.
The original hood:
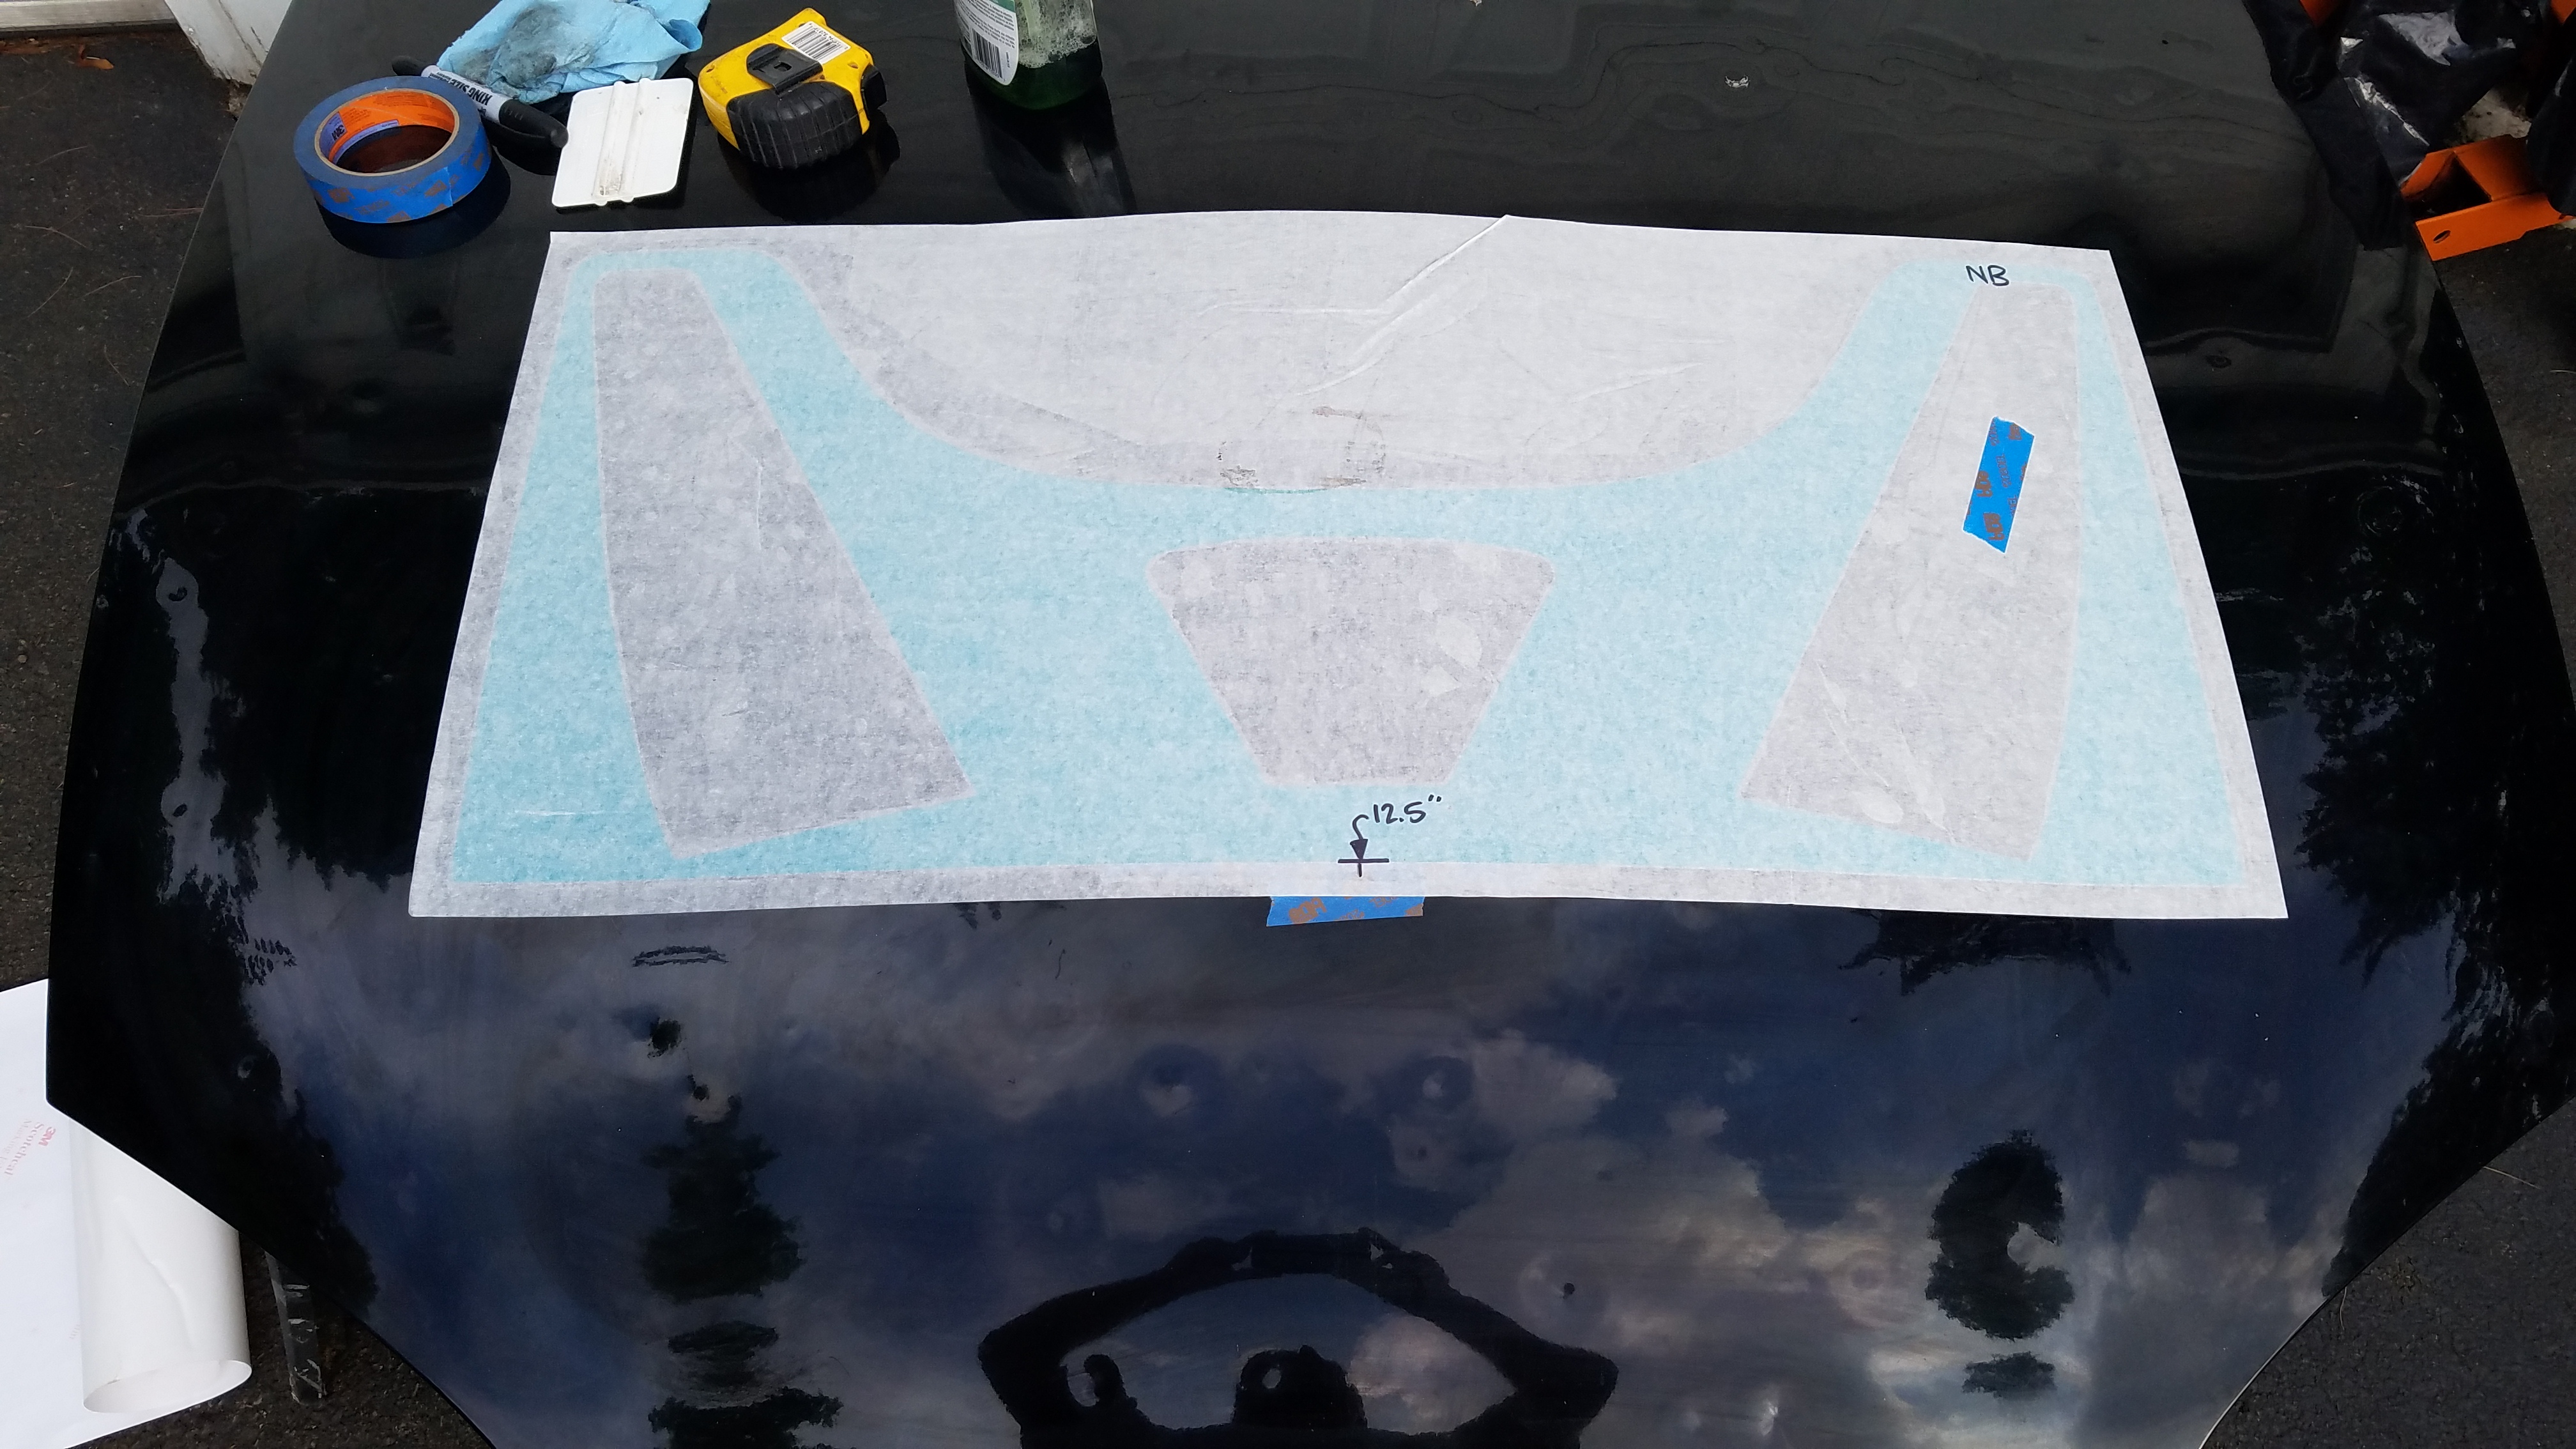
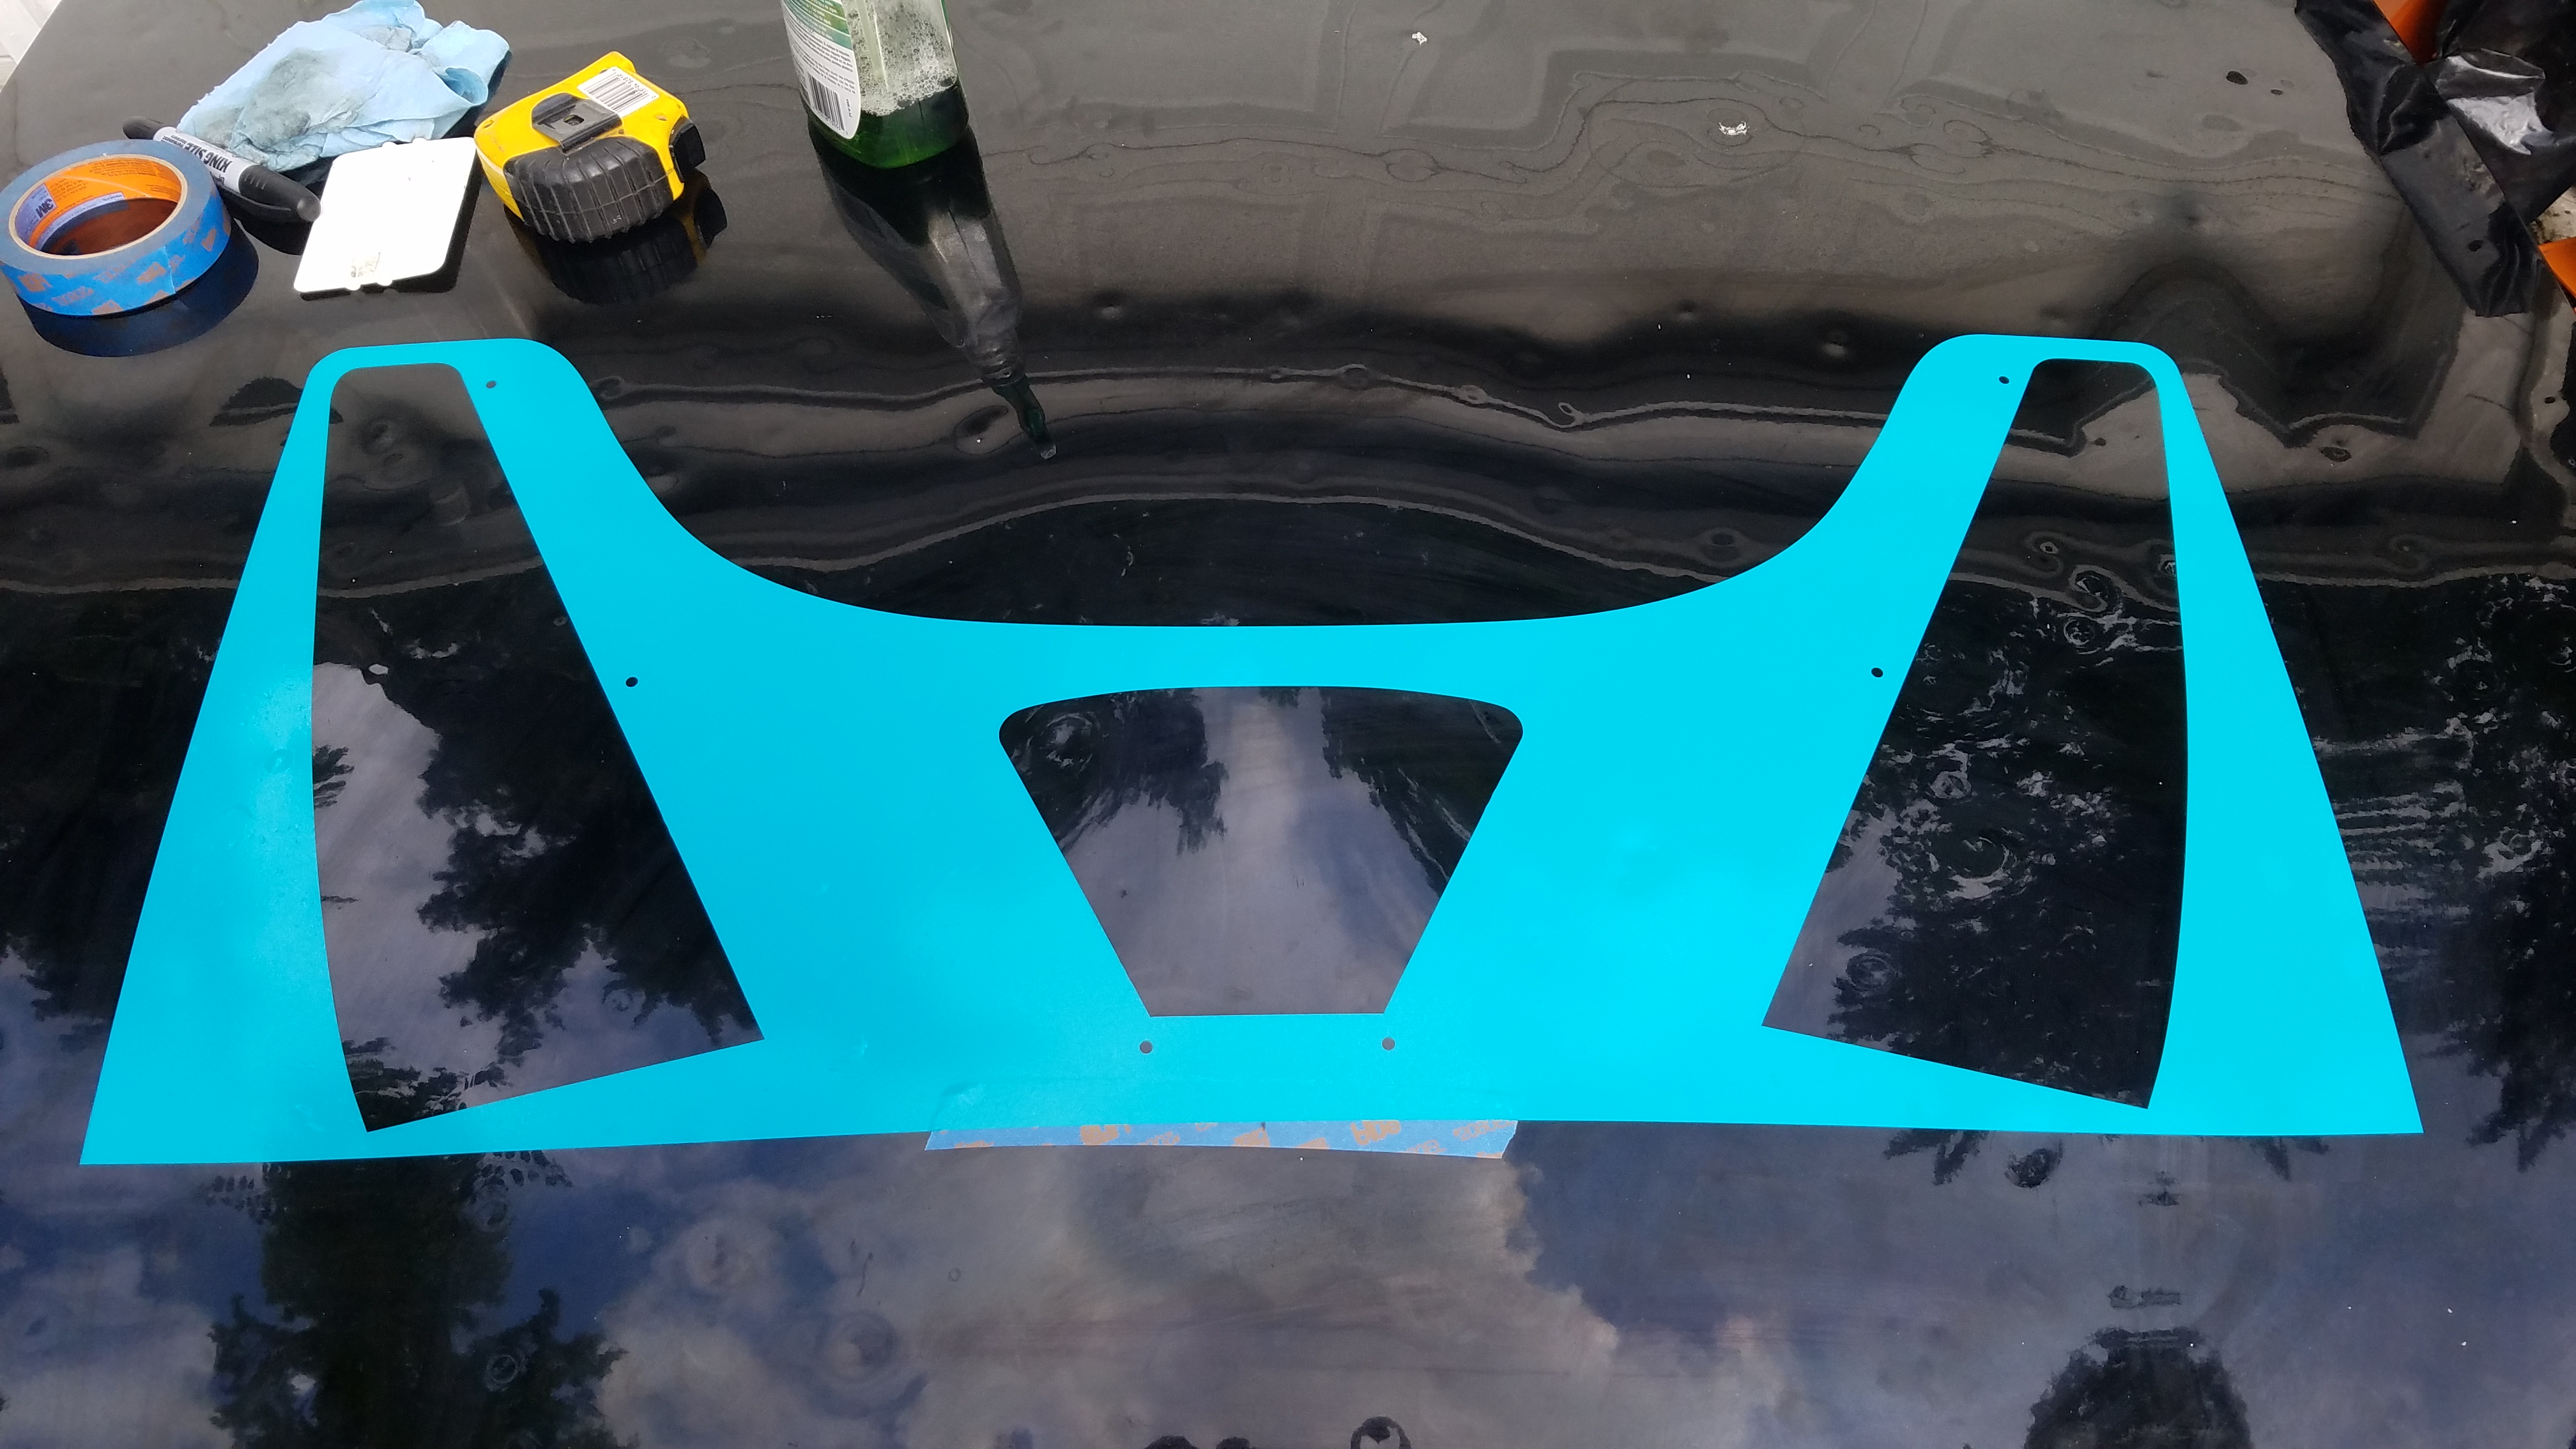
The include a nice vinyl stick-on template for your cuts, which is really nice:

After the cutting and sanding/stripping of the paint:
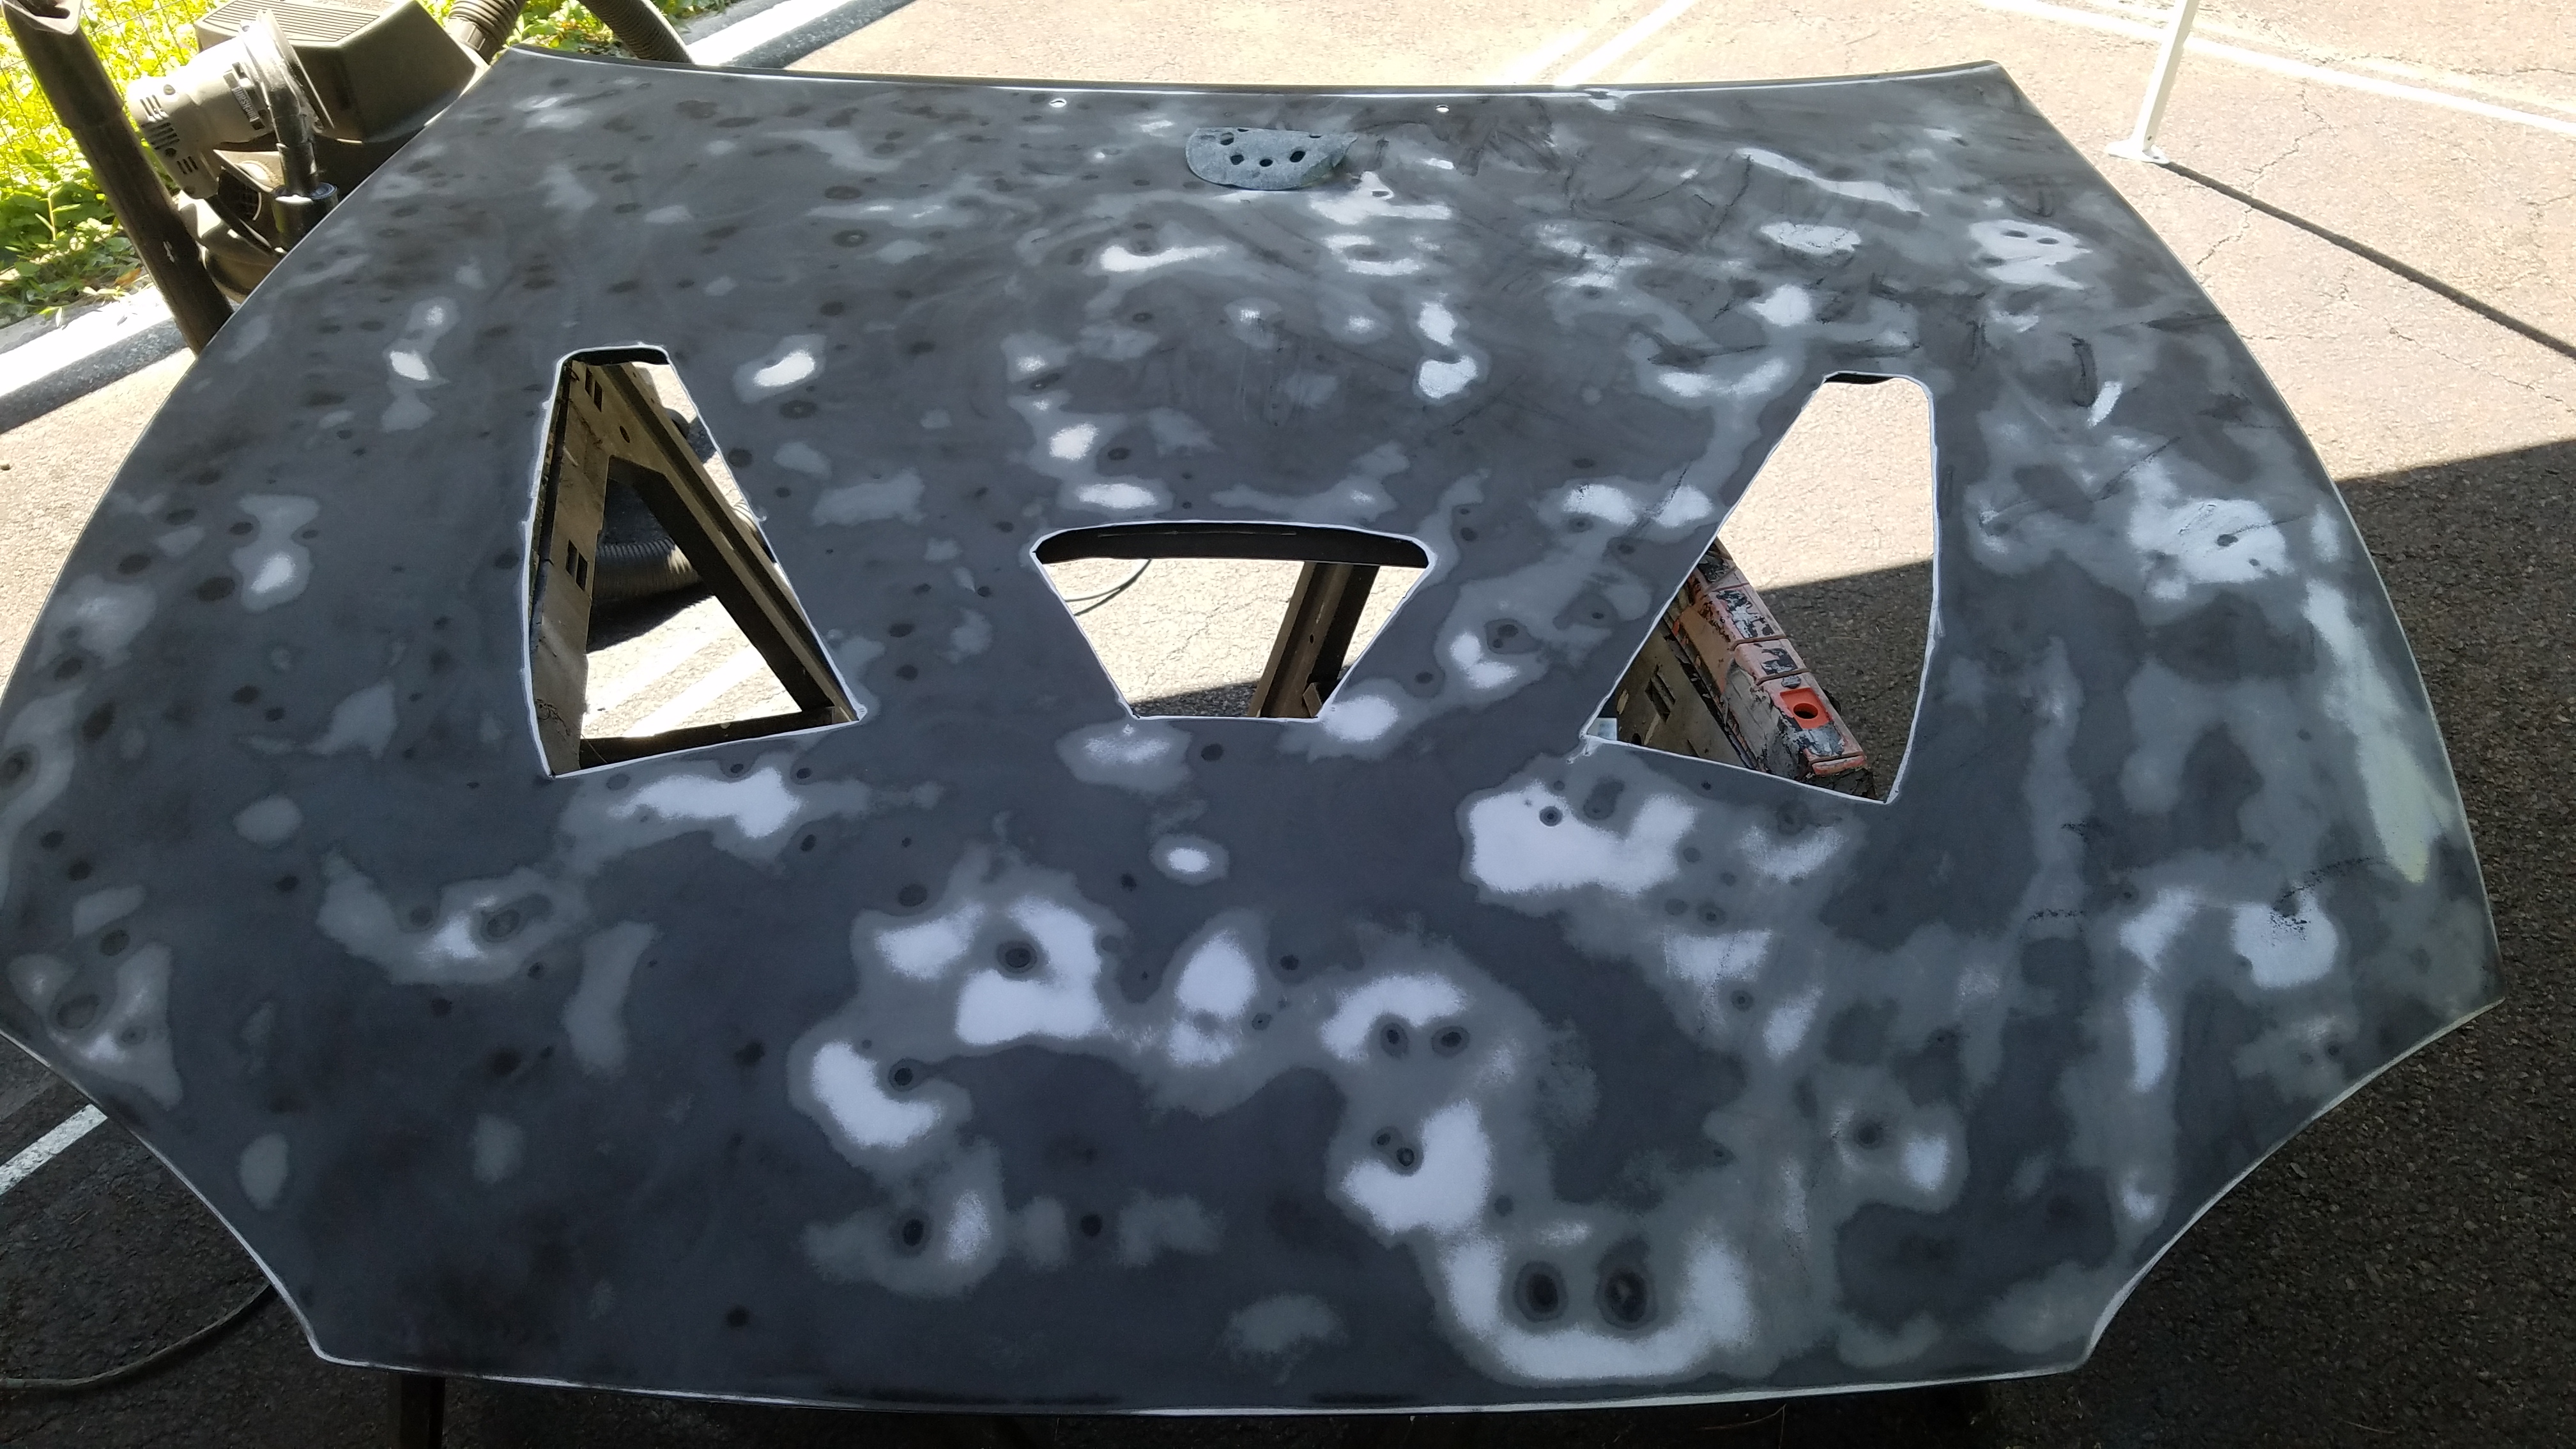
Coats of filler and primer:
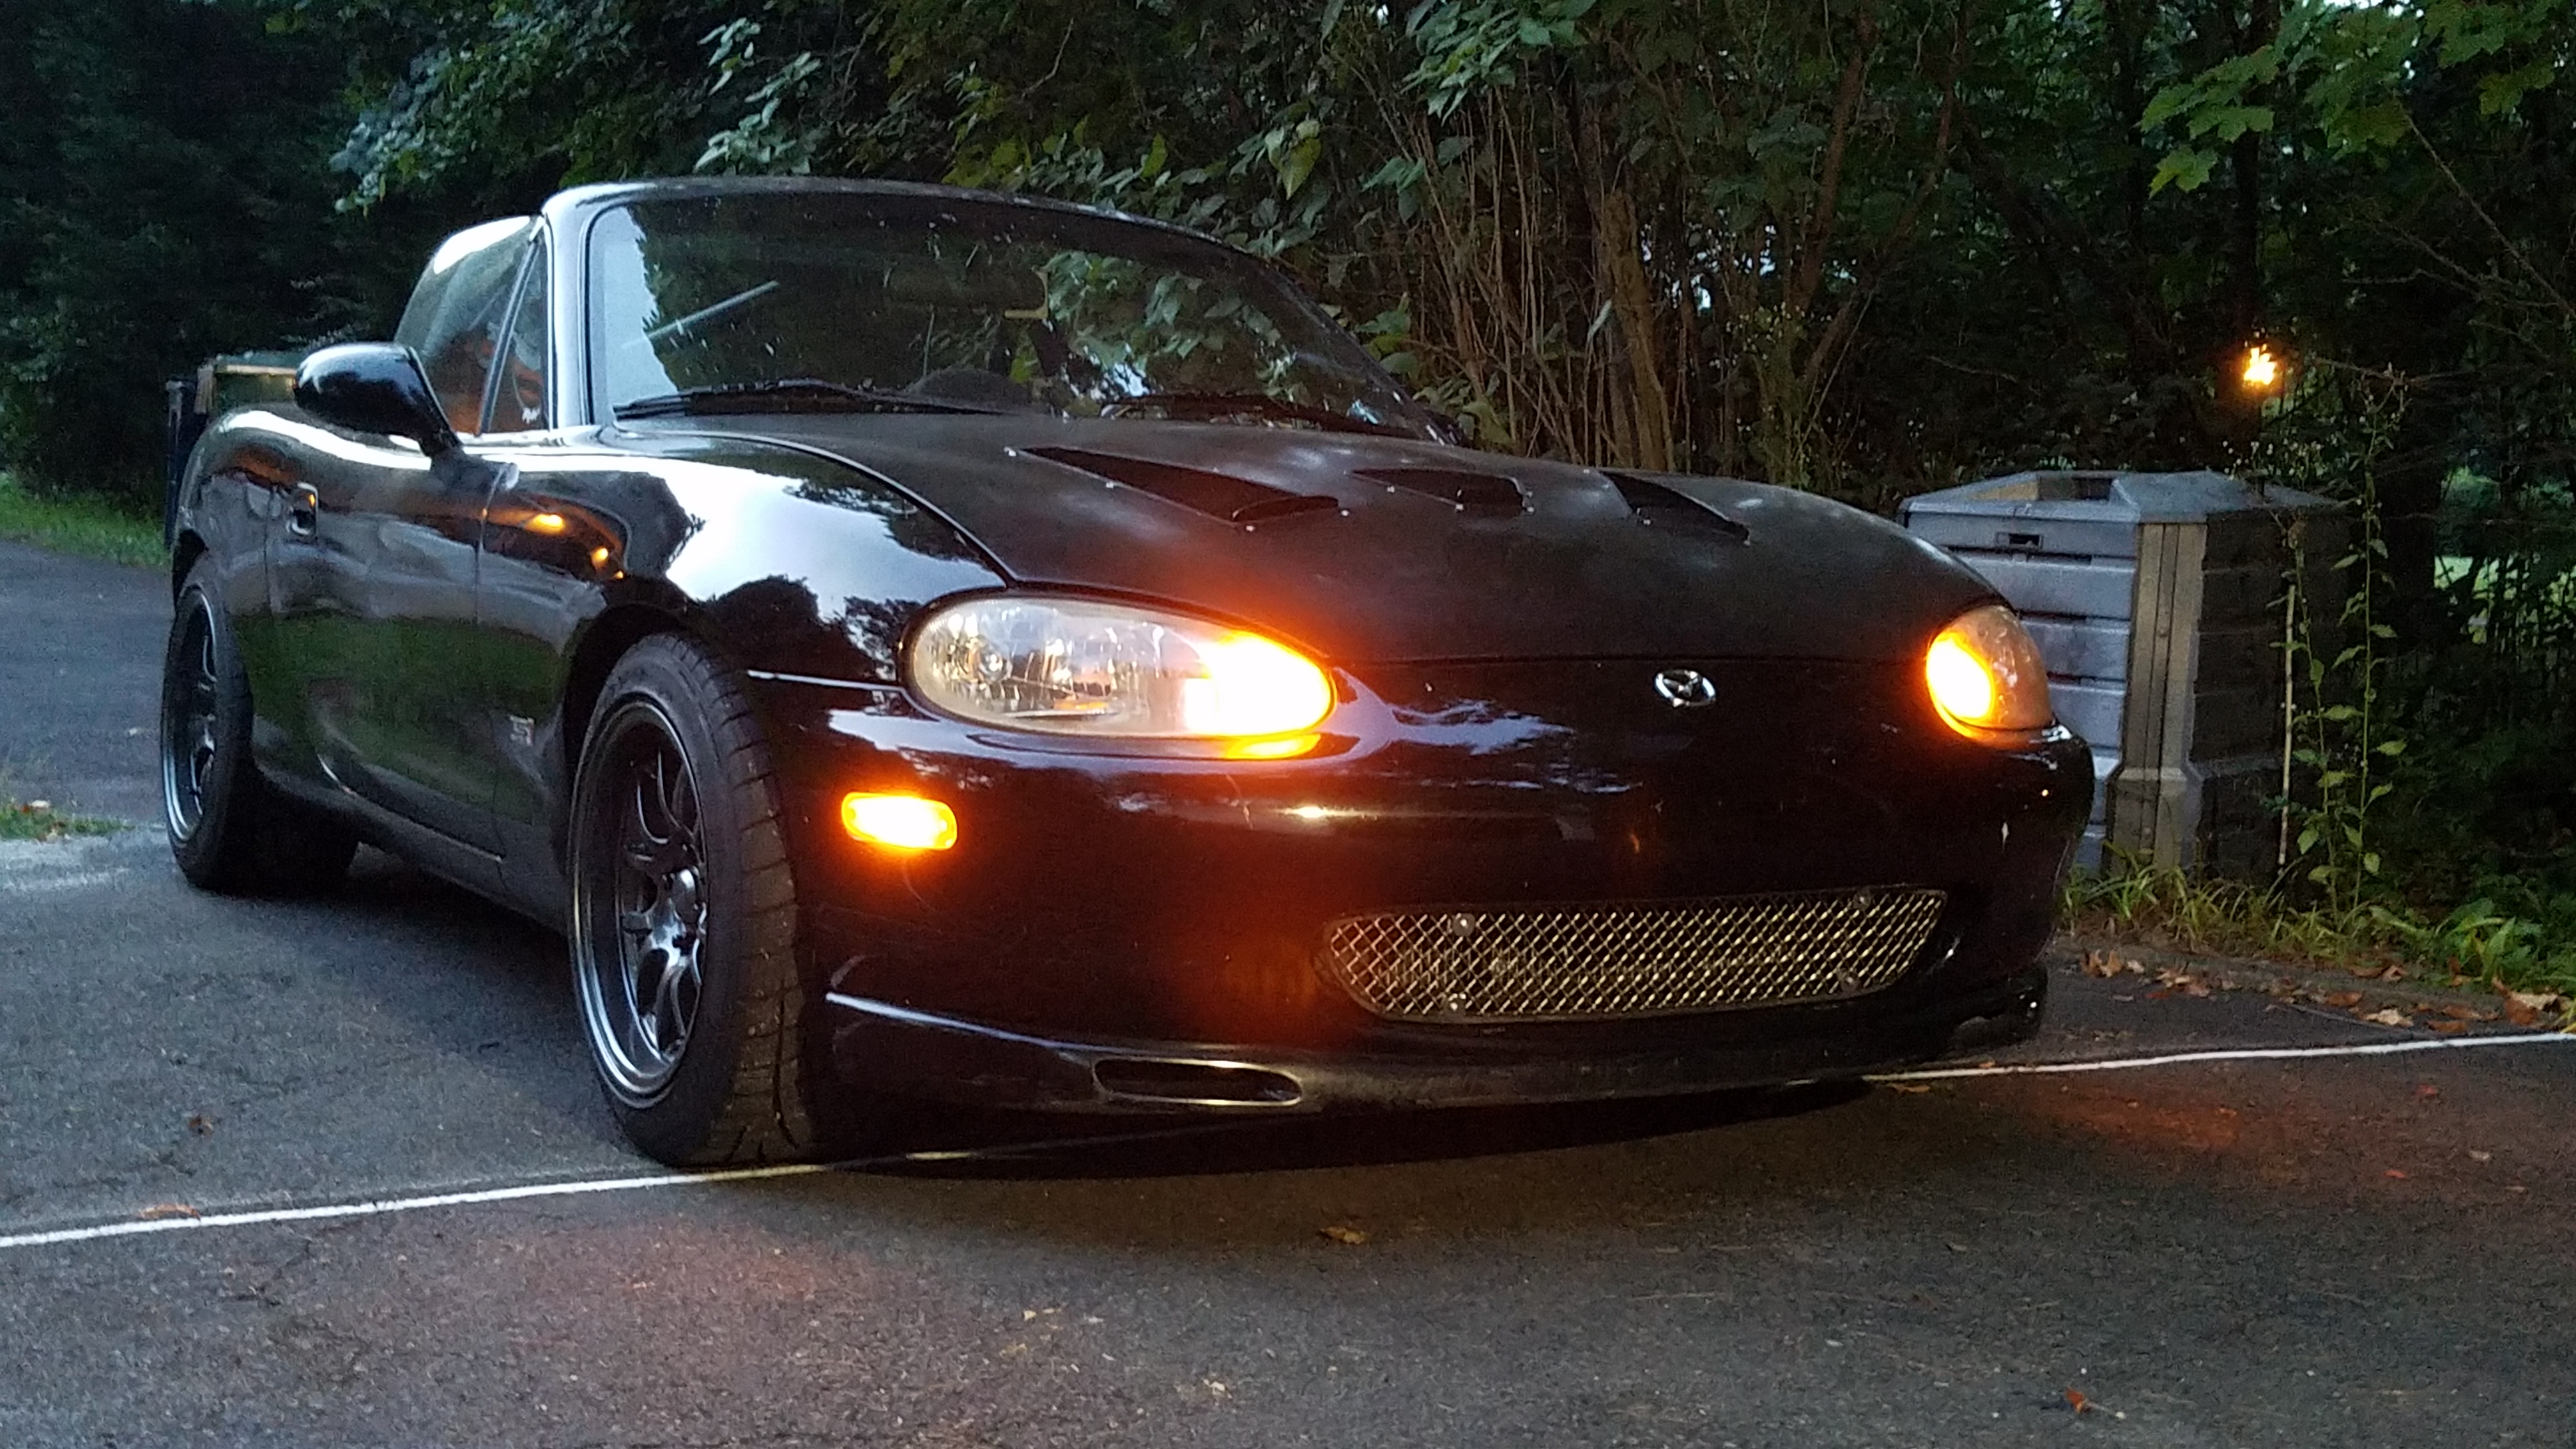
Couple shots I captured one night of the hood installed:
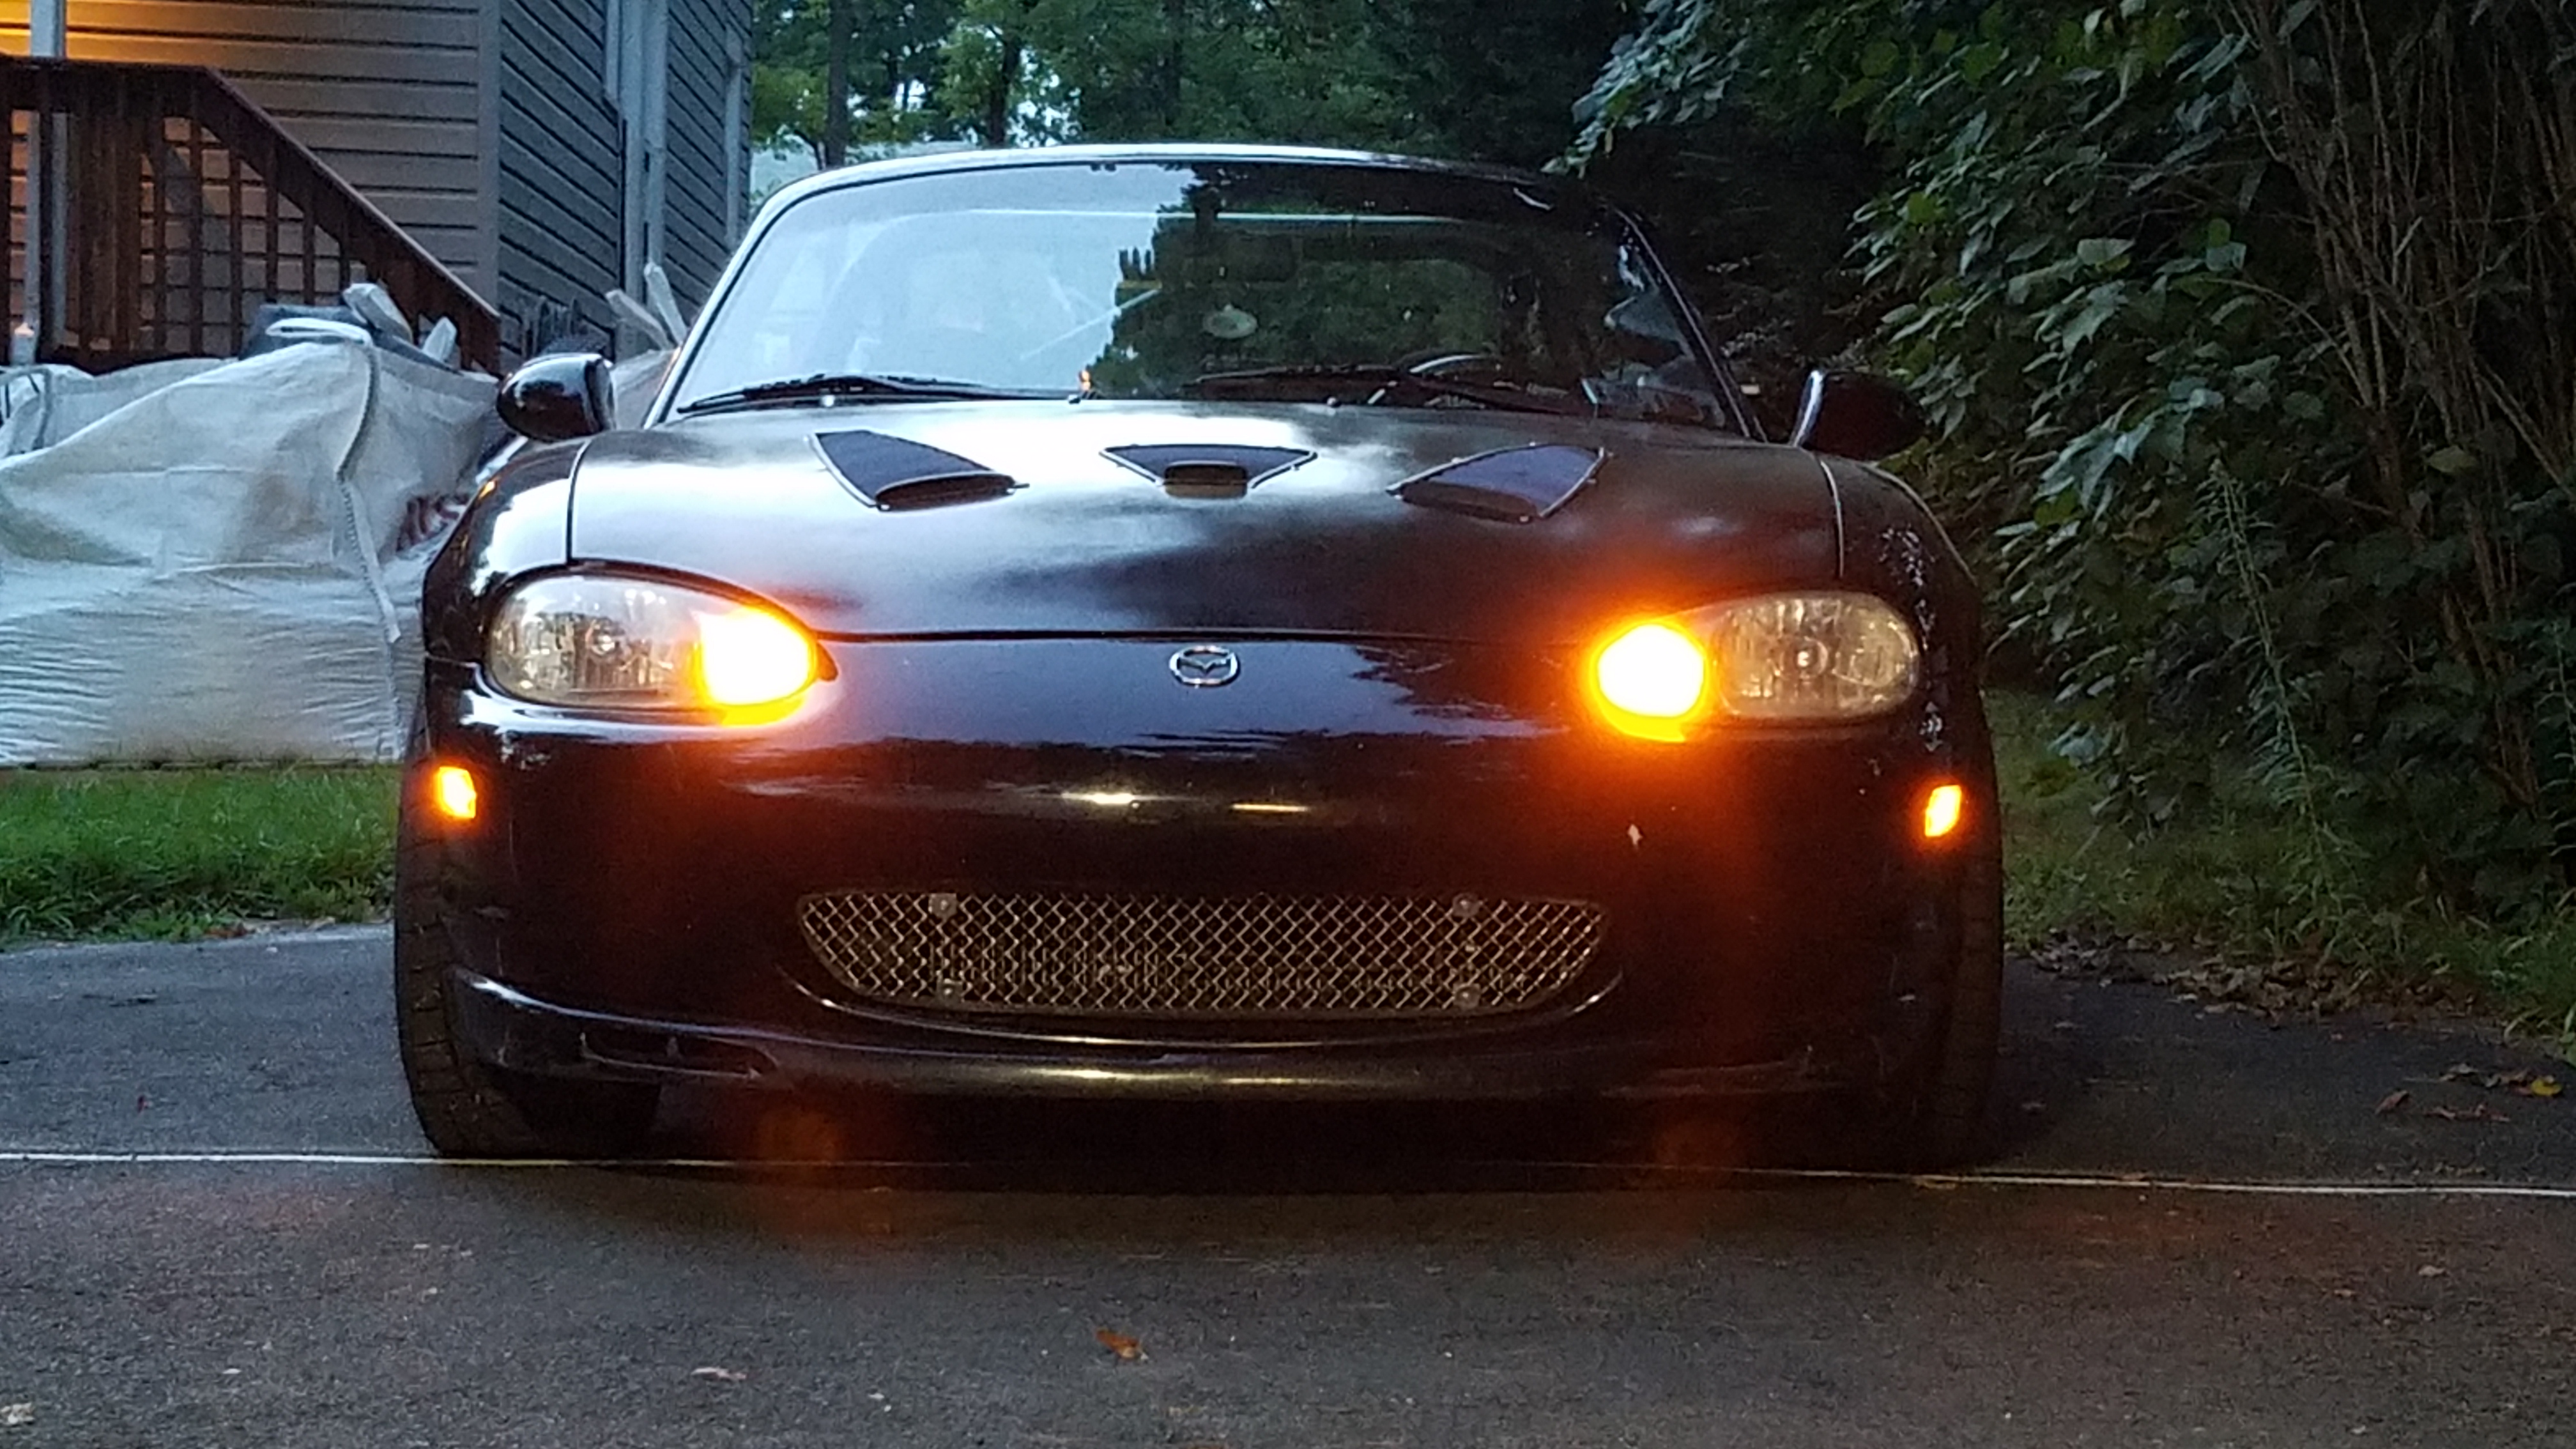
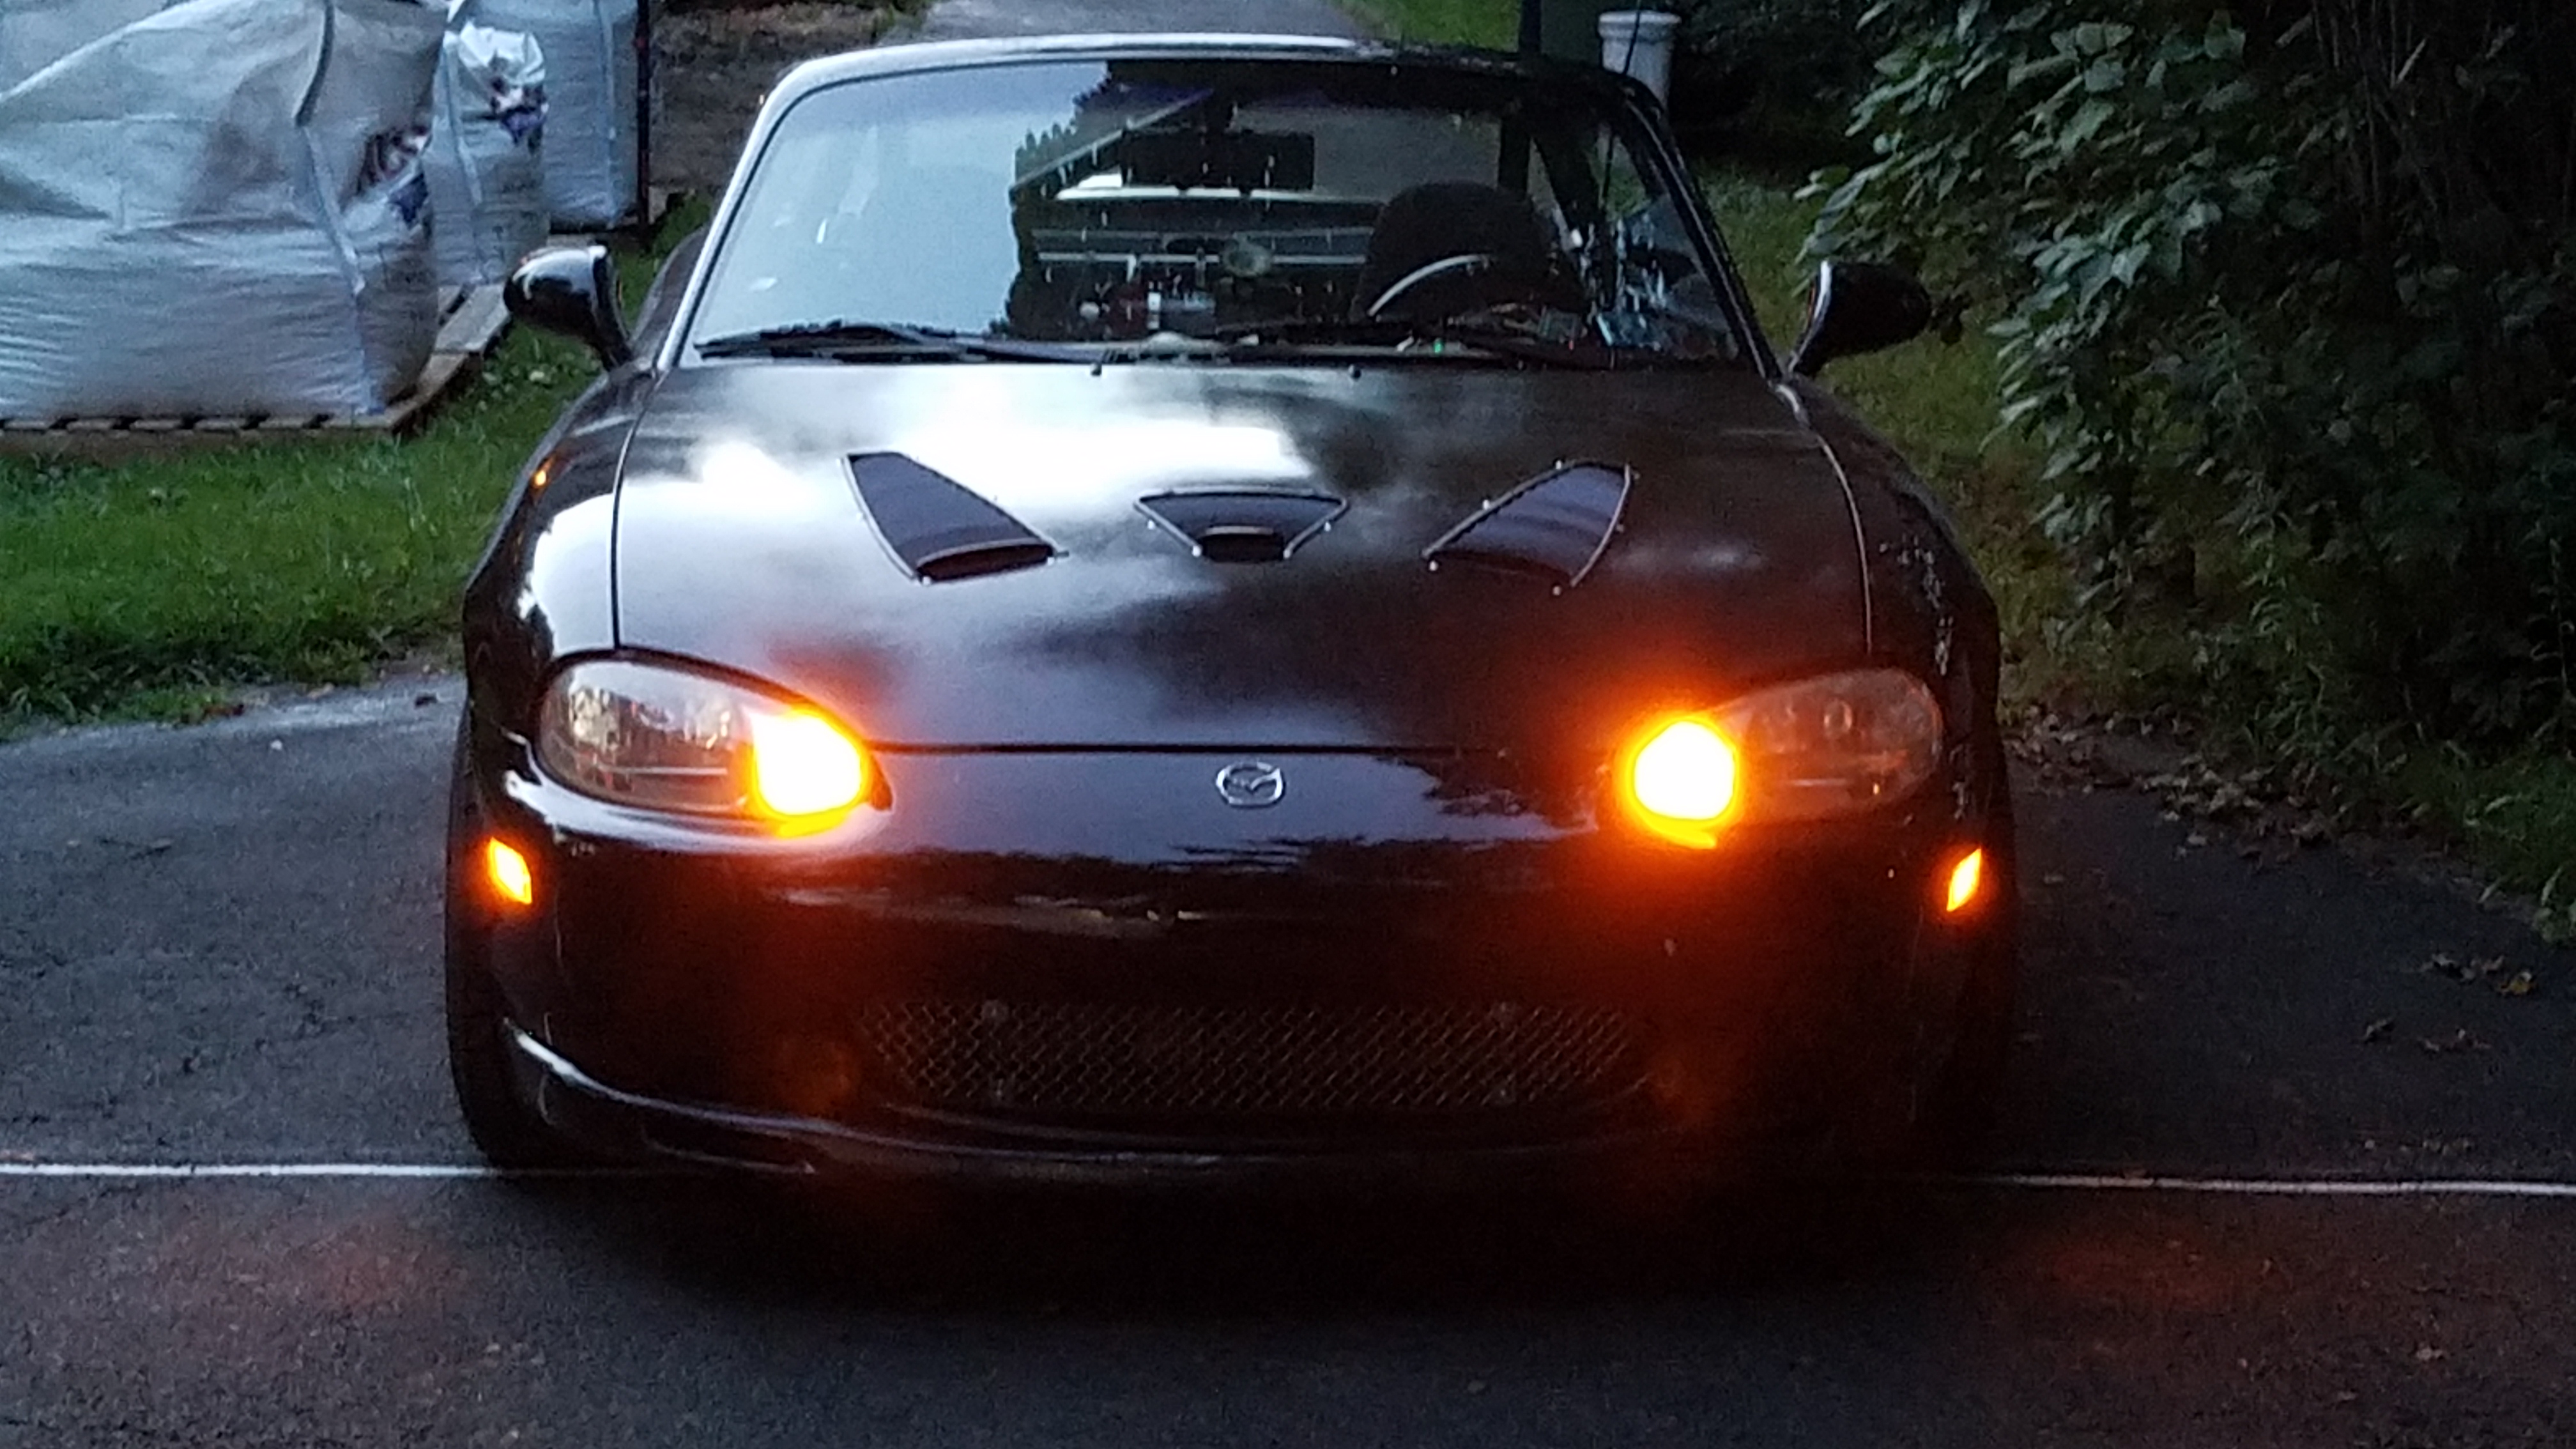
In this pic you can see the grille I installed as well.
This is a Buck Diamond grill (BuckDiamond) that also came with the car, but it was installed poorly with zipties. I had removed it awhile back, but after some thought I decided I'd use some small aluminum strap to make brackets and then use Nutserts to make it easy to install and remove. Sorry, no pics of the install but I nutserted into the plastic bumper cover and then made some 90 degree brackets when the holes in the grille would fall, and then used stainless bolts and washer to hold the grille tight to the bracket.
Nutsert/Rivet nut kit from Amazon was cheap, but did the job:

Some small updates:
For awhile, unbeknownst (big word) to me, my alternator was not charging my battery. I was driving the car very little, and when the battery would be weak I assumed it was because it sat for a few weeks. Once I figured out that I had it wired wrong, the fix was relatively simple. Basically the alternator "trigger" wire needed a 5v signal to tell it to charge. I updated my wiring posts with the information here:
https://www.v8miata.net/general-moto...ge7/#post23046
I went with the Singular Motorsports hood vents. Singular Motorsports Hood Louvers: NB Miata | Singular Motorsports
I had an old hood from the previous owner that had alot of hail damage. I decided this would go under the knife for some hood vent surgery and some DIY bodywork to fix the dents and then a flat black finish for that rat rod look.
The original hood:
The include a nice vinyl stick-on template for your cuts, which is really nice:
After the cutting and sanding/stripping of the paint:
Coats of filler and primer:
Couple shots I captured one night of the hood installed:
In this pic you can see the grille I installed as well.
This is a Buck Diamond grill (BuckDiamond) that also came with the car, but it was installed poorly with zipties. I had removed it awhile back, but after some thought I decided I'd use some small aluminum strap to make brackets and then use Nutserts to make it easy to install and remove. Sorry, no pics of the install but I nutserted into the plastic bumper cover and then made some 90 degree brackets when the holes in the grille would fall, and then used stainless bolts and washer to hold the grille tight to the bracket.
Nutsert/Rivet nut kit from Amazon was cheap, but did the job:
08-10-2017, 08:47 PM
#184
V8 Miata Enthusiast
Thread Starter
Went with a new steering wheel, the Momo Prototipo has grown on me, and seems to be popular with other Miatas.
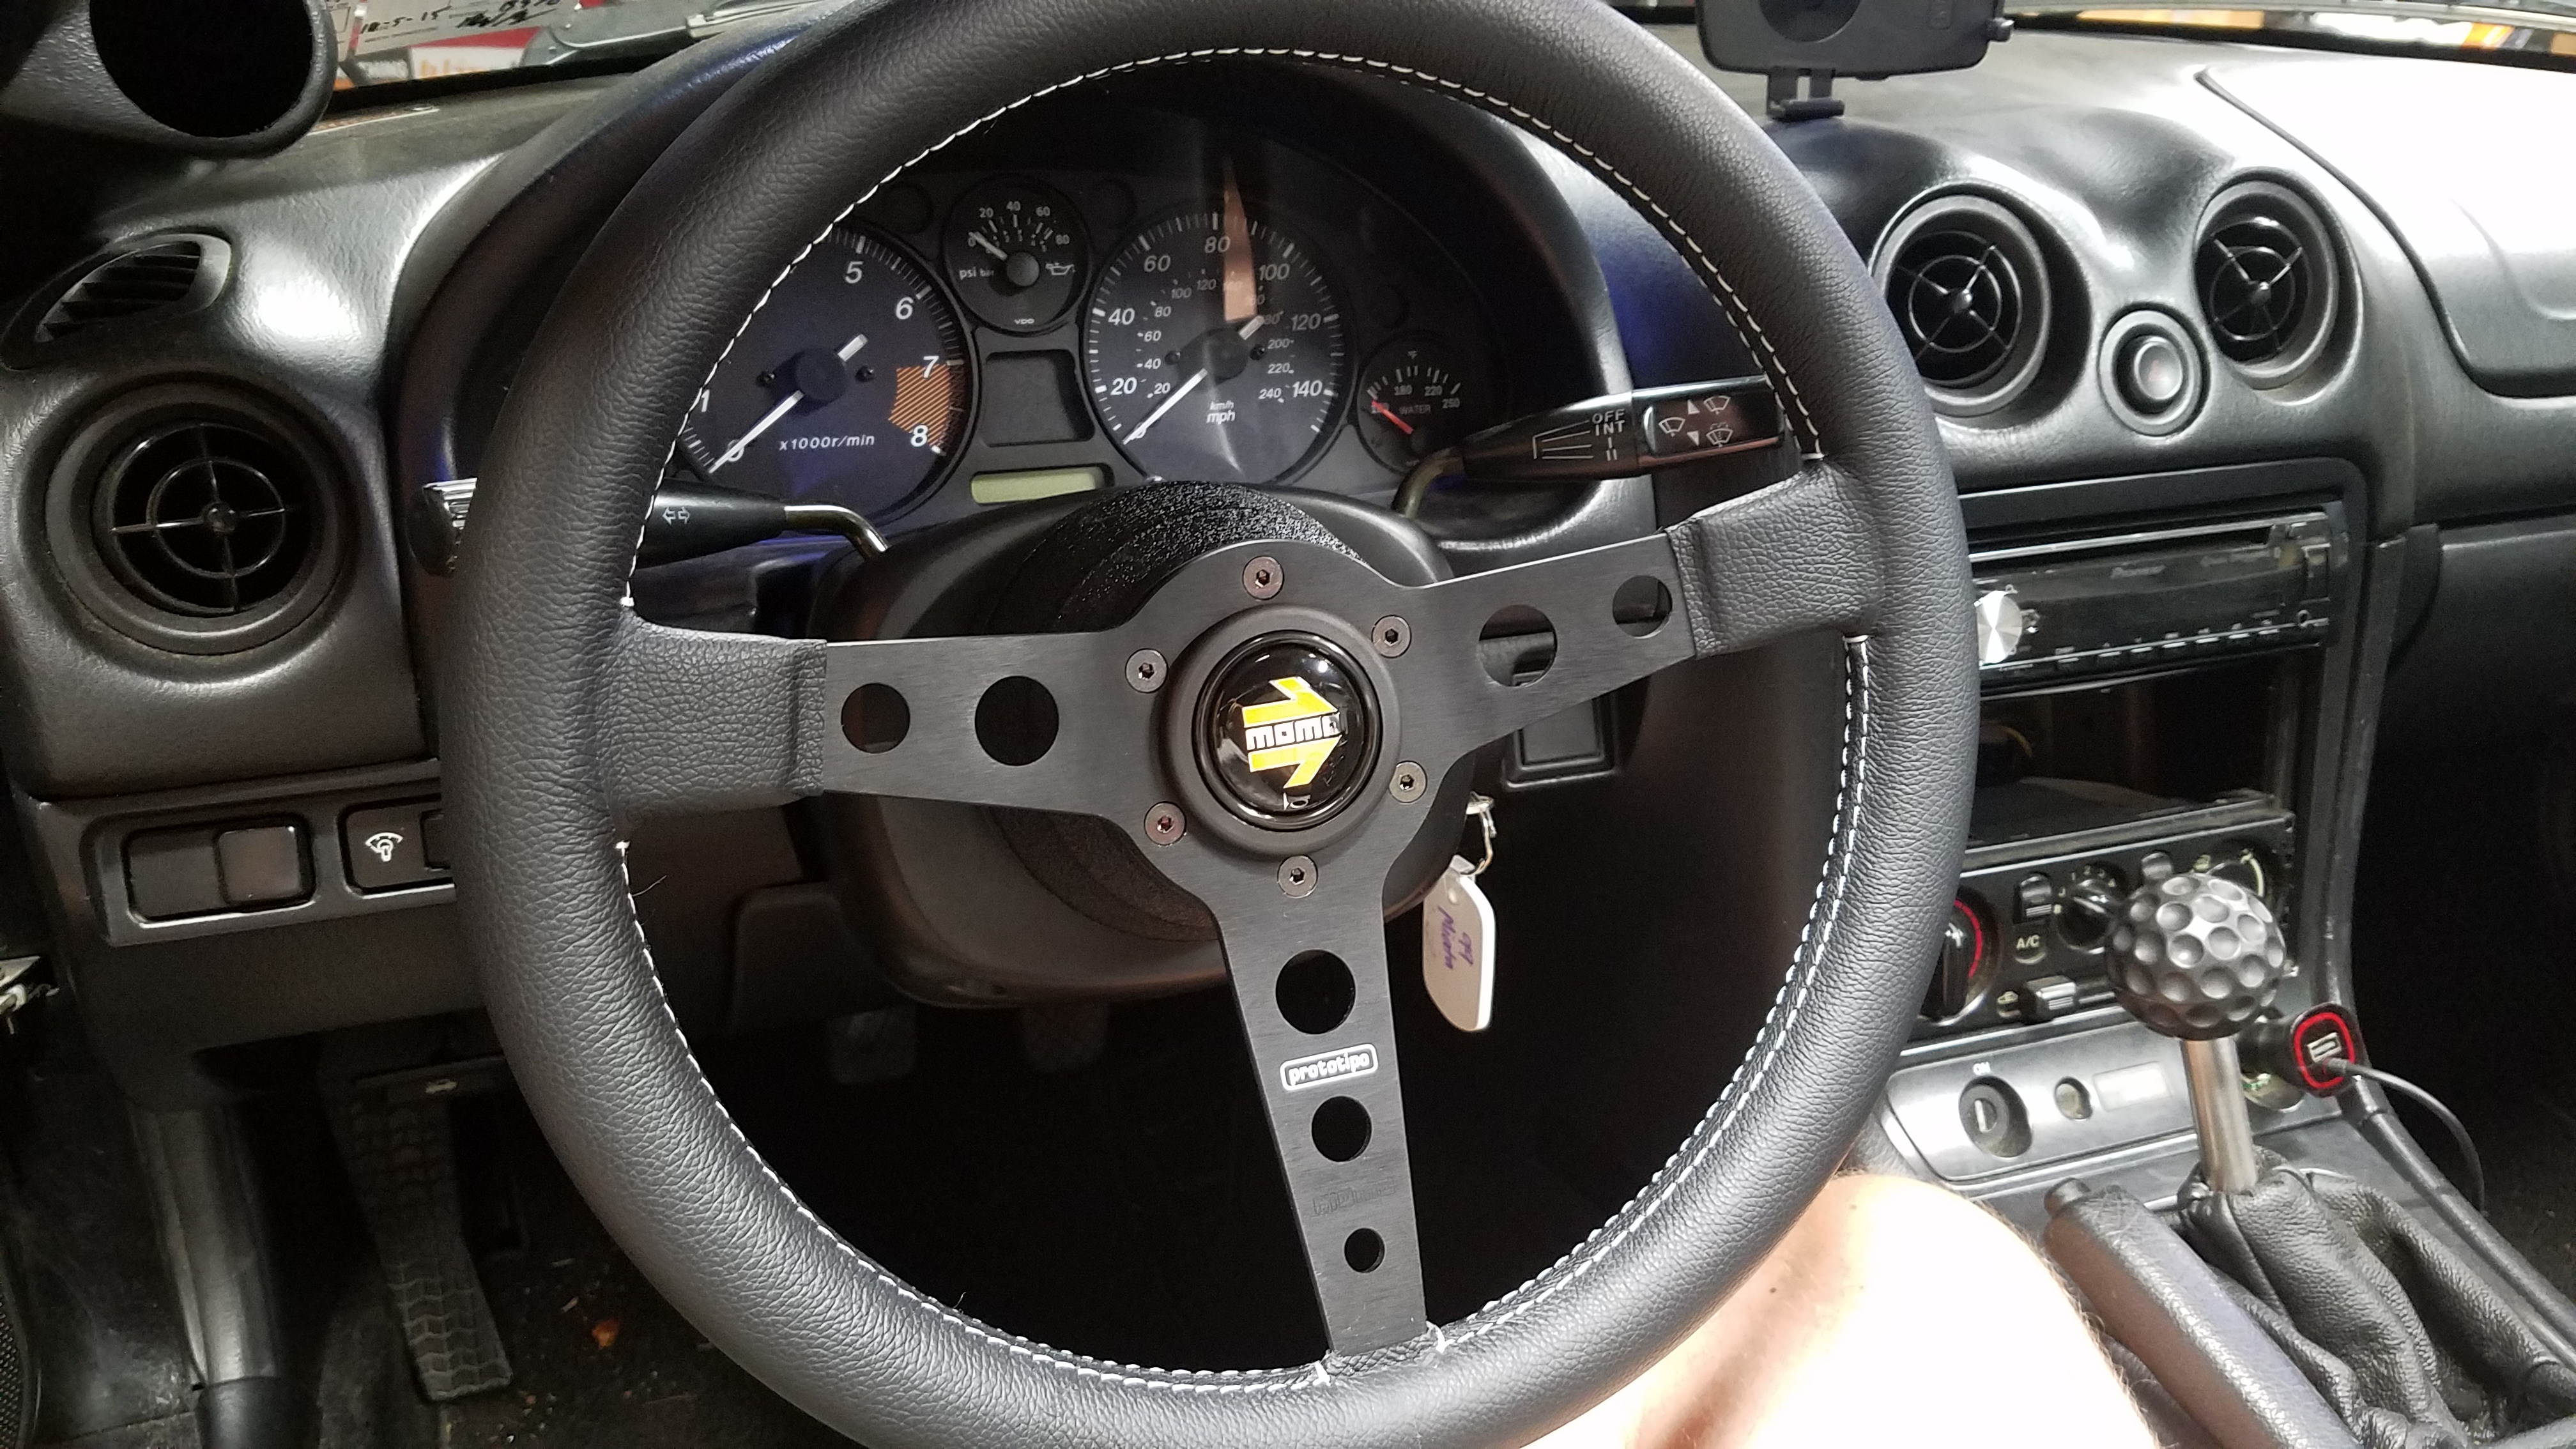
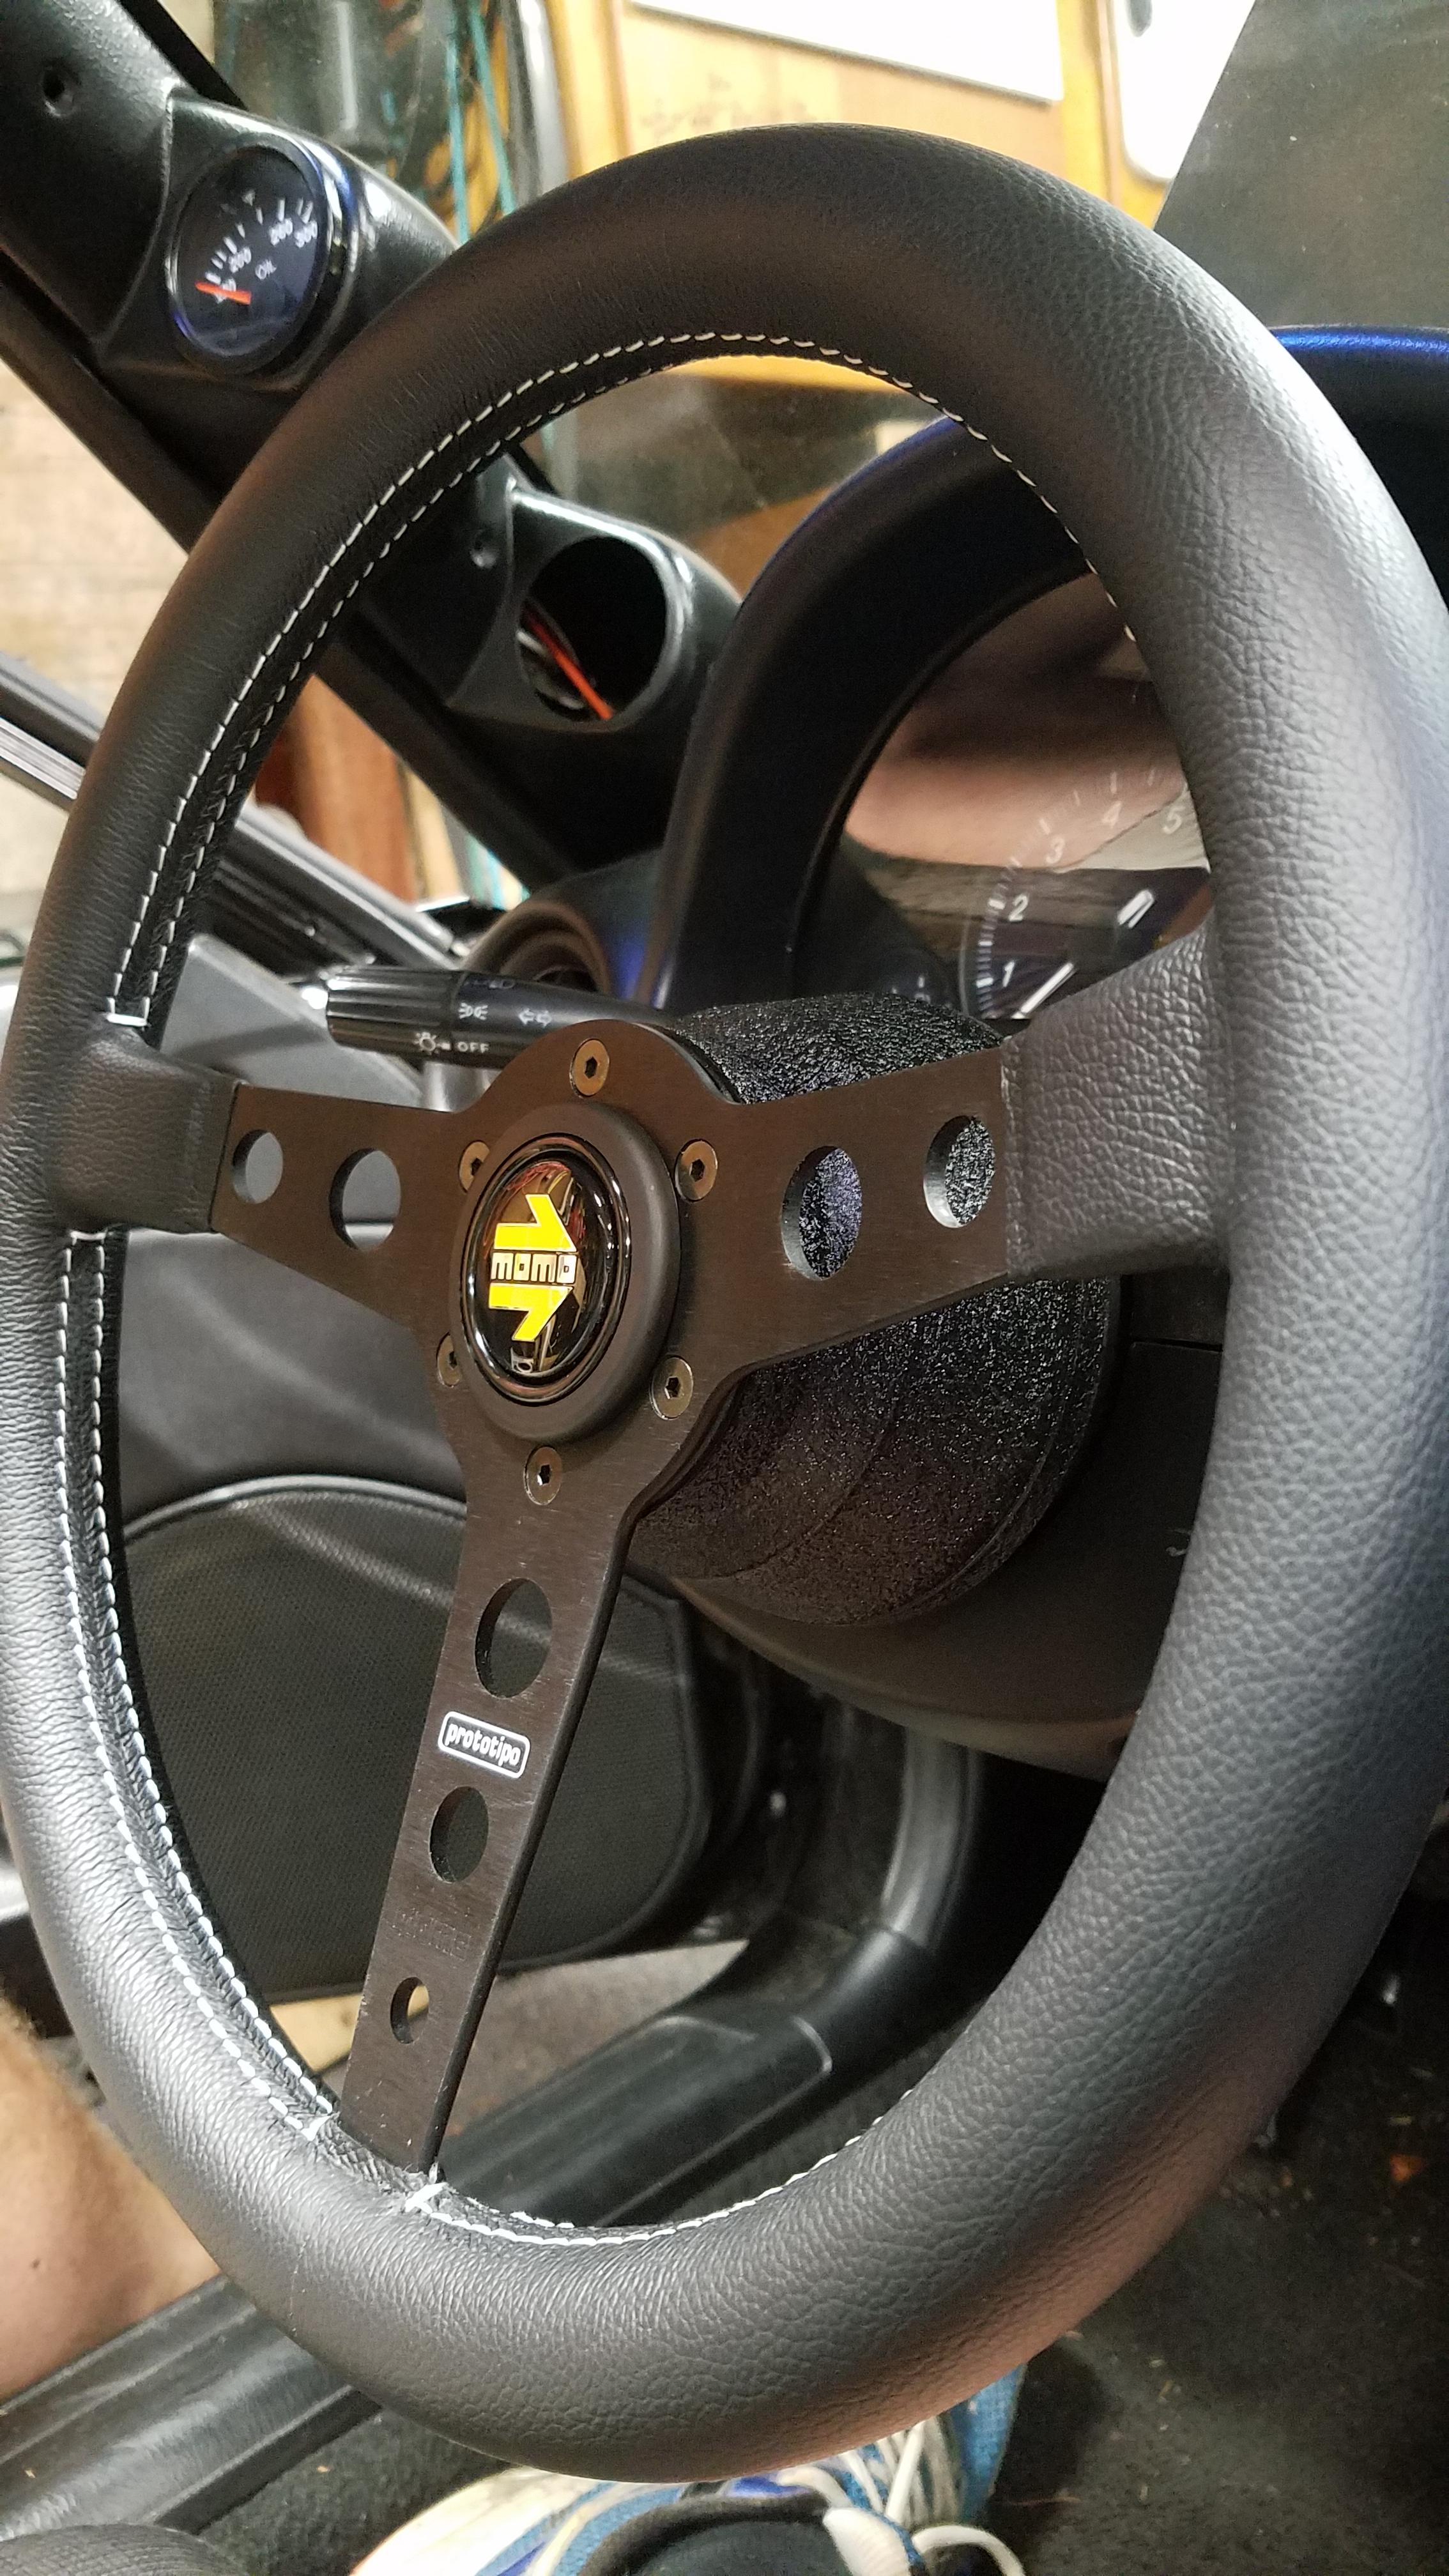
It's a simple looking wheel, but has a nice classic look and seems to be comfortable.
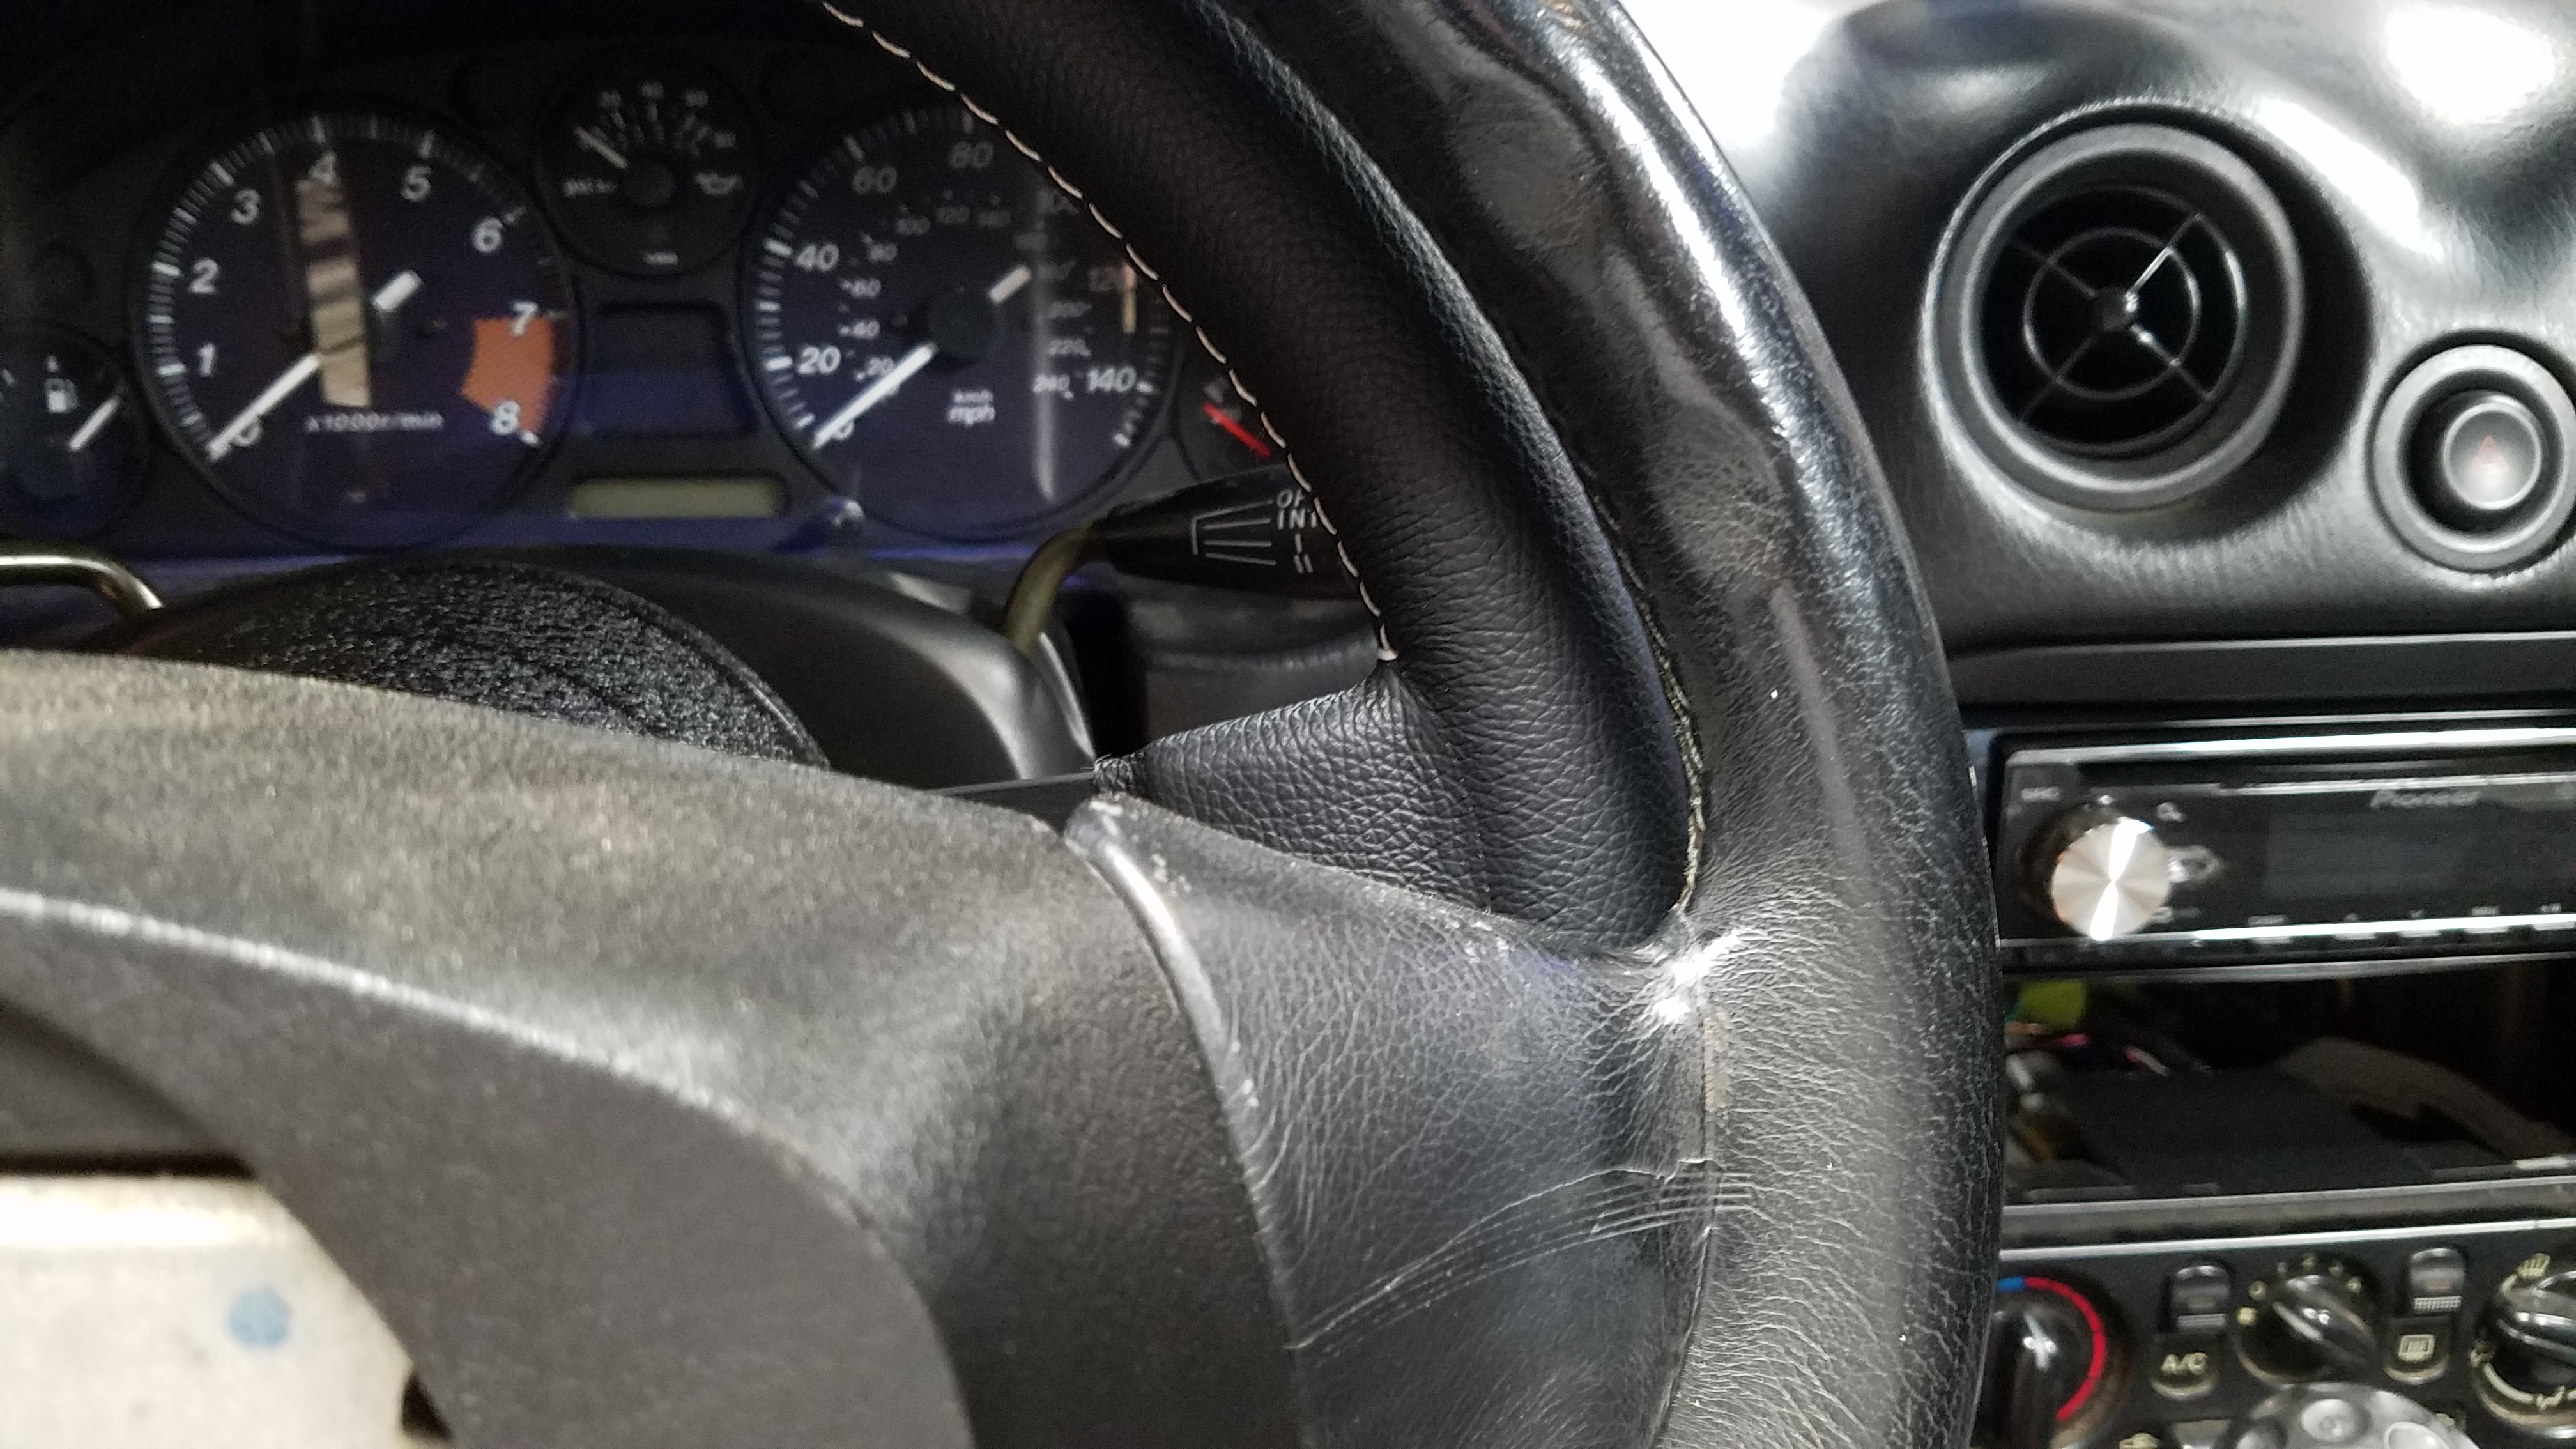
Here's a comparison of the wheel size vs. the stock airbag Nardi steering wheel that came on my car. The diameter is a about an inch smaller which is good, and probably saves a few pounds as well.
These instructions were somewhat helpful: http://revlimiter.net/blog/2013/11/n...wheel-install/
Pro tip here for the NB Miata is don't bother with the Momo hub, just go with a hub that allows you to adapt the airbag clockspring without any modification of the hub. There are a few options out there, but I went with the Daikei Hub kit from Rev9 Autosport Daikei Boss Hub Kit For Mazda Miata MX-5 NA NB NC | REV9.
The kit is nice looking, will adapt to the Momo wheel bolt pattern and has the right resistors to disable the airbag light. It's a bit pricey but only took about a week to ship from Japan.
It's a simple looking wheel, but has a nice classic look and seems to be comfortable.
Here's a comparison of the wheel size vs. the stock airbag Nardi steering wheel that came on my car. The diameter is a about an inch smaller which is good, and probably saves a few pounds as well.
These instructions were somewhat helpful: http://revlimiter.net/blog/2013/11/n...wheel-install/
Pro tip here for the NB Miata is don't bother with the Momo hub, just go with a hub that allows you to adapt the airbag clockspring without any modification of the hub. There are a few options out there, but I went with the Daikei Hub kit from Rev9 Autosport Daikei Boss Hub Kit For Mazda Miata MX-5 NA NB NC | REV9.
The kit is nice looking, will adapt to the Momo wheel bolt pattern and has the right resistors to disable the airbag light. It's a bit pricey but only took about a week to ship from Japan.
Last edited by pj_mcgarvey; 08-21-2017 at 08:11 AM.
08-11-2017, 08:51 AM
#186
V8 Miata Enthusiast
Thread Starter
Thanks, the dual pod a-pillar piece was when I moved gauges from the center hvac vents that the previous owner had been using. I have an oil temp gauge in the top opening since the car will see track work. The second opening had a boost gauge b/c the car was supercharged which I removed. Not sure about the bottom one yet, maybe a A/F ratio gauge again for track related information, or one that can monitor both banks of the engine.
 08-11-2017, 01:31 PM
#188
V8 Miata Enthusiast
Thread Starter
I have smaller "bottle type" resonators from Vibrant which are shown here: https://www.v8miata.net/general-moto...ge7/#post23208
I guess I don't have any pics of them installed, but I think I have dual pipes going past the trans cross member, then the x-pipe, then the resonators then it goes past the rear diff. They xpipe and resonators are close to each other and are tucked up in the tunnel a bit since they were hanging too low before. Smaller resonators will help make it all fit.
I guess I don't have any pics of them installed, but I think I have dual pipes going past the trans cross member, then the x-pipe, then the resonators then it goes past the rear diff. They xpipe and resonators are close to each other and are tucked up in the tunnel a bit since they were hanging too low before. Smaller resonators will help make it all fit.
08-24-2017, 05:07 PM
#189
V8 Miata Enthusiast
Thread Starter
I've reached a milestone with the car as I now have it running as it should.
Major issue resolved was the cam timing was off. Yeah. I installed a new timing set before the engine was installed, and apparently the cam may hav moved between removing the old timing set and the new one. Hence the cam timing was off quite a bit. Easy to imagine how the car would run but not breathe well enough to make decent power.
There were two zero marks on the gear and well, I guess I mistook the wrong one. So lesson here is to double check your timing during your build if you take anything apart.
That said, car runs quite well. It's fast, makes great sounds, and the exhaust is actually much quieter now too with zero drone at this point. Engine combustion timing being off will obviously send unwanted noises out the tailpipe at the wrong times. Another unintended problem solved
The car will need a tune as fuel trims are way high now and I've added intake and exhaust enhancements that will benefit in power too. So before any hard driving or track days - I will be taking it back for a solid tune.
More to come once she's tuned and the clutch is broken in.
08-24-2017, 05:15 PM
#190
V8 Miata Enthusiast
Thread Starter
Second nagging issue I fixed was the coolant overflow bottle... overflowing.
I had routed the steam port to the overflow bottle, with a tee off to the radiator. Turns out that's bad. The steam from the engine basically ran right to the overflow bottle once it was hot.
So using parts from jagsthatrun.com I have a nice looking adapter with 90 degree tee for the steam port into the upper rad hose.
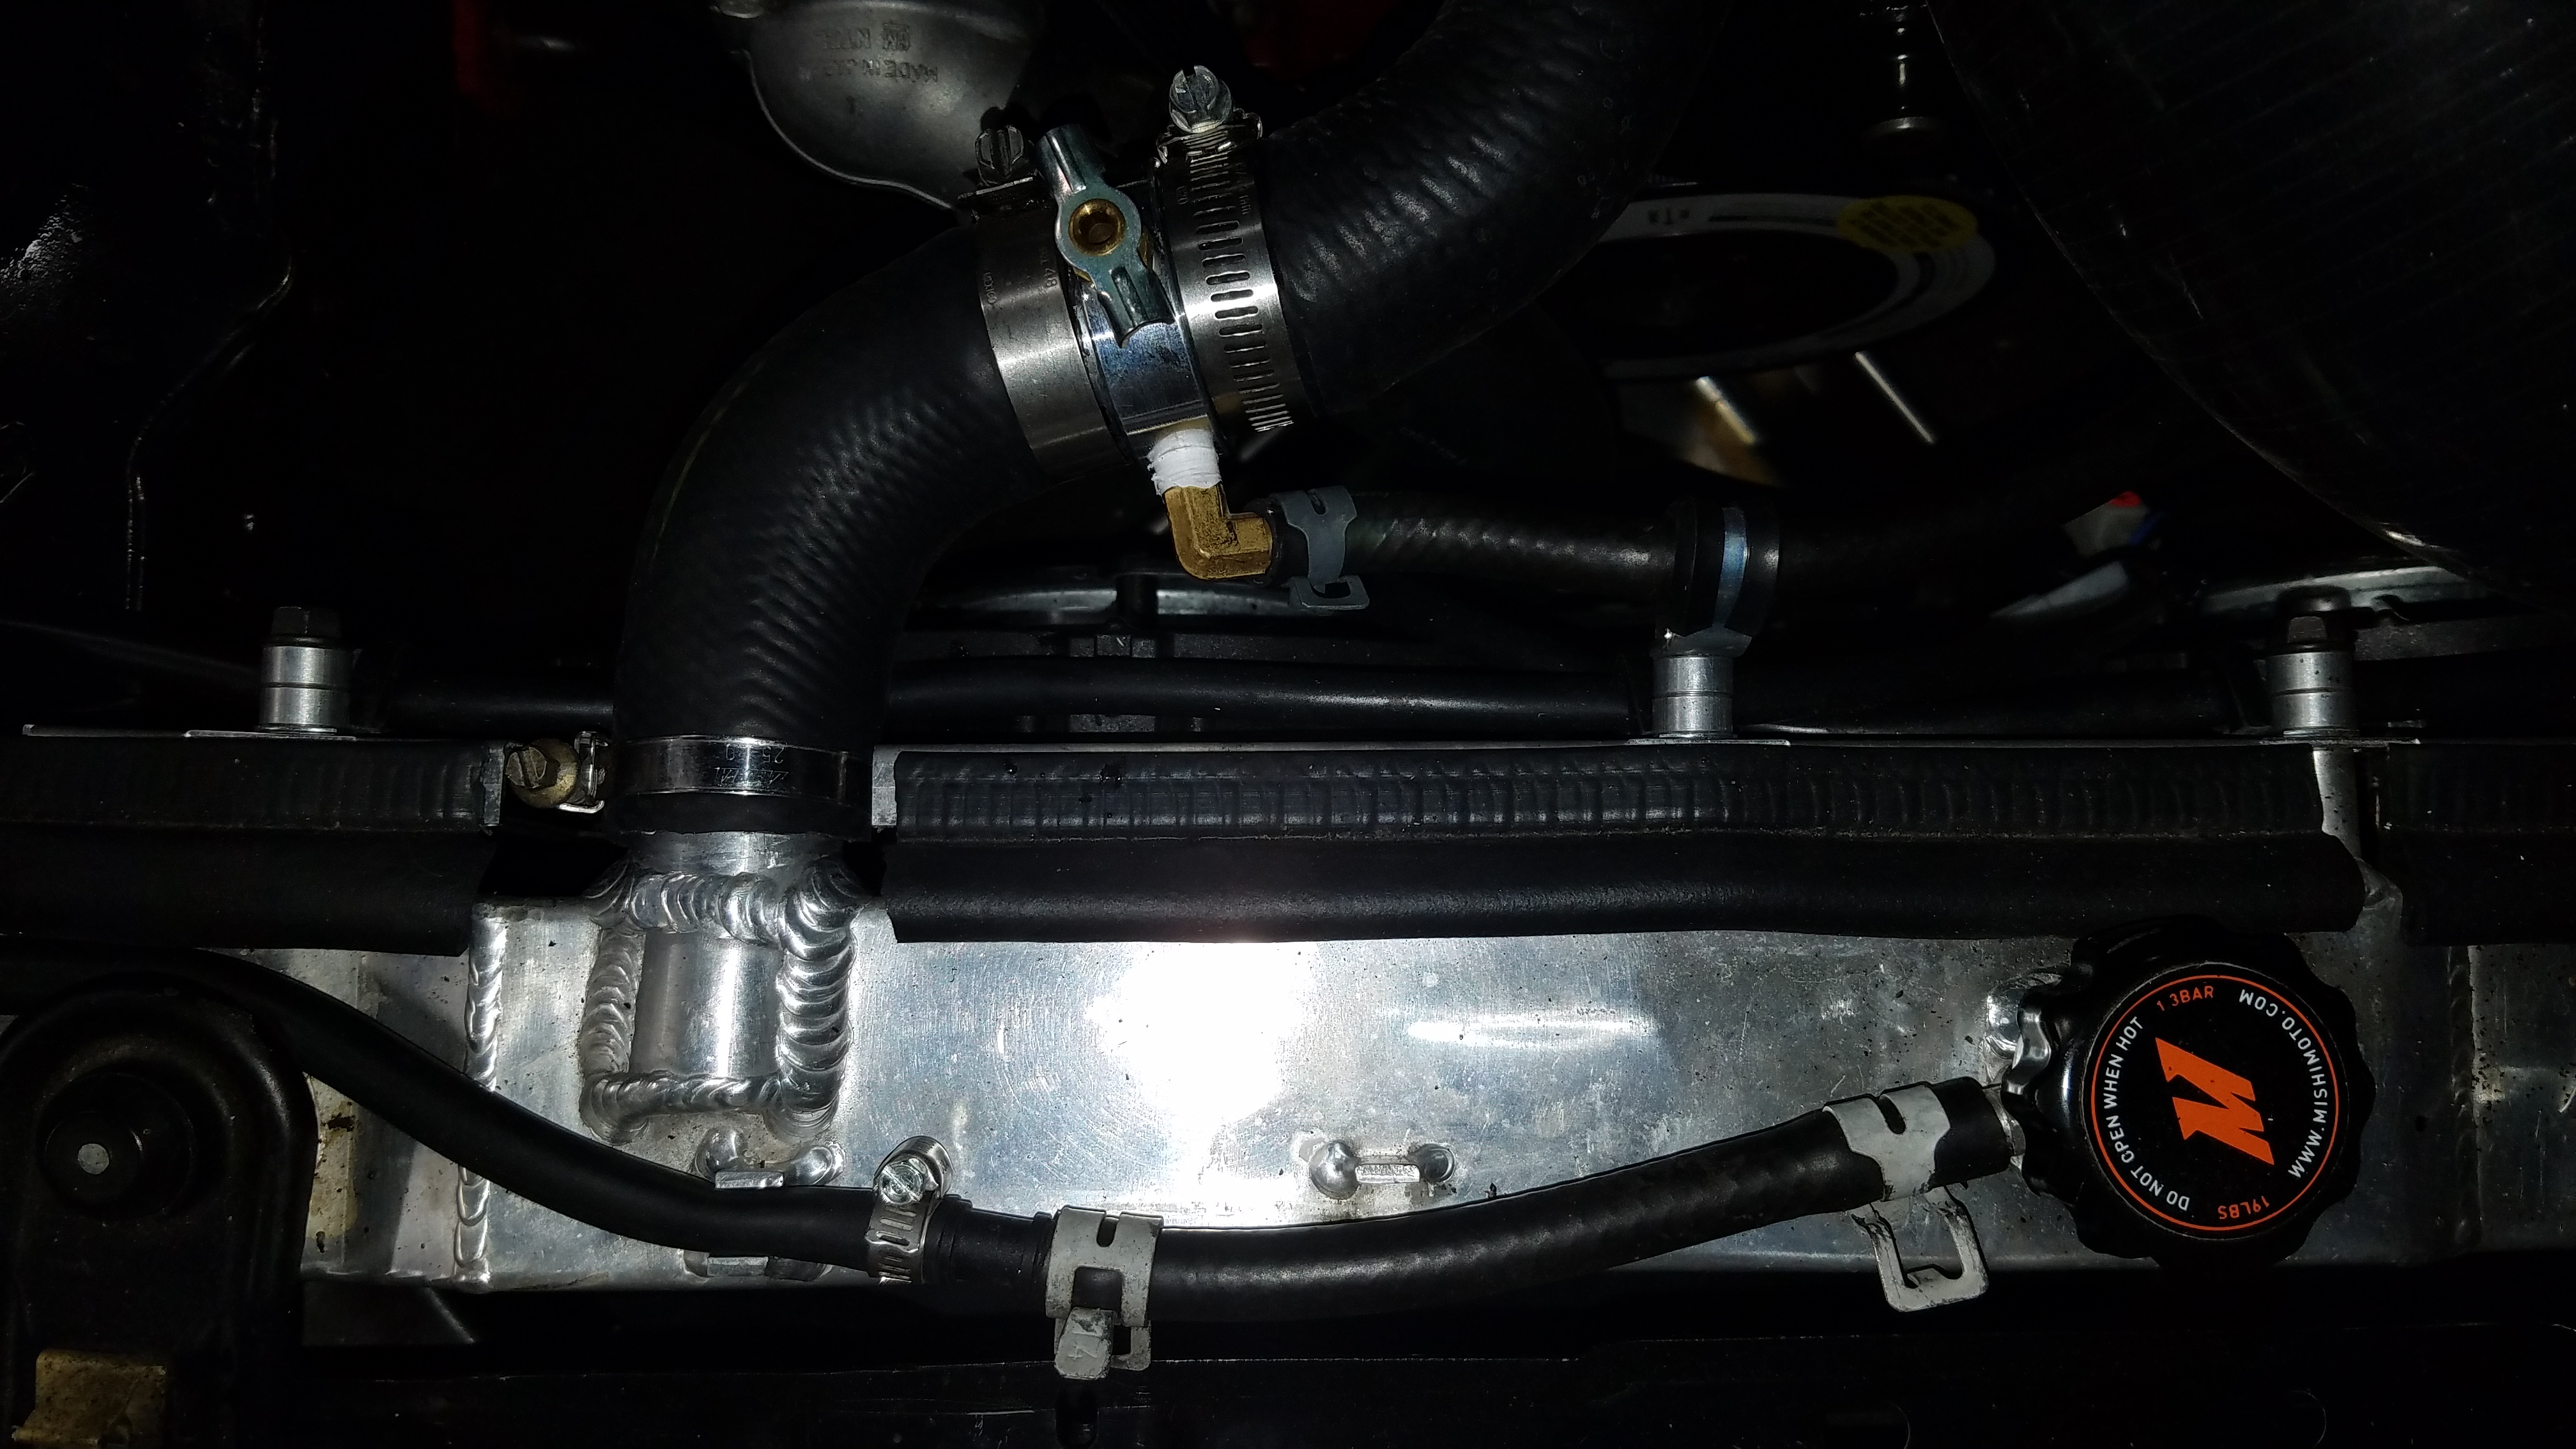
I came across this part a number of times during my build research, but never realized I needed it. Stealth Conversions V8 Cooling System Parts - Transitional Hose Tee
I had routed the steam port to the overflow bottle, with a tee off to the radiator. Turns out that's bad. The steam from the engine basically ran right to the overflow bottle once it was hot.
So using parts from jagsthatrun.com I have a nice looking adapter with 90 degree tee for the steam port into the upper rad hose.
I came across this part a number of times during my build research, but never realized I needed it. Stealth Conversions V8 Cooling System Parts - Transitional Hose Tee
08-24-2017, 05:18 PM
#191
V8 Miata Enthusiast
Thread Starter
Last issue as that I'm sensing some driveline "whine". My guess is it's from the diff, and seems to be under any kind of power, and deceleration.
Going to drain fluid and check for anything amiss. Curious if this is just symptom of the poly mounts or the solid mounting to the subframe, or just normal NVH from the car that's louder in the Miata with top down, diff close to the driver, etc. ...
Thoughts?
Going to drain fluid and check for anything amiss. Curious if this is just symptom of the poly mounts or the solid mounting to the subframe, or just normal NVH from the car that's louder in the Miata with top down, diff close to the driver, etc. ...
Thoughts?
08-25-2017, 07:37 AM
#192
V8 Miata Follower

Last issue as that I'm sensing some driveline "whine". My guess is it's from the diff, and seems to be under any kind of power, and deceleration.
Going to drain fluid and check for anything amiss. Curious if this is just symptom of the poly mounts or the solid mounting to the subframe, or just normal NVH from the car that's louder in the Miata with top down, diff close to the driver, etc. ...
Thoughts?
Going to drain fluid and check for anything amiss. Curious if this is just symptom of the poly mounts or the solid mounting to the subframe, or just normal NVH from the car that's louder in the Miata with top down, diff close to the driver, etc. ...
Thoughts?
Personally, I wouldnt fret over it too much. Changing the gear oil may still be worthwhile, but a little rear end whine never hurt anybody. Just monitor and see if it changes.
Anyhow, I did have a question about your timing issue! I was really surprised to hear that it was timed incorrectly. I dont think we got any "install" pics, but I feel like its sort of uncommon to screw timing up on an LS. I mean its pretty straight forward, the gears have marks on them, and its pretty easy to see if everything lines up. Have you already corrected that issue? Your making me second guess my install! haha
08-25-2017, 07:53 AM
#193
V8 Miata Zealot

I have built hundreds of those differentials when I worked as a Ford tech. I would suspect that the source of your noise would be the backlash is off. This is most likely caused by deflection in the aluminum housing. In order to fix it, you will need to have the ring & pinion replaced by somebody who knows what they are doing & has a case spreader to set pre-load on the new bearings. In my opinion, all aluminum differential housings are garbage. They are some noisy bastards.
08-25-2017, 10:31 AM
#194
V8 Miata Enthusiast
Thread Starter
Ok, thanks for the input on the diff. Seems to be a potential source of issues. I'll drain the fluid to make sure nothing crazy is going on. I think I need to pop the cover on the diff to do that anyway, and I have a micrometer and magnetic base that I can us to measure backlash, so maybe I can take a measurement and see how "off" it is.
Since I've also not broken the clutch in, I haven't confirmed if the limited slip function is working either (two black stripes during burnout for example). Thought I don't think the whine would be related to worn clutch packs in the diff?
Since I've also not broken the clutch in, I haven't confirmed if the limited slip function is working either (two black stripes during burnout for example). Thought I don't think the whine would be related to worn clutch packs in the diff?
08-25-2017, 11:04 AM
#195
V8 Miata Enthusiast
Thread Starter
Anyhow, I did have a question about your timing issue! I was really surprised to hear that it was timed incorrectly. I dont think we got any "install" pics, but I feel like its sort of uncommon to screw timing up on an LS. I mean its pretty straight forward, the gears have marks on them, and its pretty easy to see if everything lines up. Have you already corrected that issue? Your making me second guess my install! haha
No pics from my original install to confirm, but the mechanic did take a pic which I haven't seen yet of what it looked like.
He also said that on a later LS (I have a 98) the piston design may have bent a valve on the motor - that's how "off" it was. So it might be obvious if you are way off on the timing, but maybe not so much if you were off a few degrees advanced or retarded, which the adjustable gear allows you to do. He said the spark plugs seemed to indicate something was up, but without pulling the heads and degreeing the cam, you might not really know.
08-25-2017, 06:13 PM
#197
V8 Miata Fan
 08-25-2017, 06:16 PM
#198
V8 Miata Fan
You could probably do this with no stress on your clutch *or* engine. Fully engage clutch, in, say 2nd gear, apply 50% throttle, count black stripes. :-)
08-25-2017, 07:21 PM
#199
V8 Miata Enthusiast
Thread Starter
My thought process is that the T56 was rebuilt fresh when I bought it. The noise sounds like it's coming from the rear, and the diff was used when bought, and not rebuilt. I also think I might feel some noise coming up through the shifter from the trans.
Might try to use an old smartphone and take some video of the driveline while driving and see if it picks up anything.
Might try to use an old smartphone and take some video of the driveline while driving and see if it picks up anything.
09-12-2017, 01:06 PM
#200
V8 Miata Enthusiast
Thread Starter
Got the car back from the engine tuner and things are definitely looking good. The tuner uses EFI Live and spent some time on the dyno getting things right. Turns out it needed some fuel as it was running lean. He thinks the intake setup is much better than stock and the headers, no cats and the exhaust system are making it flow much better. How much better?
412 lb ft to the wheels better!

That said, in my quick research, Dynocom dynos may be a bit on the optimistic side. So that still seems pretty incredible to me, but the proof is in the driving experience. The car makes crazy power, but also smooth power in any gear, with a great sound.
Still need to get the car inspected and aligned before I really open it up. I don't want a weird alignment to send me off the road at full whack.
I have an LS6 intake coming to me that I scored off LS1Tech.com. The tuner thinks that would add about 20hp. Aside from that I think that will be good for awhile. next step is to take it an autocross and then a track day or two before the season wraps up.
I'll be sure to post more pics and videos as I get to experience the car a bit more.
412 lb ft to the wheels better!
That said, in my quick research, Dynocom dynos may be a bit on the optimistic side. So that still seems pretty incredible to me, but the proof is in the driving experience. The car makes crazy power, but also smooth power in any gear, with a great sound.
Still need to get the car inspected and aligned before I really open it up. I don't want a weird alignment to send me off the road at full whack.
I have an LS6 intake coming to me that I scored off LS1Tech.com. The tuner thinks that would add about 20hp. Aside from that I think that will be good for awhile. next step is to take it an autocross and then a track day or two before the season wraps up.
I'll be sure to post more pics and videos as I get to experience the car a bit more.


