
Update and more questions on my Ford build


Thread Starter
V8 Miata Fanatic
Joined: Mar 2014
Posts: 635
Likes: 37
From: SW Ont.
I should do a build thread with pics, but need to find some spare time to post pics.
To get up to speed, here is what I have done up to this point.
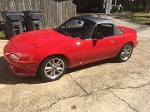
Car is a low mileage '90 no PS no AC. Engine is a '94 5.0 that has the shorter front drive, but I've switched to the pre '93 upper intake and wiring and A9L EEC, since the engine came with no wiring or EEC. Most of the builds use the Fox body setup and I'm not a mechanic so I thought this would be easier.
Did a mild refreshening of the engine with new bearings, rings, WP, OP, etc.
Bought Martins kit including full rearend. Bought a rebuilt T5 z spec.
Got the old drivetrain out and sold. Put all the rearend stuff in and upgraded brakes to '94+.
Pulled out the front subframe and did my engine bay cuts. Went with FM's firewall reinforcements as it looks like you gain a bit more room in the corners for fuel and brake lines, and to my eye looks better (minus my crappy welding).
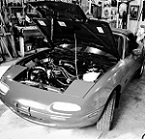
Next up I installed the wiring harness and generally tidied up the engine bay.
So that brings me up to reinstalling the front subframe. Obviously I want to do as much as I can in the engine bay before I start reassembly, so I test fit the clutch master so I could make brackets for the coolant overflow tank that will sit just forward of the master.
Question d'jour. The Miata clutch rod pushes in the piston on the master about a good half inch when installed. Pretty sure it's not supposed to. I've searched and read that there is adjustment for this under the dash. Should the rod be adjusted with some tension on the piston? Or slightly loose?
Keeping in mind it's not filled with fluid yet or hooked up at all (engine/tranny not in yet). Speaking of which, how do you bench bleed the master? Can it be bled on the car?
Will post some pics soon.
Thanks,
Brad
To get up to speed, here is what I have done up to this point.
Car is a low mileage '90 no PS no AC. Engine is a '94 5.0 that has the shorter front drive, but I've switched to the pre '93 upper intake and wiring and A9L EEC, since the engine came with no wiring or EEC. Most of the builds use the Fox body setup and I'm not a mechanic so I thought this would be easier.
Did a mild refreshening of the engine with new bearings, rings, WP, OP, etc.
Bought Martins kit including full rearend. Bought a rebuilt T5 z spec.
Got the old drivetrain out and sold. Put all the rearend stuff in and upgraded brakes to '94+.
Pulled out the front subframe and did my engine bay cuts. Went with FM's firewall reinforcements as it looks like you gain a bit more room in the corners for fuel and brake lines, and to my eye looks better (minus my crappy welding).
Next up I installed the wiring harness and generally tidied up the engine bay.
So that brings me up to reinstalling the front subframe. Obviously I want to do as much as I can in the engine bay before I start reassembly, so I test fit the clutch master so I could make brackets for the coolant overflow tank that will sit just forward of the master.
Question d'jour. The Miata clutch rod pushes in the piston on the master about a good half inch when installed. Pretty sure it's not supposed to. I've searched and read that there is adjustment for this under the dash. Should the rod be adjusted with some tension on the piston? Or slightly loose?
Keeping in mind it's not filled with fluid yet or hooked up at all (engine/tranny not in yet). Speaking of which, how do you bench bleed the master? Can it be bled on the car?
Will post some pics soon.
Thanks,
Brad

V8 Miata Zealot
Joined: Mar 2010
Posts: 1,220
Likes: 51
From: Canton, Georgia
Did you use the spacer for the master cylinder that came in the kit?
Bench bleeding is easy. I am sure that you can find a video on the internet of the procedure. If not, I can send you my phone number & talk you through it.
Bench bleeding is easy. I am sure that you can find a video on the internet of the procedure. If not, I can send you my phone number & talk you through it.
V8 Miata Participant
Joined: Nov 2014
Posts: 296
Likes: 12
From: Atlanta, Ga
Brad, I had the same concern when I put Martin's master cylinder on my car. With the spacer on it would still push the master cylinder at least one half inch into the bore. Pre-loaded so to speak. Interestingly, it worked fine that way. But eventually I went under the dash and adjusted the rod to get some of that pre-load removed. I noticed that when I pushed the pedal all the way down, I was bottoming the master before hitting the clutch pedal stop. I still have slight pre-load on the master but with the adjustment, there is additional stroke at the slave and an even better overall clutch feel/operation.
So make the adjustment under the dash for sure.
Mike
So make the adjustment under the dash for sure.
Mike
Thread Starter
V8 Miata Fanatic
Joined: Mar 2014
Posts: 635
Likes: 37
From: SW Ont.
Here's the address to the build blog I set up. Updates should be weekly as I'm starting to move along a bit now.
https://sites.google.com/site/myv8mi...ect/build-blog
https://sites.google.com/site/myv8mi...ect/build-blog
Last edited by MX-Brad; Feb 22, 2015 at 07:51 AM. Reason: zpelling

V8 Miata Follower
Joined: Jan 2014
Posts: 143
Likes: 15
From: Innisfil, Ontario, Canada
Brad - i ran into the same issue and caused what is known as "pump up" there is some sort of release mechanism in the master to let the fluid back in the reservoir, but only works when the pedal is fully released... and does not happen when the pushrod preload from the pedal is too much
what would happen is if you would hit the clutch extra hard and fast, it seemed to pump and lock more fluid into the system, pushing the slave further everytime until the clutch fork stayed pushed in all the way... the only way to get the tension off was to go bleed the slave...
I adjusted the pushrod preload under the dash which was very easy... and then (although i seem to be the only one to have done this) i ended up shortening that push rod slightly... it seemed to work fine until recently I've been noticing some pump up again, i need to revisit the adjustment under the dash again..

Thread Starter
V8 Miata Fanatic
Joined: Mar 2014
Posts: 635
Likes: 37
From: SW Ont.
Thanks for the info guys. I'll see about a subscribe feature, Jim....didn't see one at first glance though.
Getting all set to install the engine today. Question about the tranny mount. The Mustang mount that Martin provides attaches to the tapped holes on the tranny. I'm concerned about stripping those out if I just screw the mount onto those. Would it be a better bet to put the bolts through the holes from the top and use them as studs put the mount on and then a nyloc? Or am I overthinking this again, and just bolt them up?
Getting all set to install the engine today. Question about the tranny mount. The Mustang mount that Martin provides attaches to the tapped holes on the tranny. I'm concerned about stripping those out if I just screw the mount onto those. Would it be a better bet to put the bolts through the holes from the top and use them as studs put the mount on and then a nyloc? Or am I overthinking this again, and just bolt them up?
Thread Starter
V8 Miata Fanatic
Joined: Mar 2014
Posts: 635
Likes: 37
From: SW Ont.
Thanks tbone.
I didn't get as far as I hoped today...ran into trouble getting the pilot bearing out, but at least got the engine in for a test fit. Some progress that I can see.

I didn't get as far as I hoped today...ran into trouble getting the pilot bearing out, but at least got the engine in for a test fit. Some progress that I can see.


Thread Starter
V8 Miata Fanatic
Joined: Mar 2014
Posts: 635
Likes: 37
From: SW Ont.
Thanks. If it wasn't for that dang pilot bearing I could have had the tranny done too. I have a mechanic friend who was going to pull it for me, but I decided to try it myself with the wet paper trick. I managed to get the bearing out that way but the bushing is still inside. Now my friend is away for a week on a snowmobile trip. Gotta go get a slide hammer puller, shims for the motor mounts and red locktite for the flywheel bolts. End of next weekend should see all the drivetrain in.
lol Mike, I considered yanking the headlights, but I was really running out of space to put things. The trunk and interior are full, my basement work area is full, no room left in the garage etc. So far I've managed not to mangle them.
Cheers all.
lol Mike, I considered yanking the headlights, but I was really running out of space to put things. The trunk and interior are full, my basement work area is full, no room left in the garage etc. So far I've managed not to mangle them.
Cheers all.
V8 Miata Zealot
Joined: Mar 2010
Posts: 1,220
Likes: 51
From: Canton, Georgia
I have had good luck pulling the pilot bearing using the "grease & bolt" method. This cheap puller works good, too 3-Jaw Pilot Bearing Puller
Thread Starter
V8 Miata Fanatic
Joined: Mar 2014
Posts: 635
Likes: 37
From: SW Ont.
Thanks for the encouragement everyone.
I ended up just ordering a slide hammer puller from the local Carquest. It'll be here in the morning.
Is best plan to keep the hoist attached to the motor while I install the flywheel, clutch and tranny, so I can keep the engine from leaning too much while i finalize it's position?
I noticed yesterday that i needed to keep the rubber mounts loose while lowering the engine to catch the studs in the block mounts. Will tighten once in place.

V8 Miata Fan
Joined: Nov 2014
Posts: 76
Likes: 3
From: Tuscaloosa, AL
On that bearing, i have had the best luck with a die grinder and a small bit. If you grind down onto one side of it and get it thin, you can just tap a screwdriver between it and the crank and it will fall right out! I tried the grease method a couple and ended up with grease splattered everywhere! I probably wasn't doing it correctly. I have never had a slide puller that would grab it right... thats my $.02...
Thread Starter
V8 Miata Fanatic
Joined: Mar 2014
Posts: 635
Likes: 37
From: SW Ont.
Yes, it was only a small amount. Engine is back in...urrg. I meant to index the flywheel so I didn't have to mess around with that under the car. Oh well.
Engine has seemed to have found it's spot. I have the morning off, so will jack up the car real high and get the tranny in.
Engine has seemed to have found it's spot. I have the morning off, so will jack up the car real high and get the tranny in.
Thread Starter
V8 Miata Fanatic
Joined: Mar 2014
Posts: 635
Likes: 37
From: SW Ont.
This morning I pulled the motor again because the right side rubber mount was touching the steering shaft boot. A few minutes with a die grinder fixed that. I decided to grind down the rack a bit too as I thought I might have a clearance issue there.
Martin suggested dry fitting the bell and tranny sans flywheel and clutch so I could set my tranny brace in place, make any clearance adjustments, set angles etc, then go back and install with all the parts. I got stopped dead at the bellhousing. I can't seem to get enough clearance for the left side middle bolt. i pulled the engine as far forward as the mounts would allow, placed a board under the front of the pan and carefully tilted the engine back, and even tried the BFH on the tunnel, but that's a real stong corner. I ran out of time there for today. Anyone else have an issue there? Suggestions?
To clarify, the boss for the bolt won't slide in between the firewall and the block to allow the bell to slide onto the dowel on the drivers side.
Cheers,
Brad
Last edited by MX-Brad; Mar 4, 2015 at 02:18 PM.
V8 Miata Participant
Joined: Nov 2014
Posts: 296
Likes: 12
From: Atlanta, Ga
There's that brace inside the car on the tunnel in that area that really prevents it from getting hammered in. If you look at some of the LS engine installs they actually take the brace out to widen that area of the tunnel (and then weld it back in). Same on the other side.
I had the same issue. I think you are talking about this area circled in yellow.
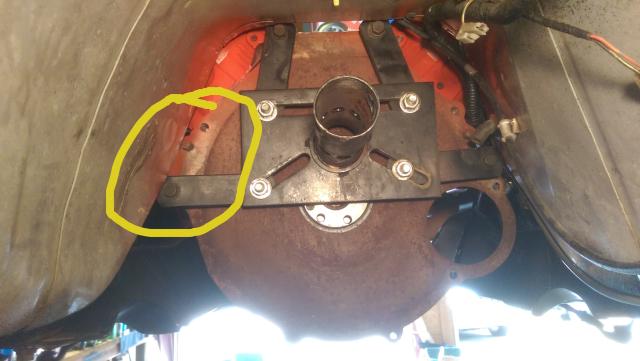
I had to do two things. You alluded to one of them. I had to slot the engine mount brackets to allow the entire engine to move to the right about 1/4 inch - to passenger side. This alleviated the steering boot rub as well (I think, hard to remember that now). I also flipped the engine mount brackets so that it let the engine slide forward much further than needed and wound up with the trans cross member right at where Martin has you put it in his instructions (actually for me it was 5/8 further back because of the SN95 T5 trans being that much longer but...). My engine landed about 3/4 inch from the firewall at the driver side rear cylinder head. I do not have the air injection tube back there. I also "45'ed" that boss on the bell housing that goes over the alignment dowel. I also beat that part of the tunnel too but it did not seem to budge at all... Are you using a Fox body bell or the SN95 bell? I abandoned the SN95 bell right away as it looked like there would be extensive "beating" to come close to getting it to fit.


