'99 LS Build
 11-29-2014, 09:29 PM
#1
V8 Miata Participant

Thread Starter
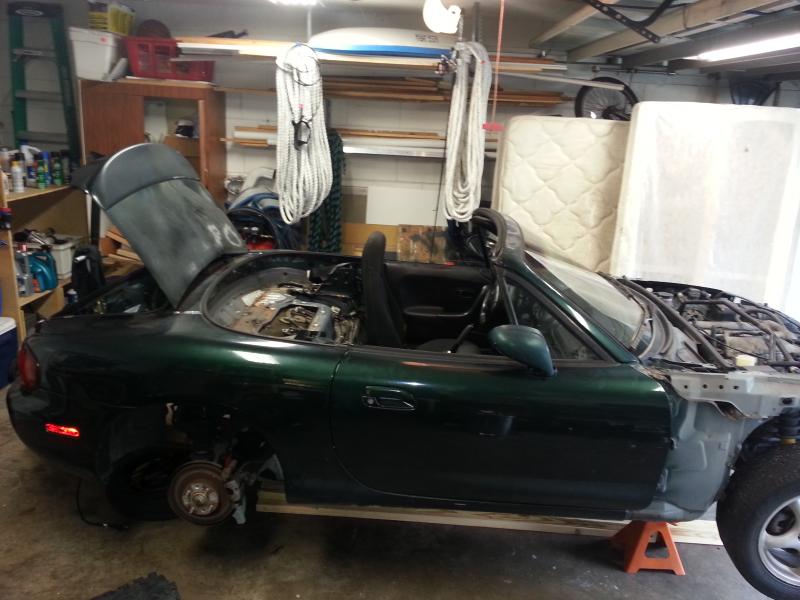
Figured I'd quit lurking and start a build thread. I picked up a 130k mile 99 NB with a blown head gasket for $1500 at the beginning of the year. Her body is in great shape but the interior was pretty shot. I think the car sat uncovered with a leaky top before the PO put a brand new one on before selling it.
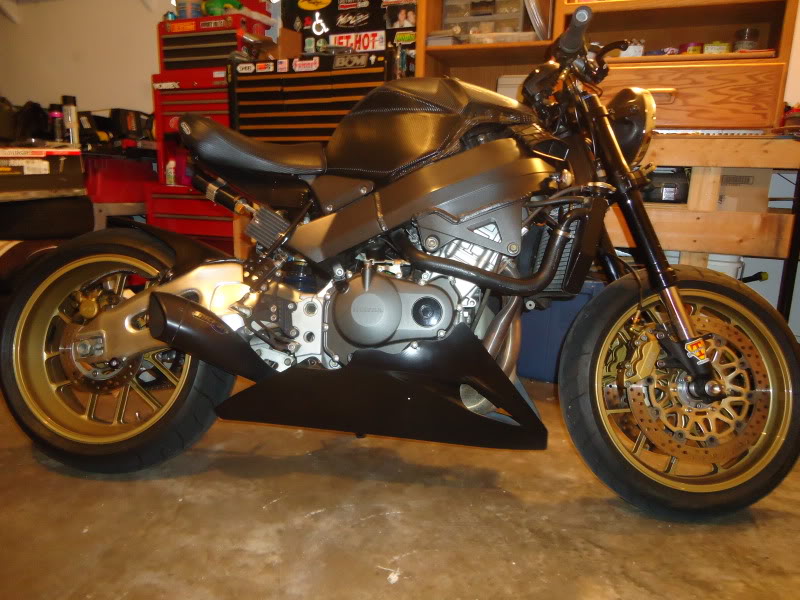
Sold my baby to get some positive cash flow since I knew I'd need it
I've recouped the money I paid for the car by selling the new top, motor/trans combo and the torsen it had. But I think the money coming in was allergic to my wallet and ended up at Summit for fuel parts and building a rear end kit.
The only pic I have before it got totally stripped. Quickly realizing my garage is shrinking...anyone need a mattress?
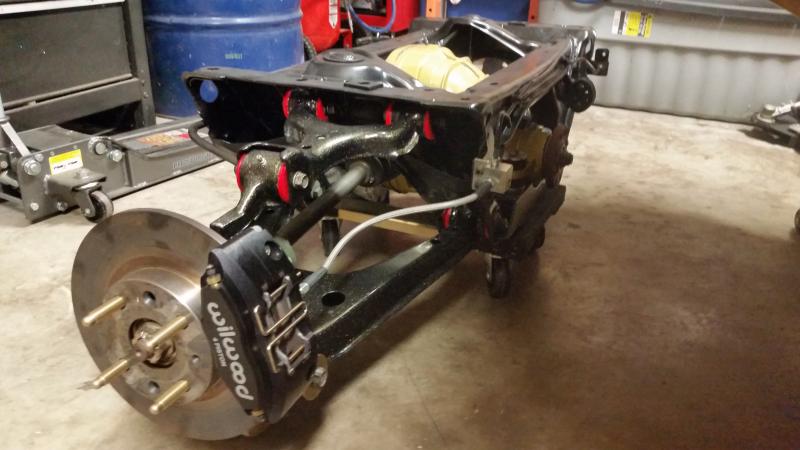
The build has been slow going as Im trying to find as many used parts as possible. I came across a guy selling a boss rear end kit with stage 3 axles and overhauled cobra diff all with zero miles. It came on an NA subframe with crap welds so I transferred all the parts to the NB frame. Since I had all the bushings out I installed zerk fittings and put it all back together.
Fully assembled subframe ready to be bolted in once I apply some undercoating to the bottom of the car.
Since I had the rear subframe out I tackled the fuel line routing. After a lot of research on braided vs hard line, I decided on hard lines. This was the first time I've ever bent any type of line and it took me quite a few tries to get the hang of it. Cursing and a punching bag helped. I'm waiting to get the engine fitted before i run the line to the engine bay.
AN fittings are man ****.
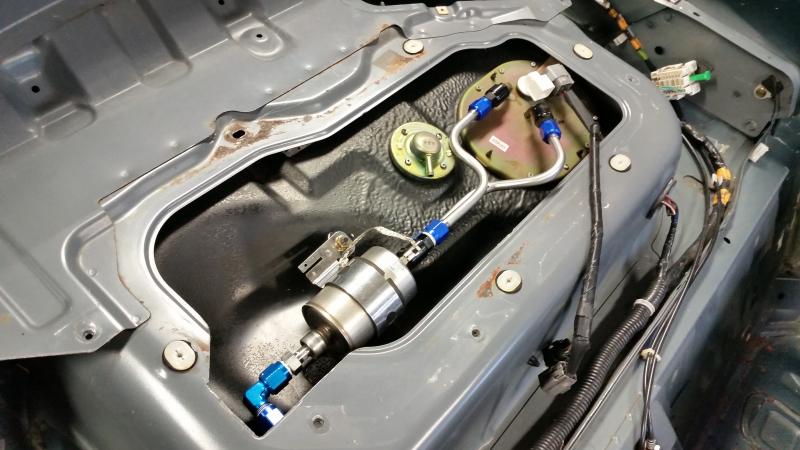
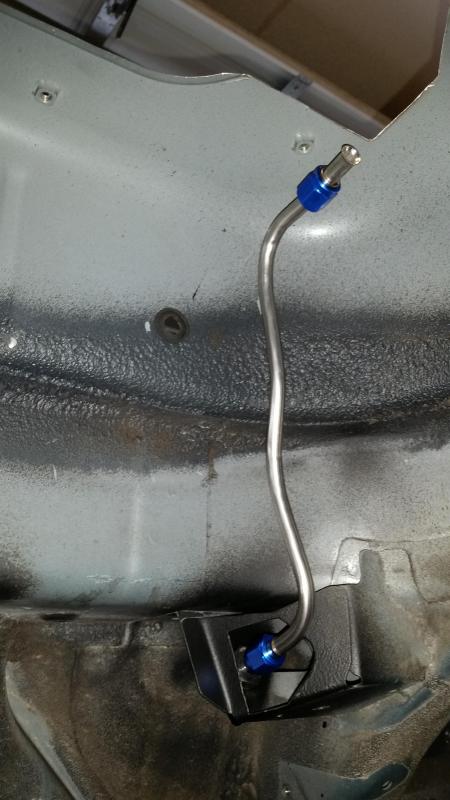
I installed a bulkhead fitting in the bracket that the tank bolts into to make running the feed line to the engine a little easier when Im ready to.
It feels good to be finally getting somewhere with it. Next up will be getting the V8R front subframe and start the trans tunnel widening.
Cheers,
Dave
Sold my baby to get some positive cash flow since I knew I'd need it

I've recouped the money I paid for the car by selling the new top, motor/trans combo and the torsen it had. But I think the money coming in was allergic to my wallet and ended up at Summit for fuel parts and building a rear end kit.
The only pic I have before it got totally stripped. Quickly realizing my garage is shrinking...anyone need a mattress?

The build has been slow going as Im trying to find as many used parts as possible. I came across a guy selling a boss rear end kit with stage 3 axles and overhauled cobra diff all with zero miles. It came on an NA subframe with crap welds so I transferred all the parts to the NB frame. Since I had all the bushings out I installed zerk fittings and put it all back together.
Fully assembled subframe ready to be bolted in once I apply some undercoating to the bottom of the car.

Since I had the rear subframe out I tackled the fuel line routing. After a lot of research on braided vs hard line, I decided on hard lines. This was the first time I've ever bent any type of line and it took me quite a few tries to get the hang of it. Cursing and a punching bag helped.
I'm waiting to get the engine fitted before i run the line to the engine bay.AN fittings are man ****.

I installed a bulkhead fitting in the bracket that the tank bolts into to make running the feed line to the engine a little easier when Im ready to.

It feels good to be finally getting somewhere with it. Next up will be getting the V8R front subframe and start the trans tunnel widening.
Cheers,
Dave
Last edited by ItsAllRigged; 09-30-2015 at 10:41 AM.
 11-30-2014, 04:03 AM
#2
Jim Stainer

Wow that is one well done build you have cooking there! I love the fuel set up and never thought about putting the filter there. So with no soft top are you going hard top or is this just going to be a track car or something?
Great build thread - subscribed!
Great build thread - subscribed!

 11-30-2014, 01:48 PM
#5
V8 Miata Participant
Thread Starter
Thanks guys, its definitely going to be a fair weather machine. I do like the look of a hardtop but that will be something I pick up much later.
12-09-2014, 01:00 PM
#6
V8 Miata Participant
Thread Starter
With the fuel system finished and the rear subframe installed, I decided to wait until the new year to buy any more parts. So I figured I'd get started on the dash.
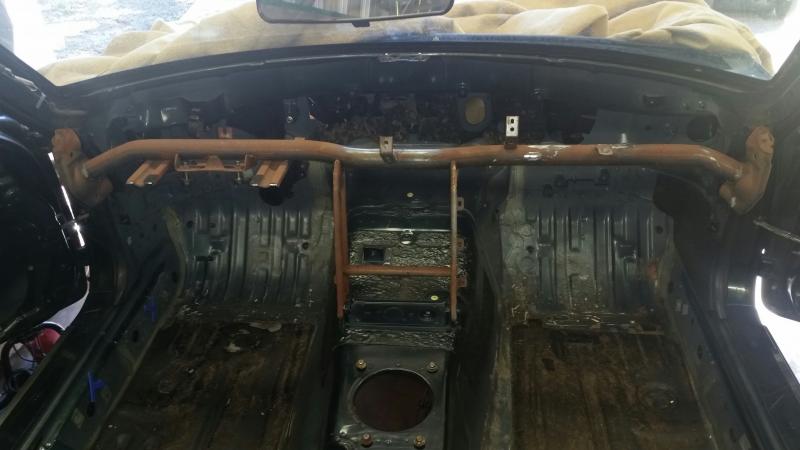
Pulled the dash bar out and removed all the unnecessary brackets then bolted back in to mark where to trim the dash.
Dash reinstalled after trimming
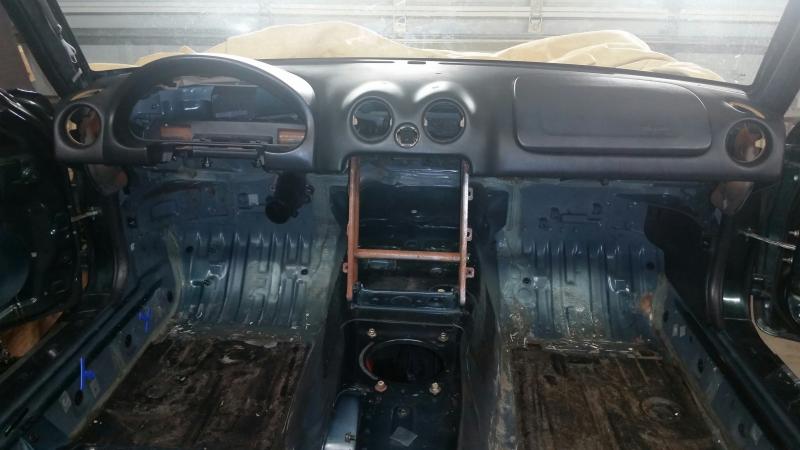
I still havnt decided what to do with the center support section, whether to leave it or remove and weld in my own support. I'll probably wait until I determine where the switch panel and smaller gauges are going.
Cheers and Happy Holidays fellas!
Pulled the dash bar out and removed all the unnecessary brackets then bolted back in to mark where to trim the dash.

Dash reinstalled after trimming

I still havnt decided what to do with the center support section, whether to leave it or remove and weld in my own support. I'll probably wait until I determine where the switch panel and smaller gauges are going.
Cheers and Happy Holidays fellas!
12-30-2014, 11:03 PM
#7
V8 Miata Participant
Thread Starter
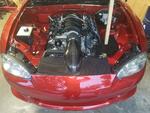
Well the build just got serious! 
[IMG]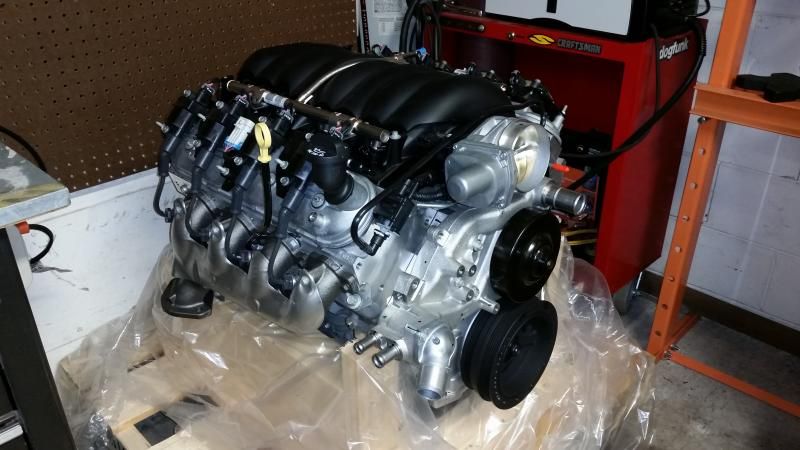 [/IMG]
Super stoked as I found this for an incredible deal locally from a guy who's project tanked. Its turnkey with pcm, harness and dbw pedal.
Ordering the V8R subframe next month...
[IMG]
 [/IMG]
Super stoked as I found this for an incredible deal locally from a guy who's project tanked. Its turnkey with pcm, harness and dbw pedal.
Ordering the V8R subframe next month...
12-31-2014, 07:40 AM
#10
V8 Miata Participant
Thread Starter
Its the crate 480hp LS3 
The fuel lines are 3/8 stainless using 6an fittings. I decided on hard lines for their durability. After searching many forums, some people using braided started smelling fuel in the cabin after xx amount of miles. That scared me enough not to go that route. Plus, hard lines are much cheaper per foot but you do have to buy the bender and flange tool. 3/8 line is stout but the Home depot bender works well putting one handle in a vice and using a pipe for leverage.
[IMG]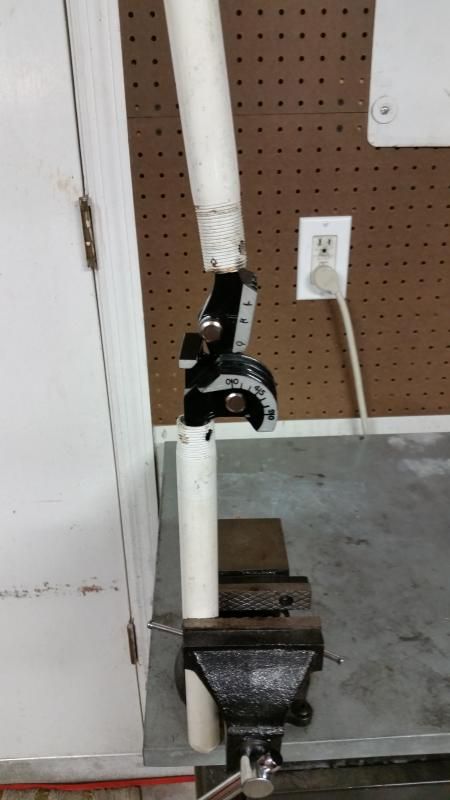 [/IMG]
The Ridgid tool works great although it isnt cheap. Im hoping to be able to use it for another job to justify the cost.
[IMG]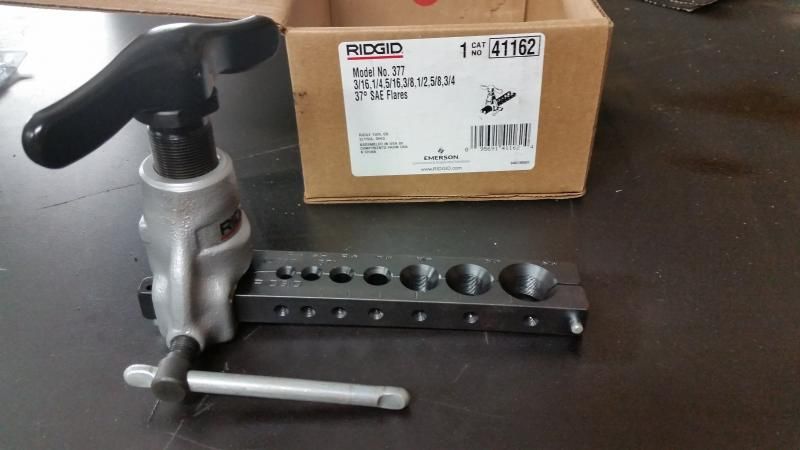 [/IMG]
SupaDupaSteve if youre near Orlando youre welcome to use my bender and flare tool.
Cheers
Dave
The fuel lines are 3/8 stainless using 6an fittings. I decided on hard lines for their durability. After searching many forums, some people using braided started smelling fuel in the cabin after xx amount of miles. That scared me enough not to go that route. Plus, hard lines are much cheaper per foot but you do have to buy the bender and flange tool. 3/8 line is stout but the Home depot bender works well putting one handle in a vice and using a pipe for leverage.
[IMG]
 [/IMG]
The Ridgid tool works great although it isnt cheap. Im hoping to be able to use it for another job to justify the cost.
[IMG]
 [/IMG]
SupaDupaSteve if youre near Orlando youre welcome to use my bender and flare tool.
Cheers
Dave
Last edited by ItsAllRigged; 12-31-2014 at 07:47 AM.
12-31-2014, 07:47 AM
#11
V8 Miata Fanatic


 12-31-2014, 07:56 AM
#13
V8 Miata Participant
Thread Starter
 12-31-2014, 07:58 AM
#14
V8 Miata Participant
Thread Starter
12-31-2014, 06:24 PM
#16
V8 Miata Participant
Thread Starter
Got my door cards mocked up today. I picked up some NA upper door pads yesterday. Besides being a nice custom touch Im hoping the extra room width wise will give me more seat options.
[IMG]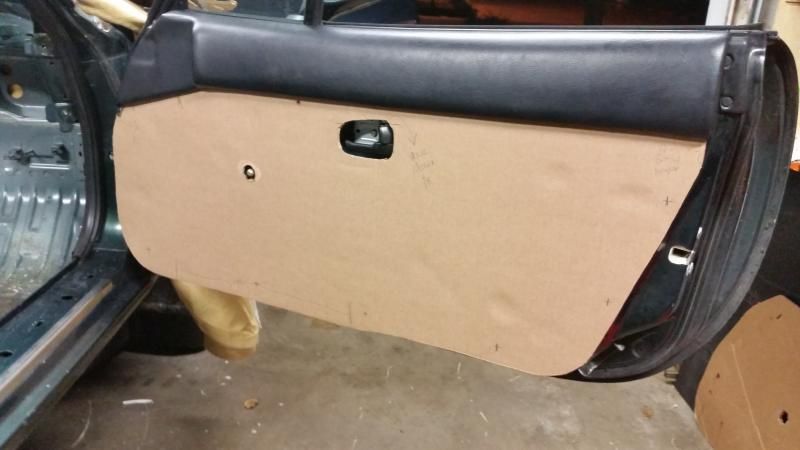 [/IMG]
Im still undecided on the material to use, leaning toward cintra panels covered with the 3m carbon fiber di-noc. Any other recommendations?
Happy New Years Eve!!
[IMG]
 [/IMG]
Im still undecided on the material to use, leaning toward cintra panels covered with the 3m carbon fiber di-noc. Any other recommendations?
Happy New Years Eve!!
 01-07-2015, 08:55 PM
#19
V8 Miata Participant
Thread Starter
So I decided to go plain jane. Turned out pretty good for my first upholstery gig. I might put door pulls in later but kinda diggin it the way it is.
Materials used:
3mm Sintra PVC panel
Foam backing, spray glued to panel
Polyester suede stretched and stapled over backing
New nylon push rivets (OEM from Grainger)
[IMG]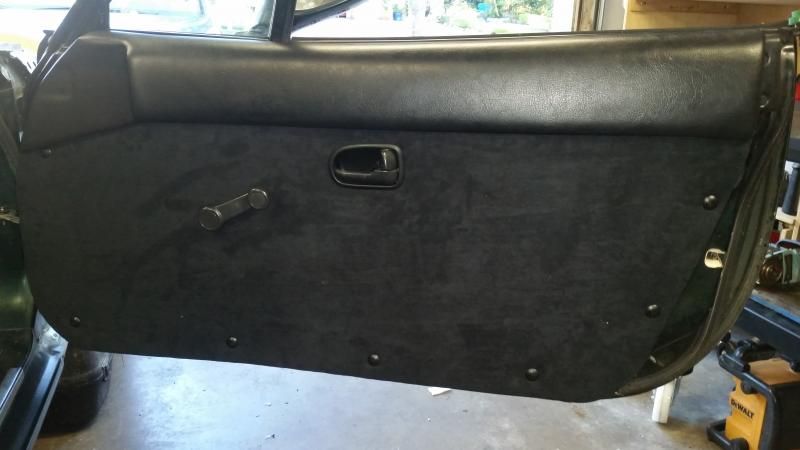 [/IMG]
Materials used:
3mm Sintra PVC panel
Foam backing, spray glued to panel
Polyester suede stretched and stapled over backing
New nylon push rivets (OEM from Grainger)
[IMG]
 [/IMG]
Last edited by ItsAllRigged; 01-07-2015 at 09:11 PM.
01-08-2015, 08:22 AM
#21
Jim Stainer
Wow I like that a whole lot and it's definitely going on my to do before Atlanta list. Could you post up details on the parts? I found some of the PVC on the web but none of it big enough and can't figure out the rivets either.
I was thinking about tbones print idea and wonder if covering one of them with an American flag would be kind of cool. Or would that be sacrilege?
I was thinking about tbones print idea and wonder if covering one of them with an American flag would be kind of cool. Or would that be sacrilege?
Last edited by charchri4; 01-08-2015 at 08:25 AM.
01-08-2015, 10:47 AM
#22
V8 Miata Participant
Thread Starter
Jim,
The PVC I picked up at a large sign shop and screening warehouse. Id look around your area for something similar.
I went to Joann's fabric for the suede and padding. You could spend hours in there looking at different prints and materials. I almost went with vinyl that had a neat texture to it but finally decided on the polyester suede. The good thing about the poly is that it shouldnt fade in the sunlight.
The nylon push rivet part number from Grainger is 5ZLW8, ~12 bucks for a pack of 25. I picked up in store as they wanted $10 shipping. They are stock specs for miata interior pieces that use an 8mm hole. They went in great yesterday but today I went out to look at the doors and a couple had popped out. They have an 18mm depth which seems to be a tad too short for a 3mm PVC panel, padded and covered. I would try to find a longer one, I recall seeing one that had a 20mm depth on Grainger that might work better.
The hardest part of the job after sourcing out the NA upper bumper piece was making the template and lining up all the screw holes that the NA piece has that will screw into the new panel. Just takes lots of marking, fitting and confirming hole placements. I used cardboard as a template and it worked great.
Another thing to note is I had to repair about 80% of the screw studs in the NA bumper piece. And the remaining 20% that were not broken broke by the time I was finished mocking them up multiple times to confirm fitment.
I fixed the busted studs by cutting 3/8 clear tubing into 1/2 sections and pushing over what was left of the broken stud. Then used 2 part epoxy and filled the clear tubing full to the top. Once dried, use a dremel to cut down to right height, drill and tap, making this a stronger than factory stud. I also used medium loctite on the screws on final assembly. The screws on the backside of my old NB door panel worked great as replacements as the NA panels I got came sans hardware.
I used Loctite brand spray adhesive, comes in a blue can from Lowes, to adhere the padding to the door panel to help hold it down when stretching the suede around and stapling to the back. I did not use adhesive on the suede.
Before final install I stuck adhesive backed felt on the inside of the door at the top near the quarter window where the NA bumper piece was a little squeeky. Got this at Joann's as well, in 12" squares.
Hope this helps, pm me if you need any pics as I can remove the panels if need be.
01-16-2015, 12:45 PM
#24
V8 Miata Participant
Thread Starter
Little update, been traveling a lot for work but able to do a little here and there....
Switched out the plastic rivets on the door panels (ended up being too short) and went bling. Aluminum hardware threaded into blind rivets in the door. They hold the panel on nice and tight.
[IMG] [/IMG]
Also ordered the V8R subframe kit, comes in first week in February. Hoping to have the motor fitted in by March.
Switched out the plastic rivets on the door panels (ended up being too short) and went bling. Aluminum hardware threaded into blind rivets in the door. They hold the panel on nice and tight.
[IMG]
 [/IMG]
Also ordered the V8R subframe kit, comes in first week in February. Hoping to have the motor fitted in by March.
02-06-2015, 06:35 PM
#25
V8 Miata Participant
Thread Starter
Made a bit of progress lately. Ive been traveling for work for most of the last month but been able to squeeze in some time on the car.
The V8R kit came in this week. Last thing I did on the car was cut out the interior trans tunnel/firewall supports so today I cut out the engine bay gussets. Messy gig, as a grinder was the only thing I had to do the job. Took me about 3 hrs to cut them out along with wire wheeling all factory seam sealer off the firewall and shock tower areas.
[IMG]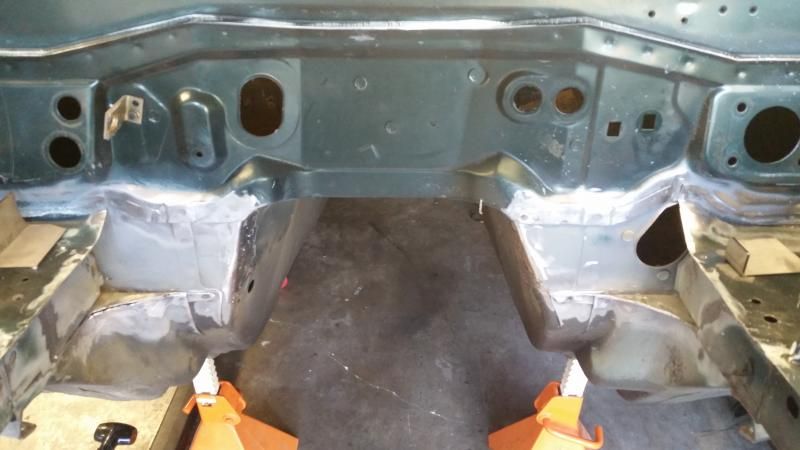 [/IMG]
When I get back from work next week I'll make the cuts and get to whackin that tunnel open.
As I was working on the car today my MGW shifter got delivered. This thing is as nice as everyone said, very well built. Since I bought the t56 with no shifter I havnt been able to confirm that it shifted into all the gears. I mounted the MGW and was very relieved that it felt good. The shifter feels very crisp too, cant wait till Im running through them gears!
[IMG]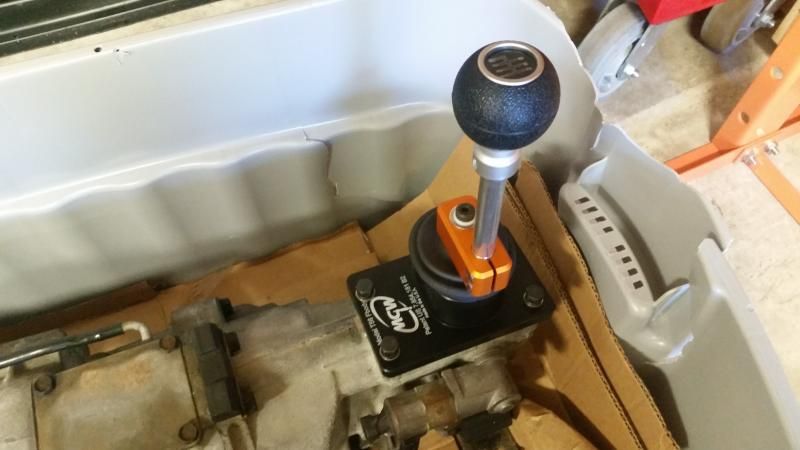 [/IMG]
The V8R kit came in this week. Last thing I did on the car was cut out the interior trans tunnel/firewall supports so today I cut out the engine bay gussets. Messy gig, as a grinder was the only thing I had to do the job. Took me about 3 hrs to cut them out along with wire wheeling all factory seam sealer off the firewall and shock tower areas.
[IMG]
 [/IMG]
When I get back from work next week I'll make the cuts and get to whackin that tunnel open.
As I was working on the car today my MGW shifter got delivered. This thing is as nice as everyone said, very well built. Since I bought the t56 with no shifter I havnt been able to confirm that it shifted into all the gears. I mounted the MGW and was very relieved that it felt good. The shifter feels very crisp too, cant wait till Im running through them gears!
[IMG]
 [/IMG]


