1991 Miata Monster 5.0 Build With SN95
 12-01-2014, 08:20 AM
#1
V8 Miata Participant
Thread Starter
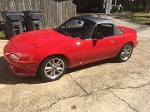
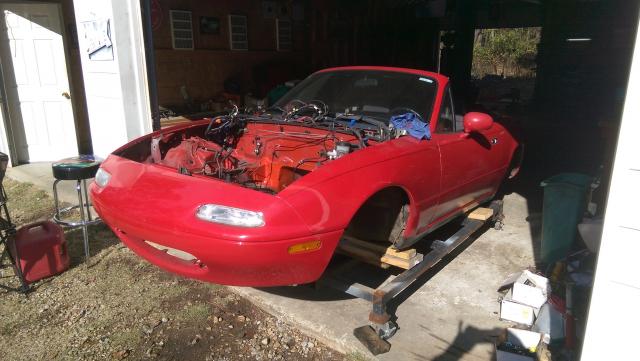
Ordered the Monster kit from Martin. I'll be using the SN95 Mustang setup - longer bell housing and input shaft on trans, short front accessories. Here is the "clean car" before diss-assembly.

 12-01-2014, 08:23 AM
#2
V8 Miata Participant
Thread Starter
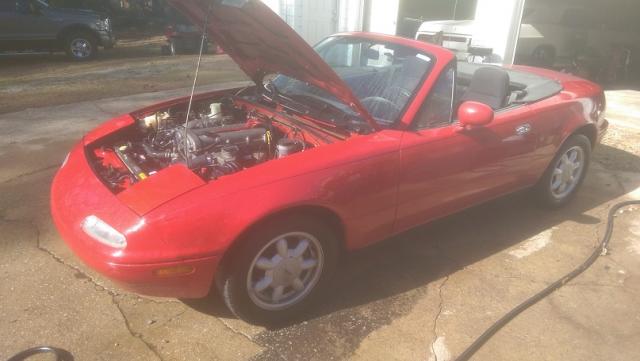
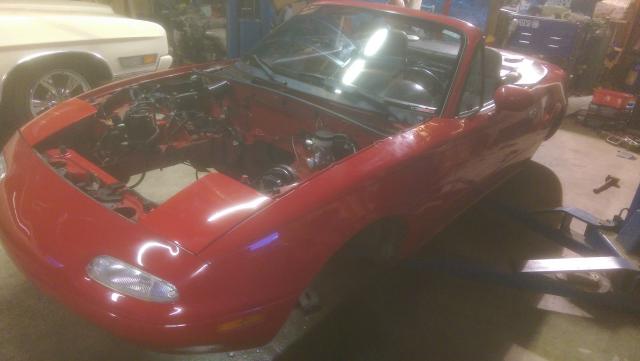
Spent about 6 hours yesterday removing the drive train. engine, trans and K member are out. Today I will remove the back diff assembly. The driver side rear axle nut had to be "split" to get it off. I actually busted two 1/2" drive breaker bars before splitting the nut. It was a bear!
12-02-2014, 08:56 AM
#3
V8 Miata Participant
Thread Starter
Deconstruction complete. Sending K member and hubs to Martin today!
Driver side rear axle nut was a bear. Actually busted two 1/2" power bars trying to get it off. Finally used a grinder to spit it and take it off. Good grief...
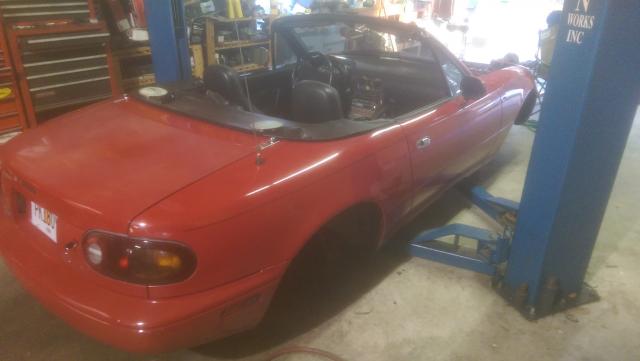

Driver side rear axle nut was a bear. Actually busted two 1/2" power bars trying to get it off. Finally used a grinder to spit it and take it off. Good grief...
 12-02-2014, 11:06 AM
#4
Jim Stainer

Ya know I started to feel really bad for your struggle with the nut TILL I SAW THE HOIST! Here I thought your cars were cool but man what a shop!
Start of a great build looking forward to following along.
Start of a great build looking forward to following along.
 12-03-2014, 11:18 AM
#7
If you intend to keep the smog pump, and run all the accessories in their original locations, you will need to notch the frame to accommodate the a/c compressor. A few of us have done it; not a big deal once you figure it out and take the plunge.
One of my youtube videos has a view of the notch, at about 1:20 in--
. If the link doesn't work, search on Miata v8 5.0 walkaround.
TM
One of my youtube videos has a view of the notch, at about 1:20 in--
TM
12-05-2014, 07:26 AM
#9
V8 Miata Participant
Thread Starter
Well, i could easily spend 100% of my time day and night working on this thing (really enjoying it) but waiting on parts is a real bummer. So now it is "cleaning" time for trans, rear end, engine, etc which is the only thing I do not like about this kind of project.
Based on some great help from this forum I am now confident that the SN95 setup works. Hopefully with the accessory items moved back a bit and possibly the overall weight of them being lower (A/C compressor on the bottom), handling is a tick better than with the fox body setup.
I'll be using an 8.8 rear with 3L08 gears. T5 straight out of the 95 Mustang. Engine has GT40P heads and GT40 intake with E cam. A9P EEC.
 12-05-2014, 10:44 AM
#11
Jim Stainer
Roger that! Over running your supply line really stinks. But the good news, as you pointed out, is there is still always something to do on the car!
Enjoy the build while you can because when it's done you will miss tinkering with it, even cleaning parts! I guess that's why they are never truly done...
Enjoy the build while you can because when it's done you will miss tinkering with it, even cleaning parts! I guess that's why they are never truly done...
12-08-2014, 10:06 AM
#12
V8 Miata Participant
Thread Starter
My hubs and K member should be arriving at Martin's today. Hoping the turn around time is good. I'm also hoping to see some parts from Martin arrive today as well. I can get the diff mounted up and completed if so.
Over the weekend I went ahead and made the frame notch for the SN95 A/C compressor and did the passenger side firewall trim. Took off the radiator tabs as well. Gonna get the driver side firewall trim done today.
Over the weekend I went ahead and made the frame notch for the SN95 A/C compressor and did the passenger side firewall trim. Took off the radiator tabs as well. Gonna get the driver side firewall trim done today.


Last edited by V8MiataMike; 07-11-2015 at 02:12 PM.
12-09-2014, 08:36 AM
#13
V8 Miata Participant
Thread Starter
Completed driver side firewall mod. Today will be the removal of the A/C evaporator and the EEC loom access hole cutout.

Last edited by V8MiataMike; 07-11-2015 at 02:13 PM.
12-10-2014, 09:08 AM
#15
V8 Miata Participant
Thread Starter
I completed all engine bay mods. I'm delaying a bit the "placement" of the brake and fuel lines as I've read there can be lots of concerns about header heat cooking them. I also relocated the car to a roll around frame so I could roll it out and wash it again. Car was covered in grinding dust...
Martin has not responded in the last couple of days and I'm really hoping to hear something about parts on the way. I did not bother him at all last week.
Martin has not responded in the last couple of days and I'm really hoping to hear something about parts on the way. I did not bother him at all last week.

 12-10-2014, 05:15 PM
#18
V8 Miata Participant
Thread Starter
I think I am going to wrap the headers to reduce heat in the engine compartment. I'm also going to run them straight up the firewall and then over the valve cover. My engine has GT40P heads on it so there is no thermactor/air pipe back there on the back side of the head to get close the the firewall. Hope it works.
12-10-2014, 05:33 PM
#20
V8 Miata Fanatic

I'm running trick flows, no air pipes either. Thinking of bringing the fuel lines up over the back of the ending and wrapping around the other side of the intake back to the inlets. Not sure. Just getting to that point.
As far as Martin goes, just keep trying to call him, he'll get back to you. I have everything but the headers, they are backed up on order.
Jason
As far as Martin goes, just keep trying to call him, he'll get back to you. I have everything but the headers, they are backed up on order.
Jason
12-11-2014, 11:59 AM
#21
V8 Miata Fan

Mike,
I used a SN95 engine in my build. I am very pleased with the results. Looks like you are making good progress. I notched my frame as well because I wanted to keep the stock configuration. Mine has been done for almost two years and I still find some things to tinker with. Like Jim stated previously they are never truly done!
John
12-11-2014, 04:03 PM
#22
I bet there aren't more than 10 in the whole country with notched frames like ours to accommodate the SN95 accessories, and 3 of us are here.
One advantage of the SN95 setup is that the hood braces don't have to be cut. And with the extra room between the water pump and radiator, it's easy to fit a puller fan in addition to the pushers (I use the CCRM for fan and A/C control). Also makes it much easier to access the front of the engine, remove the belt when needed, or drop the radiator.
The most common comment I get, other than it's all really packed in there, is that it looks almost factory.
TM
12-12-2014, 08:36 AM
#23
V8 Miata Participant
Thread Starter
I will definitely tinker with this thing for a very long time! Short term plan is to get it up and running reliably. Longer term will be getting new wheels/tires, maybe coil overs (depending on ride/handling quality with Martin's spring set up), body and paint, then interior and stereo...
This is my first Miata and after driving it for only a month before shredding it for a V8, I really miss it! Too much fun.
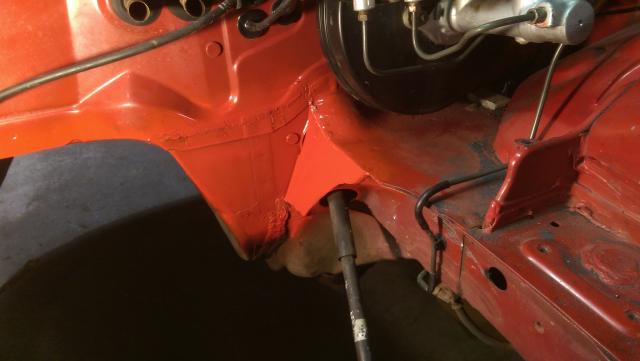
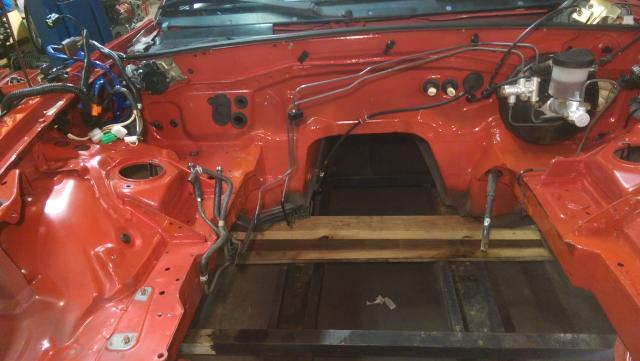
Good news Martin called and parts seem to be on the way. The radiator arrived yesterday so hopefully other parts aren't too far behind. Here is what I did with the fuel lines. By the way, I did not have the "templates" for any of the firewall/frame modes so I used a bunch of pictures as references to estimate what to do. I think I am going to wrap the headers as well.
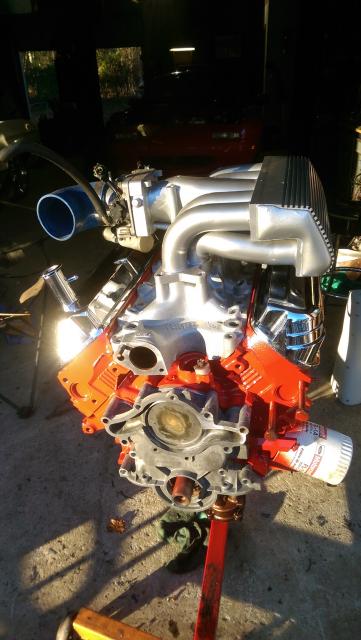
Here is my engine setup. I don't have the stock SN95 intake manifold so I may be having to trim the hood braces. I plan to put spacers between the K member and frame for a little extra hood clearance. Maybe have the lower machined down a bit too.
This is my first Miata and after driving it for only a month before shredding it for a V8, I really miss it! Too much fun.
Good news Martin called and parts seem to be on the way. The radiator arrived yesterday so hopefully other parts aren't too far behind. Here is what I did with the fuel lines. By the way, I did not have the "templates" for any of the firewall/frame modes so I used a bunch of pictures as references to estimate what to do. I think I am going to wrap the headers as well.

Here is my engine setup. I don't have the stock SN95 intake manifold so I may be having to trim the hood braces. I plan to put spacers between the K member and frame for a little extra hood clearance. Maybe have the lower machined down a bit too.
 12-12-2014, 09:07 AM
#24
Jim Stainer
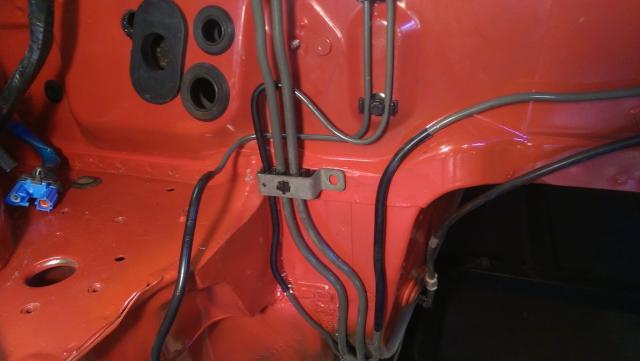
Wow that is really a nice looking engine! Fuel lines look great too like they belong there from the factory.
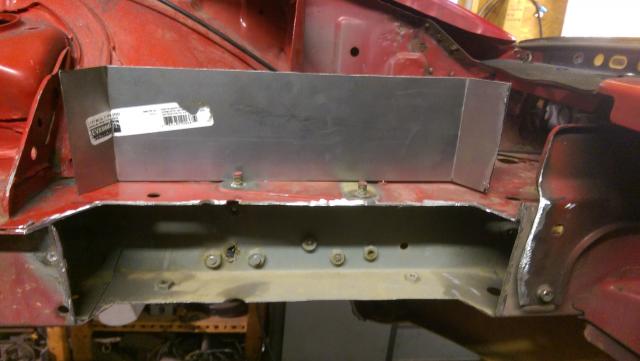
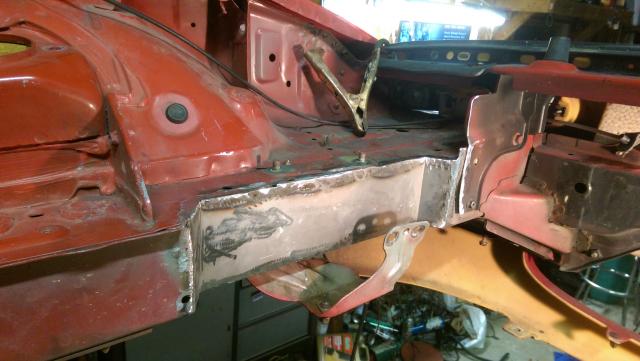
When you get down the road a little there is a perfect spot to mount a heat shield to the frame over those lines. These photos sort of show it if you don't mind me posting them in your thread.

A little closer. There is an empty threaded hole in the frame I just bolted a piece of 1x1 angle to. The shield goes all the way down to the starter. The white thing is the last tube of the header and the fuel lines and wiring run behind the shield.

For sure wrap the headers but don't use the cheap ebay fiberglass stuff it's miserable to work with. Yeah ask me how I know! Spend a few extra bucks on the titanium stuff it's totally worth it.
Great build and really loving your tread! Let me know if you want me to pull those shots of the off brand out of your thread...
When you get down the road a little there is a perfect spot to mount a heat shield to the frame over those lines. These photos sort of show it if you don't mind me posting them in your thread.
A little closer. There is an empty threaded hole in the frame I just bolted a piece of 1x1 angle to. The shield goes all the way down to the starter. The white thing is the last tube of the header and the fuel lines and wiring run behind the shield.
For sure wrap the headers but don't use the cheap ebay fiberglass stuff it's miserable to work with. Yeah ask me how I know! Spend a few extra bucks on the titanium stuff it's totally worth it.
Great build and really loving your tread! Let me know if you want me to pull those shots of the off brand out of your thread...
Last edited by charchri4; 12-12-2014 at 09:12 AM.
12-12-2014, 11:08 AM
#25
V8 Miata Participant
Thread Starter
Jim, thanks! No worries and I appreciate the pictures! Any and all help and advice is certainly welcomed!
Crap... I need to cancel that ebay order...
Crap... I need to cancel that ebay order...
Last edited by V8MiataMike; 12-12-2014 at 06:54 PM.


