Exocet LS1 Installation
 07-30-2015, 11:53 PM
#1
V8 Miata Enthusiast
Thread Starter

Join Date: Oct 2013
Location: Colorado Springs, CO
Posts: 421
Likes: 0
Received 33 Likes
on
27 Posts
This part turned out to be more difficult than I thought it would be. Since the frame was designed to fit all Miata components, I thought it would be a pretty simple process, just like installing them in a Miata. But it wasn't quite so easy.
This requires some basic metal fab tools and techniques. Nothing too fancy or difficult, just the basics. You'll need to do some cutting, welding, and fabrication here and there. Nothing extreme, though. But be prepared for that.
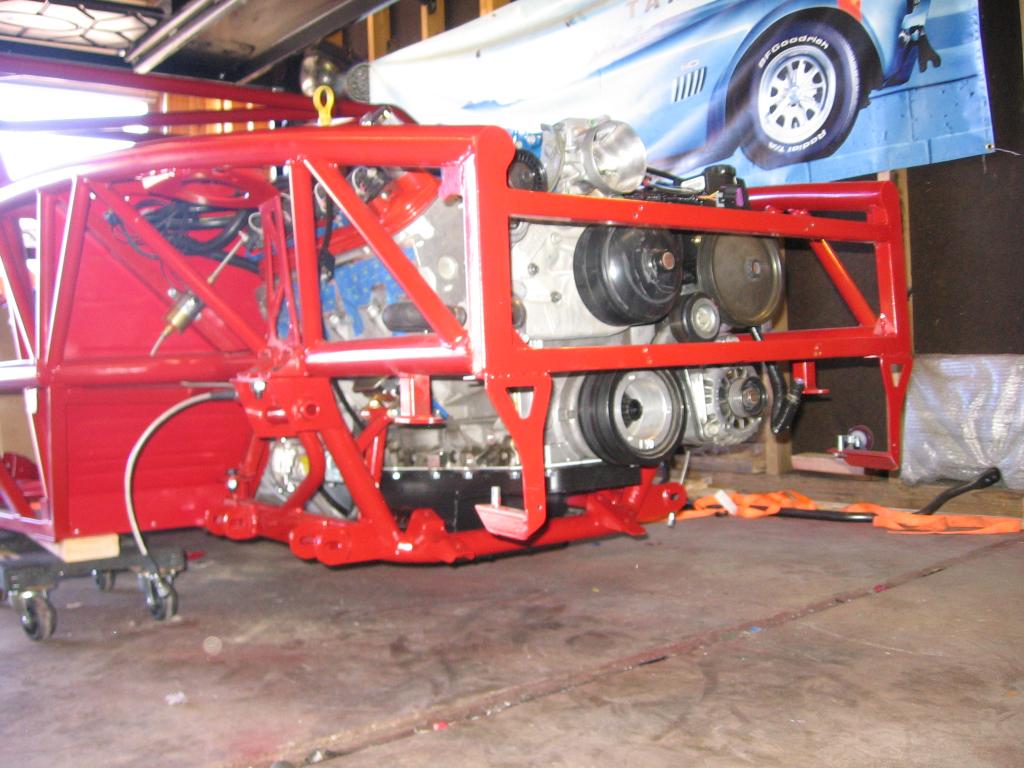
It's easiest to lift the frame, and slide the engine/trans underneath, then lower the frame. I have a 4 post lift, so it was pretty easy. But I don;t see why you couldn't do it with an engine hoist. Just like lifting off the body of the donor Miata.
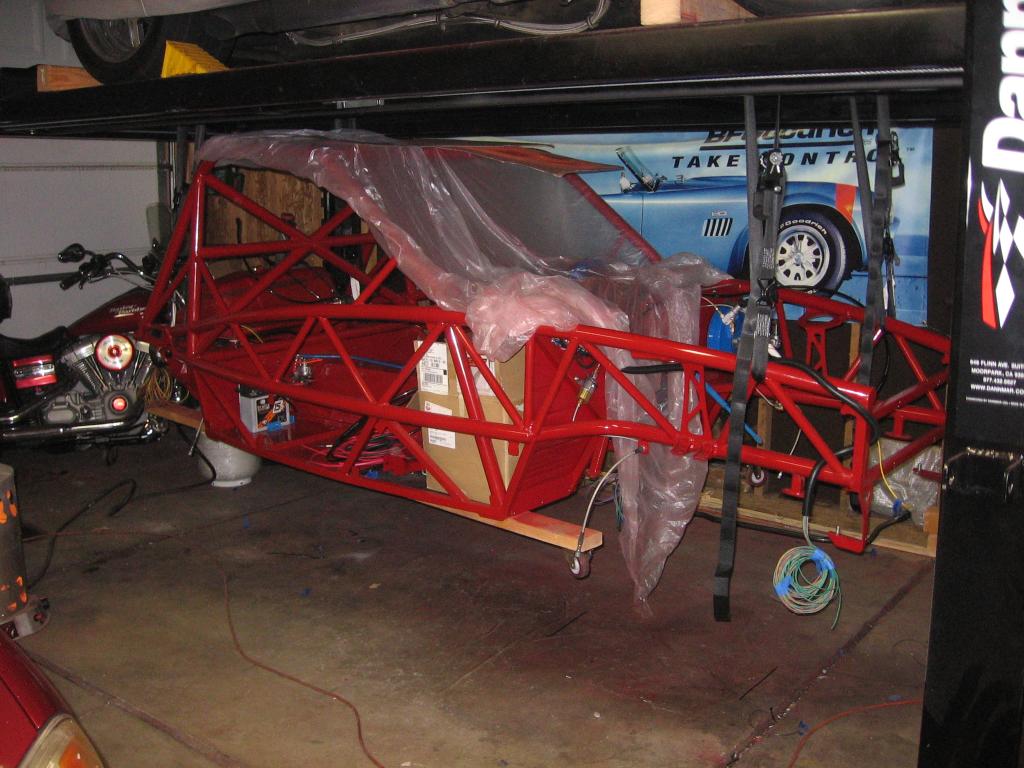
Like every initial fitting, there's a lot of up and down, and wriggling around to get things where you want them.
The frame needed a bit of trimming here on the right side. And then I welded in some support to replace the metal I removed.
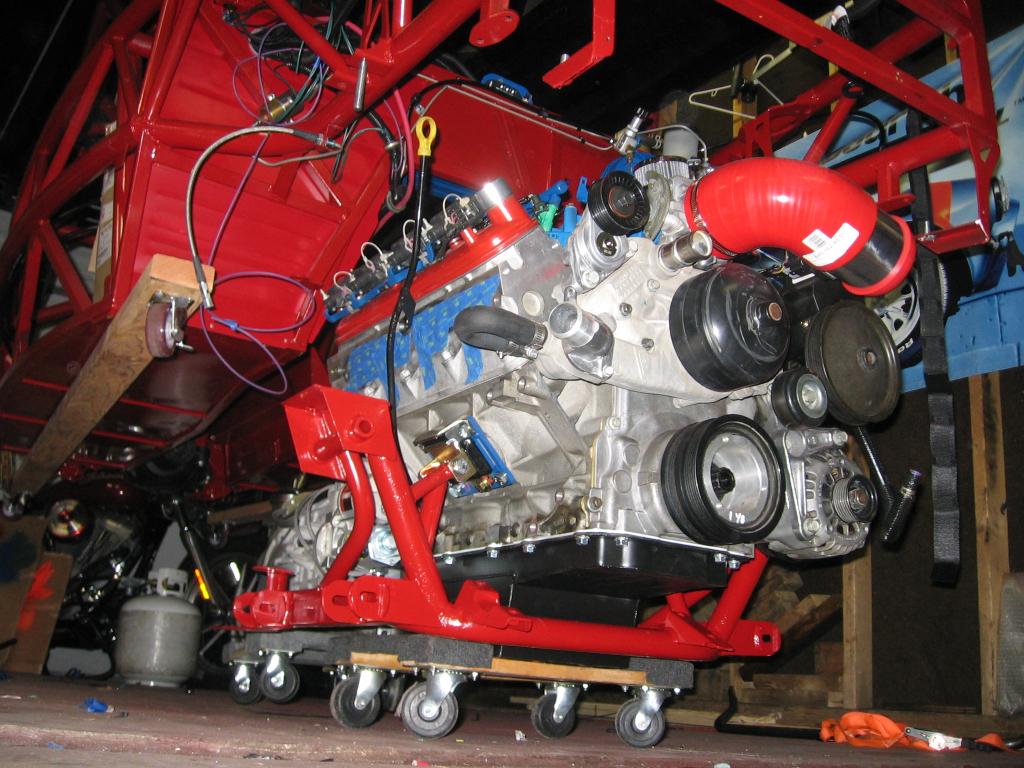
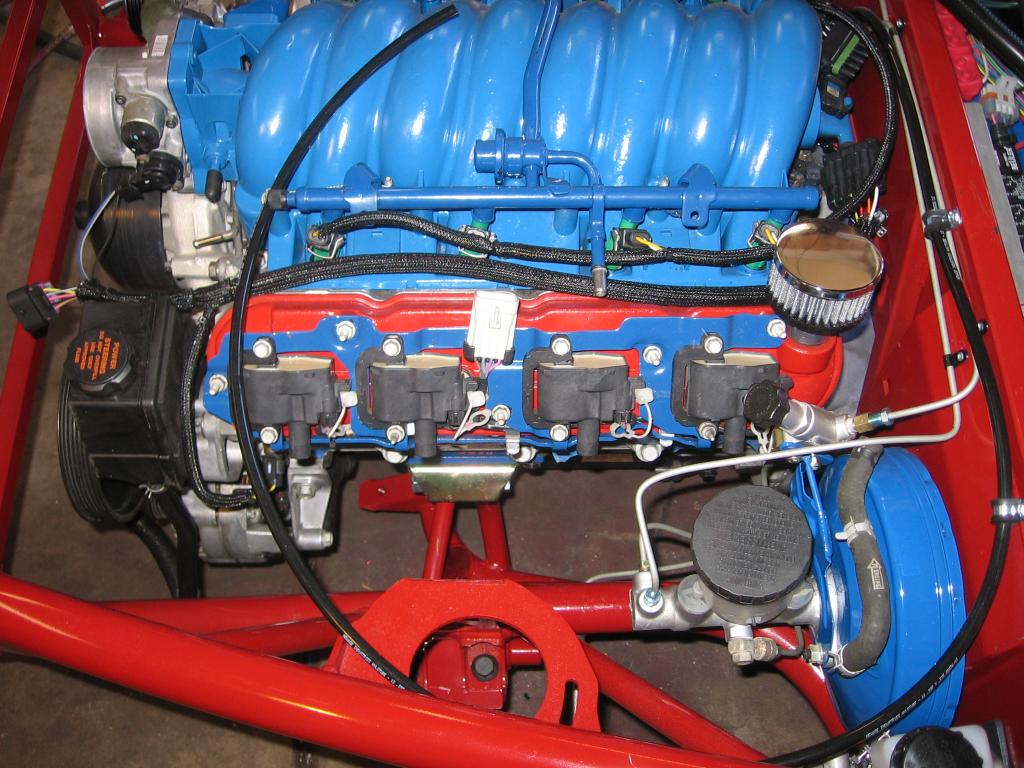
Once in, the fit is tight but good
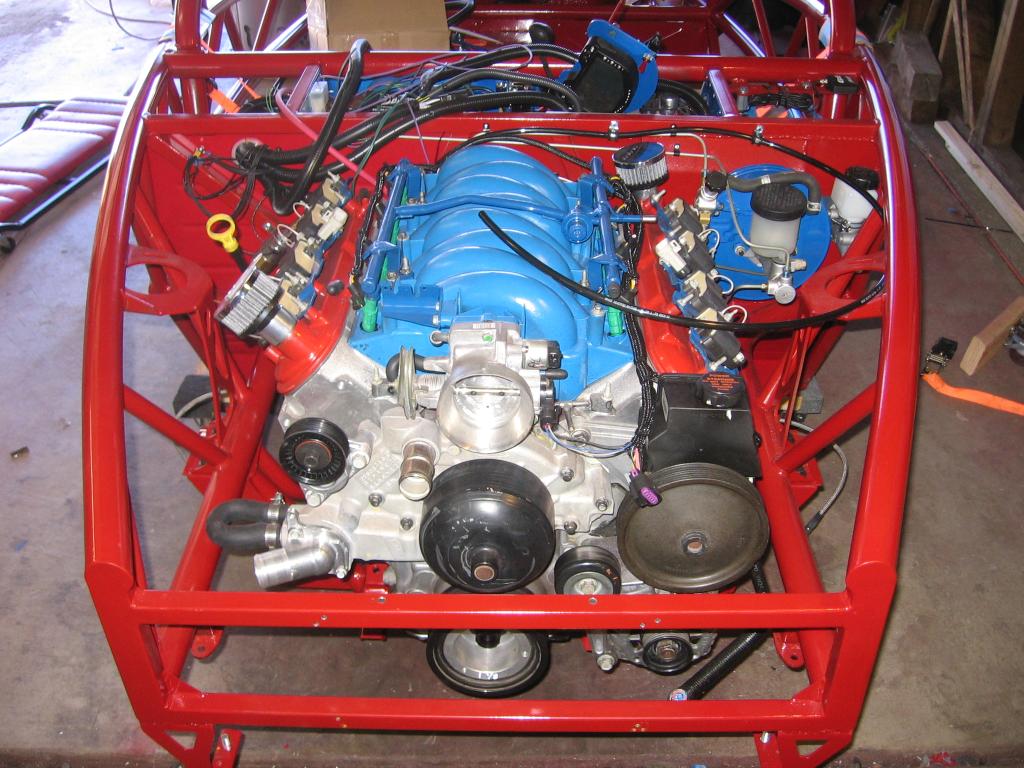
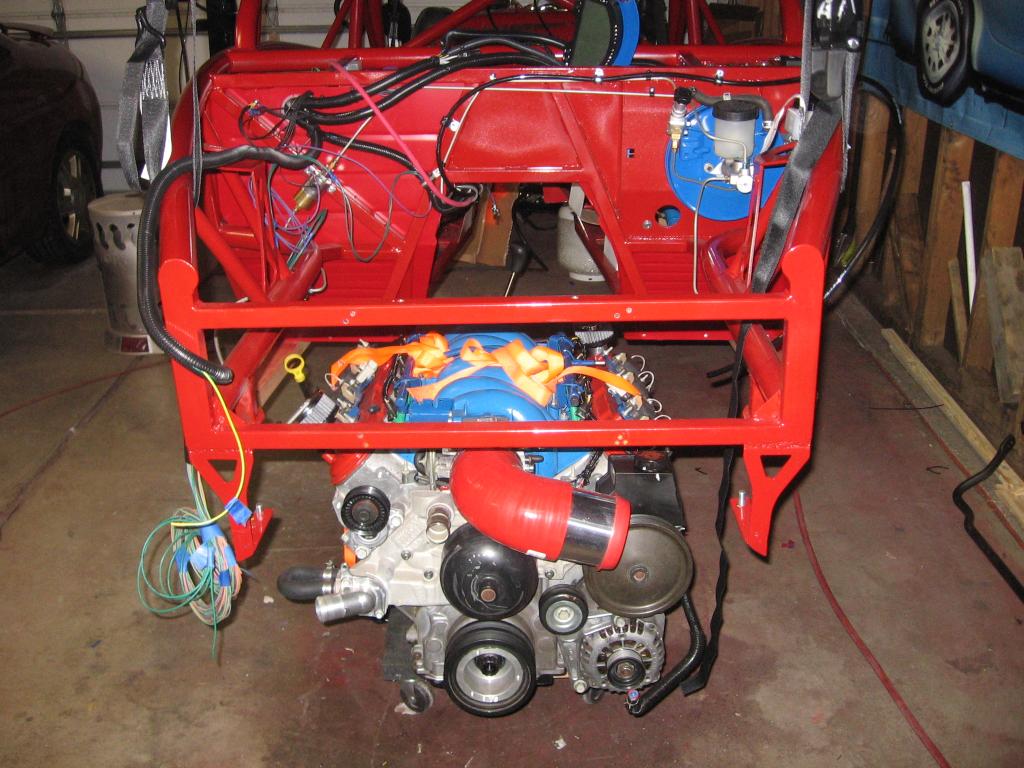
Plenty of room for the right side header. But, I had to use an aftermarket mini-starter to get the header to fit on the engine.
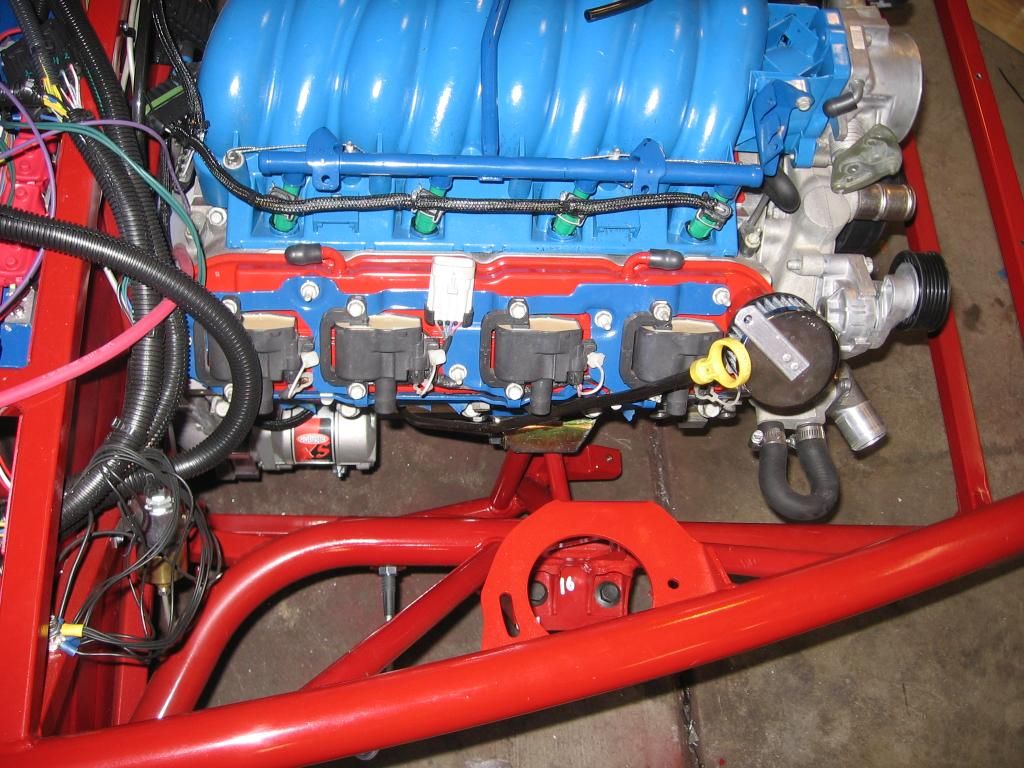
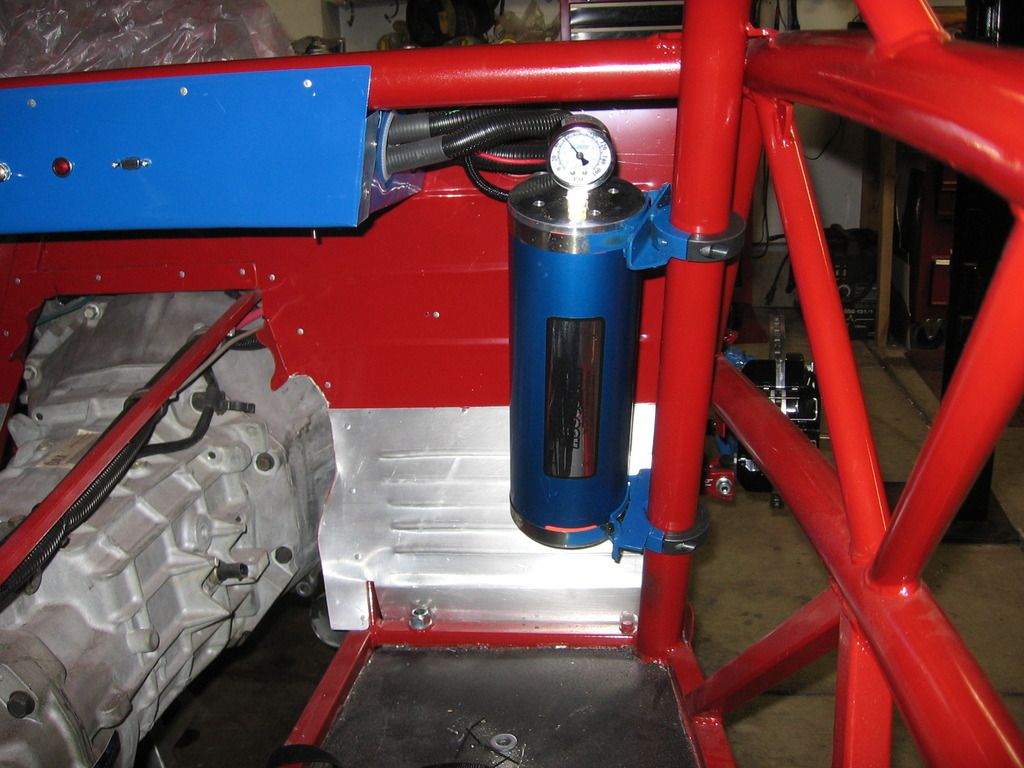
But not so much for the left side. Especially around the steering shaft. You can see where I fabbed a bracket for the brake valve. It fits, but it's close. A slightly different location would probably be better
This requires some basic metal fab tools and techniques. Nothing too fancy or difficult, just the basics. You'll need to do some cutting, welding, and fabrication here and there. Nothing extreme, though. But be prepared for that.
It's easiest to lift the frame, and slide the engine/trans underneath, then lower the frame. I have a 4 post lift, so it was pretty easy. But I don;t see why you couldn't do it with an engine hoist. Just like lifting off the body of the donor Miata.


Like every initial fitting, there's a lot of up and down, and wriggling around to get things where you want them.

The frame needed a bit of trimming here on the right side. And then I welded in some support to replace the metal I removed.

Once in, the fit is tight but good


Plenty of room for the right side header. But, I had to use an aftermarket mini-starter to get the header to fit on the engine.

But not so much for the left side. Especially around the steering shaft. You can see where I fabbed a bracket for the brake valve. It fits, but it's close. A slightly different location would probably be better


The following users liked this post:
charchri4 (07-31-2015)
07-31-2015, 12:00 AM
#2
V8 Miata Enthusiast
Thread Starter
Join Date: Oct 2013
Location: Colorado Springs, CO
Posts: 421
Likes: 0
Received 33 Likes
on
27 Posts
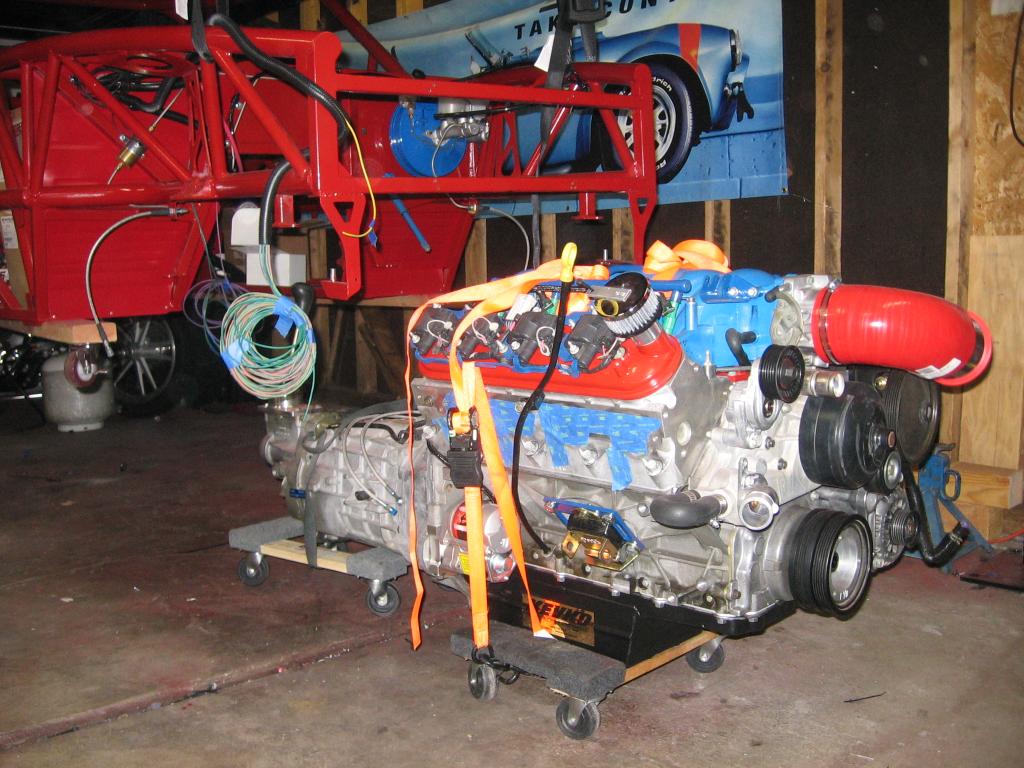
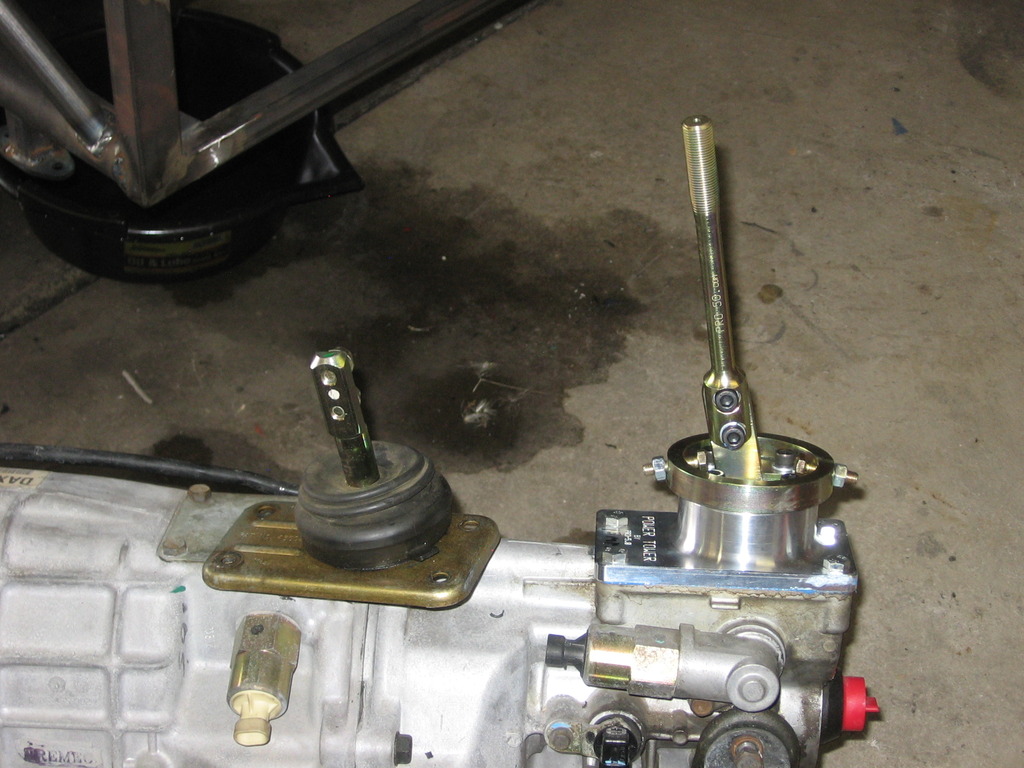
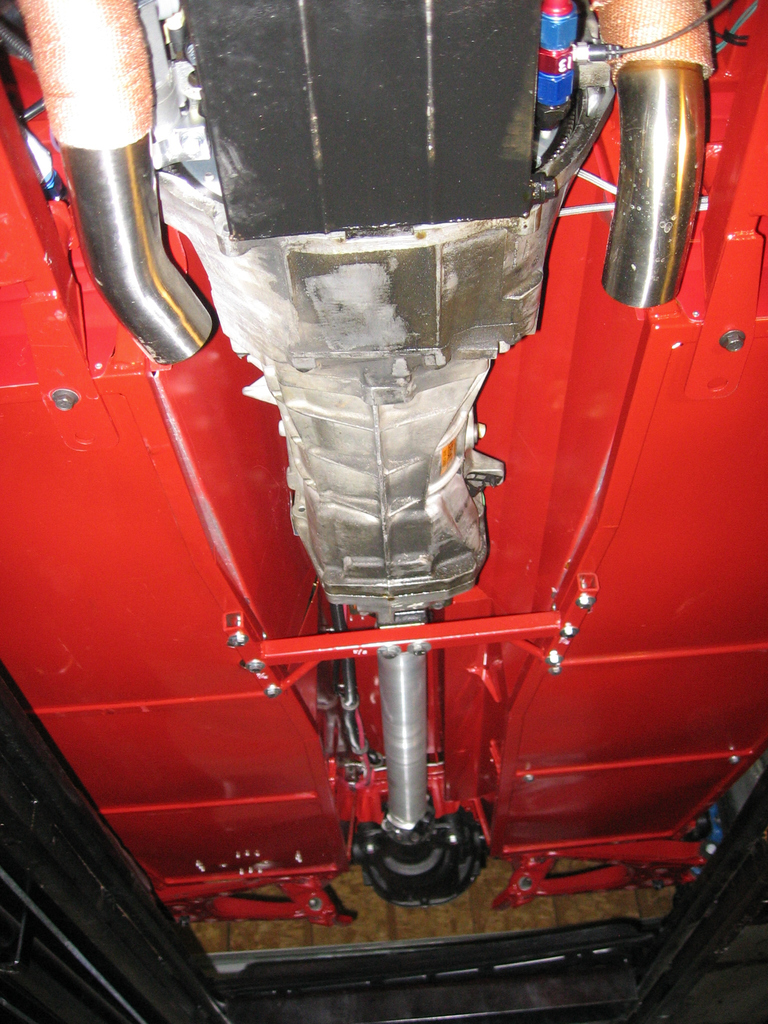
I purchased the transmission crossmember from V8R as part of their Exocet kit. But, it didn't fit very well. It lifted the end of the trans too high, and didn't fit between the frame rails very well. But it did have a double hump, so fabbing the exhaust would be easy. I could have modified the frame and CM to fit the way I wanted. But I just made a new CM instead. Mine is on the bottom.
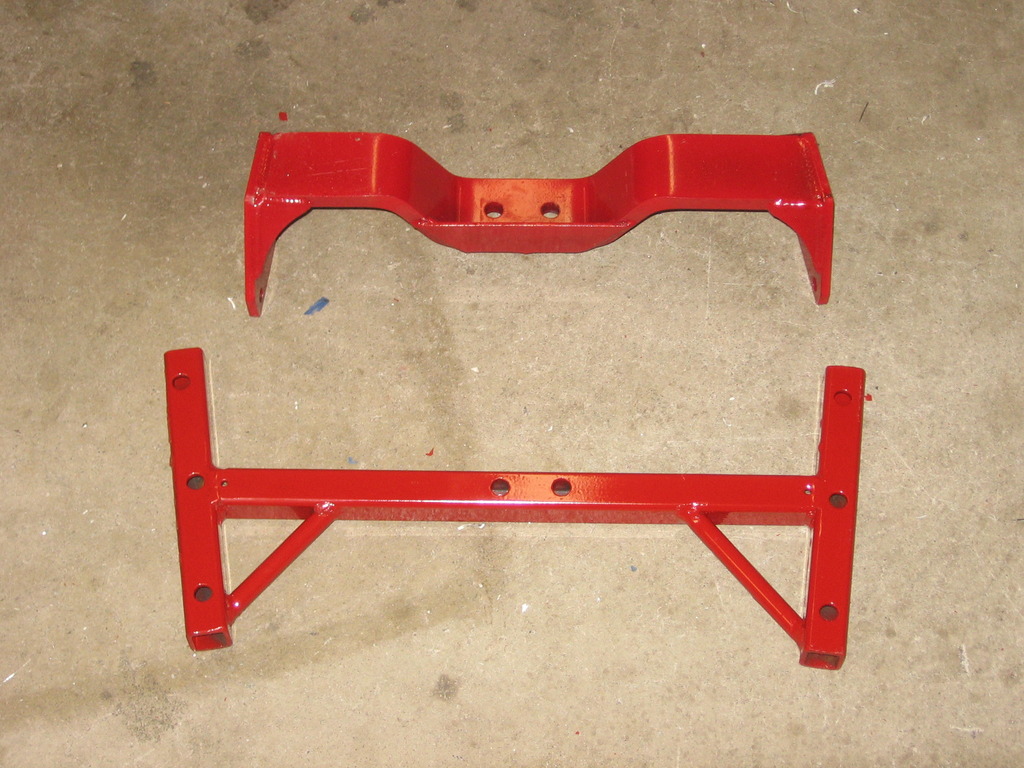
This mount move the tail of the transmission down enough to give me the perfect pinion angle.
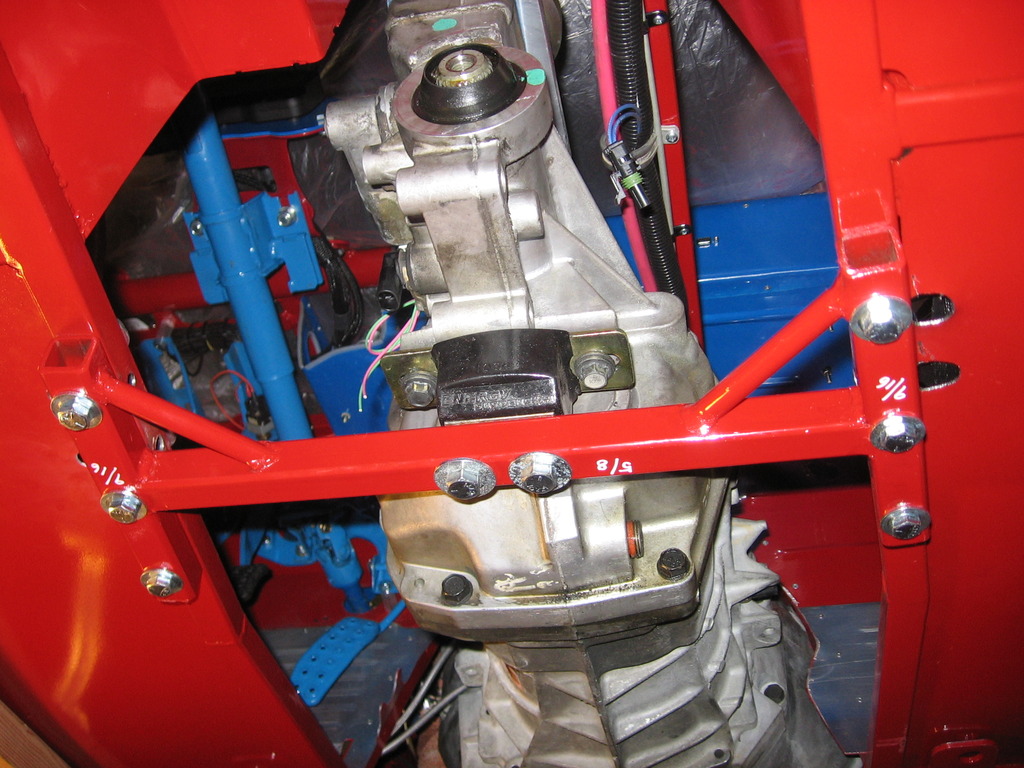
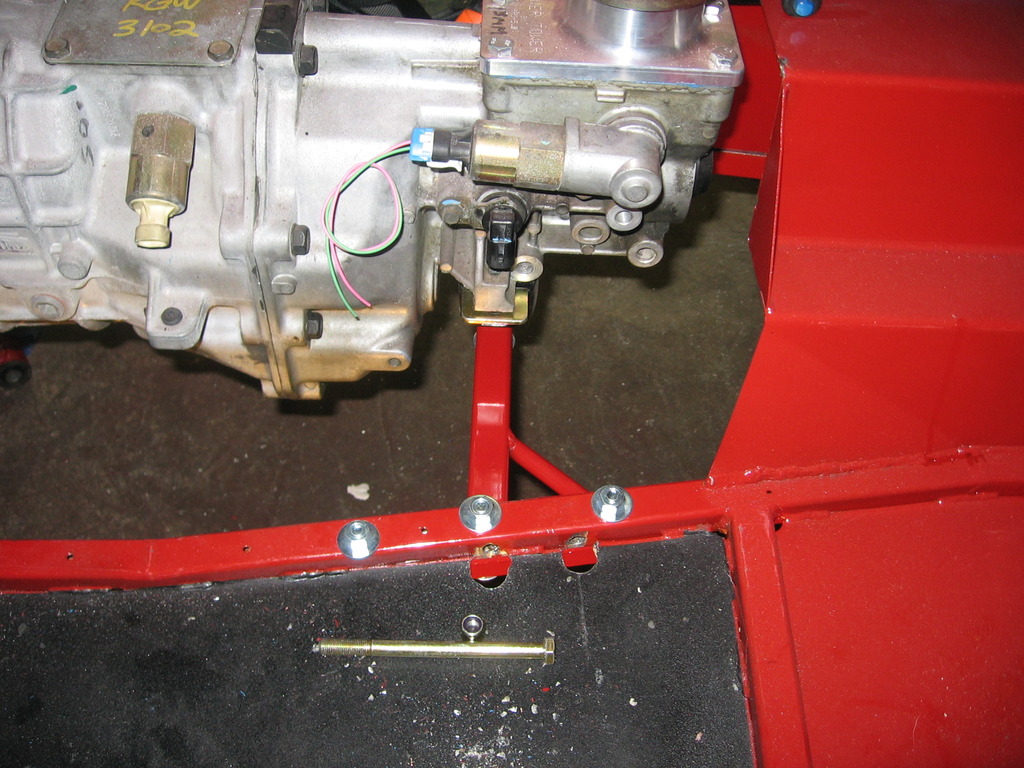
I also had to trim away some aluminum panel to get the bellhousing to fit.
I added a better (I hope) shifter, since I'm not smart enough to leave well enough alone

This mount move the tail of the transmission down enough to give me the perfect pinion angle.


I also had to trim away some aluminum panel to get the bellhousing to fit.

I added a better (I hope) shifter, since I'm not smart enough to leave well enough alone

Last edited by .boB; 07-31-2015 at 12:43 AM.

 08-01-2015, 01:22 AM
#5
V8 Miata Enthusiast
Thread Starter
Join Date: Oct 2013
Location: Colorado Springs, CO
Posts: 421
Likes: 0
Received 33 Likes
on
27 Posts
Thanx, that's kinda my idea. When I need info, I go to one forum or another, and try to find what I'm looking for. Not much info available for this car. So I thought I'd document things fairly well, without trying for a boring and long step-by-step tutorial.
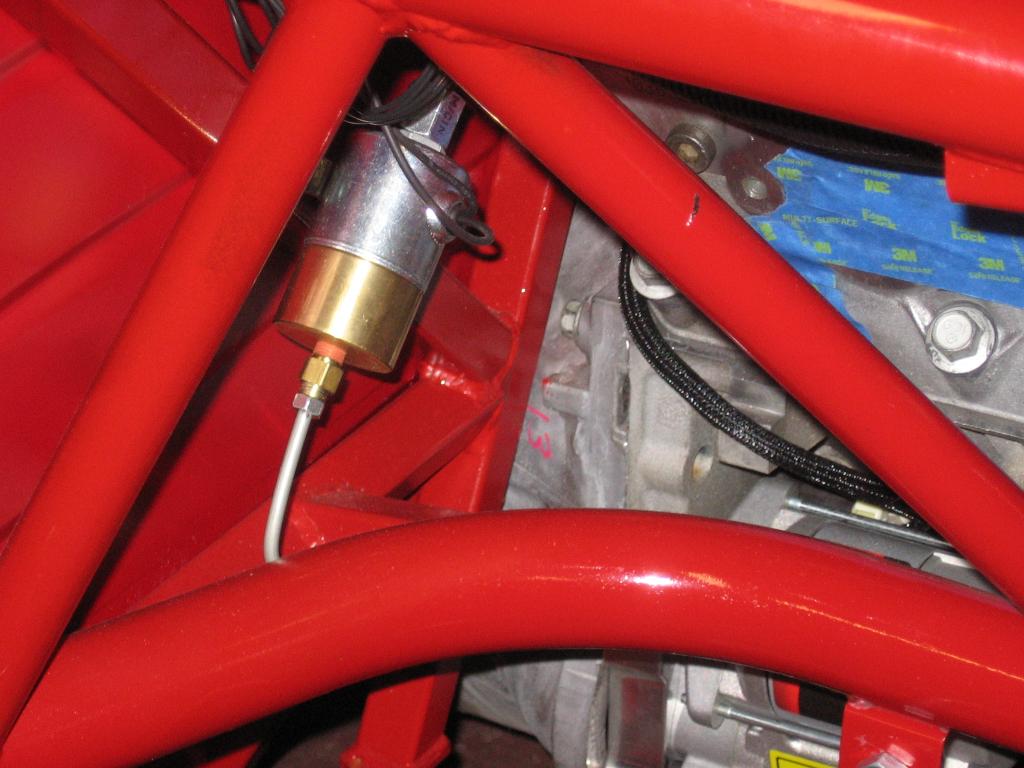
The canister is an Accusump oil accumulator. It holds almost 2qts of oil under pressure. If oil pressure in the engine drops, it will pump that oil into the galleys and keep the engine alive for a short period.
The canister is an Accusump oil accumulator. It holds almost 2qts of oil under pressure. If oil pressure in the engine drops, it will pump that oil into the galleys and keep the engine alive for a short period.
 10-22-2015, 07:11 AM
#7
V8 Miata Participant

.boB
I love the pics and the great write up. It is a lot more inclusive than the directions from Exomotive.
Let me offer a couple tips:
If you mount the front suspension to the engine cradle and use an 8" 2x4 between the upper and lower control arms, you can mount the engine to the cradle and use a block of wood under the trans to drop the body over the whole thing. I took it one step further and installed the suspension and cradle to the chassis first, then slid the engine and trans into the bay as a unit. It went in smoothly on the first try with no damage to my powder coating.
Second, the Boss Frog cradle puts the engine about 2" forward of the V8R cradle. It allows the use of the F-body oil pan without mods, and comes with the brackets to move the sway bar forward to clear the Vette dampener. With this set up I had to do very little trimming to the passenger foot well aluminum, maybe 1/2 to 3/4"
Unfortunately I do not know if the V8R driveshaft will fit with the BF cradle. I wil have to verify the length before ordering. Such is life when you can't follow the script!
Last edited by Meierznutz; 10-22-2015 at 11:31 AM.
10-22-2015, 08:46 AM
#8
V8 Miata Enthusiast
Thread Starter
Join Date: Oct 2013
Location: Colorado Springs, CO
Posts: 421
Likes: 0
Received 33 Likes
on
27 Posts
.boB
I love the pics and the great write up. It is a lot more inclusive than the directions from Exomotive.
Let me offer a couple tips:
If you mount the front suspension to the engine cradle and use an 8" 2x4 between the upper and lower control arms, you can mount the engine to the cradle and use a block of wood under the trans to drop the body over the whole thing. I took it one step further and installed the suspension and cradle to the chassis first, then slid the engine and trans into the bay as a unit. It went in smoothly on the first try with no damage to my powder coating.
Second, the Boss Frog cradle puts the engine about 2" forward of the V8R cradle. It allows the use of the F-body oil pa without mods, ad comes with the brackets to move the sway bar forward to clear the Vette dampener. With this set up I had to do very little trimming to the passenger foot well aluminum, maybe 1/2 to 3/4"
Unfortunately I do not know if the V8R driveshaft will fit with the BF cradle. I wil have to verify the length before ordering. Such is life when you can't follow the script!
One of the things on my mind as I build is maintenance. Since this is a track car, I expect to R&R the drive train a few times during it's service life. Looking at direction of the bolts, electrical conenctions in strategic places, etc. Hopefully, it should drop out the bottom fairly easily.
With the engine back as far as possible, I still had to move the sway bar foreward. And the front dress is a very tight fit as well. Not sure I would want it any further foreward?
10-22-2015, 11:38 AM
#9
V8 Miata Participant
I decided to mount the Rad on the front of the rad support. I clam-shelled the rad and the fan shroud around it. Worked out very well and I will be installing mounts from the rad support directly to the rad as well.
I love your sway relocation brackets. The ones from BF are angle iron. Vanilla looking but strong. They allow about 3/4" fro the Vette balancer to the sway.
I love your sway relocation brackets. The ones from BF are angle iron. Vanilla looking but strong. They allow about 3/4" fro the Vette balancer to the sway.
10-22-2015, 07:17 PM
#10
V8 Miata Enthusiast
Thread Starter
Join Date: Oct 2013
Location: Colorado Springs, CO
Posts: 421
Likes: 0
Received 33 Likes
on
27 Posts
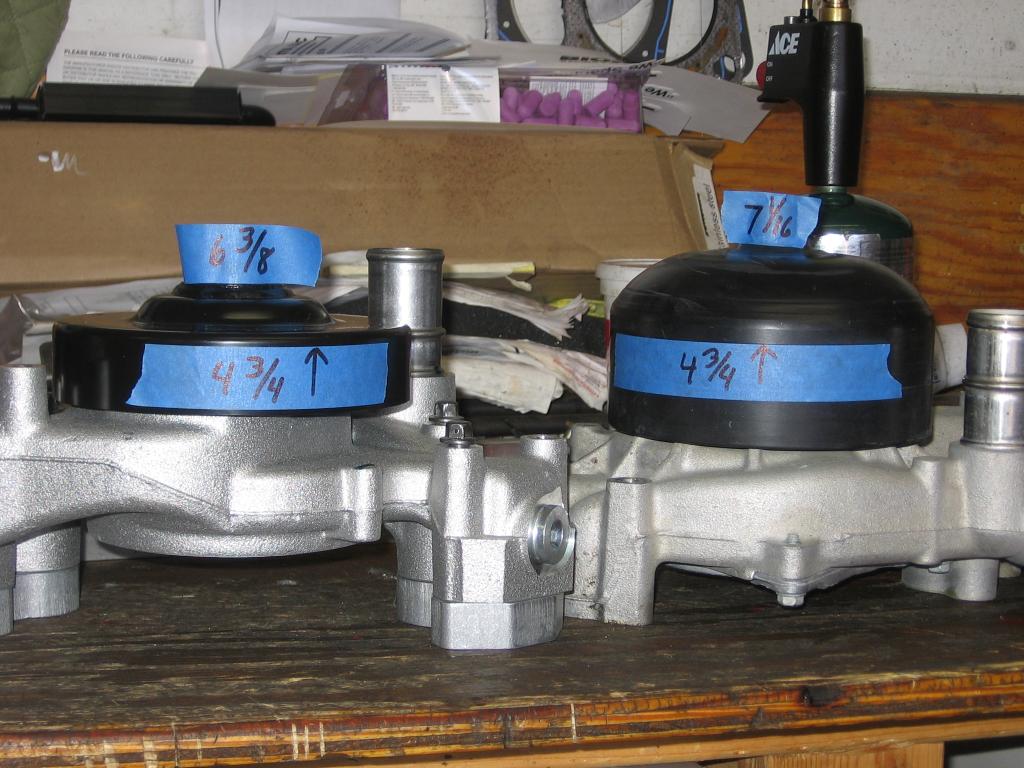
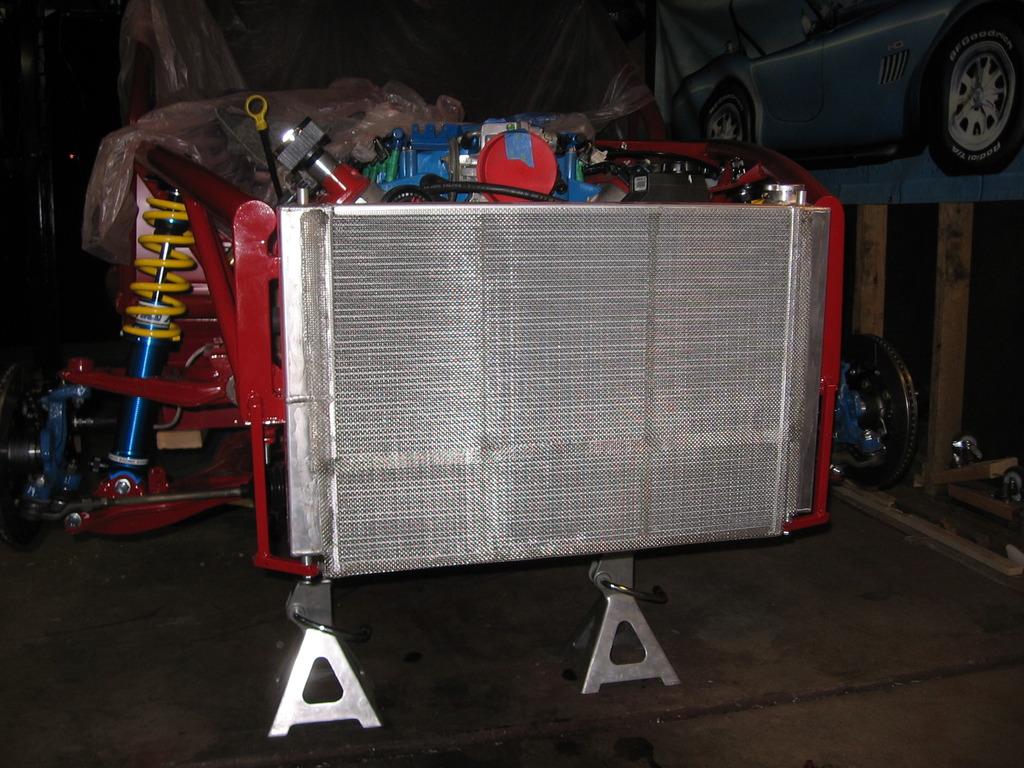
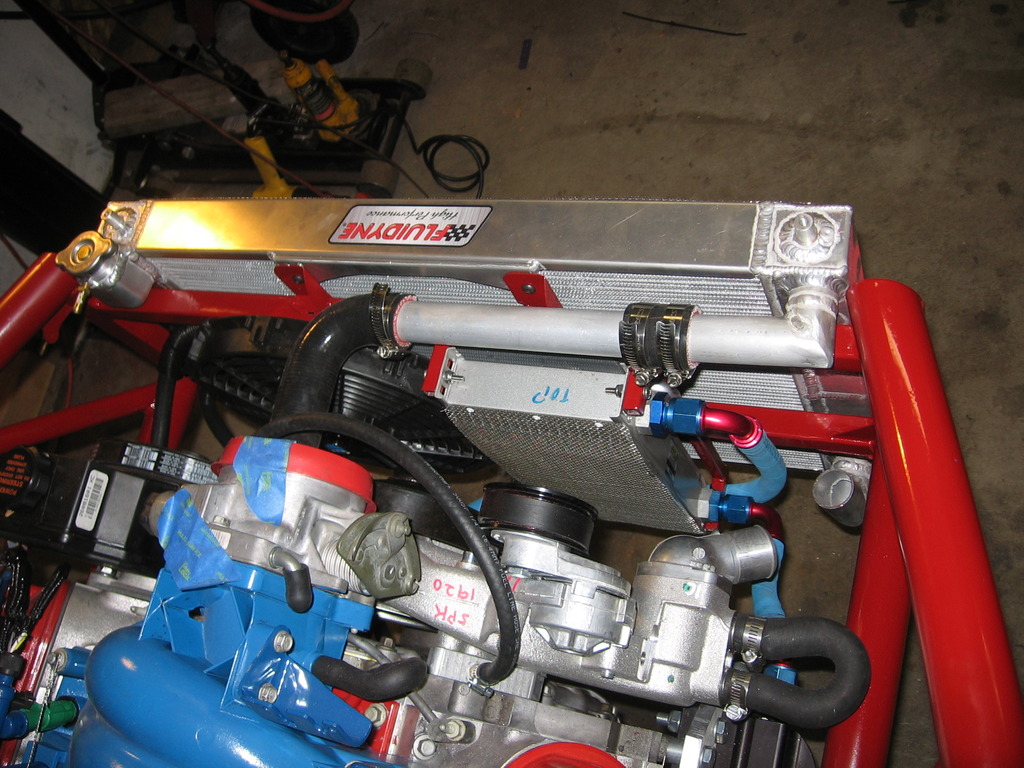
Yeah, there's just not enough room in the front. I initially built the cooling system like this, think it would work. Obviously not.
Once the engine was in, I had to re-do everything. I started by changing to a Corvette water pump, with 3/4" spacers. Kept the pulleys aligned, and gave me almost 3/4" more clearance.
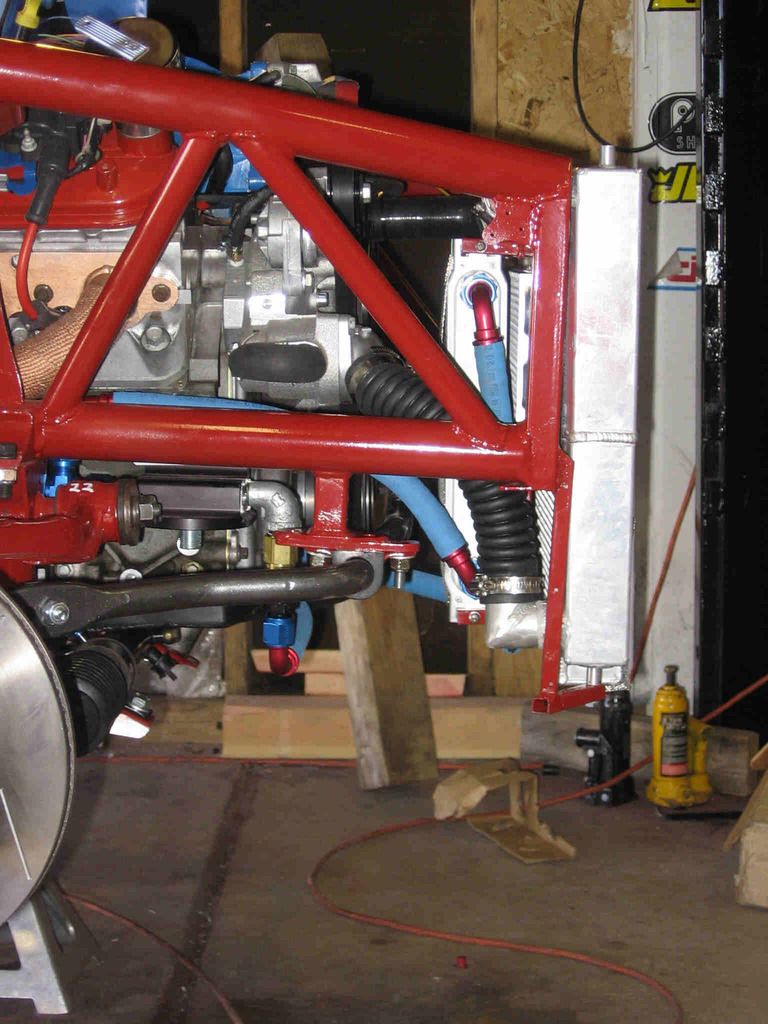
There was enough room to slide the radiator in place. But everything was so close it was impossible to get the hose where I was comfortable.
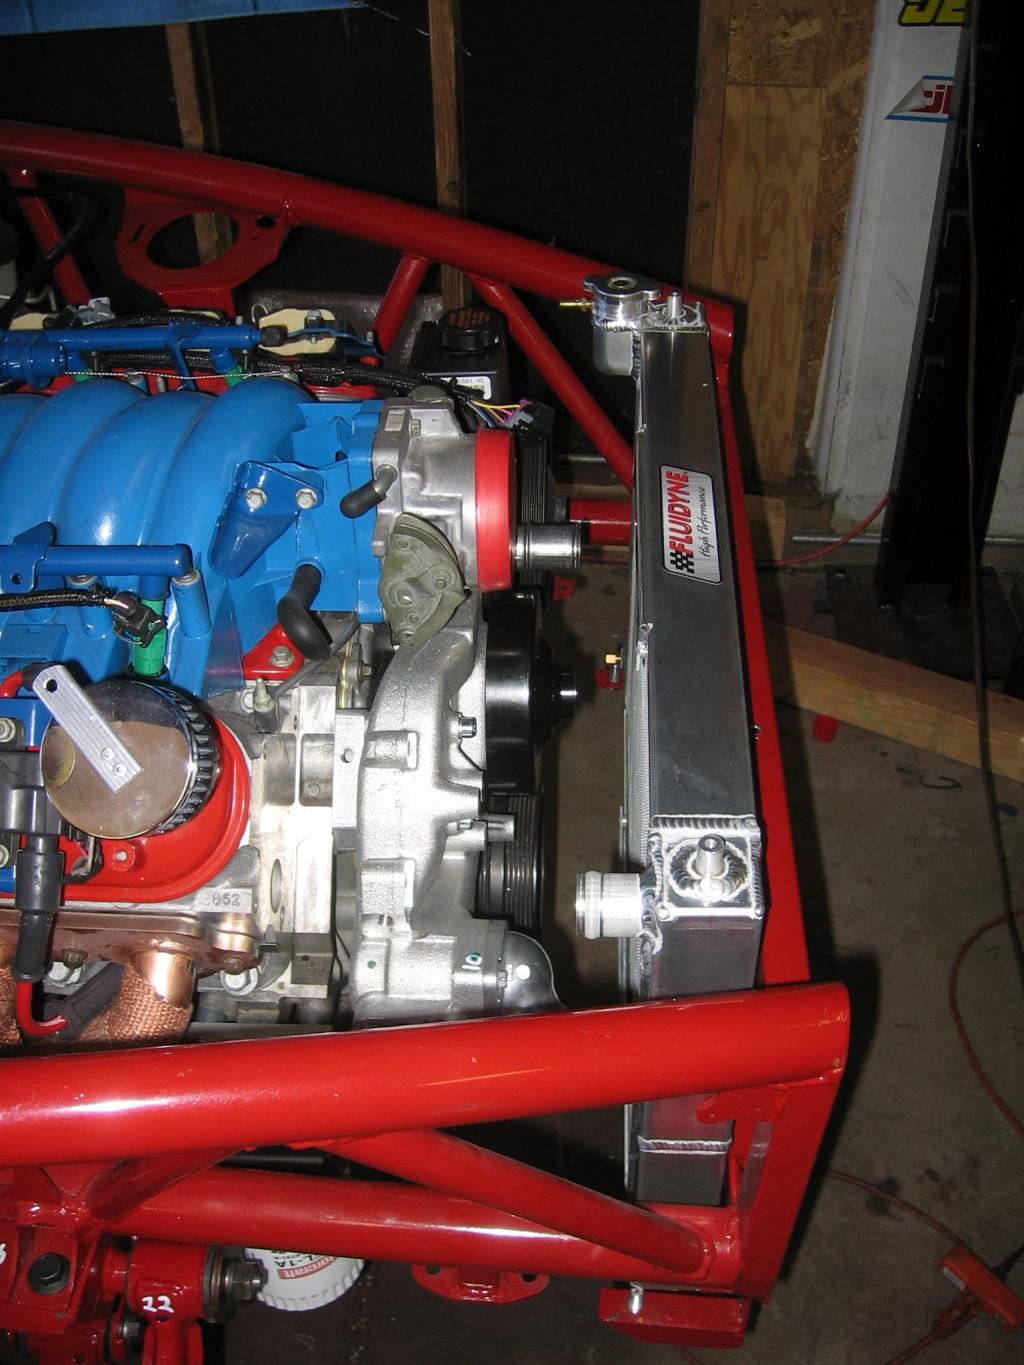
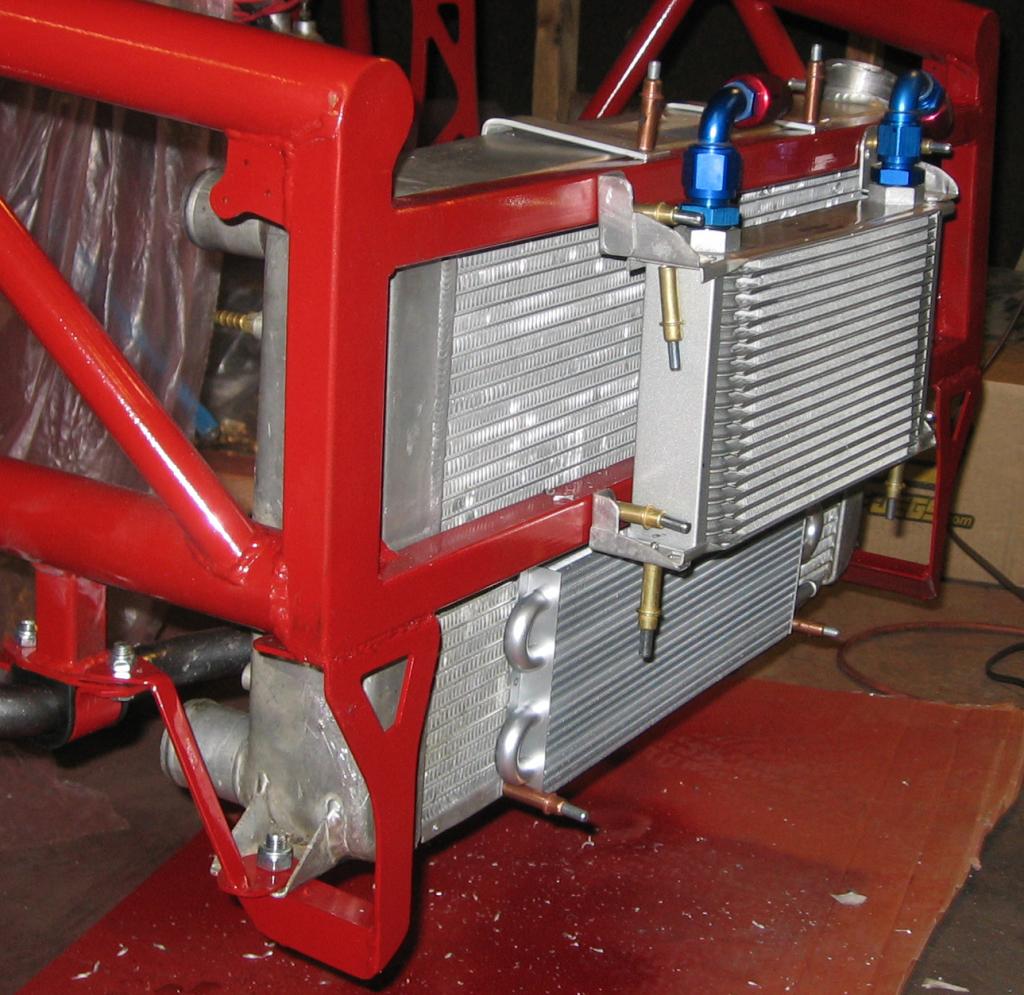
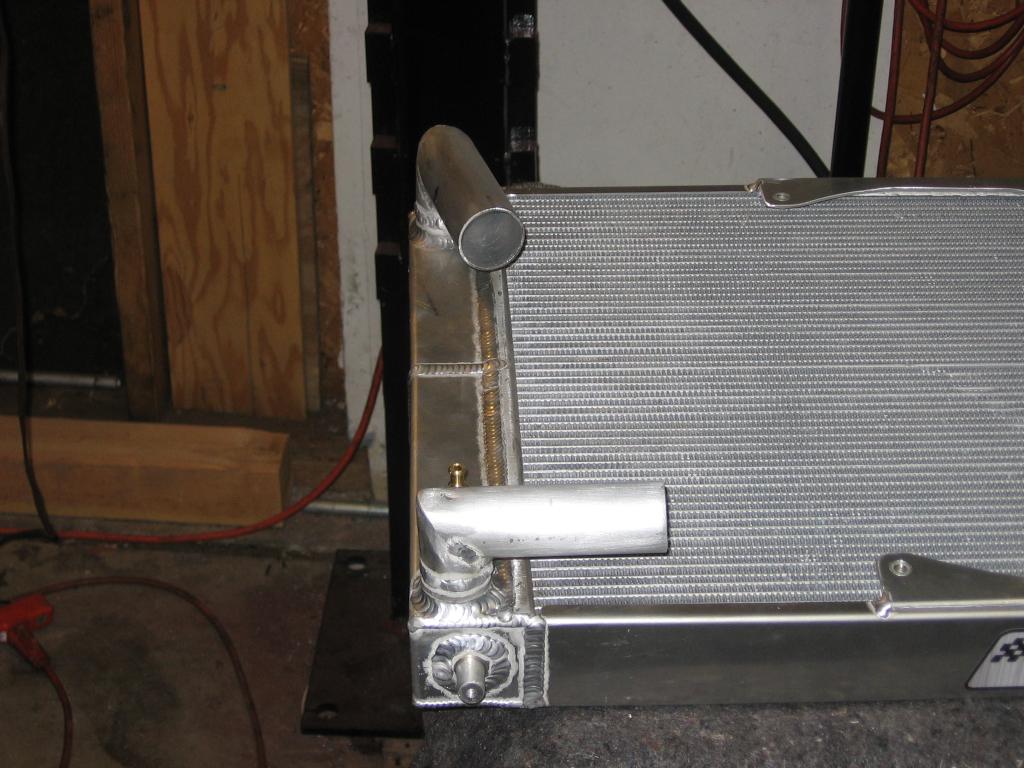
So I modified the inlet and outlet of the radiator a little bit, and then mounted the radiator to the outside of the frame.
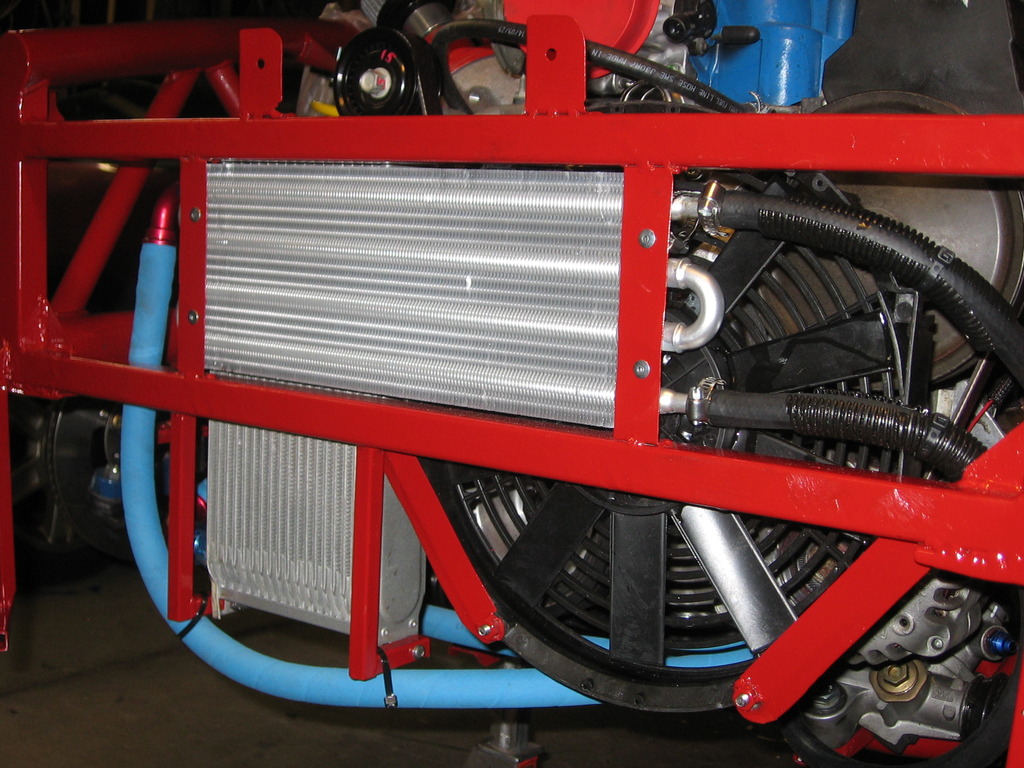
Now I have room to mount the oil cooler, power steering cooler, and fan behind the frame. The fan is rather small, and probably not enough for a street car. But this is a track car running on alcohol. The fan only runs for a few minutes in grid.
All in, it's a pretty tight fit.

Once the engine was in, I had to re-do everything. I started by changing to a Corvette water pump, with 3/4" spacers. Kept the pulleys aligned, and gave me almost 3/4" more clearance.

There was enough room to slide the radiator in place. But everything was so close it was impossible to get the hose where I was comfortable.

So I modified the inlet and outlet of the radiator a little bit, and then mounted the radiator to the outside of the frame.


Now I have room to mount the oil cooler, power steering cooler, and fan behind the frame. The fan is rather small, and probably not enough for a street car. But this is a track car running on alcohol. The fan only runs for a few minutes in grid.

All in, it's a pretty tight fit.
 10-22-2015, 07:24 PM
#11
V8 Miata Enthusiast
Thread Starter
Join Date: Oct 2013
Location: Colorado Springs, CO
Posts: 421
Likes: 0
Received 33 Likes
on
27 Posts
Also, the Kevko steel pan from V8R does not have provisions for an oil filter, like the stock piece does. The aluminum pan does, but it's not set up for road racing. So I had to use a remote filter.
I made a simple bracket, and put the filter where the A/C compressor used to live.
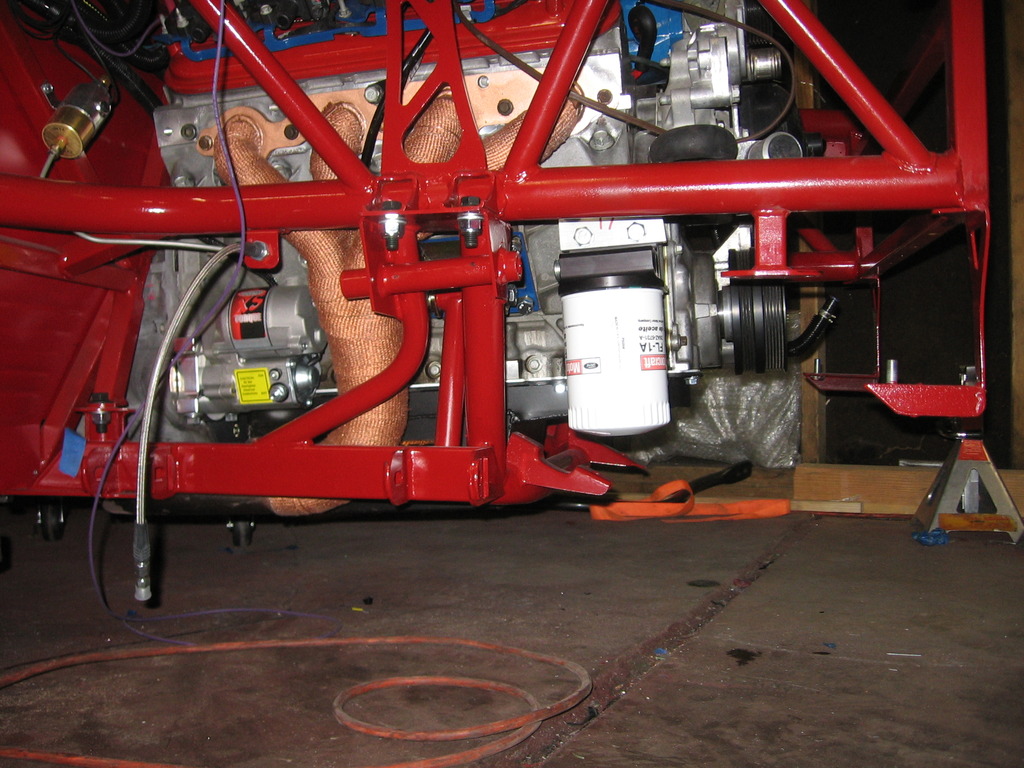
I used a 4 port billet filter mount; I don't like the cast parts. One of the ports goes to the Accusump. It routes the oil from the pan, to filter, to oil cooler, and back to the pan. There is no thermostat, like you would have for a street car.
 11-06-2015, 03:34 PM
#12

.boB,
I have a question have you started test fitting exhaust yet? I'm curious to see if you are going to have enough room in the tunnel to route above your transmission cross-member. Space in the tunnel is at a premium on the exocet's especially now with the newer ones having the even tighter tunnel.
I have a question have you started test fitting exhaust yet? I'm curious to see if you are going to have enough room in the tunnel to route above your transmission cross-member. Space in the tunnel is at a premium on the exocet's especially now with the newer ones having the even tighter tunnel.
11-06-2015, 04:12 PM
#13
V8 Miata Enthusiast
Thread Starter
Join Date: Oct 2013
Location: Colorado Springs, CO
Posts: 421
Likes: 0
Received 33 Likes
on
27 Posts
I just got the mufflers today, s I plan on working on that right away. That is a pretty tight space over the trans mount. If the pipe doesn't fit well, I might oval the pipe a little bit. If all that fails, I may have to redesign the trans mount.
In retrospect, it might have been better to modify the original part.
In retrospect, it might have been better to modify the original part.
11-06-2015, 06:17 PM
#14
I just got the mufflers today, s I plan on working on that right away. That is a pretty tight space over the trans mount. If the pipe doesn't fit well, I might oval the pipe a little bit. If all that fails, I may have to redesign the trans mount.
In retrospect, it might have been better to modify the original part.
In retrospect, it might have been better to modify the original part.
I'm intrested in seeing how it turns out. You have done a great build so far. I started drawing out how I want to build my transmission mounts this afternoon. I want to try and incorporate a good double hump for the exhaust. But if yours works its a much easier layout to build.
11-07-2015, 08:33 PM
#15
V8 Miata Enthusiast
Thread Starter
Join Date: Oct 2013
Location: Colorado Springs, CO
Posts: 421
Likes: 0
Received 33 Likes
on
27 Posts
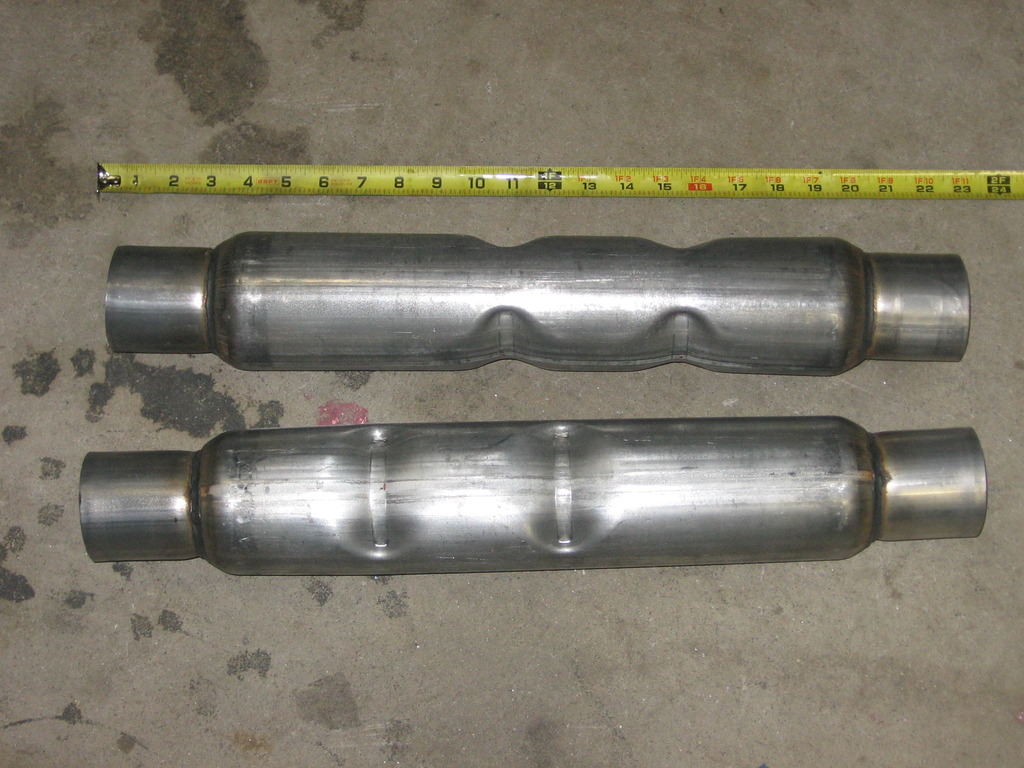
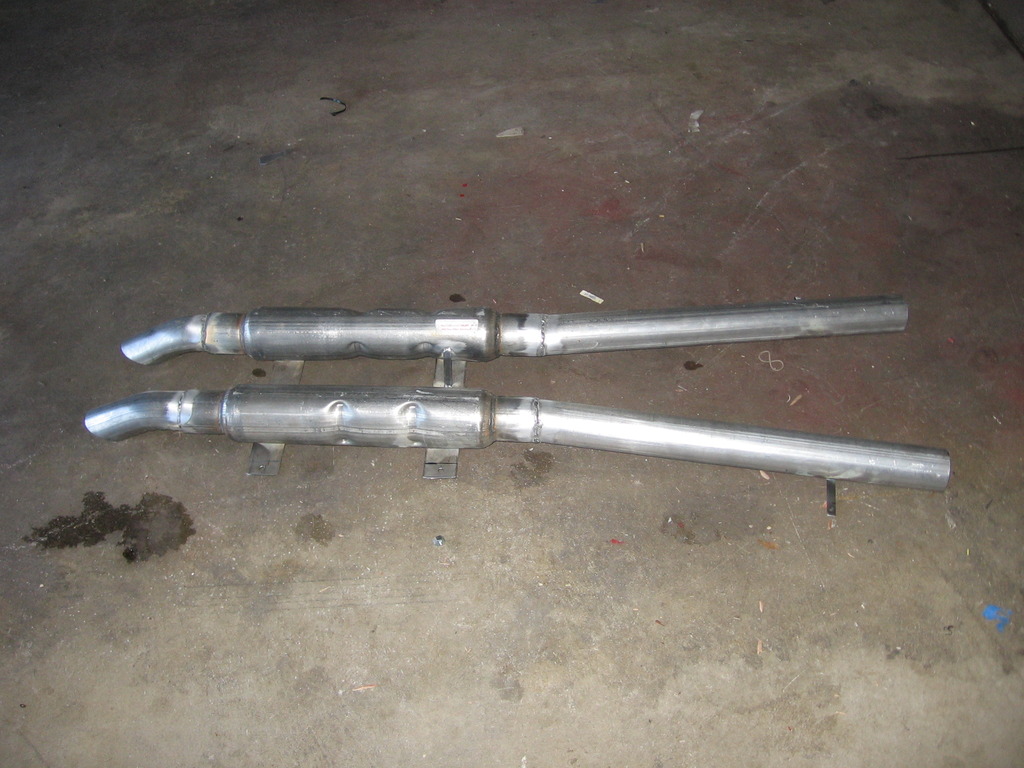
Had time to work on the exhaust. Got it nearly finished. I still need to add clamps, but I didn't have any.
Not a lot of space to work in.

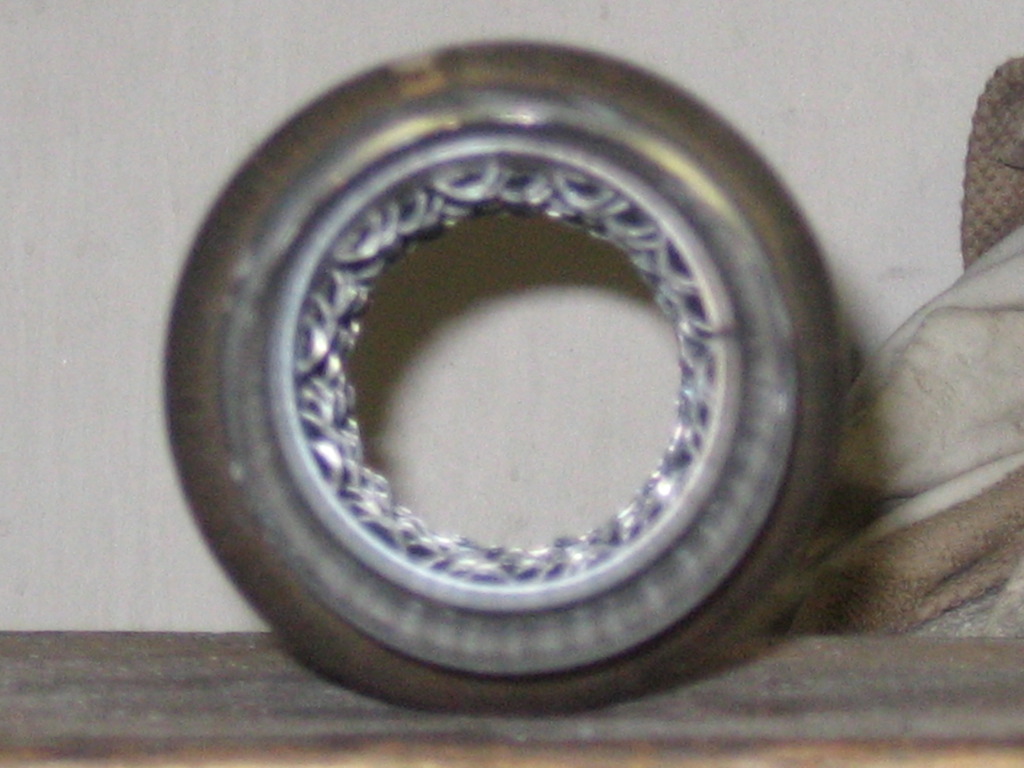
So I purchased some pretty small mufflers. These are from Classic Chambered Exhaust. I have something similar on my Cobra, and I like the way they sound. Deep, kinda loud, and mellow. No harsh Blatting. These are 16" long, about 3" in diameter, and 2.5" ID. Pretty much a straight through muffler, but still knock down a lot of the harsh sound.

 11-07-2015, 08:34 PM
#16
V8 Miata Enthusiast
Thread Starter
Join Date: Oct 2013
Location: Colorado Springs, CO
Posts: 421
Likes: 0
Received 33 Likes
on
27 Posts
Had time to work on the exhaust. Got it nearly finished. I still need to add clamps, but I didn't have any.
Not a lot of space to work in.

So I purchased some pretty small mufflers. These are from Classic Chambered Exhaust. I have something similar on my Cobra, and I like the way they sound. Deep, kinda loud, and mellow. No harsh Blatting. These are 16" long, about 3" in diameter, and 2.5" ID. Pretty much a straight through muffler, but still knock down a lot of the harsh sound.


Not a lot of space to work in.
So I purchased some pretty small mufflers. These are from Classic Chambered Exhaust. I have something similar on my Cobra, and I like the way they sound. Deep, kinda loud, and mellow. No harsh Blatting. These are 16" long, about 3" in diameter, and 2.5" ID. Pretty much a straight through muffler, but still knock down a lot of the harsh sound.
11-07-2015, 08:44 PM
#17
V8 Miata Enthusiast
Thread Starter
Join Date: Oct 2013
Location: Colorado Springs, CO
Posts: 421
Likes: 0
Received 33 Likes
on
27 Posts
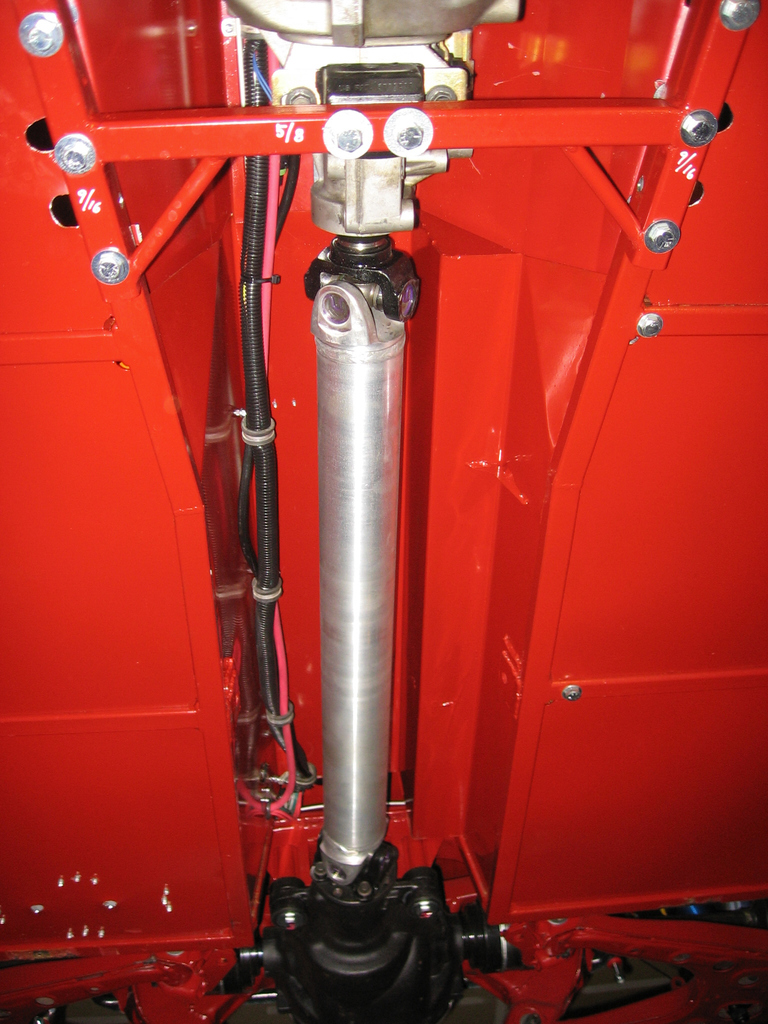
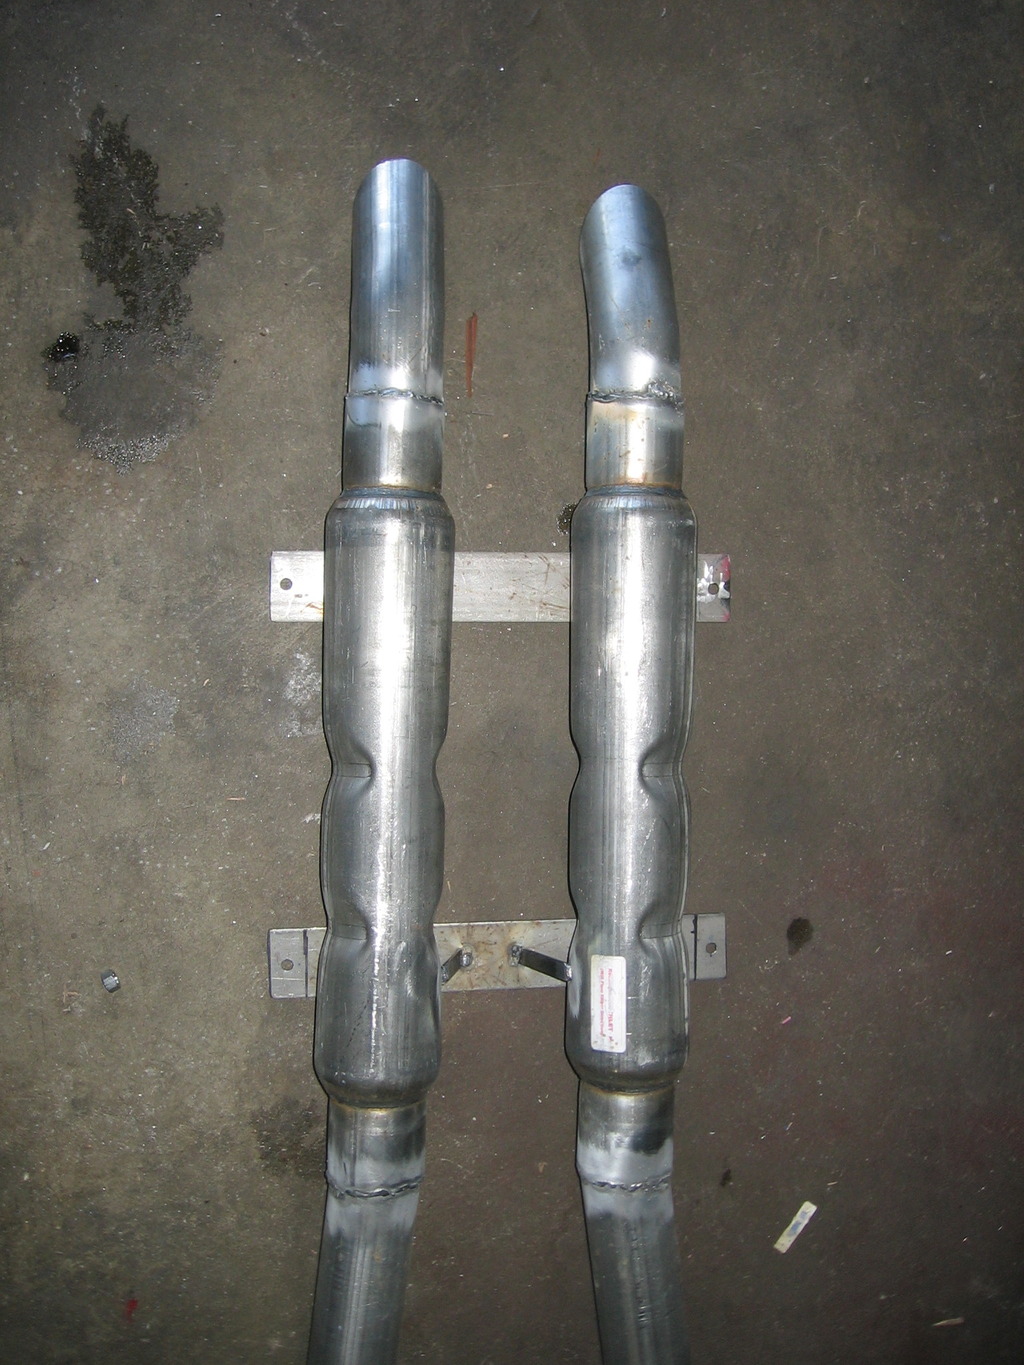
Most mufflers and exhaust are hanging down from the car. I couldn't figure out an easy way to do that. So I decided to set the mufflers on cross braces. Easier to build, and easier to service.
I started by putting in the support straps.

Then I put the mufflers in place, and tack welded them. Needed to make sure they weren't touching anything. They also cover up the heads of the bolts that hold the seat belts in place. I made sure there was enough room for wrench; but you can't remove the bolt.
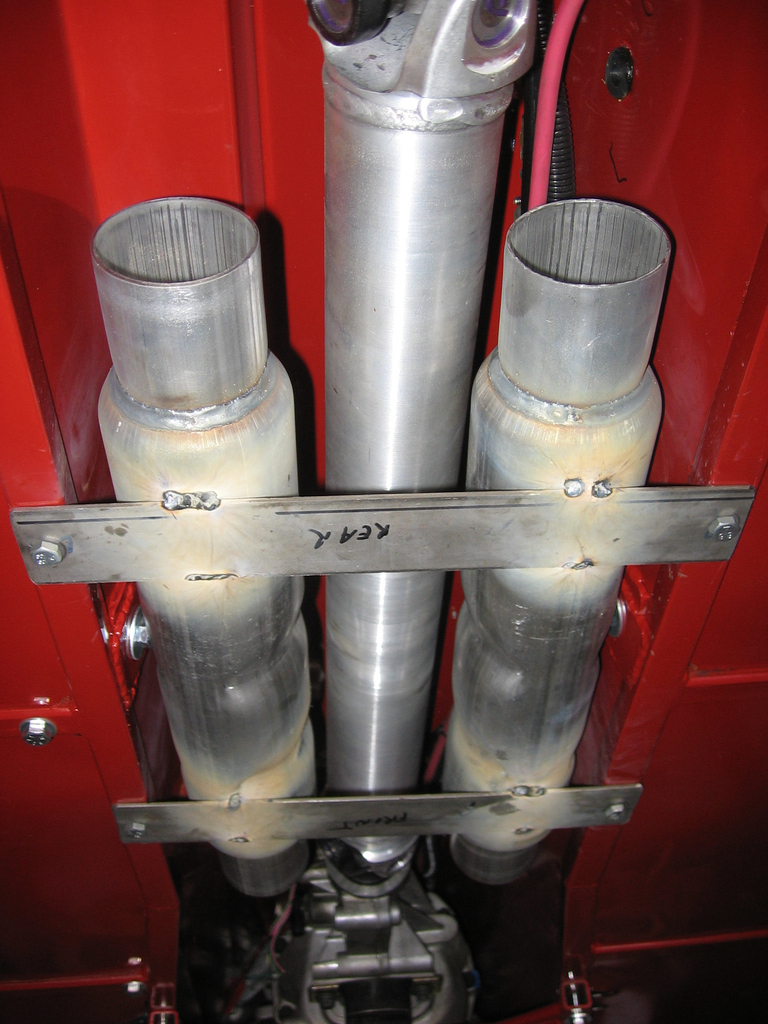
Then I played around with pipe length and position until I got something I liked. I tack welded the pipes in place, and then pulled it back out for final welding. I bombed on some BBQ paint to keep it from looking like a rusty mess later.
I also added some extra bracing on the sides of the mufflers. Necessary? IDK. But it made me feel better.
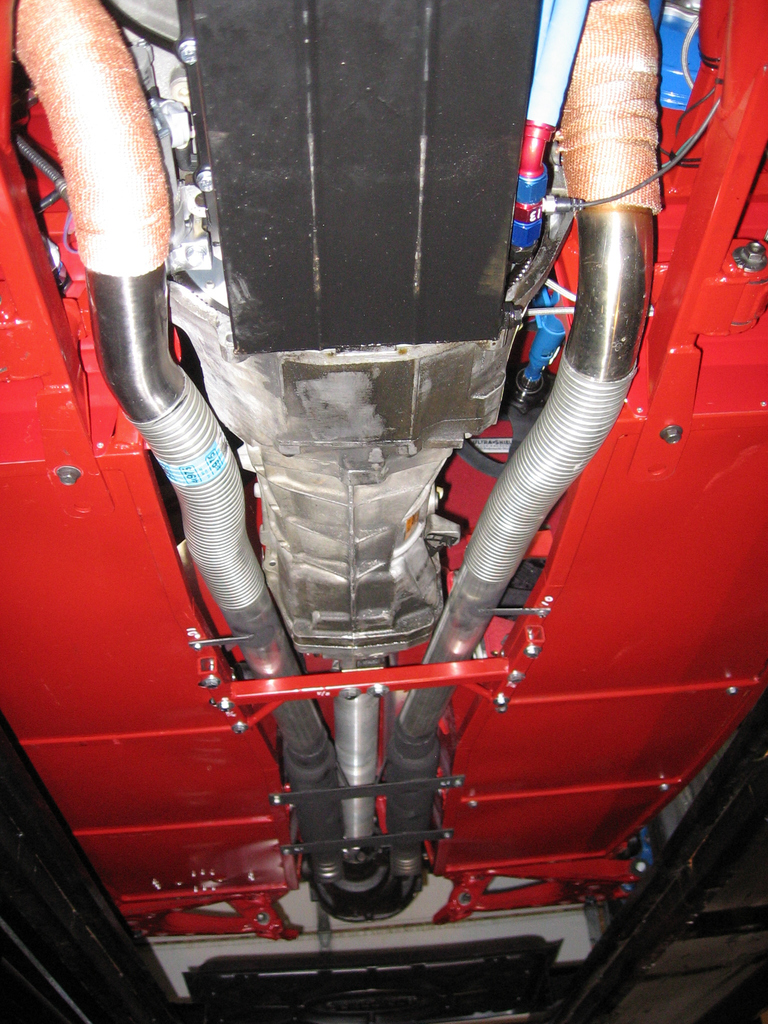
Put it all back in place. I also added some supports just ahead of the trans crossmember.
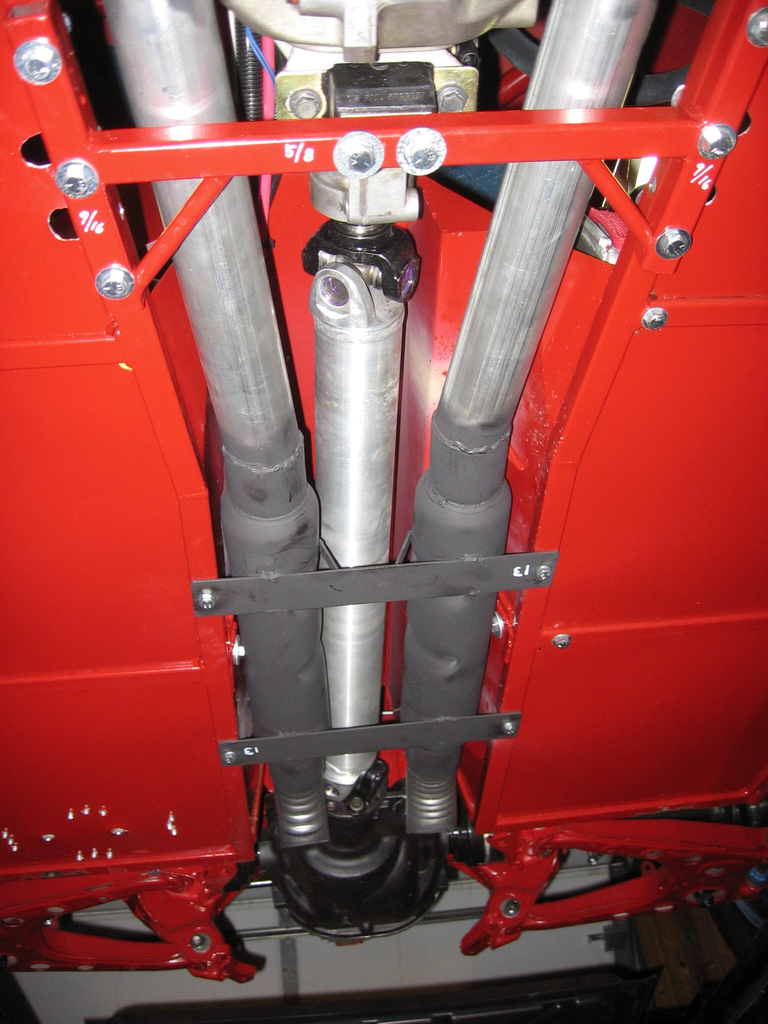
The pipes are connected to the headers with short pieces of flexible exhaust tubing. That will work for now. The flexible tubing is so light, I was tempted to use that instead of straight pipe. I still need to add some clamps there.
At some point I may take it to a muffler shop and get something better. I also want to put flanges behind the transmission crossmember to make things more easily serviced. By removing the crossmember the whole thing will drop out easily. But maybe it would be easier if I didn't have to remove the crossmember.
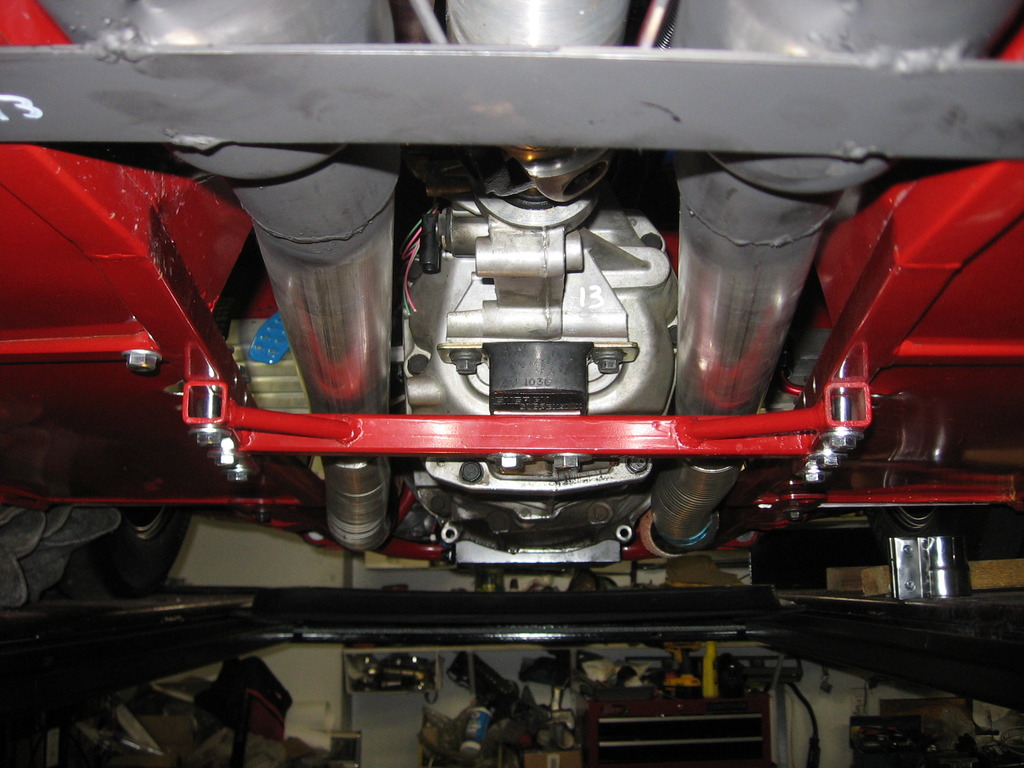
The turn down in the back are off the shelf from Pep Boys. Pretty tight clearances. I may have to dimple the right side a little bit for the drive shaft; we'll see.
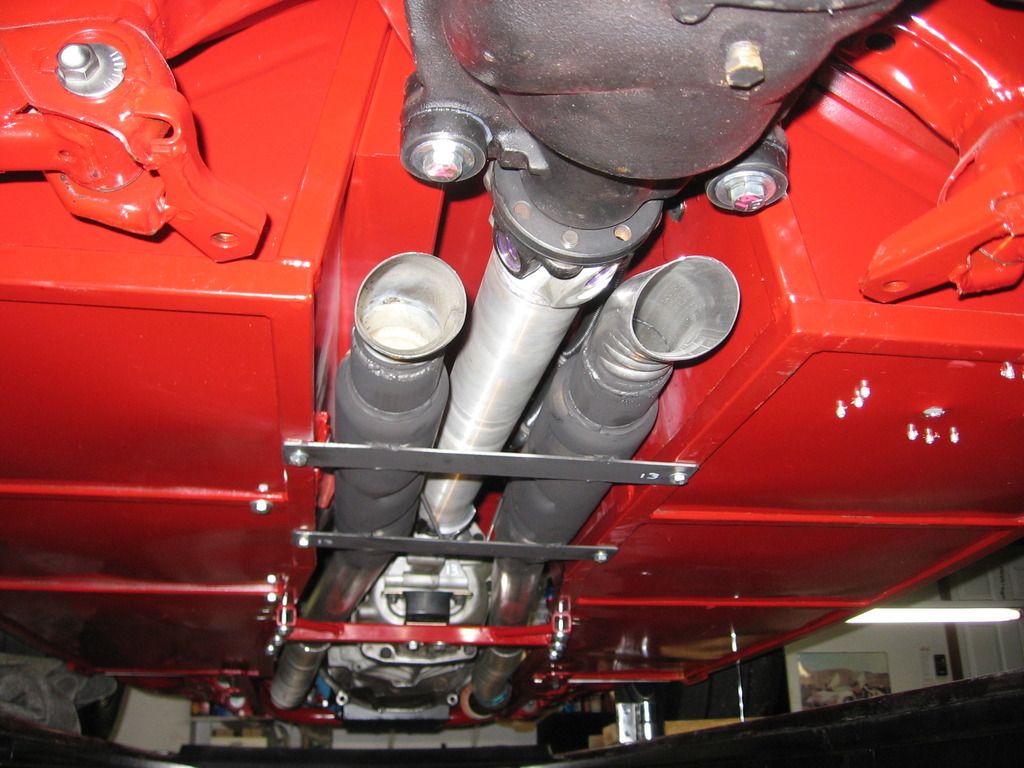
How does it sound? Good. Deep, mellow, and kinda loud. I think it's probably too loud for a street car. But there's enough room to use an 18" muffler for sure, and maybe a 20".
I started by putting in the support straps.

Then I put the mufflers in place, and tack welded them. Needed to make sure they weren't touching anything. They also cover up the heads of the bolts that hold the seat belts in place. I made sure there was enough room for wrench; but you can't remove the bolt.

Then I played around with pipe length and position until I got something I liked. I tack welded the pipes in place, and then pulled it back out for final welding. I bombed on some BBQ paint to keep it from looking like a rusty mess later.

I also added some extra bracing on the sides of the mufflers. Necessary? IDK. But it made me feel better.

Put it all back in place. I also added some supports just ahead of the trans crossmember.

The pipes are connected to the headers with short pieces of flexible exhaust tubing. That will work for now. The flexible tubing is so light, I was tempted to use that instead of straight pipe. I still need to add some clamps there.

At some point I may take it to a muffler shop and get something better. I also want to put flanges behind the transmission crossmember to make things more easily serviced. By removing the crossmember the whole thing will drop out easily. But maybe it would be easier if I didn't have to remove the crossmember.

The turn down in the back are off the shelf from Pep Boys. Pretty tight clearances. I may have to dimple the right side a little bit for the drive shaft; we'll see.

How does it sound? Good. Deep, mellow, and kinda loud. I think it's probably too loud for a street car. But there's enough room to use an 18" muffler for sure, and maybe a 20".
11-07-2015, 11:10 PM
#18
Look's good .boB you got a lot done. Is the whole thing 2 1/2" exhaust pipe? I like how you got the exhaust up and tucked in the tunnel. The flat mount for the mufflers looks like a good idea. Are you going to put a little peice of header wrap between the mount and frame rail to keep heat transfer from blistering your paint? I would imagine the turn downs would be a little on the loud side but bet it sounds good.
11-08-2015, 08:36 AM
#20
V8 Miata Enthusiast
Thread Starter
Join Date: Oct 2013
Location: Colorado Springs, CO
Posts: 421
Likes: 0
Received 33 Likes
on
27 Posts
Look's good .boB you got a lot done. Is the whole thing 2 1/2" exhaust pipe? I like how you got the exhaust up and tucked in the tunnel. The flat mount for the mufflers looks like a good idea. Are you going to put a little peice of header wrap between the mount and frame rail to keep heat transfer from blistering your paint? I would imagine the turn downs would be a little on the loud side but bet it sounds good.
Weight and complexity. And I wanted to keep heat away from the differential. I can always add that later if I want to.
11-08-2015, 09:31 AM
#21
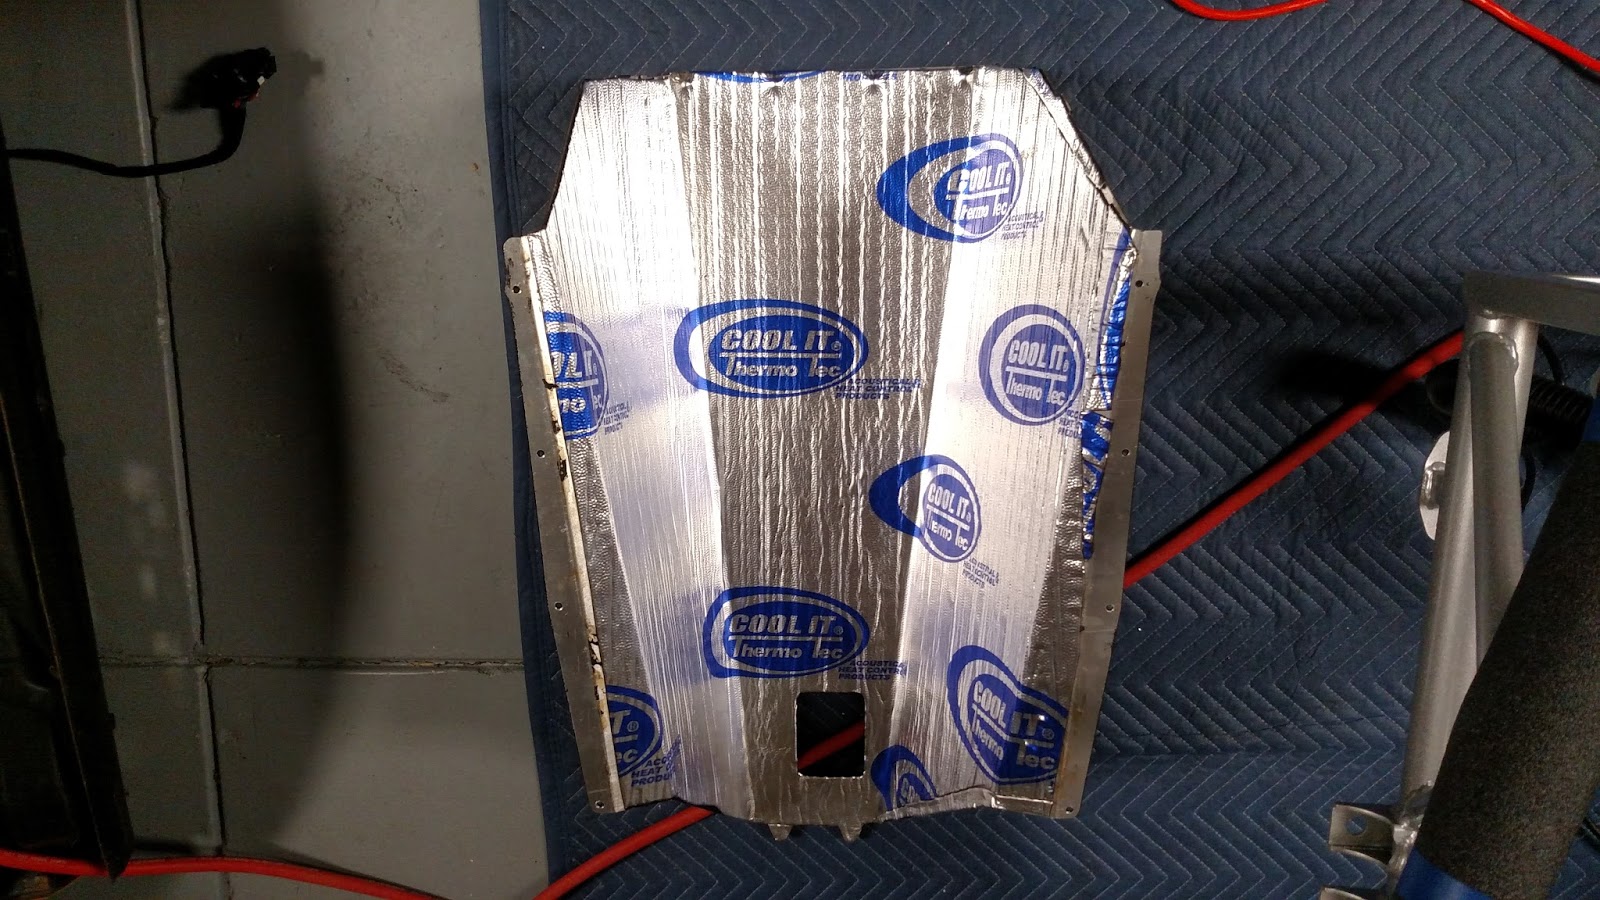
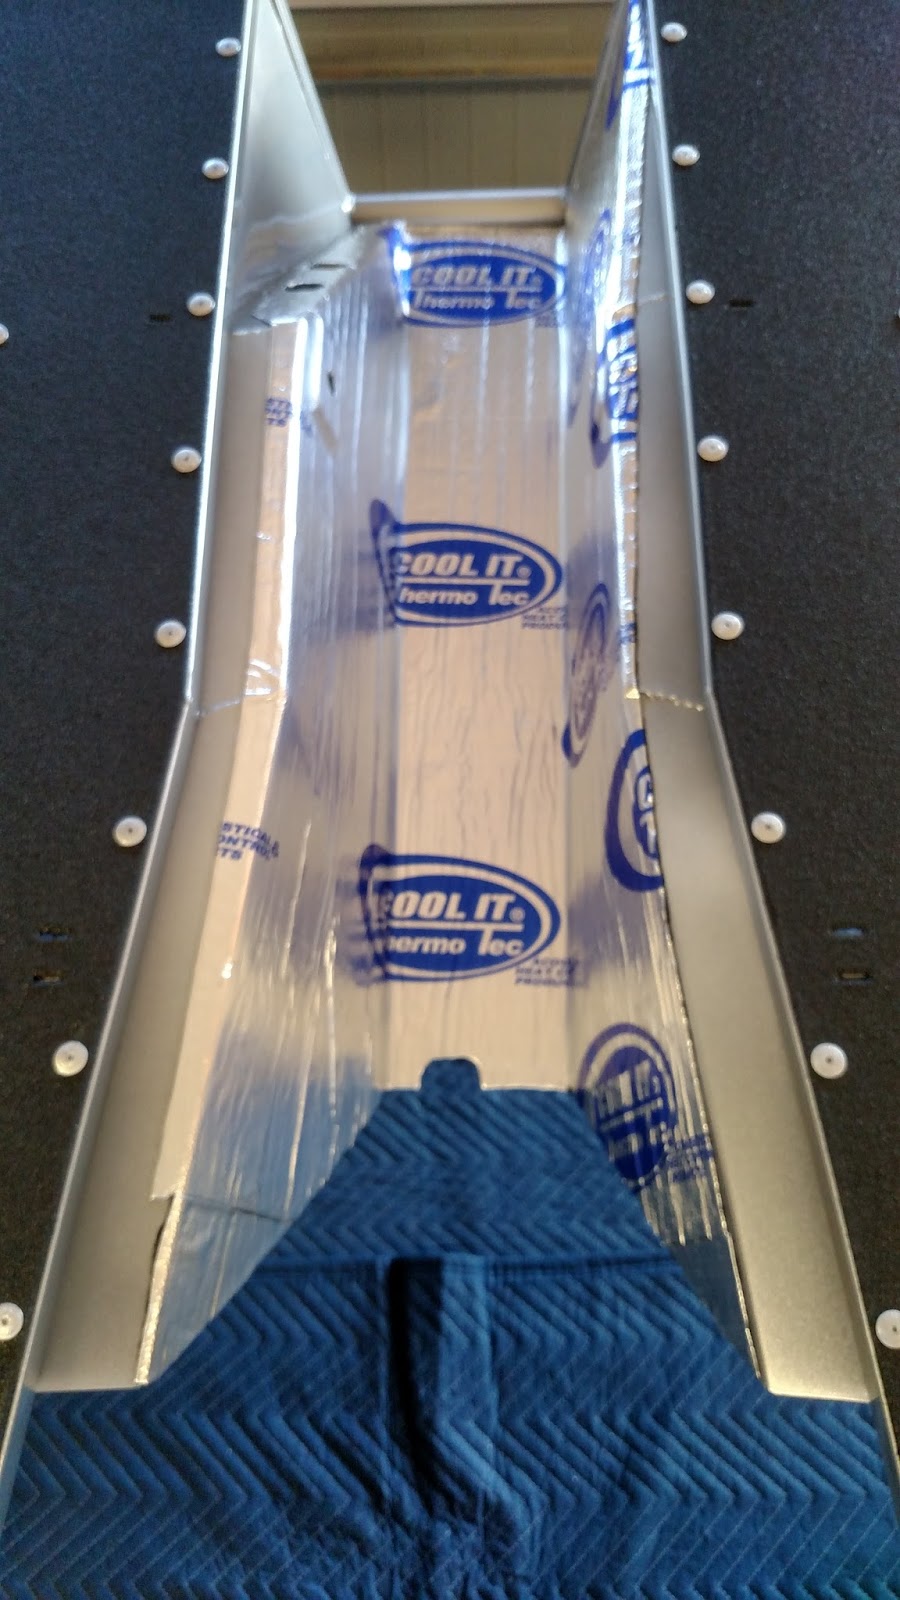
I don't know why but I thought the FM headers were 3". I spent some time looking at the Classic Chambered Exhaust web site. I appreciate you mentioning them. I has looking to ways to fit a much bigger muffler and there stuff makes packaging much simpler. I'm with you on the heat control. I did both my tunnel and trans cover. You can see what I was saying about how the new tunnel eats up space for the exhaust. Glad you are making good progress I think yours is going to be a great track car.
01-10-2016, 12:14 PM
#22
V8 Miata Enthusiast
Thread Starter
Join Date: Oct 2013
Location: Colorado Springs, CO
Posts: 421
Likes: 0
Received 33 Likes
on
27 Posts
Building this car is a lot more involved than I thought it was going to be. My original intention of this thread - and others like it - was to document the differences from dropping a V8 into a Miata. I wanted this information to be easily found and referenced for the next guy. But keeping these threads updated and organized isn't working out all that well.
So, I built a web site. Racing the Exocet
This site only documents those steps, problems, and solutions specific to the Exocet. I'm sure some of it will apply to a Miata. But since I've never owned one, I can't say. I'll still read this site nearly every day, like I have been. And I still think this is the best site not only for V8 Miata's, but Miata performance in general.
No, this is not a commercial web site. It's for information only. I'm not selling anything, promoting anything, or asking for anything. Peruse the site at your leisure. Or not.
02-11-2016, 02:34 PM
#23
Hey .boB wondered if I could ask you a question about your accusump? What valve are you running on it? I have looked at your pictures and do not see where the valve is. Appreciate your time.
02-11-2016, 10:22 PM
#24
V8 Miata Enthusiast
Thread Starter
Join Date: Oct 2013
Location: Colorado Springs, CO
Posts: 421
Likes: 0
Received 33 Likes
on
27 Posts
The purpose of the valve is to hold pressure when the engine is off, so you can pre-oil the engine before starting. I don't pre-oil any of my other engines, so I don't worry about it with this one, either.
I'm also a big believer in the KISS Principle.
02-11-2016, 11:41 PM
#25
That's because I'm not using a valve.
The purpose of the valve is to hold pressure when the engine is off, so you can pre-oil the engine before starting. I don't pre-oil any of my other engines, so I don't worry about it with this one, either.
I'm also a big believer in the KISS Principle.
The purpose of the valve is to hold pressure when the engine is off, so you can pre-oil the engine before starting. I don't pre-oil any of my other engines, so I don't worry about it with this one, either.
I'm also a big believer in the KISS Principle.


