A "Fabricators" Build Thread
 09-07-2016, 07:49 PM
#26
V8 Miata Follower
Thread Starter

I didnt think about bolting the subframe to the engine first, excellent idea! I did exactly as you described minus the subframe. I will have to try that next time!
 09-07-2016, 07:59 PM
#27
V8 Miata Follower
Thread Starter
Okay I cant help myself but share, Im excited about this one. Excited because its super simple and I wont have to spend a ton of time on fabrication of this mount!! (Although, I did pick up a sweet deal on FM frame rails.)
But this is called a fabricators build thread for a reason! I refuse to use any off the shelf swap parts =P
So get a load of this!
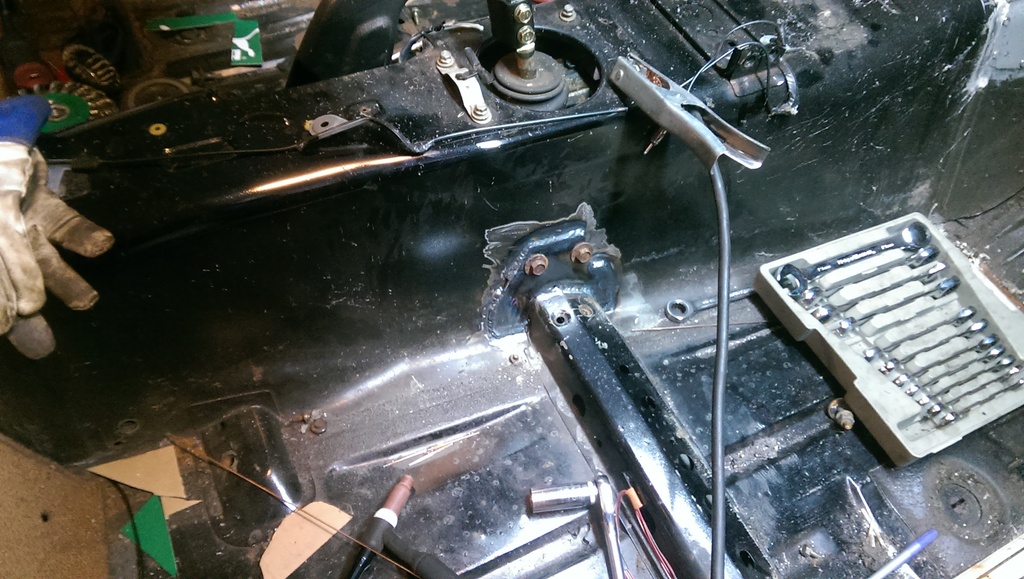
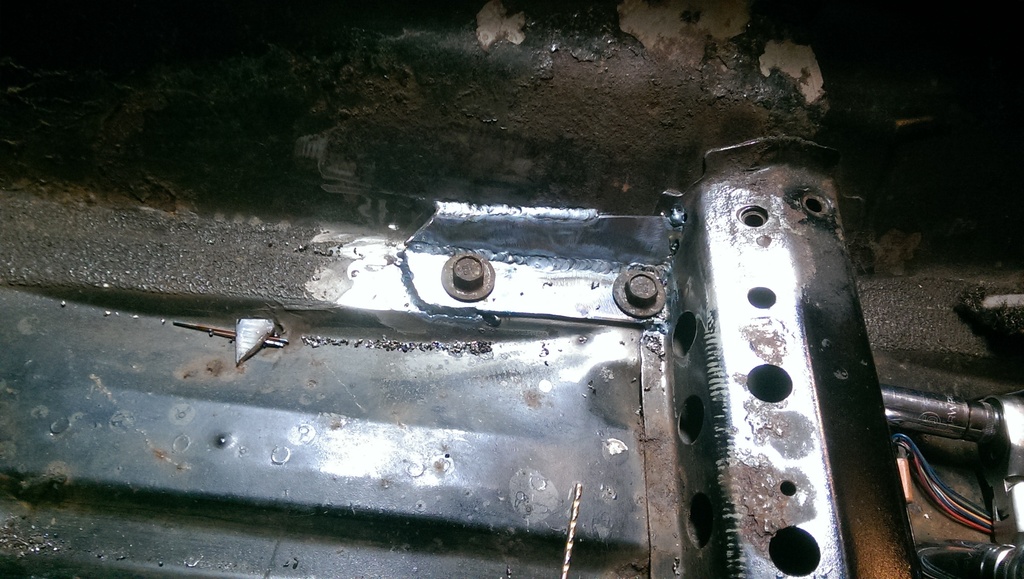
Trans supported where I want it.
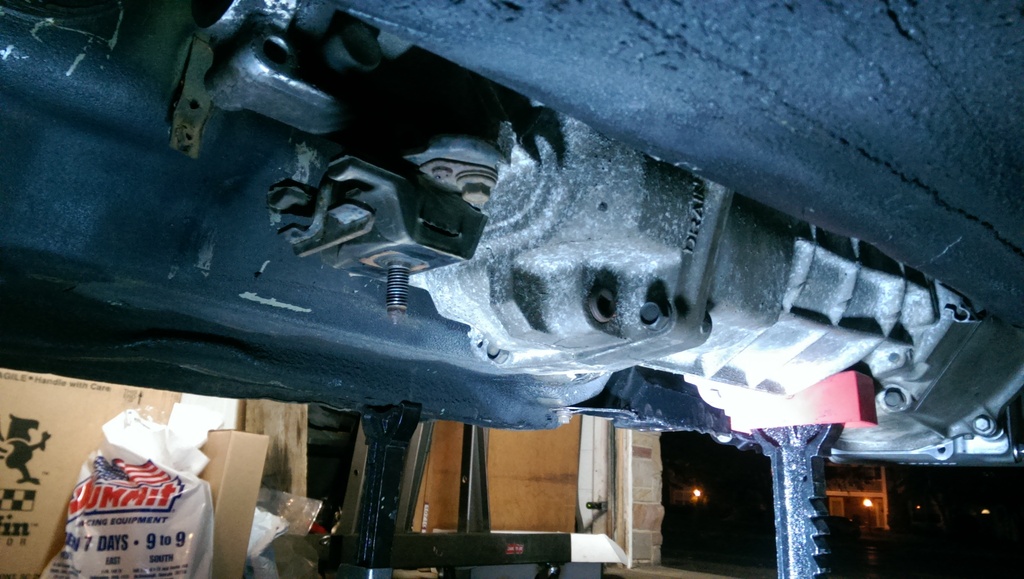
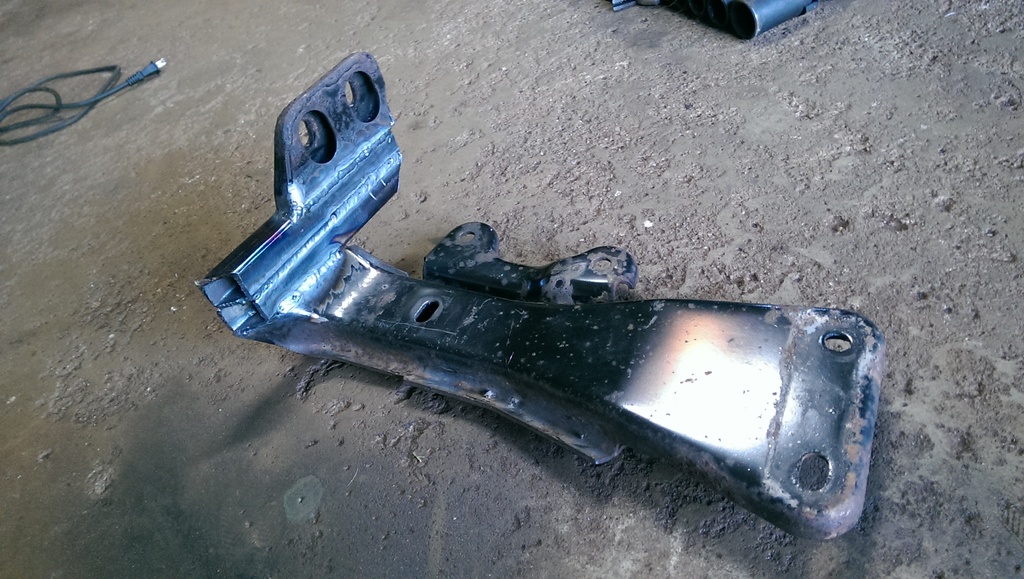
Lop off this bit off the stock fbody trans cross member,
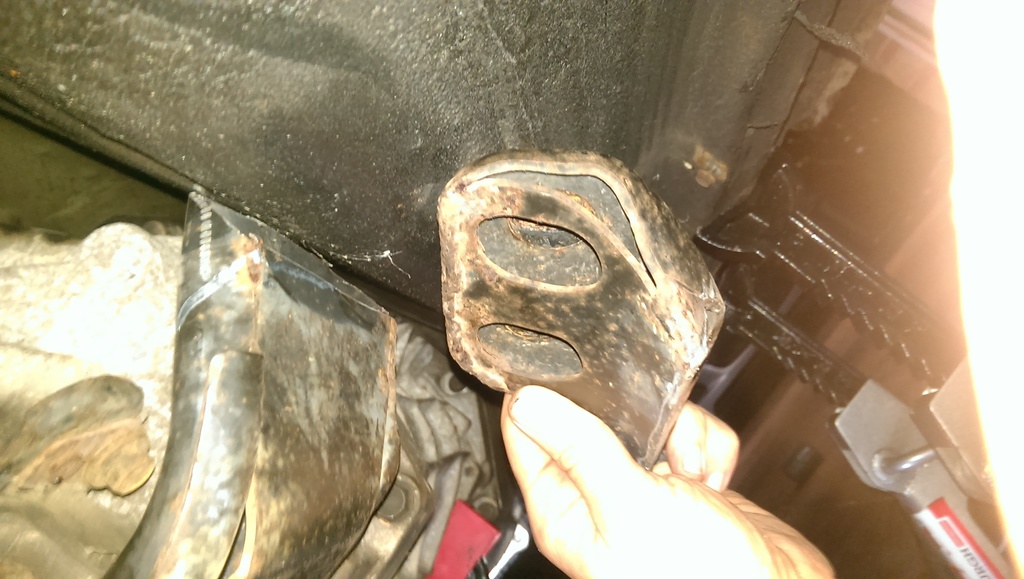
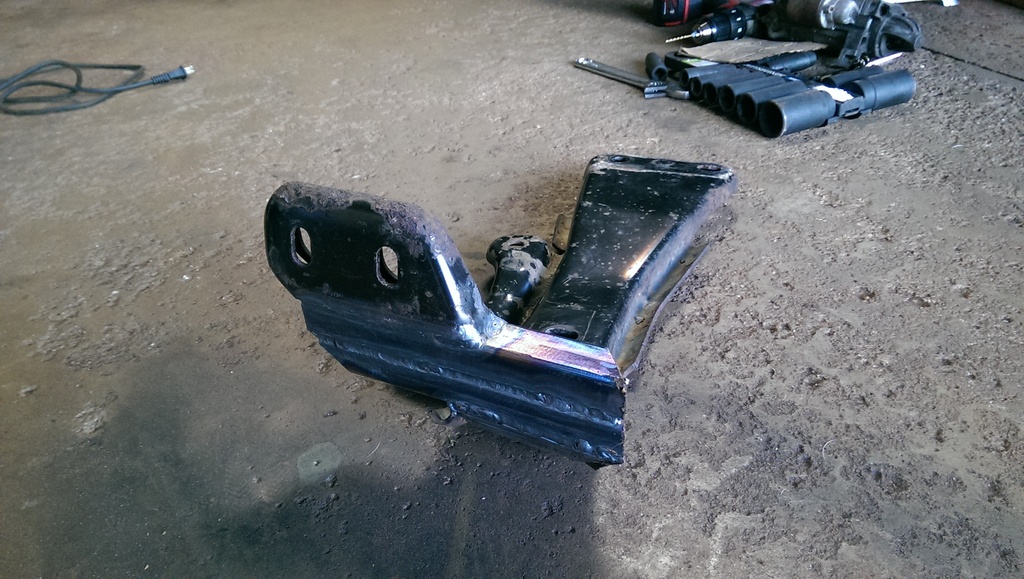
Flip it around and weld it back on like so.
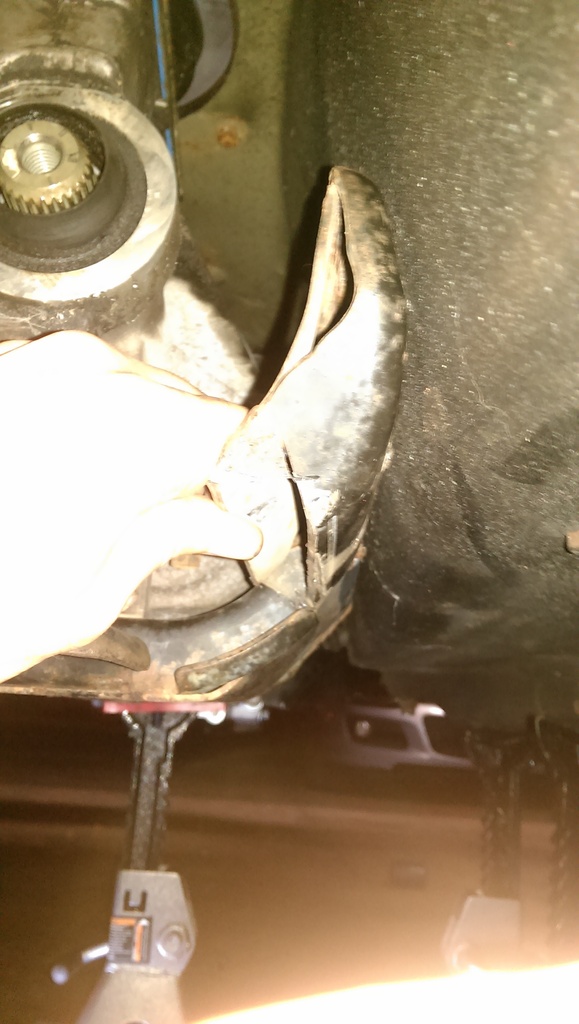
Can you see it!?! Do you see my vision?! So simple!!
Of course, I will weld on backing plates to the trans tunnel on the interior of the car. As you can see, pass side exhaust clearance will be tight. Drivers has plenty of room to go over the brace, and the other side will just have to tuck in as close as it can. But im totally okay with that!!
What do you guys think?
But this is called a fabricators build thread for a reason! I refuse to use any off the shelf swap parts =P
So get a load of this!
Trans supported where I want it.

Lop off this bit off the stock fbody trans cross member,

Flip it around and weld it back on like so.

Can you see it!?! Do you see my vision?! So simple!!

Of course, I will weld on backing plates to the trans tunnel on the interior of the car. As you can see, pass side exhaust clearance will be tight. Drivers has plenty of room to go over the brace, and the other side will just have to tuck in as close as it can. But im totally okay with that!!
What do you guys think?
09-17-2016, 09:30 PM
#28
V8 Miata Follower
Thread Starter
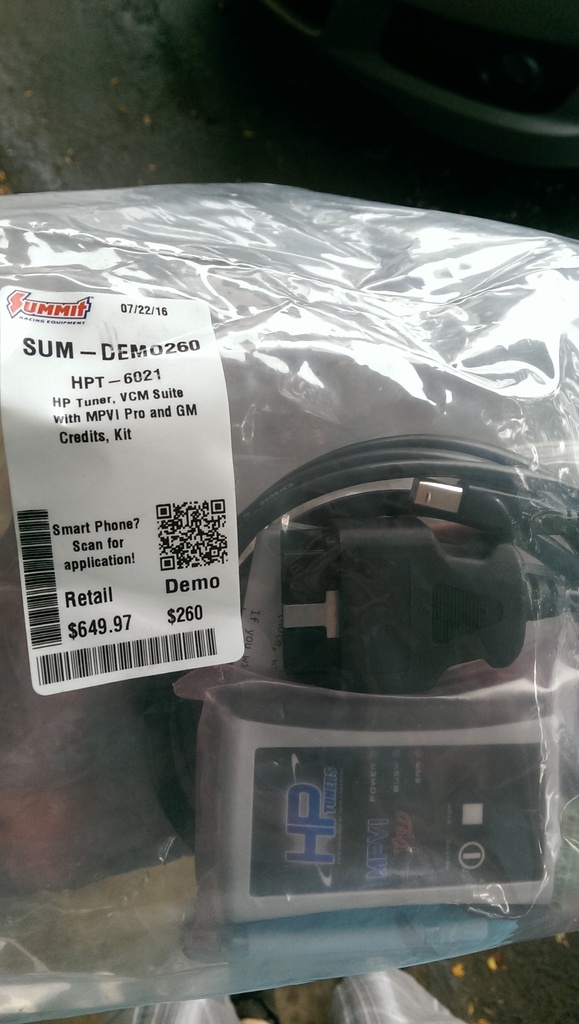
I'll update more at the end of the weekend with the progress I've made. But I just wanted to pop in and share this SCORE with you guys. Couldn't believe my eyes when I saw it!!!

 09-18-2016, 08:12 AM
#30
V8 Miata Follower
Thread Starter
I didn't see any! Or else I'd have bought them up just to resell!
Plus the only way you can find them is to go to a retail location. I'm still in shock!
Plus the only way you can find them is to go to a retail location. I'm still in shock!
09-19-2016, 09:19 AM
#32
V8 Miata Follower
Thread Starter
Alright, bout time for another update.
Impressions on the build so far:
-I spent way more money that I thought I would
-Most of that is due to simply coming across awesome deals on parts I didnt intend to purchase at this time (eg. LS6 intake, cam, frame rails etc. )
-That front subframe sucked up a HUGE part of my timeline, forcing me work harder/faster to meet my personal deadline, which is rapidly approaching I might add.
-The rest of the fab work has worked itself out nicely.
-Im not looking forward to wiring.
Anyhow, just thought Id share my thoughts at this time. Good news is the only major parts left to purchase is the axles/hubs/driveshaft.
So that must mean Im almost done all the mounts!!
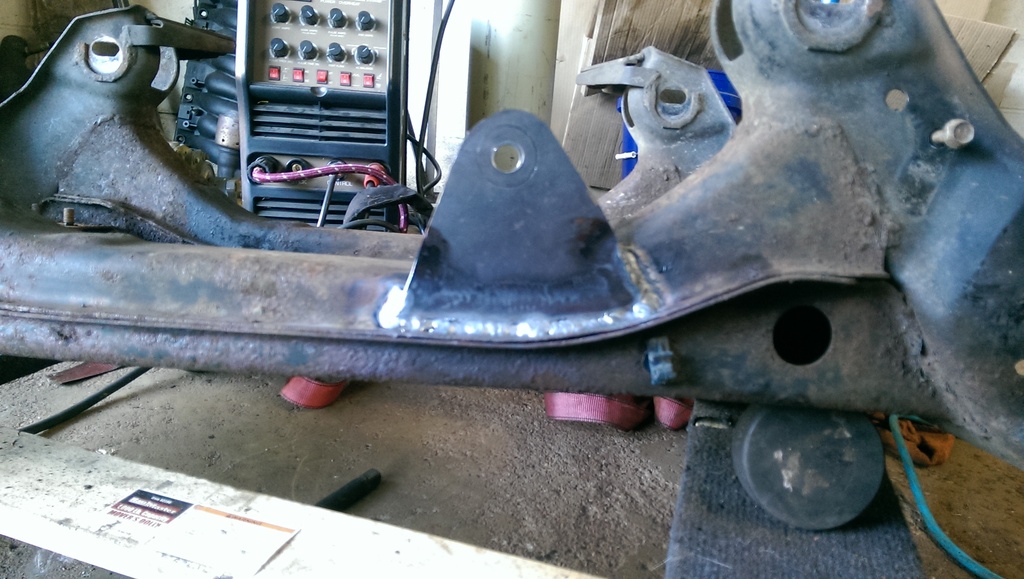
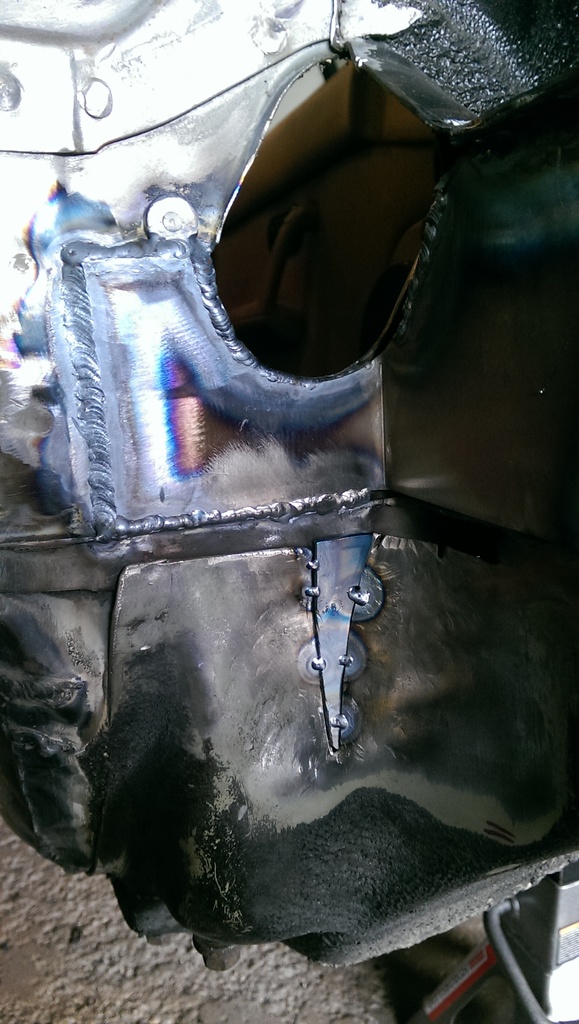
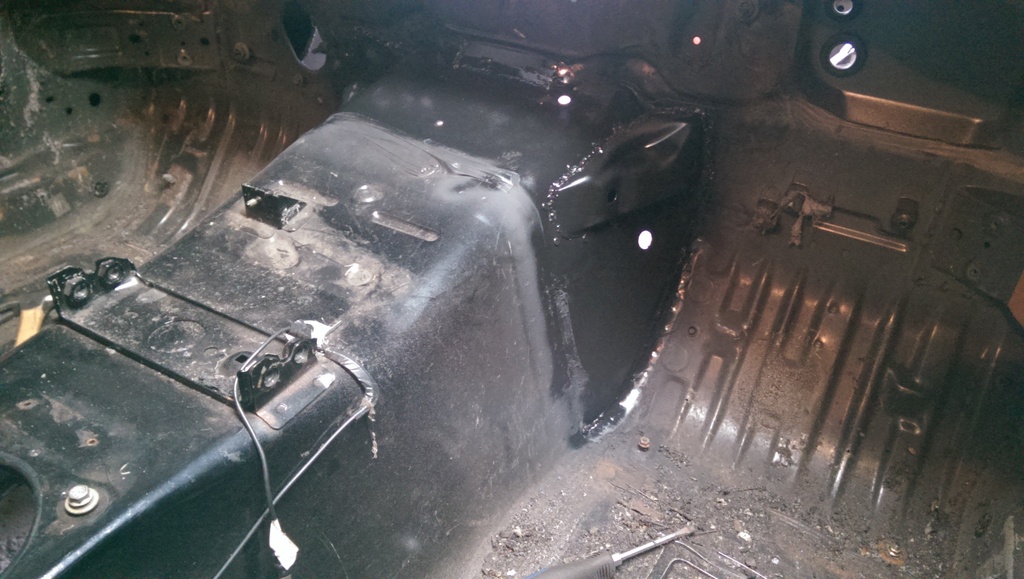
I never showed you the completed trans mounts, so again, I will let the pictures do most of the talking here. Pay no attention to my welds >.> My excuse is welding out of position for the majority of these parts. I have NO work bench, much less a welding table in my garage, so everything I have done has either been on the floor or in the car. So just pretend they are pretty okay?
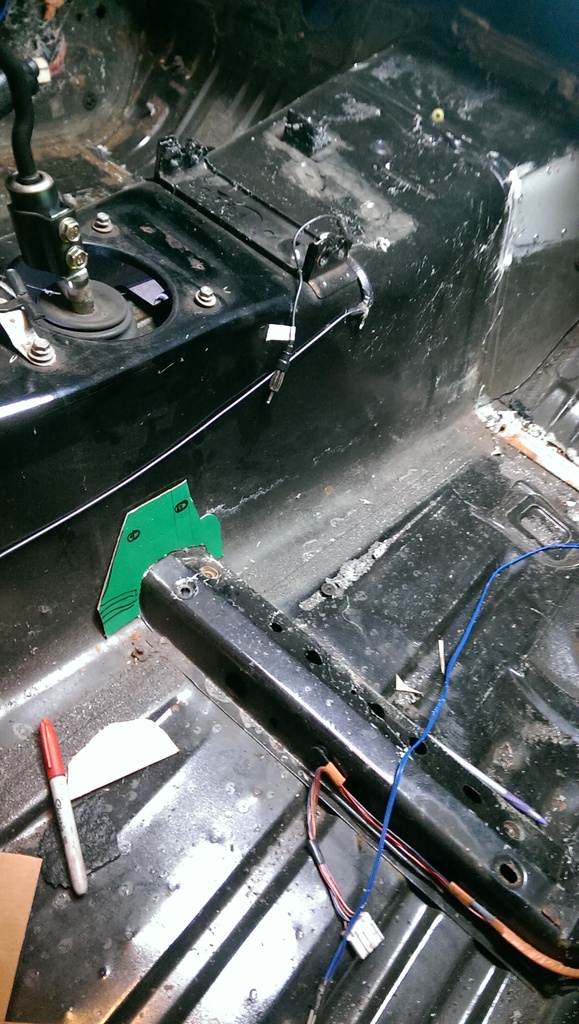
After I made a couple cuts on the stock camaro mount, and looking at the car again, I changed my mind where I wanted to place the vertical flange of the mount. Instead of just putting it inline with the mount, if I just offset it a bit and raised it, I could center it over the floor/seat brace which I liked much better.
So I used some cardboard again and made some templates for backing plates.
Fast forward.
And did the same for the drivers side.
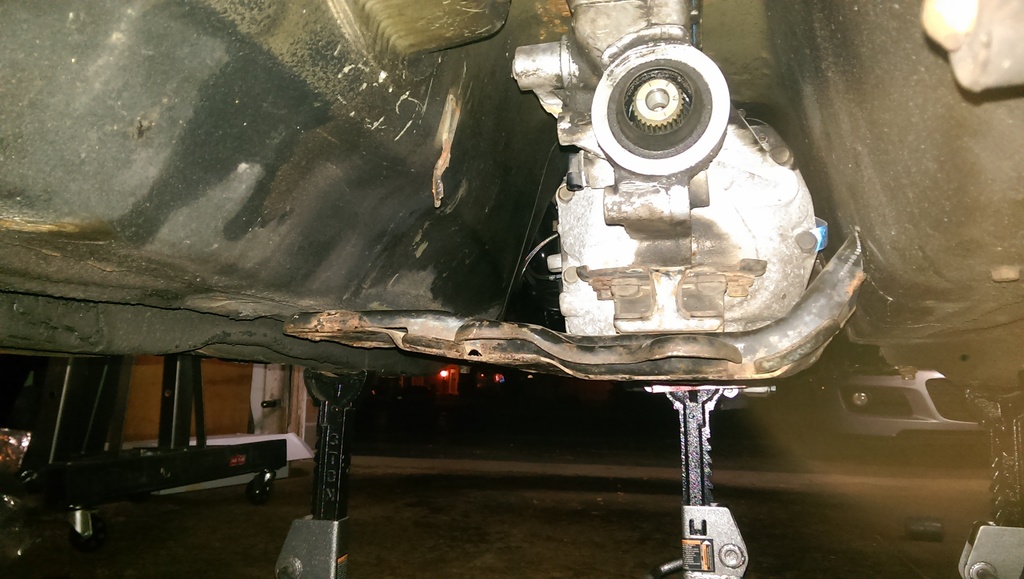
And there she is!! Next time it comes out, I will be cutting off those tabs that were used for the camaro torque arm, and wire wheeling and painting of course.
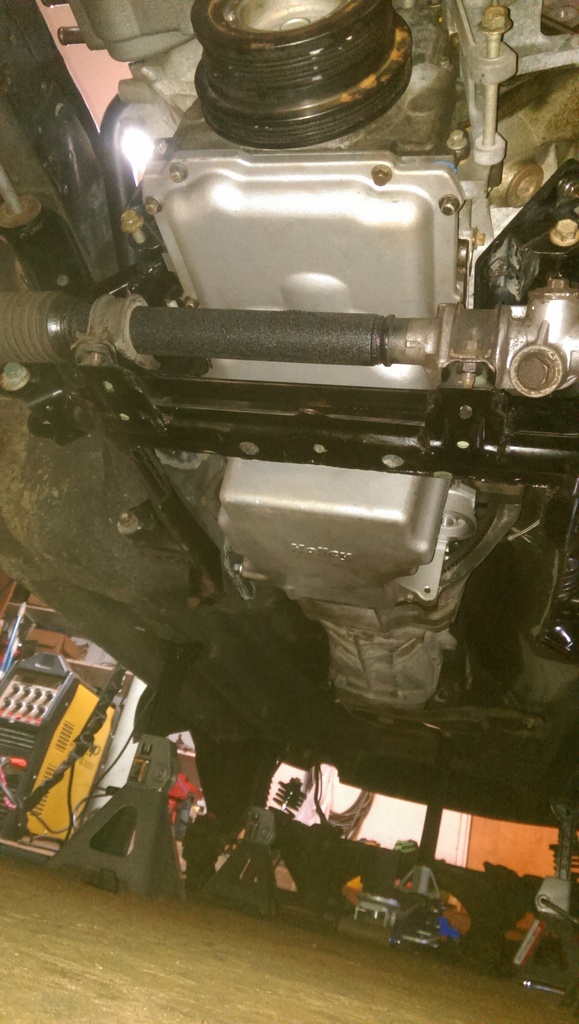
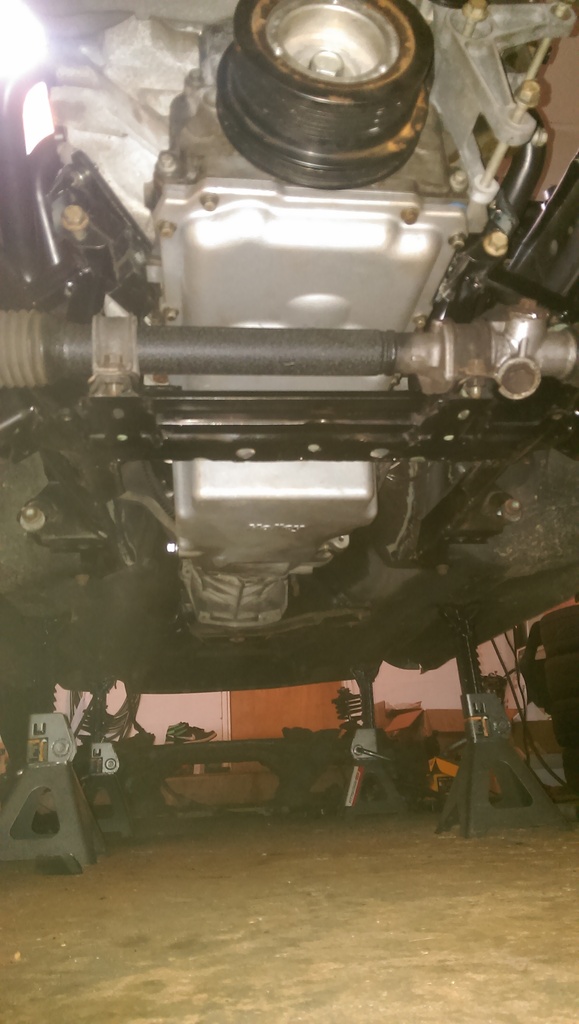
But I am super happy with it. Feels very solid! Here she is, sitting unassisted in the car! Driveline angle measured at 1.5 degrees. Perfect!!
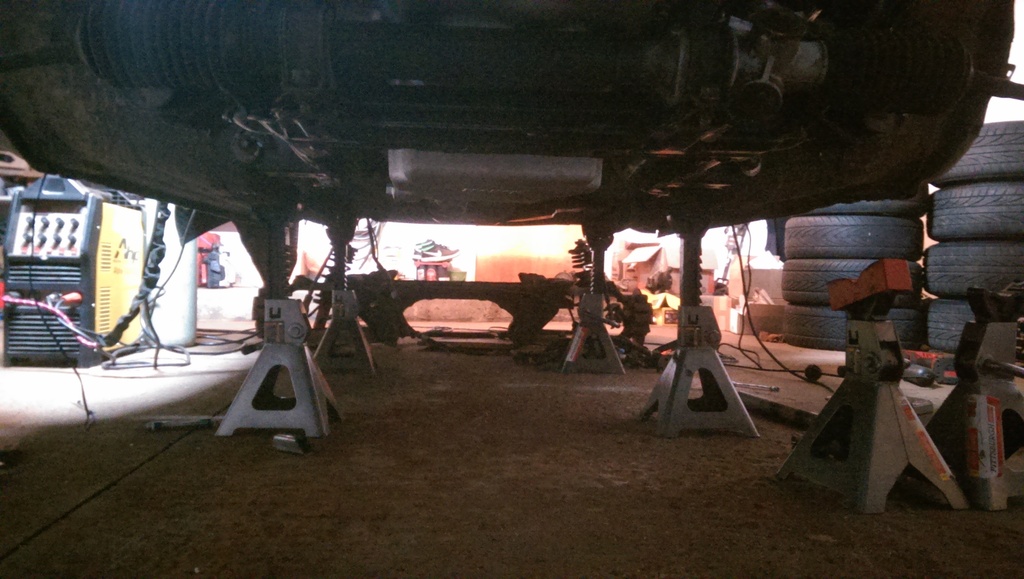
Moving along now. Gotta get that diff in there so I can get the axles ordered. Theres a three week lead time, so I need to get them measured ASAP , then I can backtrack a little and clean up some of this work.
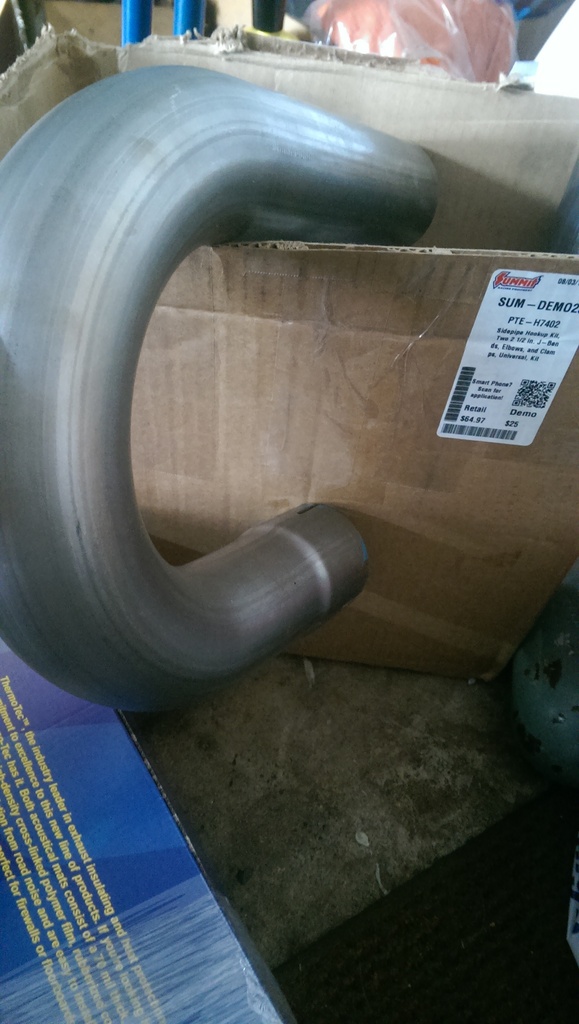
In addition to my sweet HPTuners deal, I picked up a box of (4) 2.5" steel J Bends from summit as well for $25, score!.
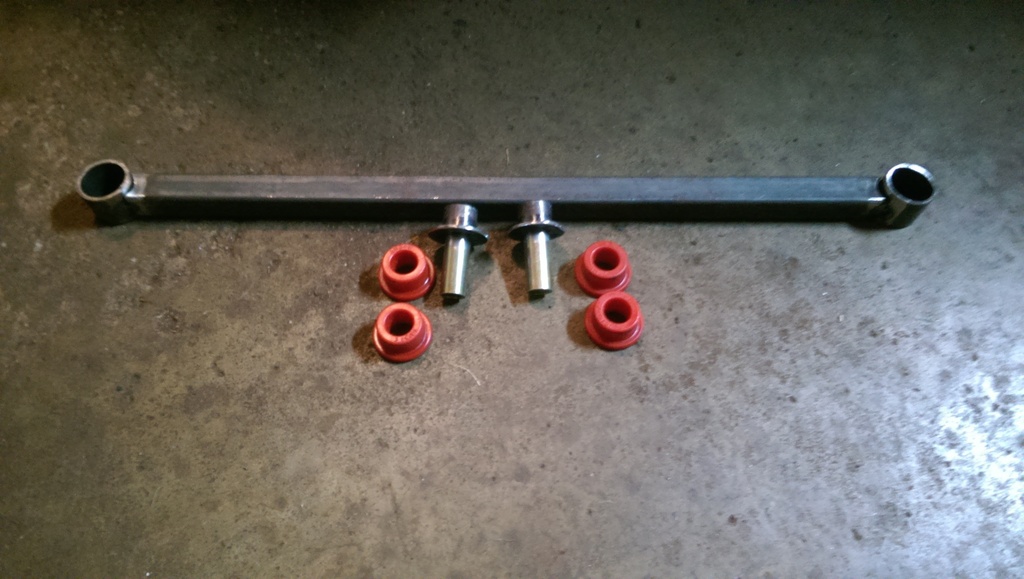
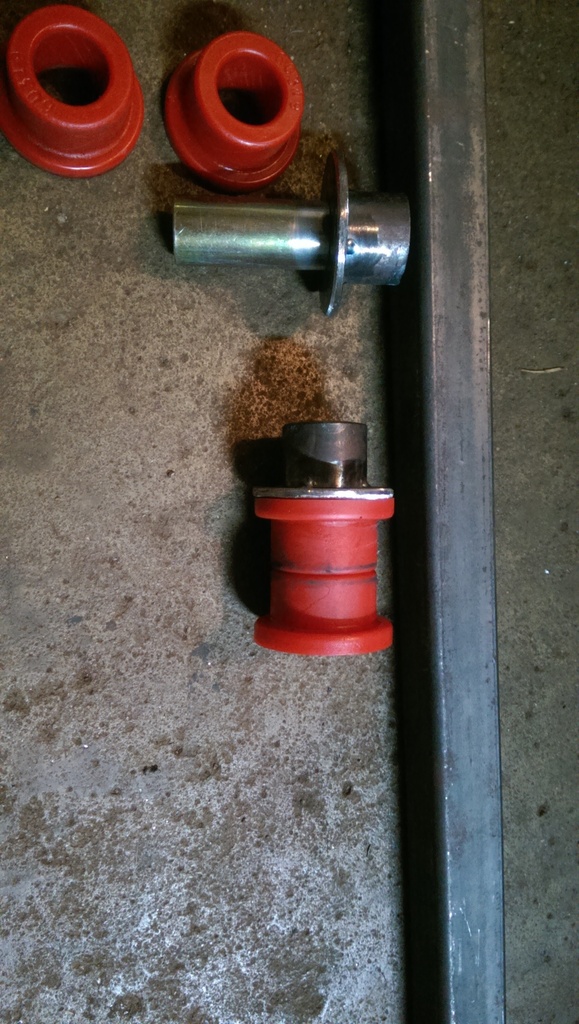
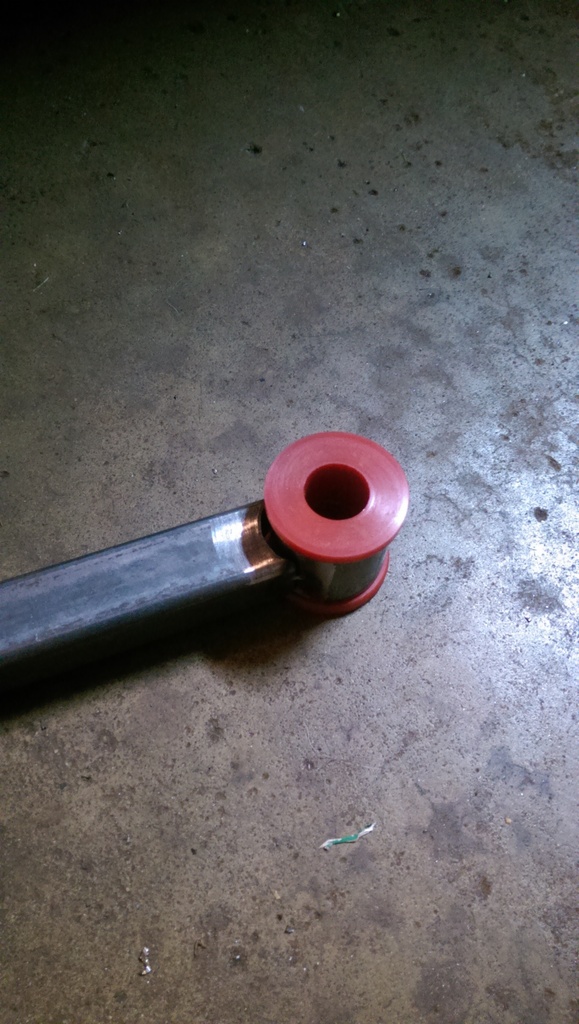
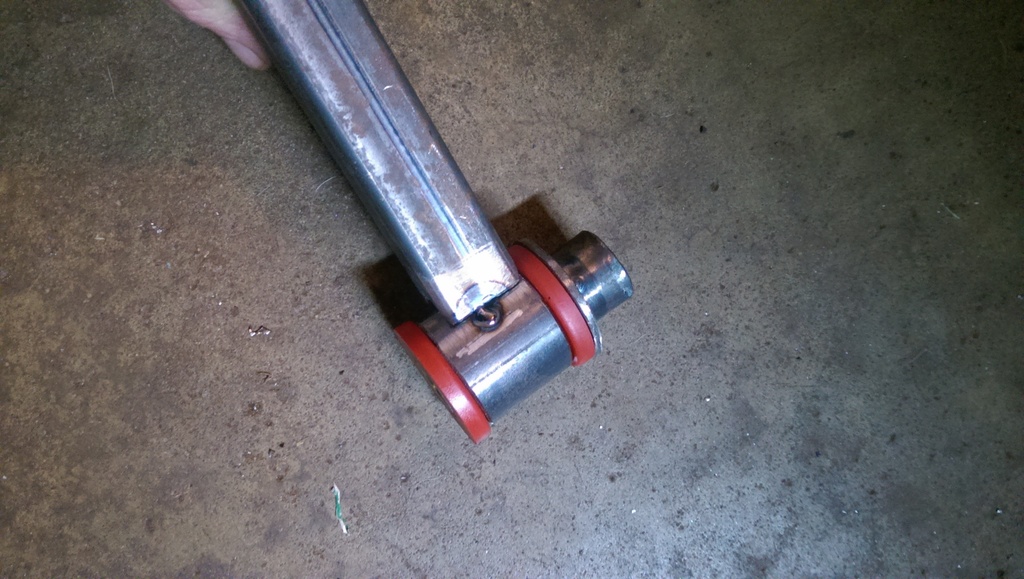
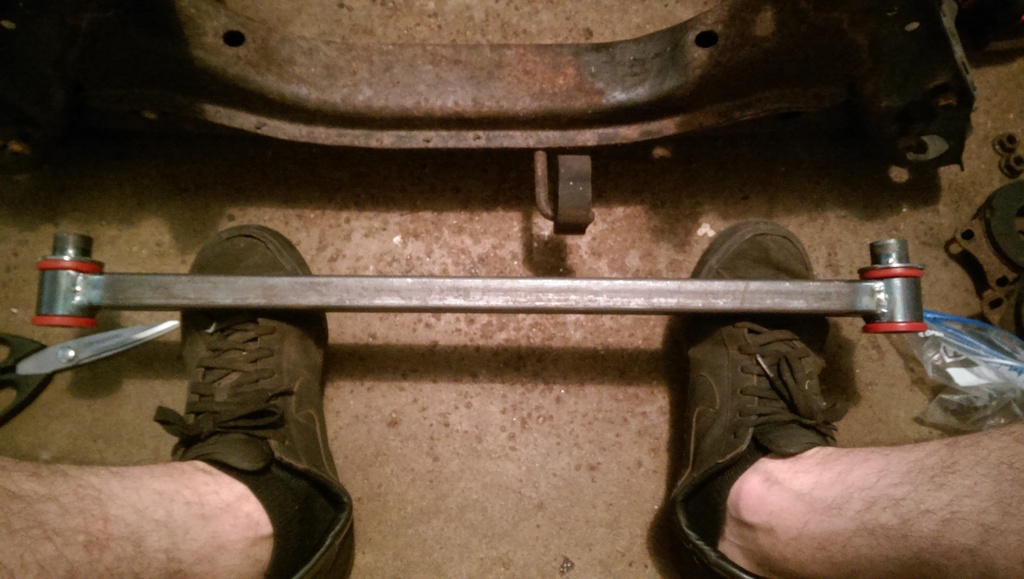
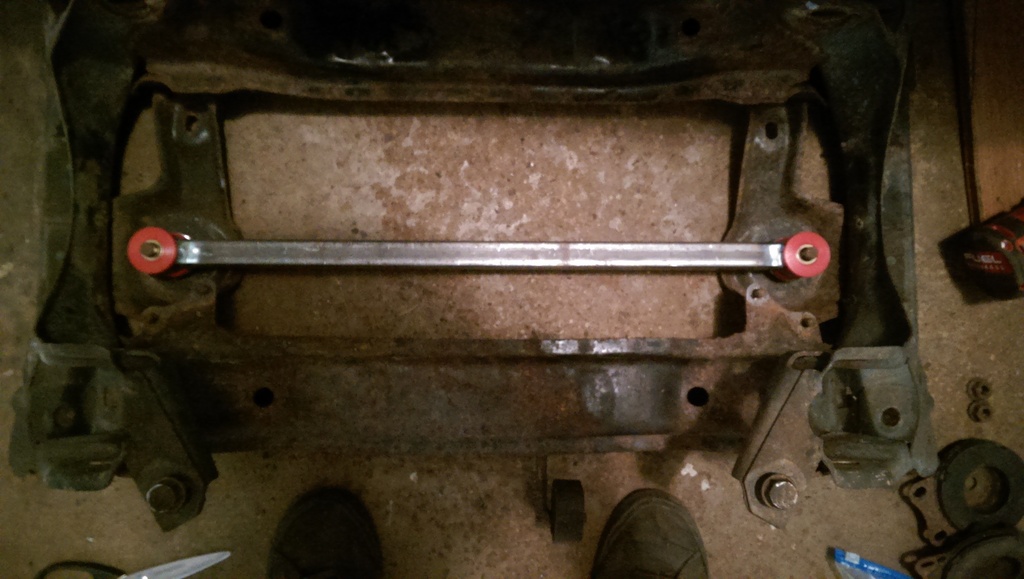
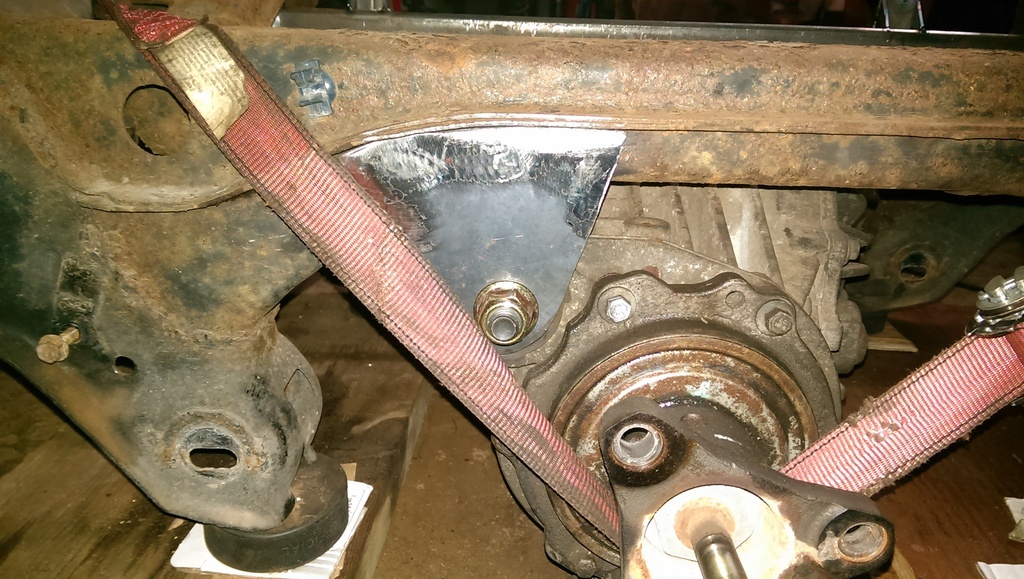
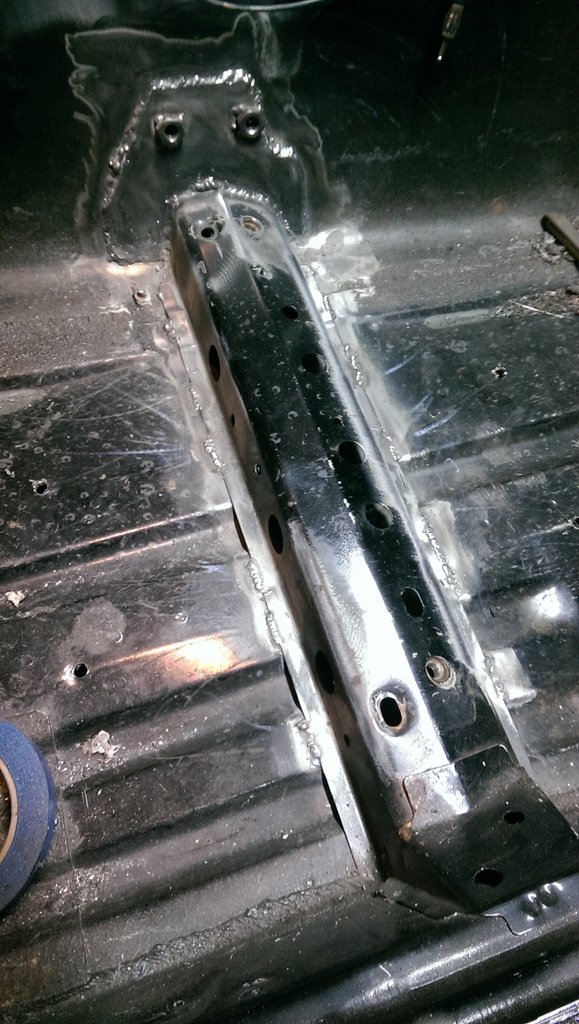
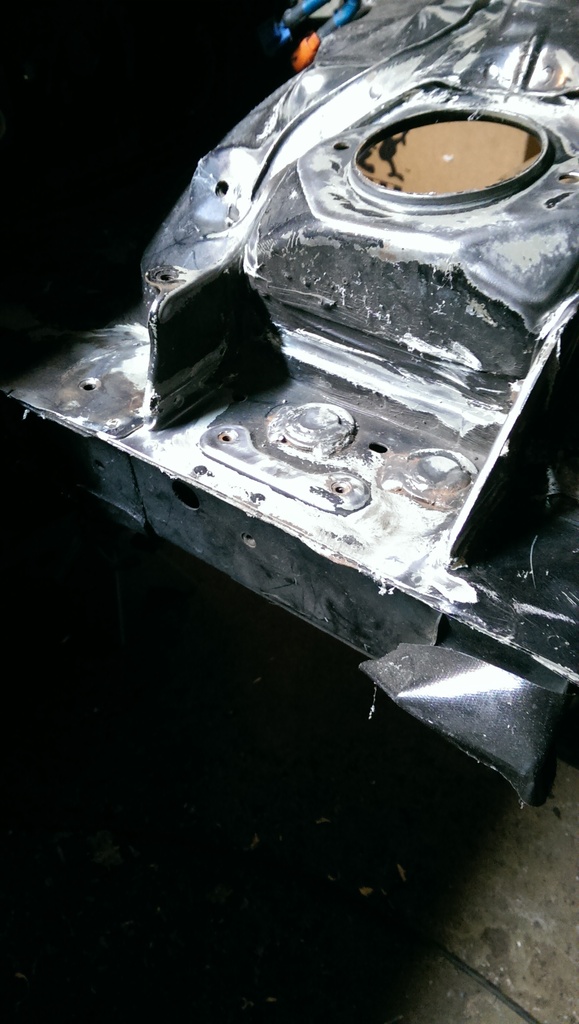
So I attempted to mimic Flyin Miatas rear diff mount. And felt like I achieved something comparable. I couldn't find a combination of bushings/sleeves that were optimal, so I have to build some standoffs so that everything sandwiched itself together to my liking.
So thats where I am at now. I was hoping the have the diff fully completed this weekend. However we had some family visiting so my only progress was on Sunday afternoon. Revised goal is to definitely have my order placed for axles by the end of the week!
Got an order in, ready to start cleaning some stuff up!
Thats all for now. Questions? Comments? Suggestions? Flaming?
Impressions on the build so far:
-I spent way more money that I thought I would
-Most of that is due to simply coming across awesome deals on parts I didnt intend to purchase at this time (eg. LS6 intake, cam, frame rails etc. )
-That front subframe sucked up a HUGE part of my timeline, forcing me work harder/faster to meet my personal deadline, which is rapidly approaching I might add.
-The rest of the fab work has worked itself out nicely.
-Im not looking forward to wiring.
Anyhow, just thought Id share my thoughts at this time. Good news is the only major parts left to purchase is the axles/hubs/driveshaft.
So that must mean Im almost done all the mounts!!
I never showed you the completed trans mounts, so again, I will let the pictures do most of the talking here. Pay no attention to my welds >.> My excuse is welding out of position for the majority of these parts. I have NO work bench, much less a welding table in my garage, so everything I have done has either been on the floor or in the car. So just pretend they are pretty okay?


After I made a couple cuts on the stock camaro mount, and looking at the car again, I changed my mind where I wanted to place the vertical flange of the mount. Instead of just putting it inline with the mount, if I just offset it a bit and raised it, I could center it over the floor/seat brace which I liked much better.
So I used some cardboard again and made some templates for backing plates.

Fast forward.

And did the same for the drivers side.

And there she is!! Next time it comes out, I will be cutting off those tabs that were used for the camaro torque arm, and wire wheeling and painting of course.
But I am super happy with it. Feels very solid! Here she is, sitting unassisted in the car! Driveline angle measured at 1.5 degrees. Perfect!!


Moving along now. Gotta get that diff in there so I can get the axles ordered. Theres a three week lead time, so I need to get them measured ASAP , then I can backtrack a little and clean up some of this work.
In addition to my sweet HPTuners deal, I picked up a box of (4) 2.5" steel J Bends from summit as well for $25, score!.

So I attempted to mimic Flyin Miatas rear diff mount. And felt like I achieved something comparable. I couldn't find a combination of bushings/sleeves that were optimal, so I have to build some standoffs so that everything sandwiched itself together to my liking.


So thats where I am at now. I was hoping the have the diff fully completed this weekend. However we had some family visiting so my only progress was on Sunday afternoon. Revised goal is to definitely have my order placed for axles by the end of the week!
Got an order in, ready to start cleaning some stuff up!

Thats all for now. Questions? Comments? Suggestions? Flaming?
The following users liked this post:
charchri4 (10-06-2016)
09-19-2016, 06:00 PM
#33
V8 Miata Prot�g�


I thought the rear subframe would be easier than it was too but it took a solid 2 Saturdays. Nice trans mount though! Only thing I would suggest is welding nuts on the inside so you can just thread bolts from the outside. Otherwise it will be very tricky to tighten or loosen by yourself, but I'm sure you thought of that already
09-19-2016, 10:04 PM
#34
V8 Miata Follower
Thread Starter
I thought the rear subframe would be easier than it was too but it took a solid 2 Saturdays. Nice trans mount though! Only thing I would suggest is welding nuts on the inside so you can just thread bolts from the outside. Otherwise it will be very tricky to tighten or loosen by yourself, but I'm sure you thought of that already
$60 worth of hardware on the way to freshen up mounting hardware etc. This is for engine mount bolts, trans mount, and differential.

As for the diff. Got only 1 mounting ear mocked up tonight. It's going to be a mad dash to pull it off by Friday so I can get an order in. But I'm sure as hell going to try!
Last edited by wcw5023; 09-20-2016 at 10:09 AM.
09-23-2016, 10:44 AM
#36
V8 Miata Follower
Thread Starter
Thanks! And I might just have to do that, because I havent really been pacing myself with this spending, Im running out of cash quick!! Its gonna be ramen noodles for me for a while! haha
09-23-2016, 01:50 PM
#37
V8 Miata Follower
Thread Starter
Today was a big day!! Put her shoes on last night to take measurements, and submitted the order this morning!
Now I can backtrack and start cleaning up, finish welding, paint some thing. The list goes on.
Exciting!
Now I can backtrack and start cleaning up, finish welding, paint some thing. The list goes on.
Exciting!


 10-03-2016, 08:54 AM
#38
V8 Miata Follower
Thread Starter
Progress over the last week has mainly consisted of cleanup work. I tried to take note of everything I needed to finish while the drive-line was out again, hopefully for the last time?
This included little things like installing the headers, starter, reverse light switch, tunnel welding, paint etc.
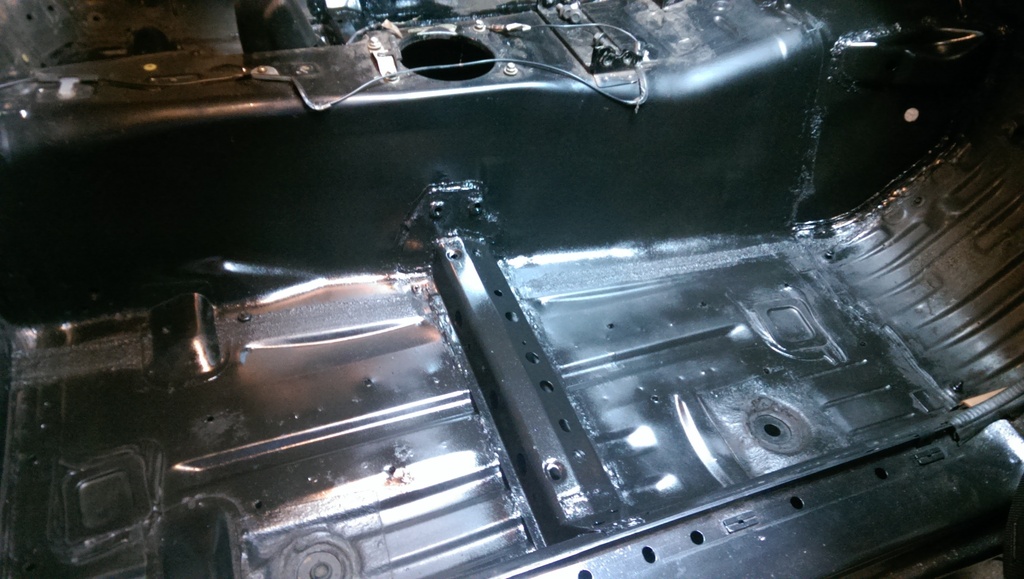
So I worked from the rear end forward, finish welded the diff mounts, and spent probably 4-5 hours wirewheeling the rear subframe. It was pretty haggard on the top side, and still doesnt look great, but at least now I know it will last for years to come. It was wire wheel-ed , hit it with some rust converter, used the same Eastwood internal frame coating that I used on the front subframe, then just black rollbar/chassis paint.
I did the same with the trans mount , but neglected to take any pictures of that progress, but just more of the same.
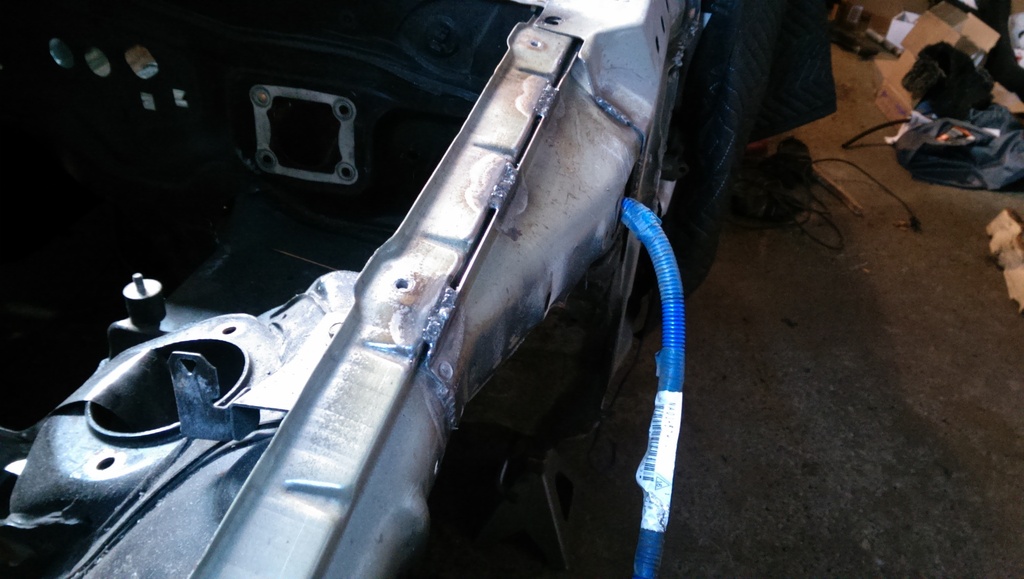
From there, I started on installing some second hand FM frame rails. I had to do some massaging of the squished rails with the aid of some angle iron and large C-clamps. After the holes were drilled I removed them from the car so I could go back, wire wheel, POR15, and undercoat. Ill have pictures of that to come still.
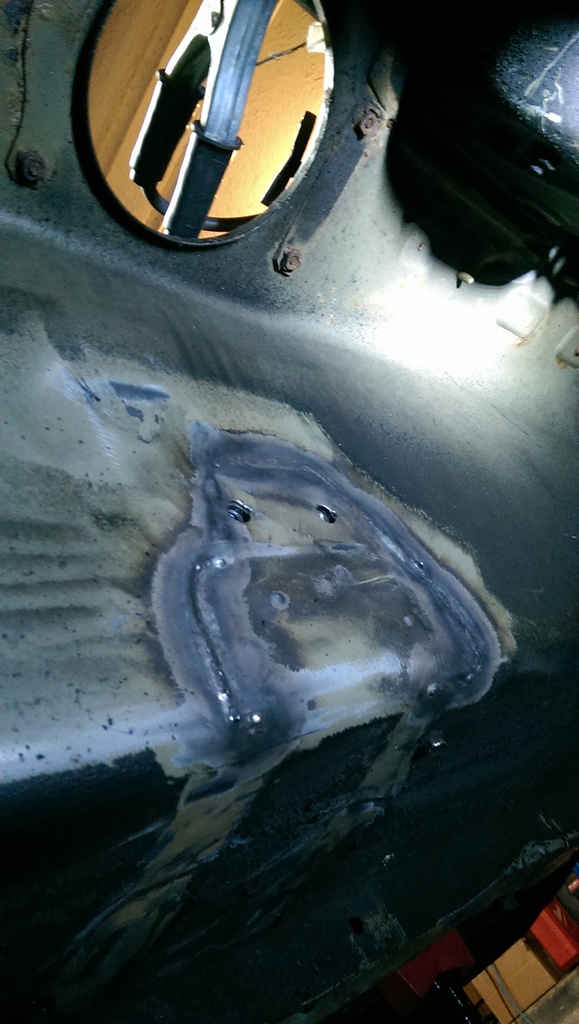
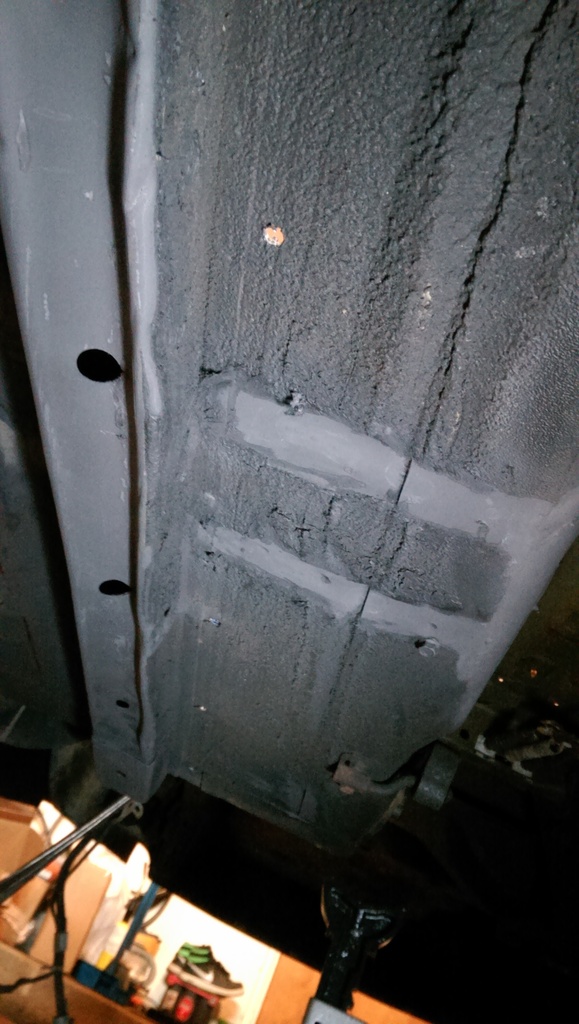
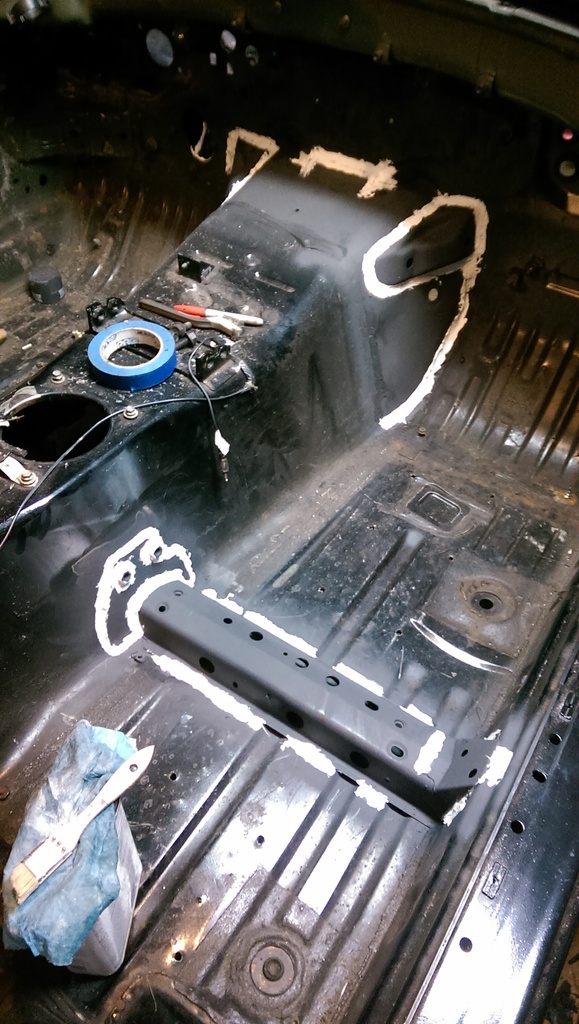
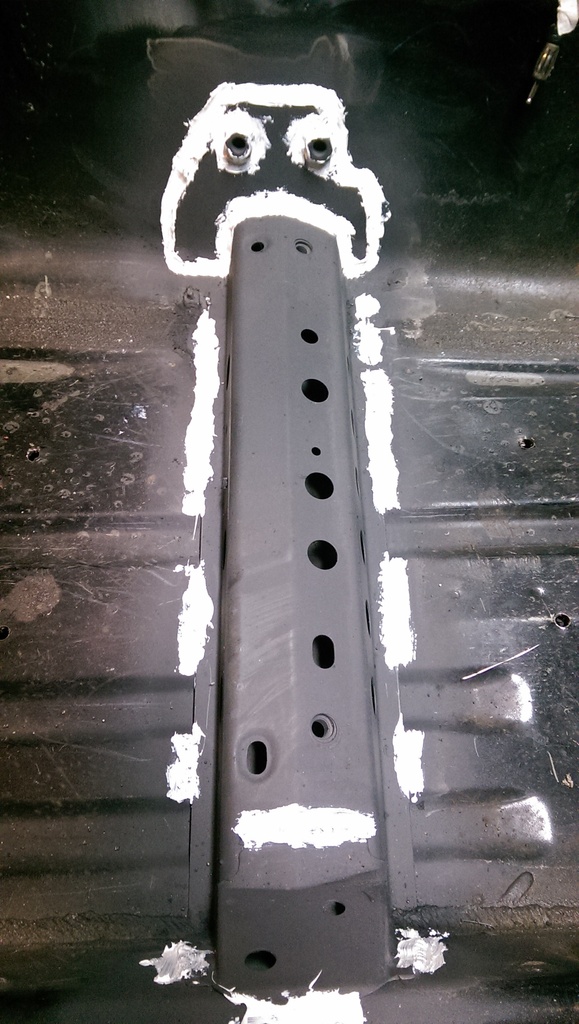
After pulling the engine/trans again, It was finally time to bite the bullet and start welding up the trans tunnel, and put the gussets back in the interior. All in all, it went quite well. Due to the inability to remove ALL the seam sealer, I chose to just flux core the tunnel, but I tigged in the corner braces.
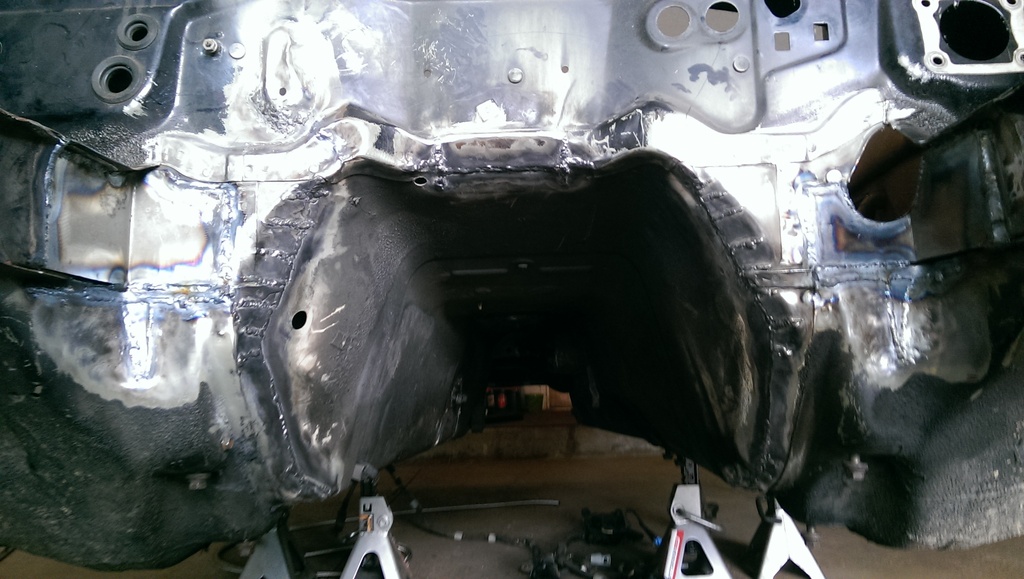
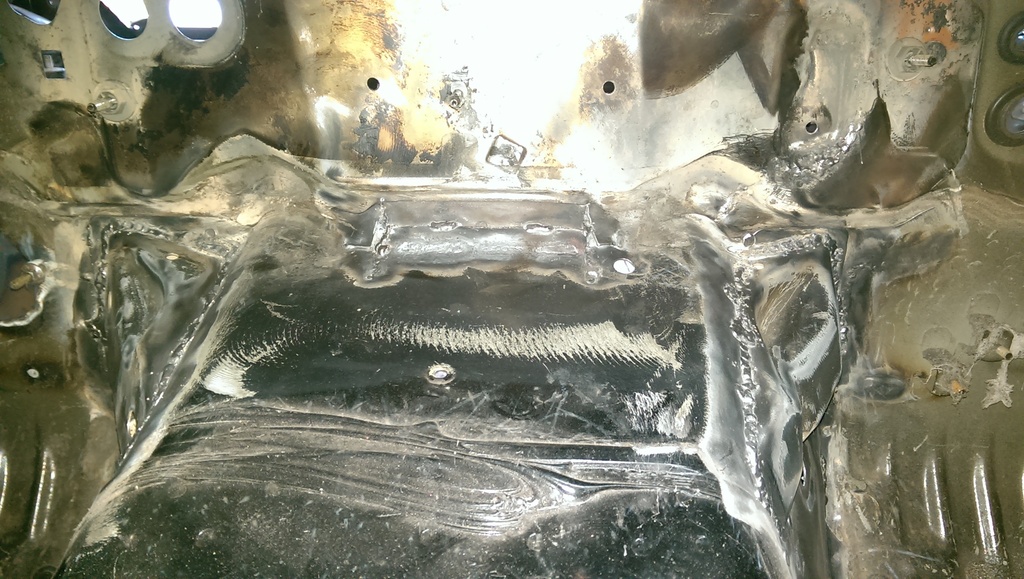
Gonna have to hide all that uglyness with seam sealer
So I hit the bare areas with some primer, next, Im going to move on the cleaning up the floorboards, and underside of the car. Goal for this week is to have that all cleaned up, painted, and ready to lay down a bunch of heat barrier/ sound deadening!
This included little things like installing the headers, starter, reverse light switch, tunnel welding, paint etc.
So I worked from the rear end forward, finish welded the diff mounts, and spent probably 4-5 hours wirewheeling the rear subframe. It was pretty haggard on the top side, and still doesnt look great, but at least now I know it will last for years to come. It was wire wheel-ed , hit it with some rust converter, used the same Eastwood internal frame coating that I used on the front subframe, then just black rollbar/chassis paint.


I did the same with the trans mount , but neglected to take any pictures of that progress, but just more of the same.
From there, I started on installing some second hand FM frame rails. I had to do some massaging of the squished rails with the aid of some angle iron and large C-clamps. After the holes were drilled I removed them from the car so I could go back, wire wheel, POR15, and undercoat. Ill have pictures of that to come still.
After pulling the engine/trans again, It was finally time to bite the bullet and start welding up the trans tunnel, and put the gussets back in the interior. All in all, it went quite well. Due to the inability to remove ALL the seam sealer, I chose to just flux core the tunnel, but I tigged in the corner braces.


Gonna have to hide all that uglyness with seam sealer


So I hit the bare areas with some primer, next, Im going to move on the cleaning up the floorboards, and underside of the car. Goal for this week is to have that all cleaned up, painted, and ready to lay down a bunch of heat barrier/ sound deadening!
10-05-2016, 08:11 AM
#39
V8 Miata Follower
Thread Starter
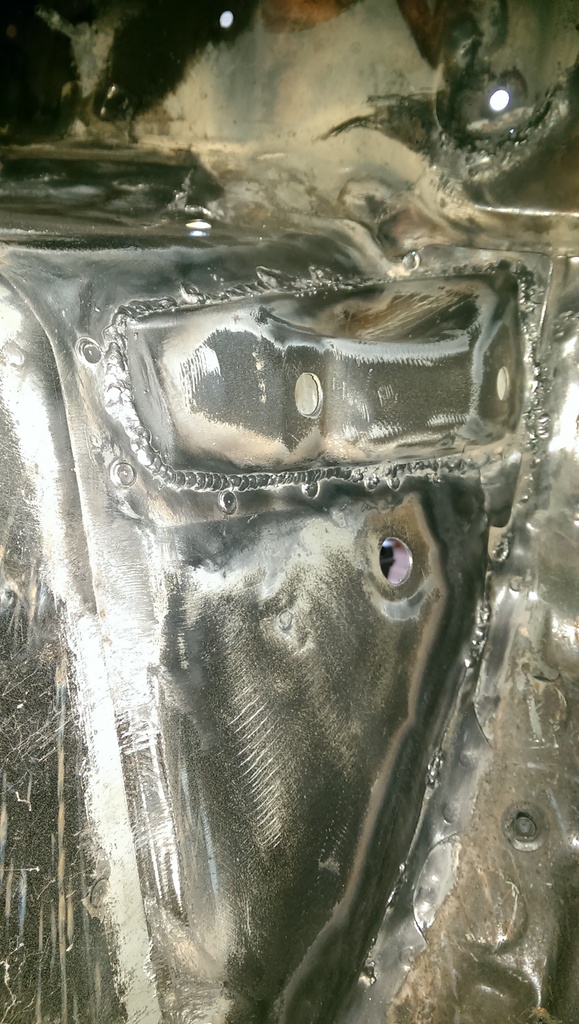
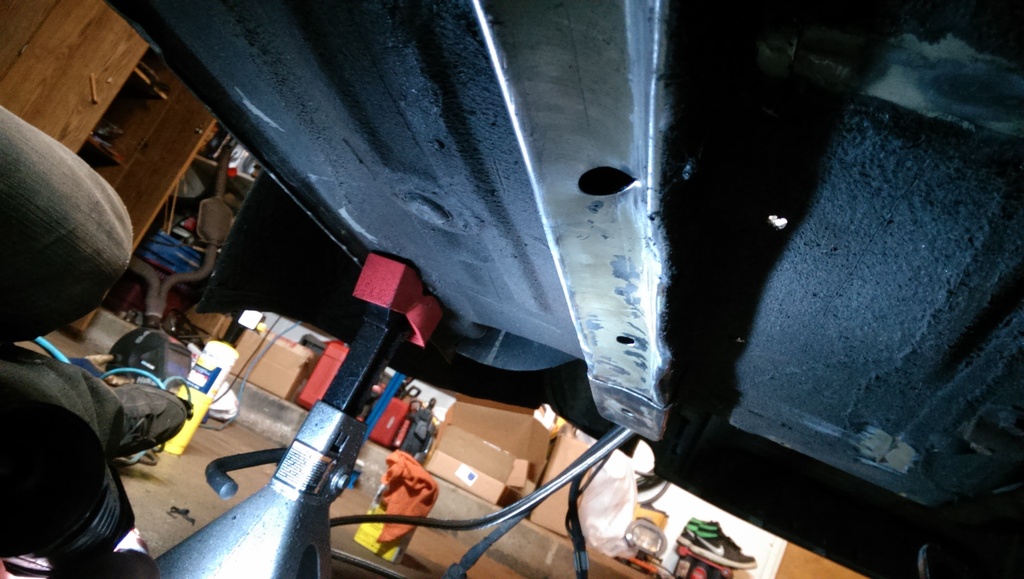
After vacuuming out all the crap left behind by the wire wheel. I decided to do a little bit of stitch welding. Im not gonna go all out here. Just doing the floor pans, shock towers and fender aprons. Will most likely leave door sills for another time, and to see what affect this has.
Part of the reason I wanted to do that at this stage is that, since I am also installing FM frame rails, this would be a good time to clean up the bottom of the car also. Since that welding will inevitably dry and crack the undercoating, I did that before cleaning up underneath.
From here I went to town with the wirewheel, used rust converter in some body seams where mild rust was developing, then hit it with primer before undercoating.
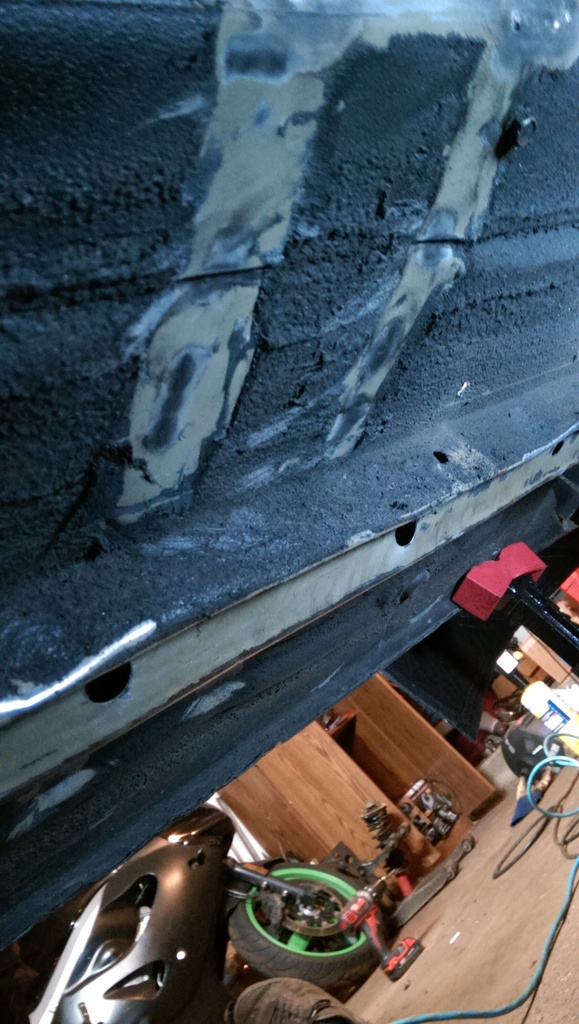
Now that the primer was dry, I could go ahead and hit it with some seam sealer. I used the "stiff bristle brush" method, and am not too happy with how it turned out, pretty sloppy. After it set and shrank a bit it certainly looks a lot better, but I will just get my hands dirty and use my finger next time haha.
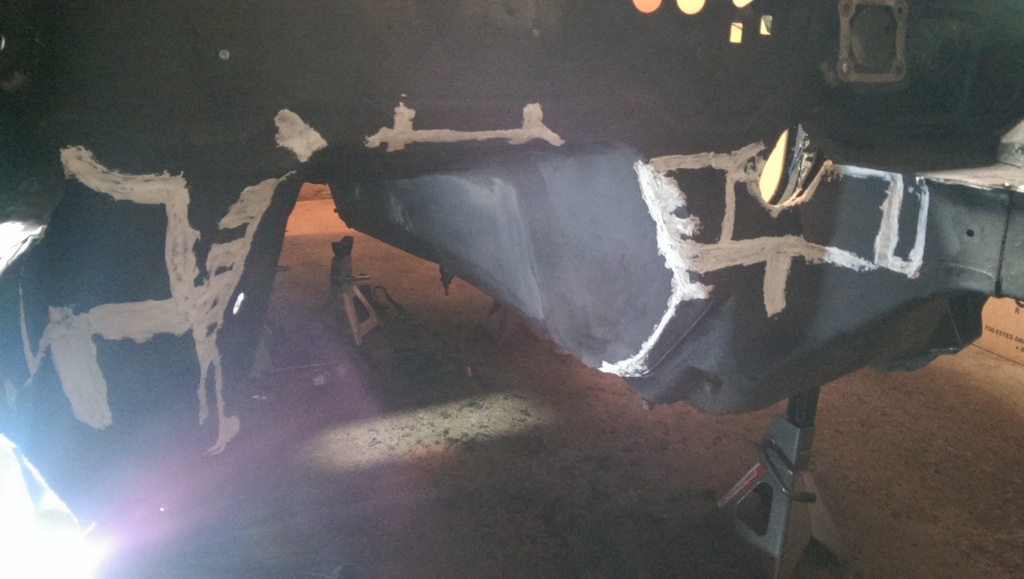
Fortunately everything Ive done so far will either be hidden under the interior, or by heat barrier/sound deadening so Im not too concerned.
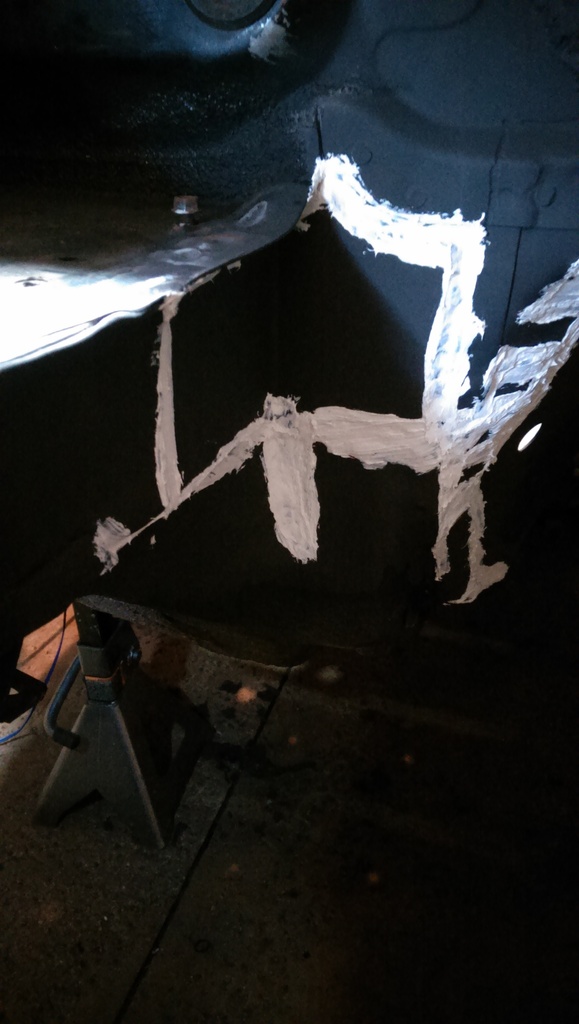
Oh and dont worry, I did a test fit!

Part of the reason I wanted to do that at this stage is that, since I am also installing FM frame rails, this would be a good time to clean up the bottom of the car also. Since that welding will inevitably dry and crack the undercoating, I did that before cleaning up underneath.
From here I went to town with the wirewheel, used rust converter in some body seams where mild rust was developing, then hit it with primer before undercoating.


Now that the primer was dry, I could go ahead and hit it with some seam sealer. I used the "stiff bristle brush" method, and am not too happy with how it turned out, pretty sloppy. After it set and shrank a bit it certainly looks a lot better, but I will just get my hands dirty and use my finger next time haha.

Fortunately everything Ive done so far will either be hidden under the interior, or by heat barrier/sound deadening so Im not too concerned.


Oh and dont worry, I did a test fit!


The following users liked this post:
charchri4 (10-06-2016)
10-11-2016, 08:09 AM
#40
V8 Miata Follower
Thread Starter
Well I lost out on another weekend of progress due to one of my best friends getting married. So I had to travel all weekend. But between my last update and now, managed to get a few more things done.
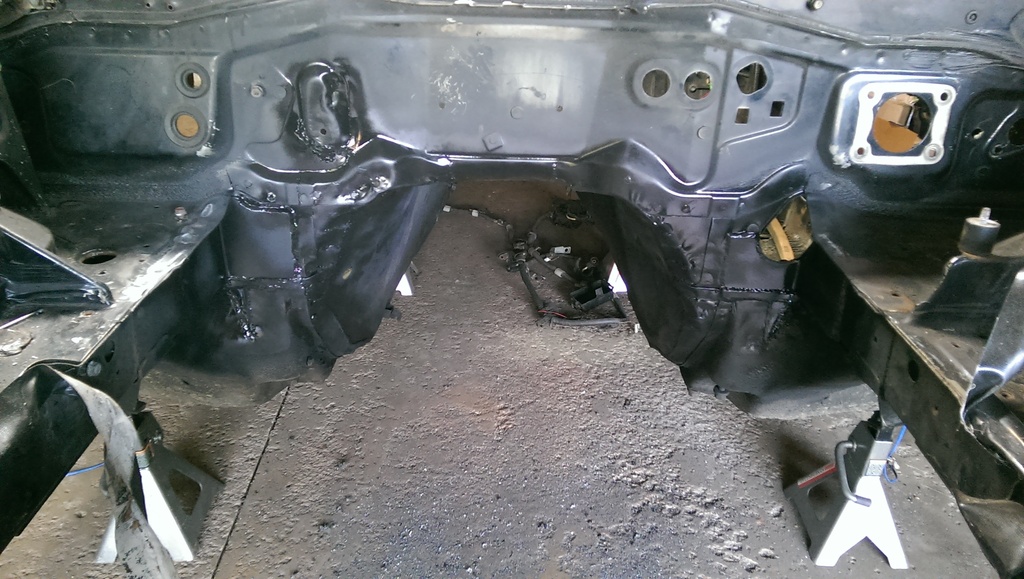
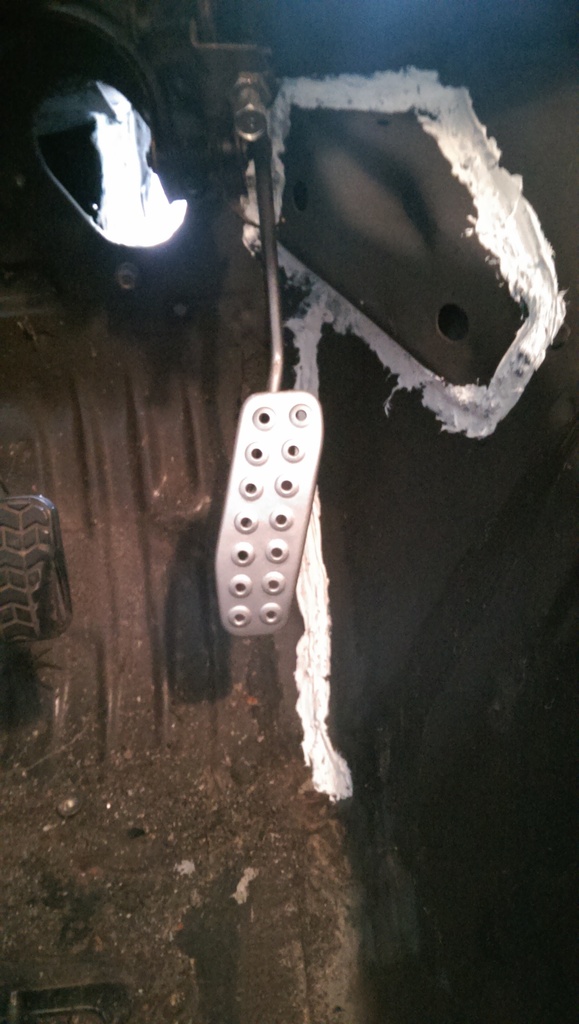
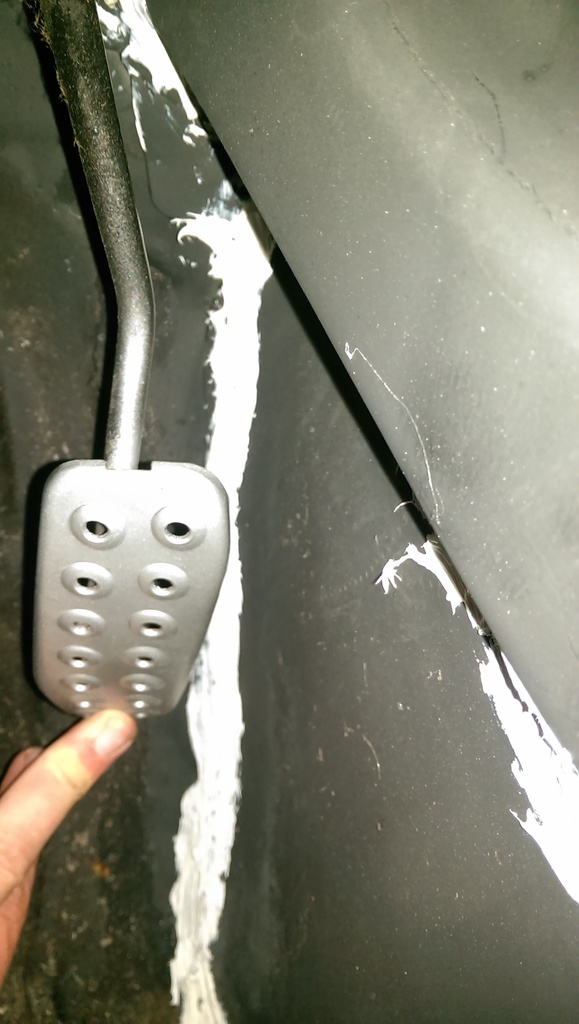
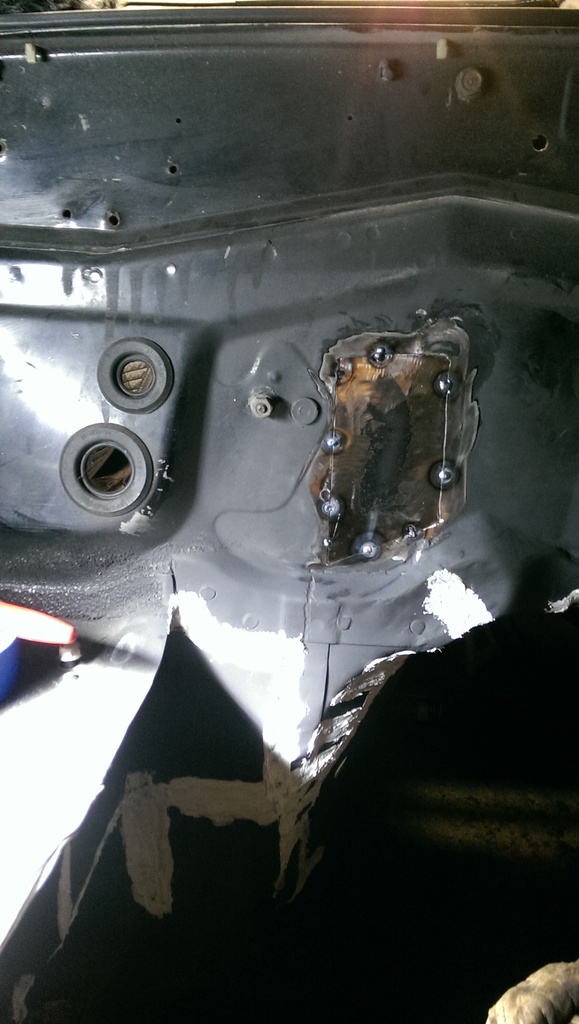
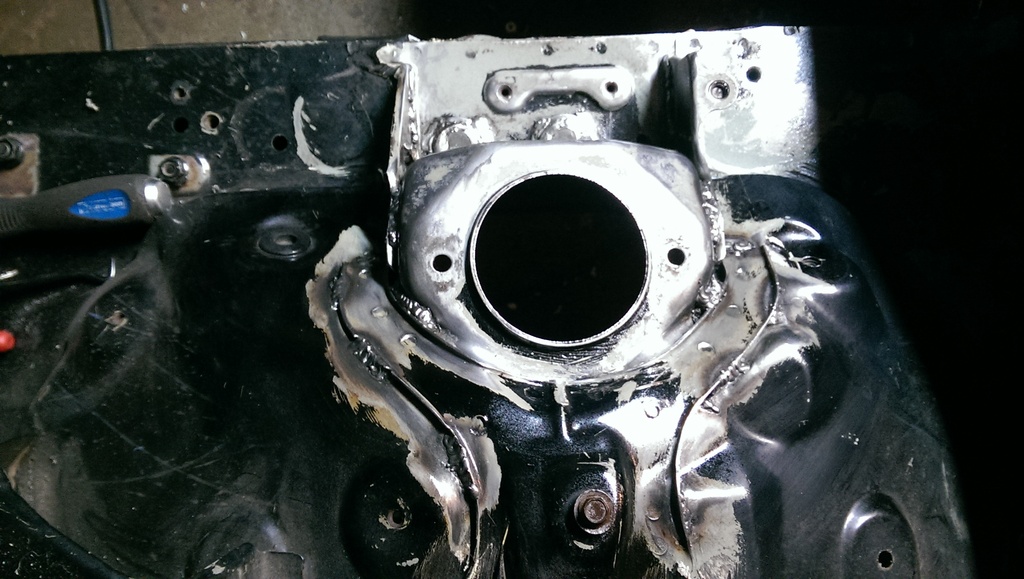
Decided I wanted to cut out that weird hump thing in the firewall, clearance has been an issue here, I beat it in a little, but was then unhappy with the appearance. So bye bye .
Finished up some stitch welding on the fender aprons. The "shiney-ness" is just some rust inhibitor until I get some paint on it.
Ahhhh, feels good to get some uniform paint on the interior!
I know I said this would all be done last week. But Im hoping I can finish up the shock towers between tonight and tomorrow, throw some more paint on, and be ready to start laying down the Thermo-tec / DEI.
Decided I wanted to cut out that weird hump thing in the firewall, clearance has been an issue here, I beat it in a little, but was then unhappy with the appearance. So bye bye .

Finished up some stitch welding on the fender aprons. The "shiney-ness" is just some rust inhibitor until I get some paint on it.

Ahhhh, feels good to get some uniform paint on the interior!

I know I said this would all be done last week. But Im hoping I can finish up the shock towers between tonight and tomorrow, throw some more paint on, and be ready to start laying down the Thermo-tec / DEI.
10-17-2016, 01:15 PM
#41
V8 Miata Follower
Thread Starter
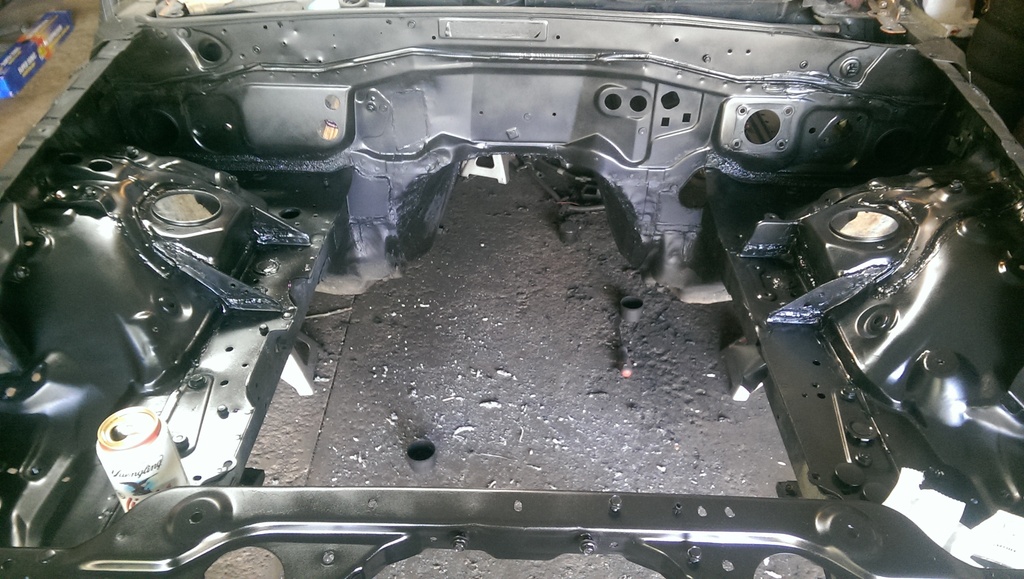
Mission accomplished! Got everything I intended to do this week done.
Strut towers got some stitch welding, then reundercoated the wheel wells.
After I went through and applied new seam sealer and let it dry... Spray bombed!
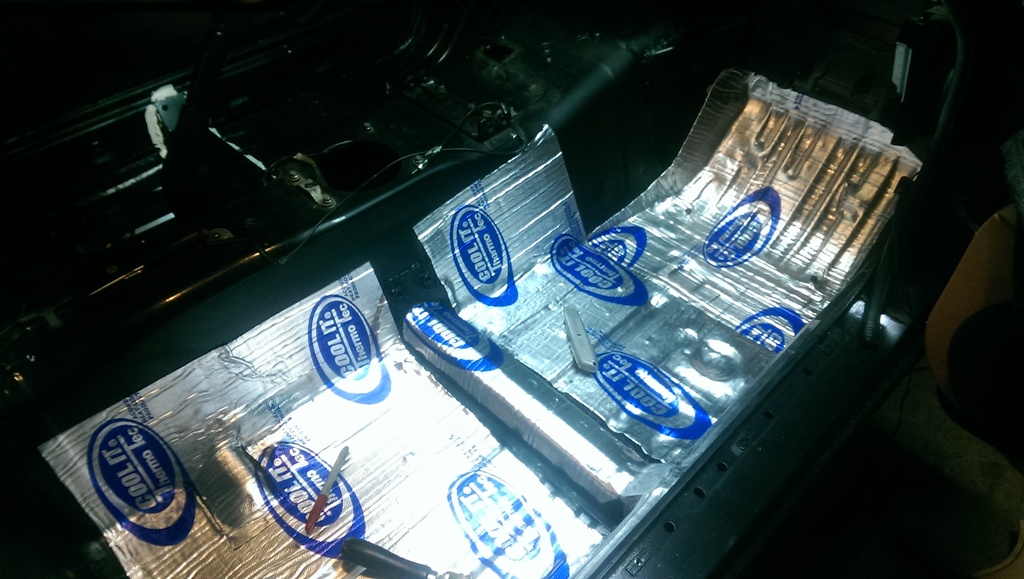
Went to work laying down interior mat It is mostly completed now, but I forgot to snap a pic of the finished product
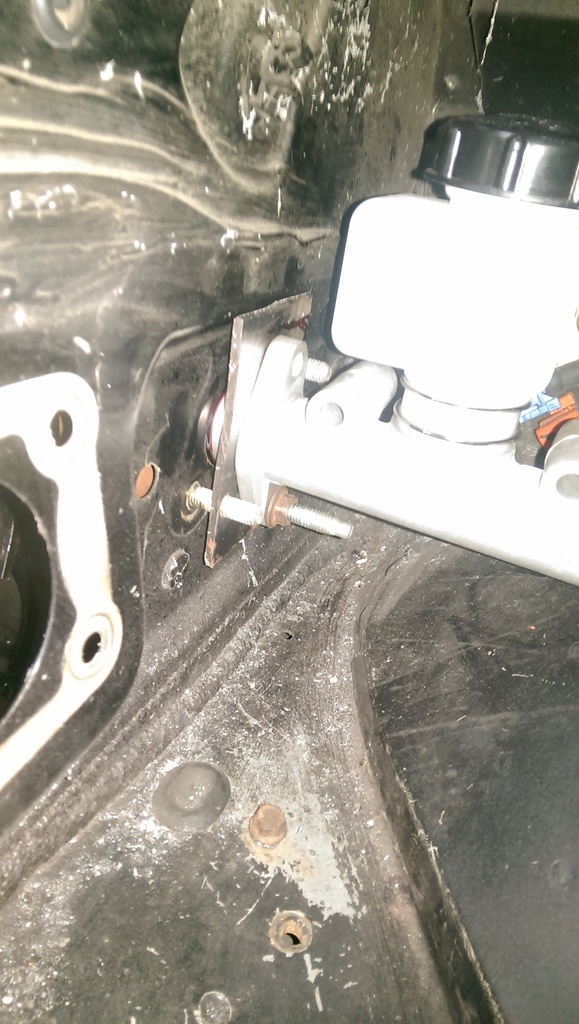
Next up, trans tunnel and firewall. However before I went to town on that, I made a little clutch master adapter bracket. You have to open up the hole a smidge for it on the firewall, which is why I wanted to do this first. Again, this is a work in progress and I forgot to take a pic of the final thing.
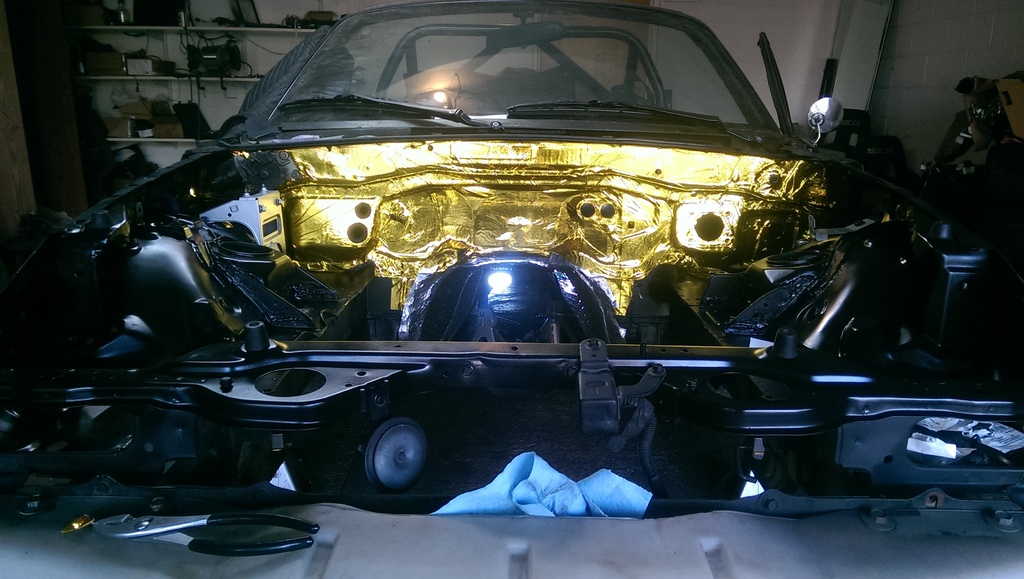
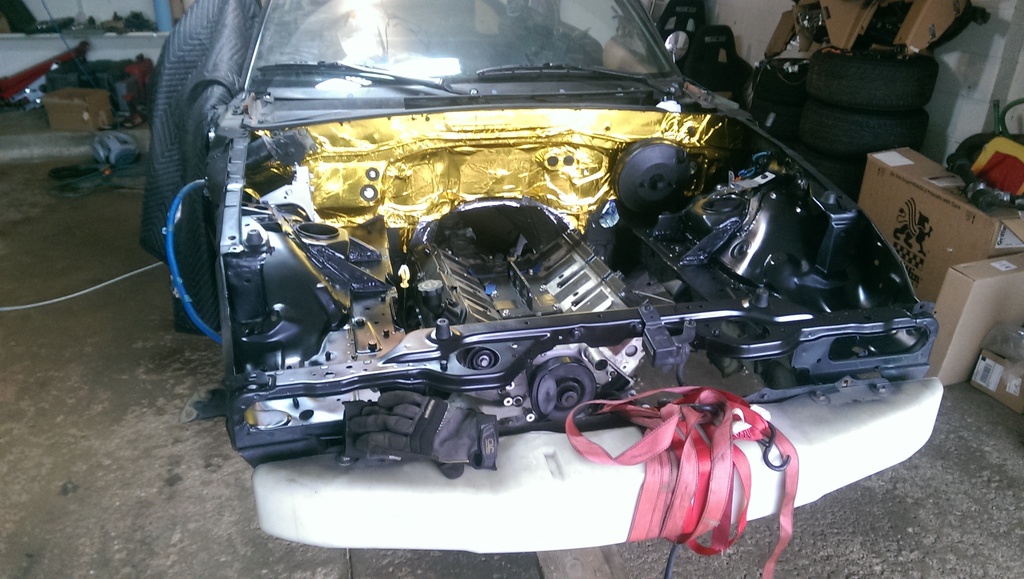
GOLD
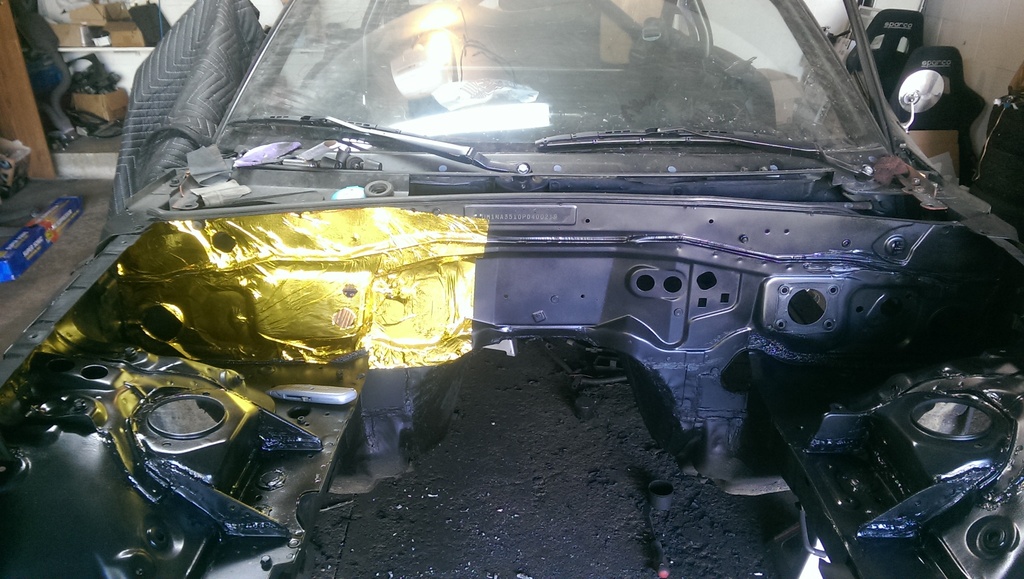
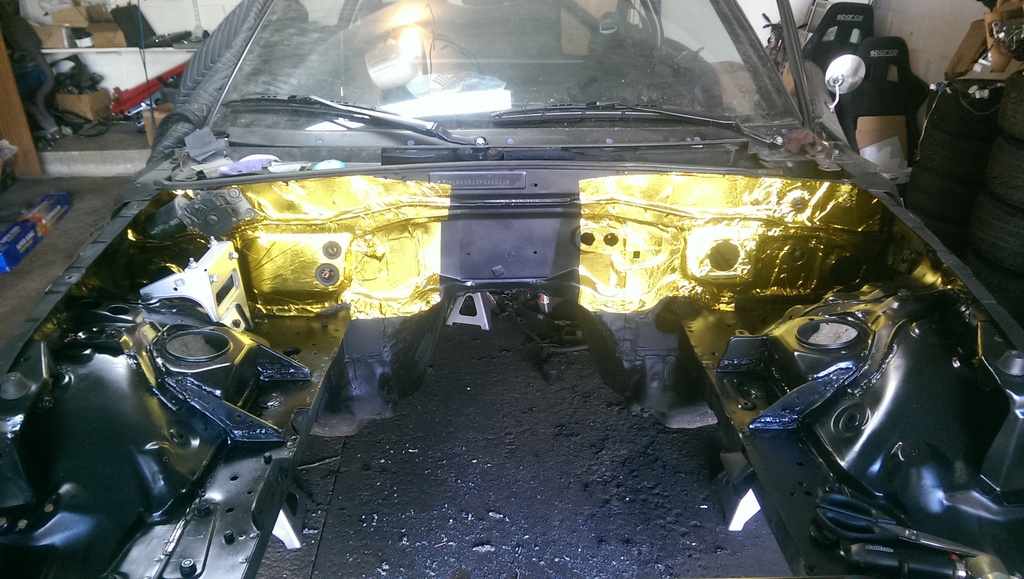
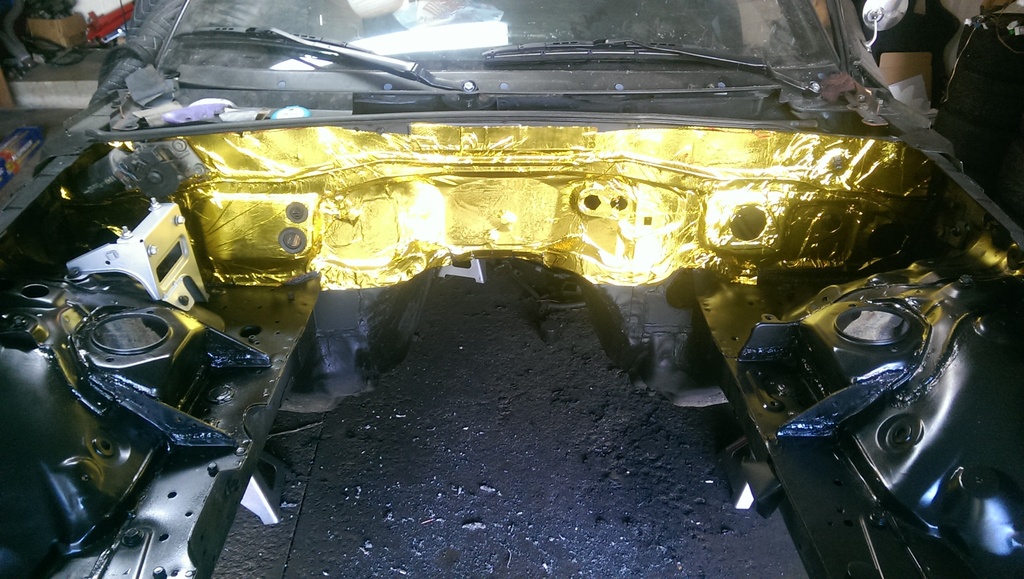
So pretty
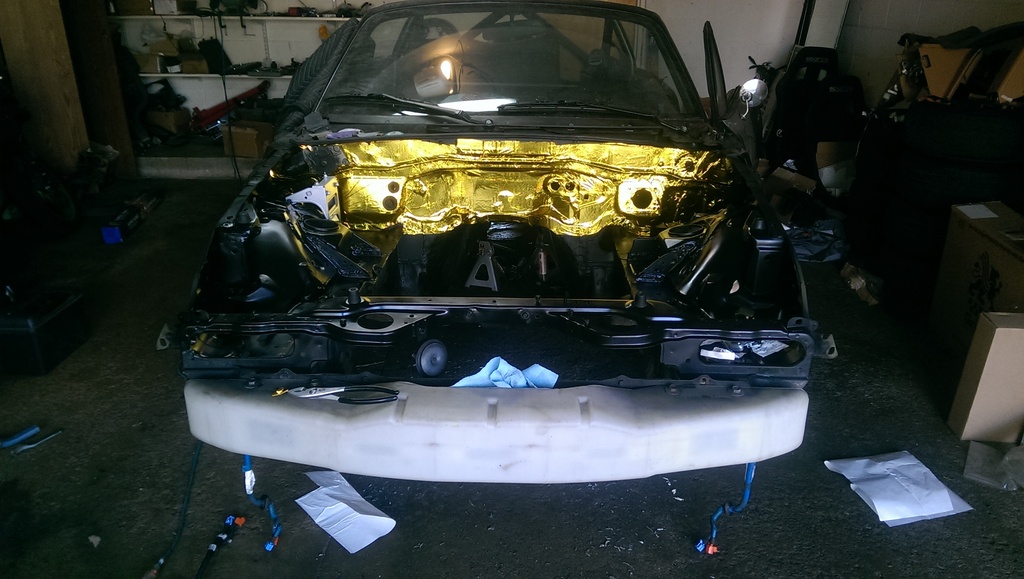
Reflectix with foil tape, back to the shifter hole. Oh yeah, look, frame rails!
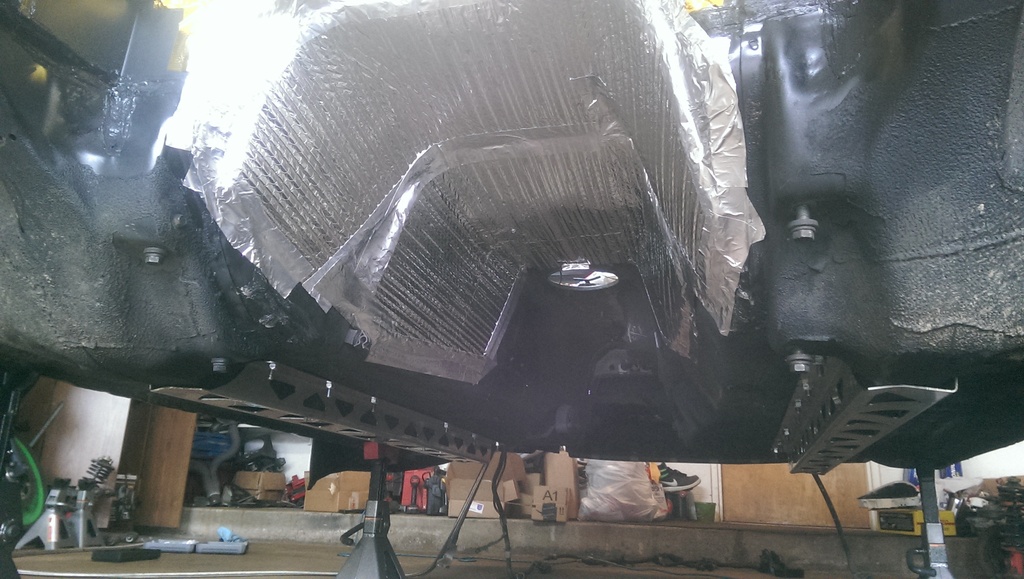
The "light" I spoke of.
Now it was time to start tieing up loose ends on the motor. I still needed to install the starter, alternator, headers, and my NA "real" oil pressure sender.
I had my OE fbody bracket milled down 3/4". With that, in order to put the top bolt in you have to clearance the block just a tinnnnnyyy bit.
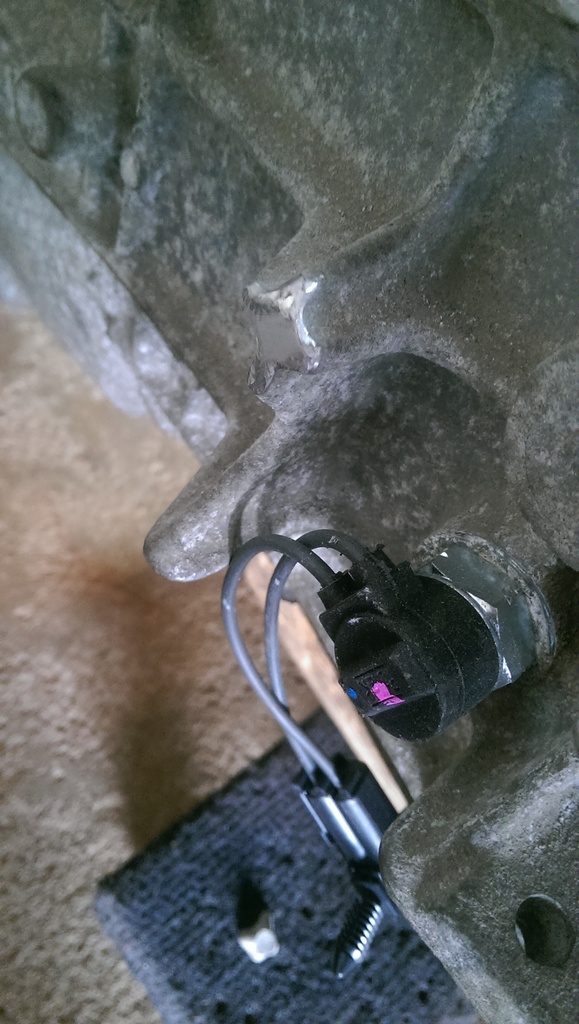
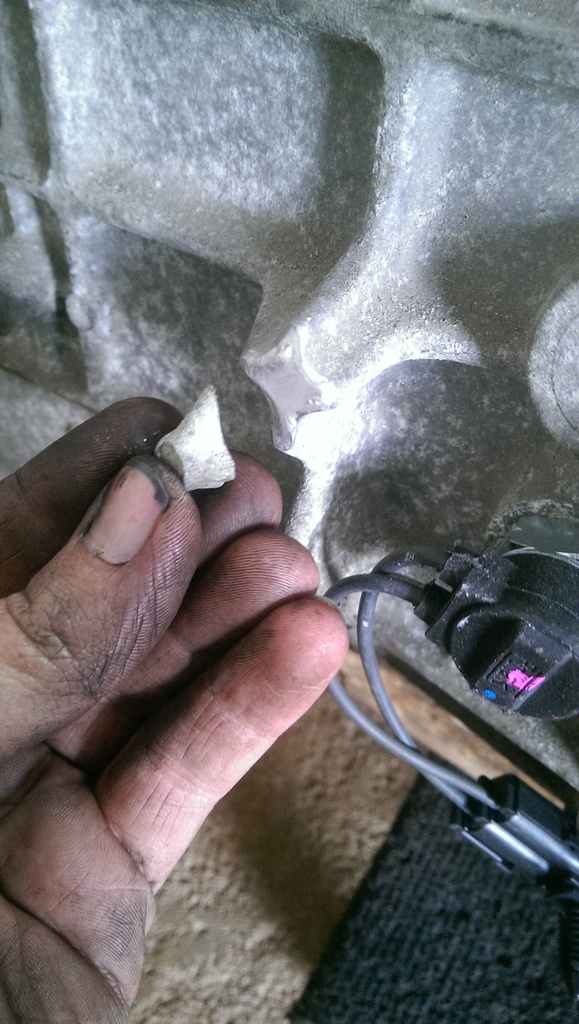
With my setup, I chose to locate the engine just a hair more over to the passenger side, and the castings that protect the reverse light switch came mighty close to the trans tunnel, and I suspected, that with the addition of the Reflectix that It would probably contact. So I trimmed them down and smoothed out a bit.
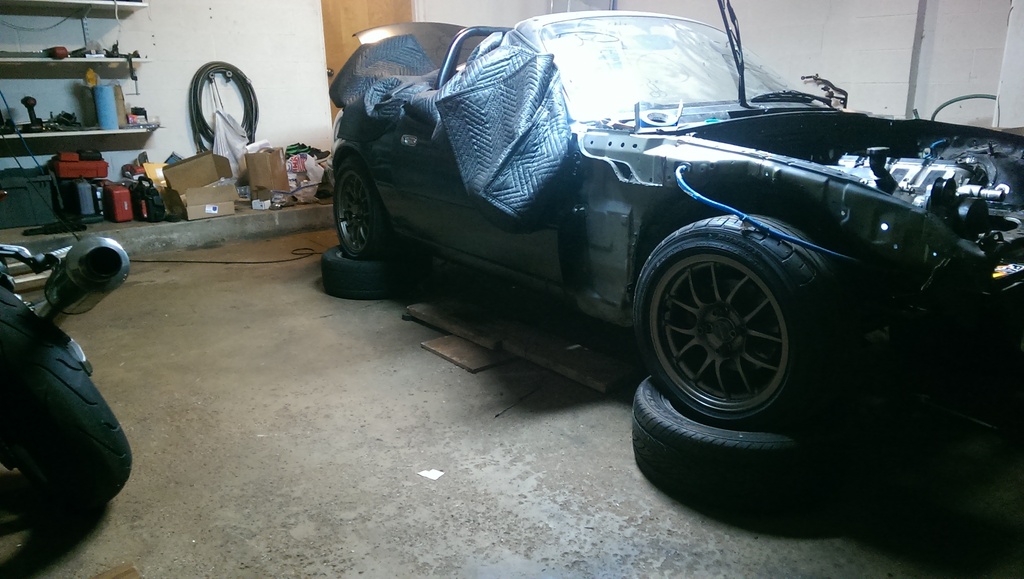
and with that, into her final resting place she goes!
Spent yesterday cleaning up and installing what I could. Driveshaft and axles are due to arrive tomorrow. So I put the rear subframe/diff in as well. So much more room for activities in the garage now!! I actually took the time in the morning to literally vacuum the garage floor. Best. Idea. Ever.
A clean work environment is so much more enjoyable to spend time in.
Strut towers got some stitch welding, then reundercoated the wheel wells.


After I went through and applied new seam sealer and let it dry... Spray bombed!

Went to work laying down interior mat It is mostly completed now, but I forgot to snap a pic of the finished product

Next up, trans tunnel and firewall. However before I went to town on that, I made a little clutch master adapter bracket. You have to open up the hole a smidge for it on the firewall, which is why I wanted to do this first. Again, this is a work in progress and I forgot to take a pic of the final thing.

GOLD


So pretty

Reflectix with foil tape, back to the shifter hole. Oh yeah, look, frame rails!

The "light" I spoke of.

Now it was time to start tieing up loose ends on the motor. I still needed to install the starter, alternator, headers, and my NA "real" oil pressure sender.
I had my OE fbody bracket milled down 3/4". With that, in order to put the top bolt in you have to clearance the block just a tinnnnnyyy bit.

With my setup, I chose to locate the engine just a hair more over to the passenger side, and the castings that protect the reverse light switch came mighty close to the trans tunnel, and I suspected, that with the addition of the Reflectix that It would probably contact. So I trimmed them down and smoothed out a bit.


and with that, into her final resting place she goes!

Spent yesterday cleaning up and installing what I could. Driveshaft and axles are due to arrive tomorrow. So I put the rear subframe/diff in as well. So much more room for activities in the garage now!! I actually took the time in the morning to literally vacuum the garage floor. Best. Idea. Ever.
A clean work environment is so much more enjoyable to spend time in.
10-17-2016, 01:56 PM
#42
V8 Miata Enthusiast

Is the engine mounted to the subframe? Looks really low, do you have ground clearance or power steering rack clearance?
Nice work all around. Are you welding with a flux core MIG? Never had luck making decent welds with flux core. Still learning as I go with a Miller Autoset 211 with gas.
Nice work all around. Are you welding with a flux core MIG? Never had luck making decent welds with flux core. Still learning as I go with a Miller Autoset 211 with gas.
10-17-2016, 02:05 PM
#43
V8 Miata Follower
Thread Starter
Is the engine mounted to the subframe? Looks really low, do you have ground clearance or power steering rack clearance?
Nice work all around. Are you welding with a flux core MIG? Never had luck making decent welds with flux core. Still learning as I go with a Miller Autoset 211 with gas.
Nice work all around. Are you welding with a flux core MIG? Never had luck making decent welds with flux core. Still learning as I go with a Miller Autoset 211 with gas.
I used both flux core and TIG depending on the project. For instance, the seam welding I did all flux core MIG. There is no way I was going to deal with trying to tig that, because as hard as you might try, you are never getting all that seam sealer out of there unless you dip the whole tub. I tigged things like the front and rear subframes, clutch master adapter, trans mount, some firewall mods etc.
10-18-2016, 02:30 PM
#44
V8 Miata Follower
Thread Starter
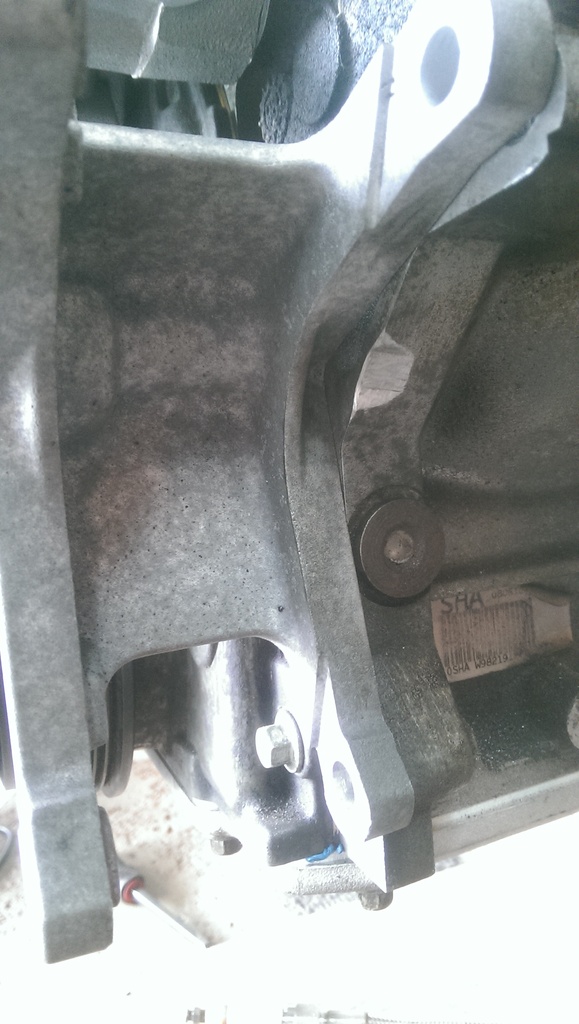
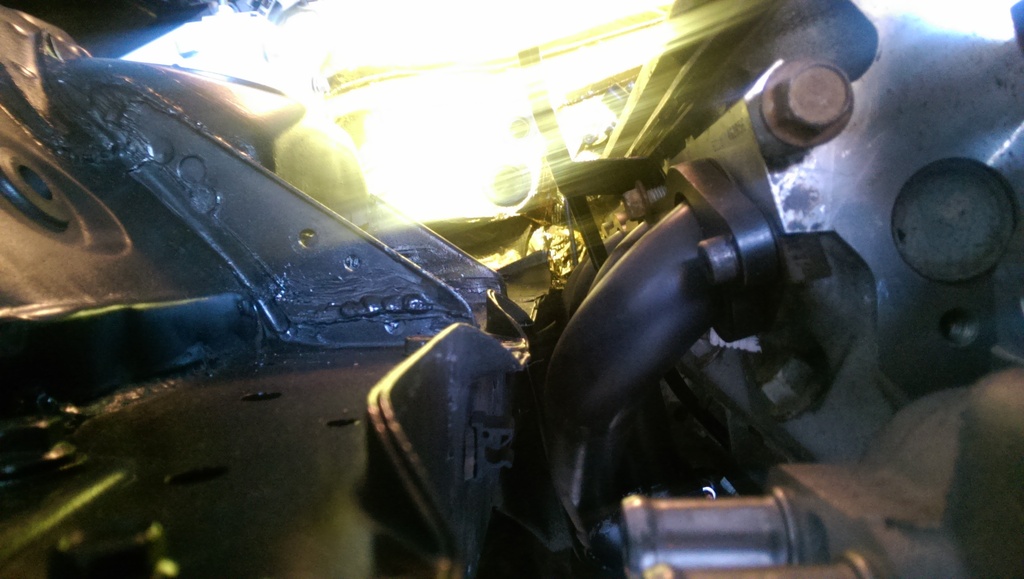
So I took a couple more pictures last night of some clearances. I should snapped some of the steering rack -> oil pan , pass head -> firewall. But ill remember to get those after some more things are installed.
So anyways, I couldnt help but sit the LS6 intake on top just to see
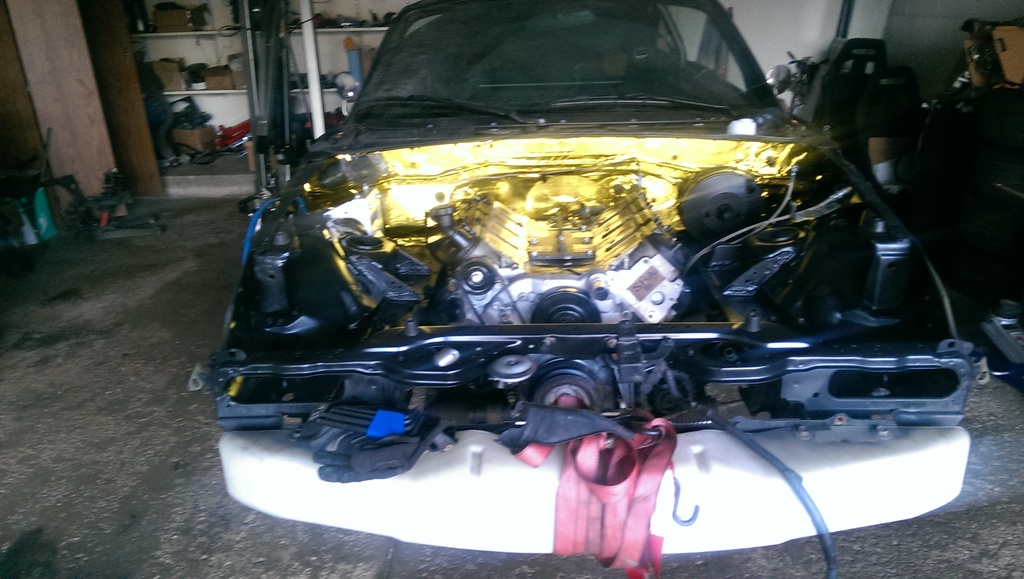
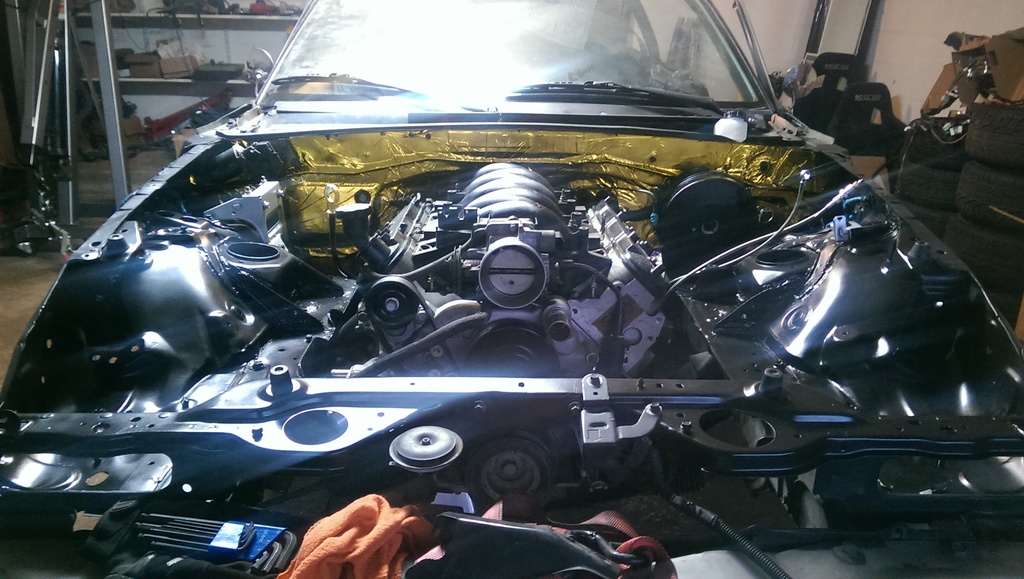
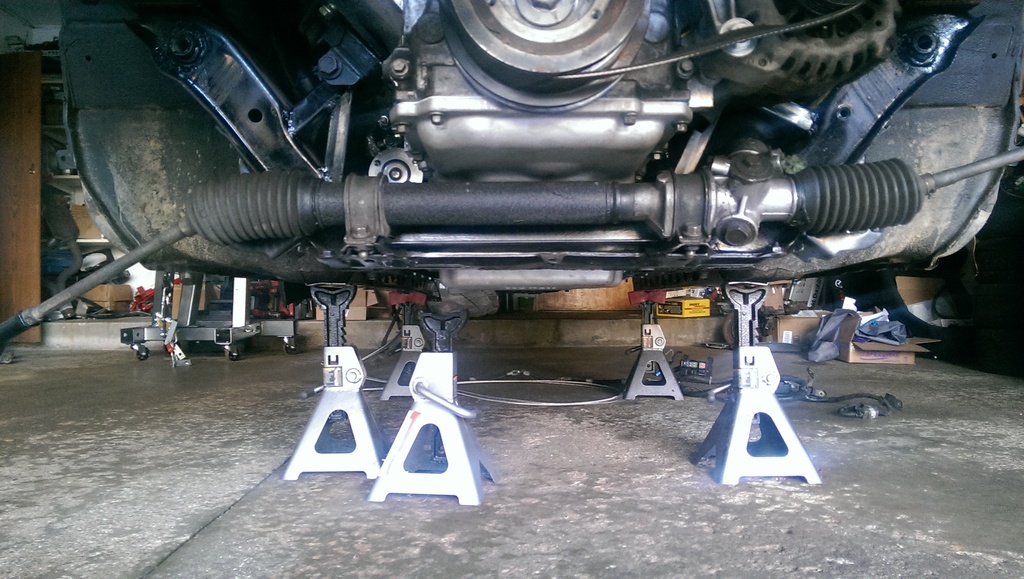

So anyways, I couldnt help but sit the LS6 intake on top just to see


 10-19-2016, 08:20 AM
#45
V8 Miata Zealot

Looks good! You may want to cut some holes through each side of the firewall to have in case you ever need to run wires for gauges, lights, NOS, ect.. You can always plug them off if not used. I have found out the hard way how difficult of a task that is with the dash & engine installed.
10-19-2016, 10:20 AM
#46
V8 Miata Follower
Thread Starter
Looks good! You may want to cut some holes through each side of the firewall to have in case you ever need to run wires for gauges, lights, NOS, ect.. You can always plug them off if not used. I have found out the hard way how difficult of a task that is with the dash & engine installed.
 10-19-2016, 03:19 PM
#48
V8 Miata Follower
Thread Starter
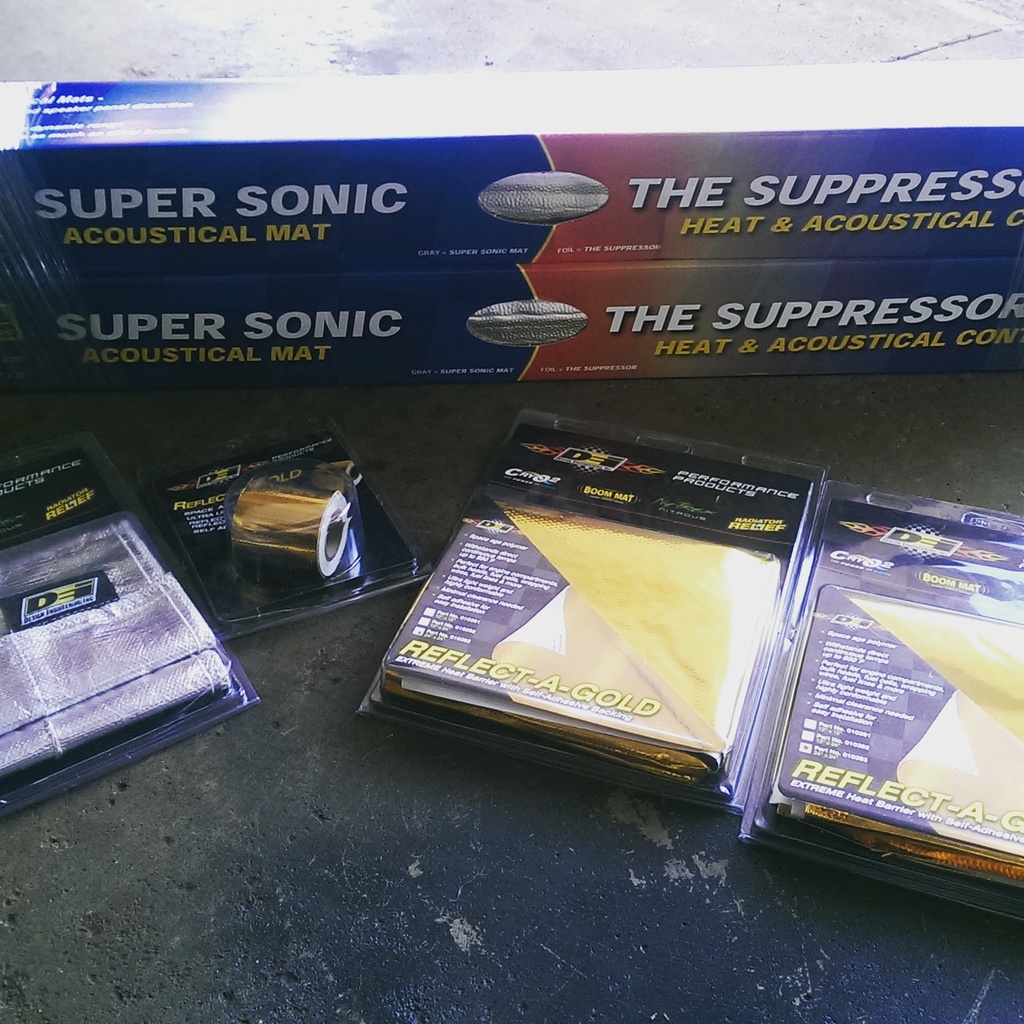
Of just the cool-it mat I used in the interior? I used 2 rolls of these
https://www.summitracing.com/oh/part...4620/overview/
Of the DEI , I used a little over 1 sheet of 24x24 reflect a gold
https://www.summitracing.com/oh/part...4620/overview/
Of the DEI , I used a little over 1 sheet of 24x24 reflect a gold
10-20-2016, 08:36 AM
#49
V8 Miata Follower
Thread Starter
Time for updates, just wanted to show you what ive been working on. A lot of this is little stuff im getting out of way to avoid having to start on the wiring. 
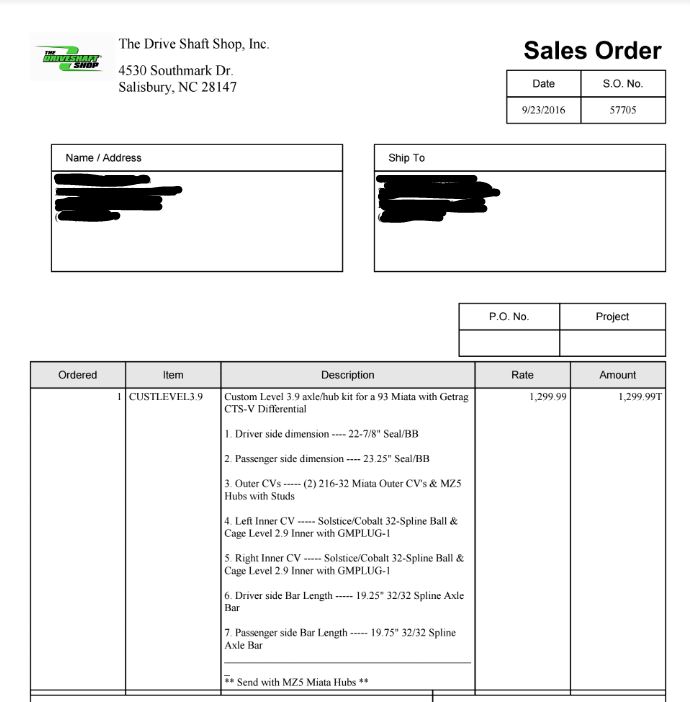
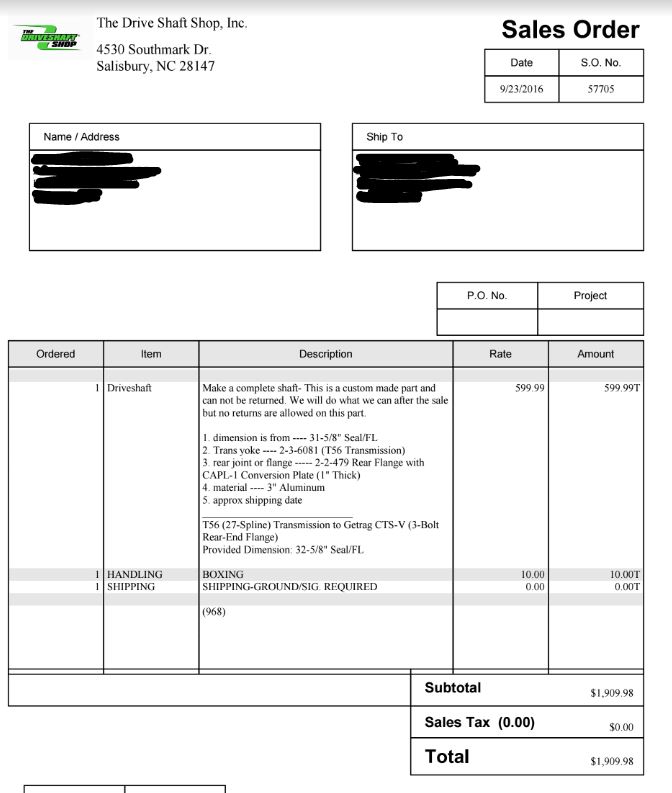
Look what showed up!!
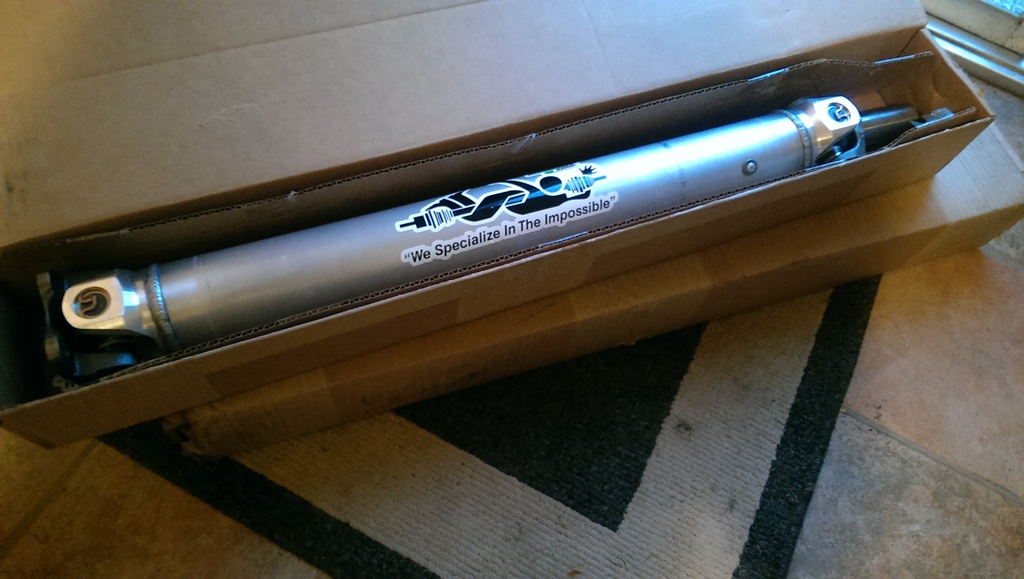
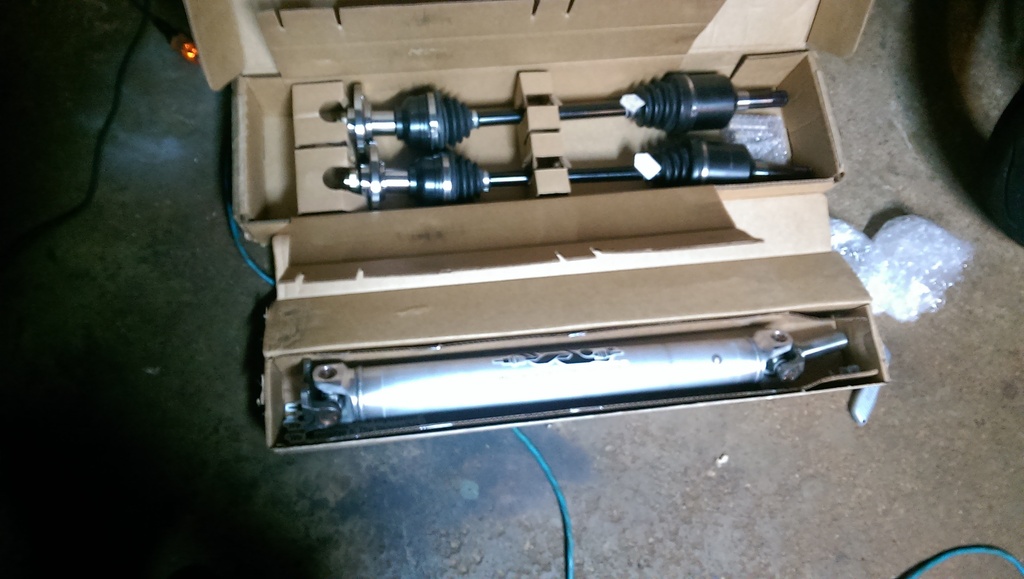
However it appears they forgot to send me the aluminum adapter plate for the 4 bolt driveshaft flange -> getrag. They didnt give me any trouble when I called and informed them of this mistake, and they shipped me one out the same day, and should be here tomorrow.
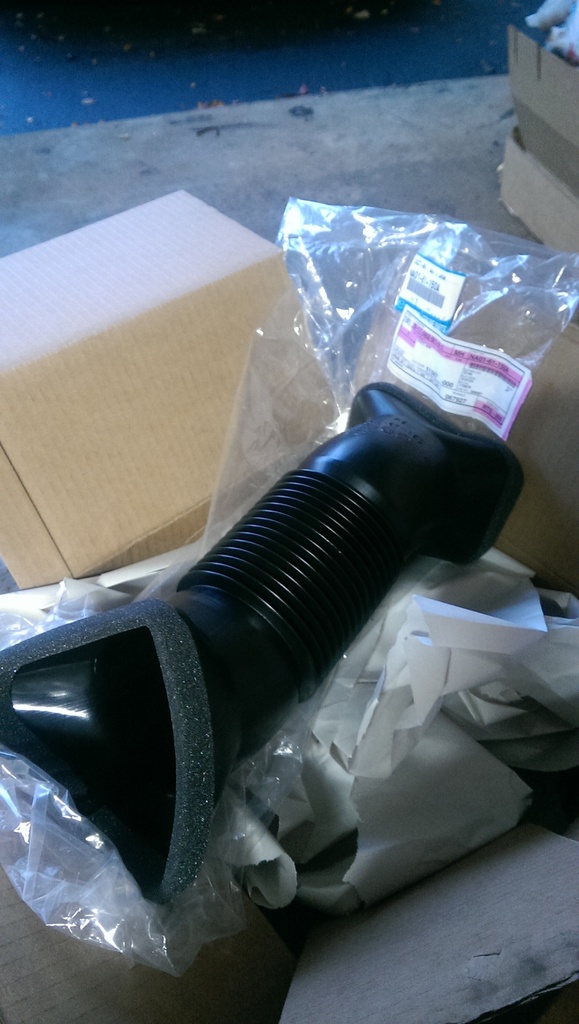
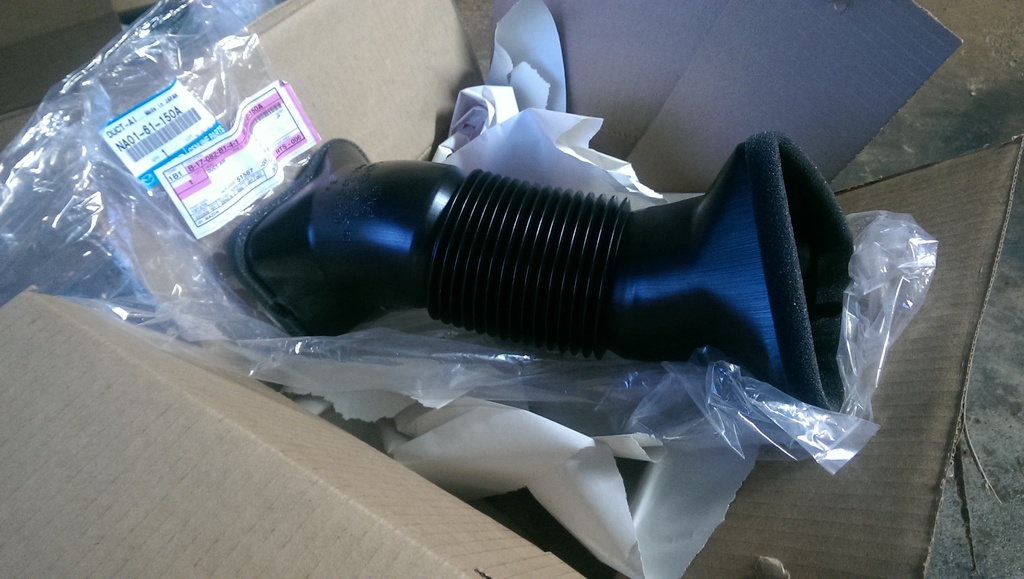
Also, im pretty excited about this part and dont know why.
That evaperator isnt exactly light! This will be a nice weight reduction and clear up a LOT of room under the dash.
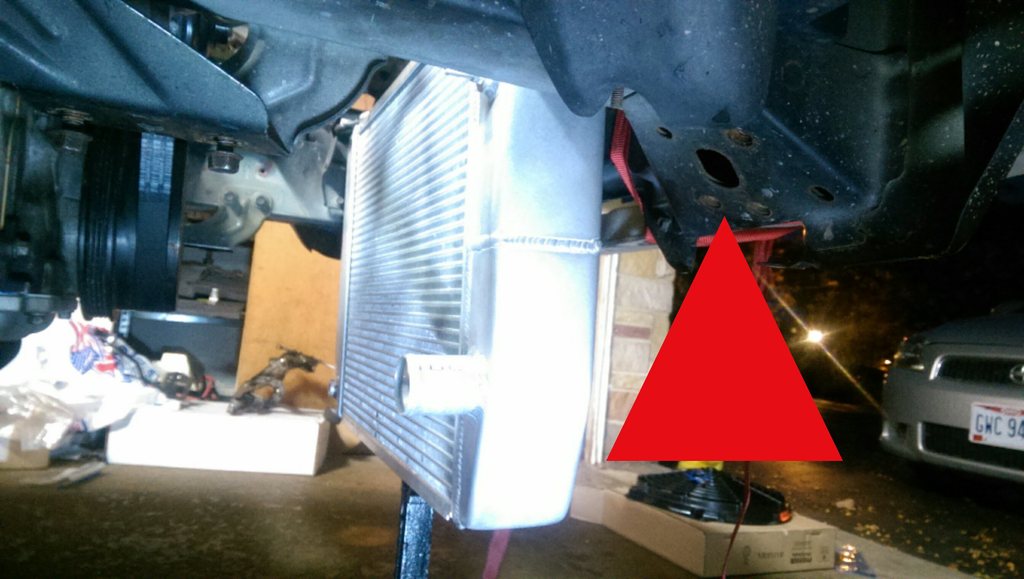
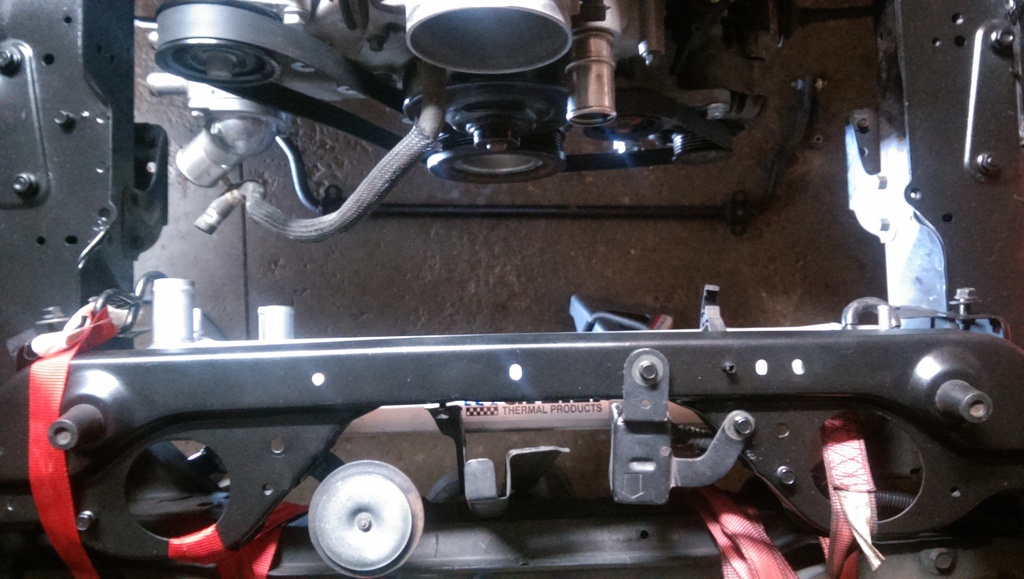
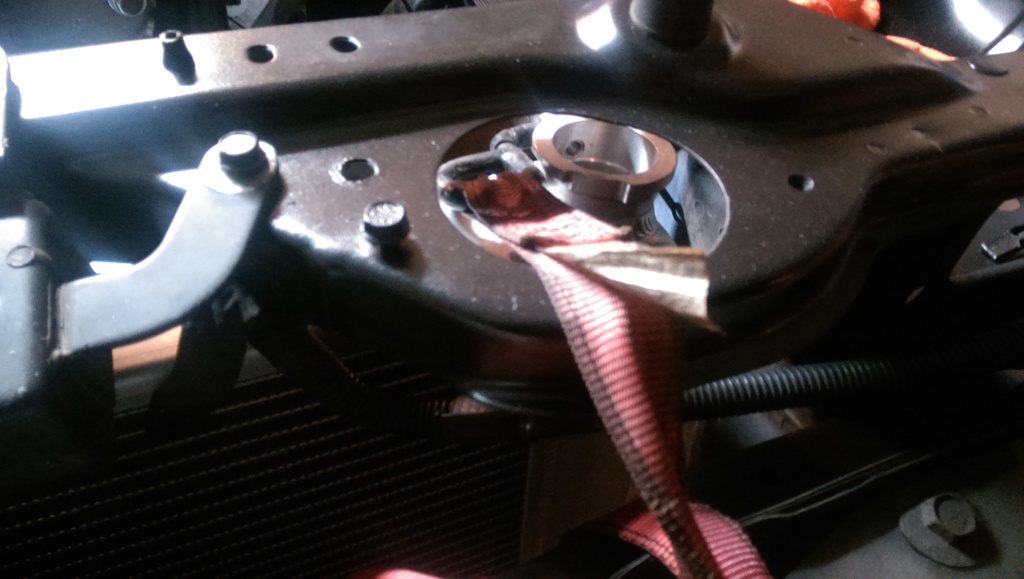
Next I figured I needed to get this radiator mounted up so the wiring has a place to go for the fan. My car no longer has baby teeth and I figured it was the closest potential mounting location and went for it!

However, this puts my filler neck below the highest point in the system, so I believe thats going to force me to run an inline filler & steam port in the upper rad hose.
If anyone has any experience with this please chime in! I know I could run a surge tank, but Id rather just just my stock overflow. Does the steamline need to go to the highest point? I have a port in my radiator just below the upper port, not sure if it will function correctly if I tap it in here.
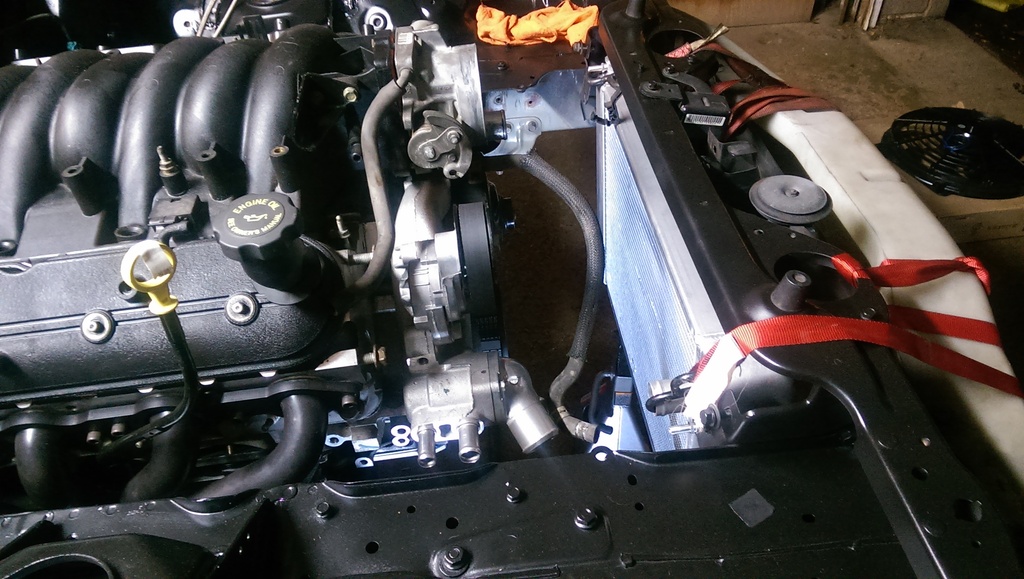
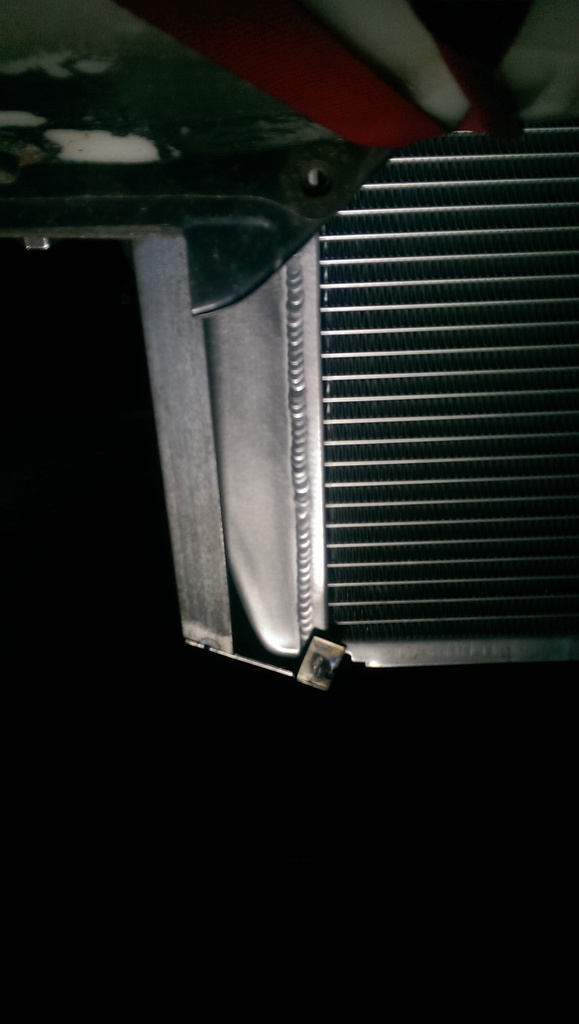
I need to finish up the other side tonight, then Ill finish weld them and paint.
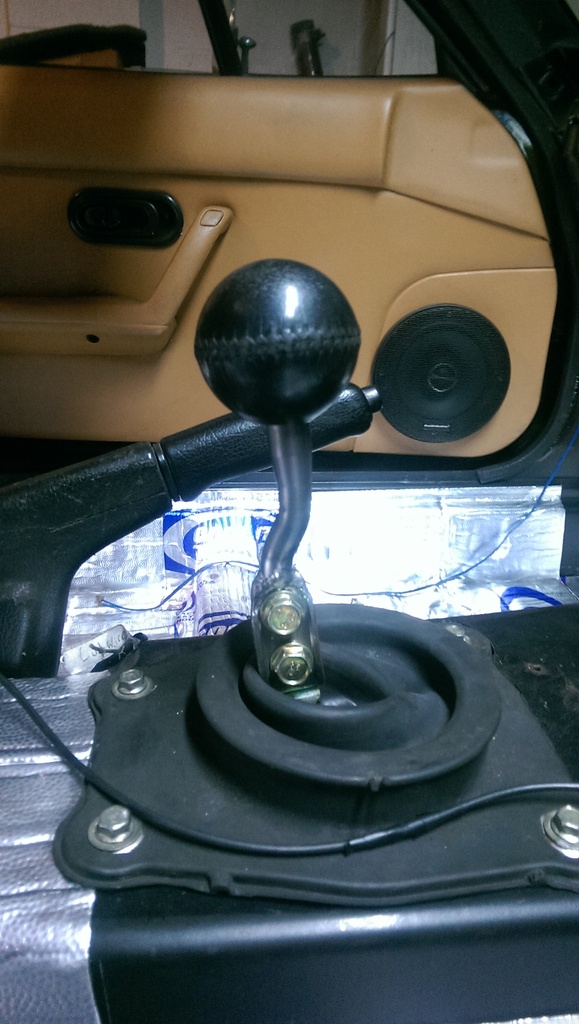
Couple nights ago, I chopped up the factory camaro shift lever and made this for the miata, nothing fancy. Depending on how it feels, I may end up making a new new one with some more forward bend in it, but we will see.
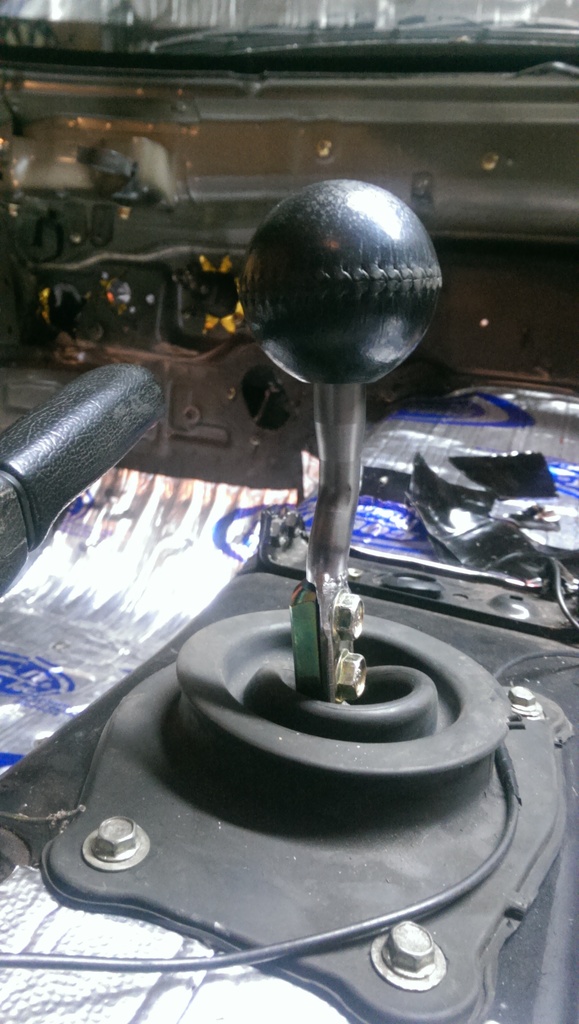
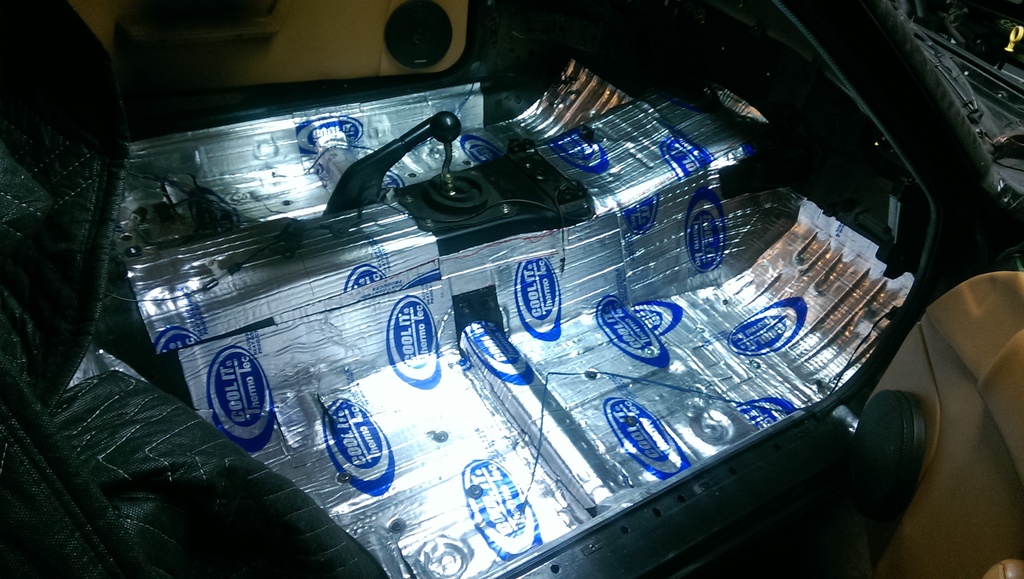
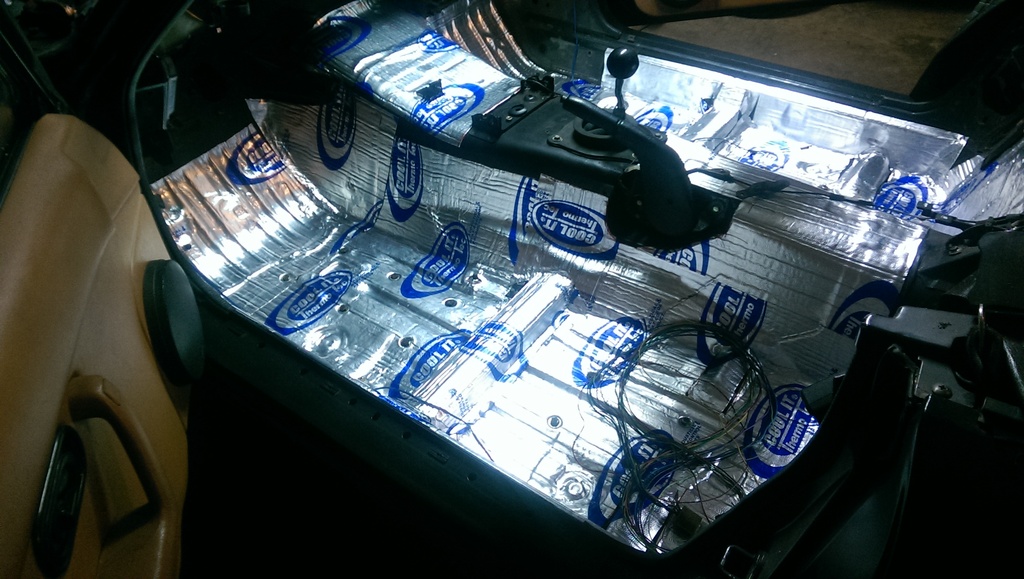
Ah yes, and you can take a peek at the 99% finish insulation on the interior floor
Thats all for now!
Look what showed up!!


However it appears they forgot to send me the aluminum adapter plate for the 4 bolt driveshaft flange -> getrag. They didnt give me any trouble when I called and informed them of this mistake, and they shipped me one out the same day, and should be here tomorrow.
Also, im pretty excited about this part and dont know why.


That evaperator isnt exactly light! This will be a nice weight reduction and clear up a LOT of room under the dash.
Next I figured I needed to get this radiator mounted up so the wiring has a place to go for the fan. My car no longer has baby teeth and I figured it was the closest potential mounting location and went for it!


However, this puts my filler neck below the highest point in the system, so I believe thats going to force me to run an inline filler & steam port in the upper rad hose.
If anyone has any experience with this please chime in! I know I could run a surge tank, but Id rather just just my stock overflow. Does the steamline need to go to the highest point? I have a port in my radiator just below the upper port, not sure if it will function correctly if I tap it in here.


I need to finish up the other side tonight, then Ill finish weld them and paint.
Couple nights ago, I chopped up the factory camaro shift lever and made this for the miata, nothing fancy. Depending on how it feels, I may end up making a new new one with some more forward bend in it, but we will see.


Ah yes, and you can take a peek at the 99% finish insulation on the interior floor


Thats all for now!


