99 10ae ls1

 06-15-2015, 08:27 AM
#1
V8 Miata Fanatic
Thread Starter

Well, after lurking and conversing a small amount of the past several months, I have finally secured a car that I am pleased with for my build, so I guess it is time to start a thread, I'll start from the beginning.
I got married a couple years ago to a wonderful young woman who completely supports this effort, which as Jim will say is key to a successful build. She at that time told me any cash I can make in my shop I can keep for my own enjoyment. As a hobby I part out or buy+fix and sell other cars/bikes to make a little extra cash. I never get rich off of any of it, but I do make enough to keep going back for more.
So last December I was trying to decide if an LS1 miata project was something I wanted to take on or not. Well, the good lord obviously had a plan for me because he dropped an ad in my lap that had a 2002 LS1/T56 combo with all the trimmings out of a 17k mile 35th anniversary SS camaro, for 3k. After that the miata was ON!!
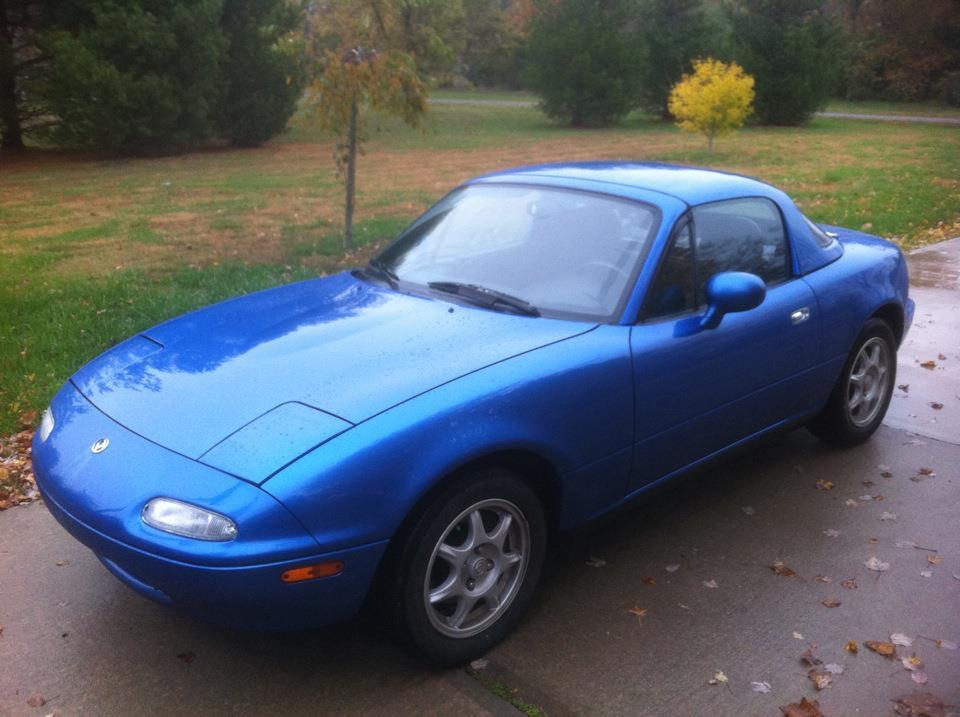
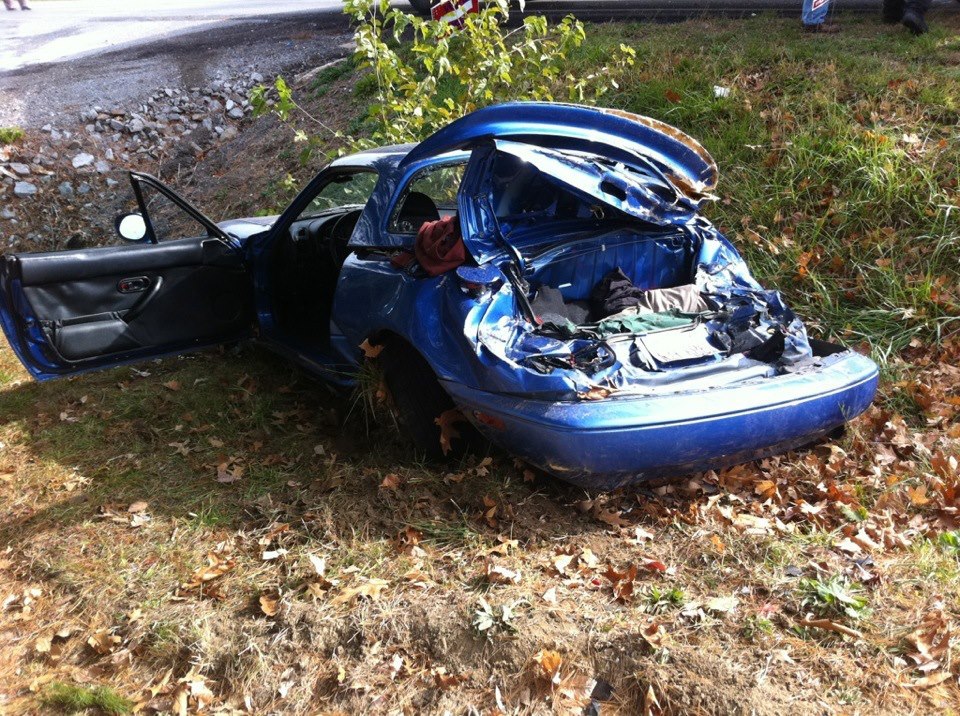
I have had two other miatas before this, my extremely clean 1994 was laid to rest on 11/6/12 when a bus decided to not stop behind me.
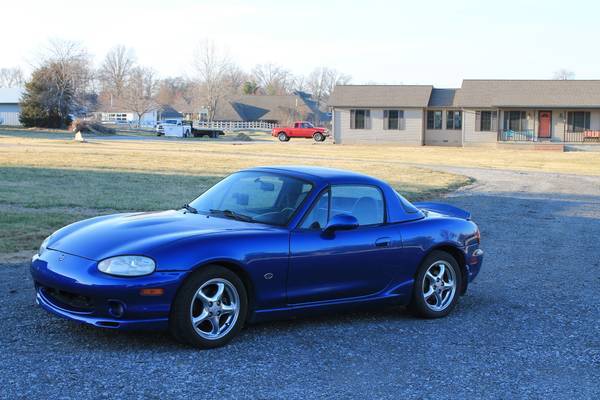
My second miata was another very clean 99 10AE, which had some light suspension mods on it. I sold it last year about this time to help fund my return to school to pursue an MBA.
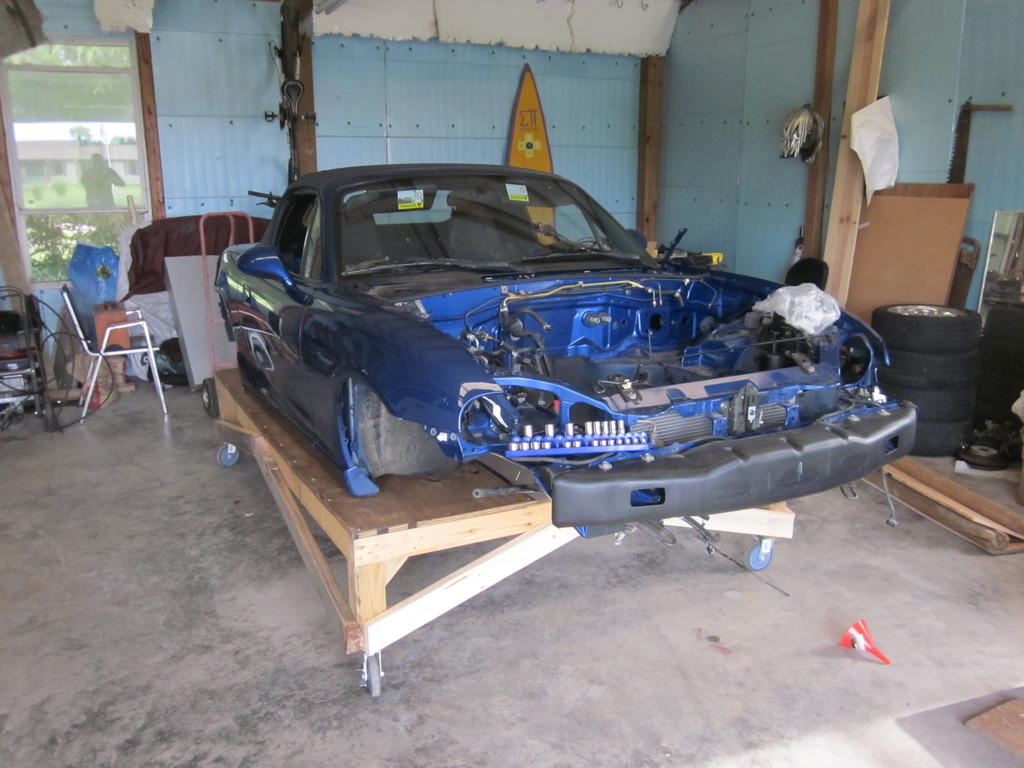
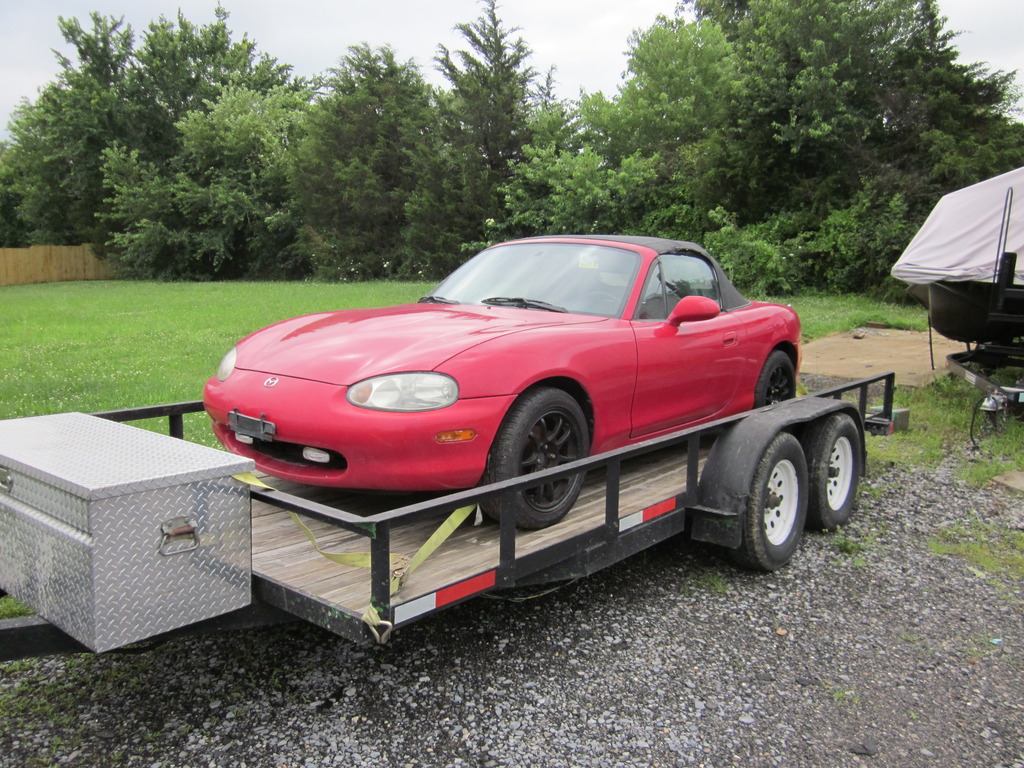
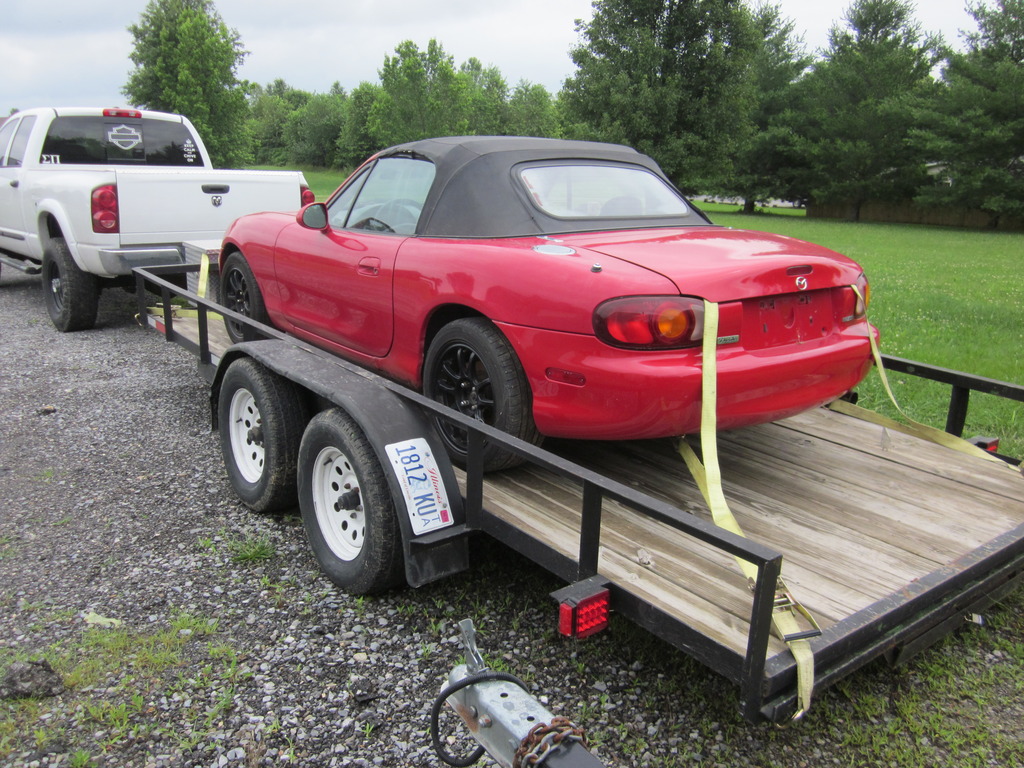
Well now here we are a year later, and I have been looking for a good clean chassis to complete my build on. I had two requirements only that could not be negotiated. Clean title, and rust free. I actually bought a nice 96 m-edition at first to complete my swap, but then changed my mind as I had wanted another NB. As luck turns out, I found this 10AE that a gentleman from nashville had used as a donor for his catfish, so it was perfect for me since I didn't need most of the stuff he had taken. Here she is...in all her glory.
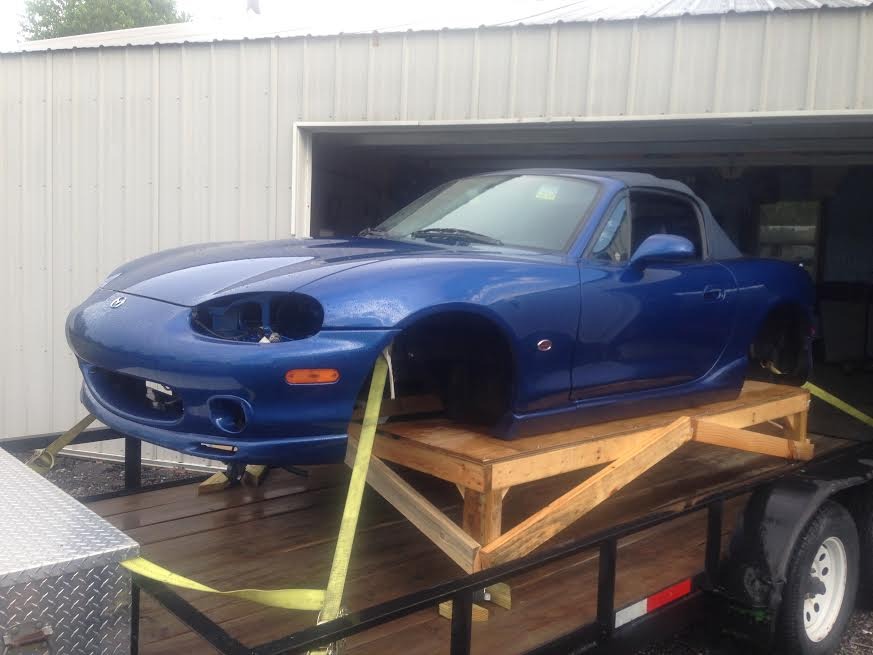
She has 57k original miles, and is clean as a pin. He got a little intense taking everything apart to get the drivetrain out, which is why the headlights are gone, but it is all there. He kept the motor, trans, rear, suspension, steering column, and fuel tank.
Since I have been looking for a car I have been shopping for parts. On top of the engine, I picked up a handful of key parts from a guy in Cincinatti that was starting his build, and ended up not being able to complete it. I got the full V8R swap kit (Subframe, transmount, etc), New style FM oil pan, and FM cooling kit, all for just under 2k to my door, brand new. I also picked up an 03 cobra rear end with 19k miles because it has the aluminum housing, 3.55 gears and trac lock. I plan on switching out the spider gears to 28 spline and calling it good.
Wish me luck....
I got married a couple years ago to a wonderful young woman who completely supports this effort, which as Jim will say is key to a successful build. She at that time told me any cash I can make in my shop I can keep for my own enjoyment. As a hobby I part out or buy+fix and sell other cars/bikes to make a little extra cash. I never get rich off of any of it, but I do make enough to keep going back for more.
So last December I was trying to decide if an LS1 miata project was something I wanted to take on or not. Well, the good lord obviously had a plan for me because he dropped an ad in my lap that had a 2002 LS1/T56 combo with all the trimmings out of a 17k mile 35th anniversary SS camaro, for 3k. After that the miata was ON!!
I have had two other miatas before this, my extremely clean 1994 was laid to rest on 11/6/12 when a bus decided to not stop behind me.


My second miata was another very clean 99 10AE, which had some light suspension mods on it. I sold it last year about this time to help fund my return to school to pursue an MBA.

Well now here we are a year later, and I have been looking for a good clean chassis to complete my build on. I had two requirements only that could not be negotiated. Clean title, and rust free. I actually bought a nice 96 m-edition at first to complete my swap, but then changed my mind as I had wanted another NB. As luck turns out, I found this 10AE that a gentleman from nashville had used as a donor for his catfish, so it was perfect for me since I didn't need most of the stuff he had taken. Here she is...in all her glory.

She has 57k original miles, and is clean as a pin. He got a little intense taking everything apart to get the drivetrain out, which is why the headlights are gone, but it is all there. He kept the motor, trans, rear, suspension, steering column, and fuel tank.
Since I have been looking for a car I have been shopping for parts. On top of the engine, I picked up a handful of key parts from a guy in Cincinatti that was starting his build, and ended up not being able to complete it. I got the full V8R swap kit (Subframe, transmount, etc), New style FM oil pan, and FM cooling kit, all for just under 2k to my door, brand new. I also picked up an 03 cobra rear end with 19k miles because it has the aluminum housing, 3.55 gears and trac lock. I plan on switching out the spider gears to 28 spline and calling it good.
Wish me luck....

The following users liked this post:
charchri4 (06-17-2015)

 06-16-2015, 11:42 PM
#5
V8 Miata Participant

Good lookin chassis. Diggin that AE paint color.
Nice to have another NB/LS builder...
...and you should be alone when you open that box of longtubes.
Nice to have another NB/LS builder...
...and you should be alone when you open that box of longtubes.
06-17-2015, 08:29 AM
#6
V8 Miata Fanatic
Thread Starter
Another day another dollar......started stripping the car down a little bit today. I was actually sick so not much to speak of. I did go ahead and order the roll cage though. I couldn't bring myself to spend ~600 on a hard dog or boss frog unit, so I ordered this one that you actually weld in yourself.
8 Point Roll Bar - 90-98 MIATA
Then as luck turns out I figured out the vendor has an ebay store and I got it on sale there...
Roll Bars and Cages 8 Point 90 98 Mazda Miata MX5 | eBay
8 Point Roll Bar - 90-98 MIATA
Then as luck turns out I figured out the vendor has an ebay store and I got it on sale there...
Roll Bars and Cages 8 Point 90 98 Mazda Miata MX5 | eBay
06-17-2015, 03:42 PM
#7
Jim Stainer

Wow luck is right! Never have I seen such a remarkable pile of parts collected by anyone! That is a really good looking car and soooo perfect for your build! Congrats on the find!
06-26-2015, 03:37 PM
#8
V8 Miata Fanatic
Thread Starter
Been busy with school+parting of my donor car so I haven't really had a lot of time to work on the 10AE. I have some pics that I'll post this weekend of progress though.....oh and my wallet hurts again today....roll cage and 15x9 Konig Dial ins were added to the list of parts waiting to be put on. I was going to wait on the wheels since I won't need them for a while, but goodwin had them on sale and free shipping, just couldn't turn them down......
07-01-2015, 09:24 PM
#9
V8 Miata Fanatic
Thread Starter
So as I'm sure I don't have to tell any of you guys, life gets in the miatas way all the time, and I dont even have kids yet!!!
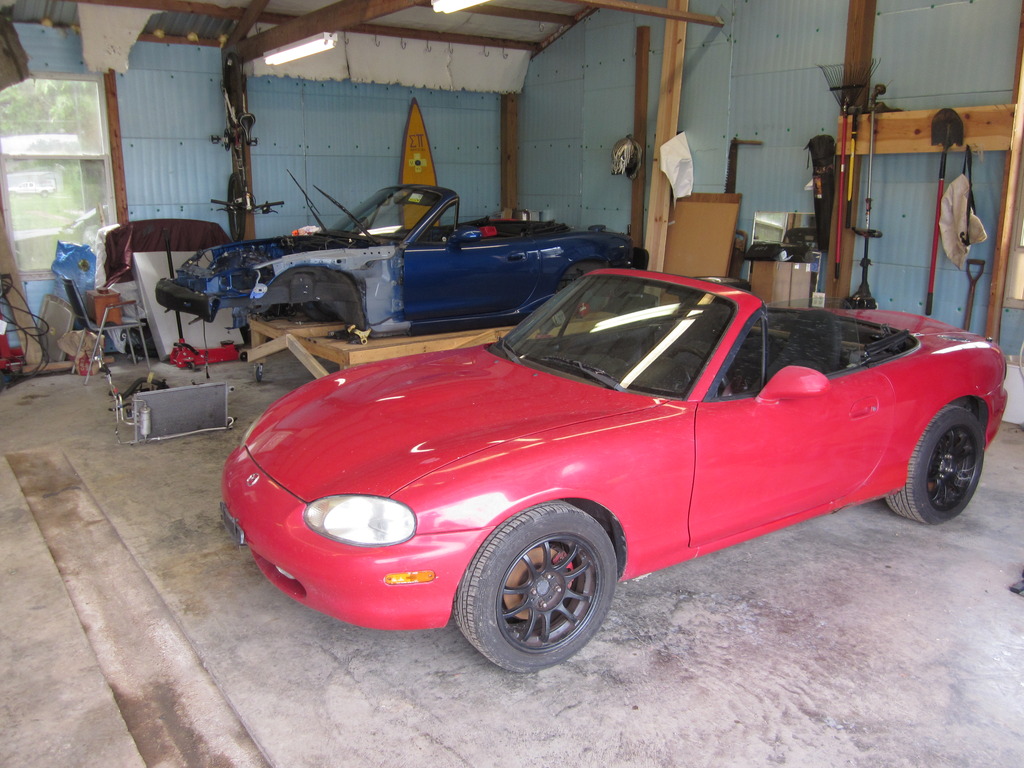
Anyways, on to the progress......I got the 10AE stripped most of the way stripped down to begin doing some real work on it. Luckily for me a lot of stuff was already gone from it so I didn't have to deal with that like the majority of you guys do. I feel sorry for those of you that start with a car that has been neglected, this car is almost too clean to cut up....almost.
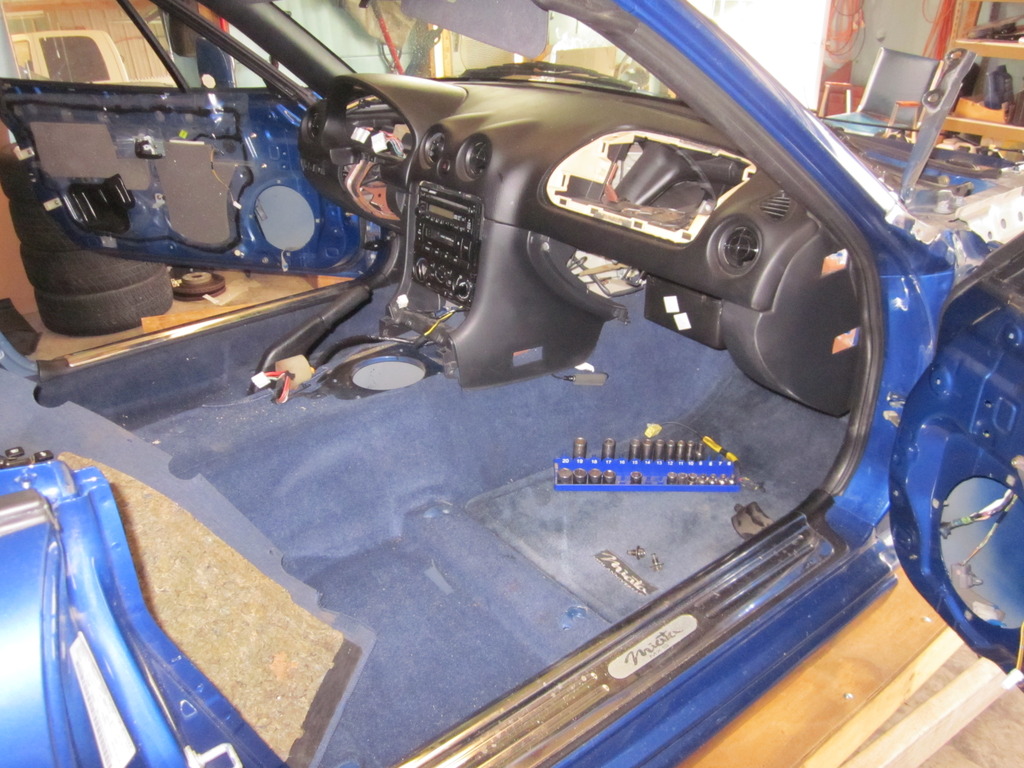

I also bought a parts car a couple weeks ago to get some of the parts back my car needed. This little 99 had a locked motor due to a failed crank bearing, and I got it for 1000. At that price it just seemed smart to me to buy it and part out what I didn't need, keep what i did, and scrap the rest. If nothing else I have found out as I go that I am able to test out a few things on it before moving on to my good car. For example, the roll cage I bought will need to be welded up by me, so I will be welding it in this car before transferring it to my good car.

Now sadly with all the parting out of the other car, school work, work, etc, the only real progress I've made on my build car so far is cutting the corners from the engine bay, and I haven't even got them all cleaned up yet.
on an unrelated note, here is me and the wife on Monday, our second anniversary. As has been stated before, for these projects to be a success, make sure your wife is on board. She stands by me the whole way through....for the most part....

Anyways, on to the progress......I got the 10AE stripped most of the way stripped down to begin doing some real work on it. Luckily for me a lot of stuff was already gone from it so I didn't have to deal with that like the majority of you guys do. I feel sorry for those of you that start with a car that has been neglected, this car is almost too clean to cut up....almost.


I also bought a parts car a couple weeks ago to get some of the parts back my car needed. This little 99 had a locked motor due to a failed crank bearing, and I got it for 1000. At that price it just seemed smart to me to buy it and part out what I didn't need, keep what i did, and scrap the rest. If nothing else I have found out as I go that I am able to test out a few things on it before moving on to my good car. For example, the roll cage I bought will need to be welded up by me, so I will be welding it in this car before transferring it to my good car.


Now sadly with all the parting out of the other car, school work, work, etc, the only real progress I've made on my build car so far is cutting the corners from the engine bay, and I haven't even got them all cleaned up yet.

on an unrelated note, here is me and the wife on Monday, our second anniversary. As has been stated before, for these projects to be a success, make sure your wife is on board. She stands by me the whole way through....for the most part....

The following users liked this post:
charchri4 (07-06-2015)
07-02-2015, 03:12 PM
#10
V8 Miata Fanatic
Thread Starter
So following the lead from itsallrigged, and a little motivation from charchi, I have bought all the fuel system parts individually to put together. For someone like me that has NEVER dealt with fuel systems aside from changing a filter, this was a little nerve racking. That being said, I think I have it worked out. For those of you thinking about doing the same thing, my parts list is as follows:
(1)Walboro 255lph fuel pump-GSS342-Ebay-$65.99
(1)Fuel Pump install kit for GSS342 pump-EBAY-$6.99
(1)Wix fuel filter/regulator-33737-Ebay-$31.46
(20')3/8" Stainless Hard fuel line-Ebay-$51.90
(3)GM 3/8" quick connect to -6an fittings-61744123-Speedway motors-$14.99 each
(2)5/16 quick connect to -6an fittings-61744113-Speedway motors-$14.99 each
(1)Male quick connect to GM fitting-Ebay-$9.71
(1)-6an to 3/8 hose fitting-Jegs-799-610025-$9.99
(1)-6an to GM quick connect 90 degree elbow-799-610165-$14.99
(4') 3/8 Steel Braided fuel hose-Jegs-865-29404-$17.99
(1) 6an to 6an male union-Jegs-361-AT981506-5.99
UPDATE!! 7/13/15 A couple things that I did not include in this list, but am learning as I go....plus one mistake
Like I said, fuel line newb, for each connection that is made you will need a tube nut and tube sleeve to connect to each fitting. I went ahead and ordered six of each, part number 361-AT581906 and 361-AT581806 on Jegs, about an extra $30 for the whole set. Also, as it turns out the return line on the Corvette regulator is actually 5/16" so I will be returning one of my 3/8 fittings and exchanging it for the 5/16-6an
If you are keeping count that is $283.97, which is approximately 200 cheaper than Flyin miata, and 180 cheaper than V8 roadsters.
A note for my particular case, there are a lot of good people on this forum that are willing to help with our common interest. I absolutely love the look of itsallrigged fuel setup so I messaged him with a few questions about it. He was very helpful with my questions, and he also sold me a couple AN fittings that he had accidentally ordered in excess...for half what he gave for them......and then he was such a nice guy he tossed his nice flaring tool and bender in the box with it for my use until I am done.
Just had to plug for a bit
Last edited by stng_96; 11-02-2015 at 07:45 AM.
The following 7 users liked this post by stng_96:
Amellrotts (08-09-2015),
charchri4 (07-06-2015),
Flavaquero (07-02-2015),
franko (03-09-2016),
ItsAllRigged (07-03-2015),
and 2 others liked this post.
07-03-2015, 02:41 PM
#12
V8 Miata Fanatic
Thread Starter
Yeah I got it last week, my honest opinion of it is I'm not crazy impressed, but I'd buy it again. First and foremost, you have to be confident in your welding skills, otherwise forget it. The reason I'm not overly impressed is that I was expecting the kit to be a little closer to ready to go in the car, but really most pieces will need some trimming before final install. That's not a huge deal, but to each his own. I will say that the hoop is very nicely bent and fits in just like it should, I'll be modifying mine some like charchi did because they send you a hoop that will go all the way to the floor. Problem is it takes up a couple inches of seat travel and I'm big enough I don't want to give that travel up.
The following 2 users liked this post by stng_96:
charchri4 (07-06-2015),
SupaDupaSteve (07-05-2015)
07-03-2015, 03:40 PM
#13
V8 Miata Participant
Don't forget this: Russell 640940, Russell Specialty SAE Quick-Connect EFI Adapter Fittings | Russell
I couldn't tell if this was listed in your parts order.
I couldn't tell if this was listed in your parts order.
07-05-2015, 08:26 AM
#15
V8 Miata Prot�g�

Yeah I got it last week, my honest opinion of it is I'm not crazy impressed, but I'd buy it again. First and foremost, you have to be confident in your welding skills, otherwise forget it. The reason I'm not overly impressed is that I was expecting the kit to be a little closer to ready to go in the car, but really most pieces will need some trimming before final install. That's not a huge deal, but to each his own. I will say that the hoop is very nicely bent and fits in just like it should, I'll be modifying mine some like charchi did because they send you a hoop that will go all the way to the floor. Problem is it takes up a couple inches of seat travel and I'm big enough I don't want to give that travel up.
07-06-2015, 09:07 AM
#16
Jim Stainer
+1 to the roll bar. I you just like to putz in the garage fitting and making things work it's a good value but if that's not how you want to spend your time it's no bargain.
Things are looking really good Travis! When I think of the life you are giving back to that car and where it probably would have ended up, cutting it up is no doubt the best thing that will ever happen to it!
Don't worry about life getting in the way of the build. Many here will tell you that the build can completely consume you if you let it and you, the wife, and the car will all come out better if you pace yourself and enjoy life as you go. Besides it's over 9 months till The Mitty and you (we) can get a lot done the night before!
07-13-2015, 03:28 PM
#17
V8 Miata Fanatic
Thread Starter
So as noted above in my fuel system post, I have an extra 3/8-6an quick connect fitting. If anyone wants it, I will sell for half what it costs from speedway, just send me a PM.
On another unrelated note, I didn't mention before that the deal that I got on the subframe did come with an issue for me.....the subframe is meant for an NA, which is basically all the same except the location of the steering rack mounts. I was just going to change steering racks, but I got to thinking, if anyone is about to pull the trigger on a new subframe na kit, perhaps you would be willing to buy the NB kit and swap me? Just trying to make my life a little easier, even though it would kind of complicate someone elses.
Just thought I'd throw it out there.
07-14-2015, 08:36 AM
#18
V8 Miata Fanatic
Thread Starter
It's been a busy week for the man in the brown truck. Got most all of the fuel system parts I need except the parts I forgot..... I on the other hand have been busy as well still stripping my parts car. My earlier post about feeling sorry for you guys that have to strip your cars before you work on them, now I feel your pain. I had a guy from Michigan buy the complete interior minus the seats from me so when I have time I have been pulling all of that out.
On a more positive note, I did receive my intake in the mail yesterday. I am actually surprised that I have never seen anyone try this. Some people decide to use the Z06 or C7 intakes, which is great, but I thought maybe try a cold air intake from one of those cars? I found a great deal on a lightly used Airaid intake, ins't she purty?
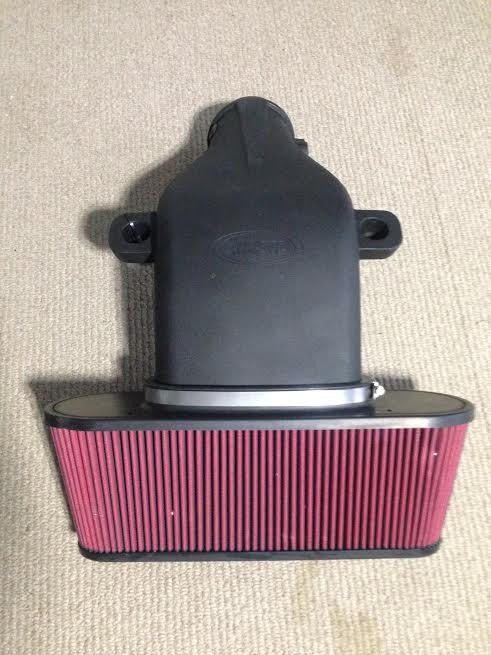
I mean, if the stock vette intake will fit, this one will to, and it led to marginal gain(as far as CAI's go) on the vettes, so why not.
I on the other hand have been busy as well still stripping my parts car. My earlier post about feeling sorry for you guys that have to strip your cars before you work on them, now I feel your pain. I had a guy from Michigan buy the complete interior minus the seats from me so when I have time I have been pulling all of that out.On a more positive note, I did receive my intake in the mail yesterday. I am actually surprised that I have never seen anyone try this. Some people decide to use the Z06 or C7 intakes, which is great, but I thought maybe try a cold air intake from one of those cars? I found a great deal on a lightly used Airaid intake, ins't she purty?

I mean, if the stock vette intake will fit, this one will to, and it led to marginal gain(as far as CAI's go) on the vettes, so why not.
Last edited by stng_96; 02-27-2019 at 01:33 PM.
07-20-2015, 09:00 AM
#19
V8 Miata Fanatic
Thread Starter
So despite the intense heat this past weekend in Southern Illinois I actually made a little progress on my build car . According to my thermometer in the barn, it was 103+ each day, but I powered through.
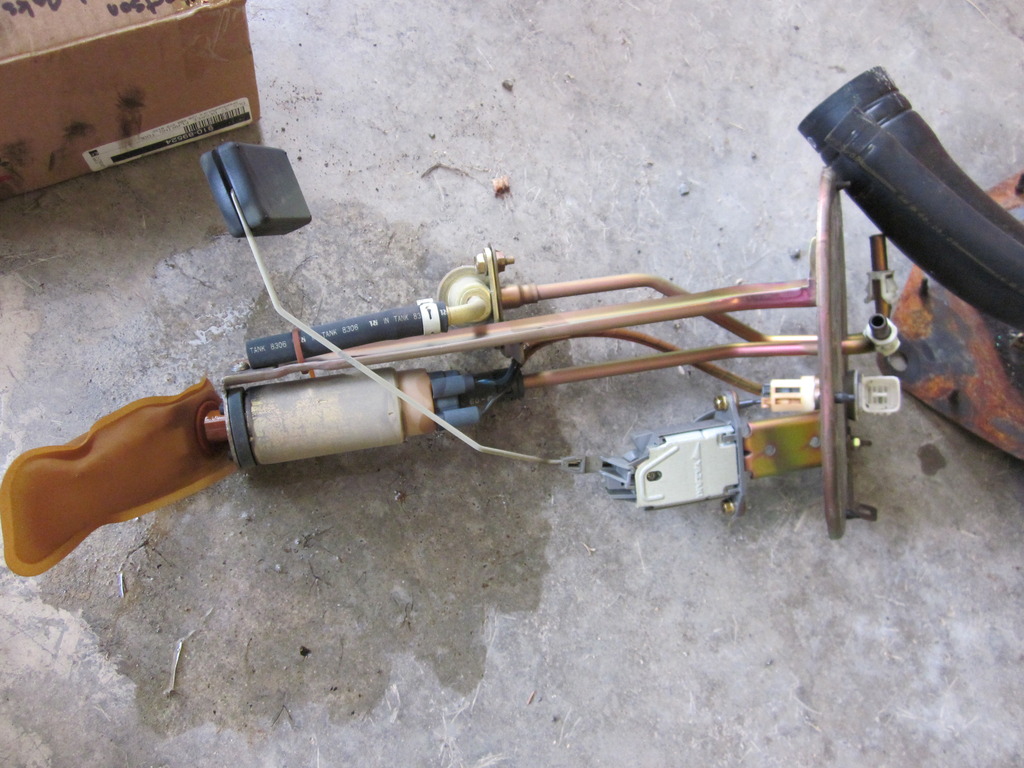
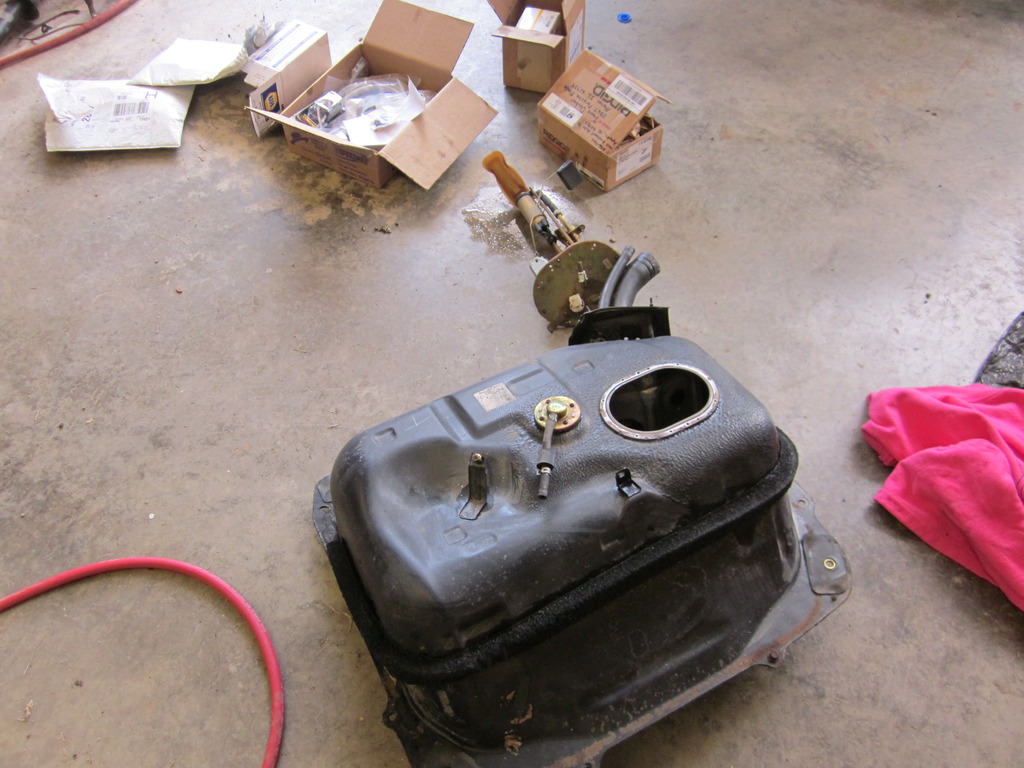
My build car did not come with the fuel tank from the previous owner, so my weekend started with me pulling the tank out of the parts car, cleaning it up, and installing the new pump. The install was very straightforward, and the only thing that was not basically plug and play was the wiring. I just cut the pigtail off the old pump and wired the new one in place, with plenty of heat shrink over the connections. If you are building an NB car, don't forget to remove the stock regulator inside the tank. You will not need it with the Vette filter/regulator.
One other thing to note is that the screen that goes on the inlet end of the fuel pump had to be reused. The new one that came with the general install kit I bought did not work. The Miata factory pump mount is angled toward the back of the tank, so the screen needs to be at an angle that counters that to run along the bottom of the tank. No big deal, just a heads up. Here is a picture of the stock setup. I only took about 100 pictures this weekend, but somehow I forgot to take a picture of the new pump in place. It looks basically the same except it has the noise blanket wrapped around it.
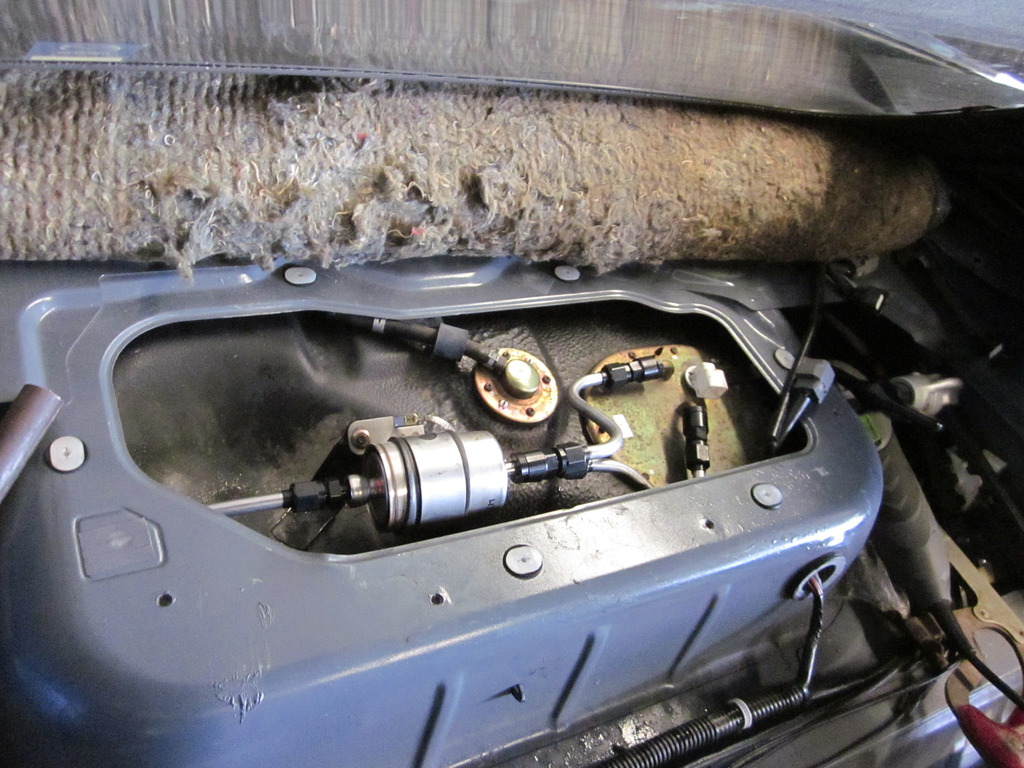
From there I moved onto the filter/lines. Thanks to some inspiration and a really nice tube flaring tool from itsallrigged, I was able to create a fuel line setup similar to his, he only charged $150 for the copyright.... About the only difference I could tell in our setups is he used one additional fitting(that I could see at least) where the line 90's toward the front of the car from the filter. It probably would have been cleaner that way, but I am cheap at those fittings are pricey, so I just bent a 90 there, it will work just fine. I plan to put rubber hose around my fuel line the entire length of the car for insulation and protection.
Another little tid-bit of advice, hard lines and flaring tools. Inherently, you need to screw up a few times on these hard lines before you can really run with them. There is a learning curve to pick up on them as far as what needs to happen to make them just right. A few things that I picked up:
1. I found it easier to get all the tubing bent the way you want it, then flare them last. The tubing nuts will slide around a 90 degree bend, but the sleeves won't even come close. If you have a flared connection close to a bend, you won't be able to get the sleeve around the bend, so put the fittings on last and flare.
2. I have to assume aluminum tubing would be less forgiving because it is inherently more brittle than Stainless Steel. With my stainless steel tubing, I was able to form it at least a small amount just by hand without the bender. Don't get me wrong, if you are too agressive it WILL kink, so be careful.
3. I wasted about 2 feet of tubing just practicing, I highly suggest this before you ruin a piece the length of the car!
4. Finally, the quality of your tools will have great affect on the quality of your work. I'm not saying these things can't be done, but nicer tools make a big difference. I bought a tube flaring tool at a yard sale for $3 bucks some time ago for this work. It could have done the job, but itsallrigged was nice enough to send me his flaring tool to borrow for my lines. His tool was made by rigid, and was very easy to use. Its key feature was it had a torque release pin that would only allow you to put the exact amount of torque needed to flare the end properly, which made the process very painless.
If you are keeping tabs on my posts, I plan once again to do like itsallrigged did, and run a stainless braided line in the engine compartment, so for now I just left about a foot of extra tubing sticking into the engine bay until I get it test fitted and ready. Don't forget to cover this open end up!! Hate to get anything into your engine.
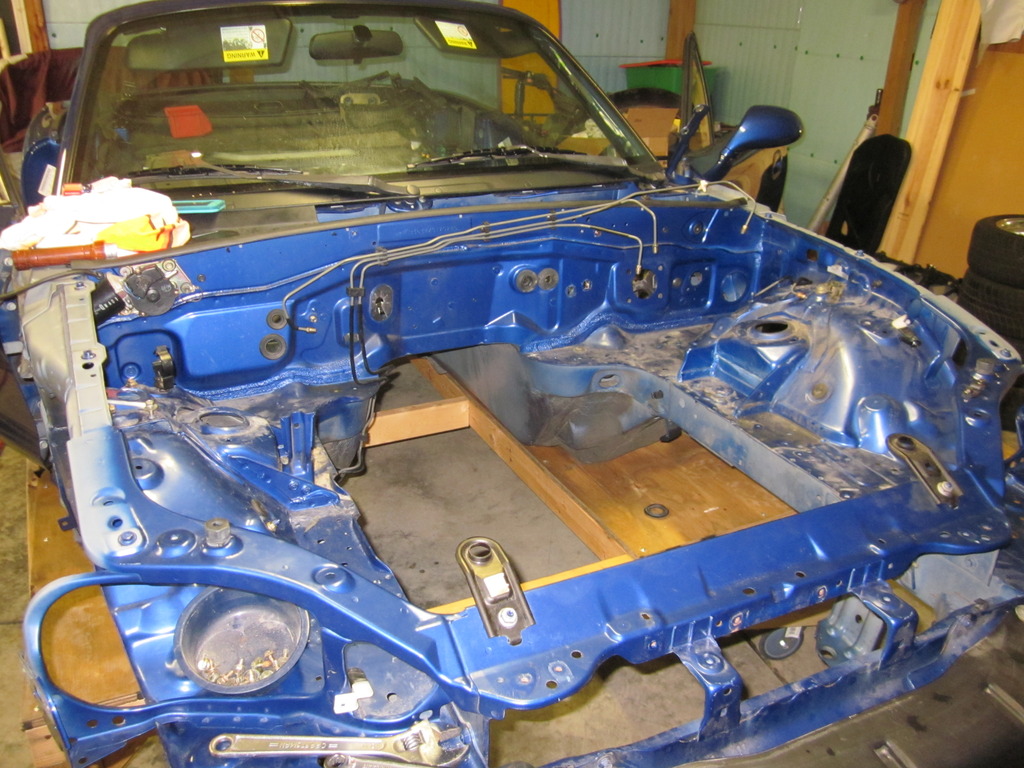
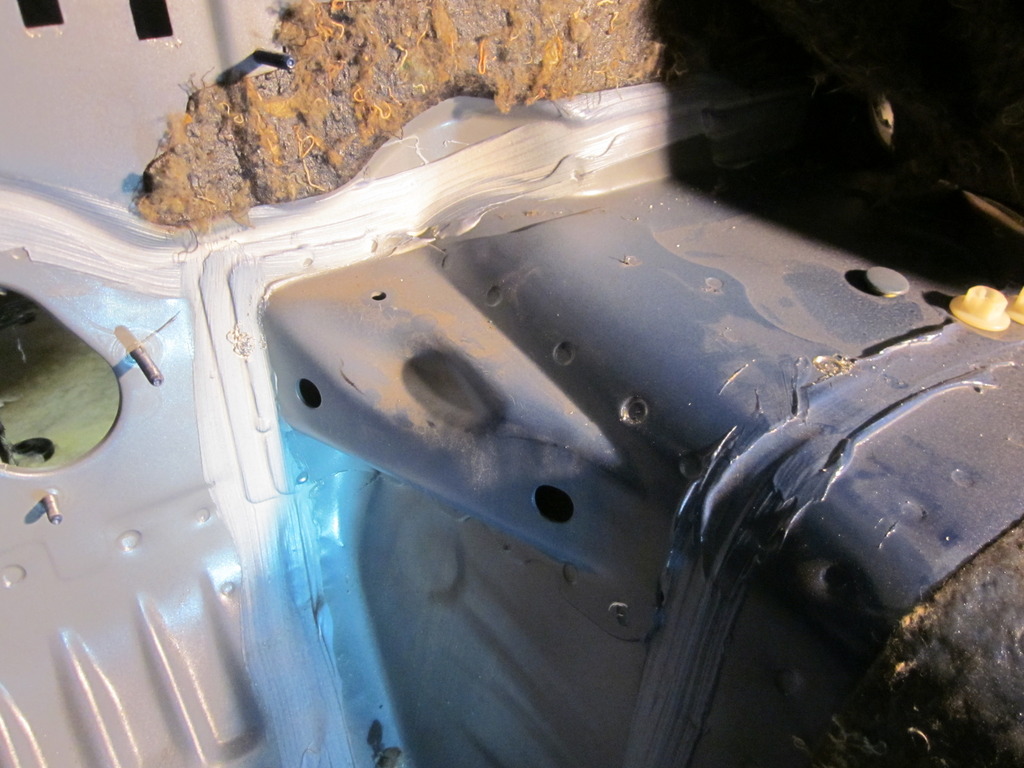
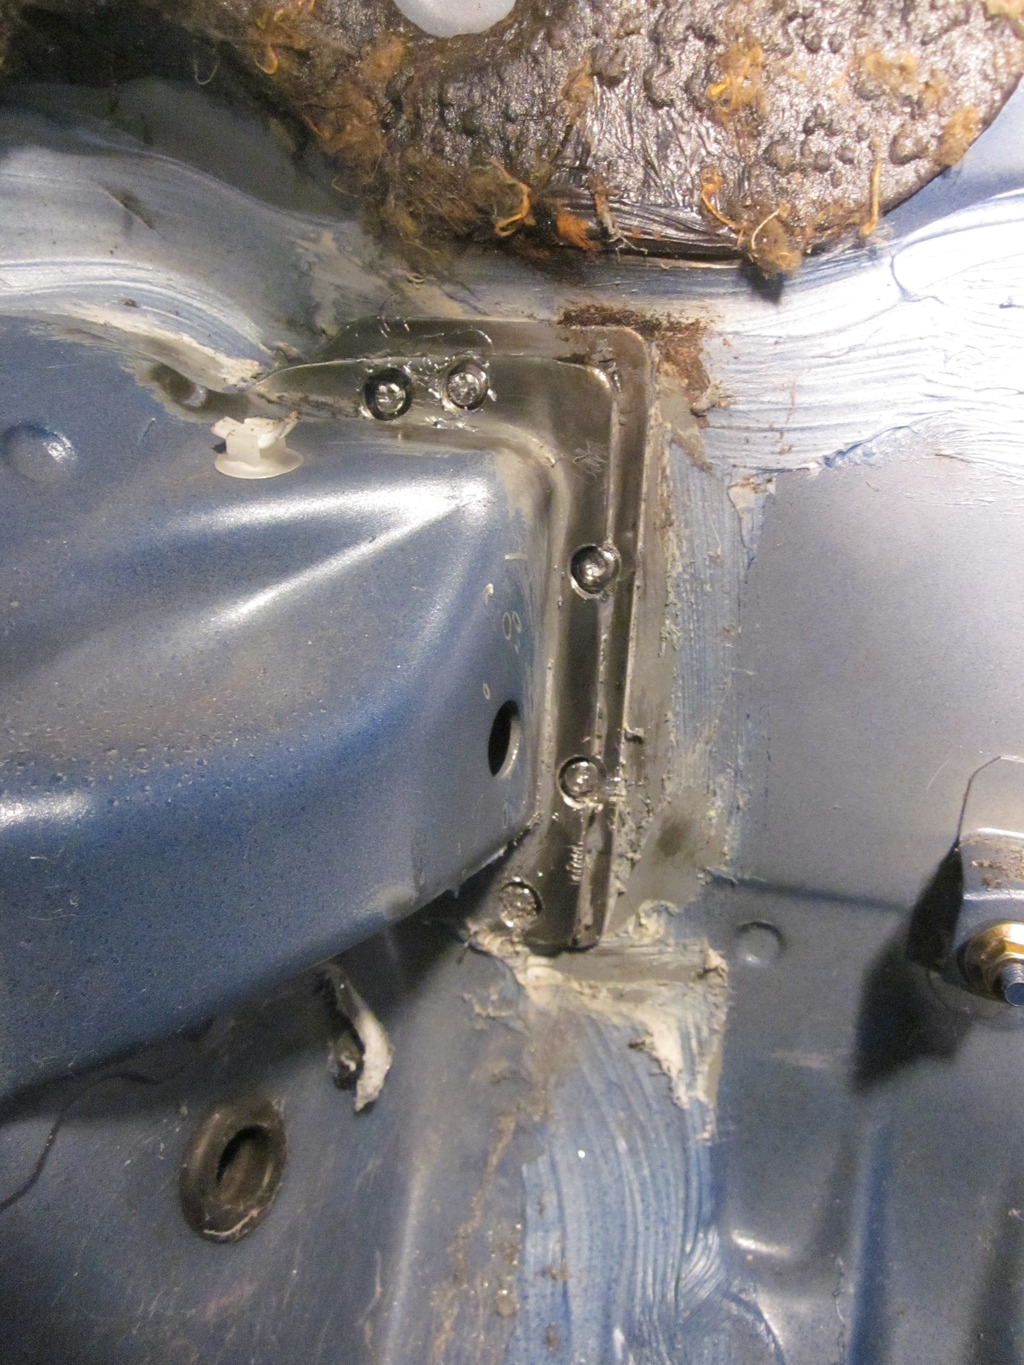
I then moved onto cutting/cleaning/welding. I cleaned up the corners of my engine bay finally, and I cut/hammered in the area on the passenger side to allow fuel lines clearance. After than I broke out my $50 harbor freight sandblaster. Great thing about the cart my shell is on is that the whole thing is easy to move, so I wheeled it to the edge of my barn, and hung plastic around it to keep the mess down. If you are thinking about getting a blaster just for this, I'd advise you to reconsider. It works great stripping rust and paint, however the sand just bounces off the seam sealer as seen here:
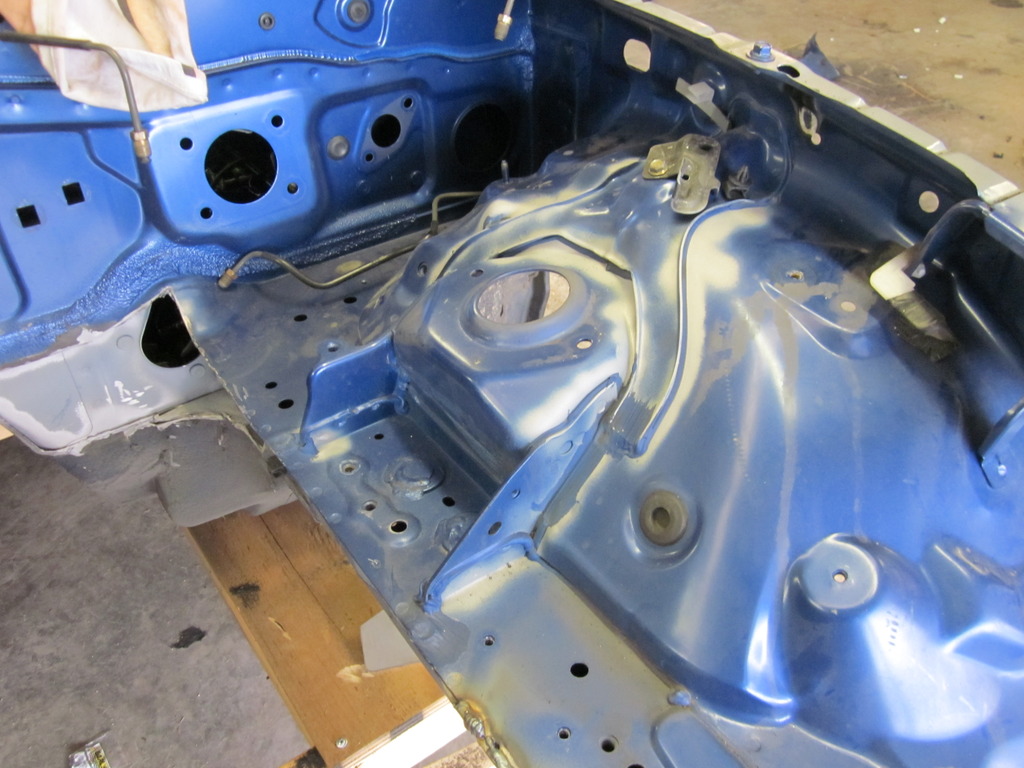
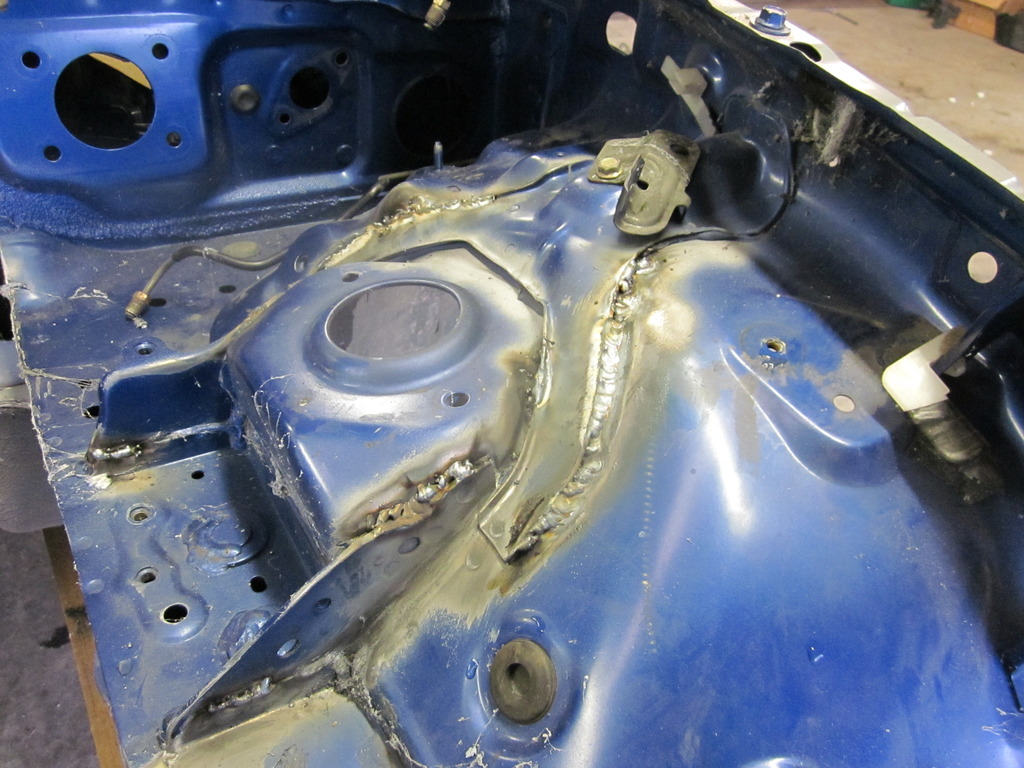
I did a fair amount of blasting, but ended up having to wire wheel it anyways. Seam Sealer makes a MESS! My engine bay looked like I slaughtered a lot spider webs. Here is another shot with a little bit of welding started. Make sure to get everything clean, and I mean CLEAN. The areas of good weld here are areas that I got all seam sealer out, the other areas where the welds look like crap are where I didn't.....
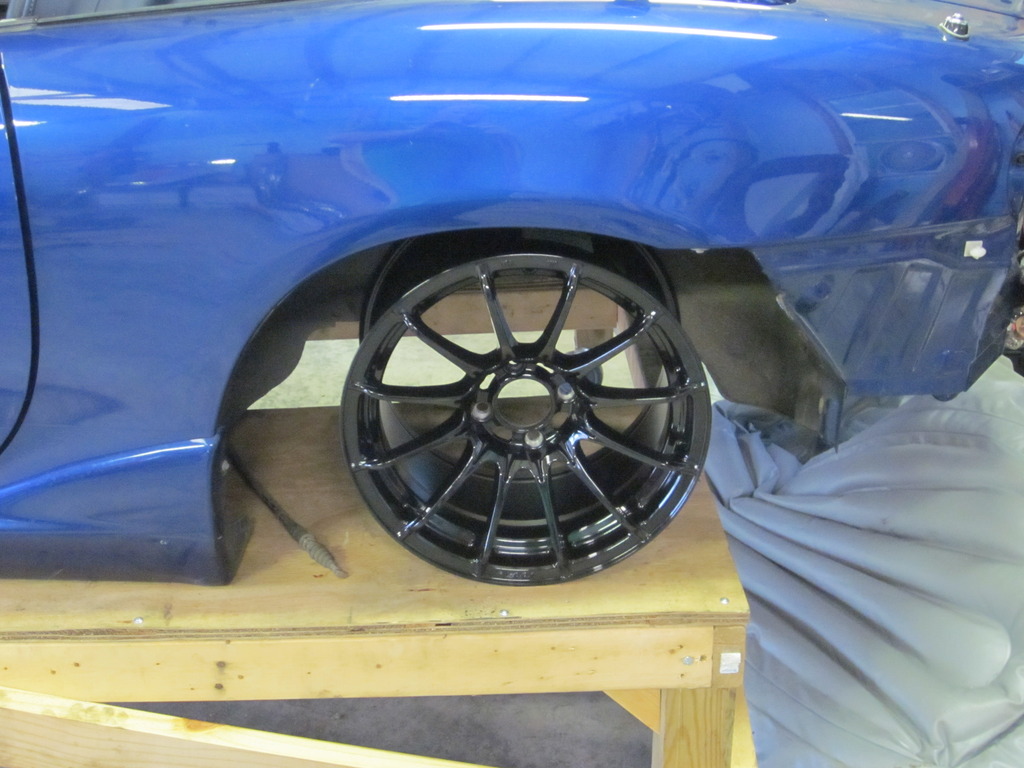
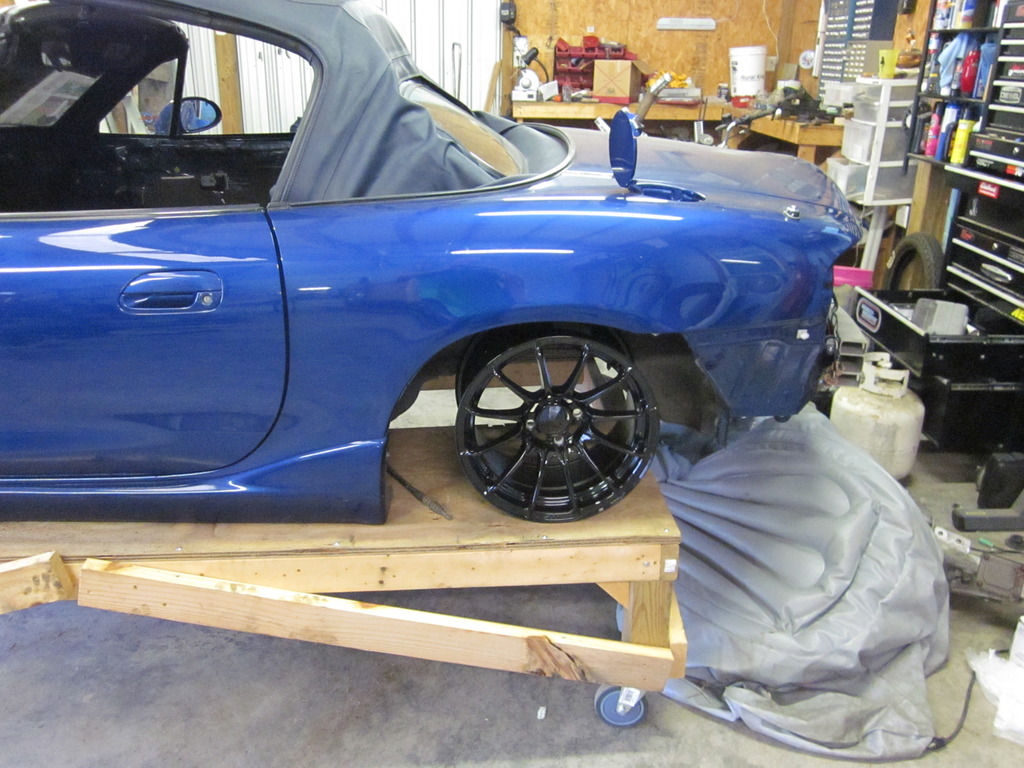
And finally, I have been asked a couple times about what wheels I am going to run. I bought 15x9 konig dial ins because they were on sale at goodwin. I was nervous about the black at first, but I after setting them in place I am very excited to get them on.
All in all it was a good weekend for the car, felt really good to finally get some progress made on it.
. According to my thermometer in the barn, it was 103+ each day, but I powered through. My build car did not come with the fuel tank from the previous owner, so my weekend started with me pulling the tank out of the parts car, cleaning it up, and installing the new pump. The install was very straightforward, and the only thing that was not basically plug and play was the wiring. I just cut the pigtail off the old pump and wired the new one in place, with plenty of heat shrink over the connections. If you are building an NB car, don't forget to remove the stock regulator inside the tank. You will not need it with the Vette filter/regulator.
One other thing to note is that the screen that goes on the inlet end of the fuel pump had to be reused. The new one that came with the general install kit I bought did not work. The Miata factory pump mount is angled toward the back of the tank, so the screen needs to be at an angle that counters that to run along the bottom of the tank. No big deal, just a heads up. Here is a picture of the stock setup. I only took about 100 pictures this weekend, but somehow I forgot to take a picture of the new pump in place. It looks basically the same except it has the noise blanket wrapped around it.


From there I moved onto the filter/lines. Thanks to some inspiration and a really nice tube flaring tool from itsallrigged, I was able to create a fuel line setup similar to his, he only charged $150 for the copyright....
About the only difference I could tell in our setups is he used one additional fitting(that I could see at least) where the line 90's toward the front of the car from the filter. It probably would have been cleaner that way, but I am cheap at those fittings are pricey, so I just bent a 90 there, it will work just fine. I plan to put rubber hose around my fuel line the entire length of the car for insulation and protection. 
Another little tid-bit of advice, hard lines and flaring tools. Inherently, you need to screw up a few times on these hard lines before you can really run with them. There is a learning curve to pick up on them as far as what needs to happen to make them just right. A few things that I picked up:
1. I found it easier to get all the tubing bent the way you want it, then flare them last. The tubing nuts will slide around a 90 degree bend, but the sleeves won't even come close. If you have a flared connection close to a bend, you won't be able to get the sleeve around the bend, so put the fittings on last and flare.
2. I have to assume aluminum tubing would be less forgiving because it is inherently more brittle than Stainless Steel. With my stainless steel tubing, I was able to form it at least a small amount just by hand without the bender. Don't get me wrong, if you are too agressive it WILL kink, so be careful.
3. I wasted about 2 feet of tubing just practicing, I highly suggest this before you ruin a piece the length of the car!
4. Finally, the quality of your tools will have great affect on the quality of your work. I'm not saying these things can't be done, but nicer tools make a big difference. I bought a tube flaring tool at a yard sale for $3 bucks some time ago for this work. It could have done the job, but itsallrigged was nice enough to send me his flaring tool to borrow for my lines. His tool was made by rigid, and was very easy to use. Its key feature was it had a torque release pin that would only allow you to put the exact amount of torque needed to flare the end properly, which made the process very painless.
If you are keeping tabs on my posts, I plan once again to do like itsallrigged did, and run a stainless braided line in the engine compartment, so for now I just left about a foot of extra tubing sticking into the engine bay until I get it test fitted and ready. Don't forget to cover this open end up!! Hate to get anything into your engine.
I then moved onto cutting/cleaning/welding. I cleaned up the corners of my engine bay finally, and I cut/hammered in the area on the passenger side to allow fuel lines clearance. After than I broke out my $50 harbor freight sandblaster. Great thing about the cart my shell is on is that the whole thing is easy to move, so I wheeled it to the edge of my barn, and hung plastic around it to keep the mess down. If you are thinking about getting a blaster just for this, I'd advise you to reconsider. It works great stripping rust and paint, however the sand just bounces off the seam sealer as seen here:

I did a fair amount of blasting, but ended up having to wire wheel it anyways. Seam Sealer makes a MESS! My engine bay looked like I slaughtered a lot spider webs. Here is another shot with a little bit of welding started. Make sure to get everything clean, and I mean CLEAN. The areas of good weld here are areas that I got all seam sealer out, the other areas where the welds look like crap are where I didn't.....

And finally, I have been asked a couple times about what wheels I am going to run. I bought 15x9 konig dial ins because they were on sale at goodwin. I was nervous about the black at first, but I after setting them in place I am very excited to get them on.


All in all it was a good weekend for the car, felt really good to finally get some progress made on it.

The following users liked this post:
charchri4 (10-13-2015)
07-21-2015, 12:48 PM
#21
V8 Miata Fan

I thought the people who used such a nice low mile 10AE as a Catfish donor were morons. I'm glad to see that you swooped in to save such a nice car and make it even better than it was originally, kudos!
The following users liked this post:
charchri4 (10-13-2015)
07-21-2015, 01:28 PM
#23
V8 Miata Fanatic
Thread Starter
Yes, although it is sad that this car was sacrificed so something else could live on, when the smoke settles it will re-emerge better than it ever hoped to be.
08-04-2015, 09:17 AM
#24
V8 Miata Fanatic
Thread Starter
Had a good weekend worth of progress this weekend so its time for an update, and a couple of questions.
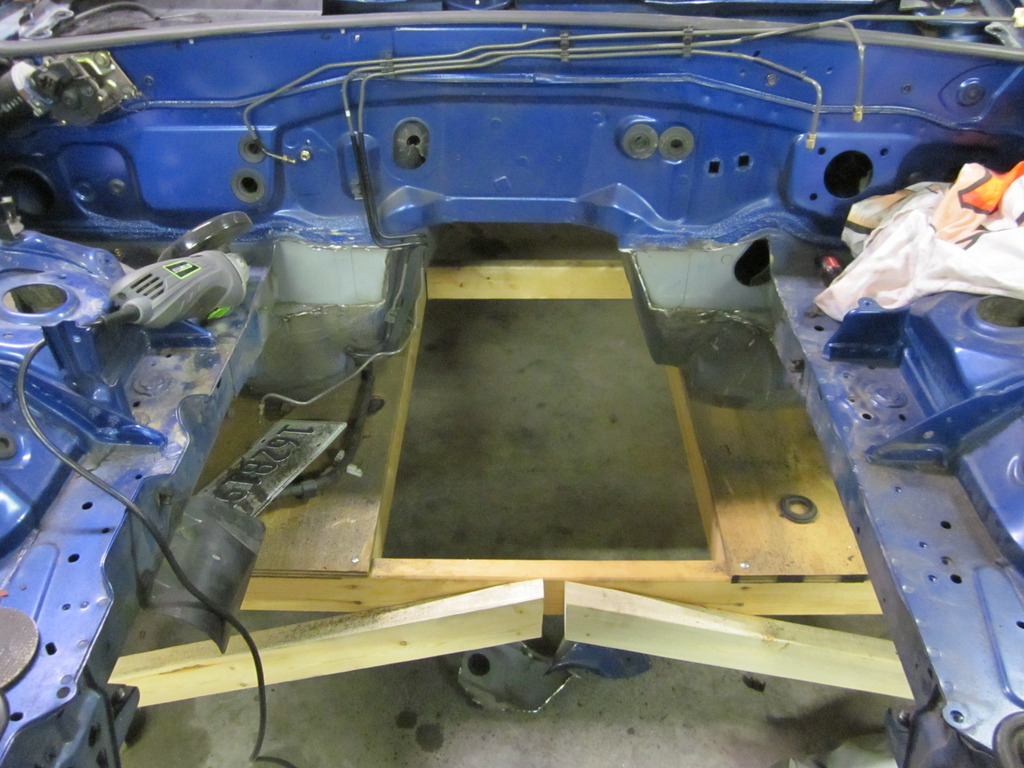
Started out on Friday by finally nutting up and cutting the trans tunnel. This has been a point of hold up for me just because I was a little nervous about making the cut. I'm past the point of no return now though so we must press on. I started out with a mediocre amount of widening since I have read from multiple people that the FM guidelines are further than they need to be.
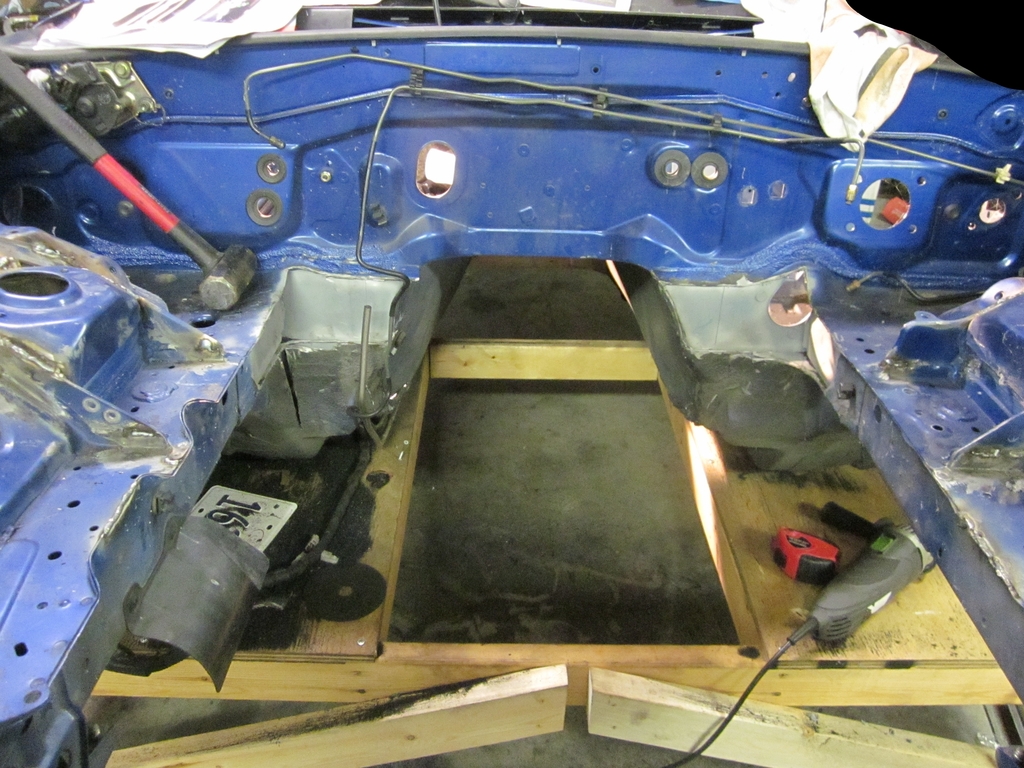
One thing I wanted to point out that I did different than the instructions and what others have said, is I did not cut the interior braces completely out. My interior braces where slightly different from some of yours I have seen before, and I just figured with the way they went all the way up on top of the tunnel, there was no reason to completely remove them. Perhaps it is the difference in NA and NB cars, but I just figured I'd leave them in place until I had to move them. It did take a little more persuasion with the hammer in that area......Notice in the pictures they curl up over the tunnel almost half way across. I ended up just drilling out the spot welds against the firewall and going at it with the hammer.
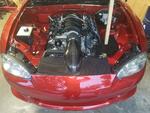
That was all Friday night. Saturday I finally pulled the LS1 out of its corner for the first time in 6 months and started in on it.
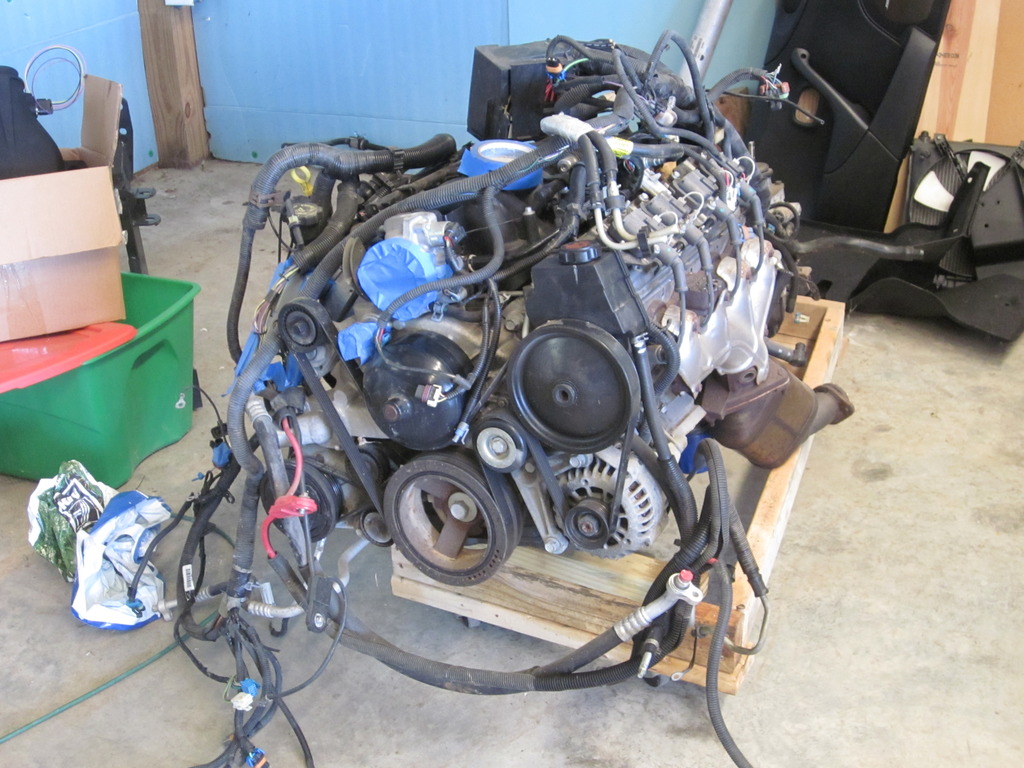
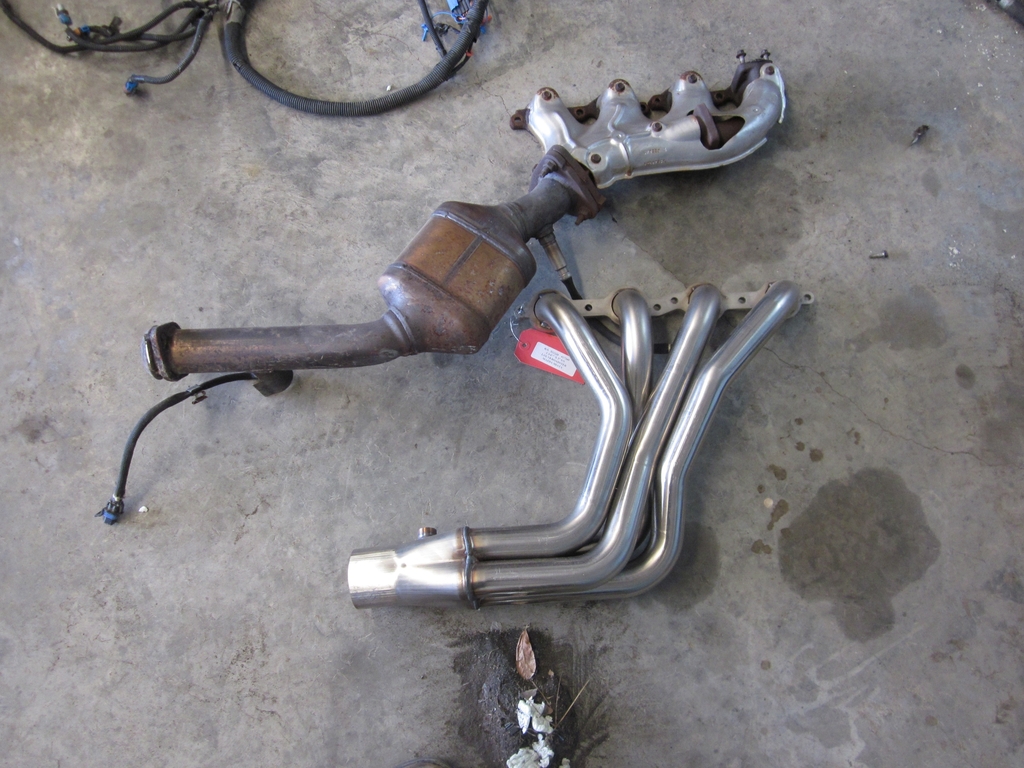
Got all the wiring pulled off, factory manifolds, oil pan changed, etc etc. Only thing I didn't get to was flipping around the fuel rail.
What a drastic improvement these are!
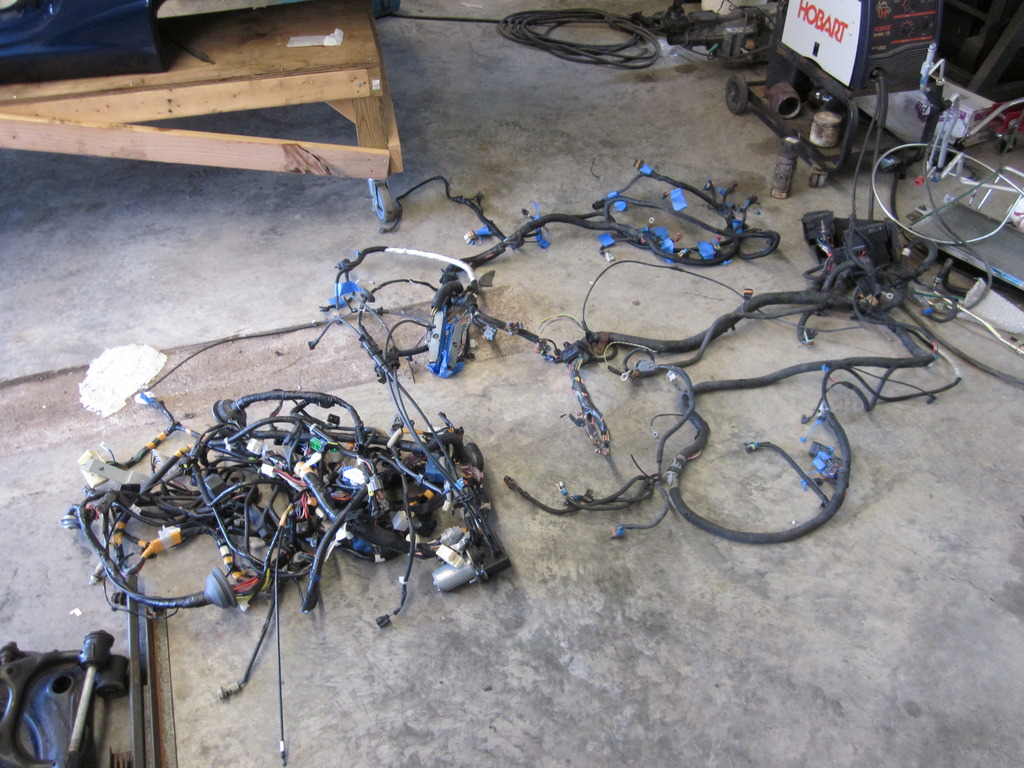
and what a huge scary mess this is! What you see is a well labeled engine harness from the LS1, and non labeled body harness from the Camaro donor car, and the harness from the miata. Before you flame me too much, keep in mind that I did not pull this car apart so labeling it was not an option for me. I do on the other hand have the parts car harness that I have been keeping good tabs on
Now for a couple of questions I have coming out of the weekend.
1. The factory oil pan bolts up to the bottom of the t56 bellhousing, and protects it from any debris getting in there. The new pan obviously does not, so did you guys just leave this open, or did you make some sort of cover?
2. I thought I had read somewhere that it is impossible to install the oil pan with the engine right side up, and it must be turned upside down, but I had no trouble at all just lifting the engine up and putting the pan on. I have the newer style FM Pan and unless I am missing something, I think it went on without a hitch!
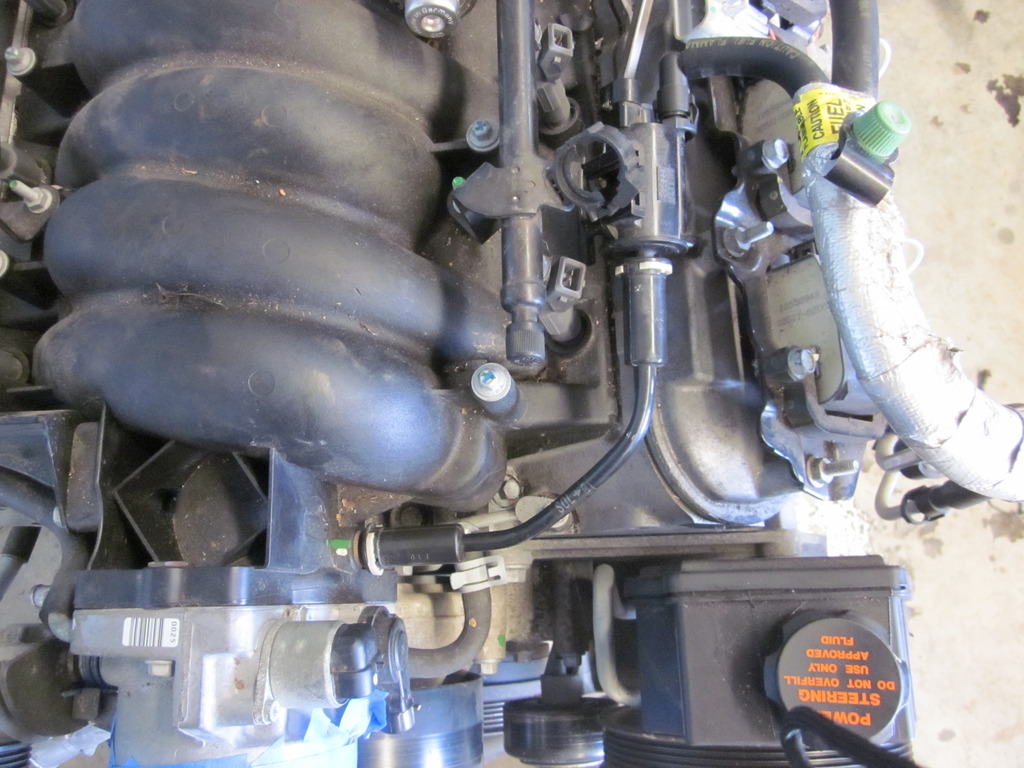
3. Please see the picture below, This piece goes between the front of the intake manifold, and connects to the fuel supply line, can anyone tell me what it is and what you did with it? Obviously it is not used with my new custom fuel line, but I am still wondering.
Anyways, progress on the car will be slow for the next couple weeks. I have a final paper to finish before Thursday, then Friday we are heading to Costa Rica for some much needed R & R.
Started out on Friday by finally nutting up and cutting the trans tunnel. This has been a point of hold up for me just because I was a little nervous about making the cut. I'm past the point of no return now though so we must press on. I started out with a mediocre amount of widening since I have read from multiple people that the FM guidelines are further than they need to be.

One thing I wanted to point out that I did different than the instructions and what others have said, is I did not cut the interior braces completely out. My interior braces where slightly different from some of yours I have seen before, and I just figured with the way they went all the way up on top of the tunnel, there was no reason to completely remove them. Perhaps it is the difference in NA and NB cars, but I just figured I'd leave them in place until I had to move them. It did take a little more persuasion with the hammer in that area......Notice in the pictures they curl up over the tunnel almost half way across. I ended up just drilling out the spot welds against the firewall and going at it with the hammer.


That was all Friday night. Saturday I finally pulled the LS1 out of its corner for the first time in 6 months and started in on it.

Got all the wiring pulled off, factory manifolds, oil pan changed, etc etc. Only thing I didn't get to was flipping around the fuel rail.
What a drastic improvement these are!

and what a huge scary mess this is! What you see is a well labeled engine harness from the LS1, and non labeled body harness from the Camaro donor car, and the harness from the miata. Before you flame me too much, keep in mind that I did not pull this car apart so labeling it was not an option for me. I do on the other hand have the parts car harness that I have been keeping good tabs on

Now for a couple of questions I have coming out of the weekend.
1. The factory oil pan bolts up to the bottom of the t56 bellhousing, and protects it from any debris getting in there. The new pan obviously does not, so did you guys just leave this open, or did you make some sort of cover?
2. I thought I had read somewhere that it is impossible to install the oil pan with the engine right side up, and it must be turned upside down, but I had no trouble at all just lifting the engine up and putting the pan on. I have the newer style FM Pan and unless I am missing something, I think it went on without a hitch!
3. Please see the picture below, This piece goes between the front of the intake manifold, and connects to the fuel supply line, can anyone tell me what it is and what you did with it? Obviously it is not used with my new custom fuel line, but I am still wondering.

Anyways, progress on the car will be slow for the next couple weeks. I have a final paper to finish before Thursday, then Friday we are heading to Costa Rica for some much needed R & R.
Last edited by stng_96; 10-05-2015 at 09:49 AM.
The following 2 users liked this post by stng_96:
be good (12-22-2015),
SupaDupaSteve (08-04-2015)
08-04-2015, 06:47 PM
#25

A simple dust cover can be made from a card board template with an outline of the bellhousing and holes for mounting. Mount the cover by using the two holes on the bottom of the bellhousing to mount the dust cover. The dust cover material I used was a piece of aluminum of relatively thin stock. It has been on my car several years with no issues.


