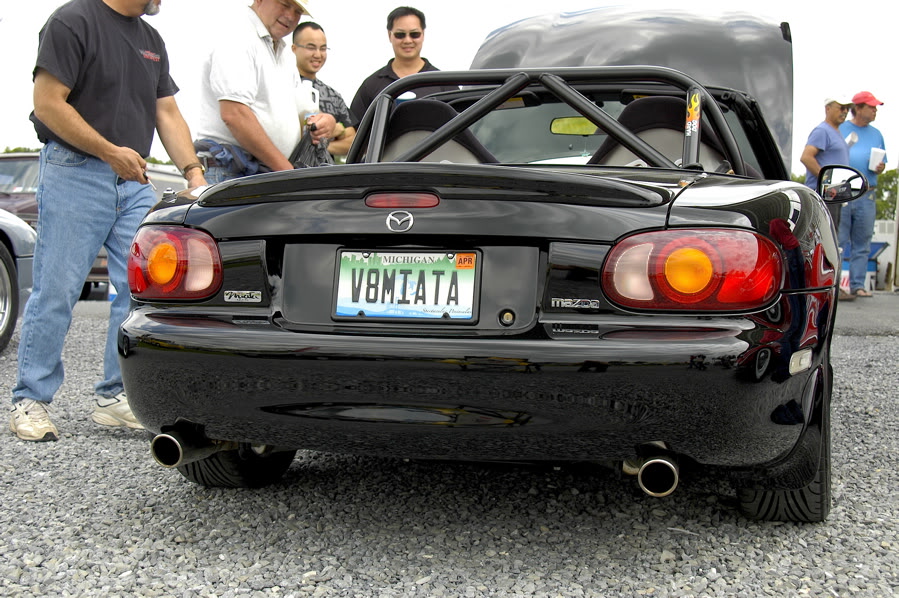
2000 Miata Project (LS1, T56, Getrag)

 03-06-2013, 07:48 AM
#1
V8 Miata Noob
Thread Starter

Join Date: Mar 2013
Location: Lawton, Michigan
Posts: 21
Likes: 0
Received 0 Likes
on
0 Posts
Bought my Miata new in 2000. Added some misc goodies along with an MP45 blower. Worked really well, but when I saw an LS conversion... I had to have one. Ended selling the engine & trans to the new owner in Arizona. Called my friend Brad and he soon came up with a used 2004 LS1 & T56 Tremec tranny. Purchased a new Getrag diff & the V8Roadsters kit.
Project took me about three months to complete. Here's some pics & details.
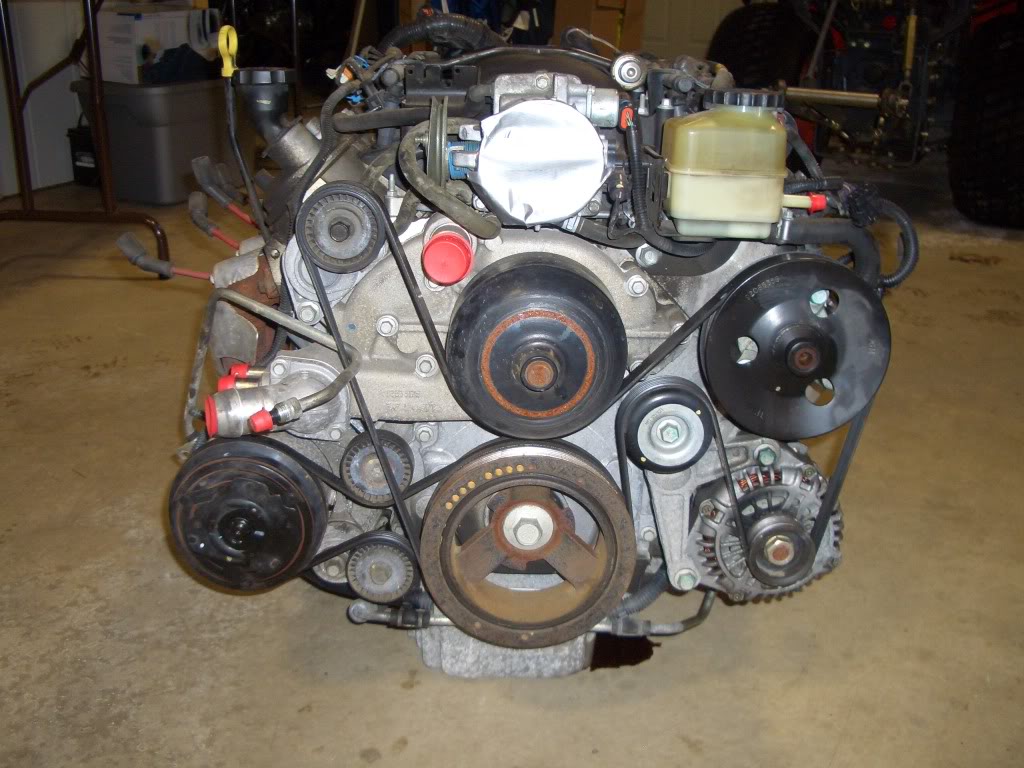
Used LS1 just off the truck
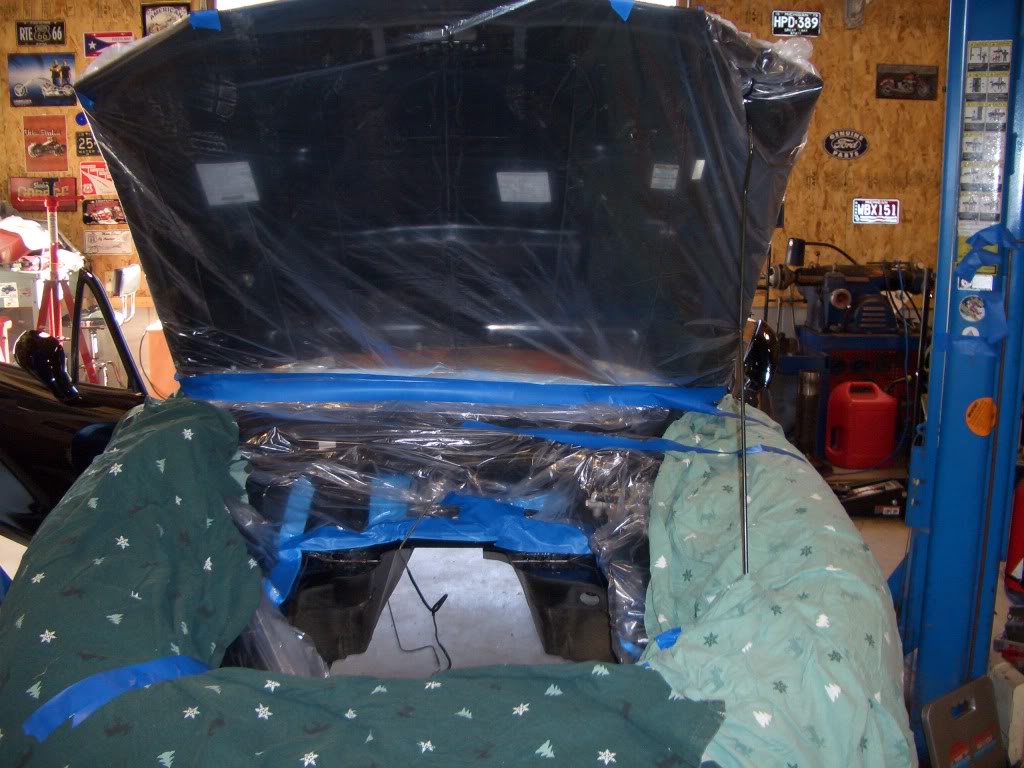
Car & engine bay covered before firewall mods
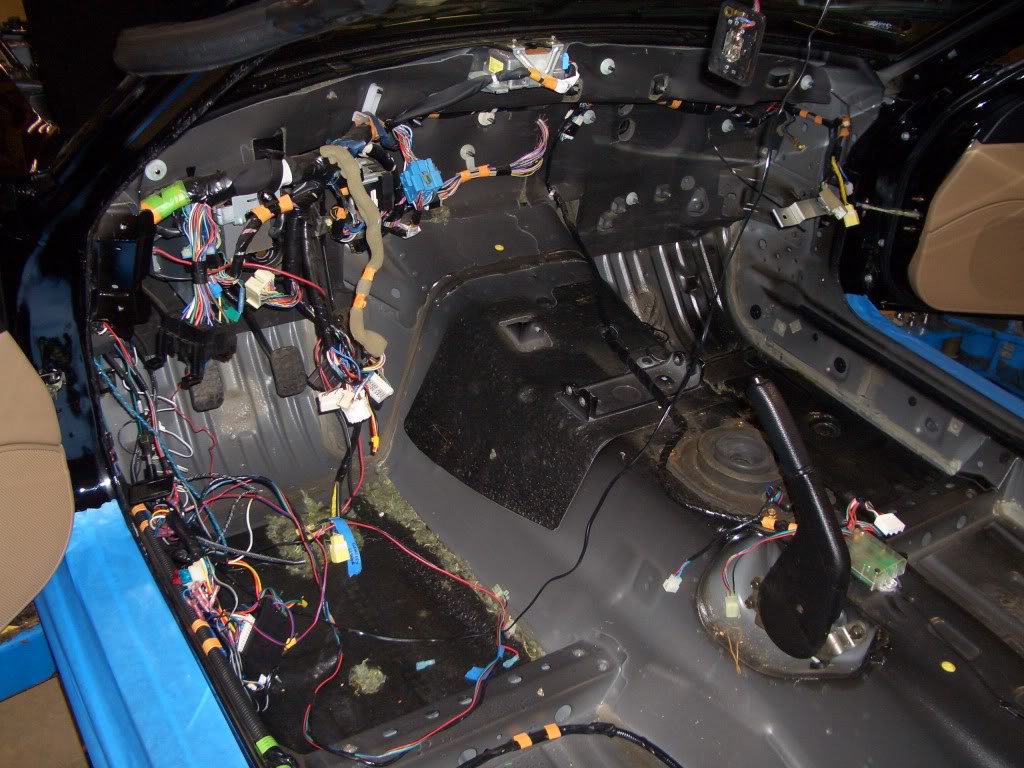
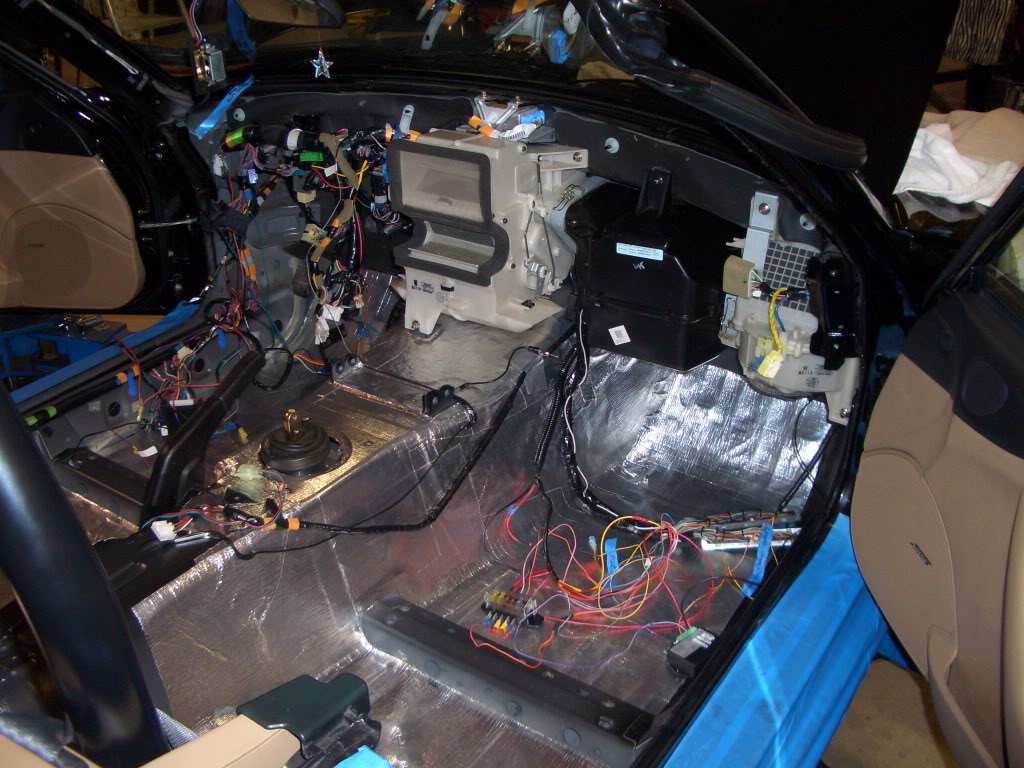
Interior gutted
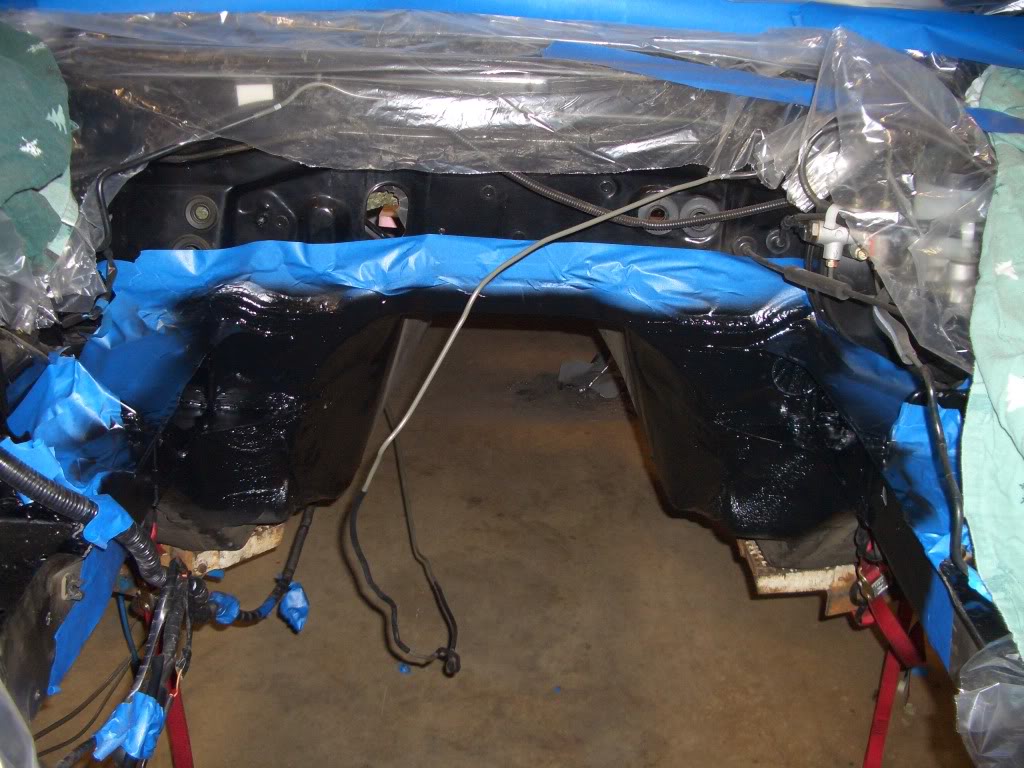
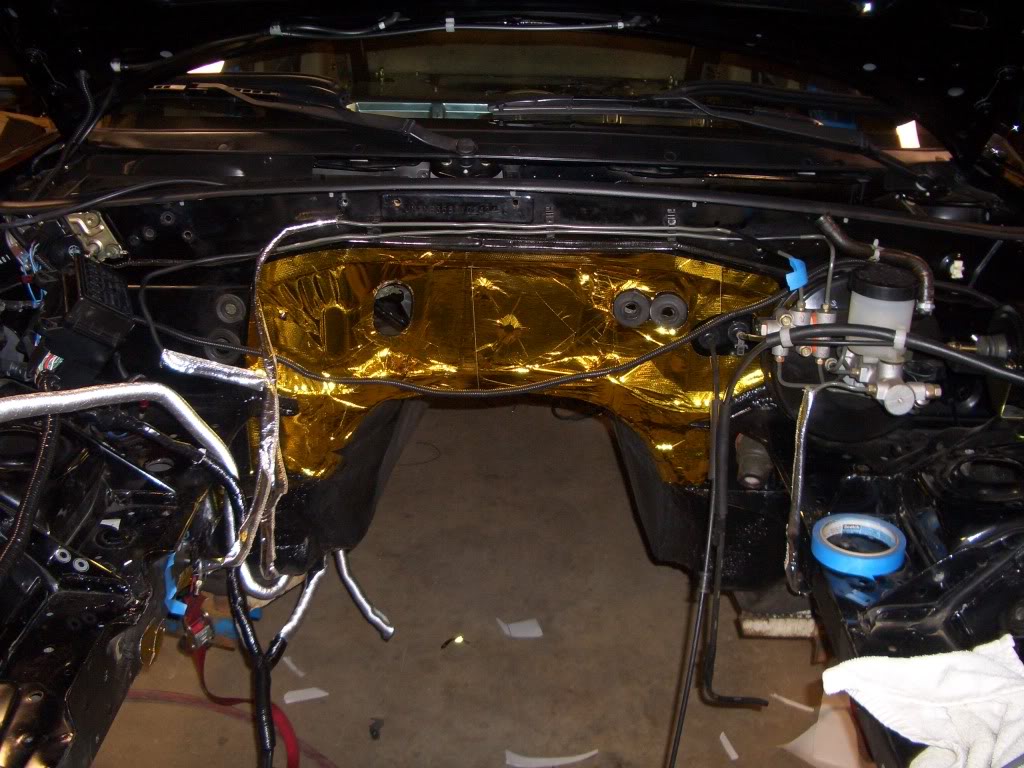
Firewall work compete, primed & painted
Gold foil material is suppose to reflect 78% (trying to keep the interior temp down)
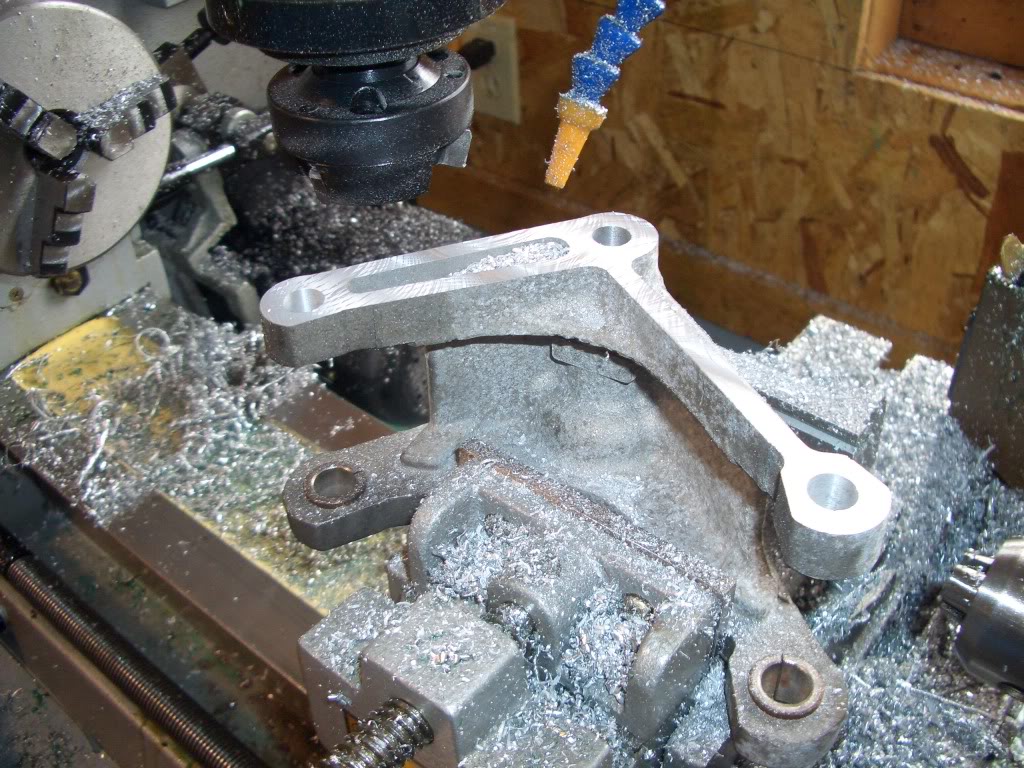
Machine 0.760" off the alternator bracket to match the LS2 water pump
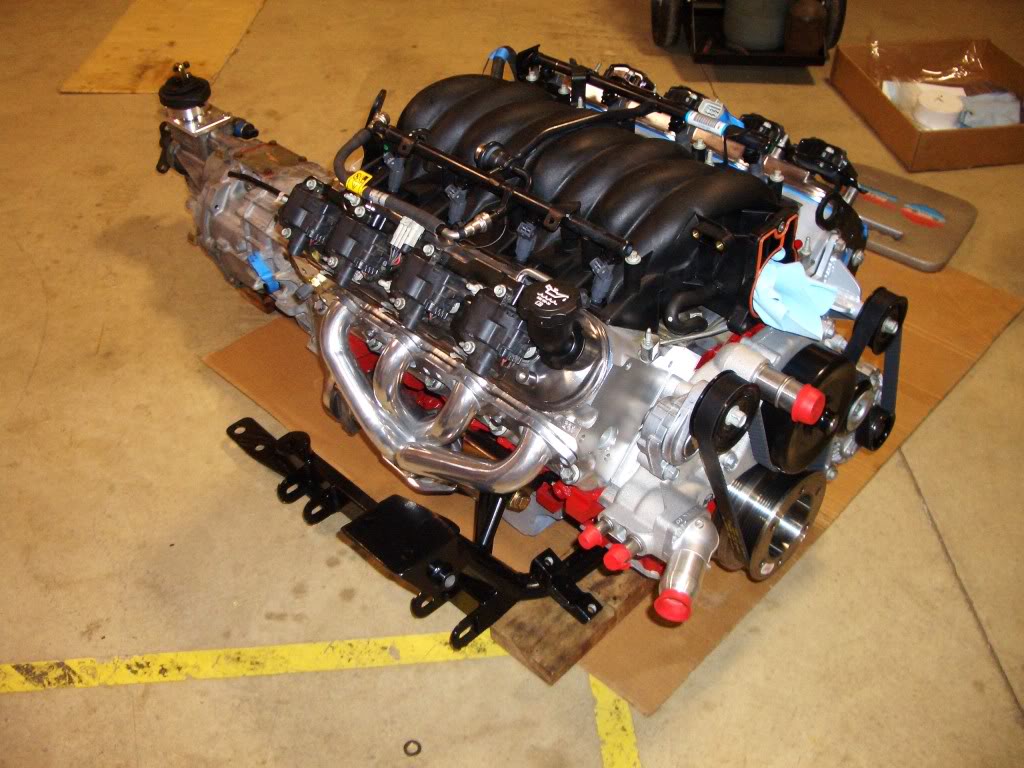
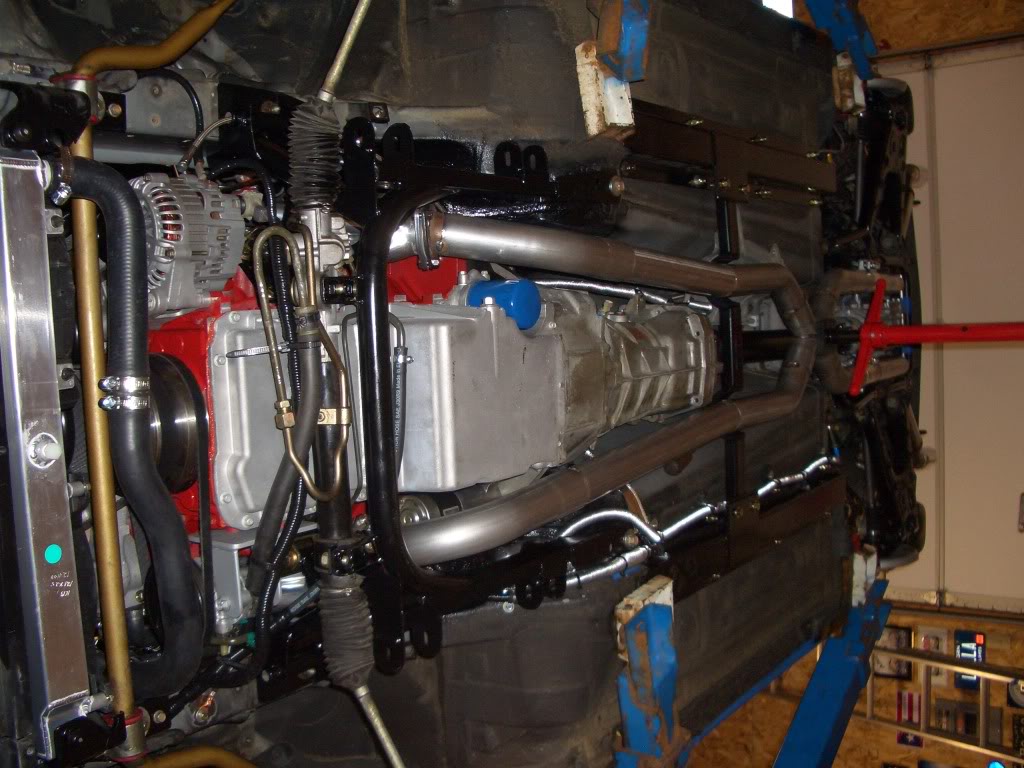
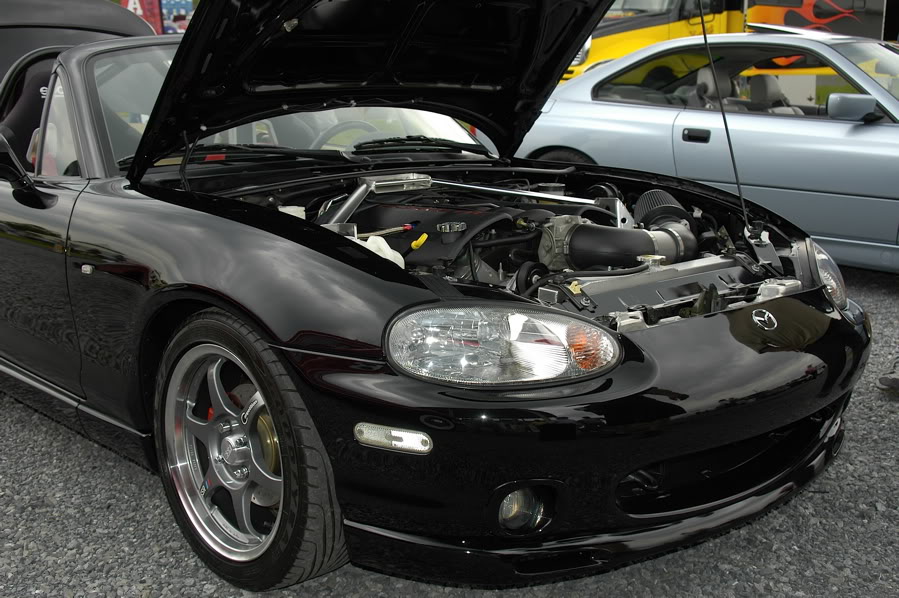
Engine & tranny rebuilt & mounted on V8Roadsters K-member
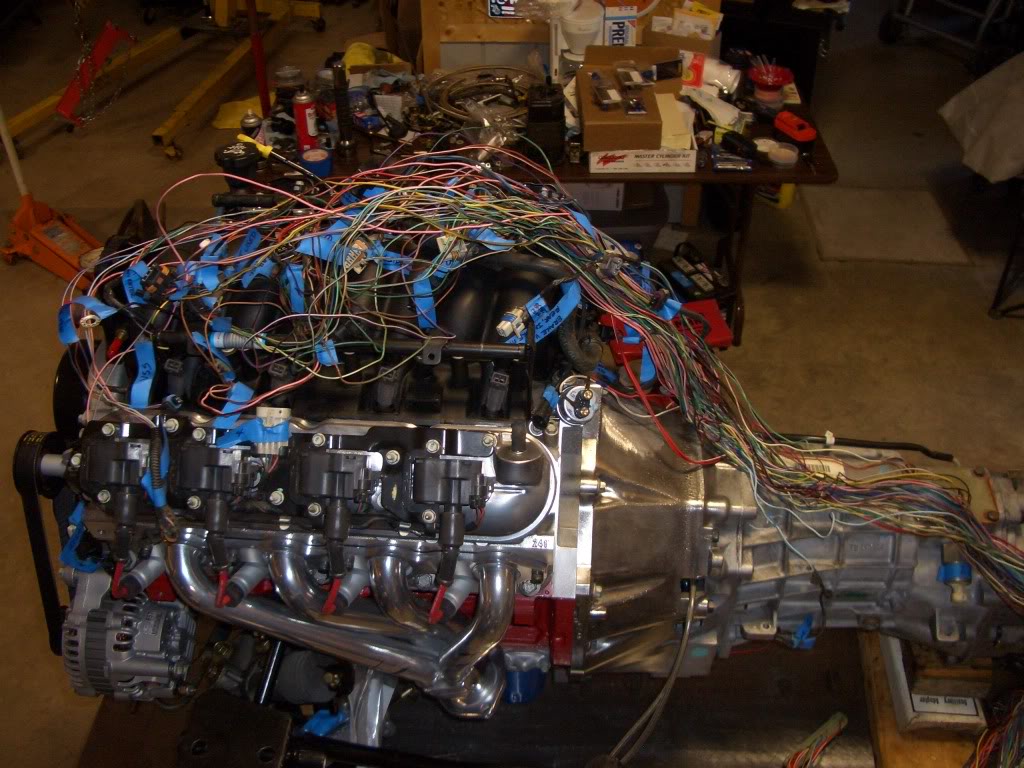
Decided to put together my own harness (won't do that again...)
Interior going back together
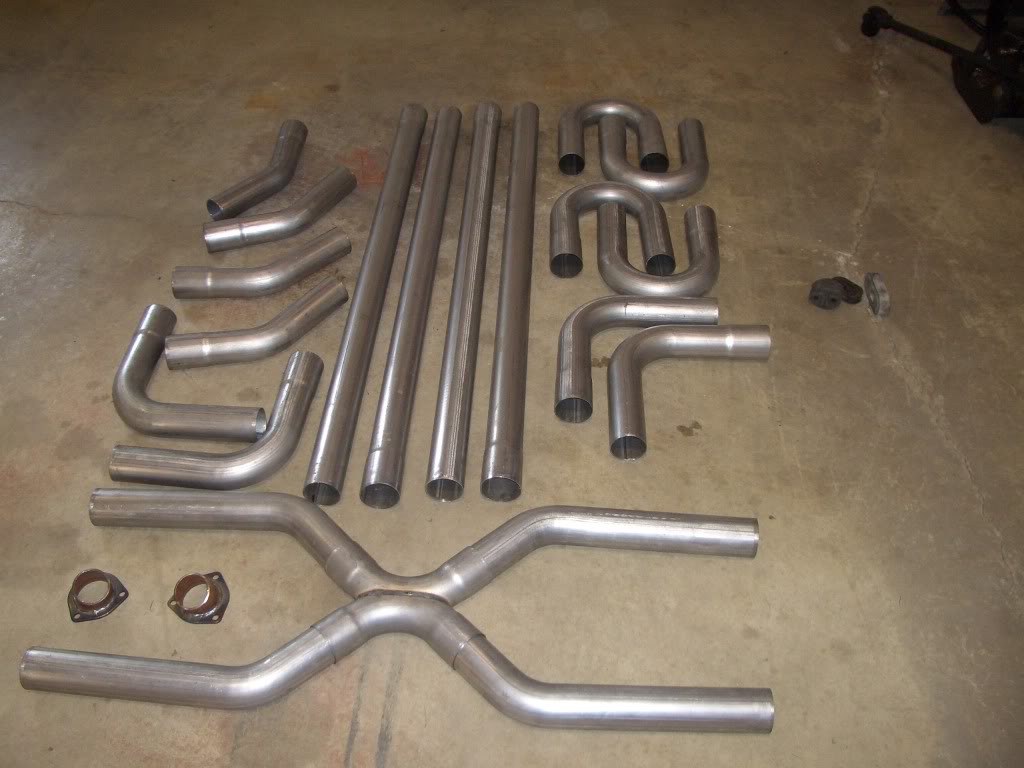
Used a Jegs 2 1/2" universal kit w/cross-over

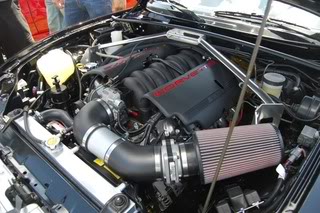
Finished photos

Project took me about three months to complete. Here's some pics & details.
Used LS1 just off the truck
Car & engine bay covered before firewall mods
Interior gutted
Firewall work compete, primed & painted
Gold foil material is suppose to reflect 78% (trying to keep the interior temp down)
Machine 0.760" off the alternator bracket to match the LS2 water pump
Engine & tranny rebuilt & mounted on V8Roadsters K-member
Decided to put together my own harness (won't do that again...)
Interior going back together
Used a Jegs 2 1/2" universal kit w/cross-over
Finished photos
Last edited by chpmnsws6; 03-08-2013 at 11:22 AM.


 03-06-2013, 02:16 PM
#4
V8 Miata Noob
Thread Starter
Join Date: Mar 2013
Location: Lawton, Michigan
Posts: 21
Likes: 0
Received 0 Likes
on
0 Posts
Thanks guys.
Jegs "Street Rod Exhaust Kits"
2 1/4", #555-30670
2 1/2", #555-30671
3", #555-30672
Jegs, Universal X-Pipes
2 1/4", #555-30660
2 1/2", #555-30661
3", #555-30662
I used Sanderson Headers (#V8RLS1-P). Had to dipple the #1 & #7 tubes to clear the steering shaft. Maybe their headers have changed since 2009 to accommodate the shaft?
Good luck with your builds!
03-06-2013, 07:14 PM
#5
V8 Miata Fanatic


Very impressive build. Really like how clean and detailed the motor looks. I guess you painted the alum block red or orange? What suspension, radiator, etc did you elect to use with this LS bundle of joy?
03-06-2013, 08:01 PM
#6
V8 Miata Noob
Thread Starter
Join Date: Mar 2013
Location: Lawton, Michigan
Posts: 21
Likes: 0
Received 0 Likes
on
0 Posts
Thanks.
The block was degreased, etched with Purple Power cleaner, rinsed, dried, prepped with thinner, then sprayed with Duplicolor Red Caliper paint.
Other details:
-Spaks coil-overs
-Fly'n Miata competition radiator (stock fans)
-Summit Racing under-drive harmonic balancer
-Custom P/S bracket for Miata pump
-Pro 1 short-shifter
-Getrag differential w/G80 LSD option
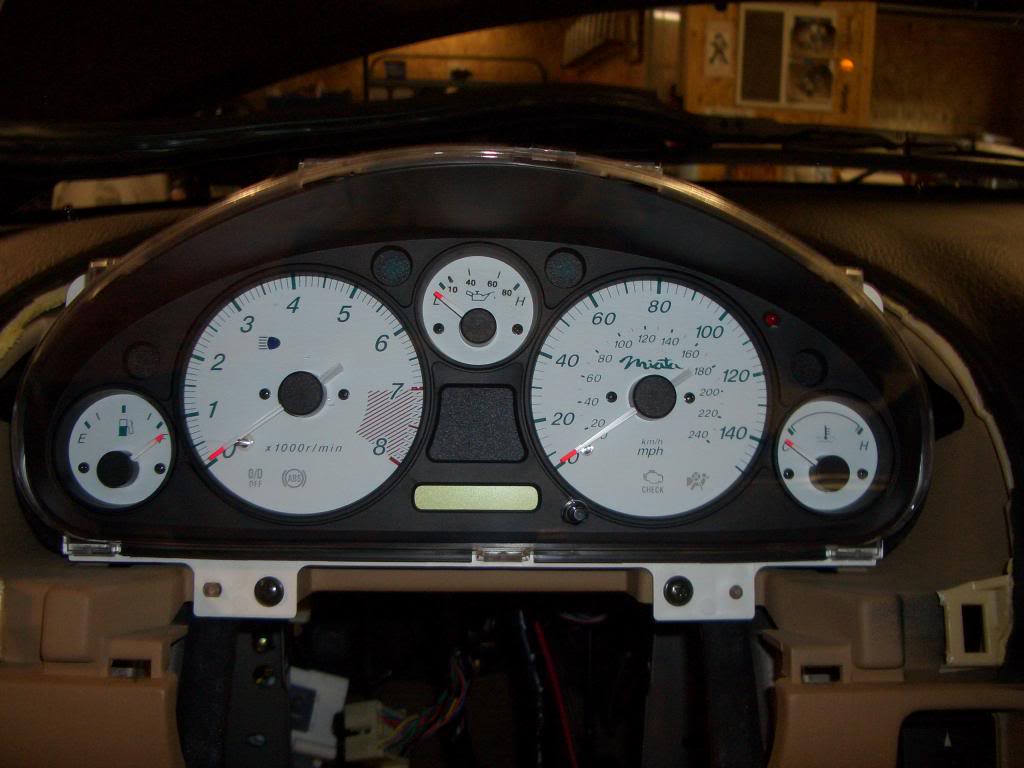
-Dual oil pressure sending unit (revised stock gauge & idiot LED next to speedo)
-Heat sheathing throughout the cabin
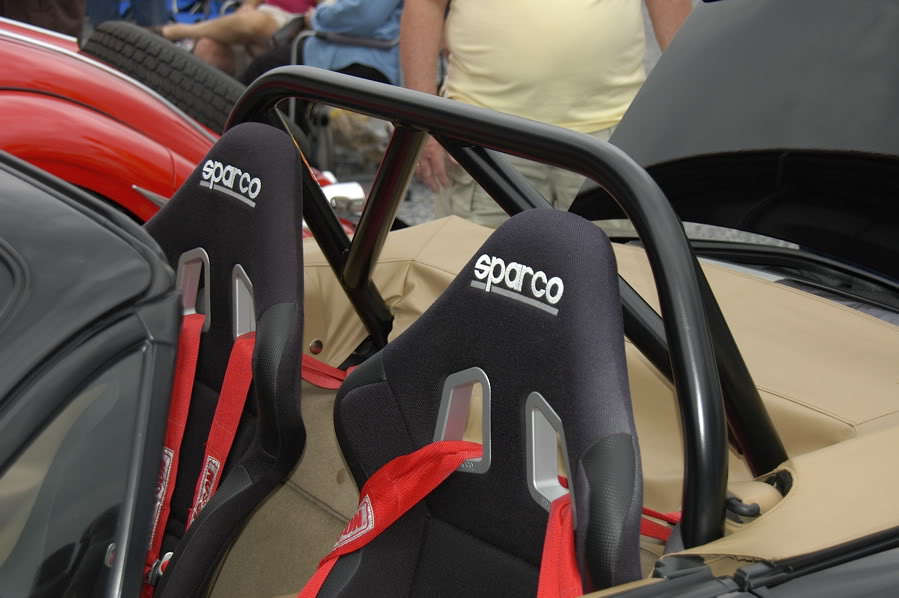
-Sparco, Roadster seats (custom seat brackets)
-Dakota Digital speedo signal converter
I'm sure I missed a few things. The swap has about 14k on it.
Thanks for your interest.
The block was degreased, etched with Purple Power cleaner, rinsed, dried, prepped with thinner, then sprayed with Duplicolor Red Caliper paint.
Other details:
-Spaks coil-overs
-Fly'n Miata competition radiator (stock fans)
-Summit Racing under-drive harmonic balancer
-Custom P/S bracket for Miata pump
-Pro 1 short-shifter
-Getrag differential w/G80 LSD option
-Dual oil pressure sending unit (revised stock gauge & idiot LED next to speedo)
-Heat sheathing throughout the cabin
-Sparco, Roadster seats (custom seat brackets)
-Dakota Digital speedo signal converter
I'm sure I missed a few things. The swap has about 14k on it.
Thanks for your interest.
03-07-2013, 08:30 AM
#7
Jim Stainer

Wow this is the best build thread I have ever seen! Thank you so much for posting it! What a sweet build. Very well thought out and detailed. I really appriate the numbers on the exhaust and how you approched that. You have given me much hope!!

 03-07-2013, 04:49 PM
#9
V8 Miata Noob

Join Date: Nov 2012
Location: Midland, TX
Posts: 20
Likes: 0
Received 0 Likes
on
0 Posts
That is a VERY nice build! The work is neatly done, and the finished product is lovely indeed. You do good work, Bro. Thanks for posting this fine thread.
Lynn B.
Lynn B.
04-03-2013, 07:26 PM
#11
V8 Miata Noob
Thread Starter
Join Date: Mar 2013
Location: Lawton, Michigan
Posts: 21
Likes: 0
Received 0 Likes
on
0 Posts
Thought I'd share a few more details.
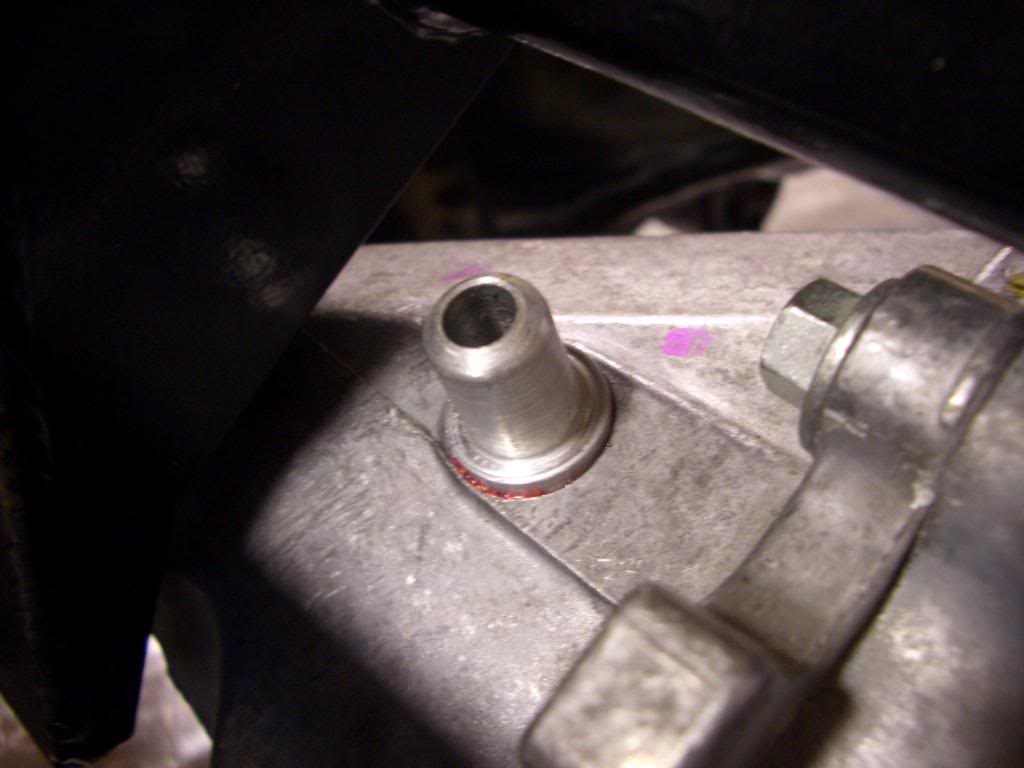
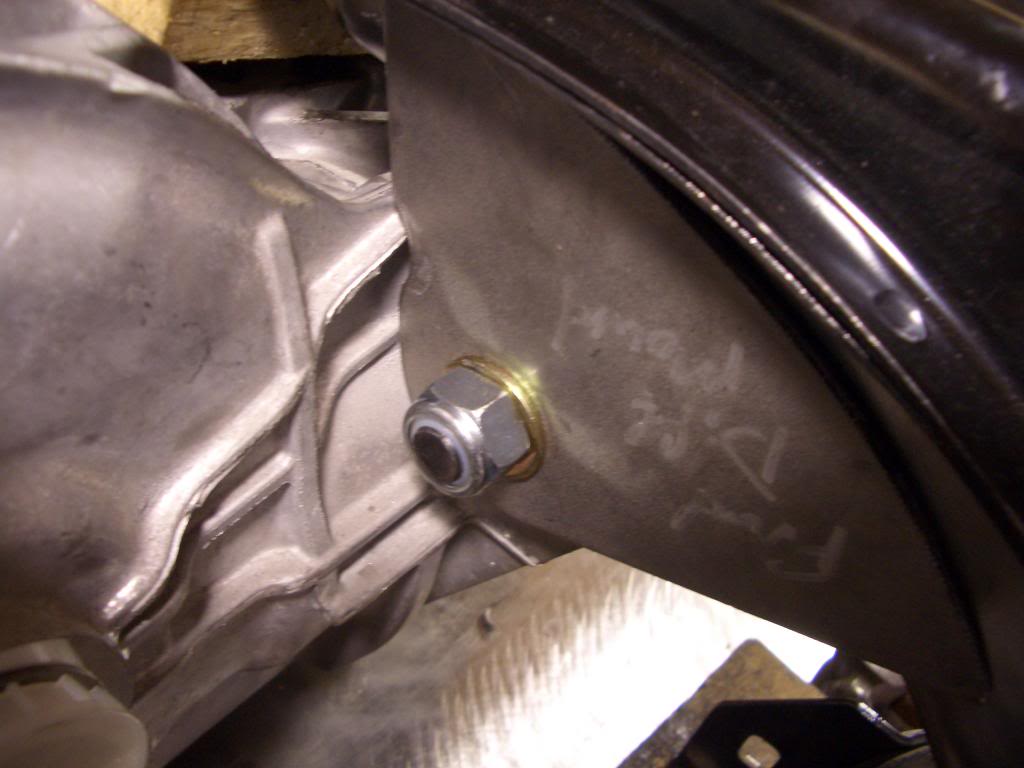
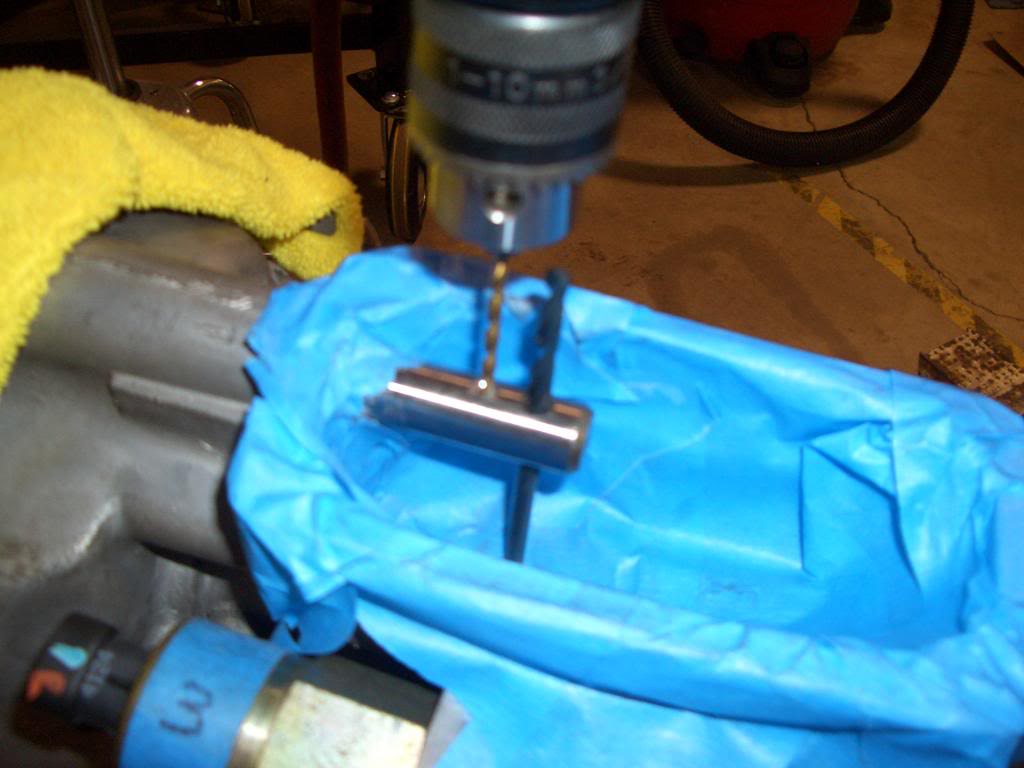
Used a Getrag differential. There was a service bulletin that addressed fluid leakage through the vent during high temps and high speed usage.
The GM fix to the dealers was to pop the top off the vent, attach a 12" piece of hose, insert a new vent at the other end and wire-tie approx. 4" above the original point.
I took a slightly different angle.
Removed the stock vent and machined a spool piece which was pressed in place
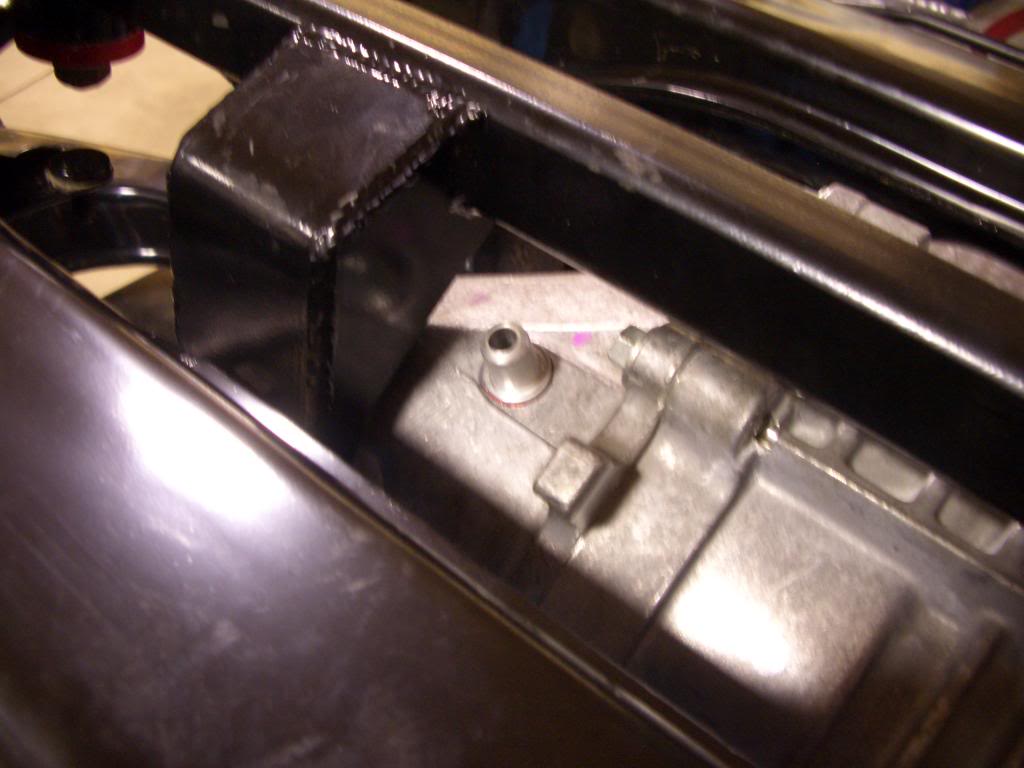
Here's a close up. Red stuff is loctite sealer
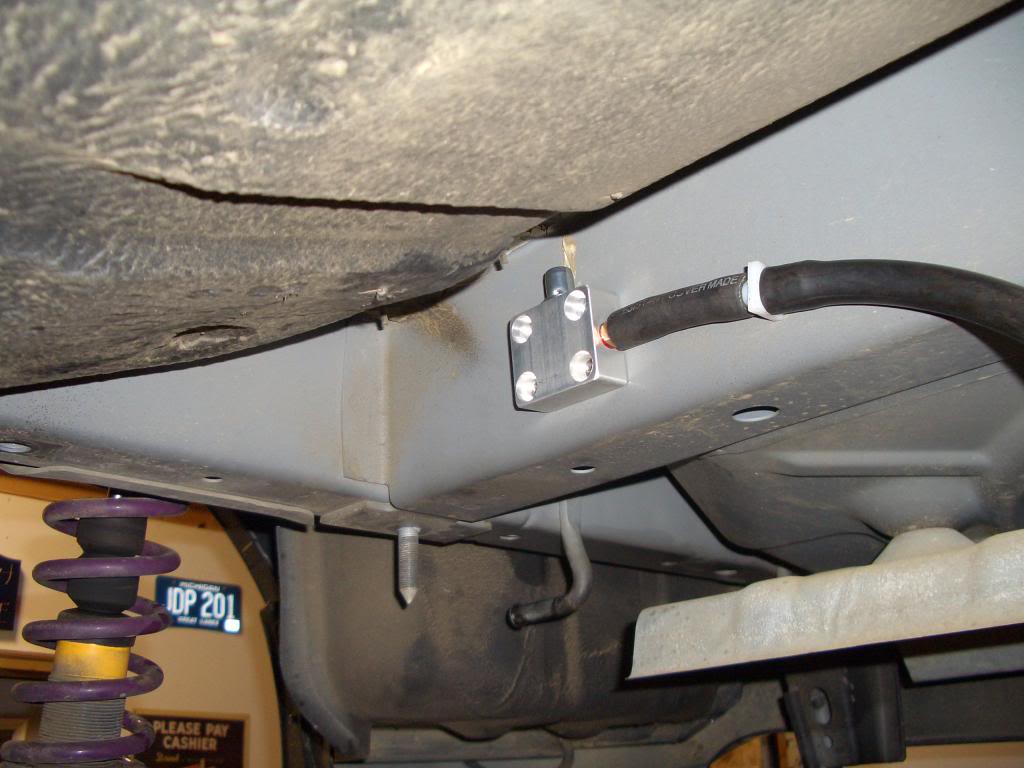
Machined an aluminum block to accept the stock vent and threaded barbed hose fitting.
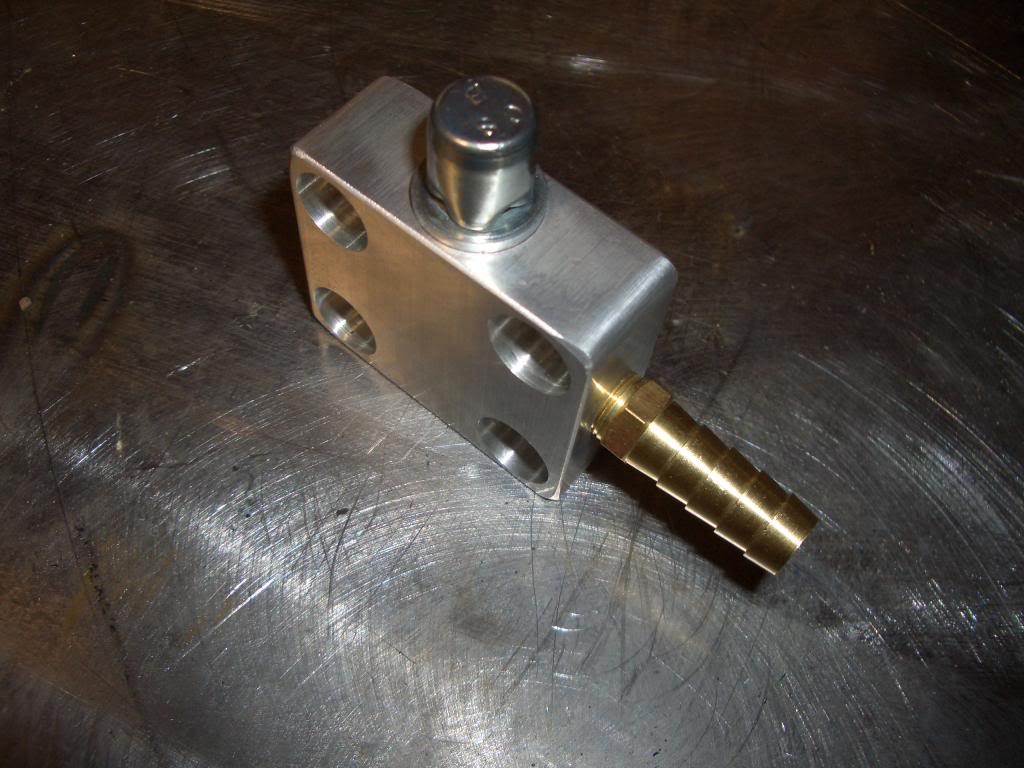
Mounted it above the differential sub-frame, on the frame header, ran a hose to the diff.
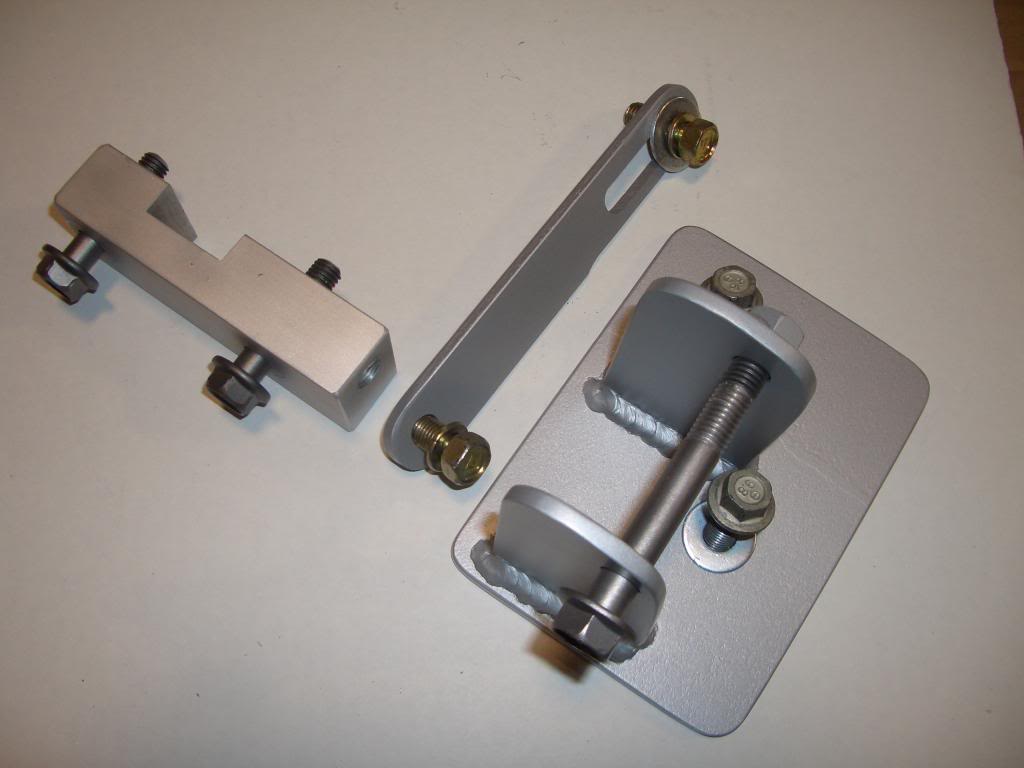
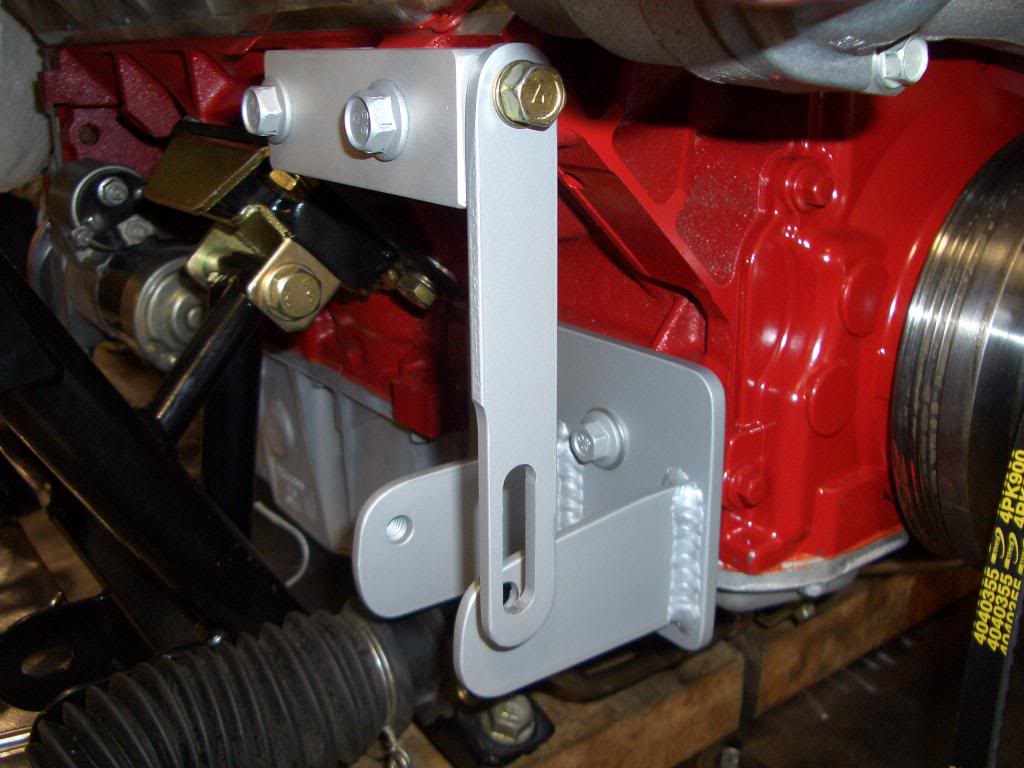
Some choose to "delete" the power steering. I'm too soft; so P/S was a must.
Here's the bracket I made and how it fits (stock Miata pump)

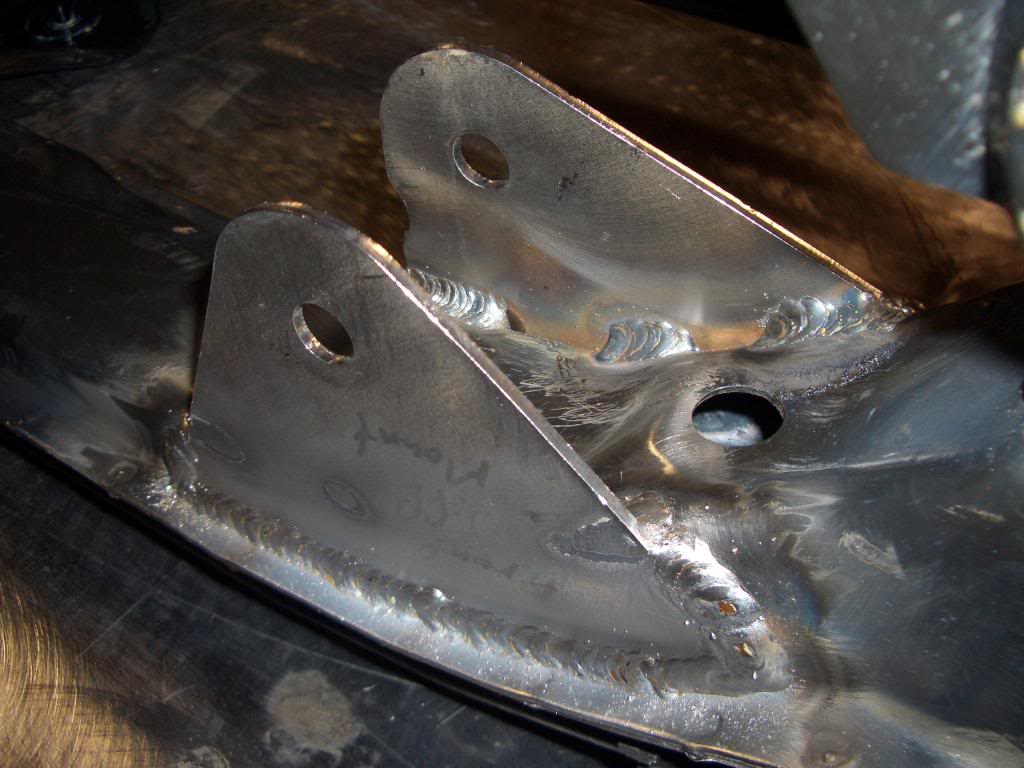
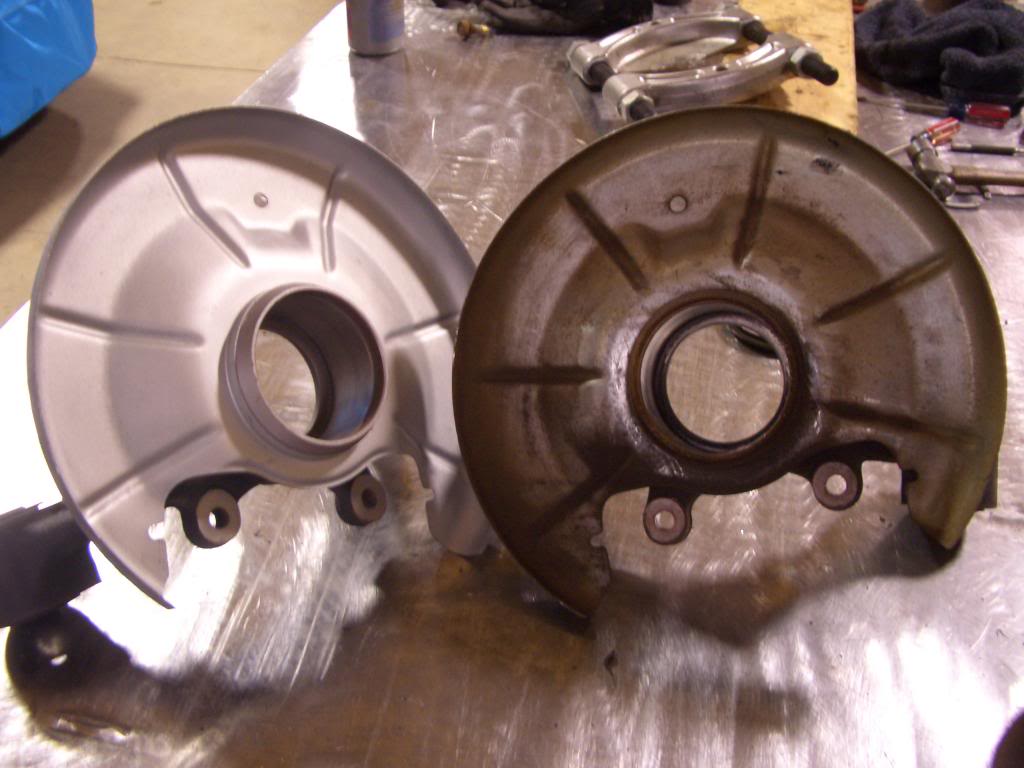
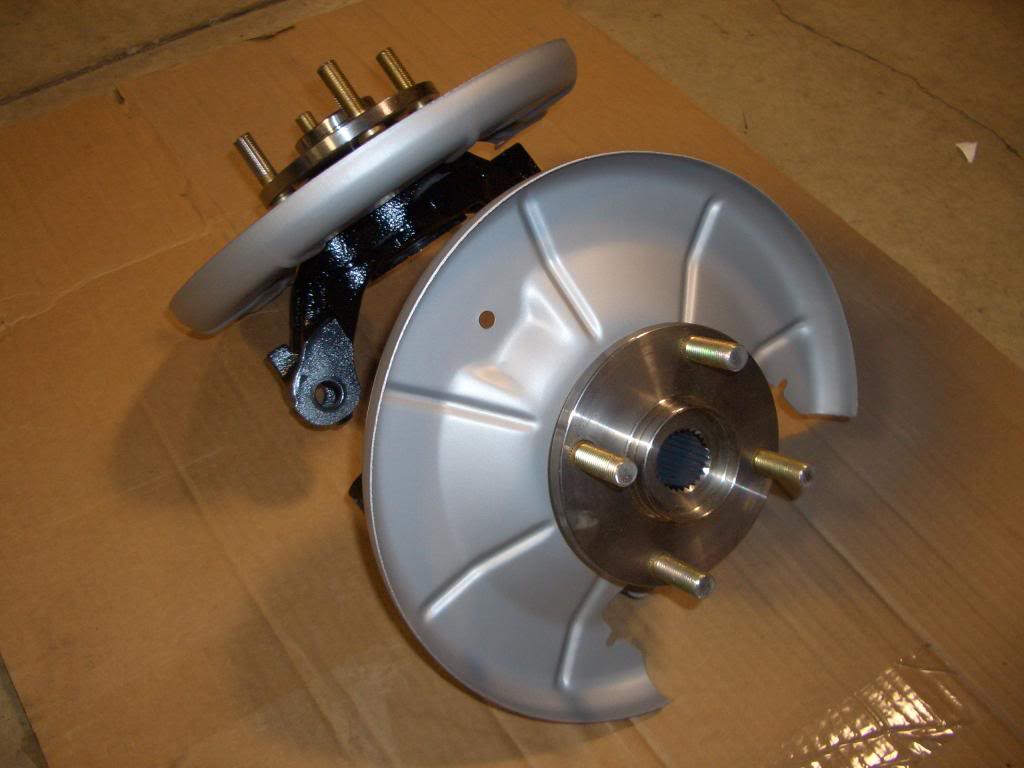
The V8Roadsters kit came with a couple of plates to mount the differential. I had to first notch out one of the plates, then set the pinion angle, then tack the plates in place
Completed welding
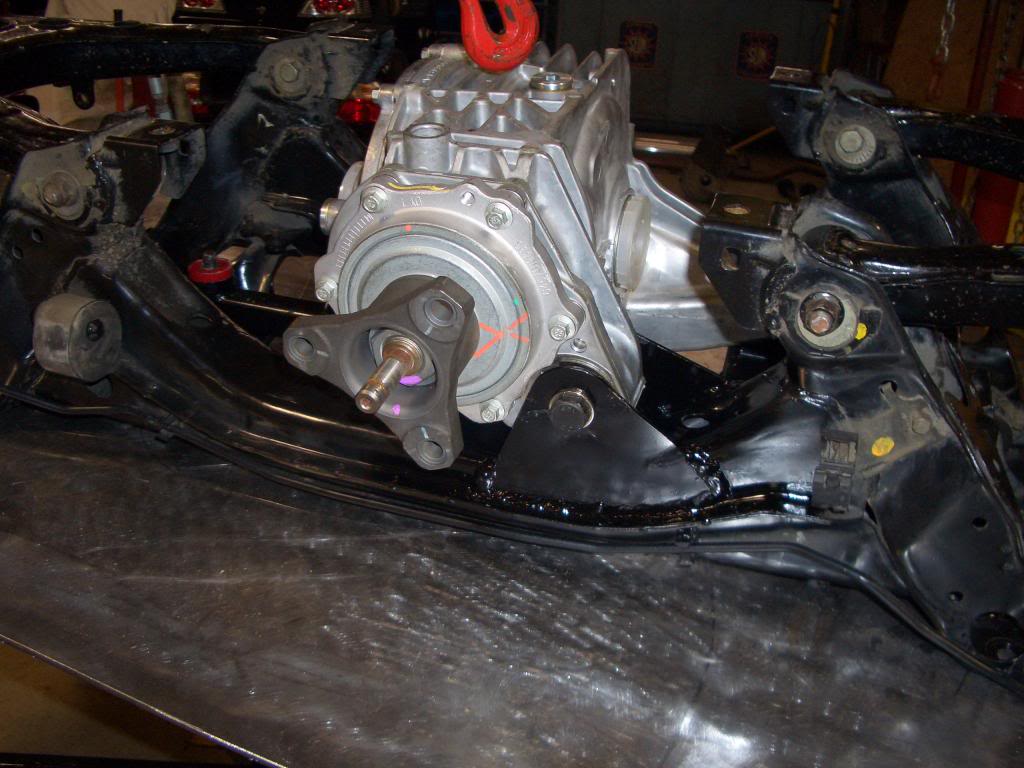
Diff with bracket in place. Ready to be installed in the car.
The car came with an "idiot" oil pressure gauge. It only registered one position once oil pressure was established. Found where others used a couple of 180 ohm resistors in the gauge & a new sending unit to have a functional gauge. I took a step further and used a dual sending unit and installed a red LED (just to the right of the speedo, 110mph). The LED is now the idiot light. Goes out when oil pressure exceeds 12psi.
Used a Getrag differential. There was a service bulletin that addressed fluid leakage through the vent during high temps and high speed usage.
The GM fix to the dealers was to pop the top off the vent, attach a 12" piece of hose, insert a new vent at the other end and wire-tie approx. 4" above the original point.
I took a slightly different angle.
Removed the stock vent and machined a spool piece which was pressed in place
Here's a close up. Red stuff is loctite sealer
Machined an aluminum block to accept the stock vent and threaded barbed hose fitting.
Mounted it above the differential sub-frame, on the frame header, ran a hose to the diff.
Some choose to "delete" the power steering. I'm too soft; so P/S was a must.
Here's the bracket I made and how it fits (stock Miata pump)
The V8Roadsters kit came with a couple of plates to mount the differential. I had to first notch out one of the plates, then set the pinion angle, then tack the plates in place
Completed welding
Diff with bracket in place. Ready to be installed in the car.
The car came with an "idiot" oil pressure gauge. It only registered one position once oil pressure was established. Found where others used a couple of 180 ohm resistors in the gauge & a new sending unit to have a functional gauge. I took a step further and used a dual sending unit and installed a red LED (just to the right of the speedo, 110mph). The LED is now the idiot light. Goes out when oil pressure exceeds 12psi.
04-10-2013, 07:38 AM
#12
V8 Miata Noob
Thread Starter
Join Date: Mar 2013
Location: Lawton, Michigan
Posts: 21
Likes: 0
Received 0 Likes
on
0 Posts
My tranny was off an '04 GTO. Didn't know it at the time, but the GTO T56 has a longer shifter shaft than the standard F body model. Since I already had the Pro One short shifter for a F body; decided to shorten the shaft, but first had to grind the hardening from the shaft before drilling the new hole. Remember this part well because a couple of my friends were over, and they kept telling me I was crazy... "just get the shifter for the GTO". I'm stubborn. Took the right size drill, inserted in the original hole (tight fit). Used this as a reference so I could line up the new hole (13mm forward). Wanted it to be at the same angle. Took me about 3 hrs, and countless visits with the Drill Doctor (sharpening). After the hole was drilled; I used my Dremel tool with a cut-off wheel and removed the 13mm to make it work. Dressed up the end, blew out the shavings & dust, then installed the short shifter. Works great!
Here's a pic after taping, grinding the hardness off, and then setting the drill to make the new hole.
Here's a pic after taping, grinding the hardness off, and then setting the drill to make the new hole.
Last edited by MX52NR; 04-10-2013 at 07:46 AM.
 10-30-2013, 03:38 AM
#15
V8 Miata Noob
Thread Starter
Join Date: Mar 2013
Location: Lawton, Michigan
Posts: 21
Likes: 0
Received 0 Likes
on
0 Posts
Conversion was finished in May/2009. I've got about 16,000 miles on it since. No problems. Thinking about replacing the Sparco seats for the original seats (modified - low back, with new upholstery to mimic the bomber types).
01-30-2015, 04:25 PM
#16
V8 Miata Noob
Thread Starter
Join Date: Mar 2013
Location: Lawton, Michigan
Posts: 21
Likes: 0
Received 0 Likes
on
0 Posts
Winter is in full swing here, but we did have a couple of 40deg days in December. I like to fire up the vehicles every now & then.
I'm technically challenged when it comes to video, but here's a short clip of the Miata.
I'm technically challenged when it comes to video, but here's a short clip of the Miata.

 02-01-2015, 10:41 AM
#20
V8 Miata Noob
Thread Starter
Join Date: Mar 2013
Location: Lawton, Michigan
Posts: 21
Likes: 0
Received 0 Likes
on
0 Posts
Thanks guys
Can't make the Mitty, got something on the calendar already. Maybe some other event?
Strut tower brace is from Moss Miata and still available. Its made for the stock Miata engine with the MP45 blower, so it's offset to the drivers side. The cool feature is the center attachment point mounts to the firewall with its own brace.
MossMiata.com - Parts & Accessories for Your Mazda Miata
Didn't do a before & after test, but the foil patent was released by NASA. It's about the only thing that would work with tight clearances. Cnet.com was selling it back in 2009.
02-01-2015, 10:53 AM
#21
V8 Miata Noob
Thread Starter
Join Date: Mar 2013
Location: Lawton, Michigan
Posts: 21
Likes: 0
Received 0 Likes
on
0 Posts
Did some searching on the foil...
Test video.... ?
Where to purchase. I'm sure there's other vendors
http://www.full-race.com/store/therm...tive-film.html
Test video.... ?
Where to purchase. I'm sure there's other vendors
http://www.full-race.com/store/therm...tive-film.html
Last edited by MX52NR; 02-01-2015 at 10:57 AM.
02-03-2015, 10:16 AM
#22
V8 Miata Participant

Right, but its supposed to reflect radiant heat, not withstand fire. Wouldn't call it overly scientific of a test, but in reading up in it, I can see the engine bay being an ideal place for it. It should keep heat in the engine bay from transmitting through the firewall, if you cover the areas hot air is going to pass through. The highest efficicency stuff, in the 90s, would basically make it never hot in the passenger compartment. My transmission tunnel used to be screaming hot with my turbo after a hard run of it. I think your use is sound, I wouldn't have thought of it myself. I can see that it is common in motorsports and a few different car makes where turbo heat kills electronics.
Last edited by V8droptop; 02-03-2015 at 10:20 AM.
02-03-2015, 10:31 AM
#23
V8 Miata Participant

I've used the DEI Silver Reflect-a-Cool to line the interiors of all of my Cobra replica builds. The tape shown is for seaming the same (also available in the silver). Line the entire interior of your Monster Miata build, then place your carpet over the top and you'll love it right from the start.
Bill S.
Bill S.

Thread
Thread Starter
Forum
Replies
Last Post
Gunpilot
V8 Miata Drivetrains
11
05-29-2015 09:41 AM
qurtrn10
Introductions
8
10-01-2014 02:34 PM
Currently Active Users Viewing This Thread: 1 (0 members and 1 guests)


